Sync your Umbraco products, categories, orders, customers, and pages to Clerk. This guide covers setting up data synchronization.
Before syncing data, make sure you have installed and configured the Clerk.io connector in your Umbraco backoffice. See the
Get Started guide for installation instructions.
Set up Sync
#
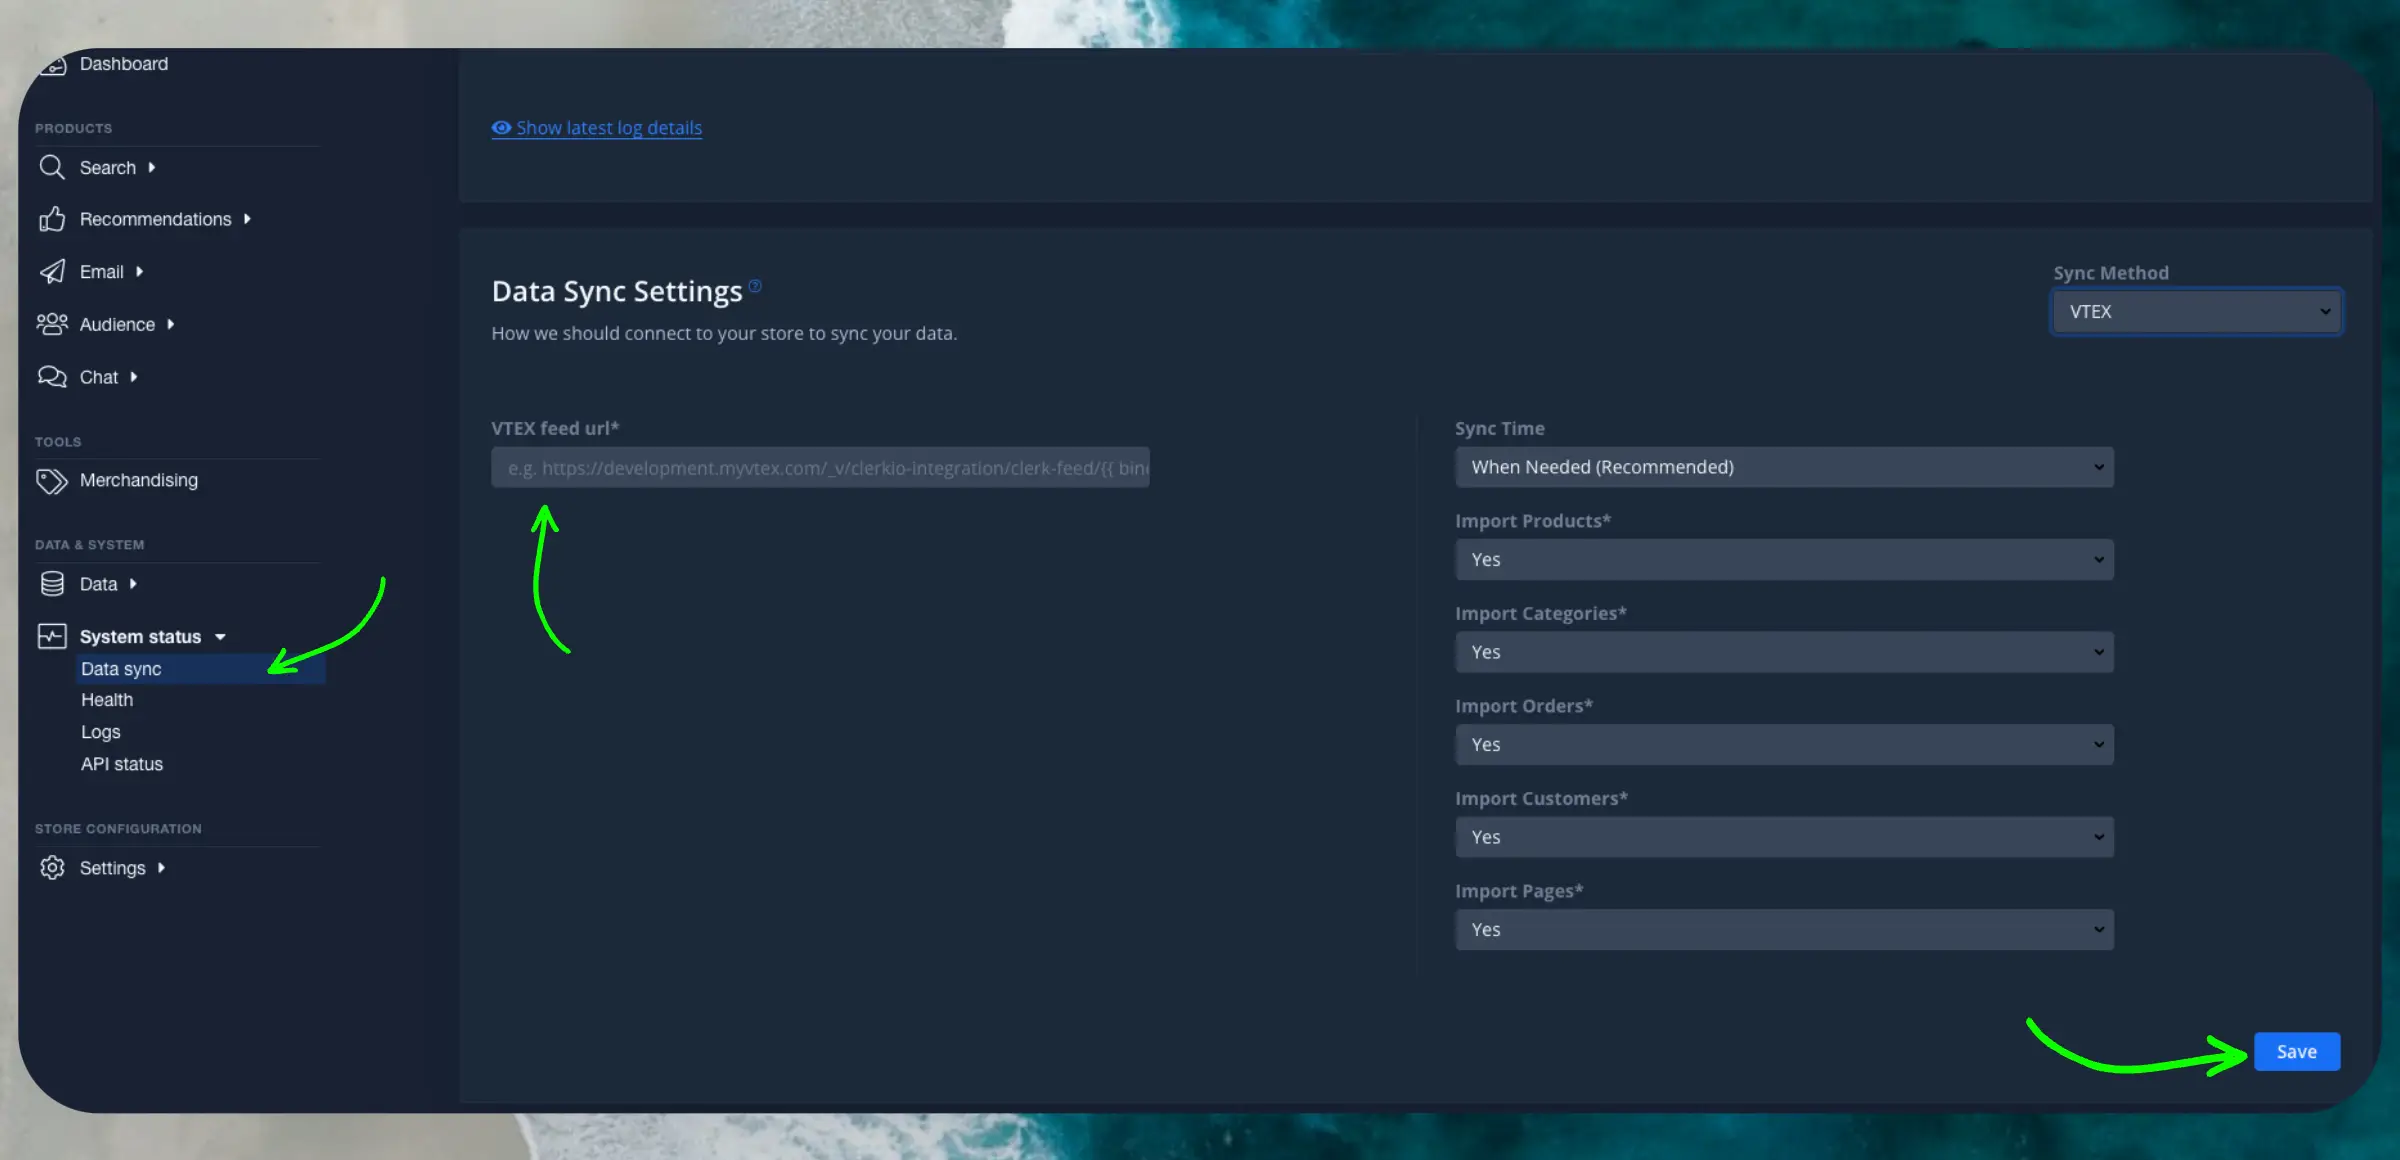
To sync your Umbraco store data with Clerk, you need to configure the feed URLs in Clerk.
Log in to
my.clerk.io
Navigate to System Status > Data sync
...
Clerk.io offers three distinct search solutions that can be used together or separately:
This article explains how to get started when using a
Clerk.js setup in VTEX.
Instant Search
#
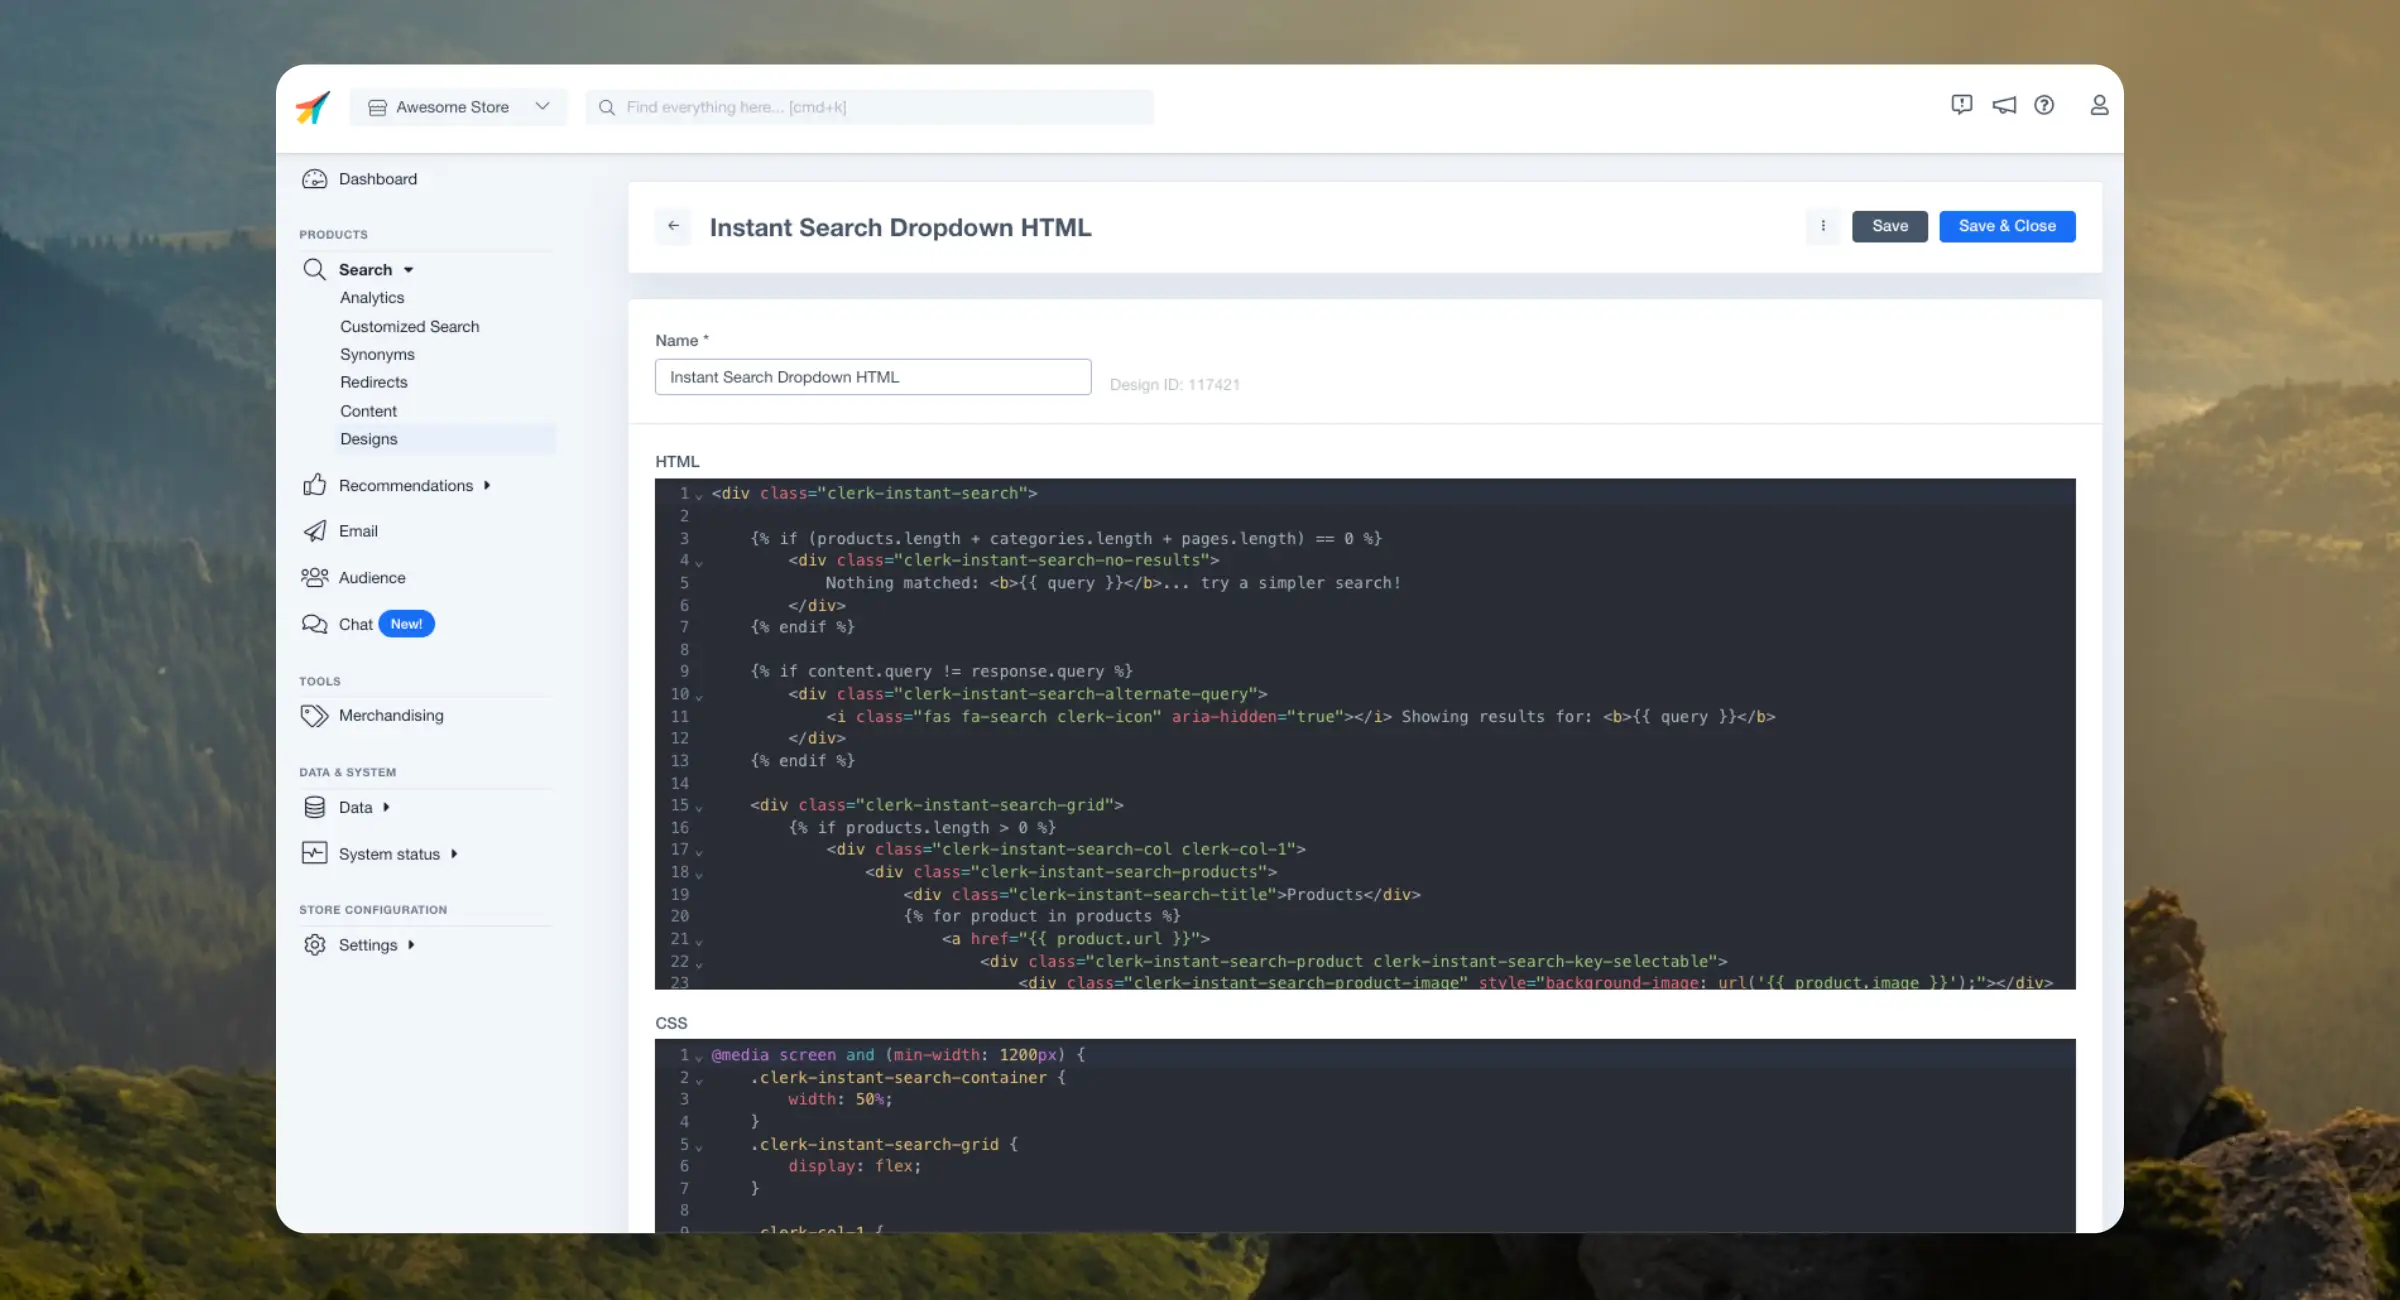
Instant Search provides real-time search results as customers type, displayed in a dropdown below the search input field.Create Design
#
You can either use the
Design Editor to configure it visually, or use
code designs.
...Sync your VTEX products, categories, and orders to Clerk. This guide covers setting up data synchronization.
Before syncing data, make sure you have installed and configured the ClerkIO Integration module in your VTEX account. See the
Get Started guide for installation instructions.
Set up Sync
#
After configuring the module, you simply need to synchronise your store.
- Go to
my.clerk.io Data -> Configuration -> Once prompted to insert the url, insert the following URL format: https://{{accountName}}.myvtex.com/_v/integration-vtex/clerk-feed/{{bindingId}} and click on save in the bottom left of the page.
- Click on “Start new data sync”. This feed URL is exclusive for the use of ClerkIO.
If you want to validate your store’s feed use this endpoint instead:
https://app.io.vtex.com/clerkiopartnerdk.integration-vtex/v1/{{accountName}}/{{workspace}}/_v/integration-vtex/clerk-feed/{{bindingId}} this endpoint requires VTEX authentication.
...Sync your WooCommerce products, categories, orders, and pages to Clerk. This guide covers the basics and advanced customization options.
Before syncing data, make sure you have installed and configured the Clerk plugin in your WooCommerce backend. See the
Get Started guide for installation instructions.
Set up Sync
#
To sync your WooCommerce store data with Clerk, you need to configure the import URL in Clerk.
In the plugin, copy your Import URL from the General section.
...
Basics
#
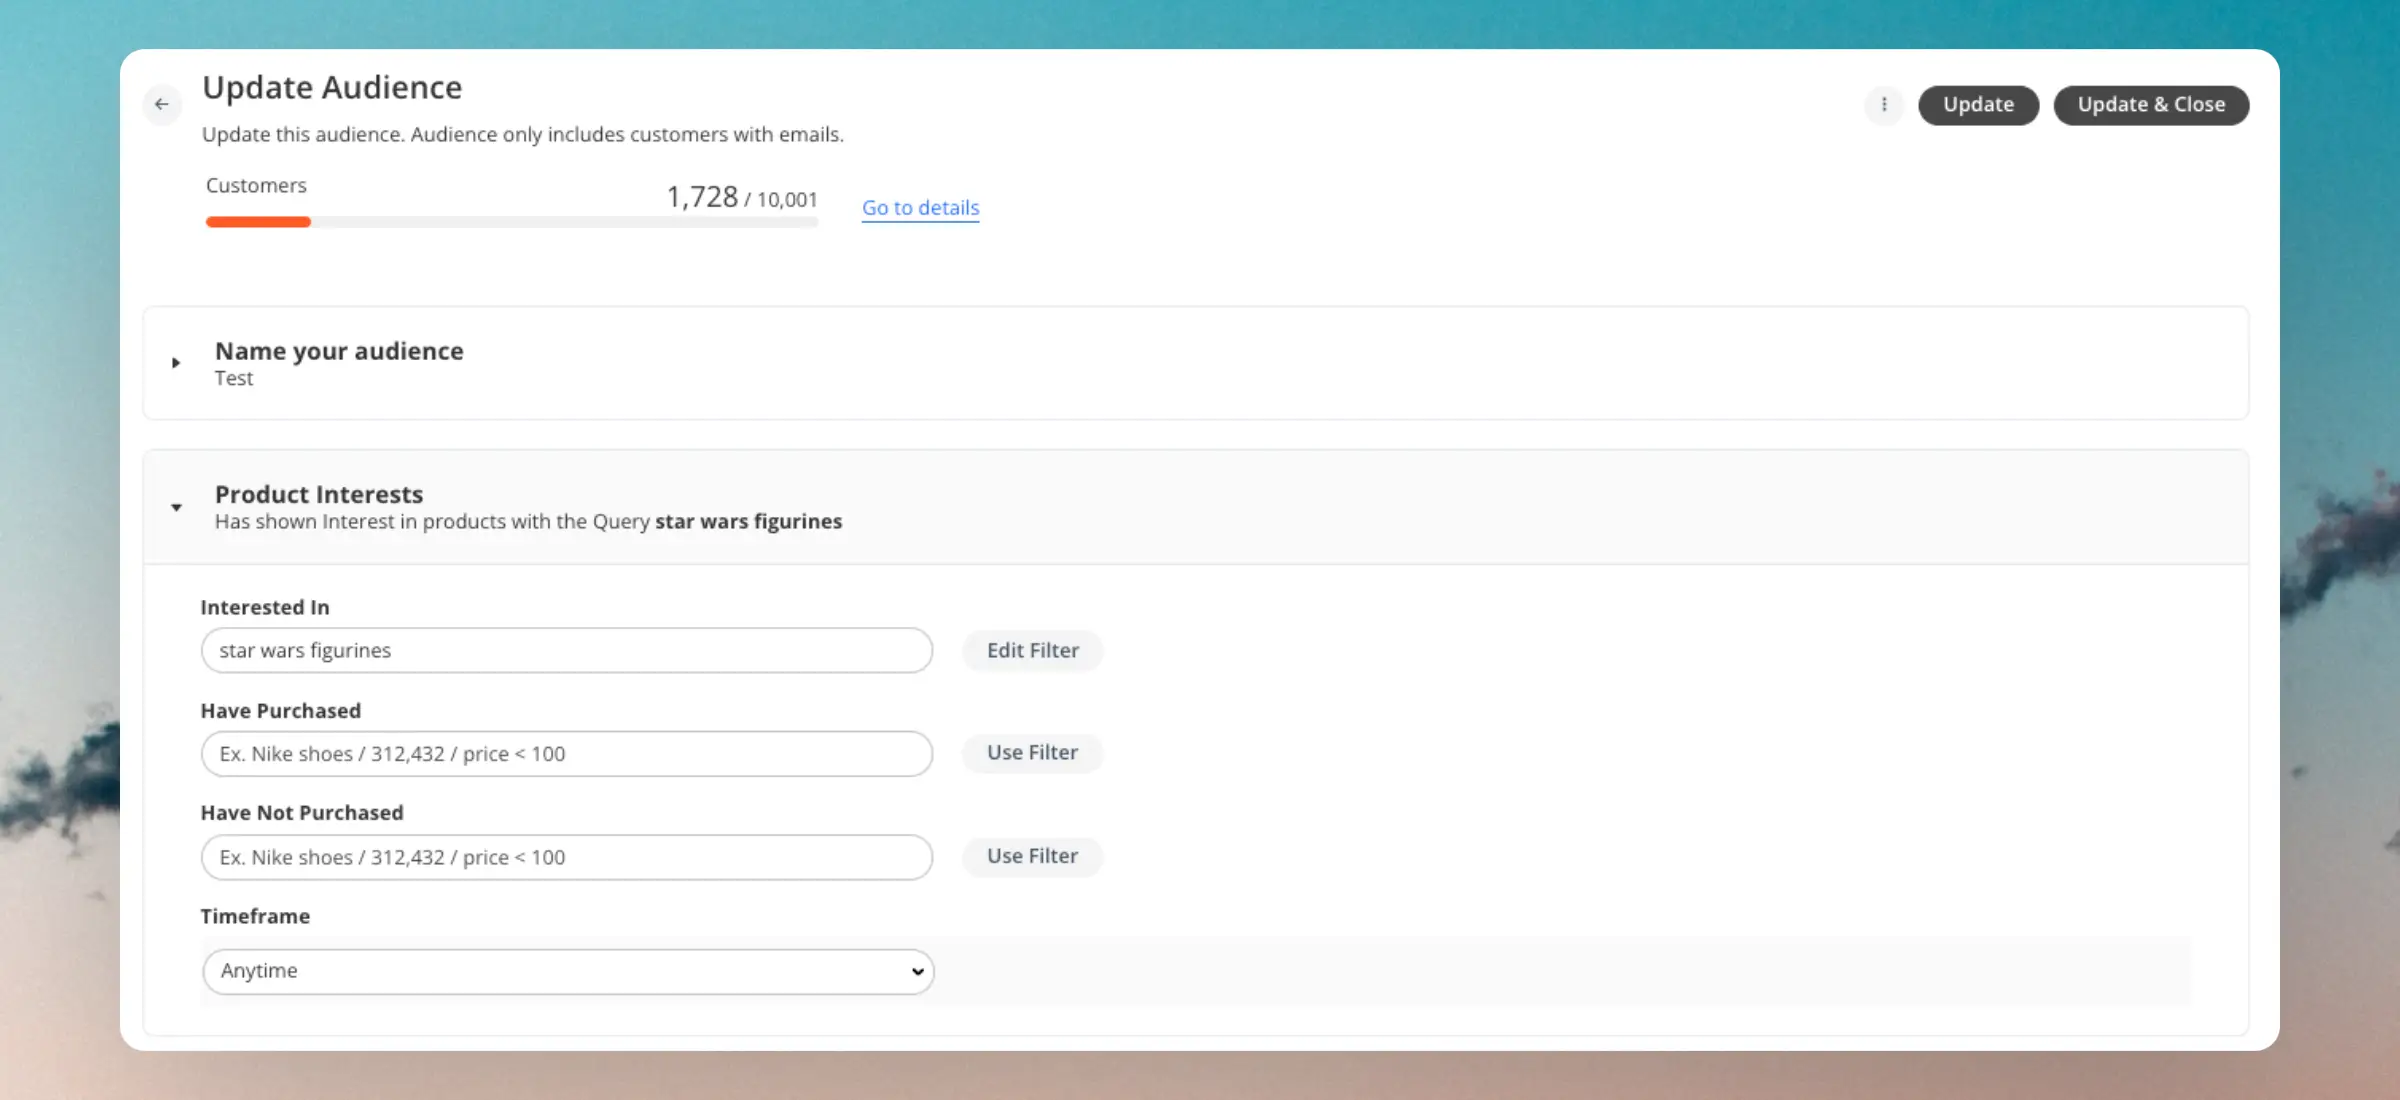
The Purchase Intent section of Audience allows you to find customers with specific purchasing patterns and intent. You have several ways of choosing the products that customers should have an interest in:
- Typing with free text. This uses Clerk’s search engine to find all matching products, and creating the Audience based on those.
- Using
filters to select items based on their attributes like
price > 100. - Writing product IDs separated by commas. This allows you to choose very specific products.
Interested In
#
This is the most powerful feature of Audience as it uses Clerk.io’s AI to intelligently predict which customers are likely to buy the products you want to sell, even if they have not purchased anything similar yet.
...Product search
#
Visitors can find products using natural language. When a question contains clear constraints—such as brand, color, size, category or price—Chat detects them and applies product filters. Examples: “red dresses under $100”, “Nike running shoes size 42” or “blue pants under 200 EUR”.
If a filtered search returns no products, Chat automatically retries with a broader search so visitors still see relevant items.
Search results are powered by the same engine as your on‑site Search, providing consistent and fast results.
...The Chat guidance allows you to personalize your Chat to fit your exact needs.
Communication style
#
Decide what style of communication should the chat use.
E.g. “Introduce yourself with a greeting and use friendly and easy-to-understand language.”
Content & clarification
#
Configure how your Chat handles follow-up questions. Here you can add as many additional setting as you need by clicking on Add trigger
E.g. “Always ask follow-up questions to better understand the customer’s needs before potential results.”.
...Basics
#
A Store is a separate entity in Clerk.io that contains all the data and settings for a specific domain. This can be a unique webshop, platform, language version, or anything else that should function as a separate entity.
They work completely separately and do not share data between each other. The only exception is that some features like Merchandising and Synonyms can be added across multiple Stores at once when needed.
...A single User has access to all Companies, and usually all Stores that they are added to, from a single my.clerk.io login. There are no extra charges for users, so we recommend that everyone working with Clerk has their own user.
Inviting new users
#
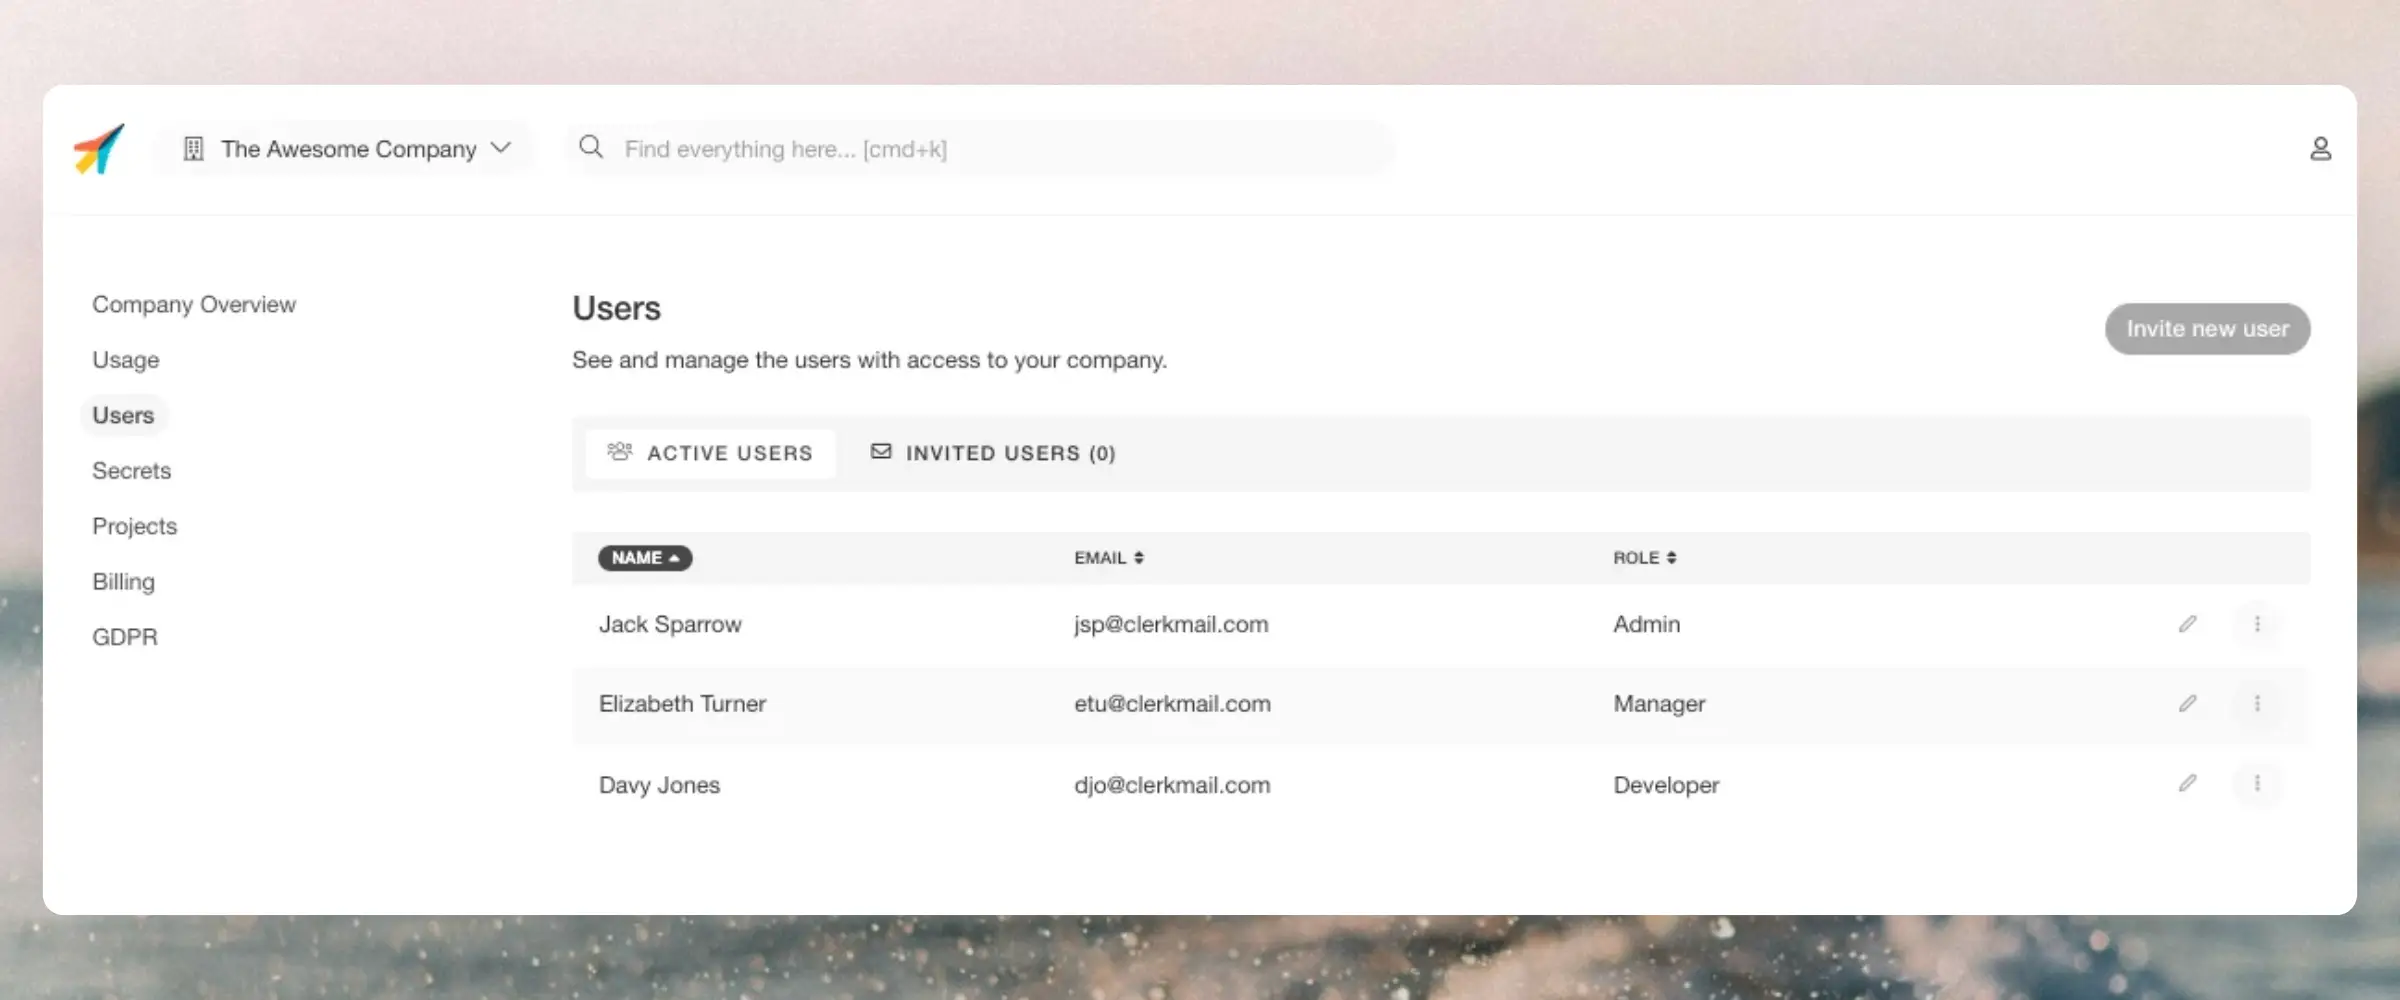
Users with Admin or Manager roles can add new team members to a Clerk.io account.
- Click your Store name in the upper left corner
- Click your Company name in the top of the dropdown
- Click Users
- Click the button Invite new user
- Enter their email address
- Set the role that best matches their needs
- Click Send invite
Getting access
#
If a user already has access to another Clerk.io Company, they will automatically have access to your Company next time they log in.
...Clerk uses
Liquid for managing code designs. It’s a safe and flexible templating language that enables you to create any kind of design you want for your Clerk elements. This article covers the basics.You can check the full documentation in
our developer docs.
Clerk uses a subset of Liquid. Only the features listed in our Clerk.js Template Language are supported in Code Designs.
View the supported syntax and formatters.
...