Clerk is built around a powerful API that offers many different ways to display results to customers. These are called Product Logics and offer various functionalities suited to different use cases.
This article explains the available logics for Email and how they work.
The names of these Product Logics match what you see in the my.clerk.io backend when using
Content. Each of them has a matching Endpoint in Clerk’s API, which you can inspect in our developer docs using the links provided below.
...Using Clerk should technically be free - you should always earn substantially more than you pay for it. That’s why we’ve built a detailed Dashboard and Analytics for all products, to show how it helps your business.
Precise Tracking
#
One of the great things about our Dashboards is that you can see exactly which orders were impacted by Clerk and how much more valuable they are.
An order is considered impacted by Clerk when a customer has bought at least 1 product from a Clerk element.
...Clerk is built around a powerful API that offers many different ways to display results to customers. These are called Product Logics and offer various functionalities suited to different use cases.
This article explains the available logics for Recommendations and how they work.
The names of these Product Logics match what you see in the my.clerk.io backend when using
Sliders. Each of them has a matching Endpoint in Clerk’s API, which you can inspect in our developer docs using the links provided below.
...Clerk is built around a powerful API that offers many different ways to display results to customers. These are called Product Logics and offer various functionalities suited to different use cases.
This article explains the available logics for Search and how they work.
The names of these Product Logics match what you see in the my.clerk.io backend when using
Content. Each of them has a matching Endpoint in Clerk’s API, which you can inspect in our developer docs using the links provided below.
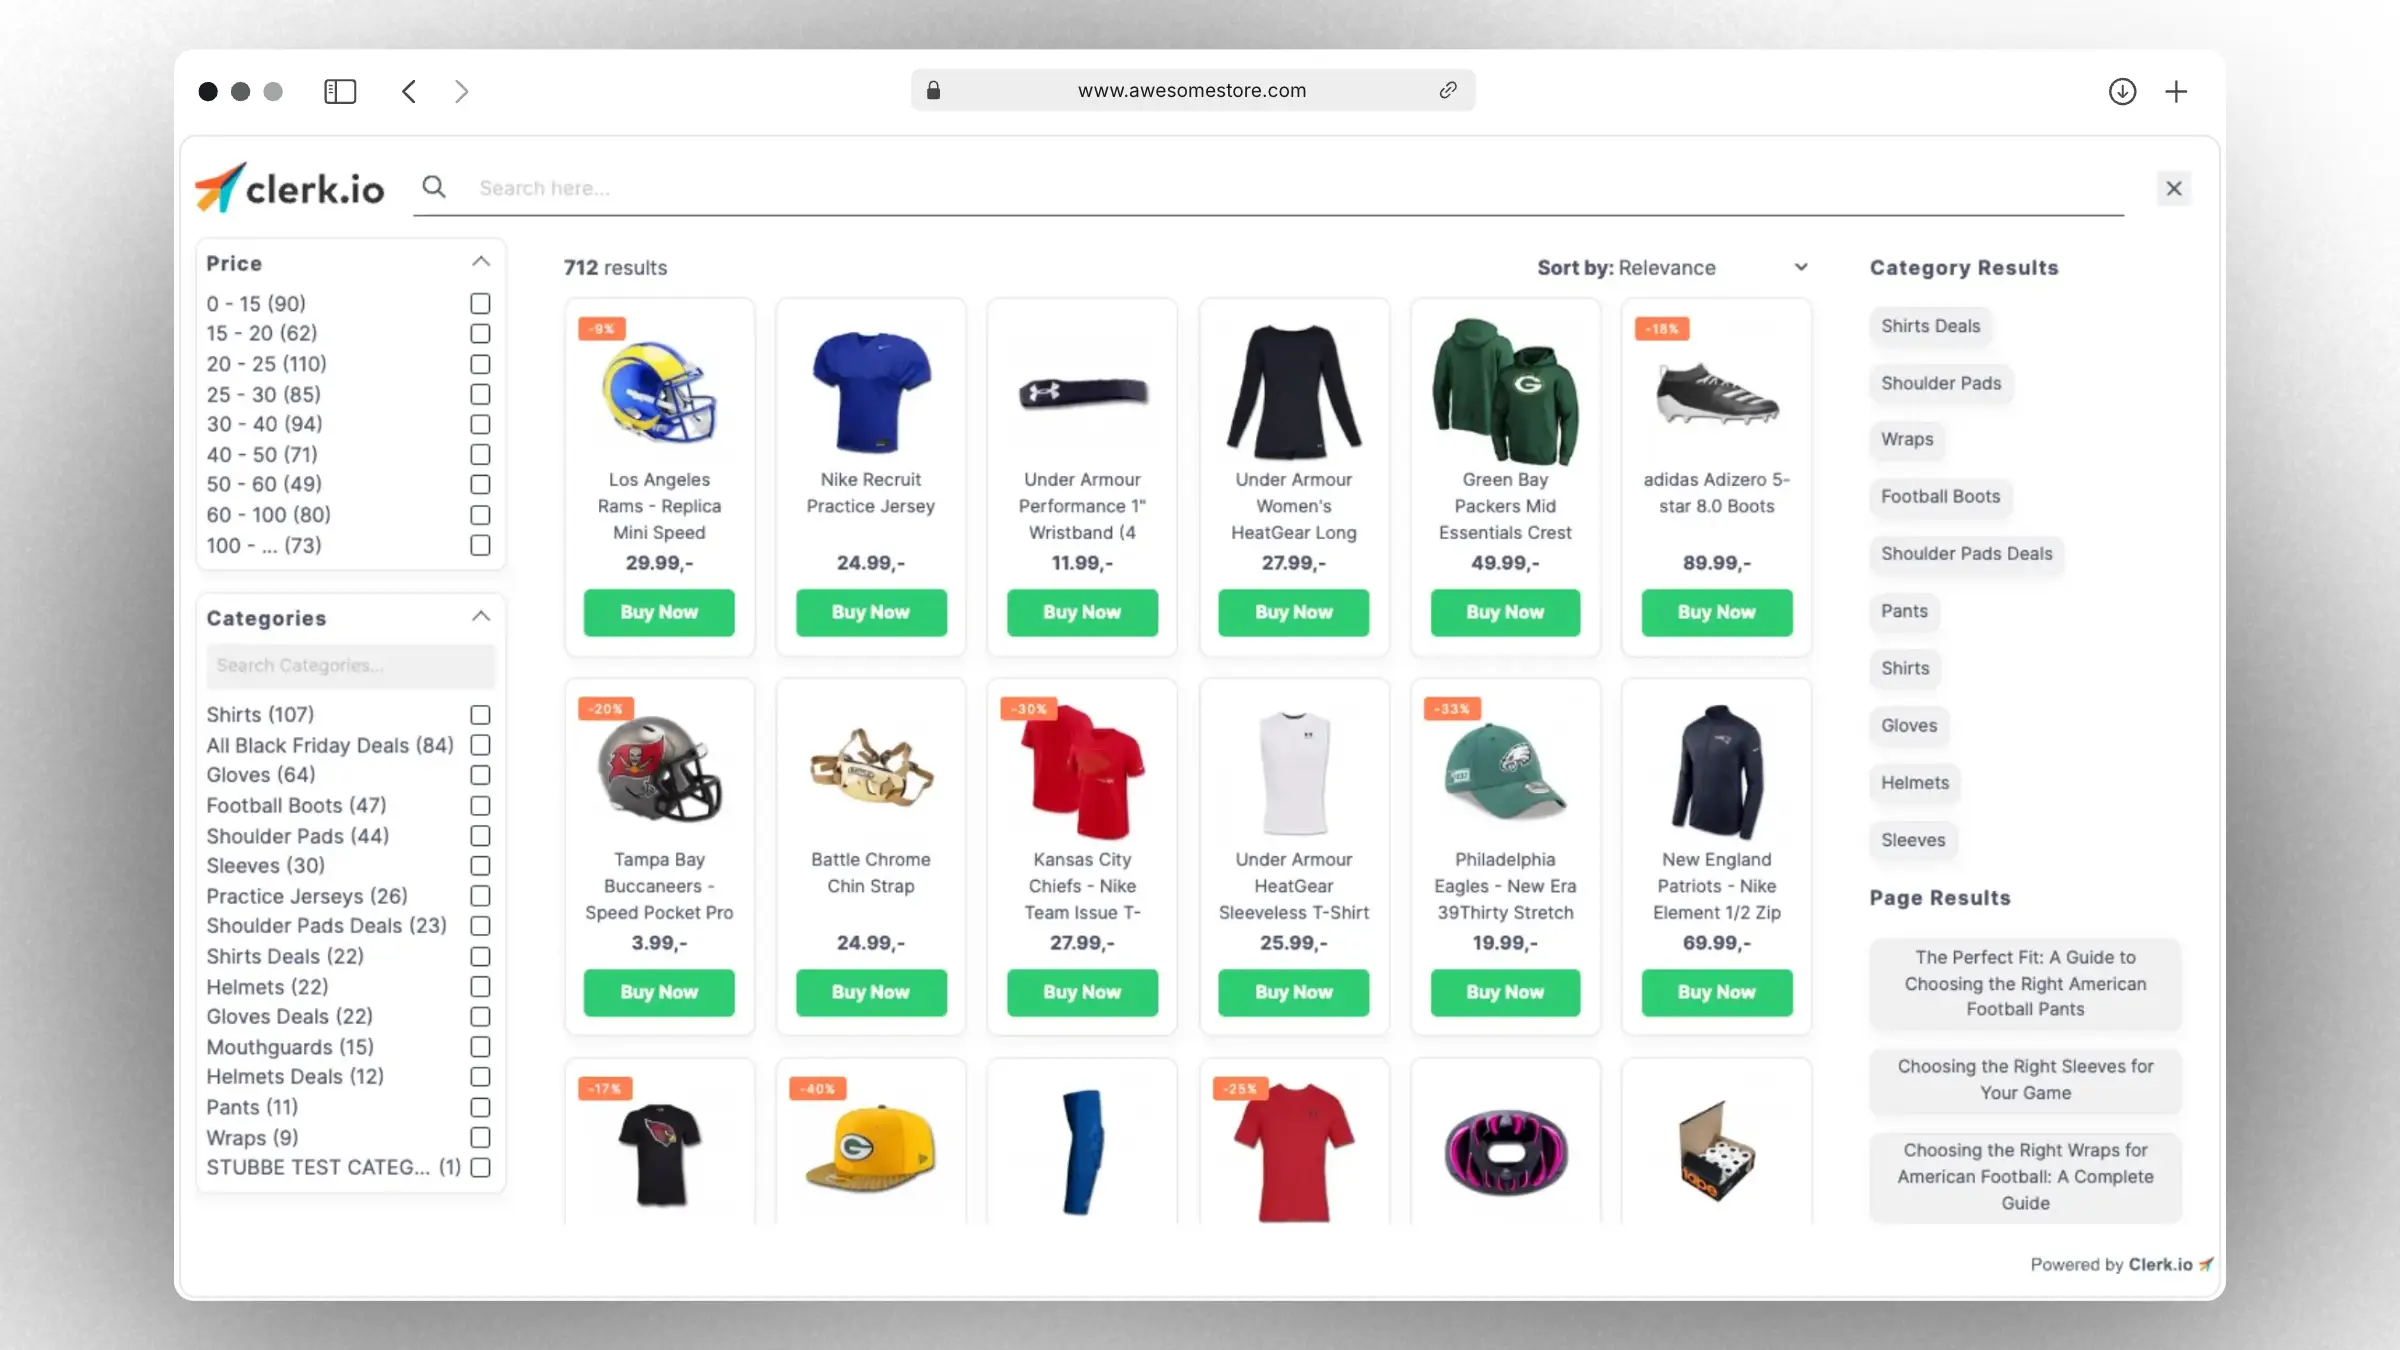
...Powered by Clerks latest Search technology, Omnisearch provides you with the flexibility that you need to offer the best modern search experience:- Live results are shown to your visitors as they type, and include products, categories and pages.
- Sorting and filtering: to let your visitors refine their search in an intuitive an easy way.
- Easy to integrate in your site using one of our great starting templates.
- It matches your brand through changing a few standard settings like logo, fonts, colors and more.
- It’s fully customizable with HTML, CSS and Liquid for
developers.
Getting started
#
Omnisearch consists of a customizable Design for visuals and an Element block that allows it to be installed on your site.
...Adding a Custom Badge
#
This guide shows you how to add a custom badge to the Recommendations slider. The process is similar for Omnisearch, Search page and Live search code designs.
Find the attribute you want to use as a rule to show the badge. For example, ‘on_sale’, or the product being in a specific category such as ‘Black_friday’.
Edit the chosen design for
Recommendations or
Omnisearch.
Insert the code in the chosen space, usually inside the div with the class='clerk-product-image-wrapper'. In the example below, we are using the categories attribute to show the badge, where 123 is the
category ID of the Black Friday category.
...
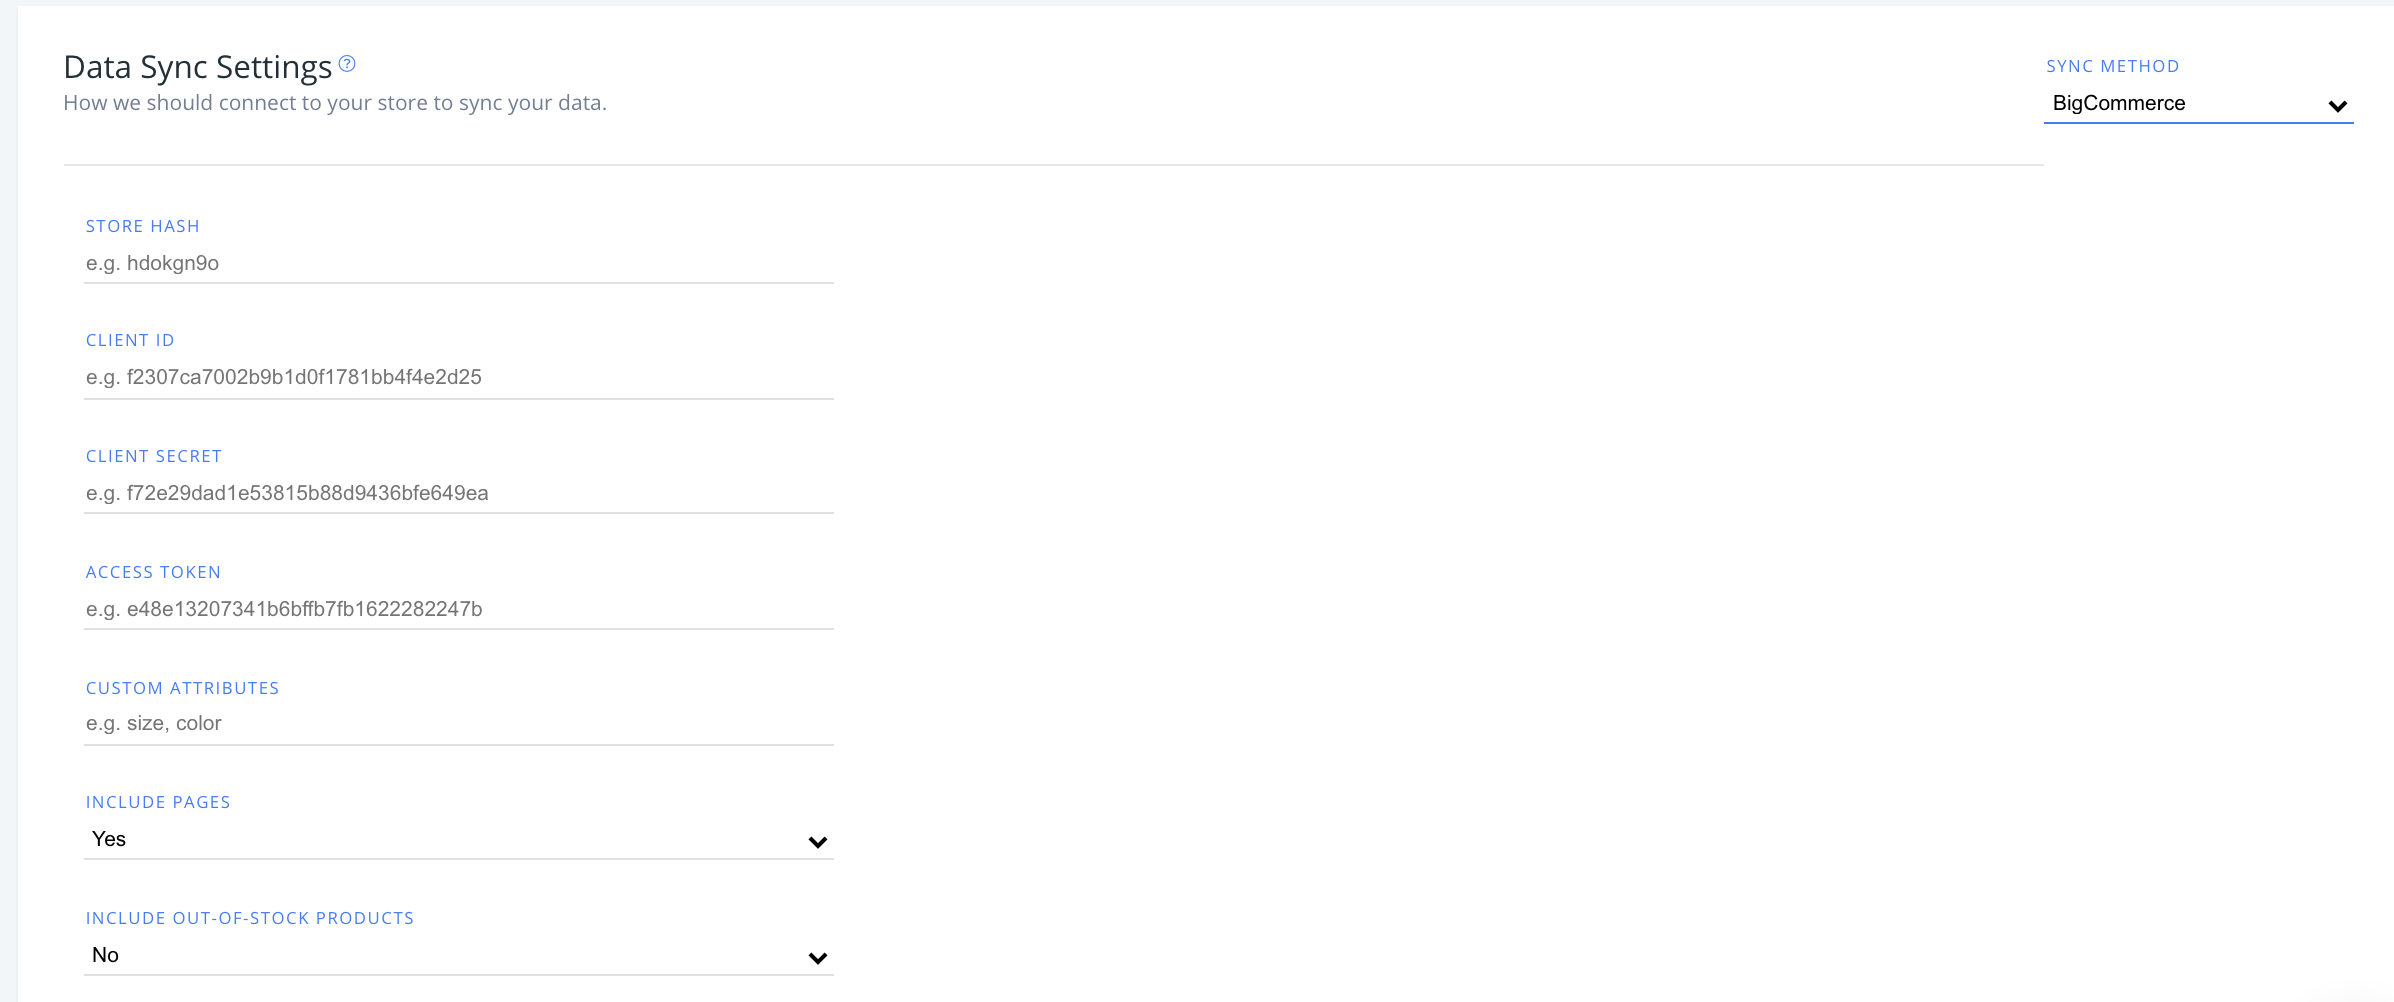
Configure your BigCommerce data sync settings and manage your integration options in my.clerk.io.
Data sync
#
In my.clerk.io, click “Data” in the left-side menu, then go to “Configuration” to see your sync options with BigCommerce here.
After entering your BigCommerce store hash, client ID, client secret and access tokens, you have the option to modify the following:
Custom attributes
#
If you have custom attributes used in your store that you want to sync with Clerk, type their values here as a comma-separated list (e.g., size, color).
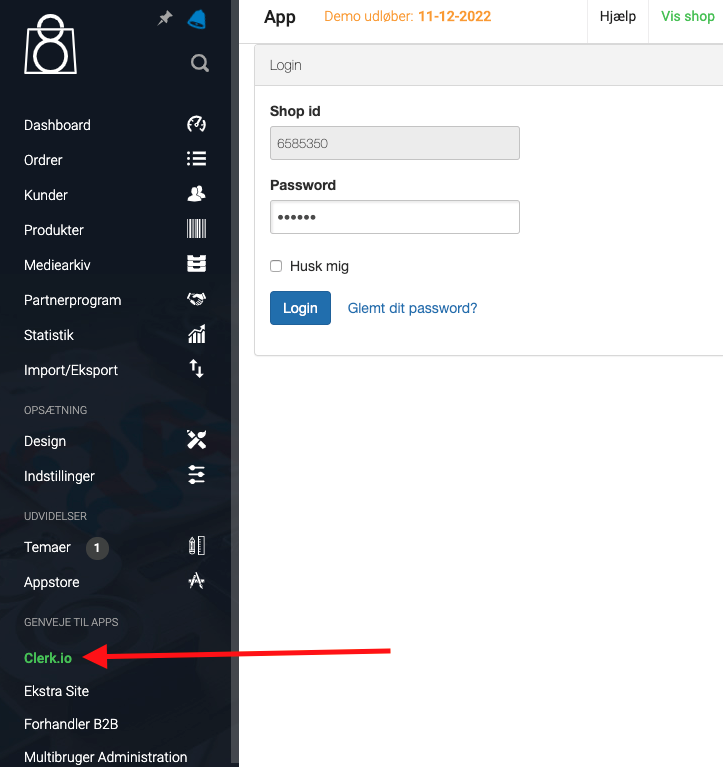
...Configure your DanDomain Classic app settings, manage logging options, enable advanced features, and customize your integration. This guide also covers upgrading and uninstalling.
Logging
#
First thing you have to do to change the logging settings, after the first data sync has run successfully, is to go into your DanDomain Classic backend, choose Clerk under Shortcuts to Apps and login to the Clerk plugin:
Next, scroll down to the bottom box called Logging and choose your preferred logging settings:
...