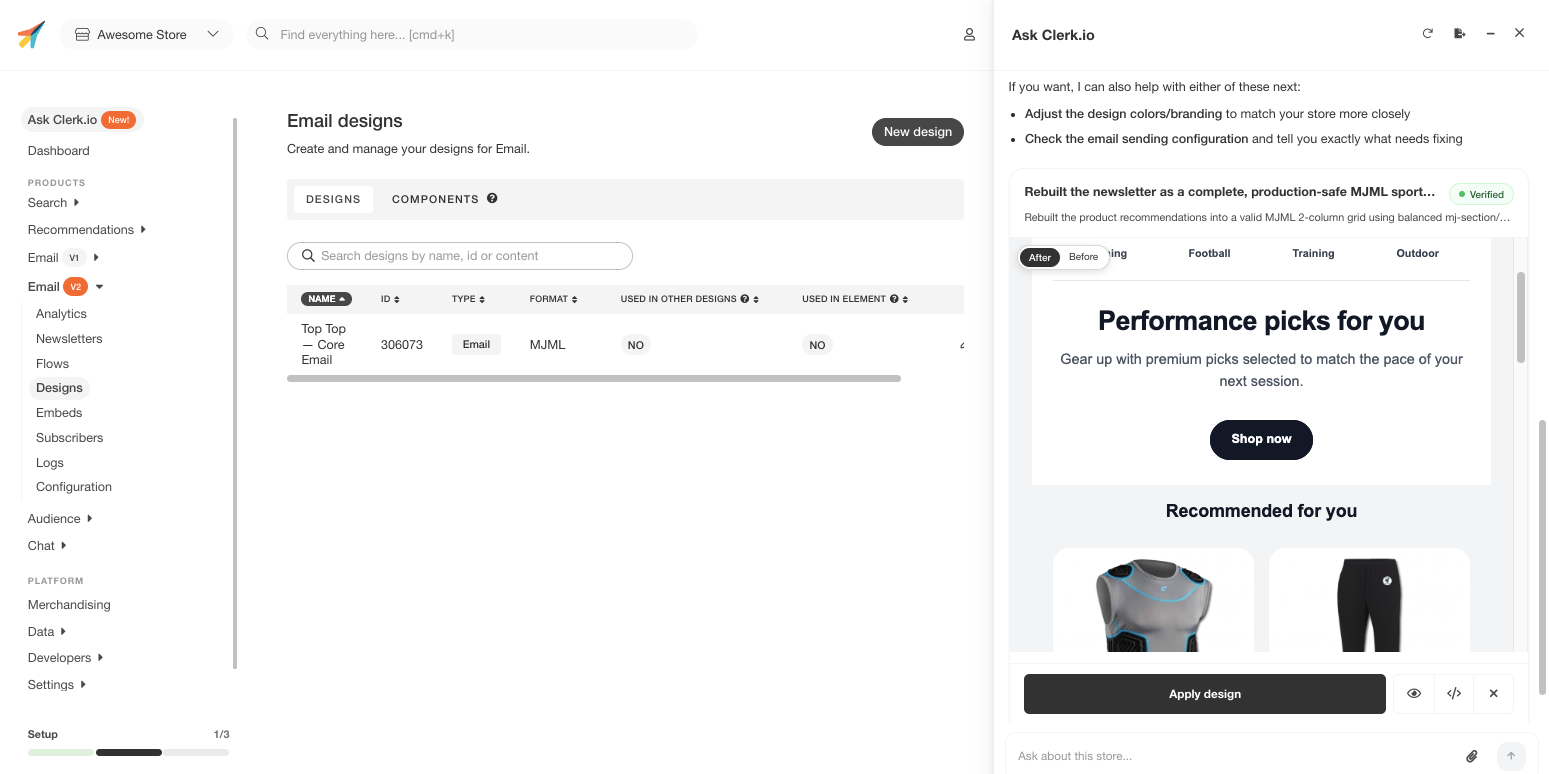
Design Studio lets you build and refine Clerk.io designs through conversation.
Instead of opening the Design Editor and adjusting components manually, you describe how you want a design to look — and Ask Clerk.io builds it, shows you a preview inline in the chat, and keeps iterating until it matches what you have in mind.
How to start
#
Just start a conversation in Ask Clerk.io and describe the design you want.
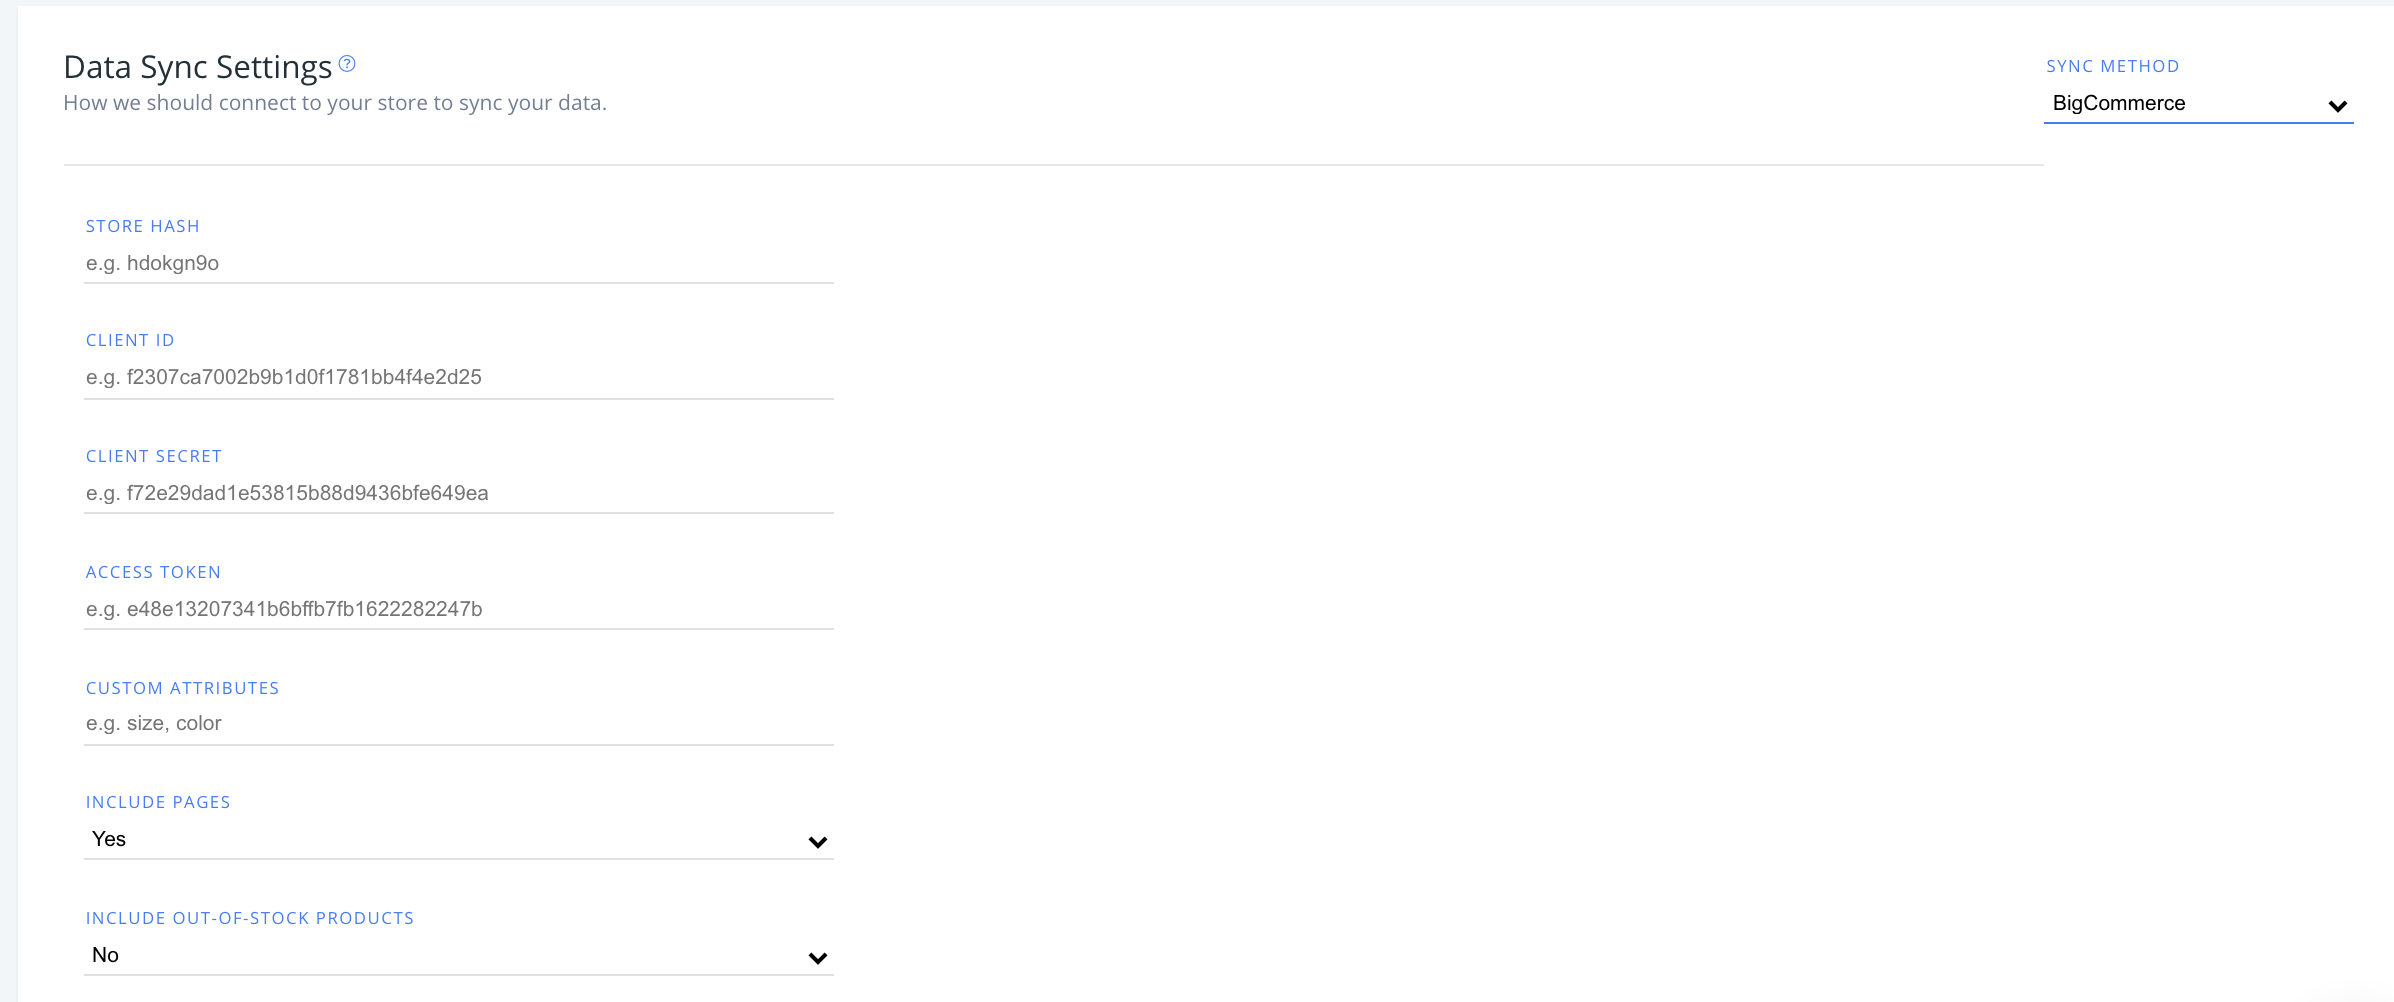
...Configure your BigCommerce data sync settings and manage your integration options in my.clerk.io.
Data sync
#
In my.clerk.io, click “Data” in the left-side menu, then go to “Configuration” to see your sync options with BigCommerce here.
After entering your BigCommerce store hash, client ID, client secret and access tokens, you have the option to modify the following:
Custom attributes
#
If you have custom attributes used in your store that you want to sync with Clerk, type their values here as a comma-separated list (e.g., size, color).
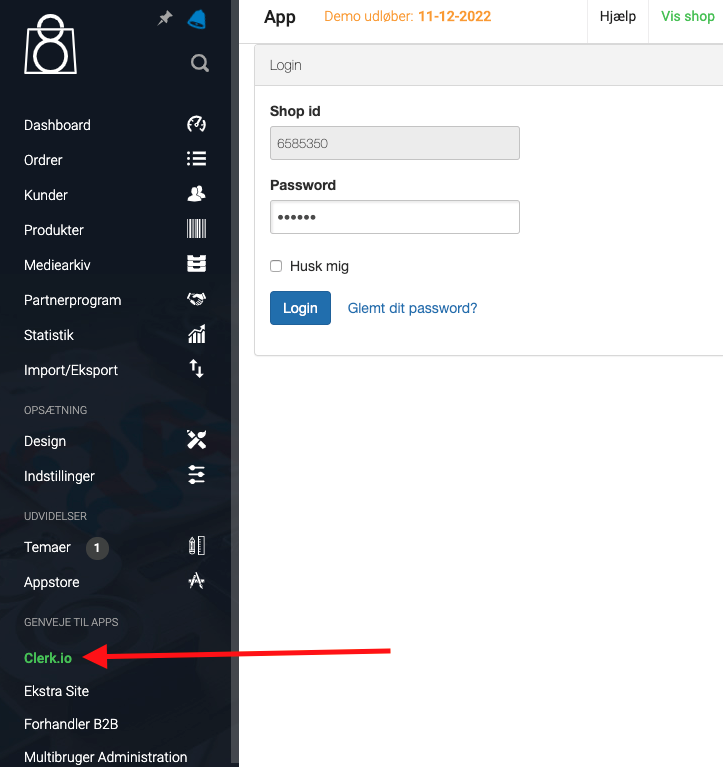
...Configure your DanDomain Classic app settings, manage logging options, enable advanced features, and customize your integration. This guide also covers upgrading and uninstalling.
Logging
#
First thing you have to do to change the logging settings, after the first data sync has run successfully, is to go into your DanDomain Classic backend, choose Clerk under Shortcuts to Apps and login to the Clerk plugin:
Next, scroll down to the bottom box called Logging and choose your preferred logging settings:
...Remove Clerk from your JTL store and cancel your subscription. This guide covers the uninstallation process and important notes about subscription cancellation.
Uninstalling
#
Below you’ll find a guide on and general steps to uninstall Clerk from your JTL store.
Removing plugin
#
You can remove and uninstall Clerk from your webshop by going to Plugins -> Installed Plugins.
Click on the gear next to the plugin to remove it.
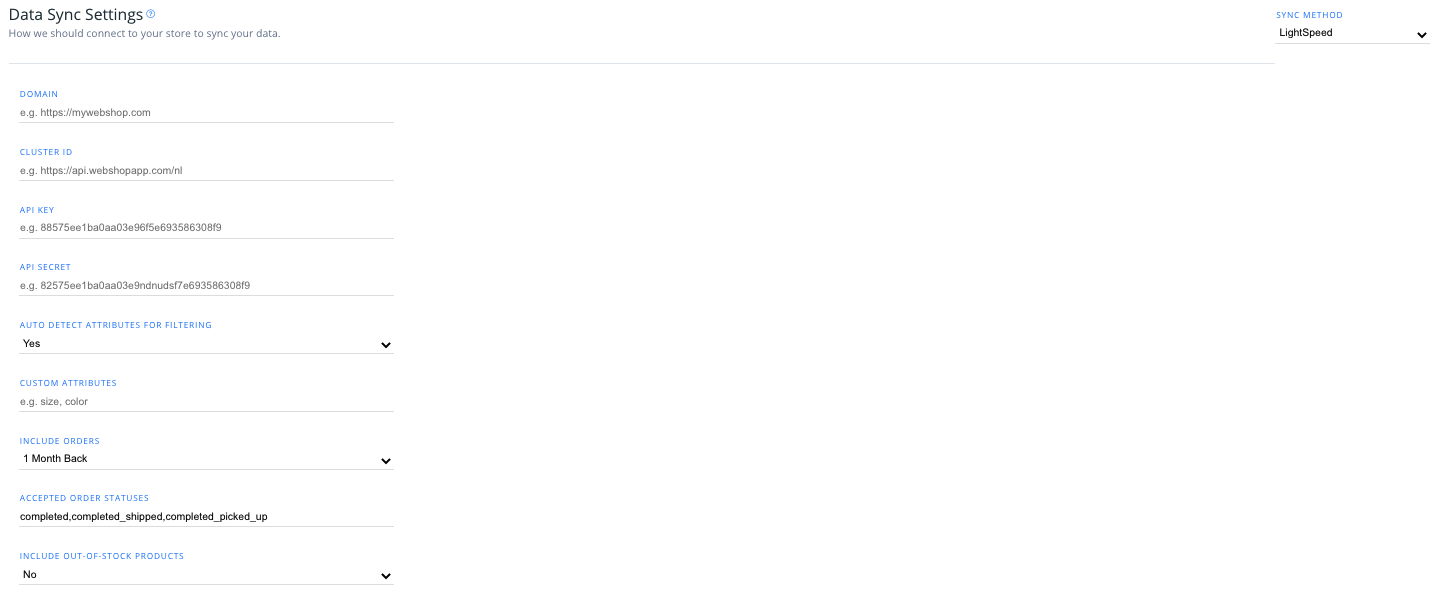
...After setting up your Lightspeed data feed to sync with Clerk, you can choose your integration options within my.clerk.io.
Click “Data” in the left-side menu, then go to “Configuration” to view your options.
Attributes settings
#
From the dropdown, you can select whether or not you want the integration to automatically detect attributes(such as stock variants, color, etc.) in your store to sync with Clerk.
...Create Design
#
Recommendations are shown as a slider by default. You can either use the
Design Editor to configure it visually, or use
code designs.
Design Editor
#
- Go to Recommendations > Designs and click New Design.
- Choose Product Slider
- Pick a template to start from, give it a name and click Create design.
- Adjust the design as needed.
Code Design
#
- Go to Recommendations > Designs and click New Design.
- Choose Other designs > Blank > With code.
- Give it a name and click Create design.
- Create a code design from scratch using
Liquid code.
If you want a starting design, check the
Slider template further down.
...Configure your Magento 1 extension settings, manage data sync options, and customize search, recommendations, and logging features. This guide also covers installation via Toolbox Script, upgrading, and uninstalling.
The Clerk Toolbox Script has been developed to make it easy to install the Clerk extension in your Magento webshop, without using Magento Connect.
...Configure your Magento 2 extension settings, manage data sync options, and customize search, recommendations, and logging features. This guide also covers installation via Toolbox Script, upgrading, and uninstalling.
The Clerk Toolbox Script has been made to make it easy to install the Clerk extension in your Magento webshop without using Magento Connect.
...Configure your PrestaShop module settings, manage data sync options, and customize search, recommendations, and logging features.
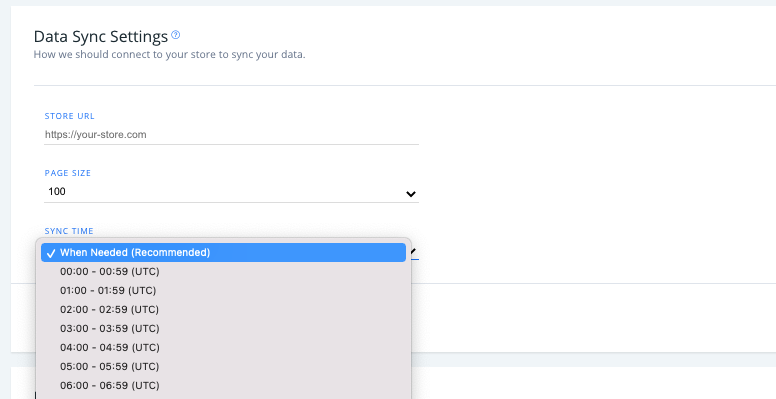
Data sync settings
#
Go to Data > Configuration in my.clerk.io to view your Prestashop sync options.
- Set your store URL, page size of your synced data, and the time of day when your webshop data syncs to Clerk (Default is “When needed”).
Module settings
#
If you are using
v 6.7.0 or a later version of the extension (you can check the newest version
here), you will be able to access the below settings in two ways after adding your Public and Private Keys to the module:
...After connecting Shopify in Clerk.io, this page is your reference for the Shopify-specific sync settings in my.clerk.io > Data > Configuration.
Use this guide together with
Get Started and
Sync Data.
Settings reference
#
This is a complete lookup reference for Shopify sync settings in my.clerk.io > Data > Configuration.
Sync method
#
Choose which Shopify connector type you are using. Most setups should use Shopify from the Dev Dashboard flow.
...