Integrations
Tracking
Guide showing why and how we track
Explain
- Visitor ID contains clicks, products, and pageviews. Can have as many ID’s as you want.
- Associate with an email address which then also holds purchase history
- Associate with an order
- Products associated with each other
Purposes #
- Analytics
- Personalisation in Recs
Email Address #
Orders #
Clicks #
Products #
Pageviews #
Labels #
Visitor ID #
By default, Clerk.io is cookieless and uses anonymous visitor ID’s rather than storing cookies.
...Sync Data
Sync your BigCommerce products and attributes to Clerk. This guide covers customizing product data and choosing which products to import.
Set up Sync #
To sync your BigCommerce store data with Clerk, you need to create an API account in BigCommerce and configure it in Clerk.
In your BigCommerce admin, go to Advanced Settings > API Accounts.
Click Create API Account and choose Create V2/V3 API Token.
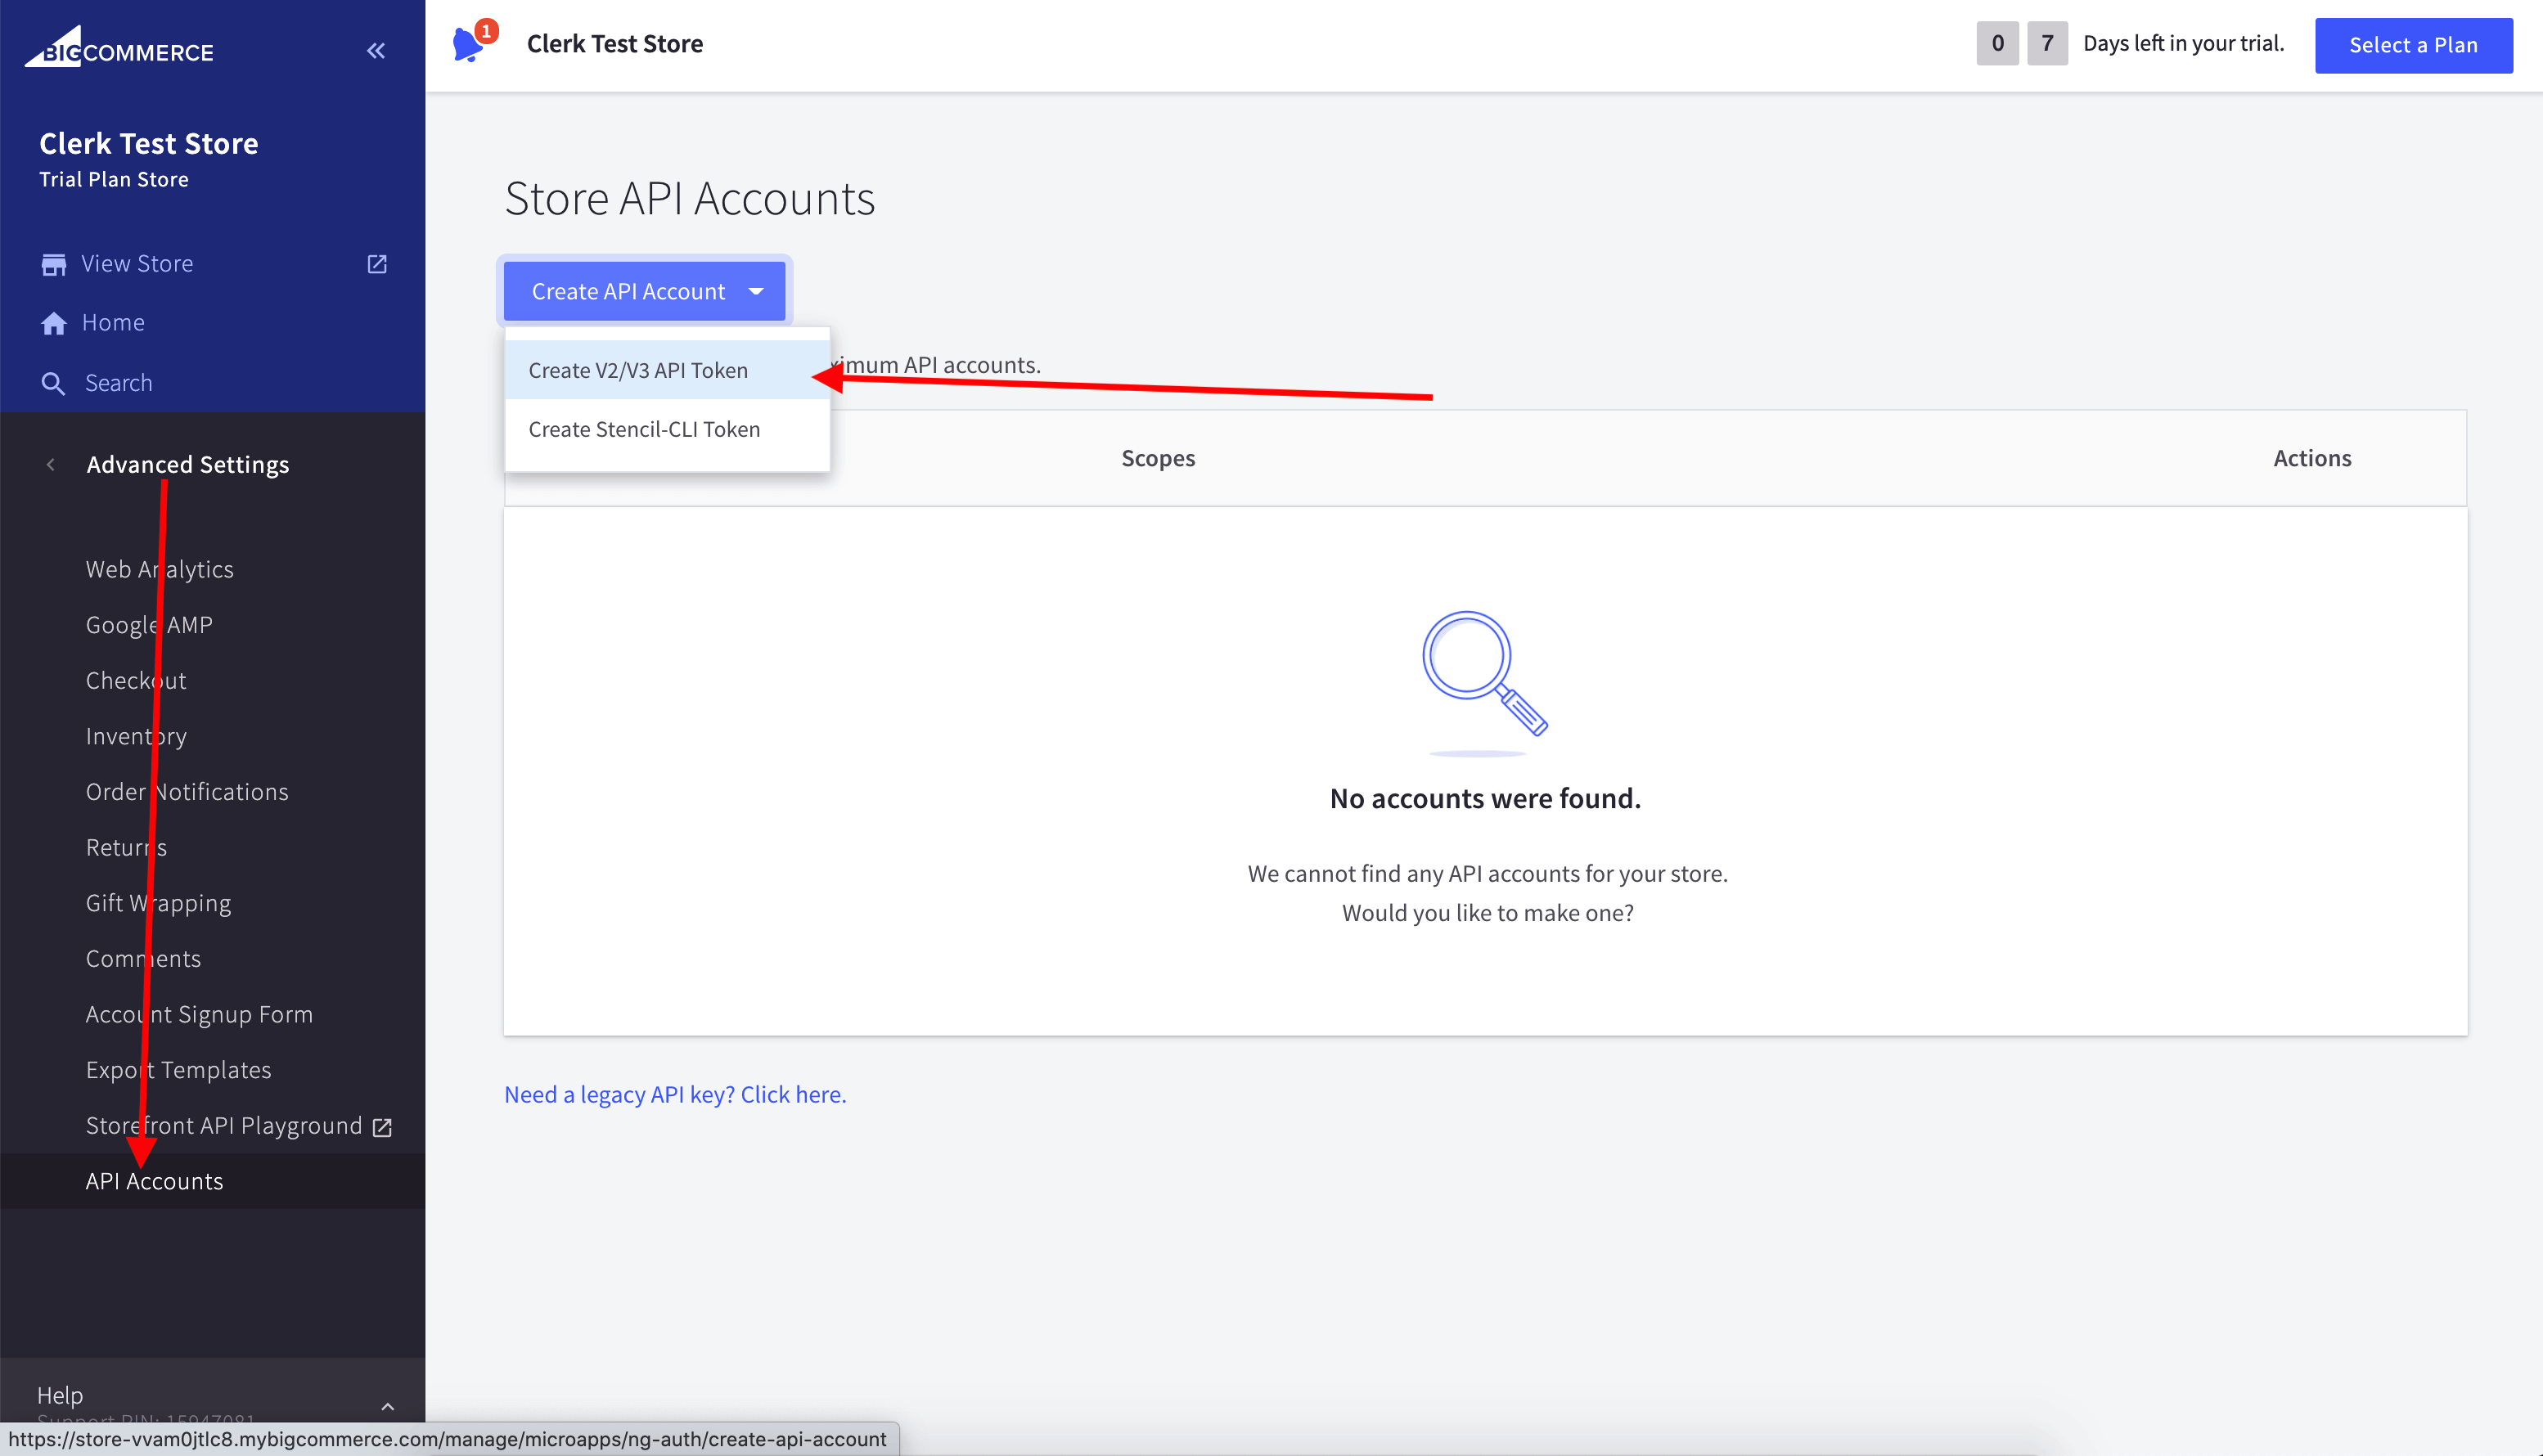
Name it “Clerk.io” and grant read‑only access to:
...
Sync Data
Sync your DanDomain Classic products, attributes, and order data to Clerk. This guide covers customizing product data, choosing which orders to import, and managing order sync.
Before syncing data, make sure you have installed and configured the Clerk.io app in your DanDomain Classic backend. See the Get Started guide for installation instructions.
Set up Sync #
To sync your DanDomain Classic store data with Clerk, you need to configure the import URL in the Clerk app and start the sync.
...Sync Data
Sync your DanDomain products and attributes to Clerk. This guide covers setting up API access and syncing your catalog.
Enable API Access #
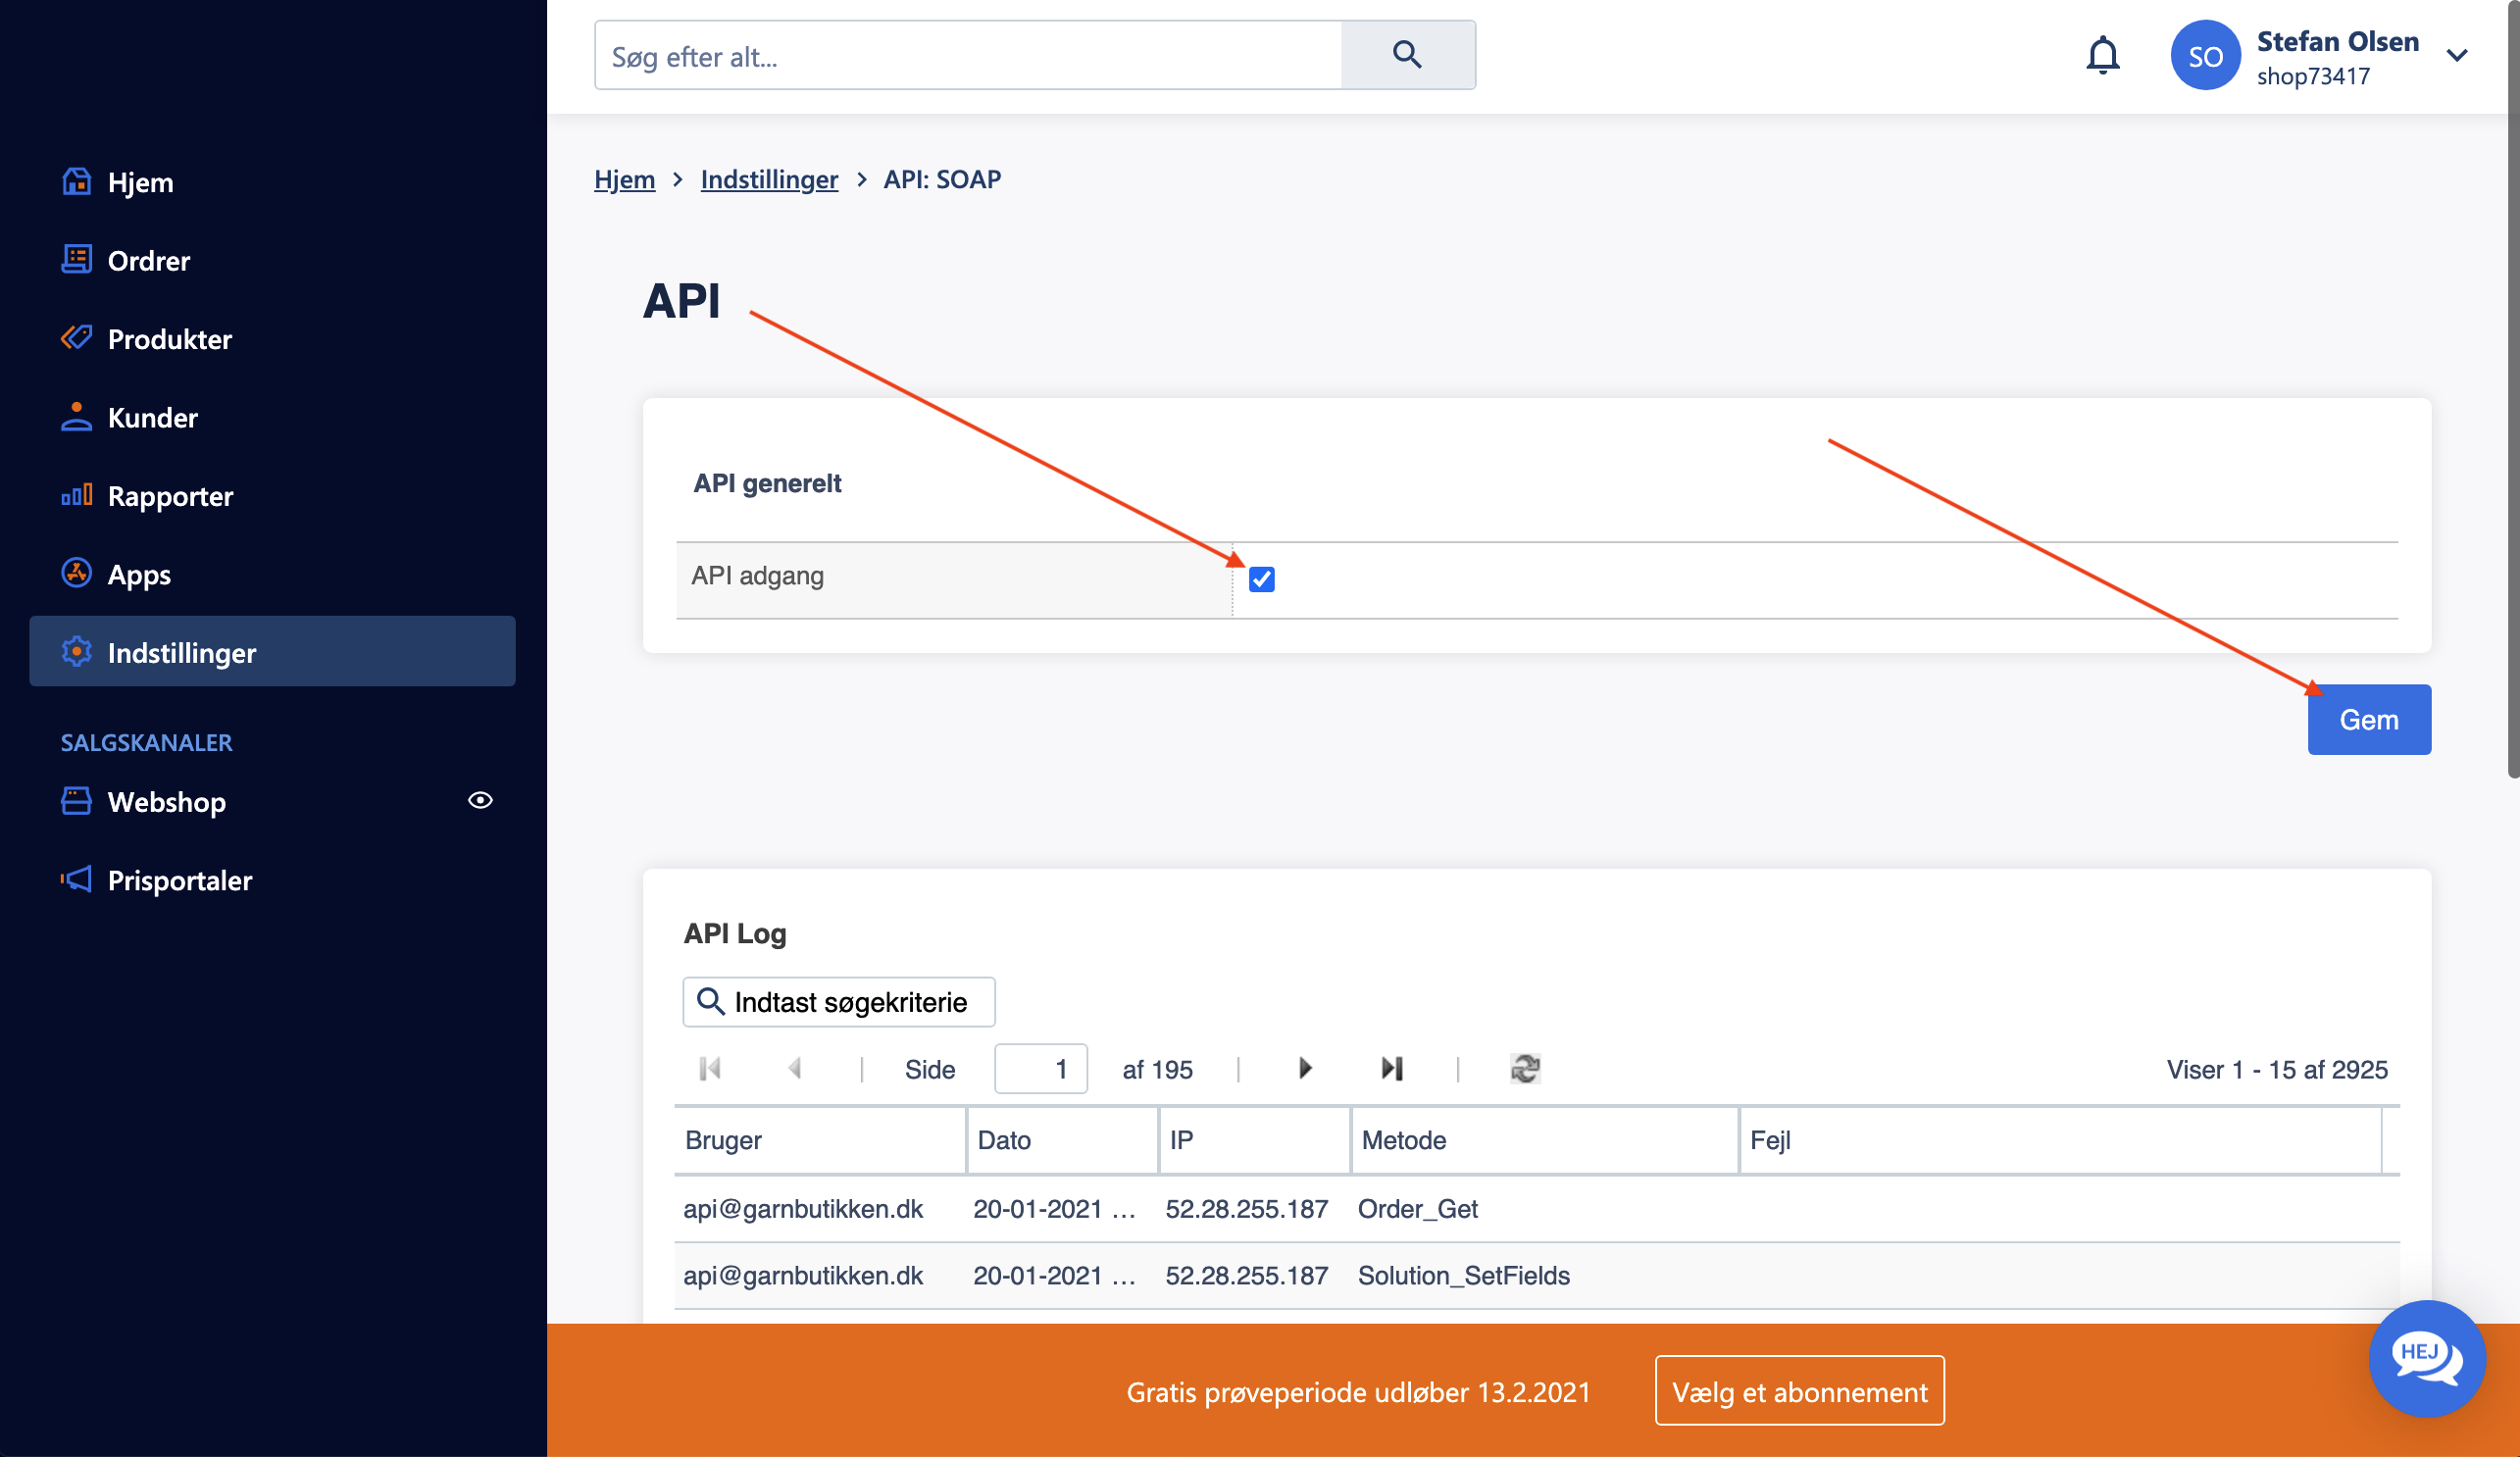
Before syncing your catalog, you need to enable API access in your DanDomain store:
- In your DanDomain administration, go to Indstillinger > API: SOAP.

- Under API generelt, check the box for API adgang.
- Click Gem to save the settings.
Create API User #
To allow Clerk to access your store data, create a dedicated API user:
...Sync Data
Sync your DynamicWeb products, categories, content, customers, and orders to Clerk. This guide covers setting up data synchronization and configuring the REST API.
Before syncing data, make sure you have installed the Clerk SDK in your DynamicWeb store. See the Get Started guide for installation instructions.
Build repository index #
Navigate to Settings -> Repositories -> Clerk.
Click the Products index
Under Builds -> Build, click the Products button to build the index.
...
Sync Data
Create and configure data feeds to sync your JTL products, categories, and customer data to Clerk. This guide covers accessing feed settings, configuring options, and choosing the right creation method.
Creating data feeds #
This guide focuses on the crucial process of creating data feeds for the S360 Clerk plugin in your JTL webshop.
Data feeds are essential for keeping your product information up-to-date and synchronized with Clerk.
Follow these steps to ensure a seamless integration and optimal performance.
...Sync Data
Sync your Lightspeed products and attributes to Clerk. This guide covers customizing product data and choosing which products to sync.
Set up Sync #
To sync your Lightspeed store data with Clerk, you need to configure the data sync settings in Clerk.
Go to my.clerk.io > Data > Configuration.
Enter the following information for your Lightspeed store:
Domain: Your webshop URL (for example, https://www.beautifulshop.nl/).
Cluster ID: See Lightspeed’s Server Clusters documentation (choose the cluster for your region, e.g. https://api.webshopapp.com/nl for NL).
...
Sync Data
Sync your Magento 1 products, attributes, and order data to Clerk. This guide covers customizing product data, choosing which products to import, changing image sizes, and managing order sync.
Before syncing data, make sure you have installed and configured the Clerk extension in your Magento 1 backend. See the Get Started guide for installation instructions.
Set up Sync #
To sync your Magento 1 store data with Clerk, you need to configure the import URL in the Clerk extension and start the sync.
...