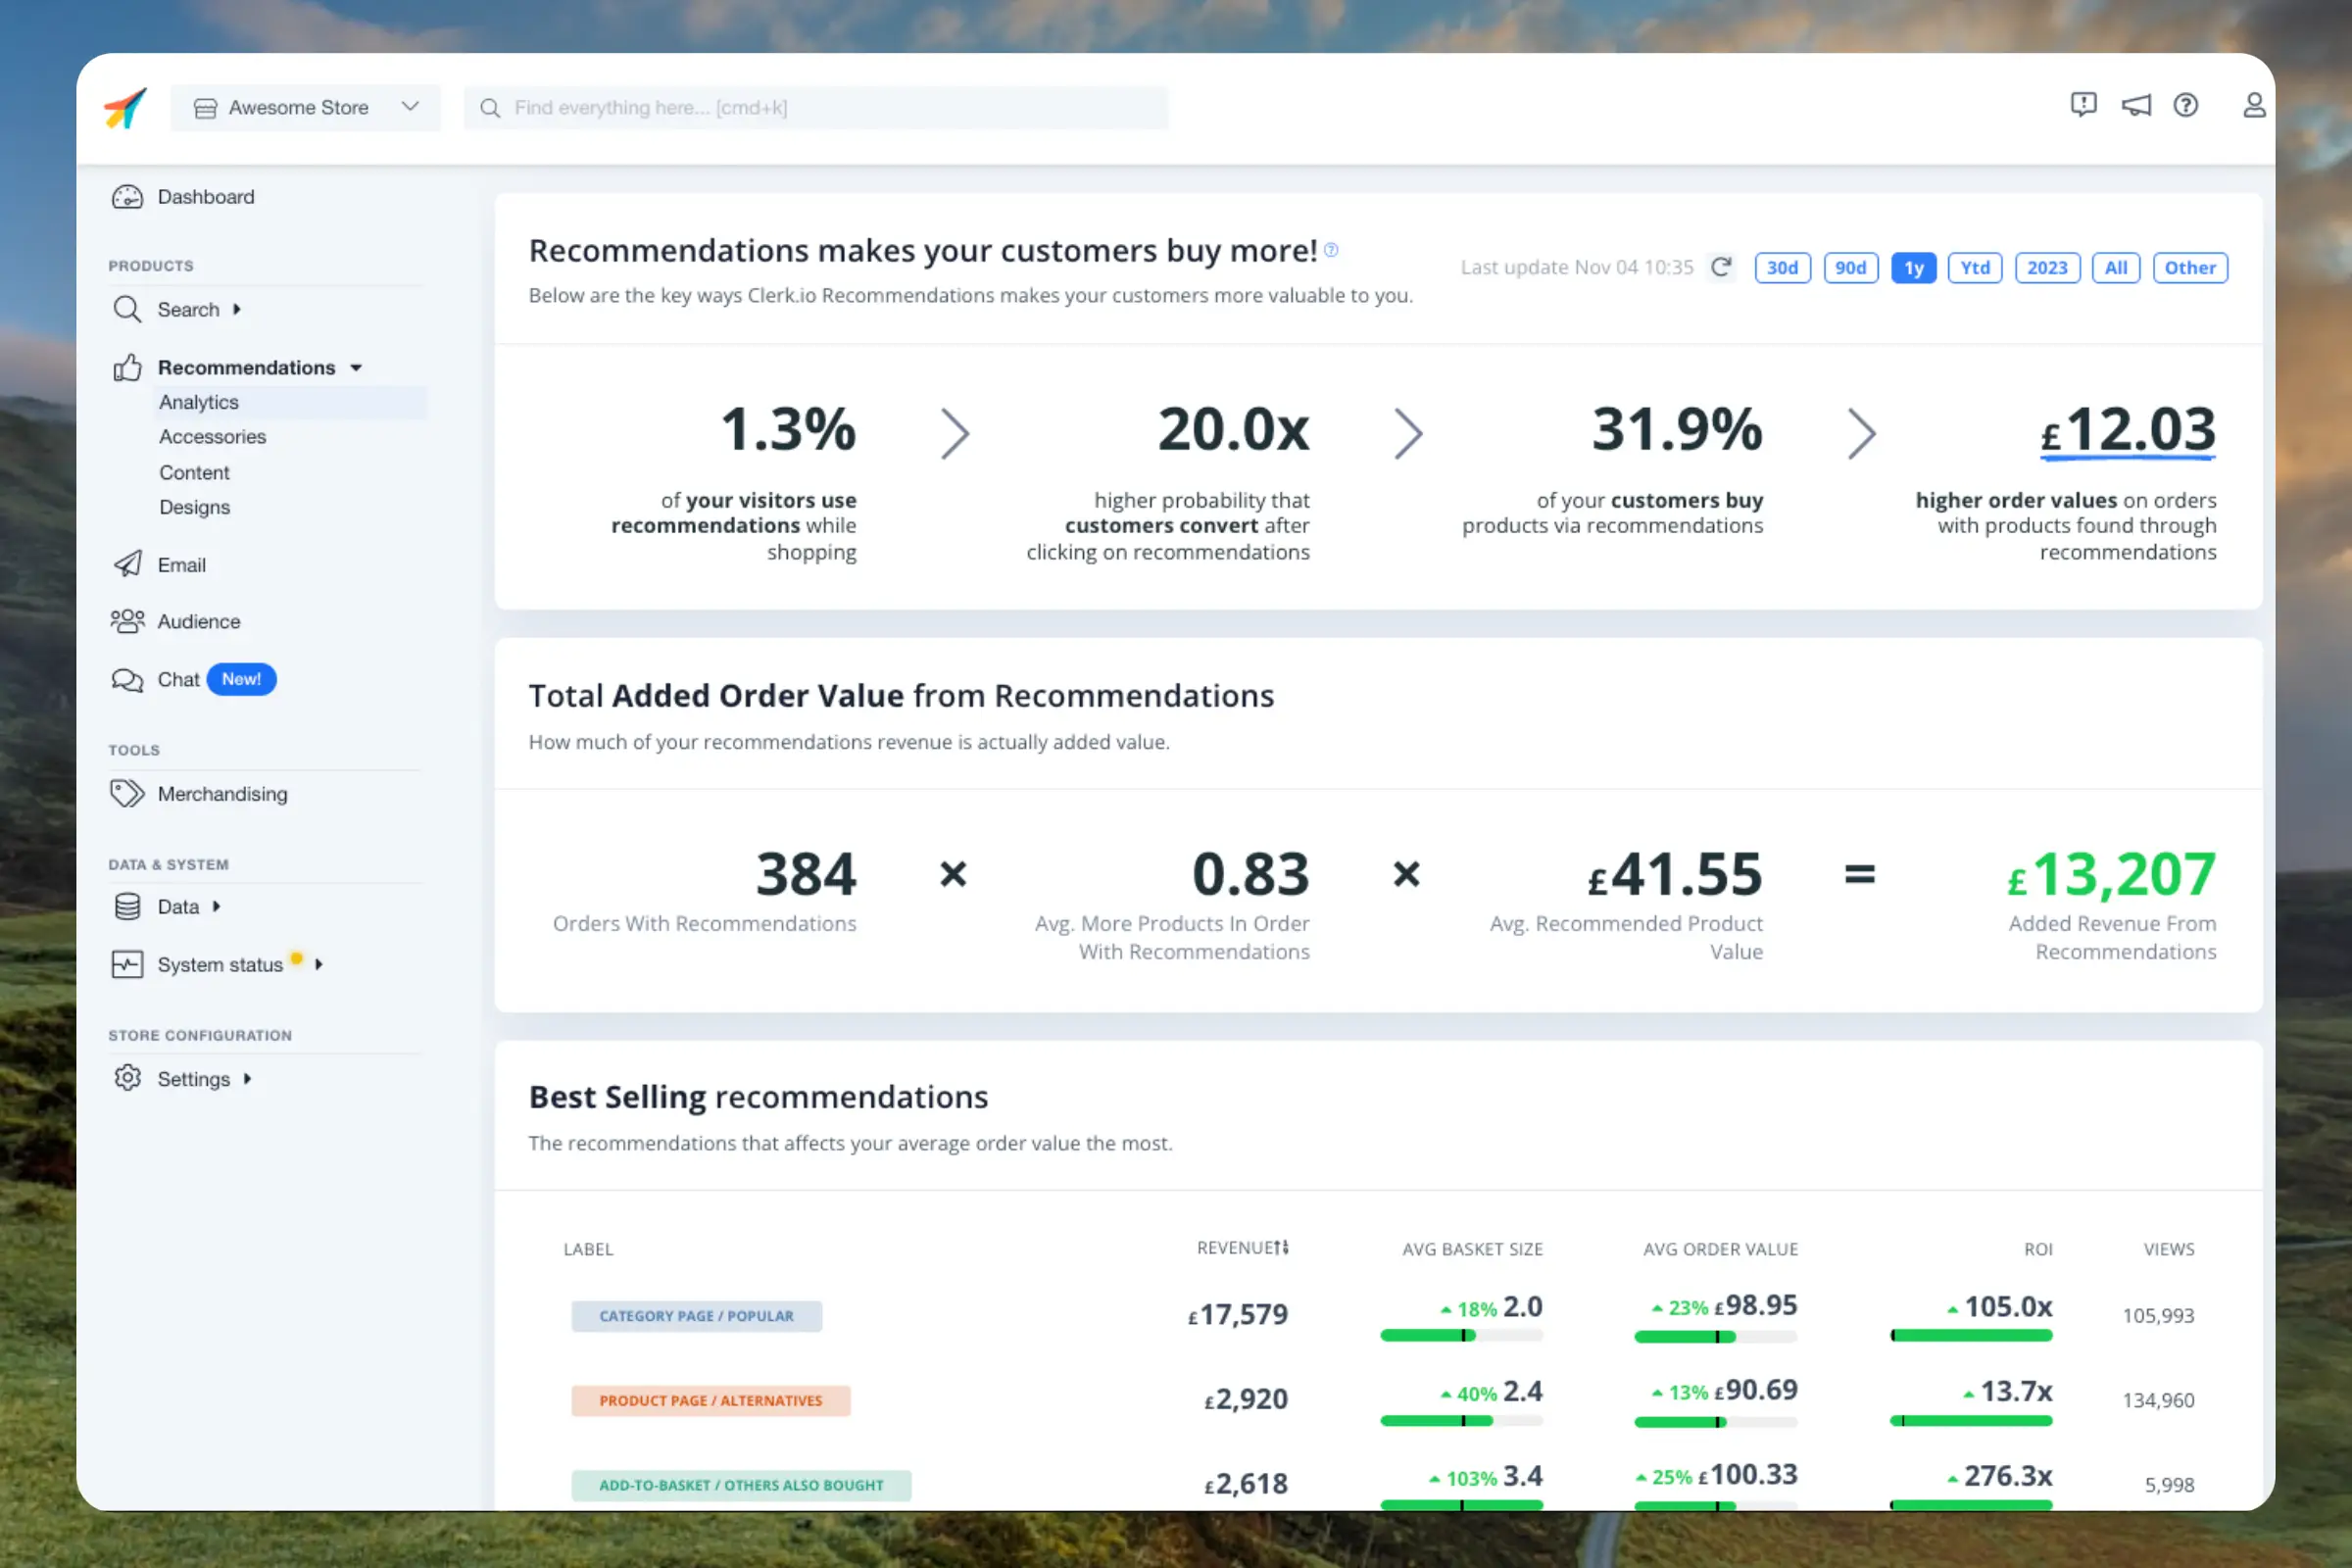
This dashboard gives you a thorough overview of how your visitors use Recommendations, both in terms of what works and what needs to be improved.Timeframe
#
By default, the dashboard shows the performance over the last 30 days, but this can be customised with the date-range selector in the top right corner.
Labels
#
These are used to identify each Recommendations element. You can define them in
Sliders or in
API calls.
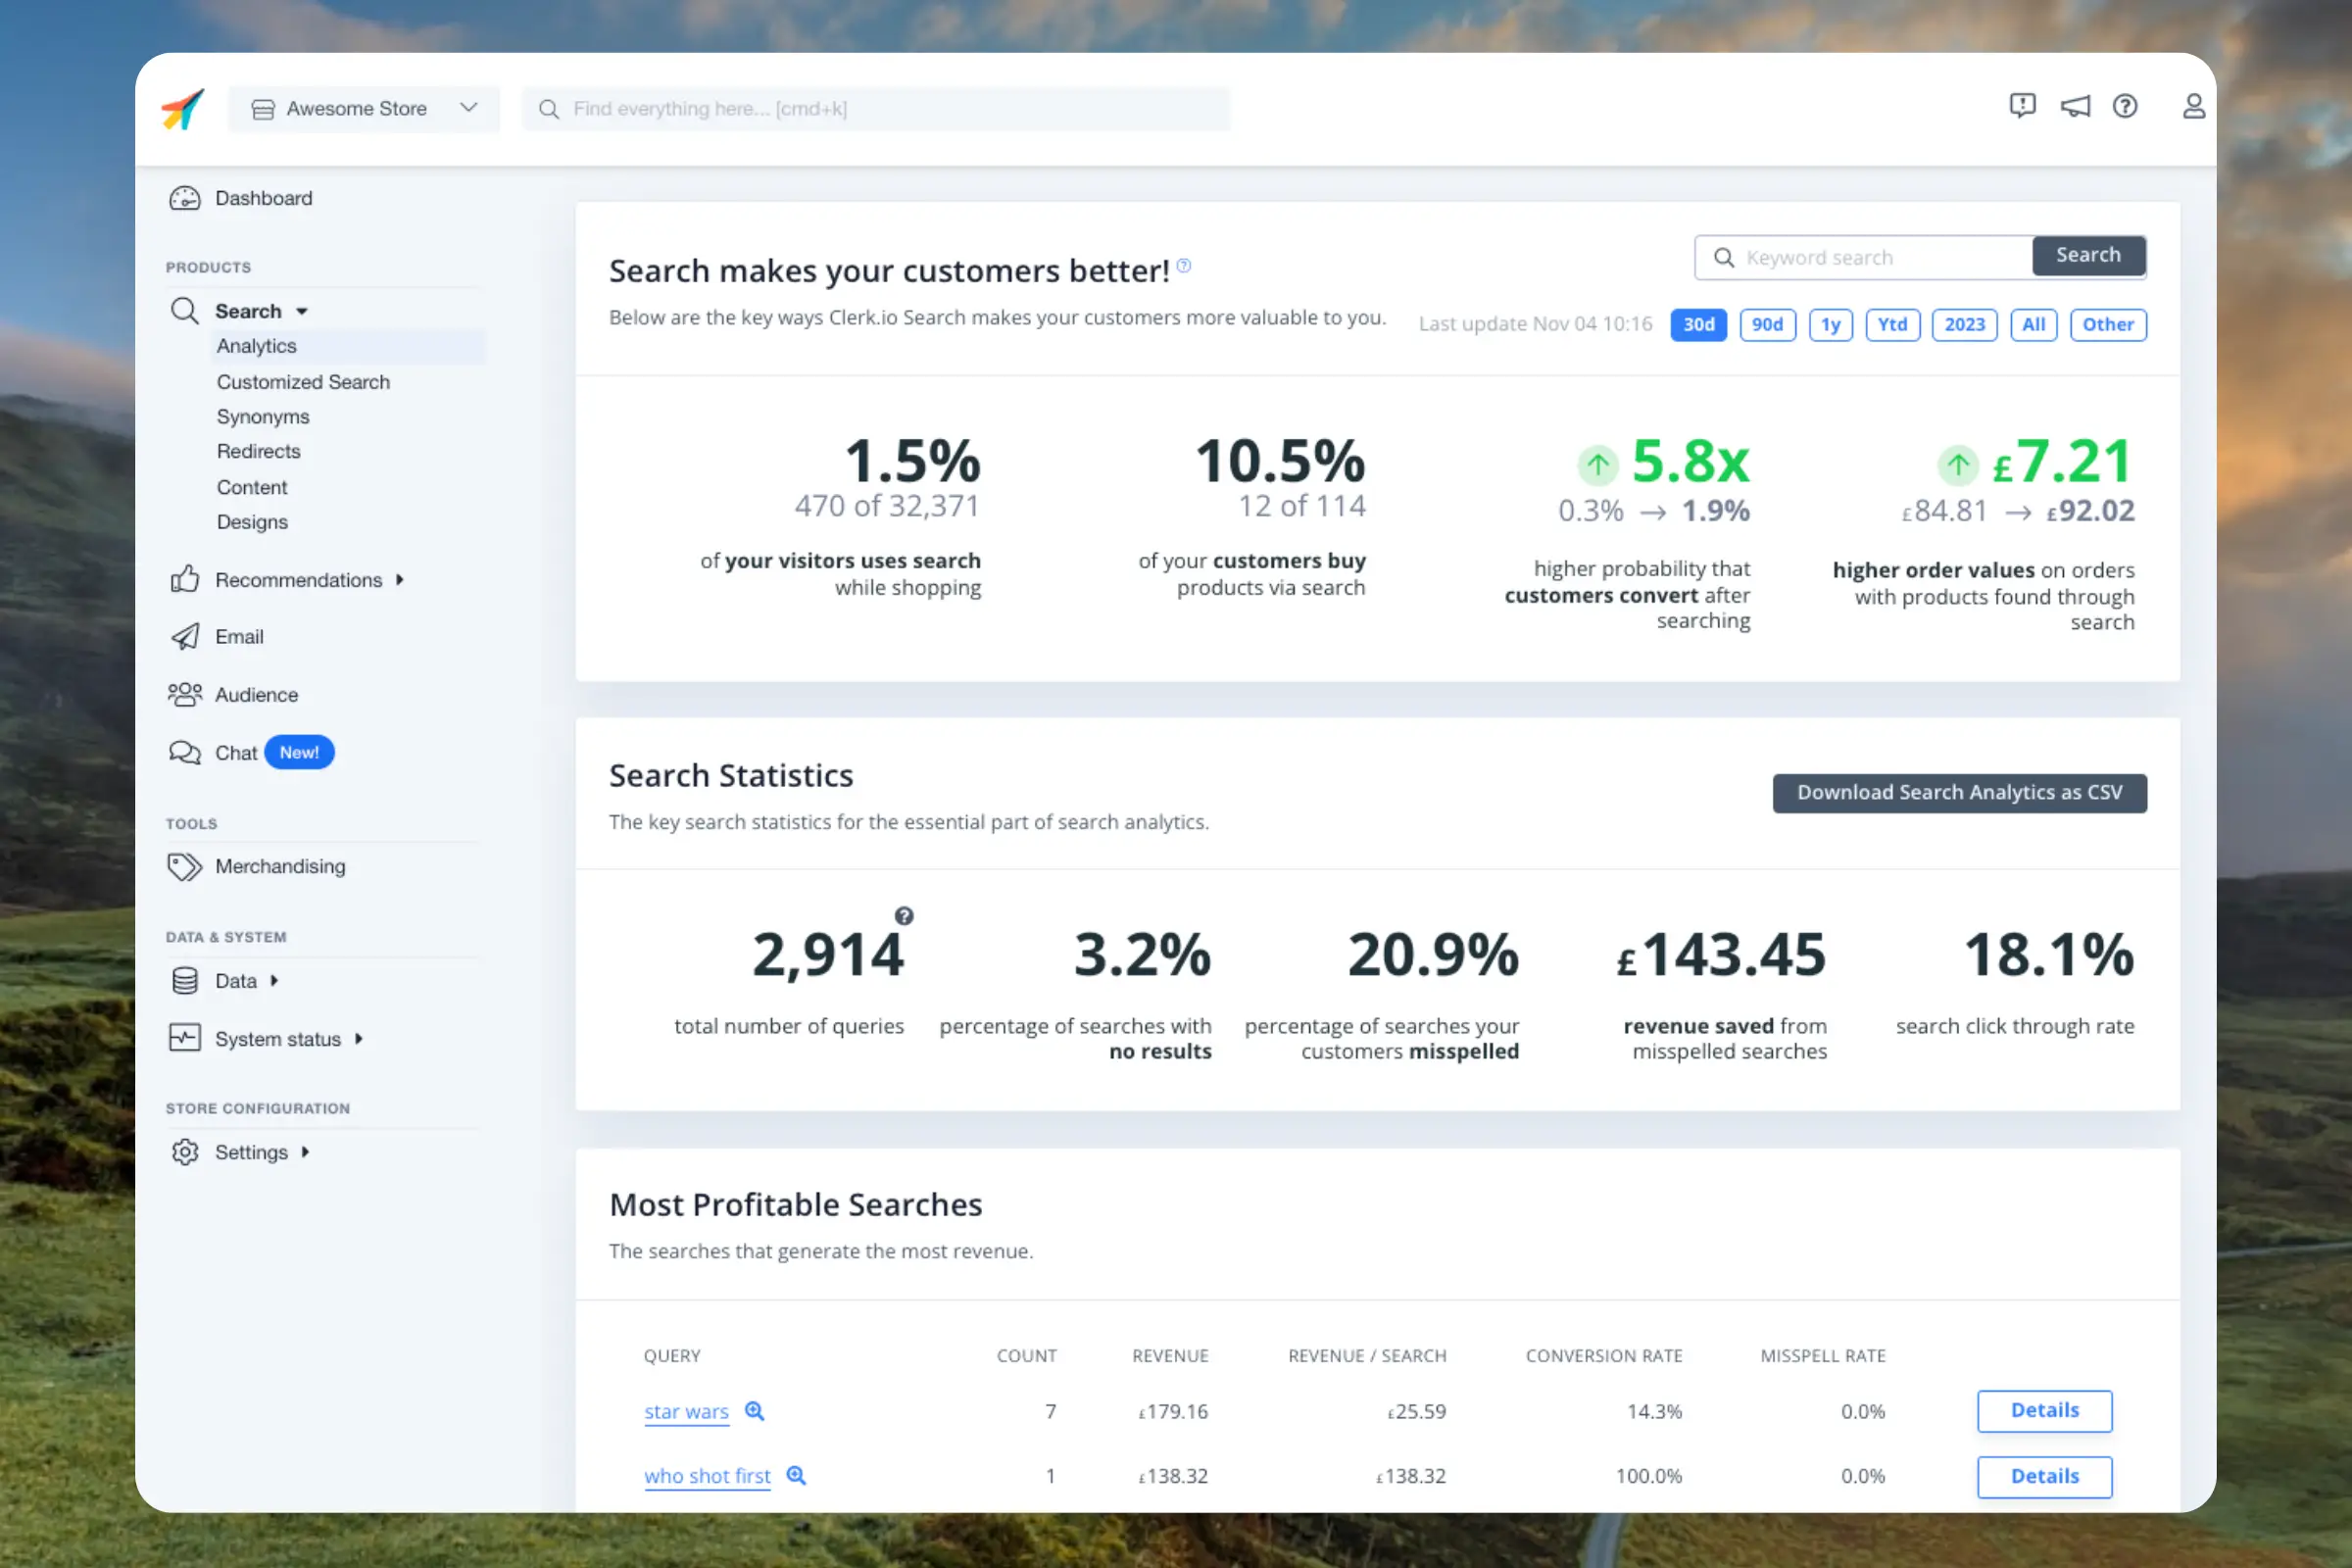
...This dashboard gives you a thorough overview of how your visitors are searching, both in terms of what works and what needs to be improved. It’s your one-stop page for understanding your visitors search behaviour.Timeframe
#
By default, the dashboard shows the performance over the last 30 days, but this can be customised with the date-range selector in the top right corner.
Overview
#
Shows the main performance indicators for the given timeframe.
...Clerk.io can read, analyse, and act across almost every part of your setup. Below is an overview of what it can do — both in terms of the questions it can answer, and the changes it can make.
All actions require your confirmation before they are applied.
Clerk.io can dig into your numbers in detail. This includes pulling core KPIs like revenue, orders, conversion rate, and average order value — and breaking them down by time period, product, or traffic source.
...This guide covers everything you need to set up before Clerk.io can send emails on your behalf.
These steps only apply when you want to send emails through Clerk.io — campaigns, flows, and automated triggers like Abandoned Cart. If you only want to add personalised product recommendations to emails you already send through Klaviyo, Mailchimp, or another platform, none of this is needed. Head straight to
Embeds instead.
Configuration
#
These steps get Clerk.io authorised to send emails from your domain, give it a list of people to send to, and get your first email design ready. You will need access to my.clerk.io, your domain’s hosting provider, and your existing email platform.
...Sync your BigCommerce products and attributes to Clerk. This guide covers customizing product data and choosing which products to import.
Set up Sync
#
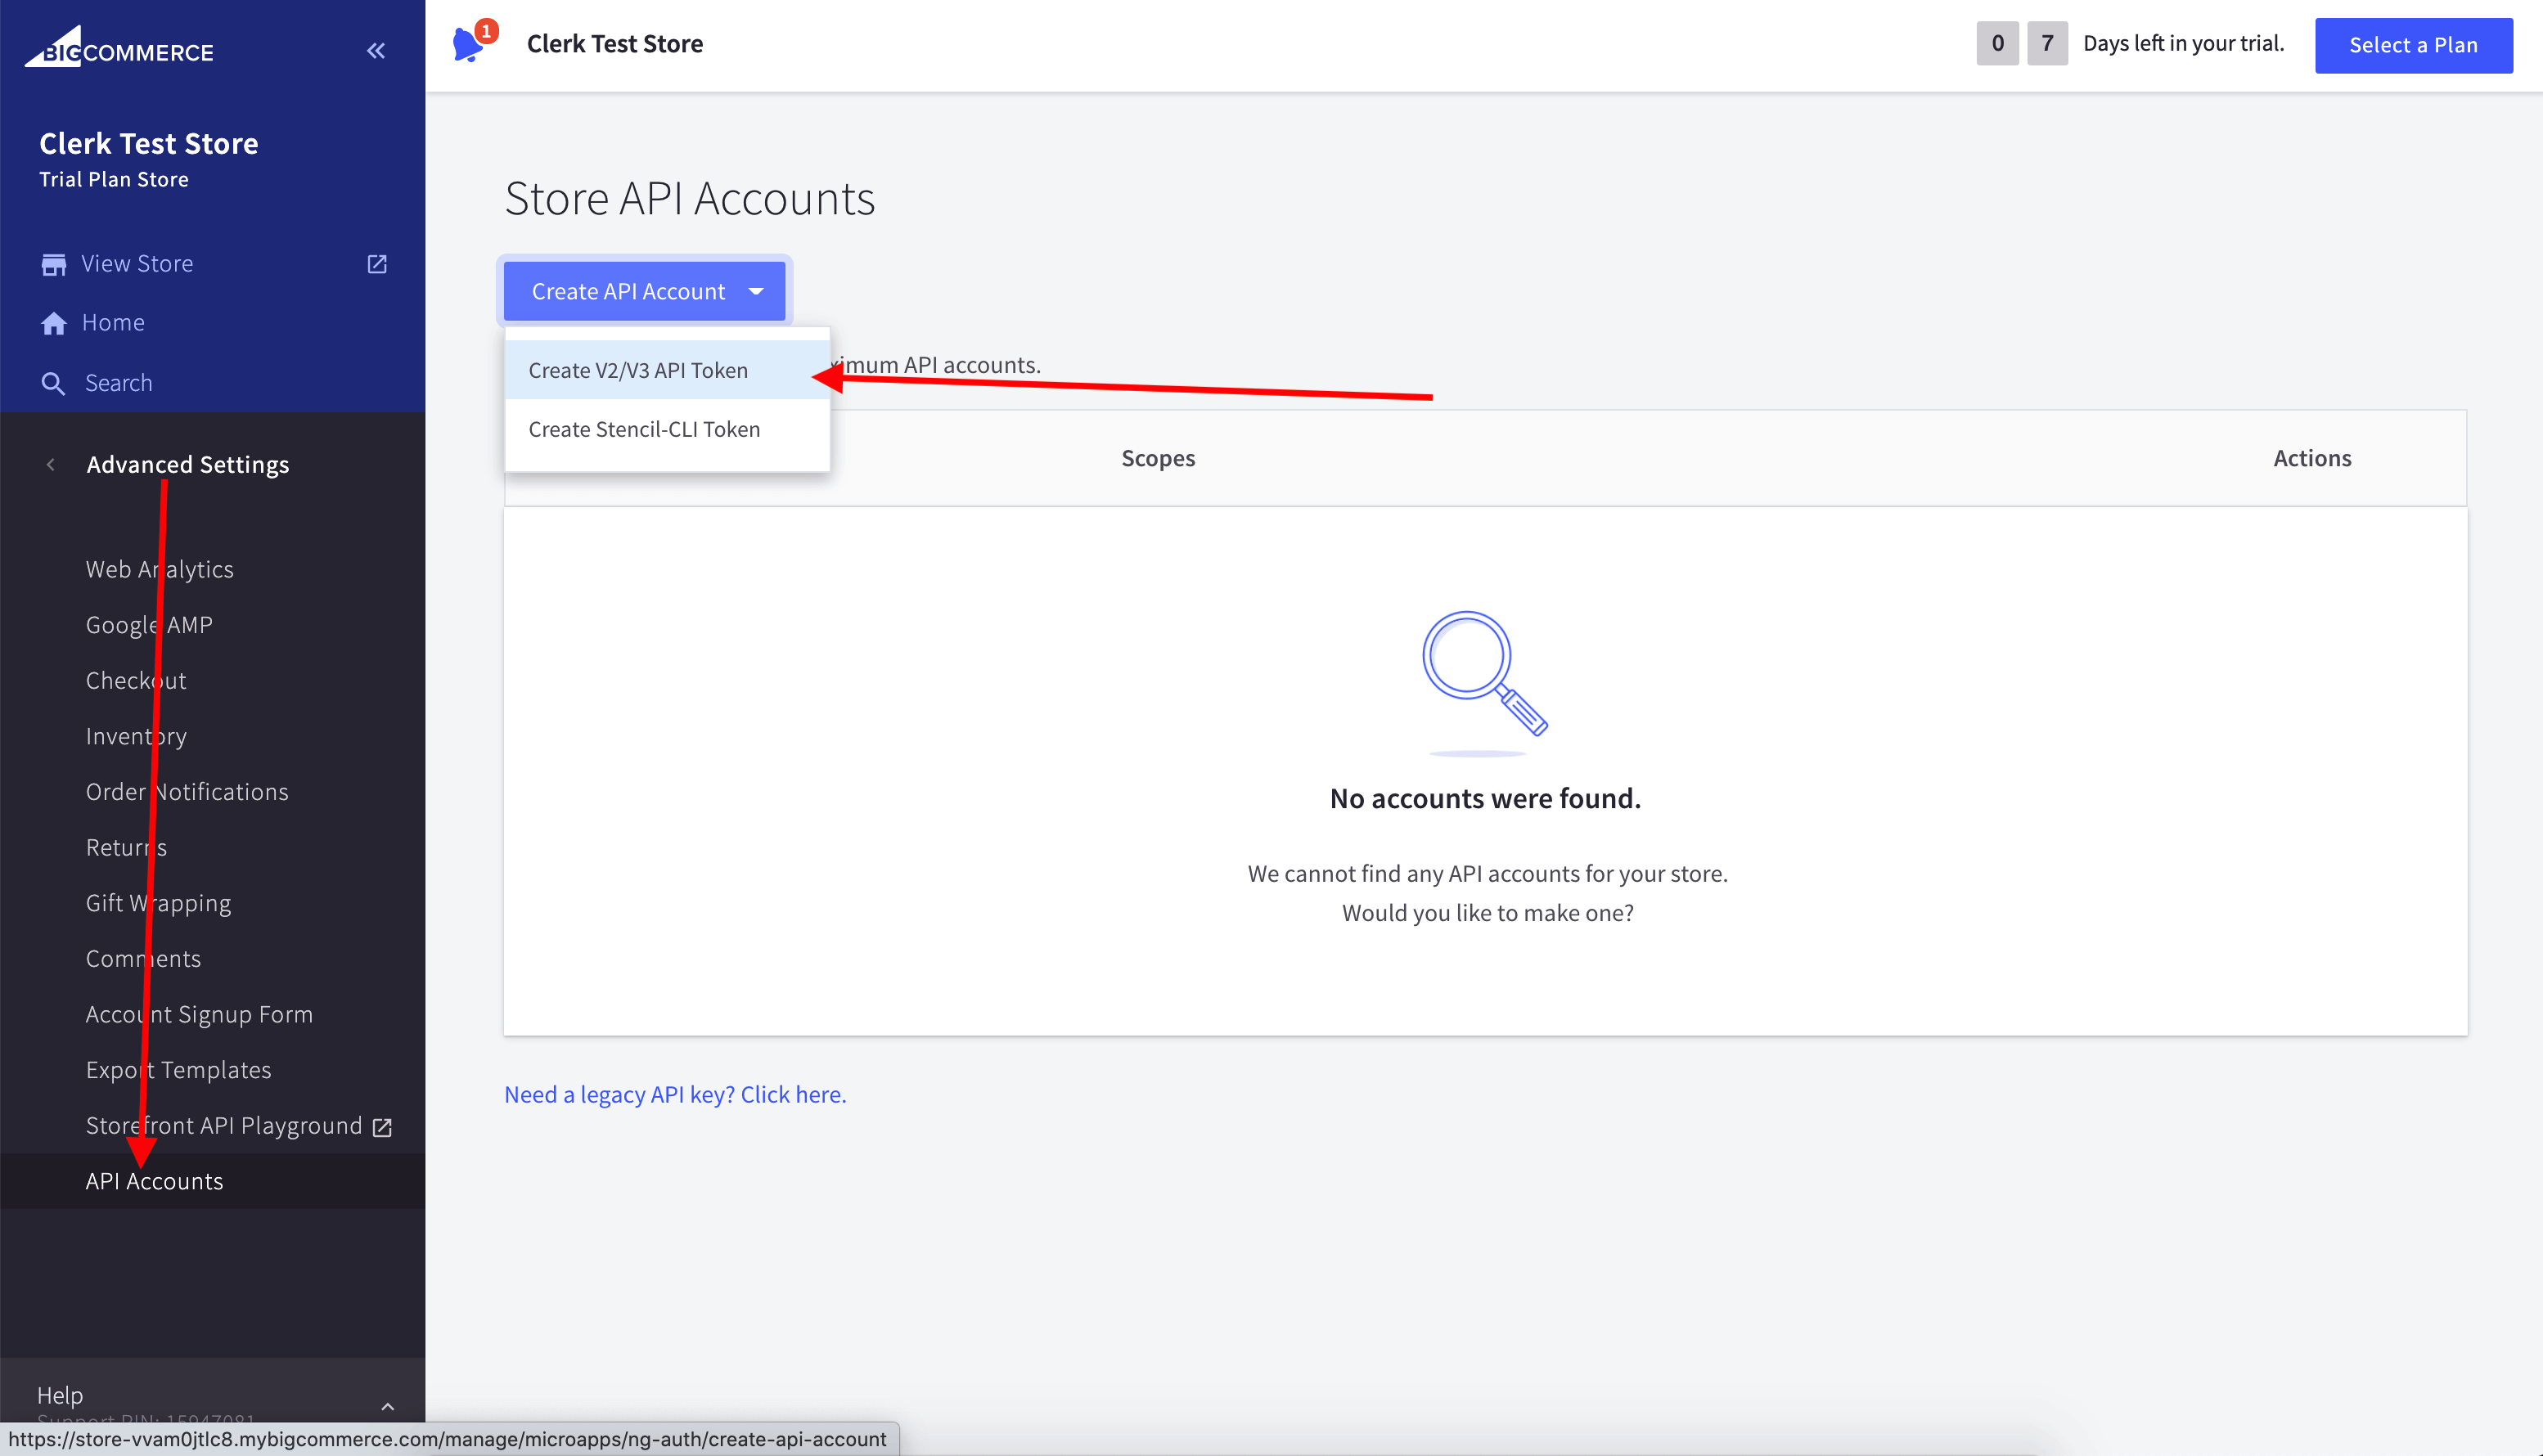
To sync your BigCommerce store data with Clerk, you need to create an API account in BigCommerce and configure it in Clerk.
In your BigCommerce admin, go to Advanced Settings > API Accounts.
Click Create API Account and choose Create V2/V3 API Token.
Name it “Clerk.io” and grant read‑only access to:
...
Sync your DanDomain Classic products, attributes, and order data to Clerk. This guide covers customizing product data, choosing which orders to import, and managing order sync.
Before syncing data, make sure you have installed and configured the Clerk.io app in your DanDomain Classic backend. See the
Get Started guide for installation instructions.
Set up Sync
#
To sync your DanDomain Classic store data with Clerk, you need to configure the import URL in the Clerk app and start the sync.
...Sync your DanDomain products and attributes to Clerk. This guide covers setting up API access and syncing your catalog.
Enable API Access
#
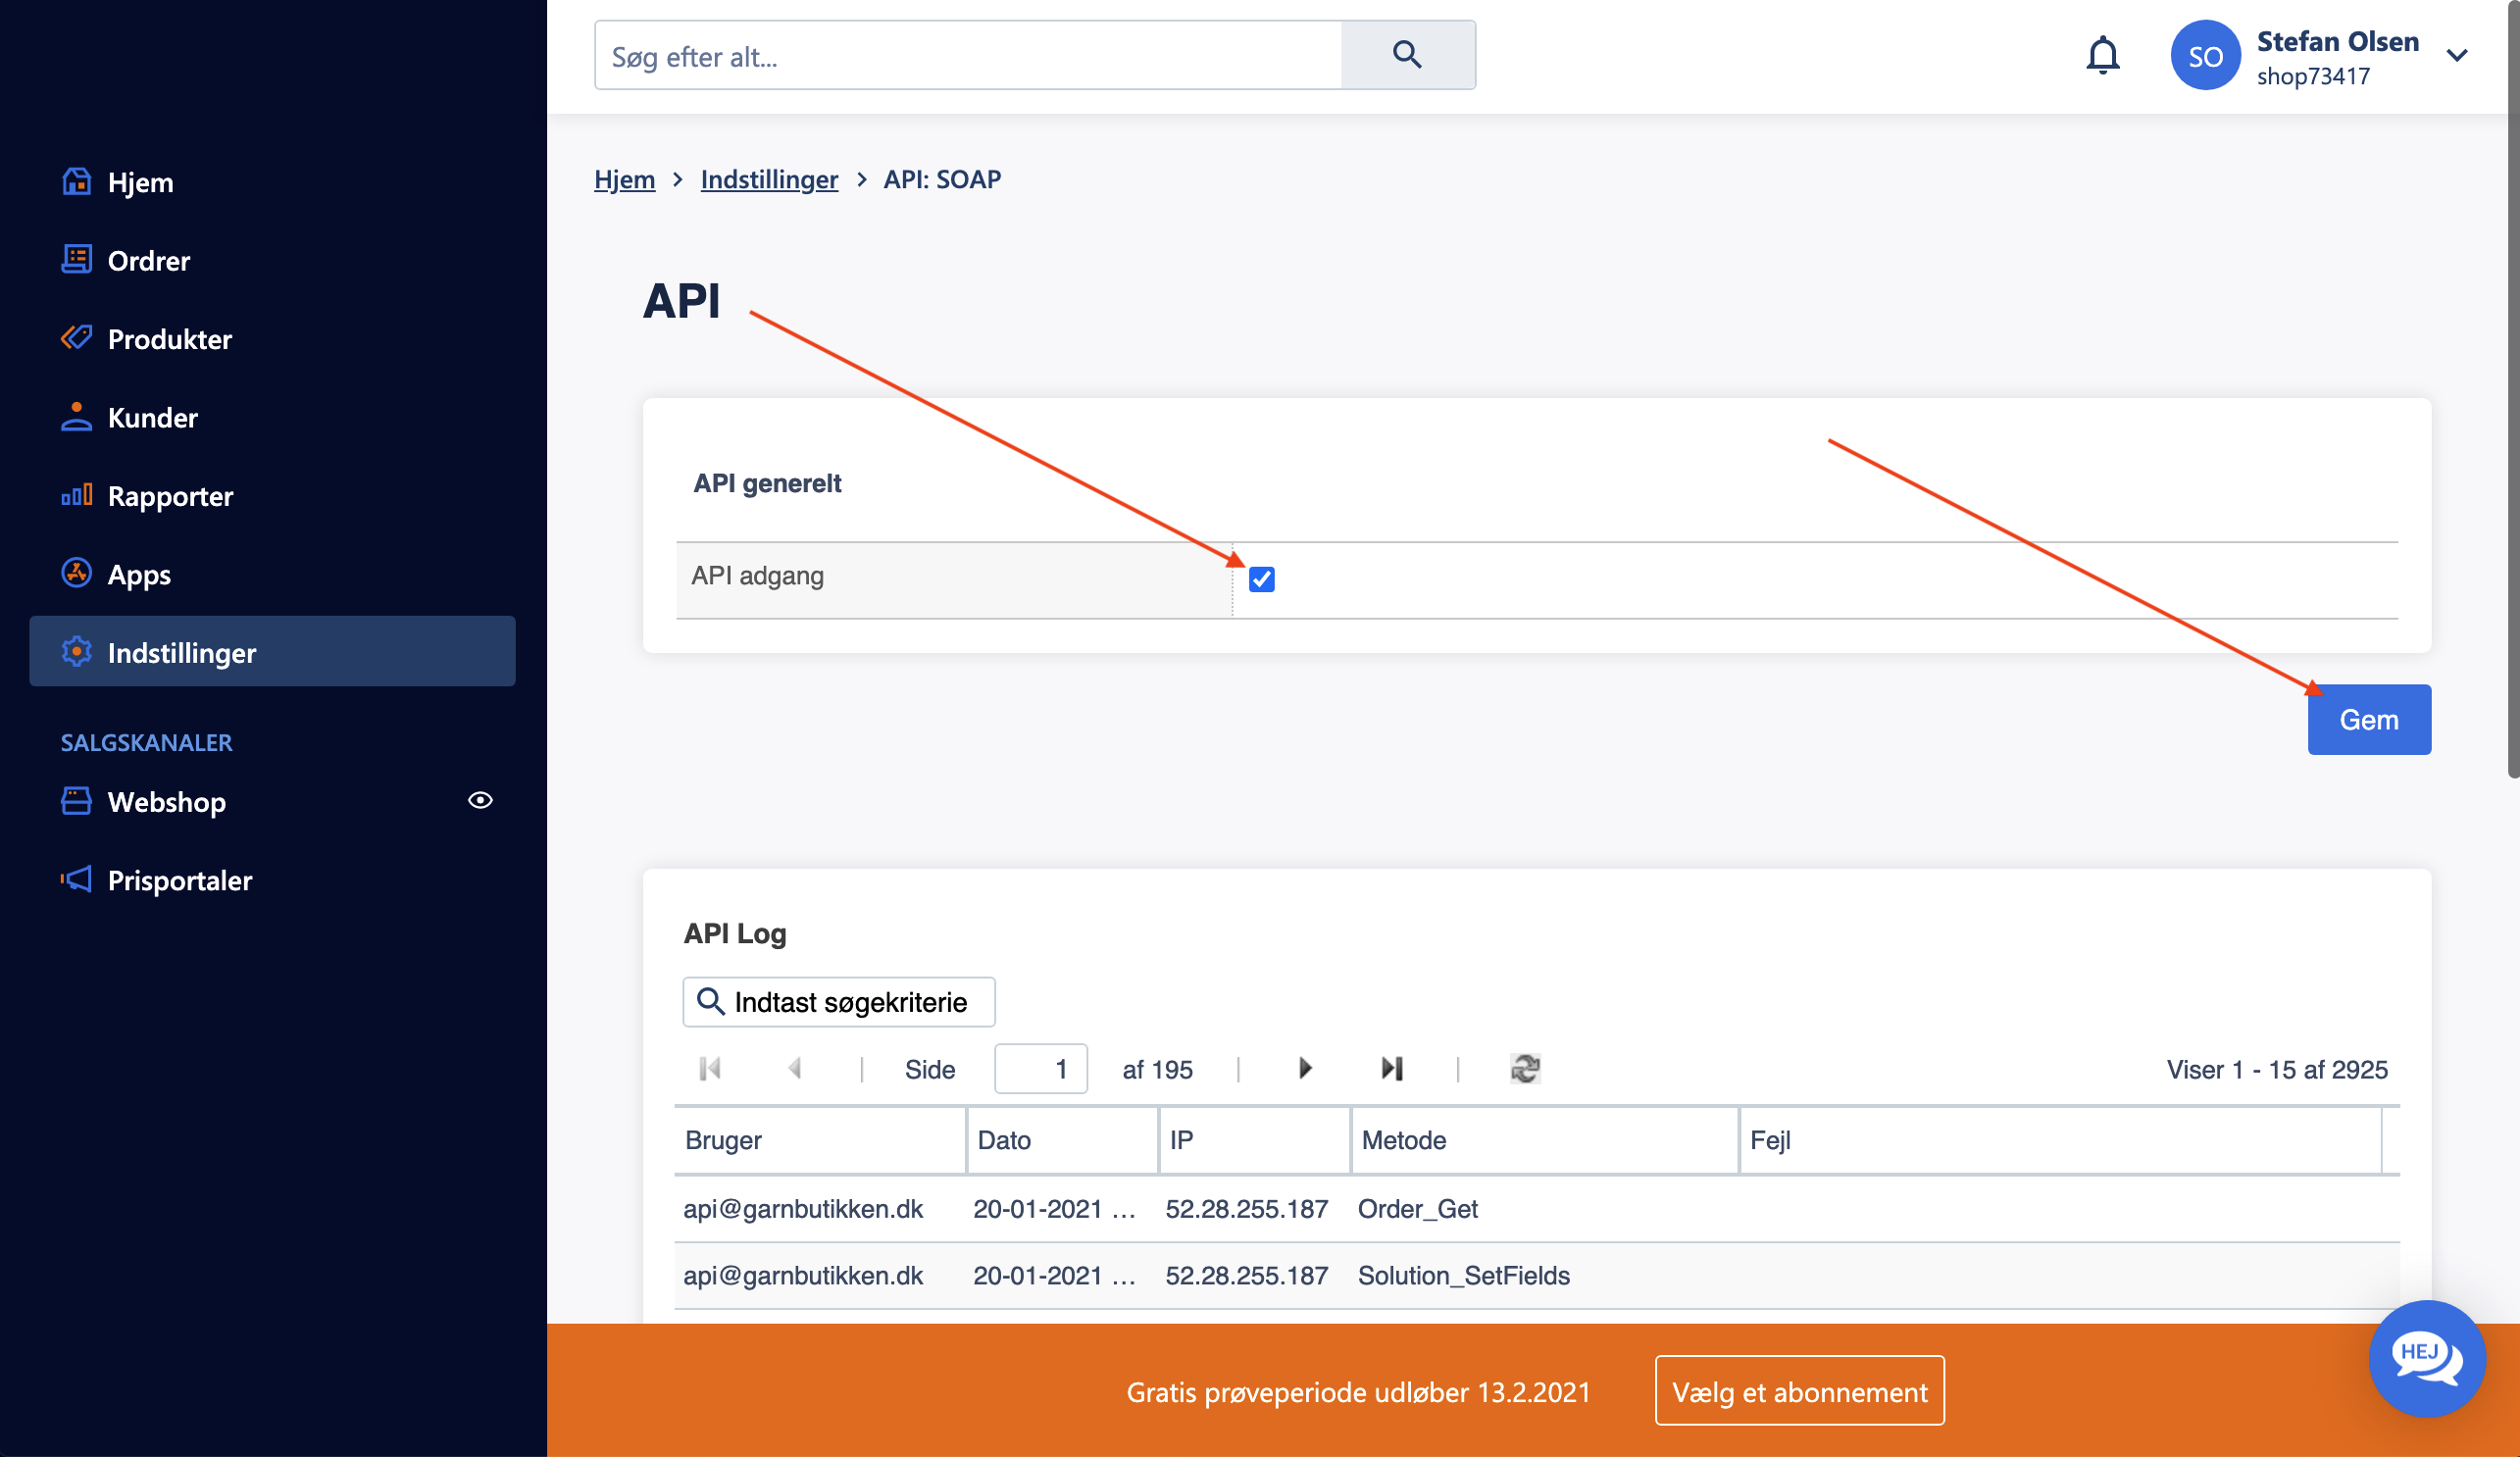
Before syncing your catalog, you need to enable API access in your DanDomain store:
- In your DanDomain administration, go to Indstillinger > API: SOAP.
- Under API generelt, check the box for API adgang.
- Click Gem to save the settings.
Create API User
#
To allow Clerk to access your store data, create a dedicated API user:
...