Using Merchandising
Merchandising is a feature that lets you impact the products shown across Search, Recommendations and Email.
The feature allows you to boost products on sale, prioritise products from a specific brand, hide out-of-stock products and in many other ways control what is being shown in results.
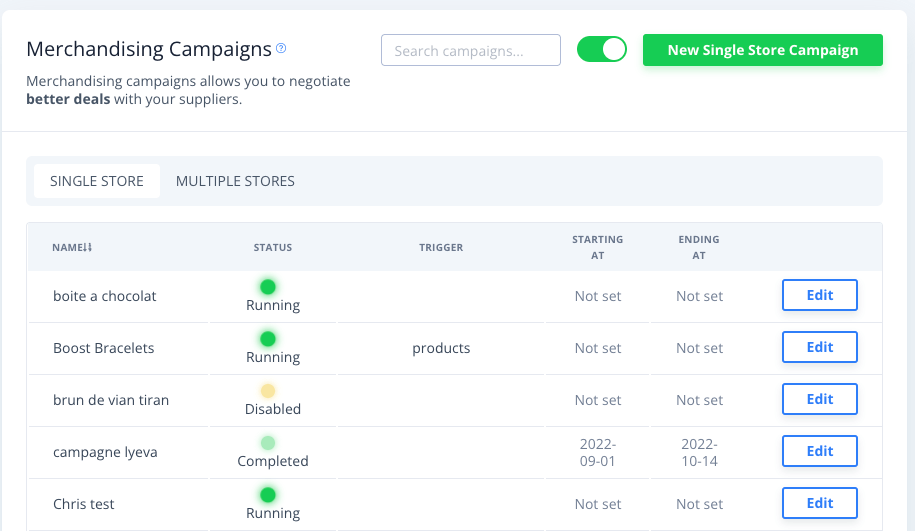
From the main menu, you will be able to see which campaigns are currently running, which will be activated later, and which are disabled:
Campaign Scope
Merchandising campaigns can be added either to just 1 Store or multiple ones at the same time, giving you the freedom to add rules on your entire account or some specific Stores.
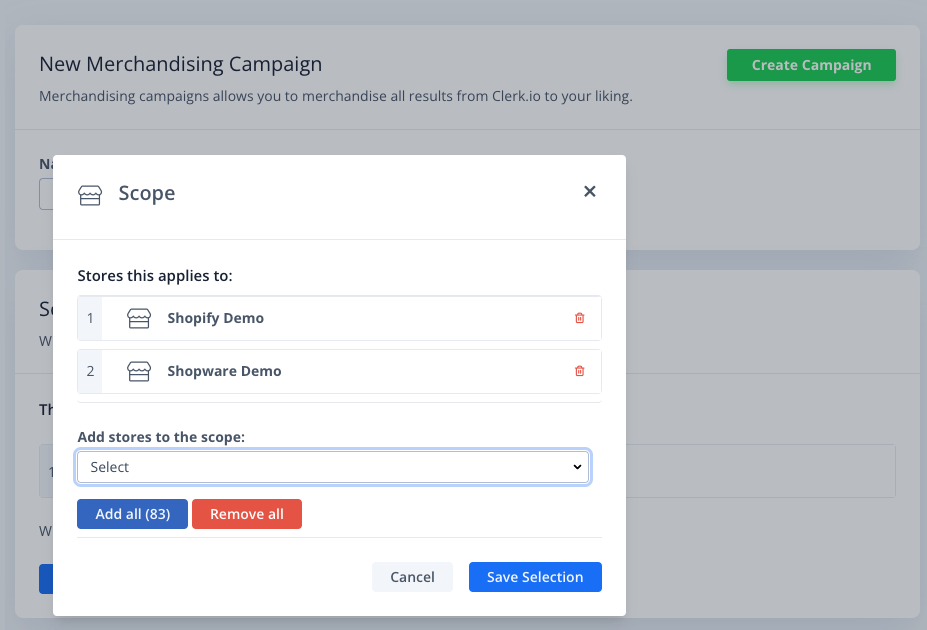
From the Merchandising overview, choose Single Store to create campaigns for this store only, or Multiple Stores to add cross-Store campaigns.
For Multi-Store, you can choose the exact scope under Modify Scope:
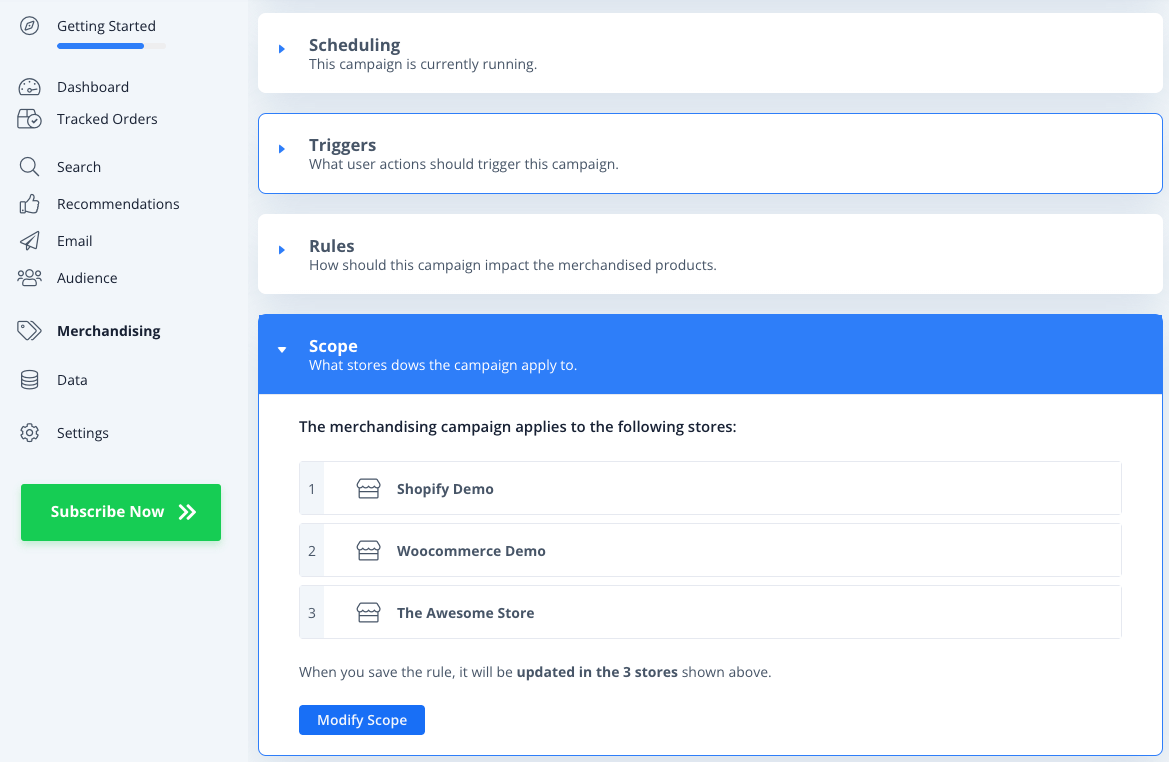
The scope can also be changed later on the Campaign itself:
Campaign Options
Every campaign consists of the following options:
1. Info
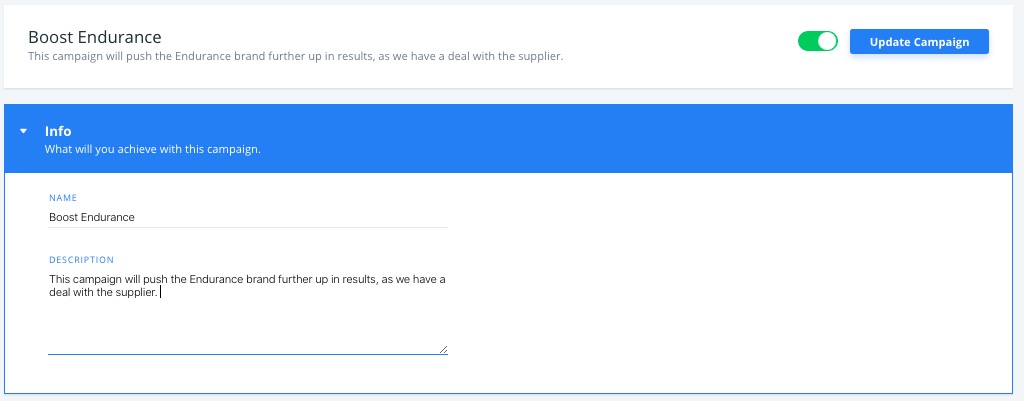
This lets you add a name and description so you can keep track of what the campaign does.
2. Scheduling

Lets you choose whether a campaign should run forever until you choose to deactivate it, or within a certain time-period when running temporary campaigns, like flash-sales or similar.
3. Triggers
This is where you choose exactly where your campaign should be used.
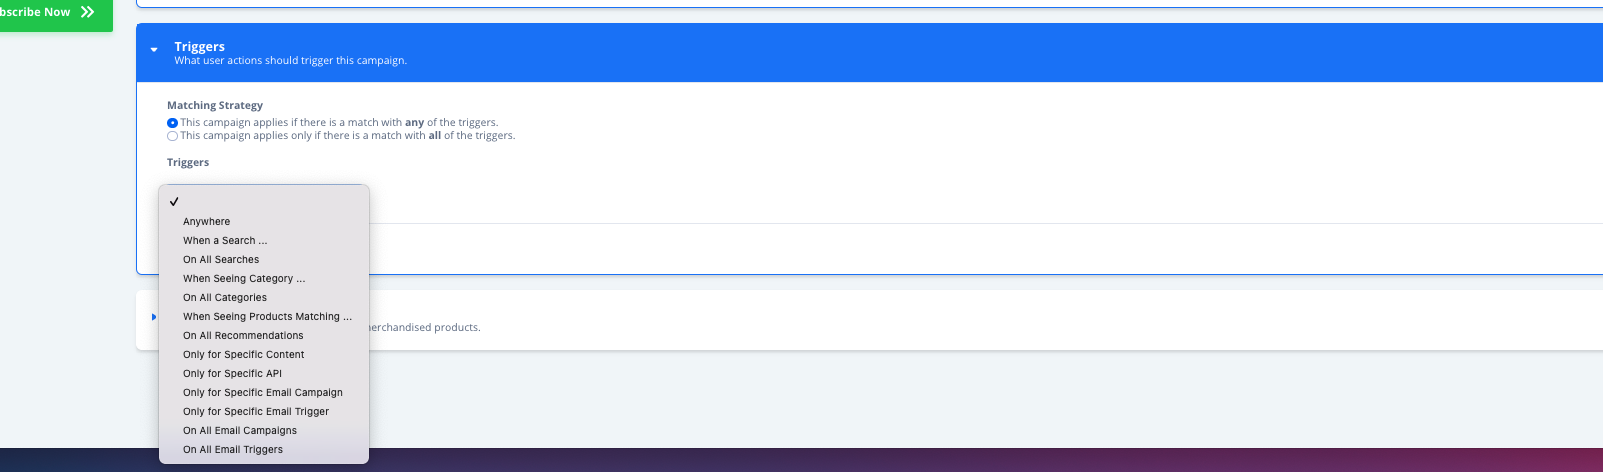
Triggers can be based for:
Customers searching for either an exact match, or when their search contains one or more particular words, or on all searches
Customers browsing specific category pages or all categories
Customers browsing specific product pages
To apply to all Recommendations
Customers view a specific Content, like Best Alternatives, or Hot Products in an email.
Only for specific API
Only for a specific Email Campaign
Only for a specific Email Trigger
On all Email Campaigns
On all Email Triggers
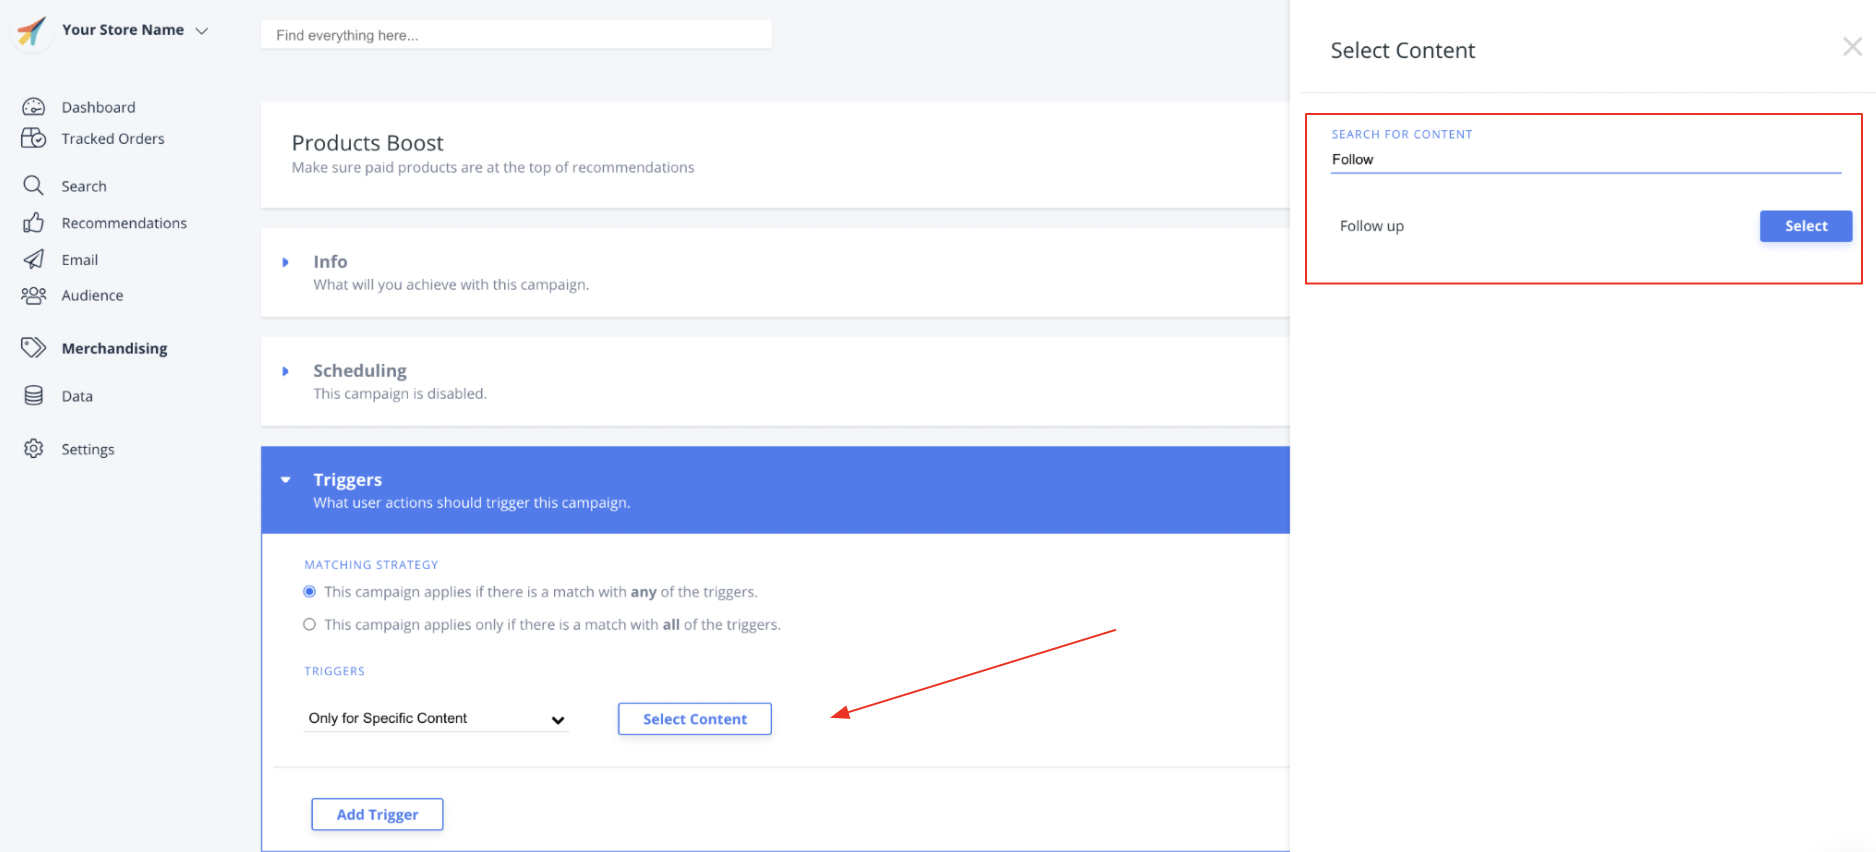
Triggers for Merchandising for Email Only
To apply Merchandising to a specific Email campaign (and so it does not apply to your webshop’s Recommendations), be sure to select “Only for Specific Content” > “Select Content”, then search for and select the name of the Email Content where Merchandising should take effect.
Similarly, for your Merchandising campaign to affect only non-Email products, be sure to select the Specific Content from your Search and Recommendations where that Merchandising campaign logic should be applied.
Further, Triggers can be set up in two different ways:
Where any triggers apply, meaning a campaign can be set up when searching for shoes, browsing products matching sneakers or browsing category 123
Where all triggers apply, allowing you to make advanced campaigns like only applying to the Content Best Cross-Sell Products and only when browsing products matching shoes that cost below €30.
4. Rules
This is where you choose which products to boost or downgrade.
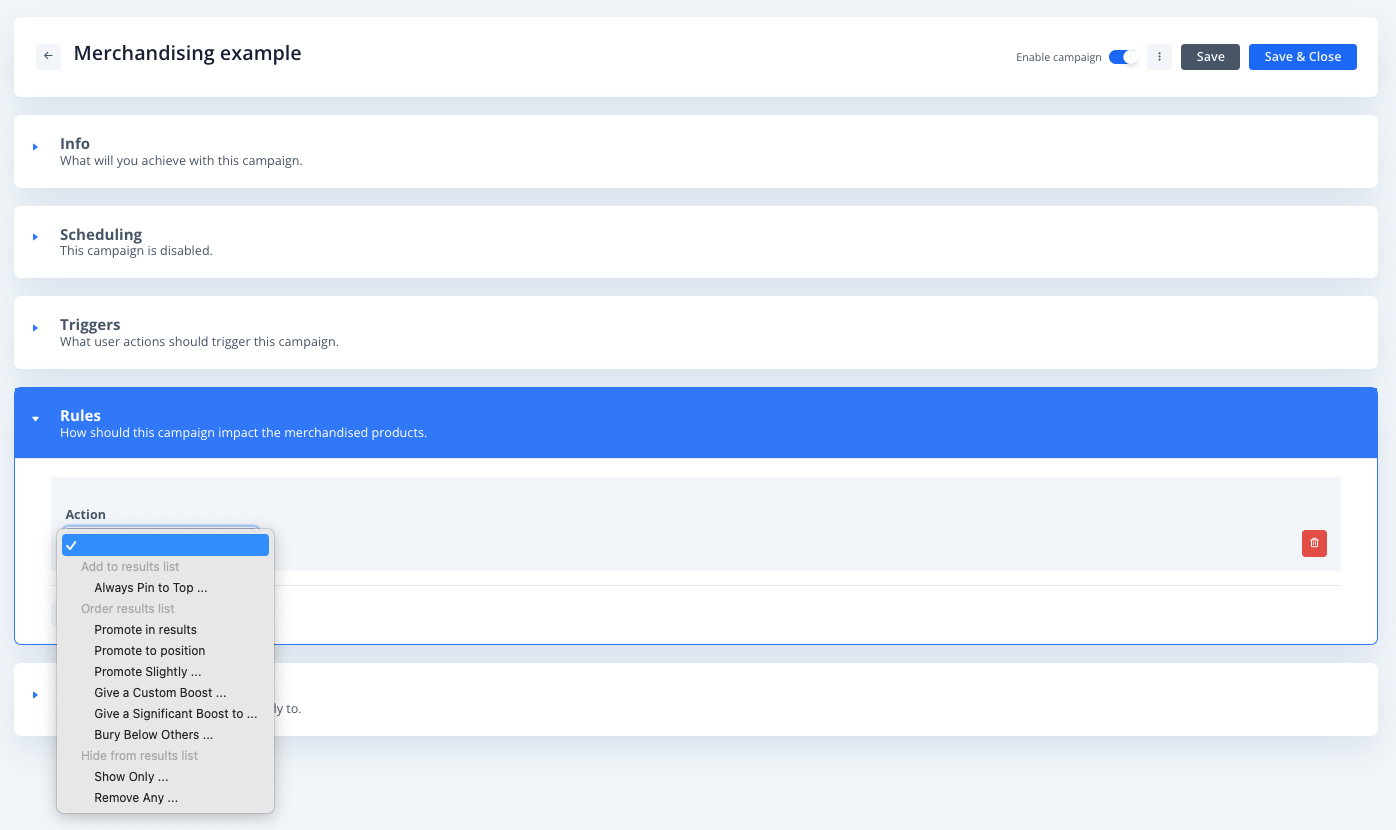
The Rules allow you to have great control over what to show:
Always Pin to Top will always show your selected products first in the results, no matter what.
Promote in results determines how frequently the highlighted products will appear. For instance, if you’re promoting a particular product, navigate to the Exposure frequency setting and choose “Every 2 products,” while also setting Starting on result n is at 1. This means the specific product will show up in every second slot on the product list.
Promote in position allows you to highlight specific products by placing them at a chosen spot in the search results. For example, if you decide where you want these special products to show up, you can go to the Starting on result n 2 setting and choose 2, and then set the Max products displayed to 3. This means those promoted products will begin appearing from the second position, and you can show up to 3 of them in the product list.
Promote slightly gives a smaller boost to products, causing them to be shown further up in results.
Bury below others will push products further down the list of results.
Give a custom boost allows you to write a specific amount the products should be boosted by. The required amount depends on the existing popularity of a product.
Give a Significant Boost to will greatly increase the ranking of the selected products, causing them to be shown much higher in the results.
Show Only will only show products matching your rules, removing anything else
Remove Any will remove products you choose completely when customers interact with your Rule.
Selecting Products
When creating Triggers and Rules, you will use the sidebar to select the logics.
The sidebar lets you select products based on these:
1. Product List
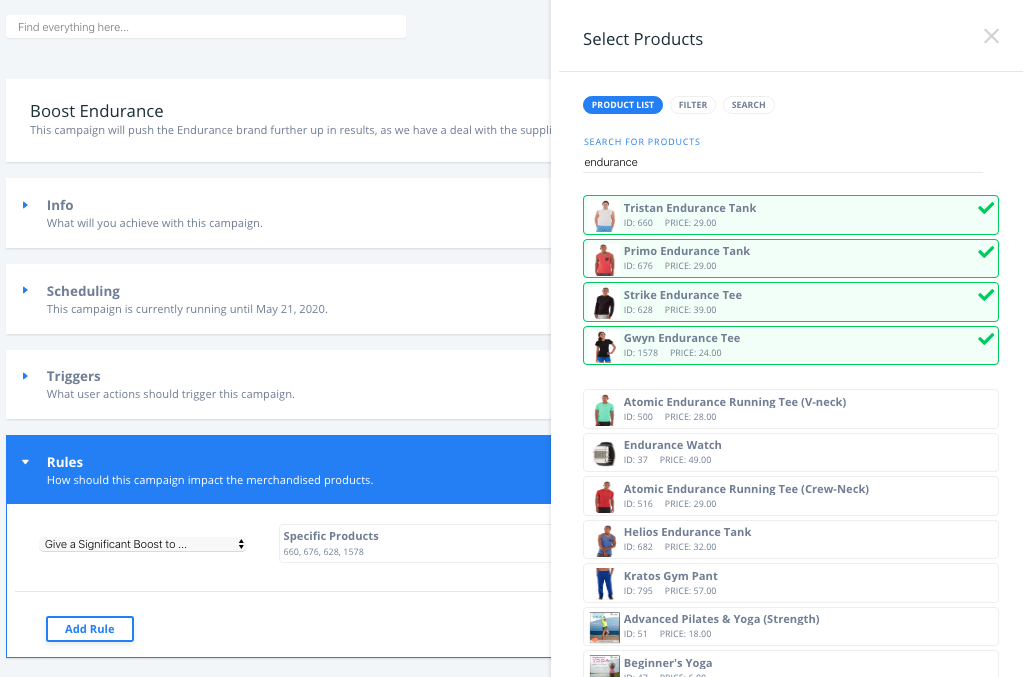
This lets you search for and manually pick out the very specific products you want to base your Campaign on.
2. Filter
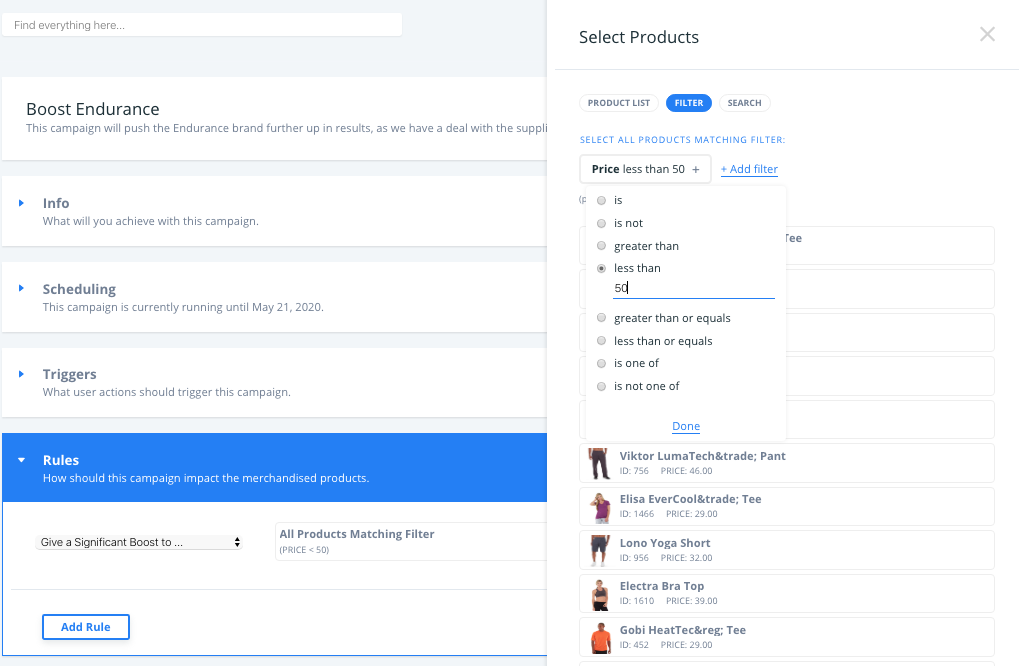
This allows you to choose products based on attributes you are sending to Clerk.io, like price, brand, margin etc.
Filters are created by selecting an attribute (eg. price), choosing how to match the attribute (eg. " less than") and selecting the value you want to base it on (eg. 30).
The campaign will then use all products matching this filter.
3. Search
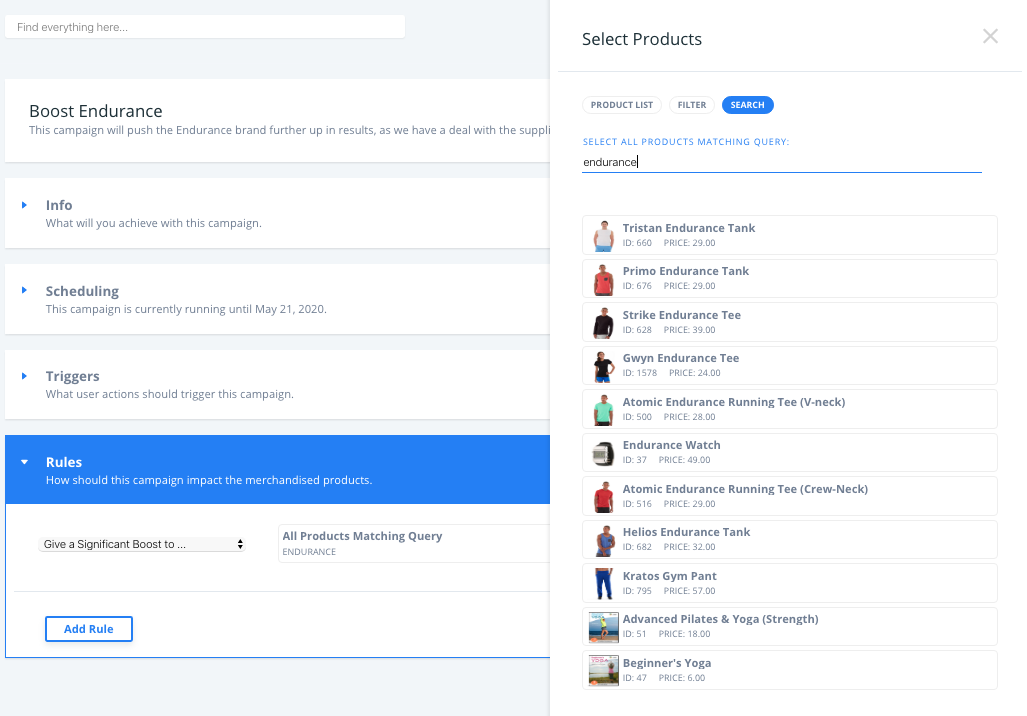
Products can also be found simply by searching. Doing this will use all products matching the query you type in.
Want Inspiration for Merchandising?
On April 14th 2020 we hosted a 45-minute Webinar about Merchandising, with 9 real-life examples of how to boost your business with it.
You can check it out here: Webinar: E-commerce Merchandising & 9 Real-life Examples