Using Content Page Recommendations
Products:
Overview
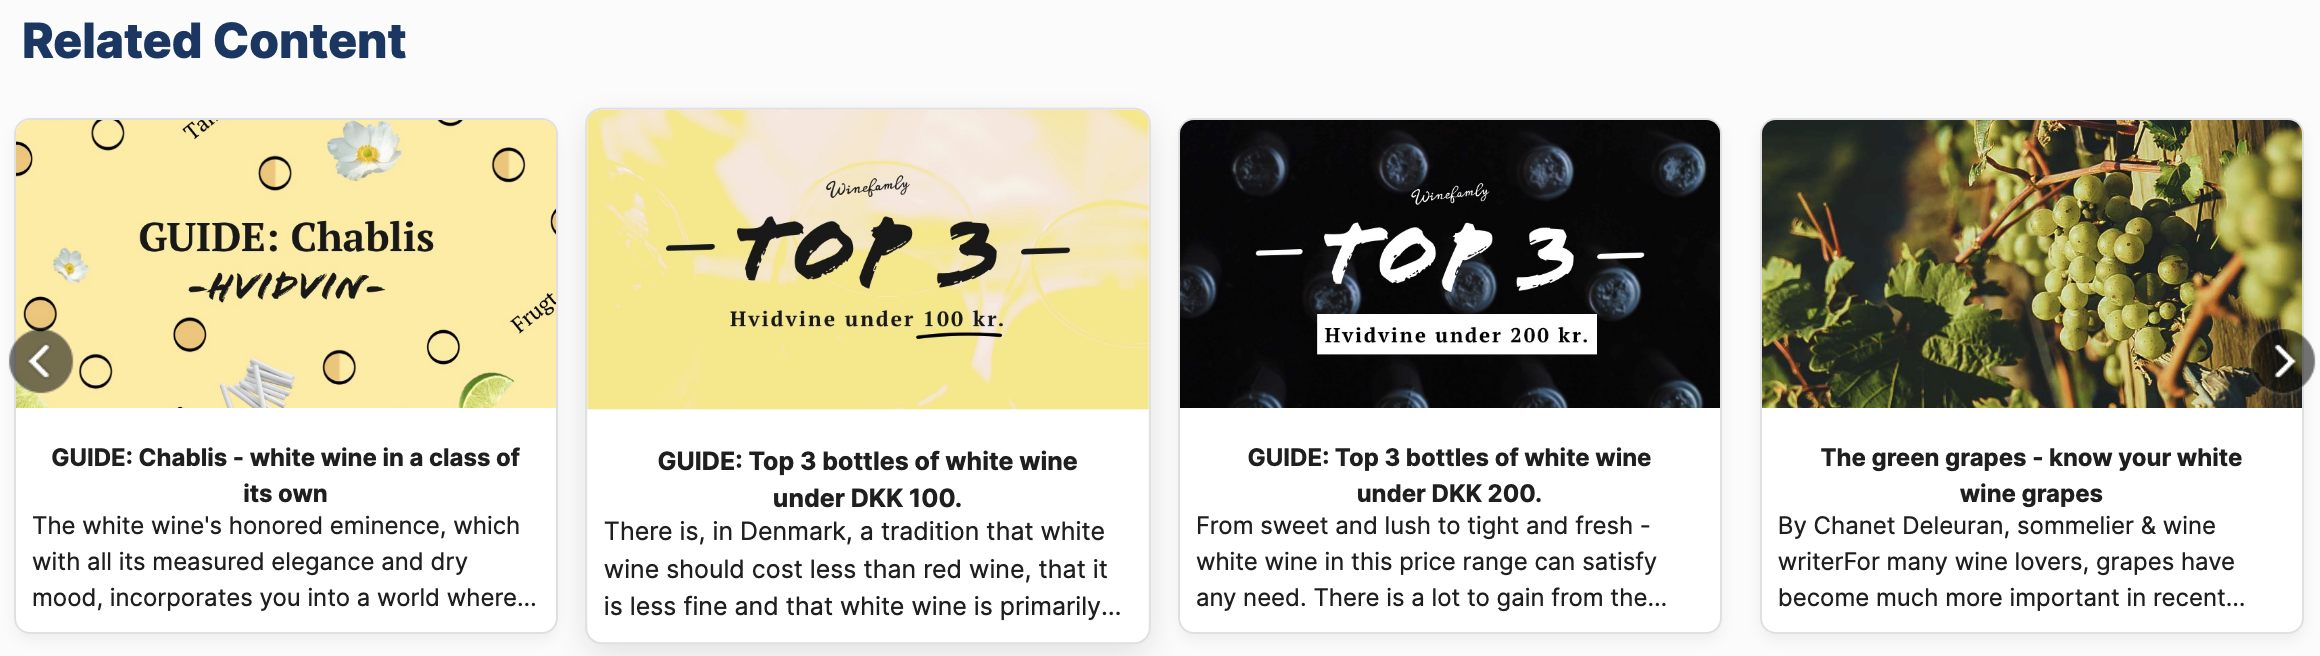
Using Clerk.io’s Recommendations, you can add fully automated banners that enhances Content Page discovery for customers.
Through several logics that can be used directly on your Content Pages, or through other pages like categories and product pages, you can ensure that customers find blogs and articles that are related to what they are viewing.
This article describes the steps to setting up Content Page banners:
Syncing Pages to Clerk.io
Creating and editing a Design
Configuring the Content Banner
Inserting the banner snippet
1. Syncing Pages to Clerk.io
Before you continue, make sure that you are syncing Pages with Clerk.io.
You can easily check this in my.clerk.io under Data -> Pages.
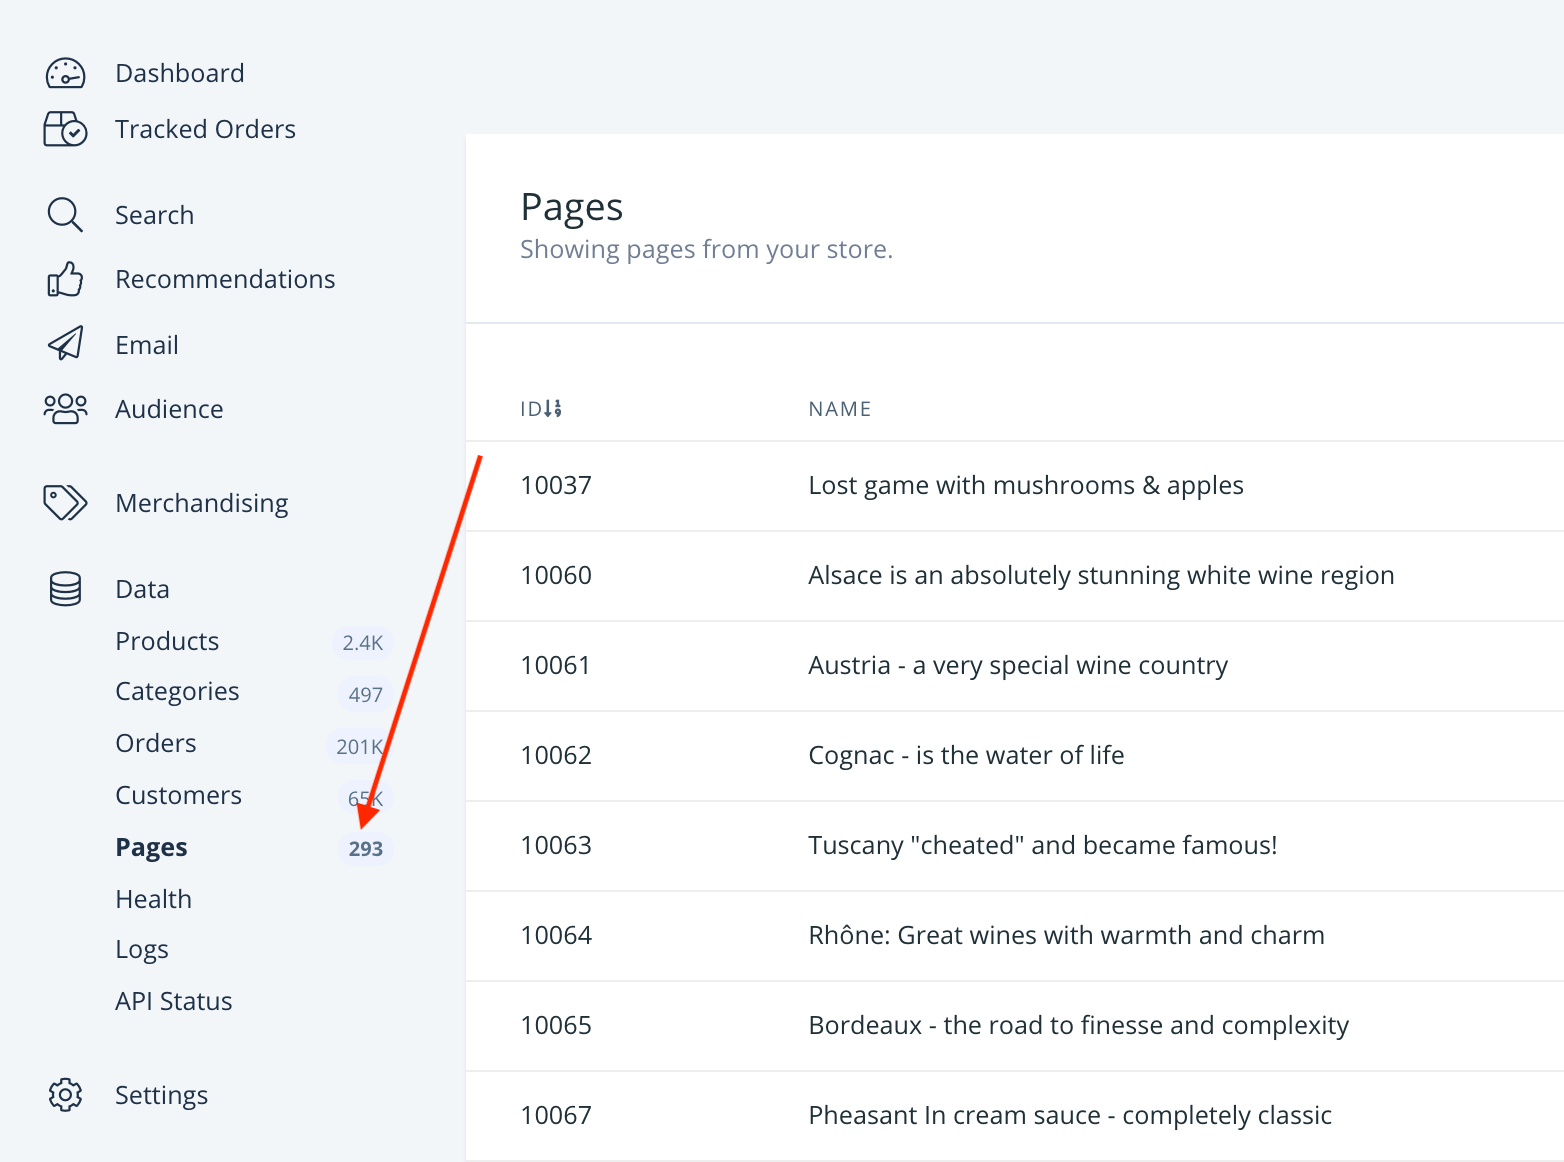
If you can see pages in my.clerk.io you can continue to the next step.
If you are not already sending pages, do one of the following:
If you are on one of our Plug&Play platforms, make sure you are on the latest version of the extension/plugin. From https://help.clerk.io you can find collections of articles for your platform, including how to upgrade.
If you are on a Custom platform integration (i.e. any other platform than you can find on the above link), make sure you are including “pages” in your data feed.
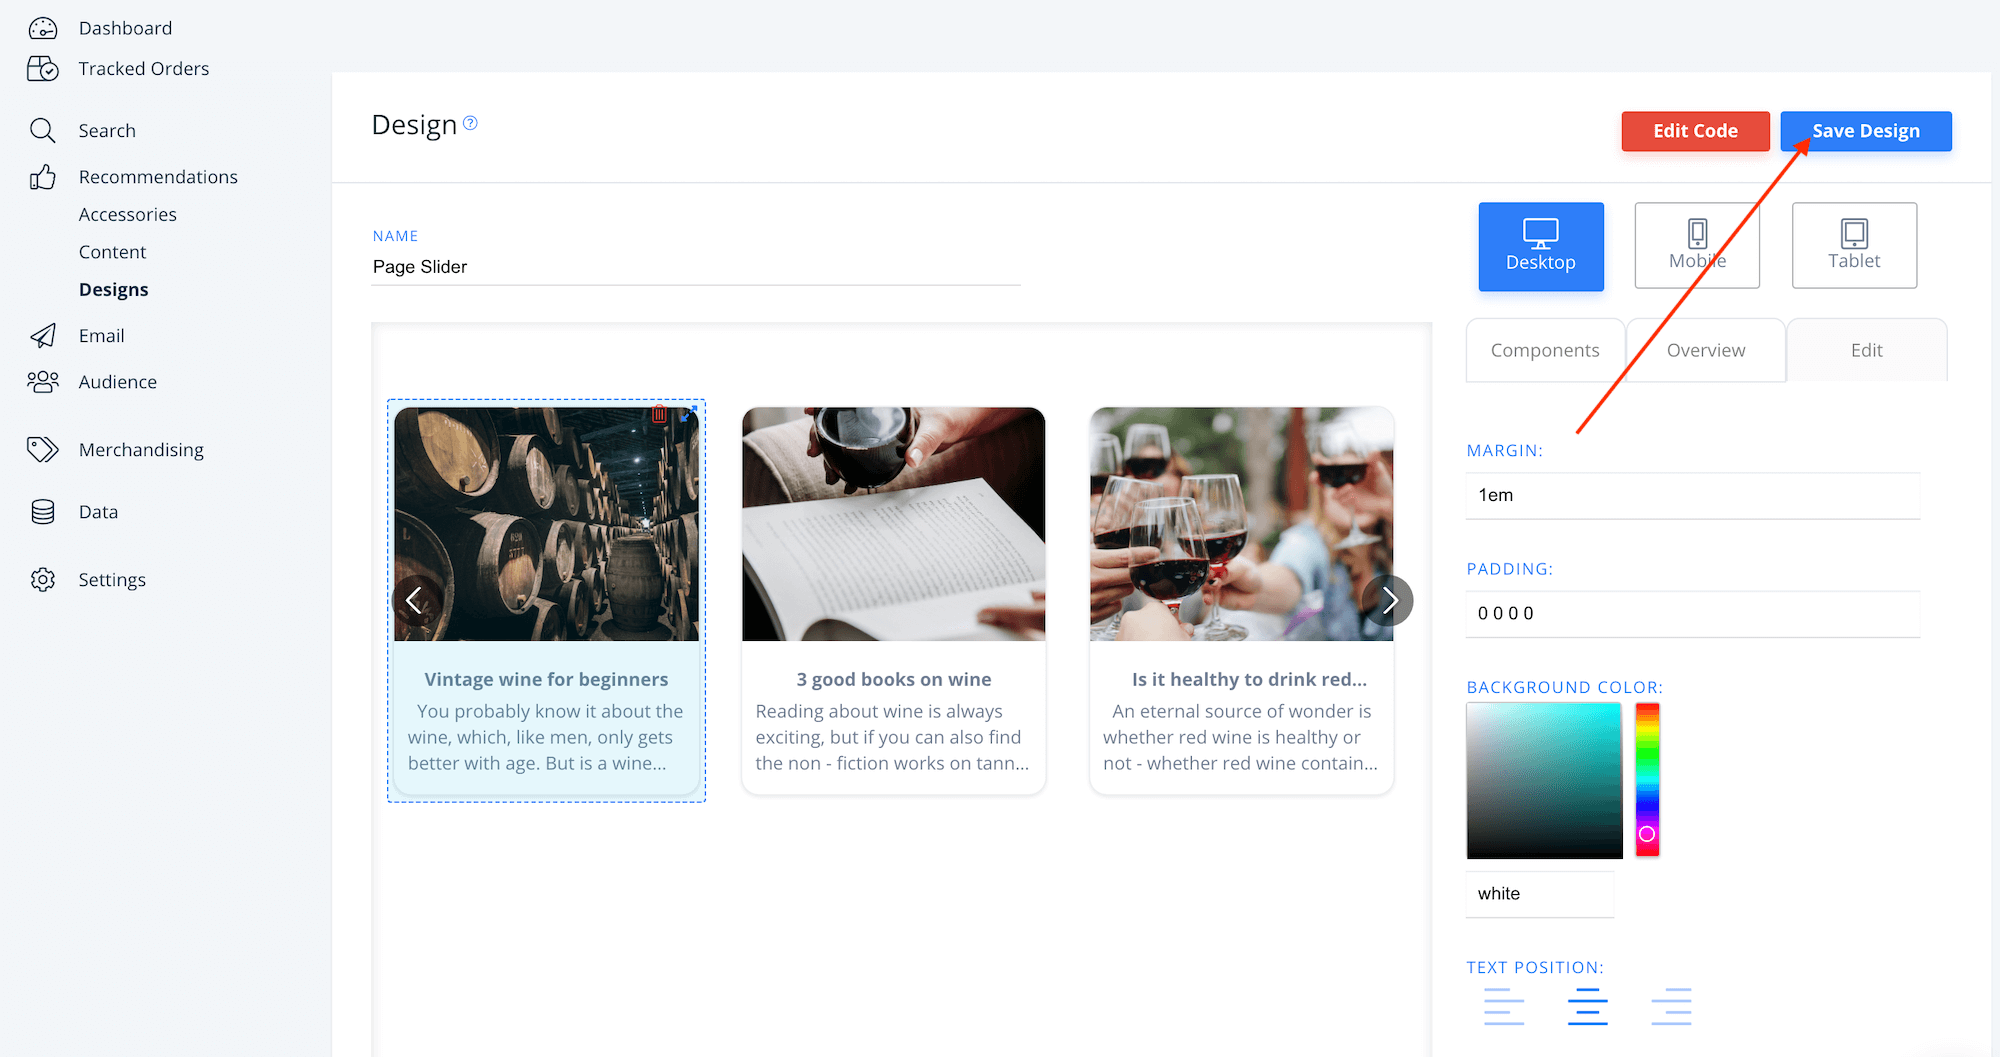
2. Creating and Editing a Design
In my.clerk.io, do the following:
1. Go to Recommendations -> Designs
2. Click New Design in the top right corner
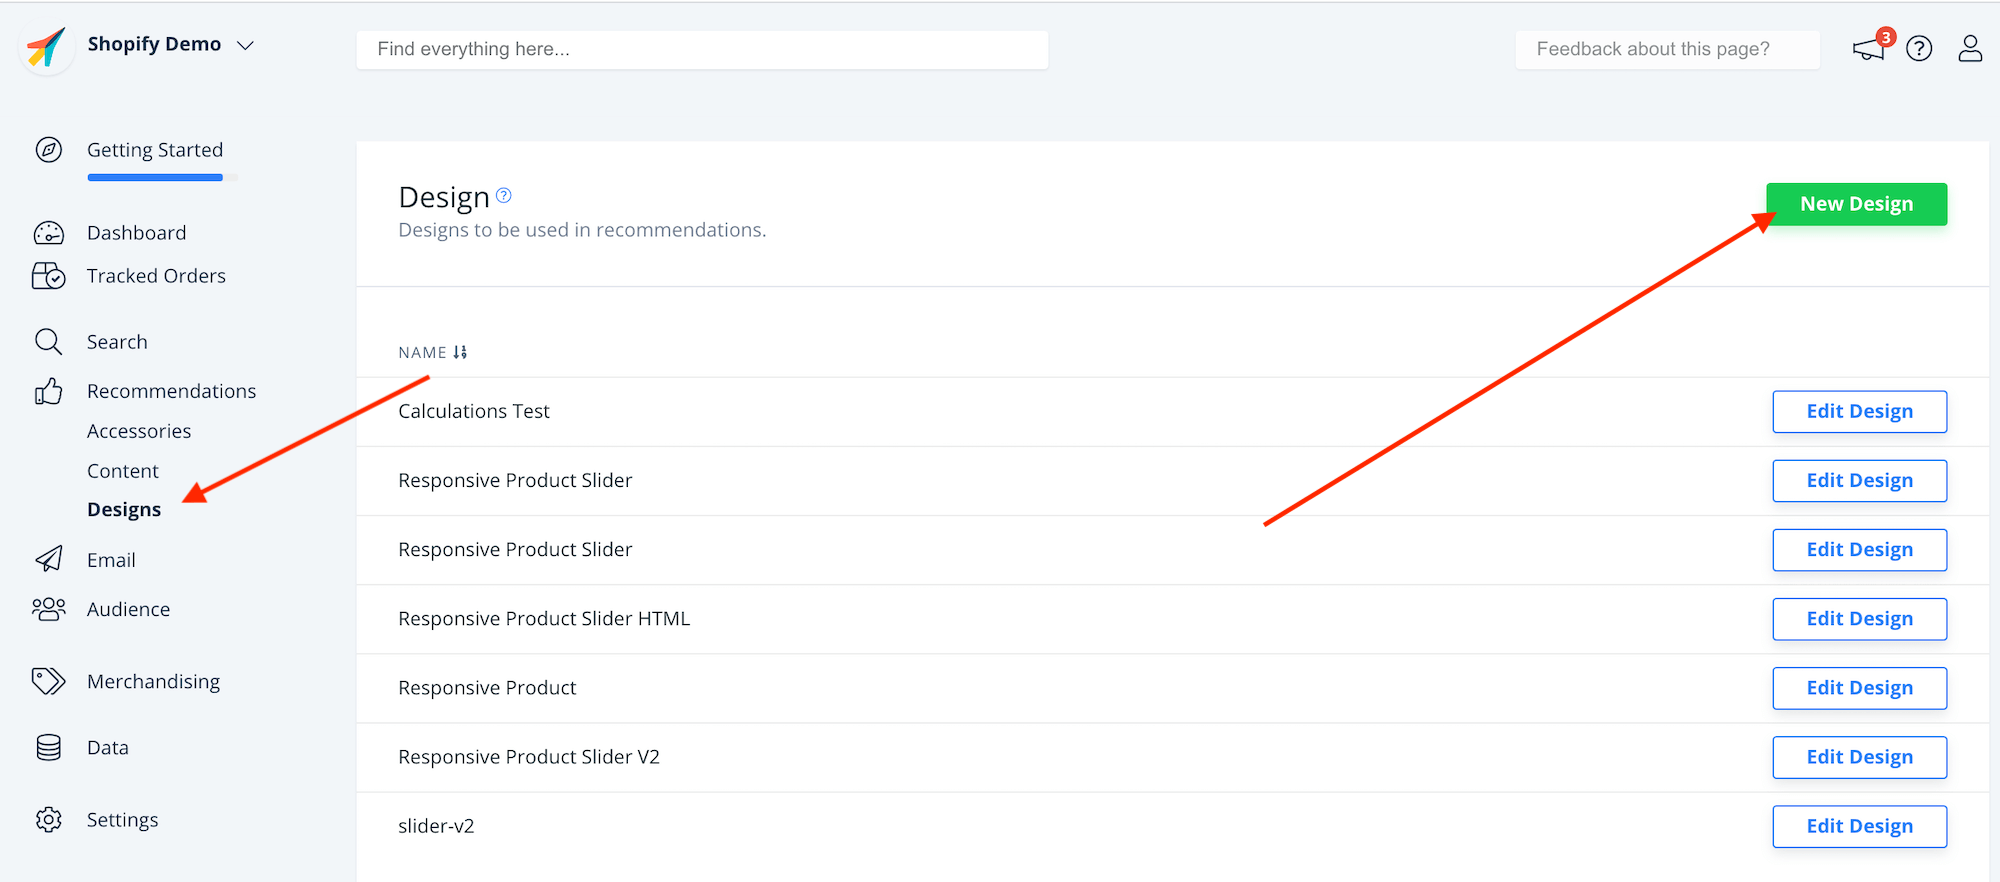
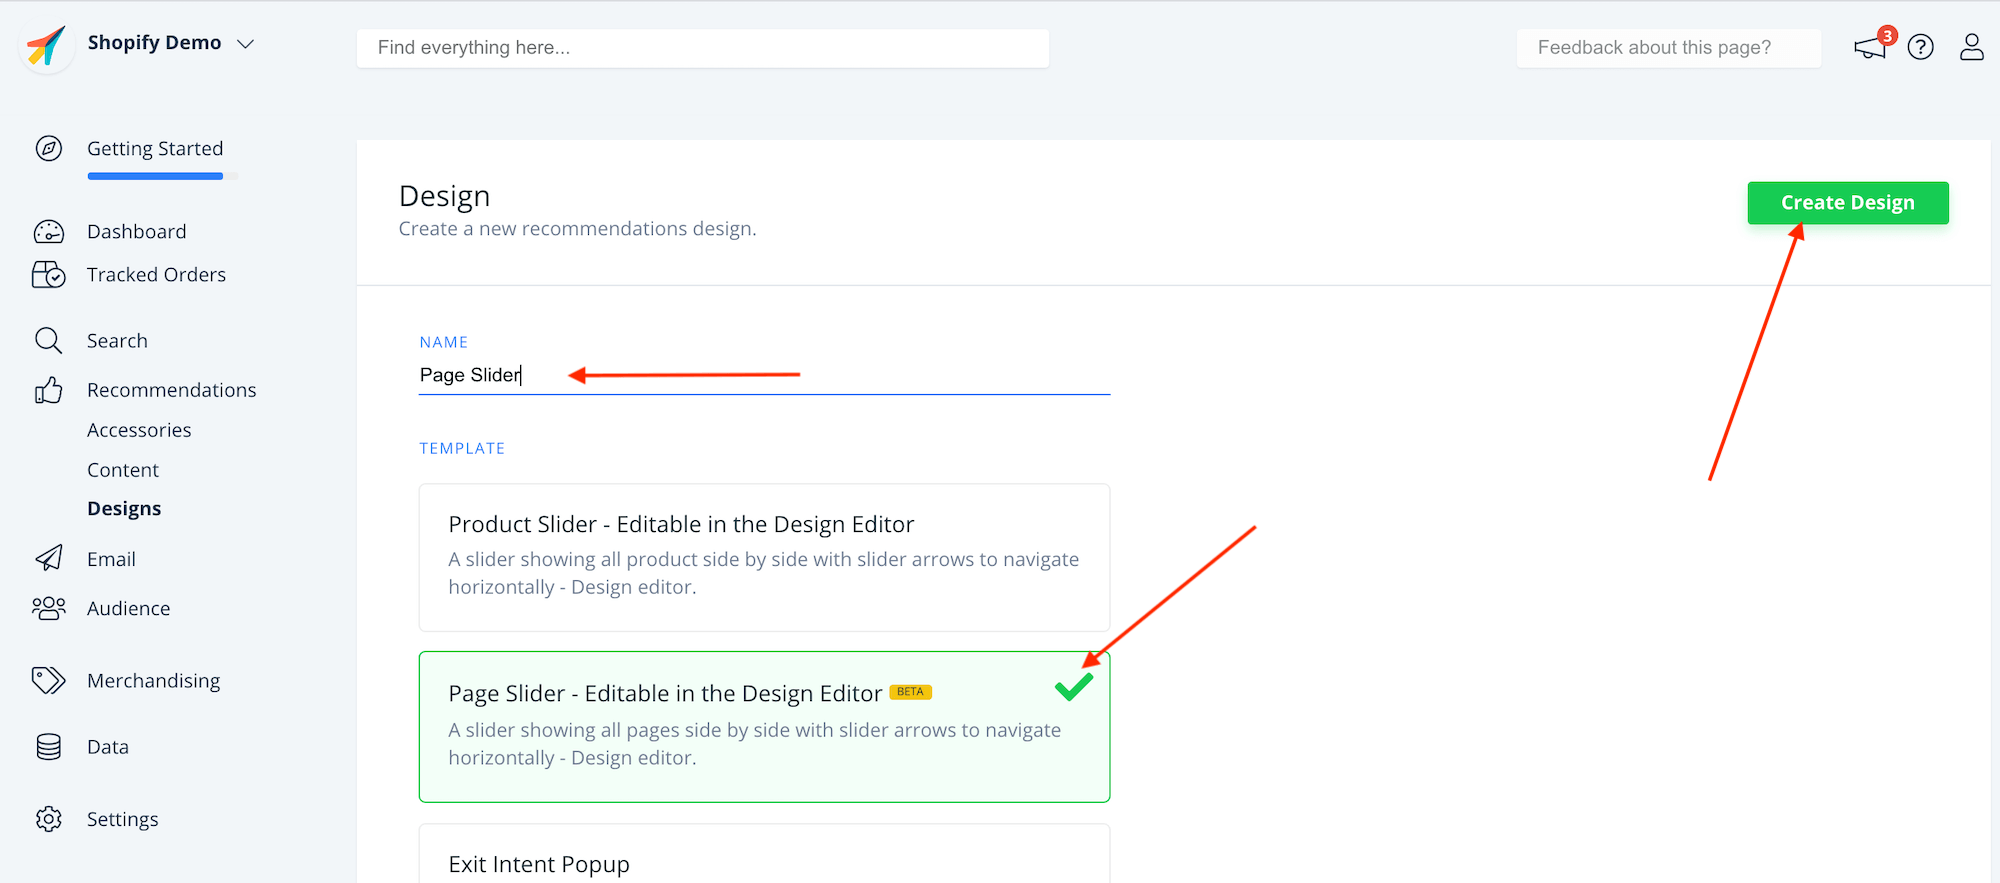
3. Under Template, choose Page Slider - Editable in the Design Editor.
4. Give your Design a name and click Create Design.
5. Use the Design Editor to change any part of the Design, or simply leave it as it is. If you want to have even more control, you can choose Edit Code to work with the design through HTML, CSS and the Liquid templating language.
6. When you are done, click Save Design.
3. Configuring the Content Banner
In my.clerk.io, do the following:
1. Go to Recommendations -> Content and click New Content
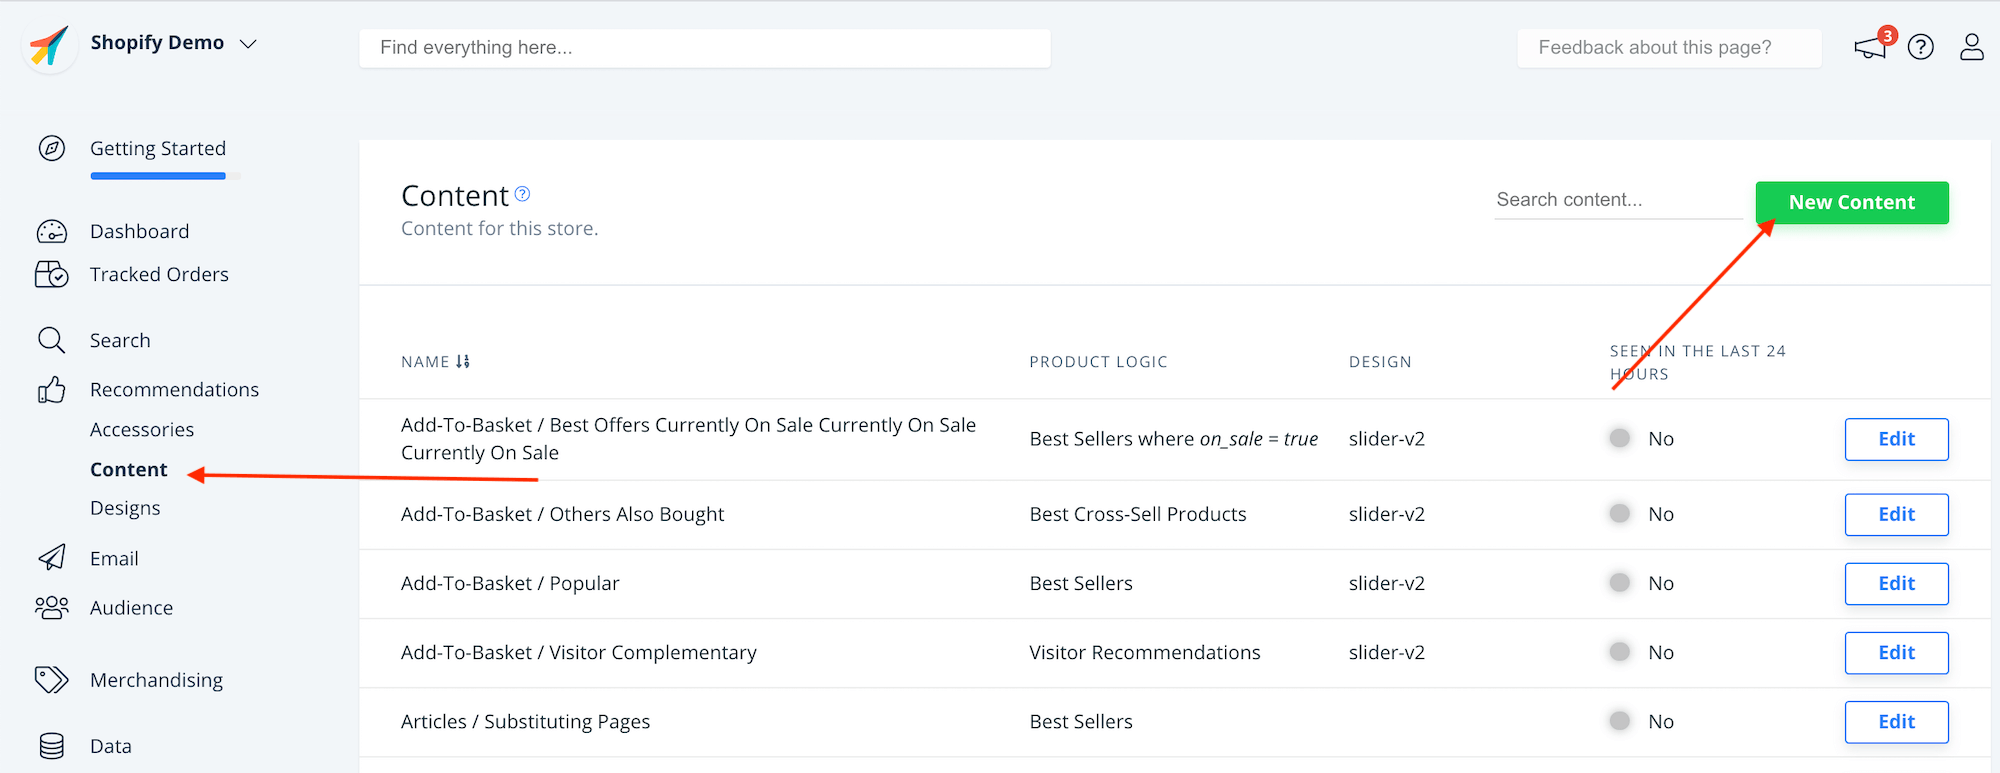
2. Give your Content a name and click Create Content.
3. Under Choose product logic, scroll to the bottom. Here you will find the various types of Content Page Recommendations.
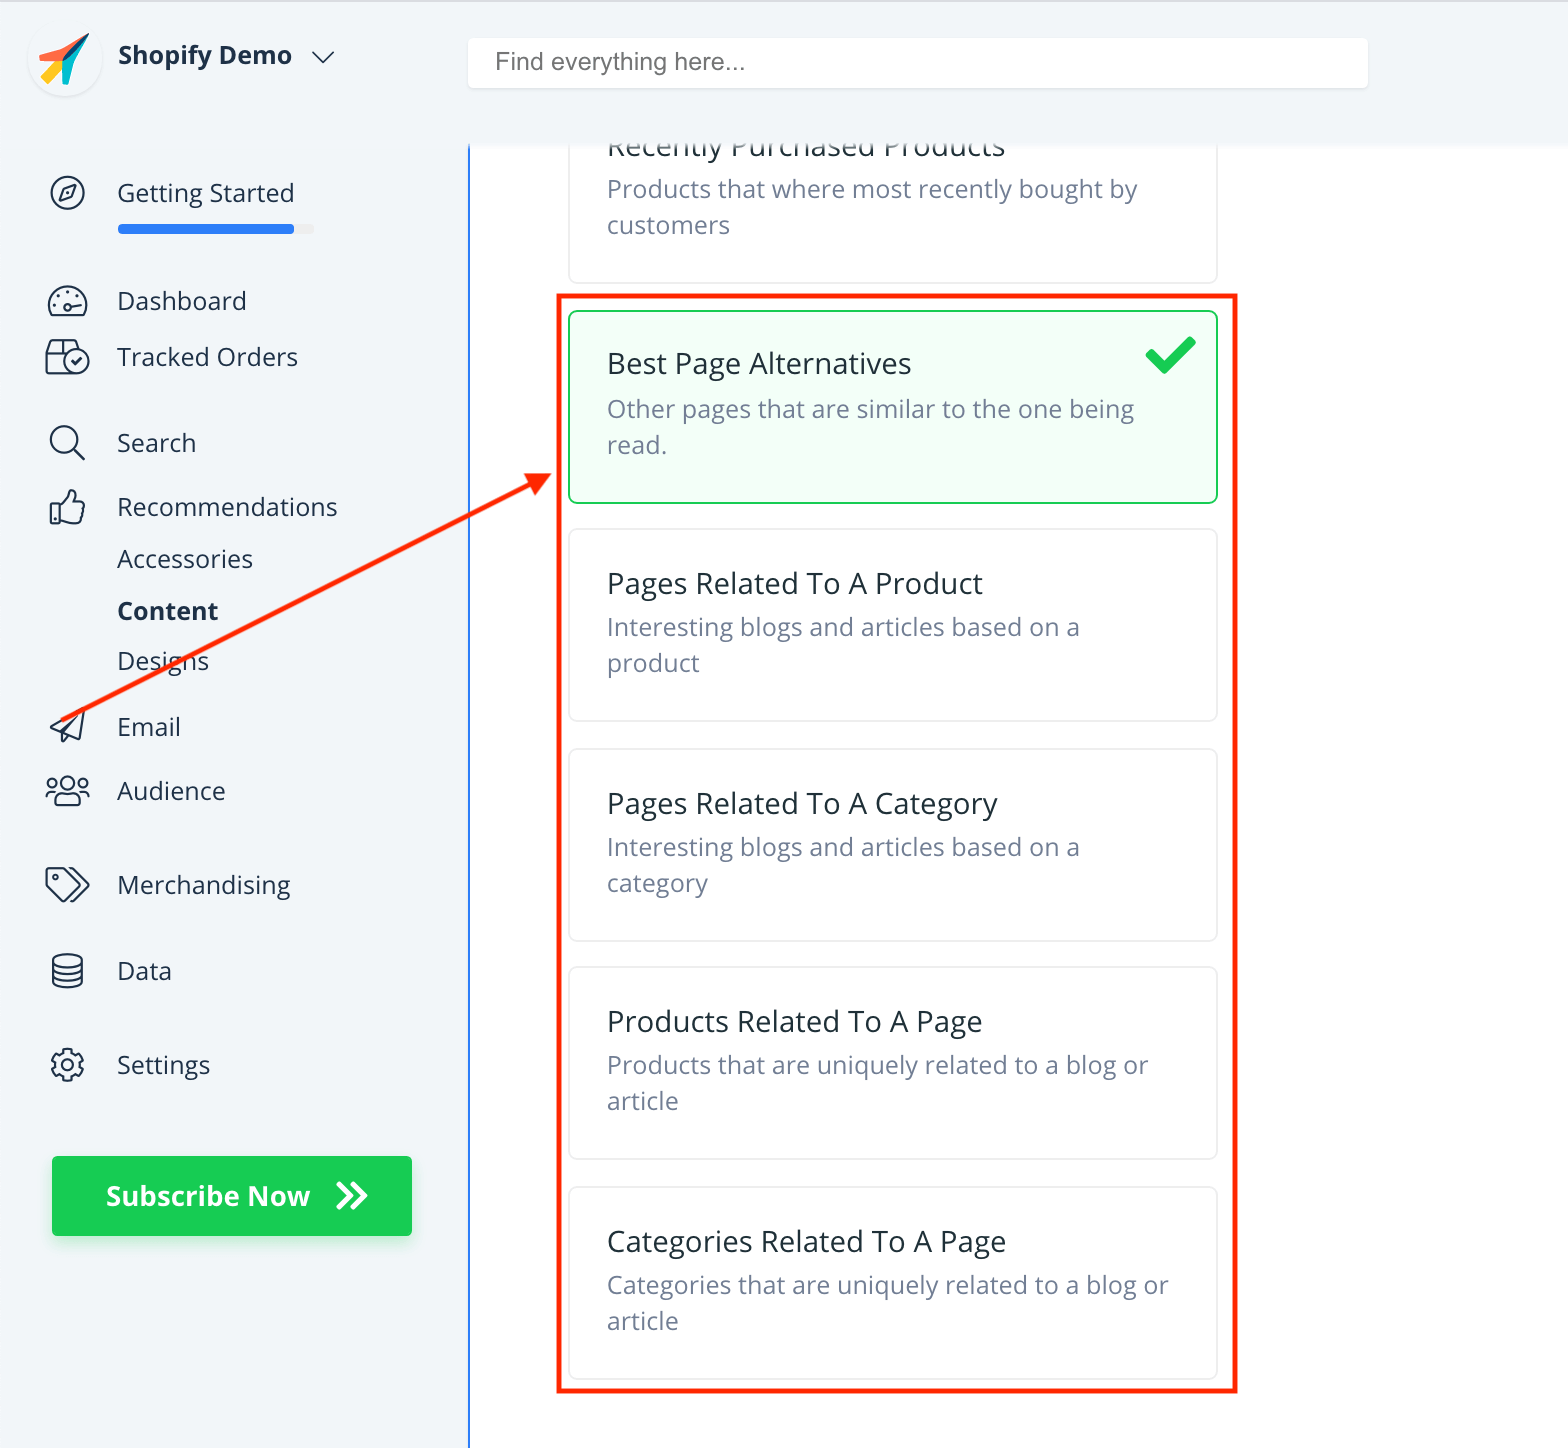
Currently, these types are available:
Best Page Alternatives - For use on article/blog pages. Show similar articles to the one being read
Pages Related To A Product- For use on product pages. Show articles related to the product being viewed
Pages Related To A Category - For use on category pages. Shows articles related to the category being viewed.
Products Related To A Page- For use on article/blog pages. Shows products that are related to the article being read. This type works best with a regular product design that also shows prices.
Categories Related To A Page- For use on article/blog pages. Shows categories that are related to the article being read.
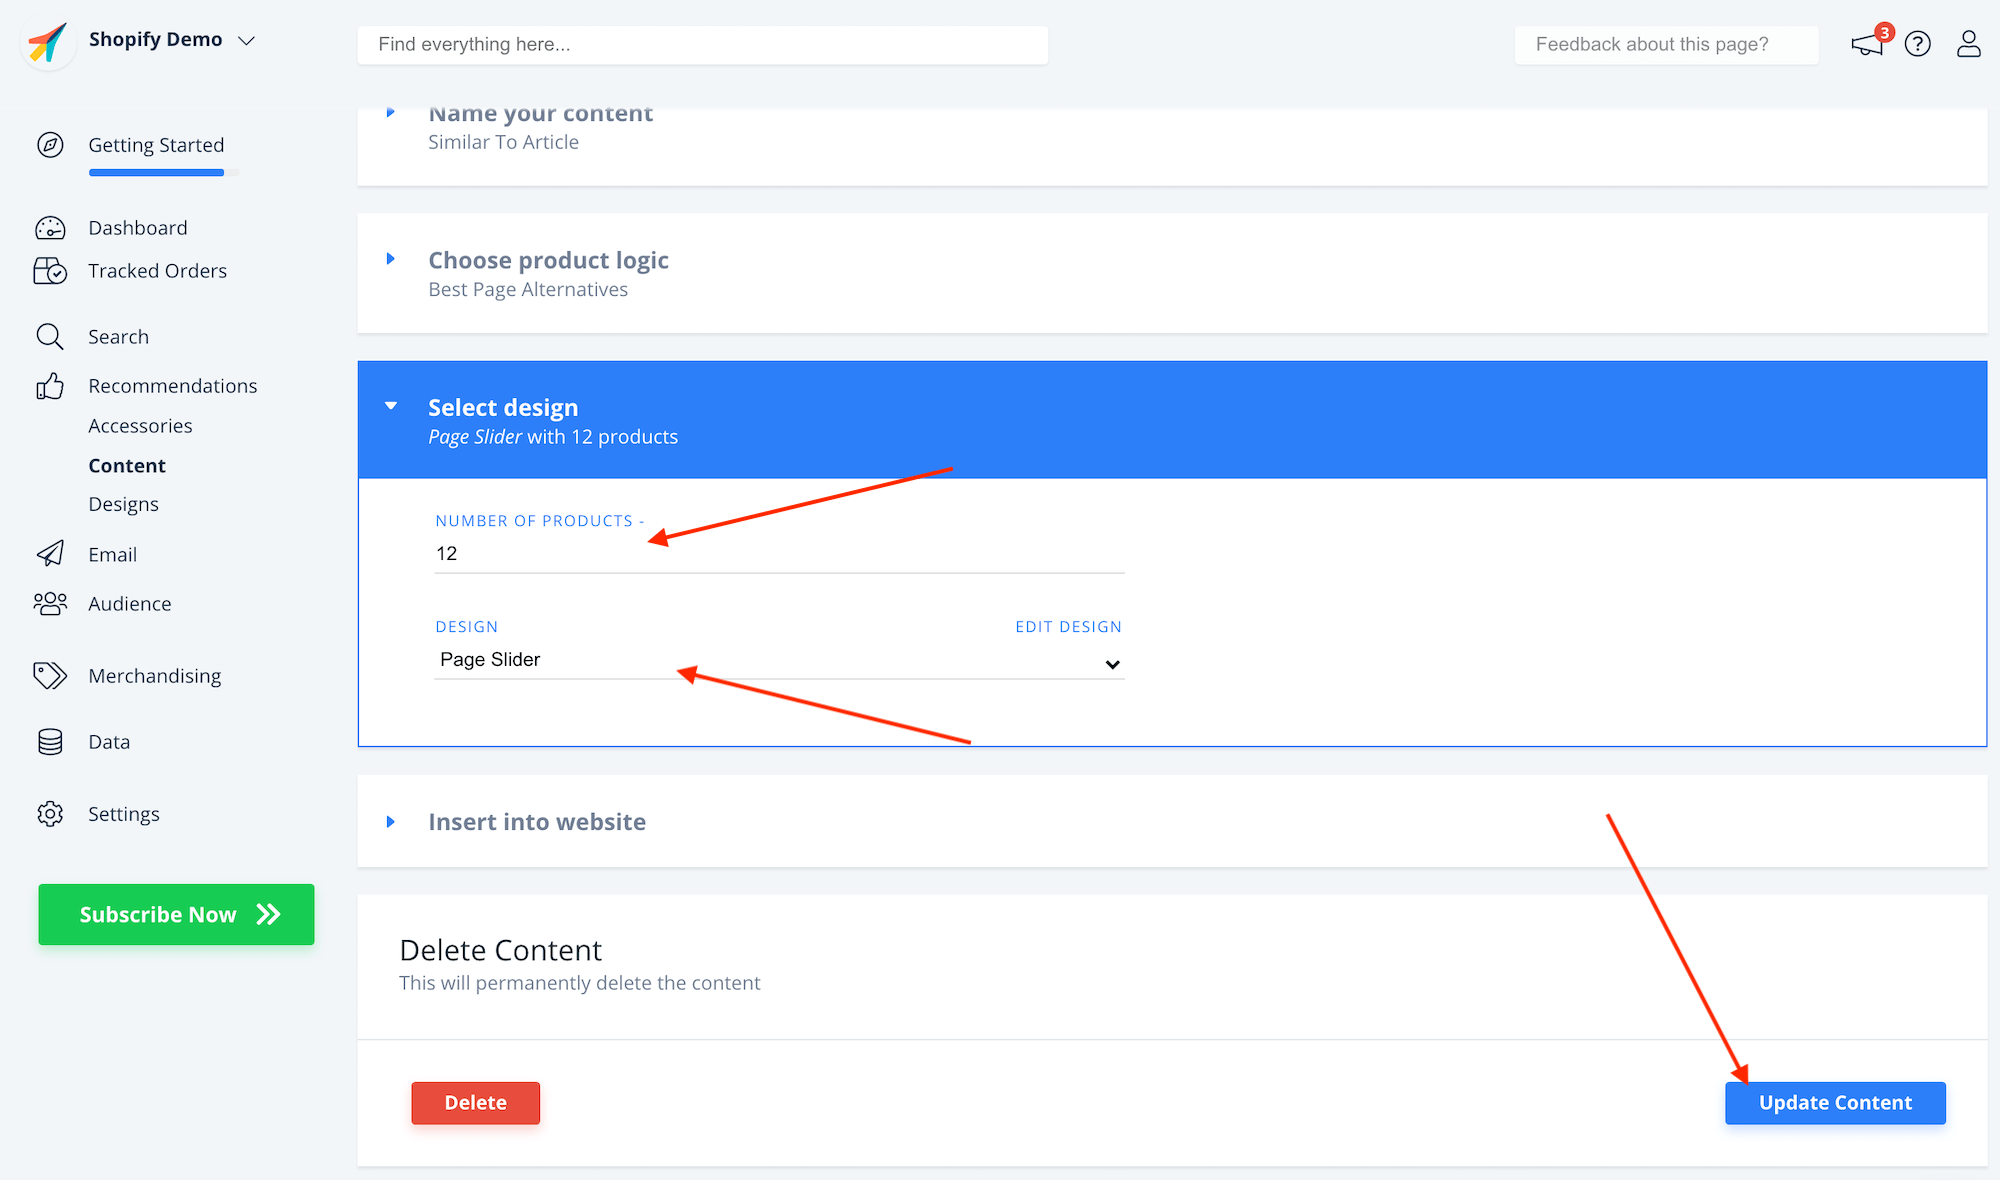
4. Select the logic you want to use.
5. Under Select Design, choose the amount of elements you want to show in the banner, and select the Design you created in step 2.
6. Click Update Content in the bottom of the page.
4. Inserting the embed code
Now you simply have to include the embed code in the file where you want to show recommendations. It needs to be configured to get the necessary information.
Under Insert into website you will find the code.
Notice that it contains either data-page, data-category or data-products. These indicate that an ID is required to show the Recommendations.
The type of data needed, depends on the type.
For the Pages Related To A Product / Category you can choose one of the Plug&Play plaforms from the Choose Platform dropdown, and the code will be configured automatically.
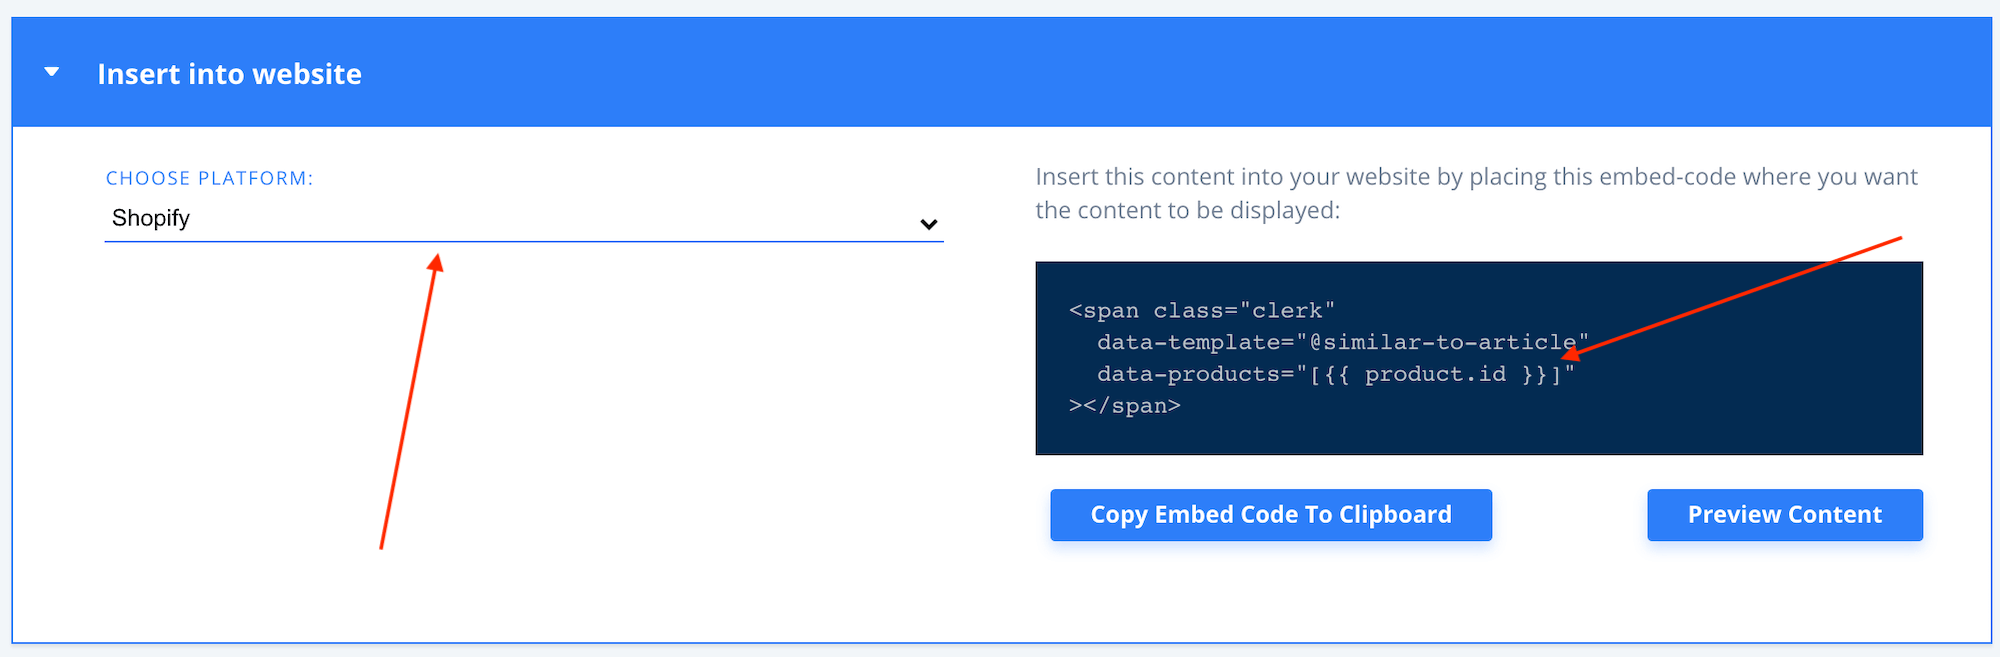
For the remaining types, or if you are on a custom platform, you will need to insert a short code that inserts the needed ID.
This will enable you to insert the code in a general template file in your webshop and thus show recommendations on all of the pages.
An example from Shopify:
<span class="clerk"
  data-template="@similar-to-article"
  data-page="{{ page.id }}"
></span>
Alternately, you can manually insert the ID of a page into the code, and insert it into a specific article page through HTML:
<span class="clerk"
  data-template="@similar-to-article"
  data-page="1234"
></span>
Should you have any questions, please reach out to our Support team, using the chat-icon in the lower right corner.