DanDomain
Sync Data
Learn how to sync and customize data from your DanDomain store
Sync your DanDomain products and attributes to Clerk. This guide covers setting up API access and syncing your catalog.
Enable API Access #
Before syncing your catalog, you need to enable API access in your DanDomain store:
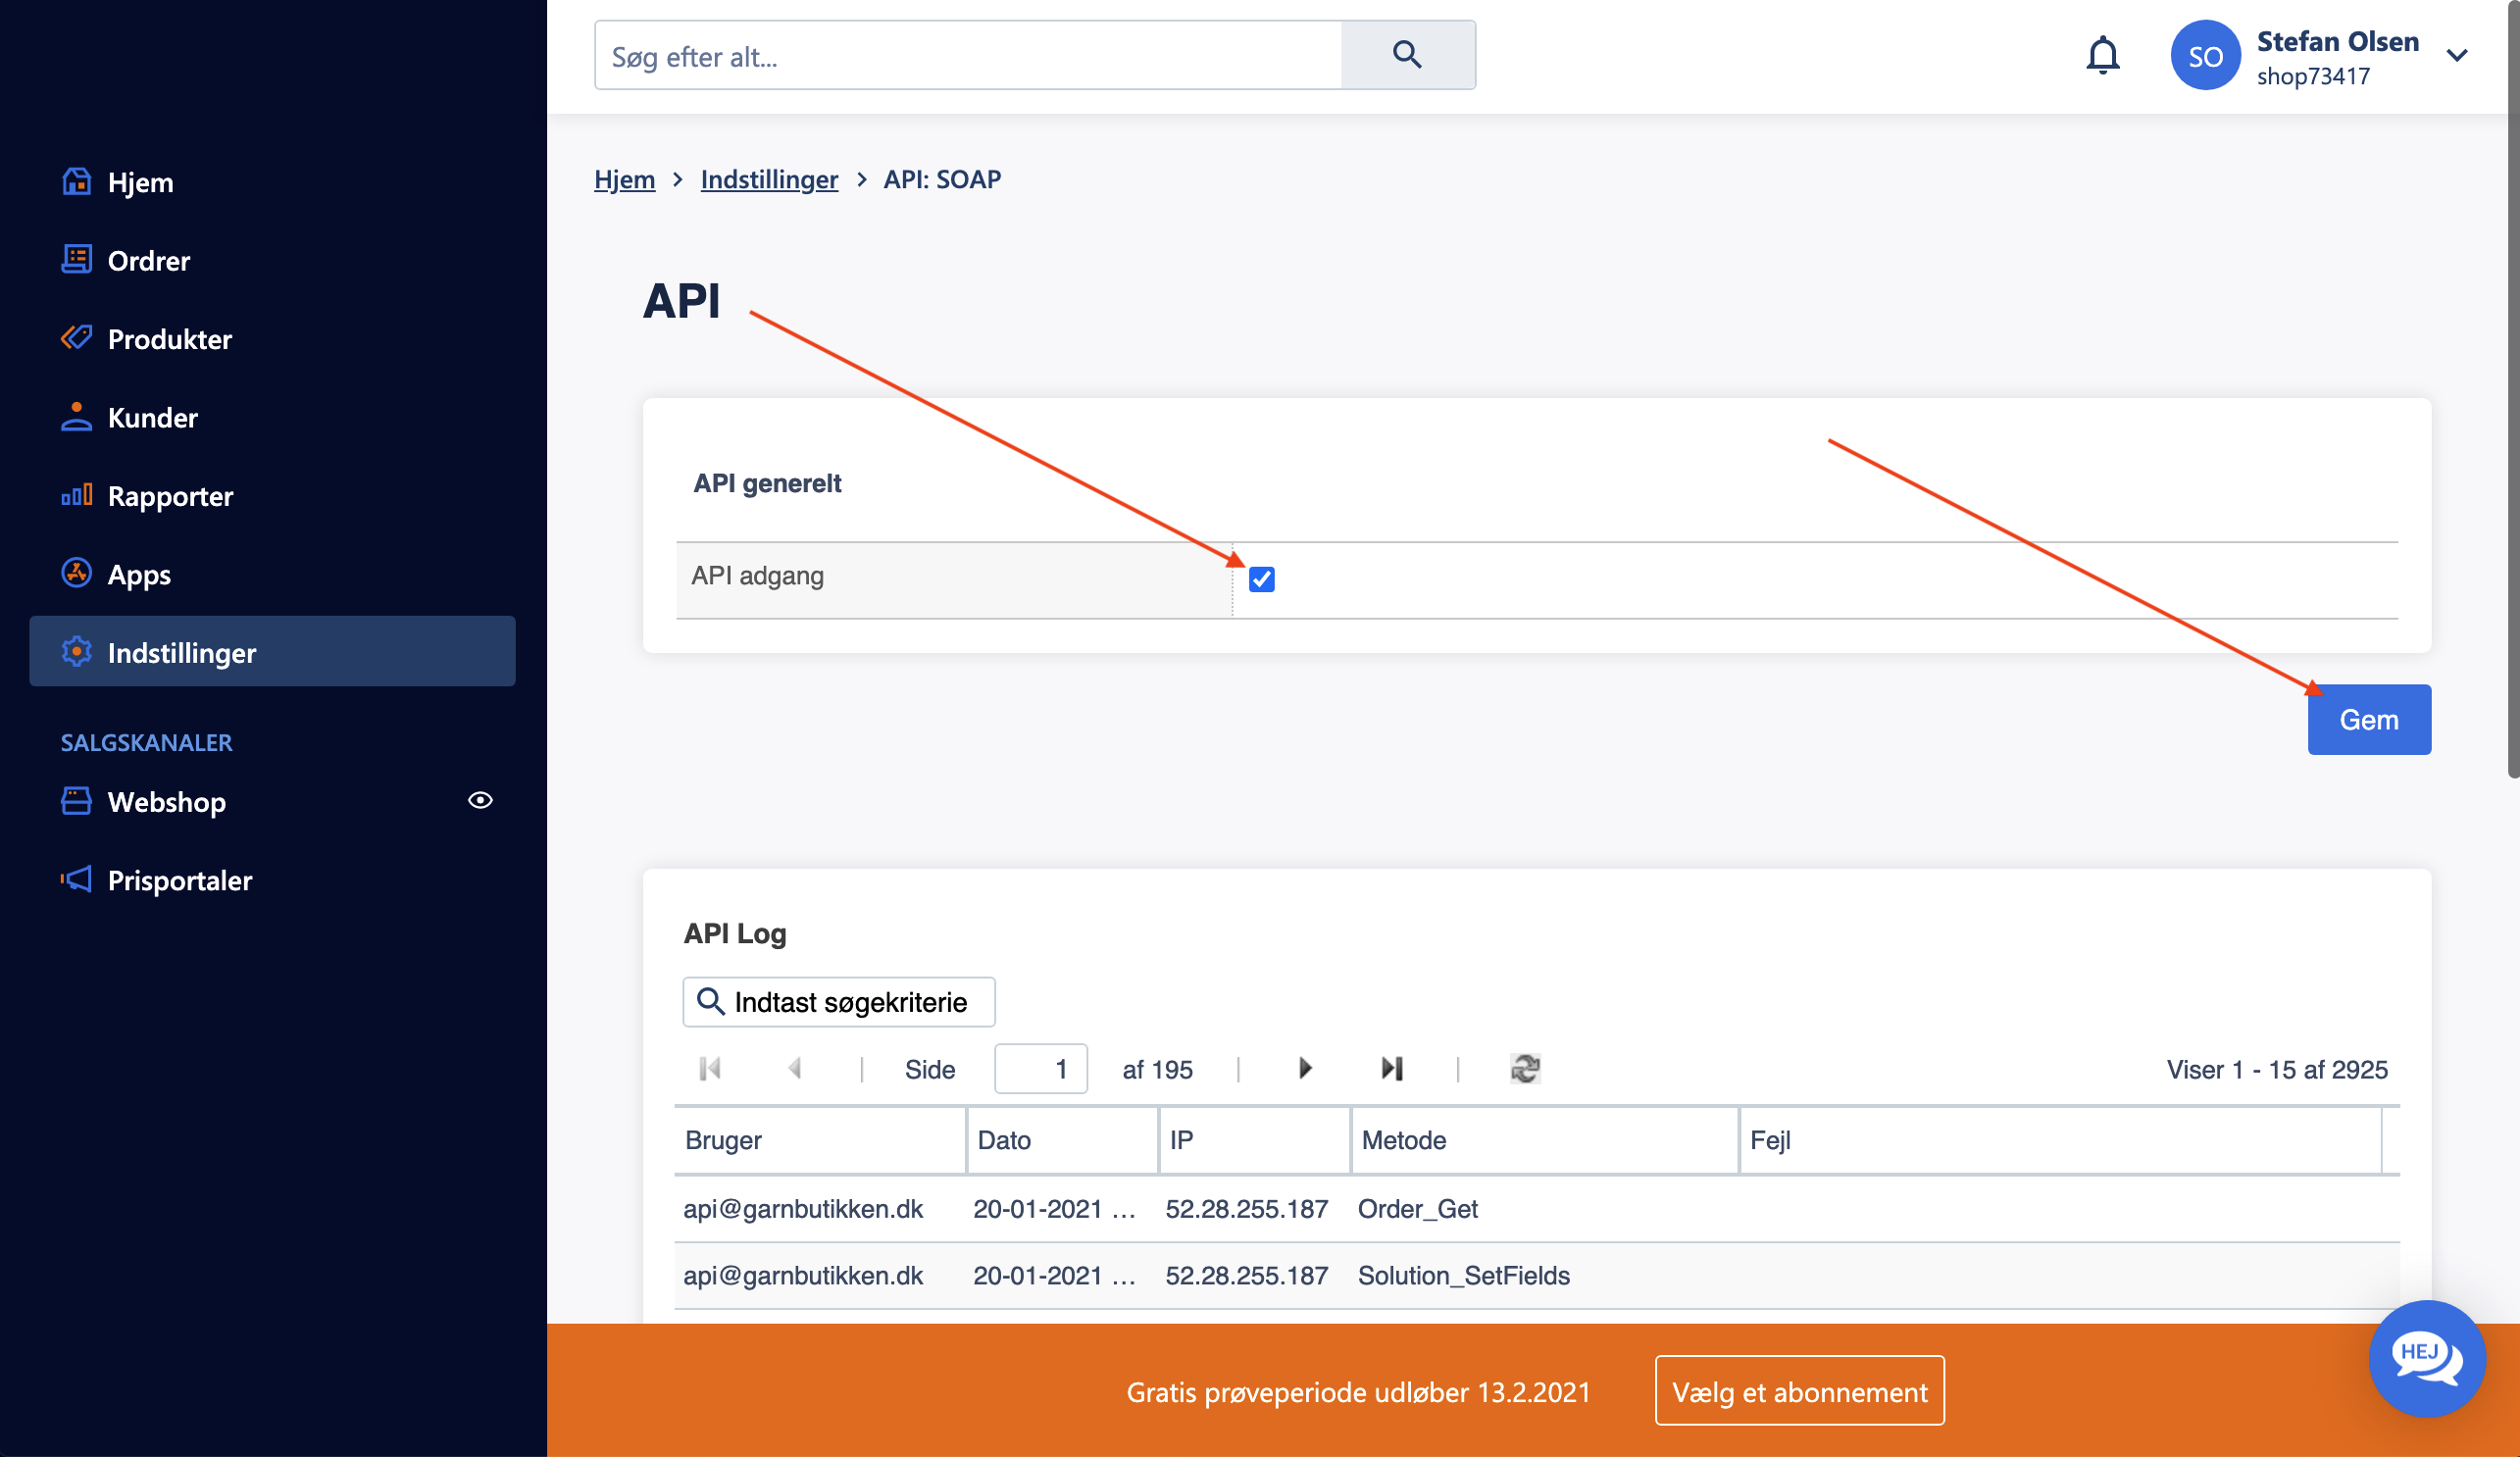
- In your DanDomain administration, go to Indstillinger > API: SOAP.

- Under API generelt, check the box for API adgang.
- Click Gem to save the settings.
Create API User #
To allow Clerk to access your store data, create a dedicated API user:
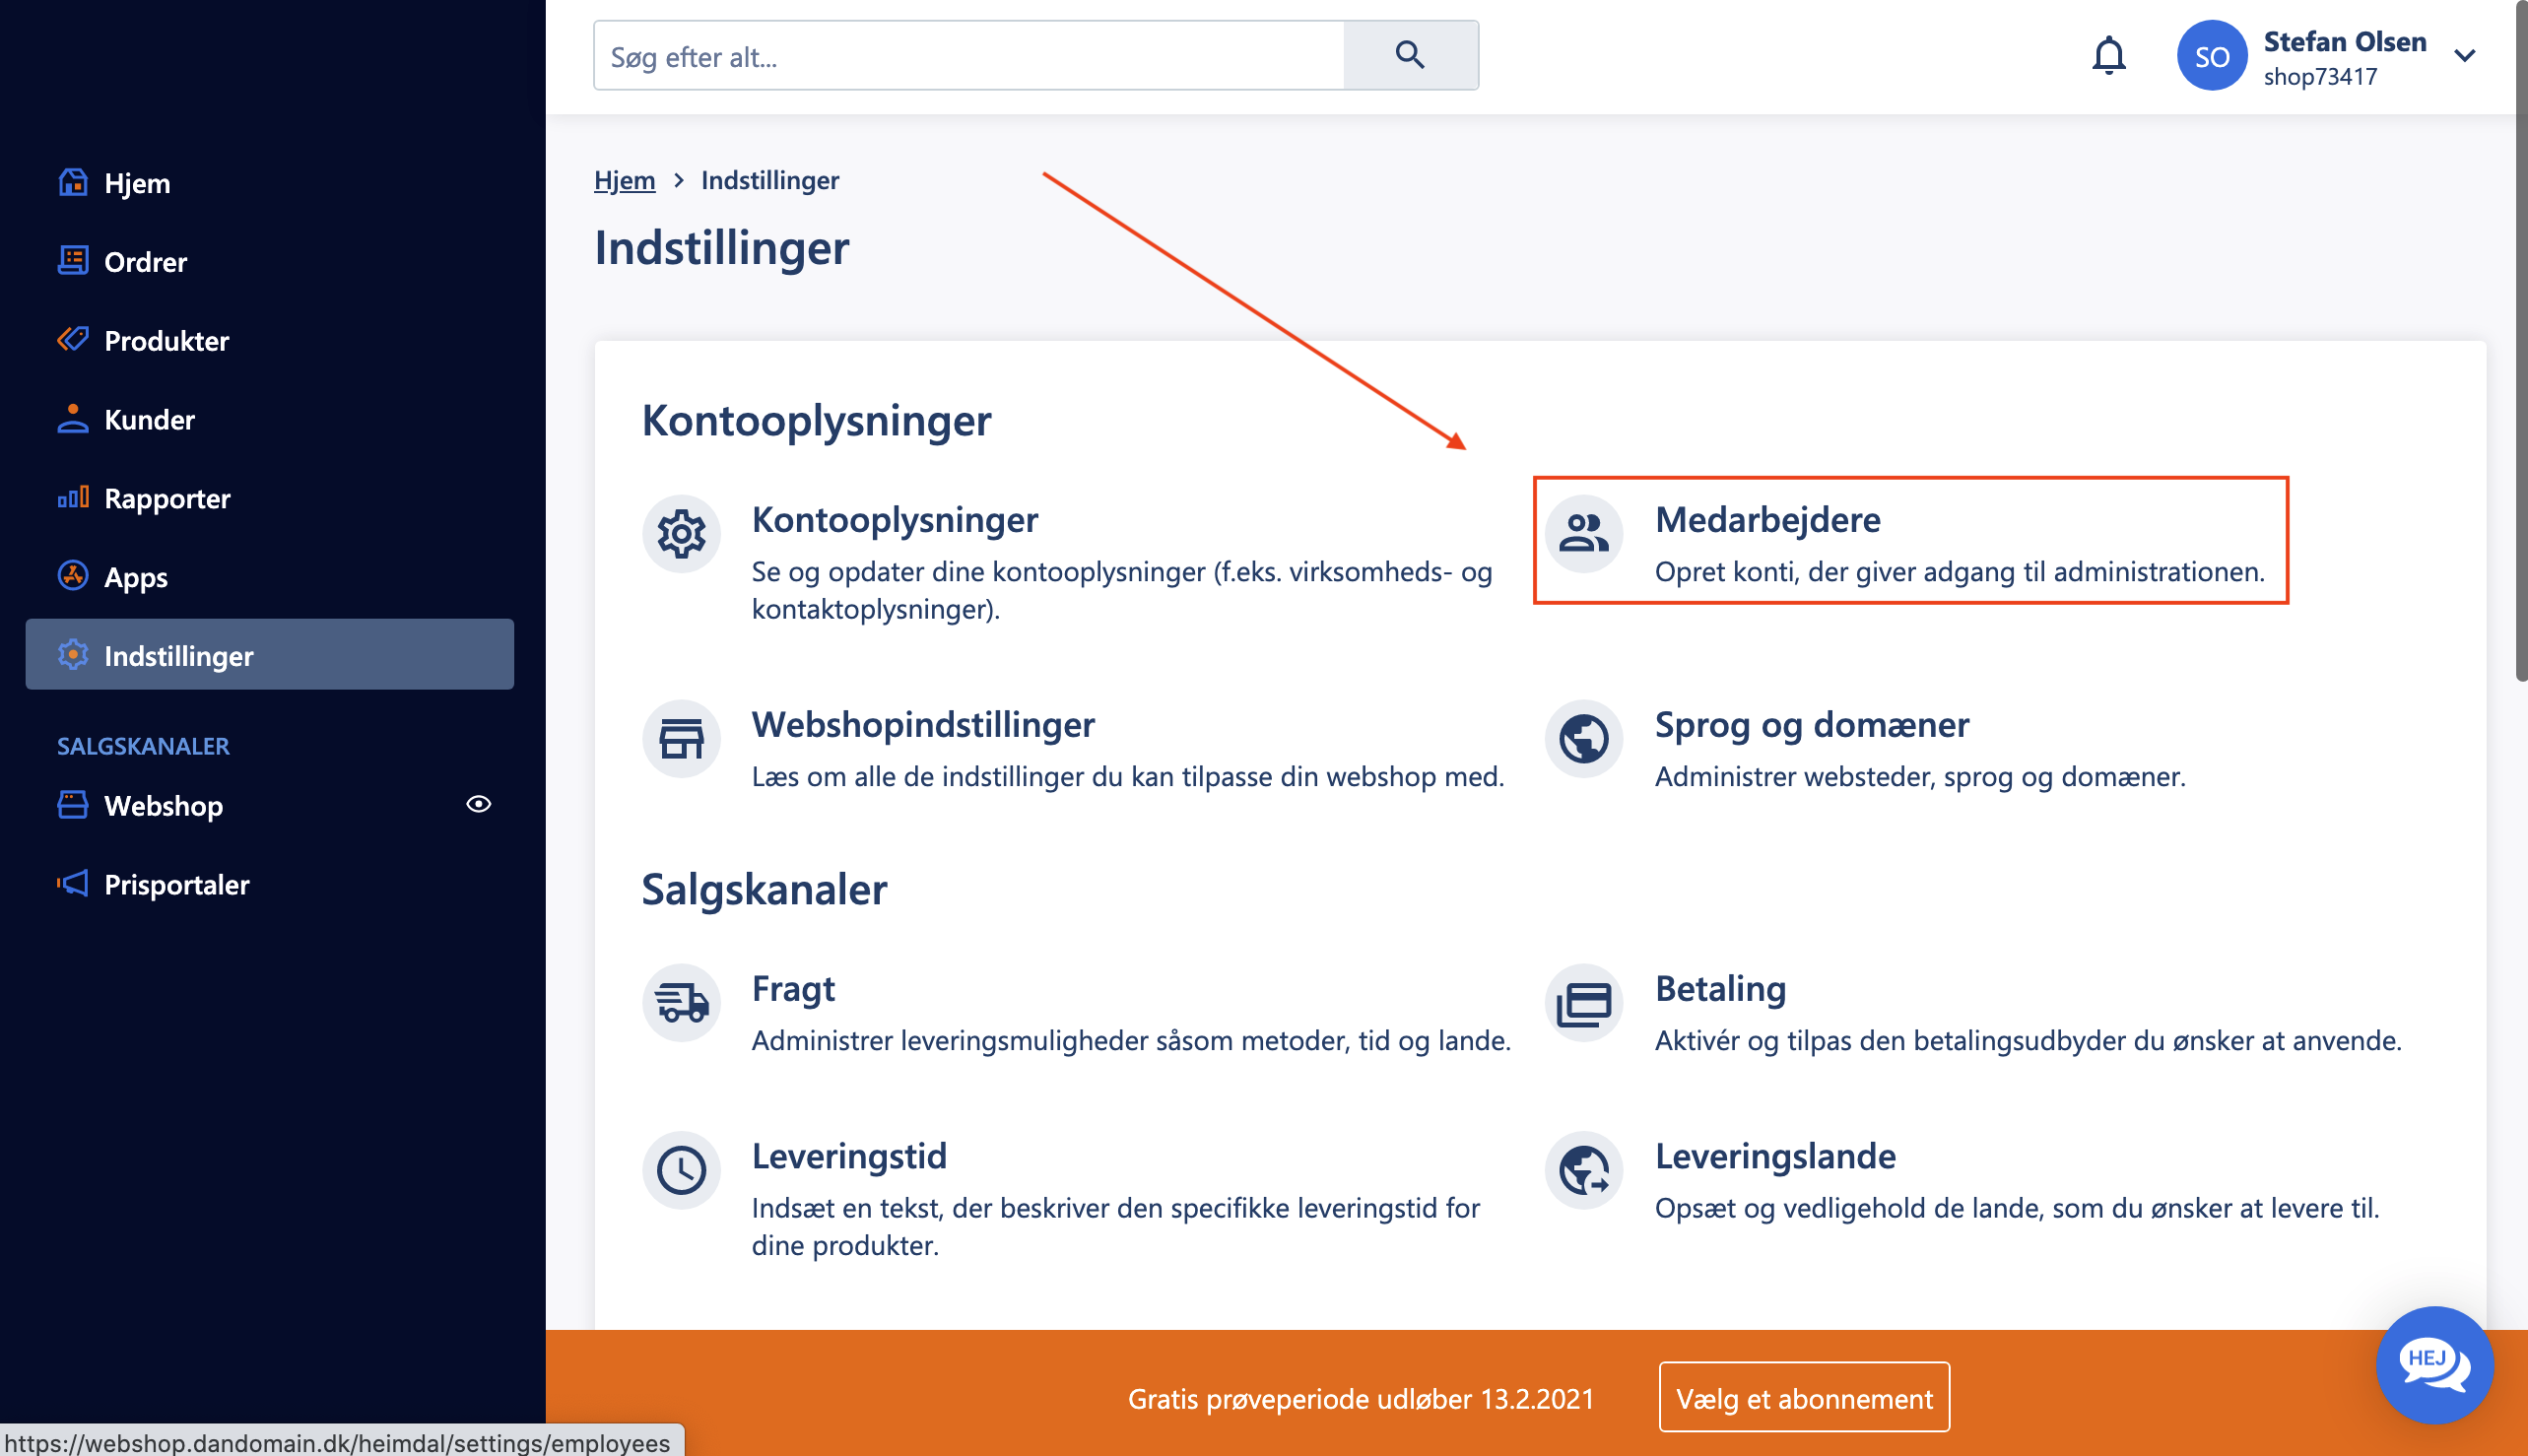
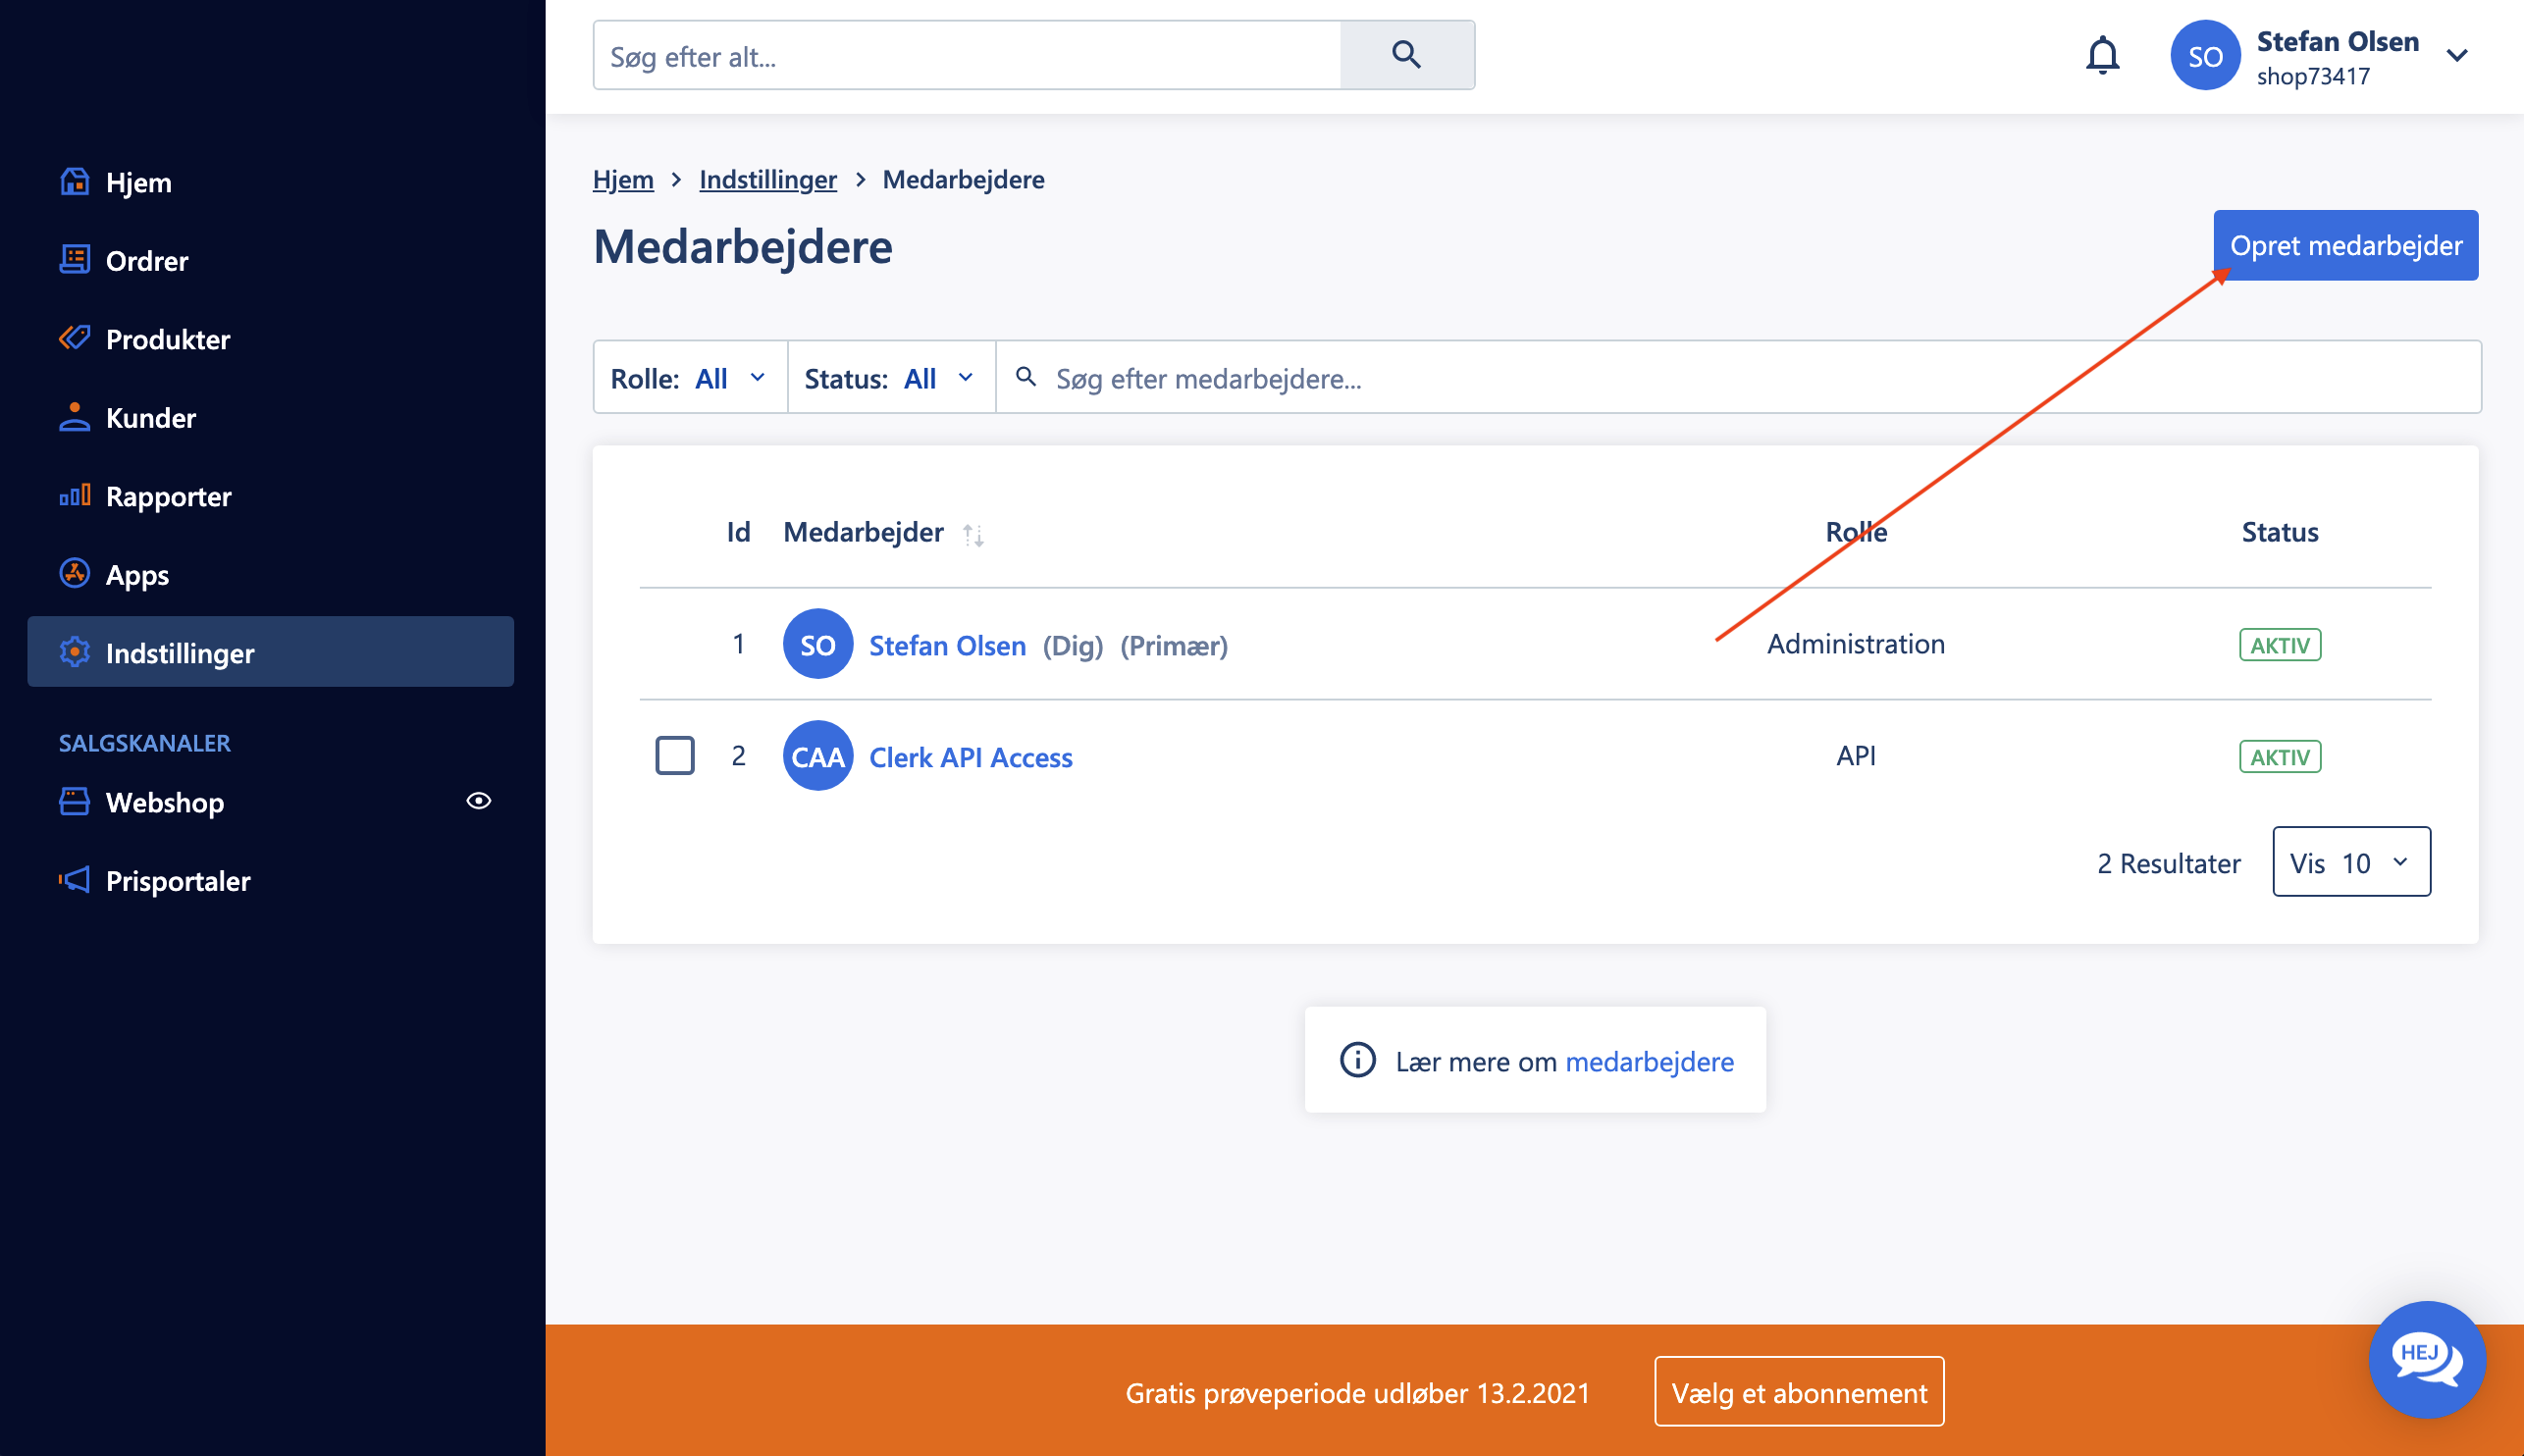
- Go to Indstillinger > Medarbejdere > Opret medarbejder.
- Fill out the user details:
- Fornavn: Clerk API
- Efternavn: Access
- Email: api@INSERT_DOMAIN (replace INSERT_DOMAIN with your actual domain, e.g.,
example.dk) - Password: Choose a secure password
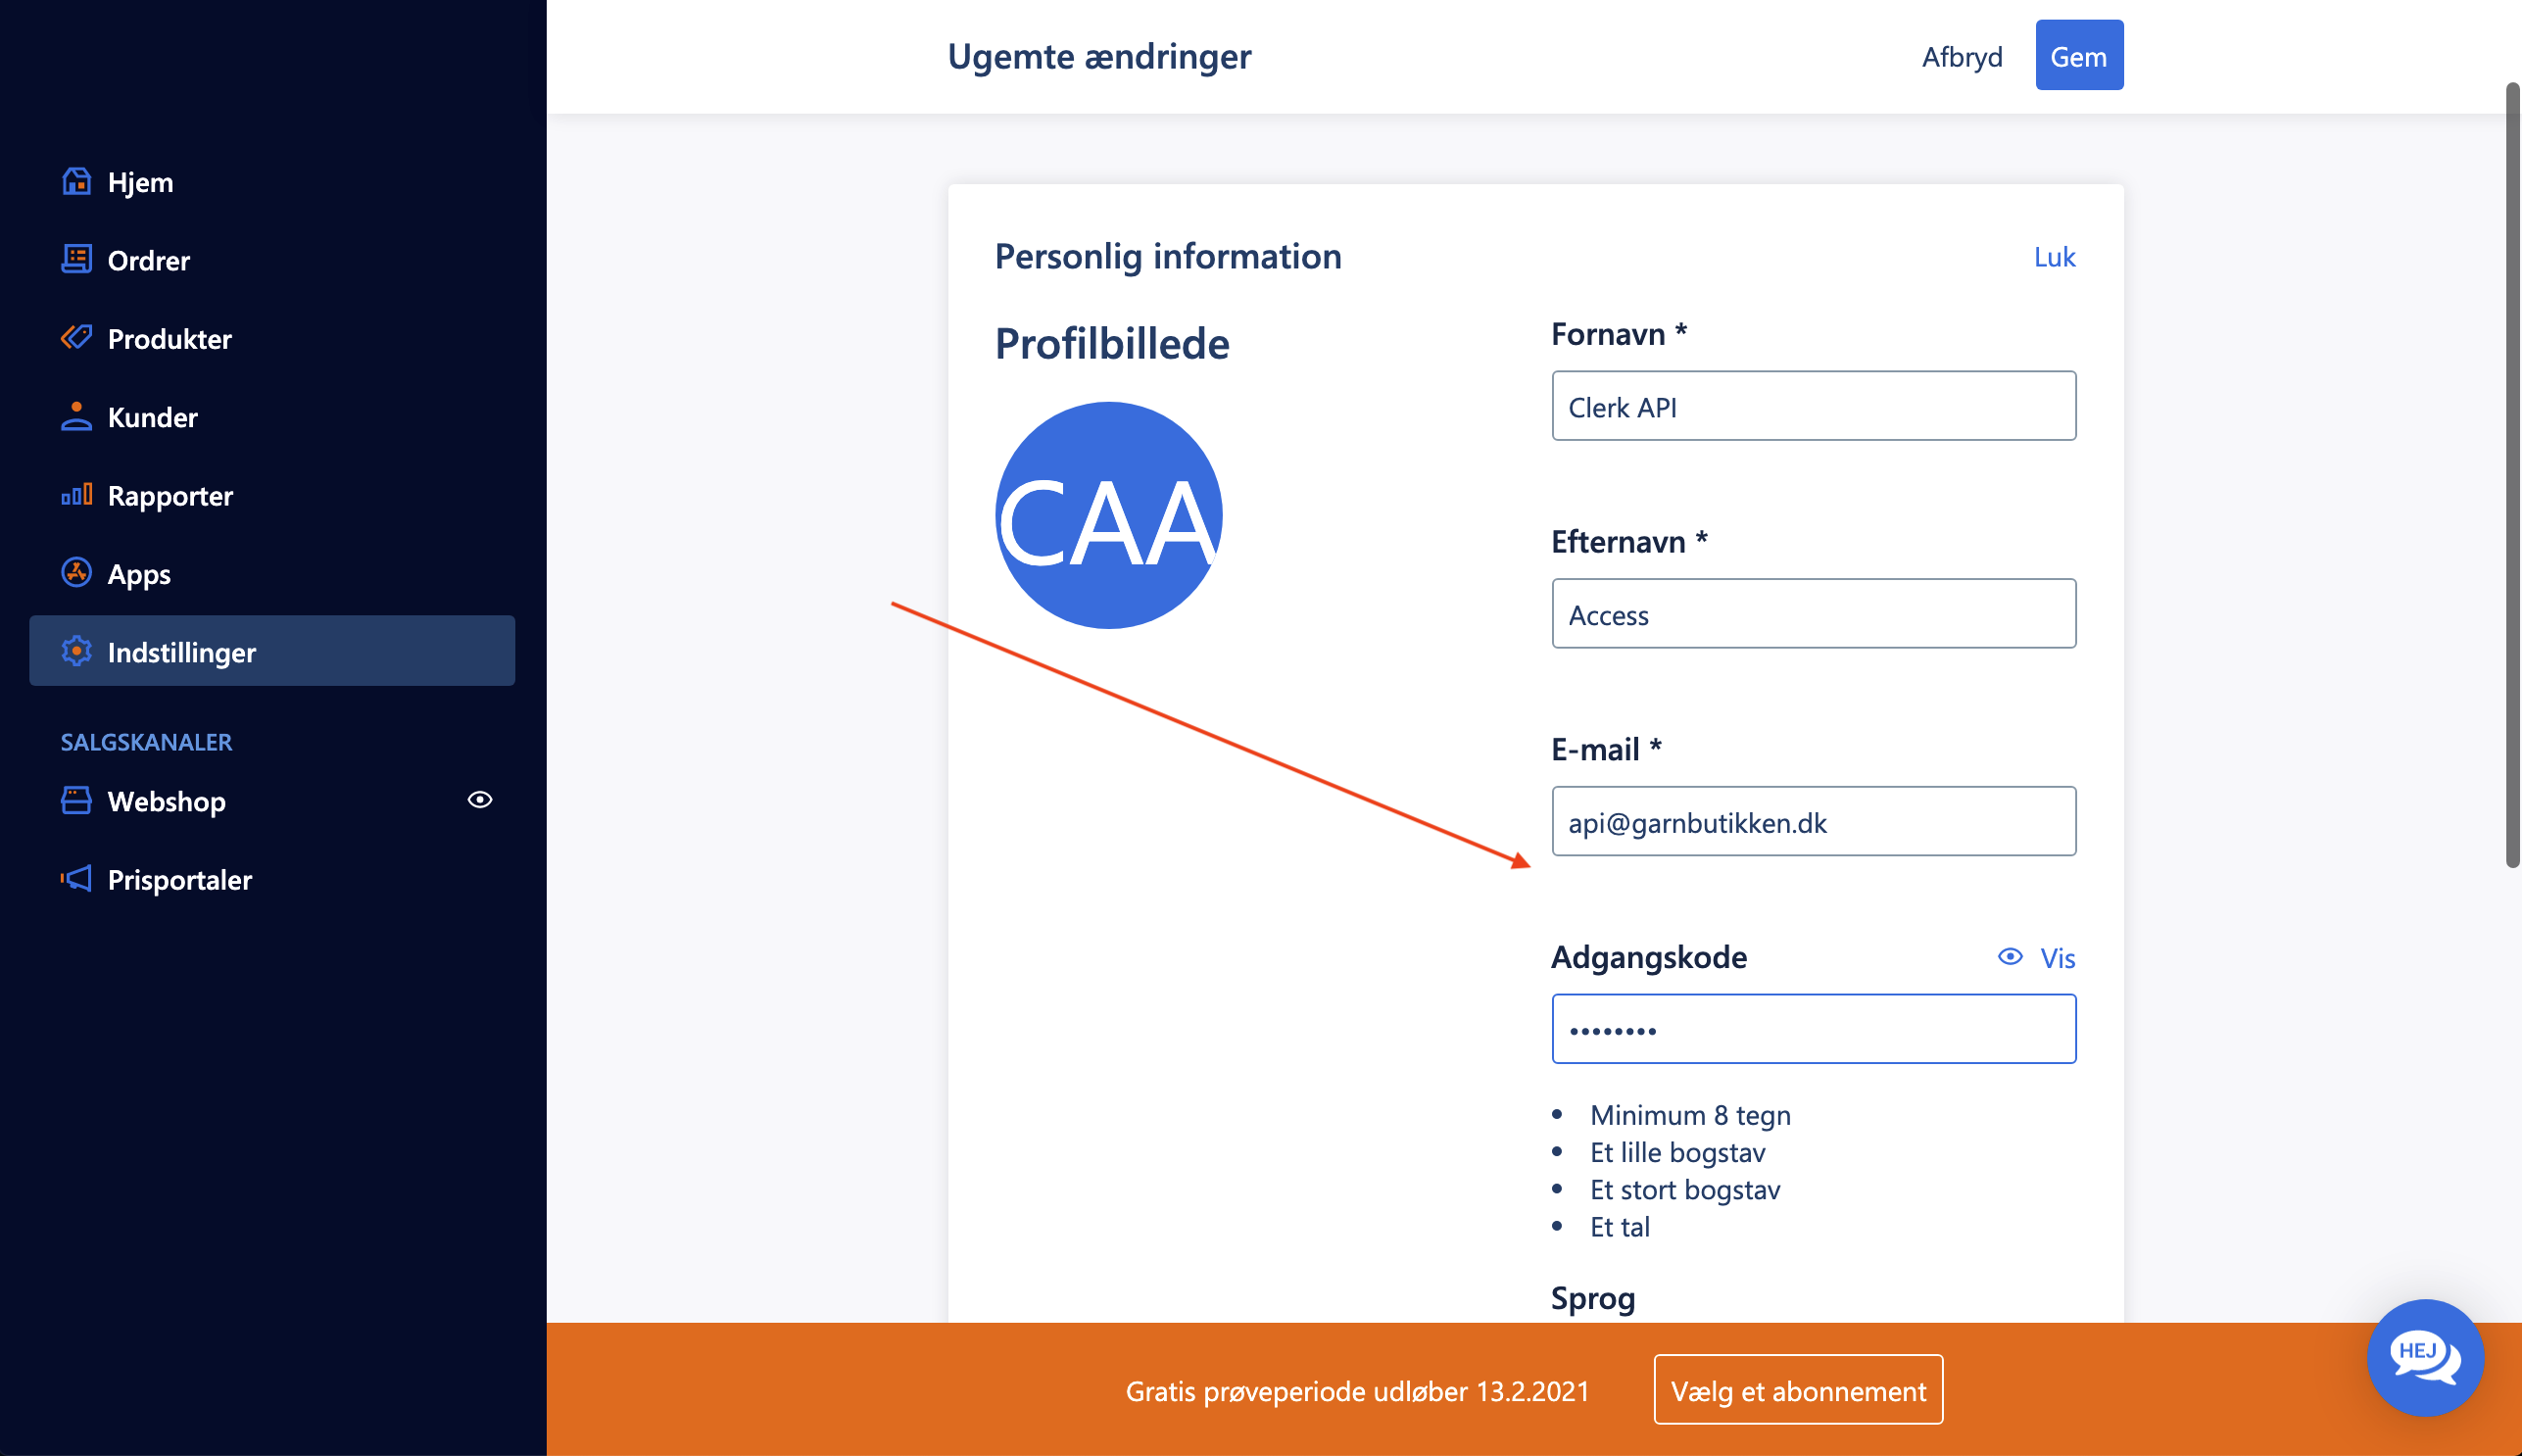
- Scroll down to Tilladelser and select API.
- Click Gem to create the user.
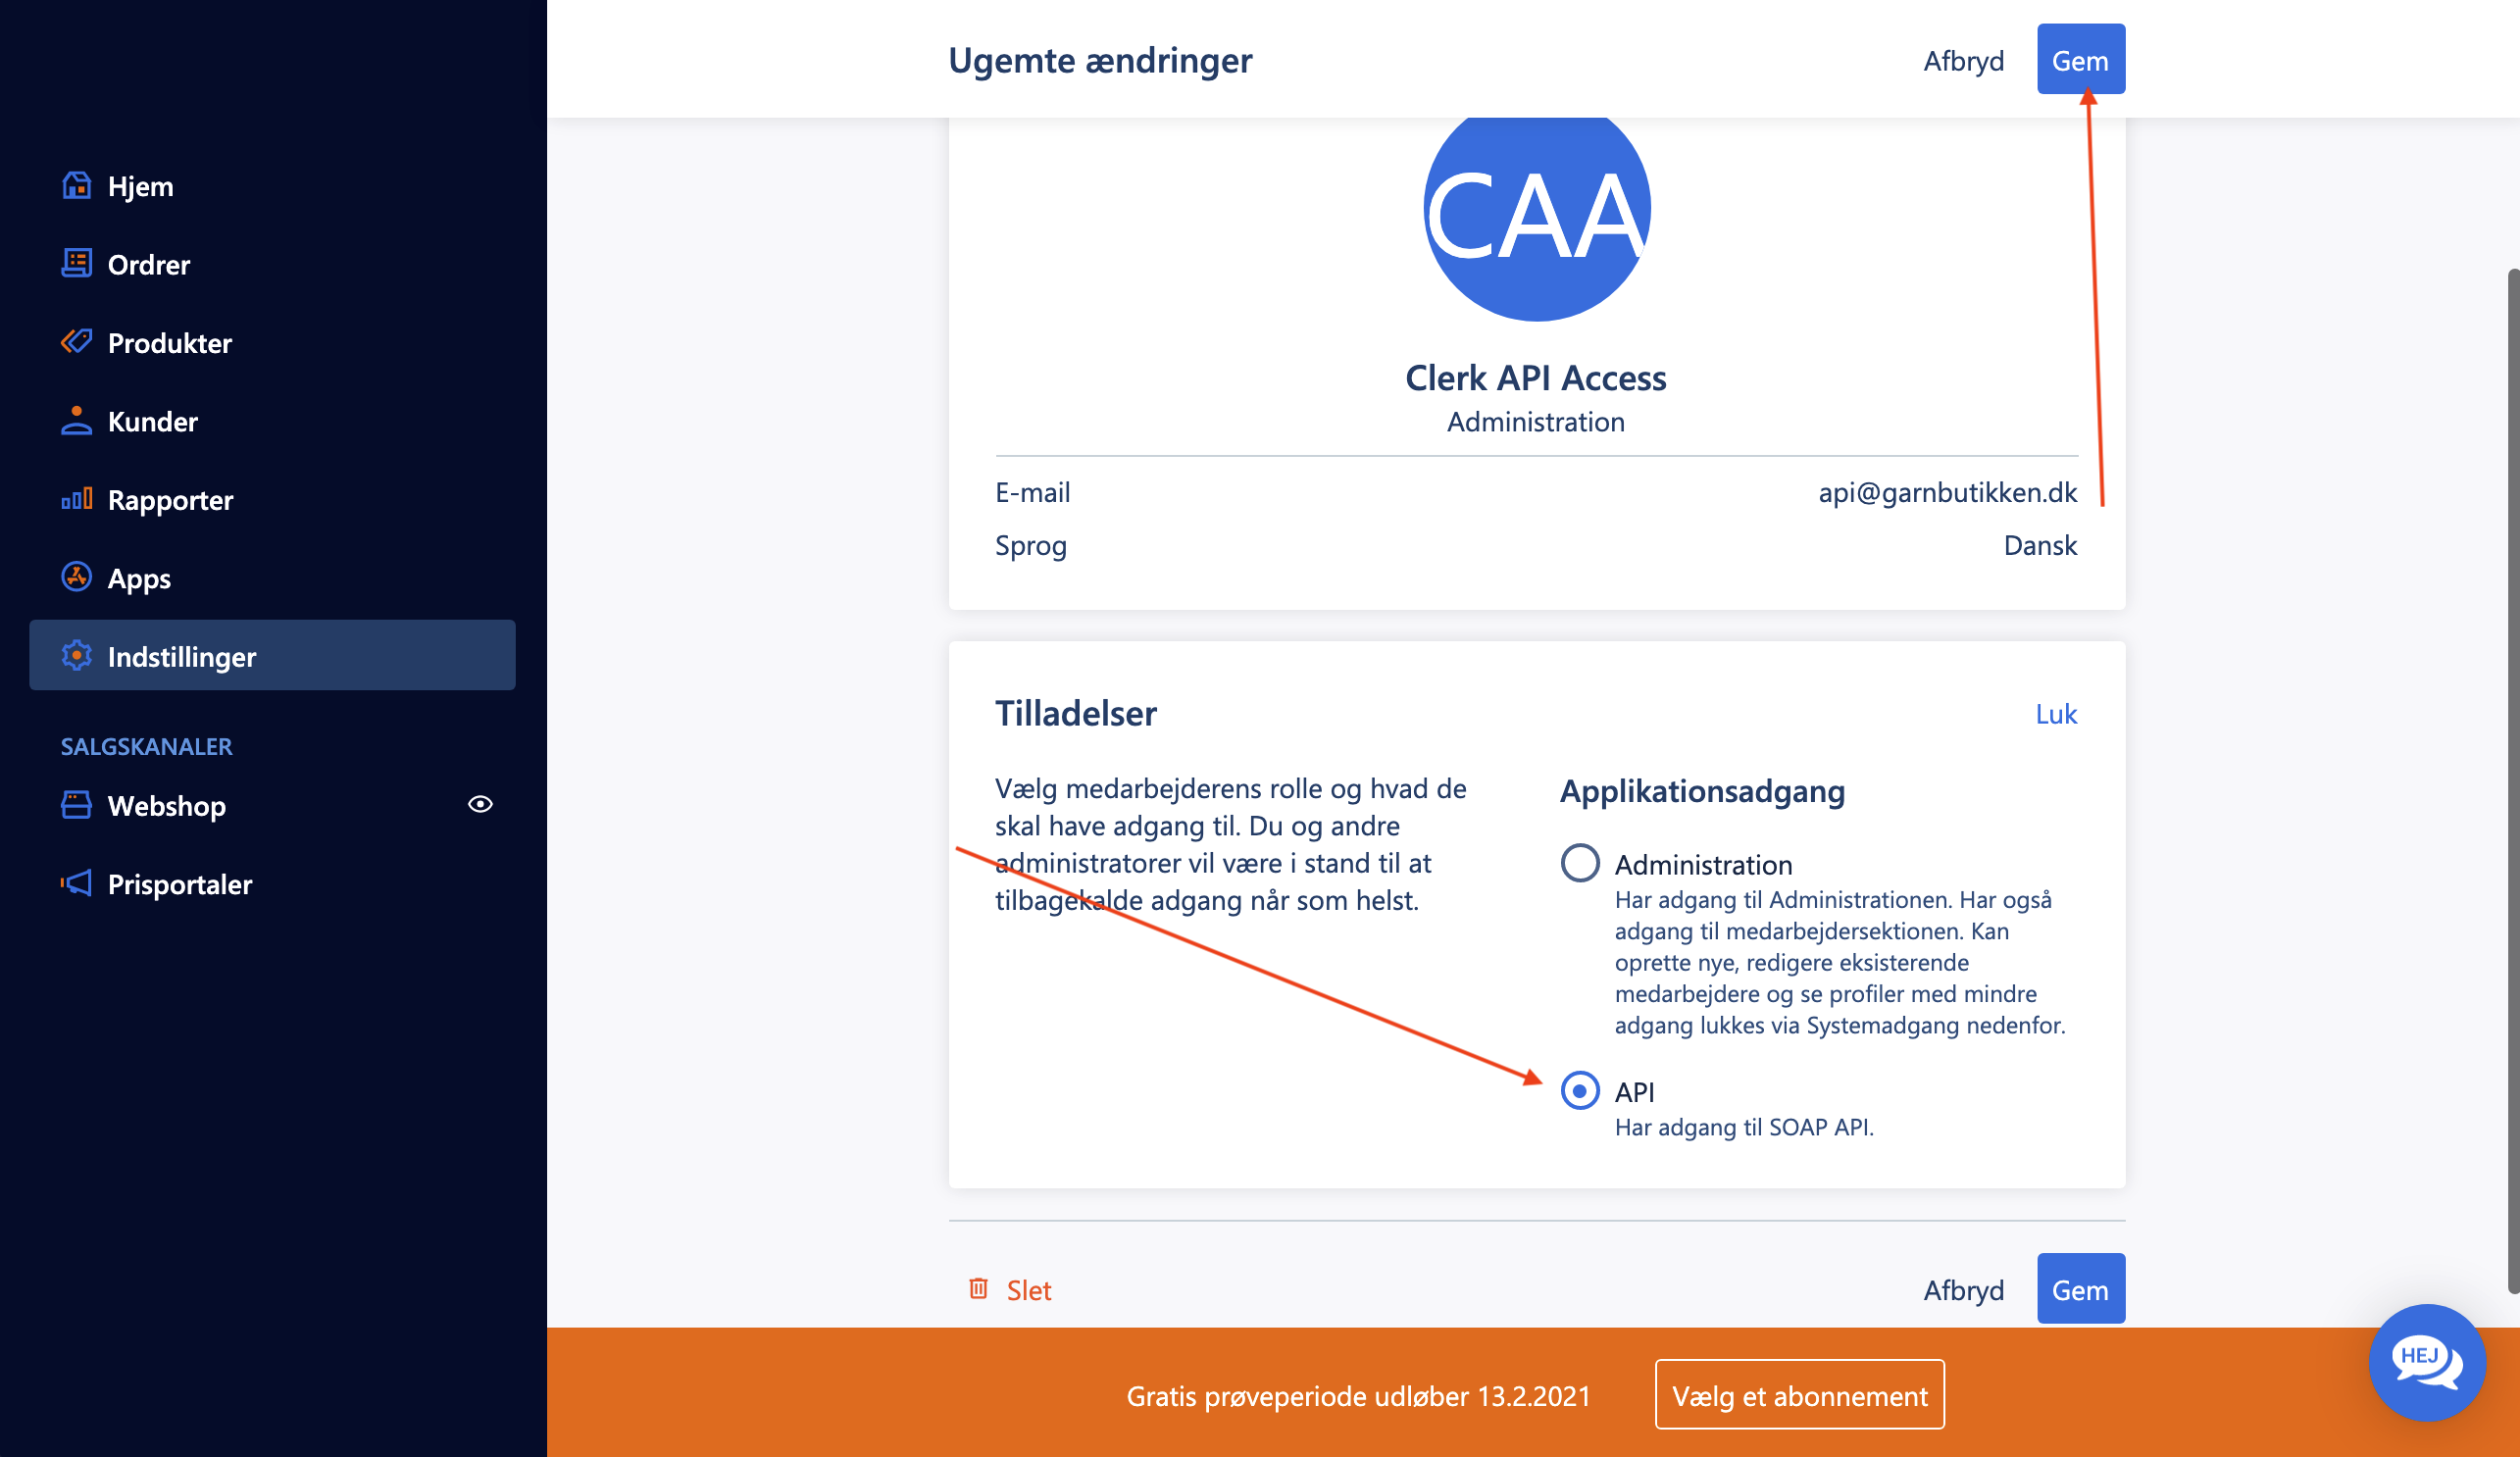
Write down your username and password when setting them up. You will need these credentials for the sync configuration.
Configure Sync in Clerk #
- Go to my.clerk.io > Data > Configuration.
- Select DanDomain as your sync method.
- Enter the following details:
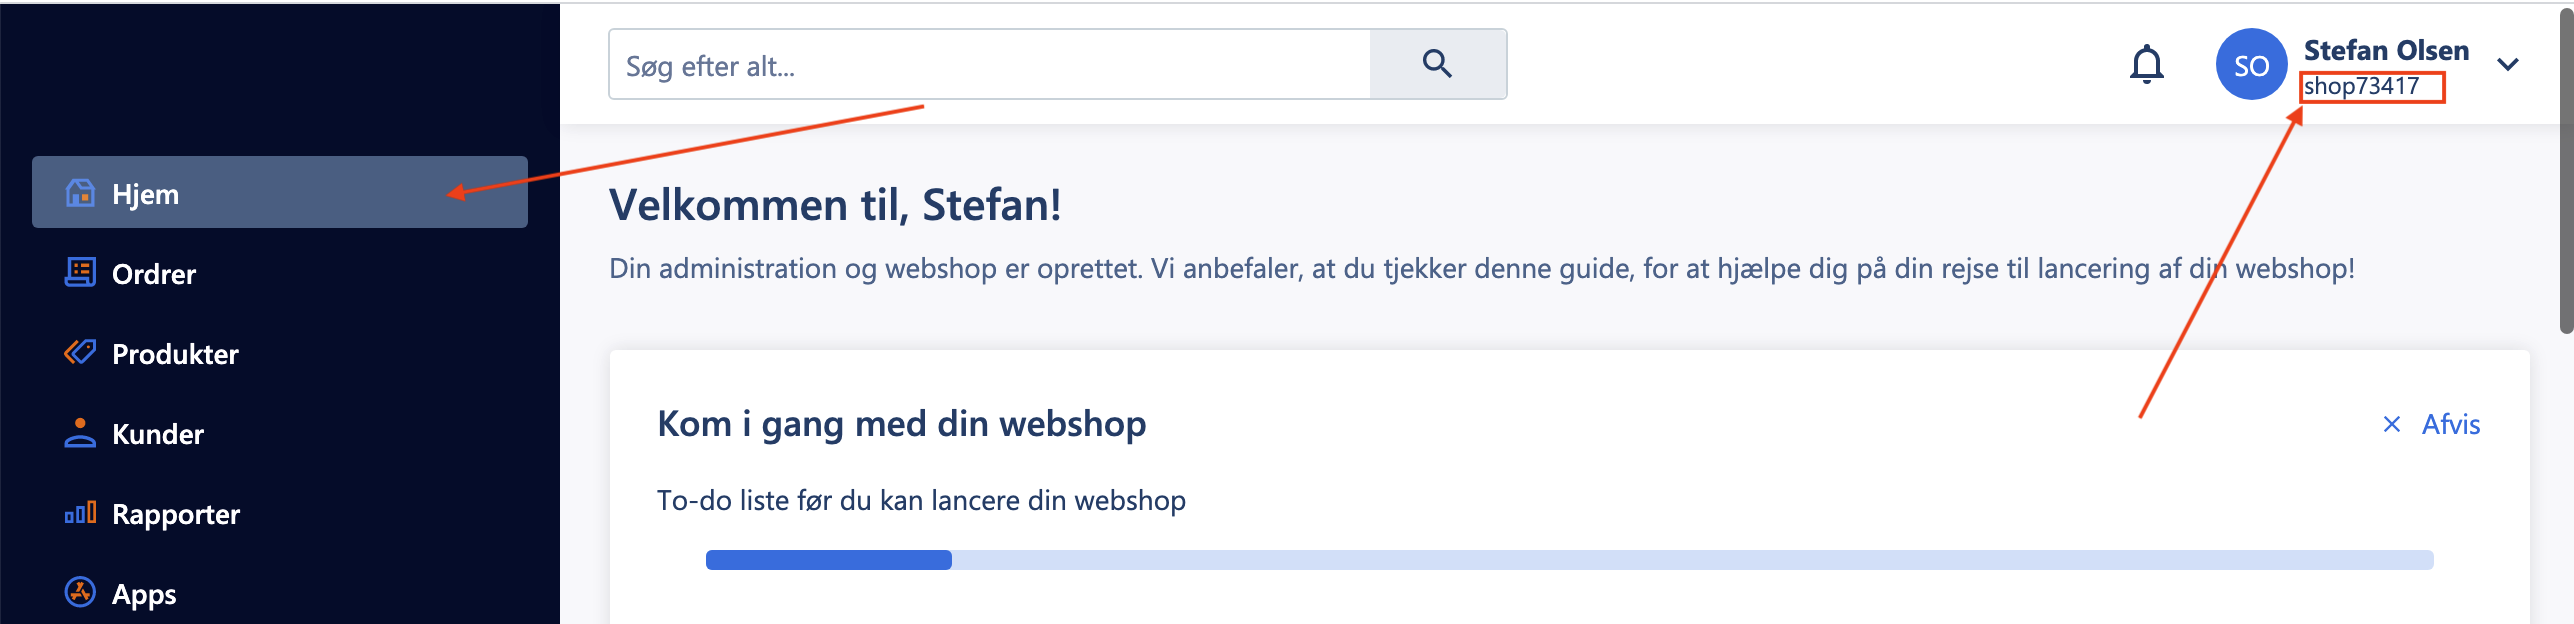
- Shop ID: Found in the top right corner on the Hjem page in DanDomain.
- API Username: The email you created for the API user.
- API Password: The password for the API user.
- Click Save and then Start Sync when you are ready.
Import Blog Pages #
If you want to import your blog pages to use with Clerk Search or Recommendations:
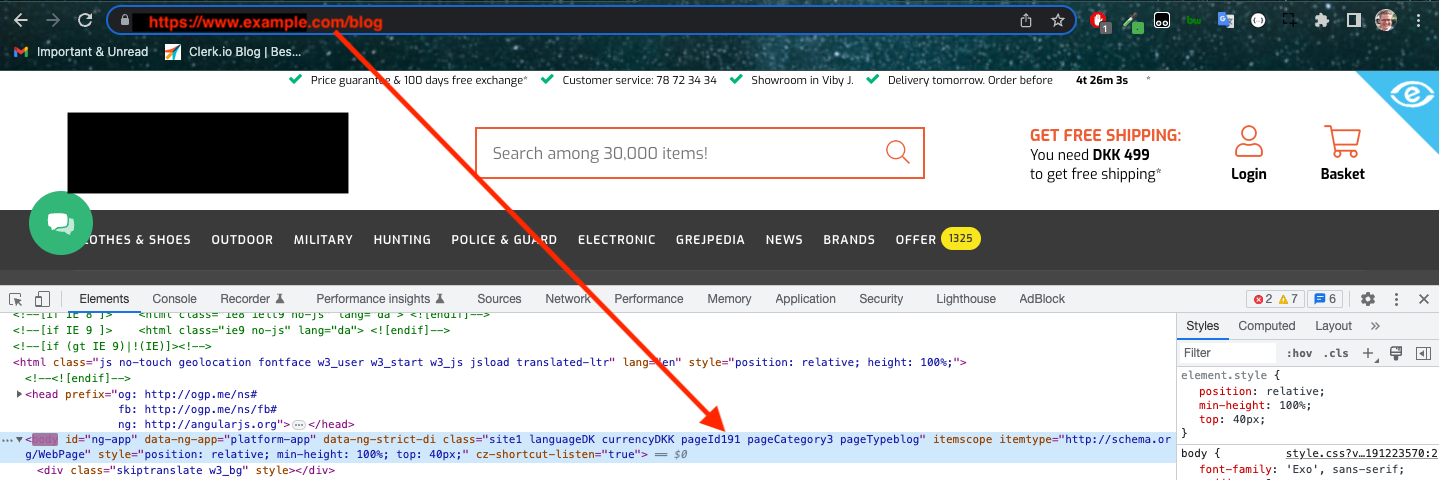
- Go to your blog page on your webshop.
- Inspect the
<body>tag in your browser’s developer tools. - Look for a class called
PageIdNUM, whereNUMis the Page ID you need.
- In my.clerk.io > Data > Configuration, enter this Page ID in the Blog Page ID field.
- Click Save and start a new sync.