Sync Data
Sync your Shopify products, meta-fields, and subscribers to Clerk.io. This guide covers creating an app in Shopify’s Dev Dashboard, customizing product data, and syncing subscriber information.
Set up Sync #
The setup has two parts: create and install an app in Shopify, then enter its credentials in my.clerk.io. Complete both parts before starting the first sync.
If a third party is completing the setup, first follow the
Shopify access steps to find the store’s .myshopify.com domain and collaborator code.
Access requirements: The Shopify user completing the app setup needs permission to develop apps and install apps on the store. Collaborator access does not automatically include these permissions. If a third party cannot complete the Shopify steps, the store’s team can create and install the app, then securely share the Client ID and Client Secret with the person configuring the sync in my.clerk.io.In Shopify #
Complete these steps in Shopify’s Dev Dashboard. See Shopify’s current Dev Dashboard app guide if the labels change.
Create app #
- Open the Shopify Dev Dashboard and sign in.
- In the left navigation, open Apps and click Create app.
- Select Start from Dev Dashboard, enter
Clerk.ioas the app name, and click Create.
Configure app #
- Open the Versions tab for the new app.
- In App URL, enter
https://shopify.dev/apps/default-app-home. The app only provides API access and does not need an embedded admin interface. - In Webhooks API Version, select the latest available version.
- Add the access scopes listed in the next section.
Configure scopes #
Grant the scopes below. They allow Clerk.io to import the catalogue, orders, customers, pages, markets, locations, and related data needed for the Shopify integration. You can paste the complete list into the access-scope field:
read_all_orders,read_customers,write_customers,read_inventory,read_locales,read_locations,read_markets,read_markets_home,read_metaobjects,read_online_store_pages,read_orders,read_products,read_publications,read_content,read_translations
Why do we need write access? Clerk.io only reads data, but Shopify requires thewrite_customersscope to access customer marketing URL fields, such ascustomer.unsub_url.
You can also choose the scopes individually:
- Customers (
read_andwrite_) - Inventory (
read_) - Locales (
read_) - Locations (
read_) - Markets (
read_) - Markets Home (
read_) - Metaobjects (
read_) - Online Store Pages (
read_) - Orders (
read_) - All Orders (
read_) - Products (
read_) - Publications (
read_) - Store Content (
read_) - Translations (
read_)
Return to the app’s Versions tab and click Release after adding the scopes.
Install app #
Install the released app on the Shopify store that will sync with Clerk.io.
- In the app, open Home and click Install app.
- Select or create the Shopify store.
- Review the requested access and click Install.
In Clerk.io #
Complete these steps in my.clerk.io using the credentials from Shopify. The store’s team can do this directly, or securely share the credentials with a third party that is configuring the Clerk.io sync.
Configure sync #
- In the Shopify Dev Dashboard, open the Clerk.io app’s Settings and copy the Client ID and Client Secret, or obtain them through an approved secure handoff from the Shopify store’s team.
- In
my.clerk.io, open the relevant Store and go to Data > Configuration. - Set Sync Method to Shopify.
- Enter the Shopify store’s current
.myshopify.comdomain in Shopify Domain. Do not enter the public custom domain,https://, or a path. - Paste the Client ID and Client Secret into the corresponding fields.
- Click Save, then click Start Sync.
Keep the Client Secret private. Share it only through an approved secure channel, and never add it to a public document, support ticket, or chat.
Known issue: Shopify may fail to generate a token on the first sync, causing an authentication error. This is a known intermittent issue in Shopify. Simply wait 1-2 minutes, then try syncing again.
Markets and inventory #
If you run multiple Shopify markets, locales, or inventory locations, confirm these fields before syncing:
Shopify MarketShopify LocalePrefix URLs with LocaleForce Relative URLs- Inventory locations
These values should match your Shopify market/domain setup. For a complete field-by-field mapping, see Shopify integration settings.
Variant data #
Shopify variant data can behave differently depending on the Import only stock variant data setting.
Typical Shopify variant attributes in Clerk.io include:
variant_inventory_policy(string list)variant_inventory_tracking(boolean list)variant_list_prices(number list)variant_names(string list)variant_option_size(string list)variant_prices(number list)variant_stocks(number list)variant_weight(number list)variant_weight_unit(string list)variants(string list, variant IDs)
Example:
{
  "variant_inventory_policy": ["deny", "deny"],
  "variant_inventory_tracking": [true, true],
  "variant_list_prices": [240, 240],
  "variant_names": ["Xs", "M"],
  "variant_option_size": ["Xs", "M"],
  "variant_prices": [120, 120],
  "variant_stocks": [1, 7],
  "variant_weight": [0.4, 0.4],
  "variant_weight_unit": ["KILOGRAMS", "KILOGRAMS"],
  "variants": ["55970989179259", "55970989244795"]
}
When Import only stock variant data is enabled, these lists only include in-stock variants.
Customizing product data #
In Shopify, meta-fields and other attributes you create can be synced through my.clerk.io > System status > Data sync.
Simply go to the input-field called Custom Attributes and type in the products attributes to include.
To add several attributes, separate them with commas.
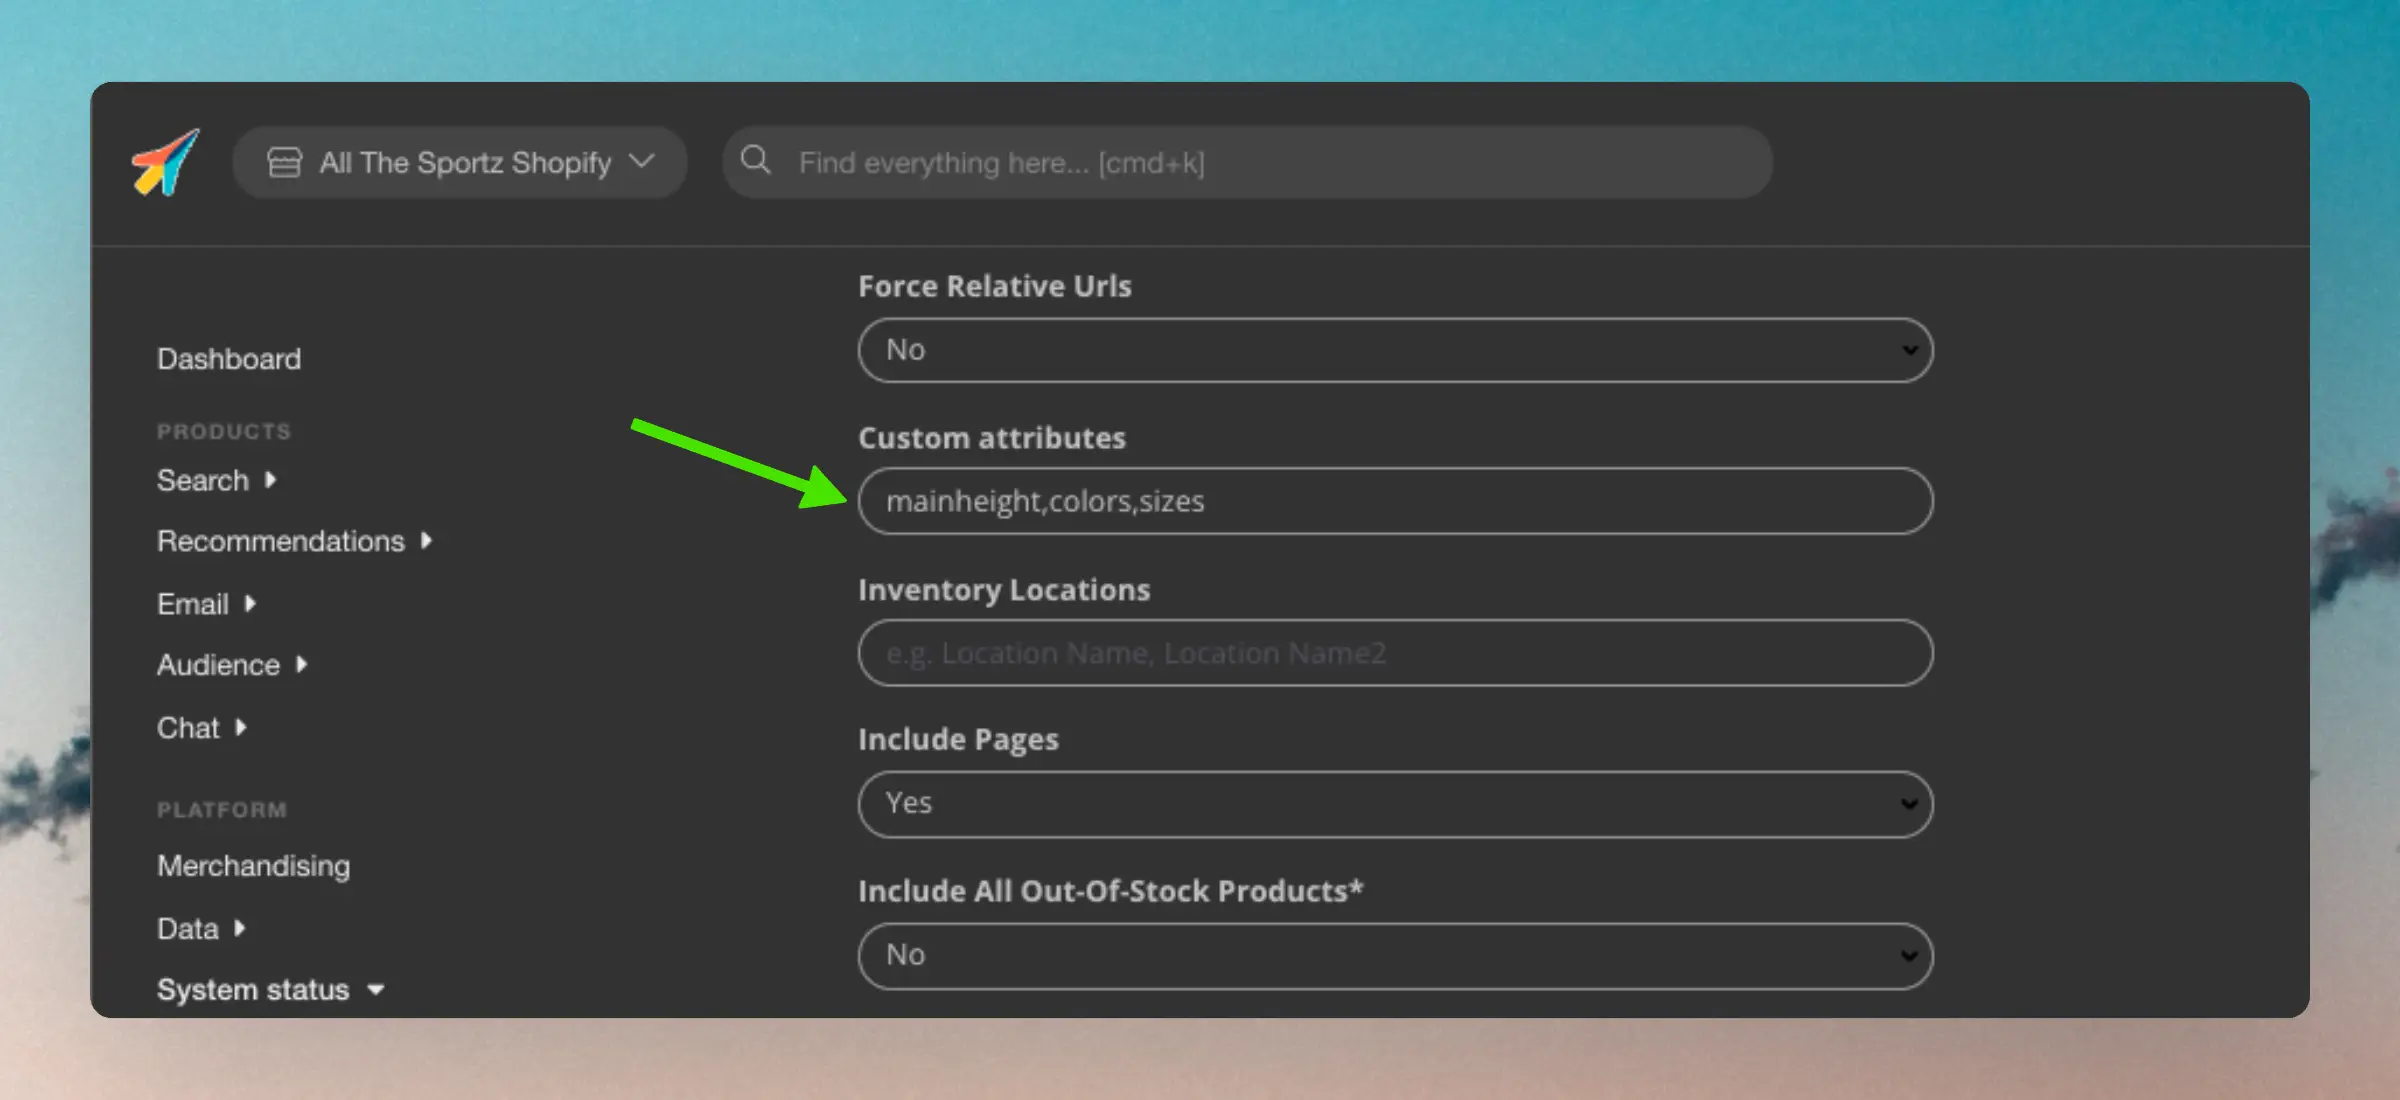
Attributes should always be written using their key.
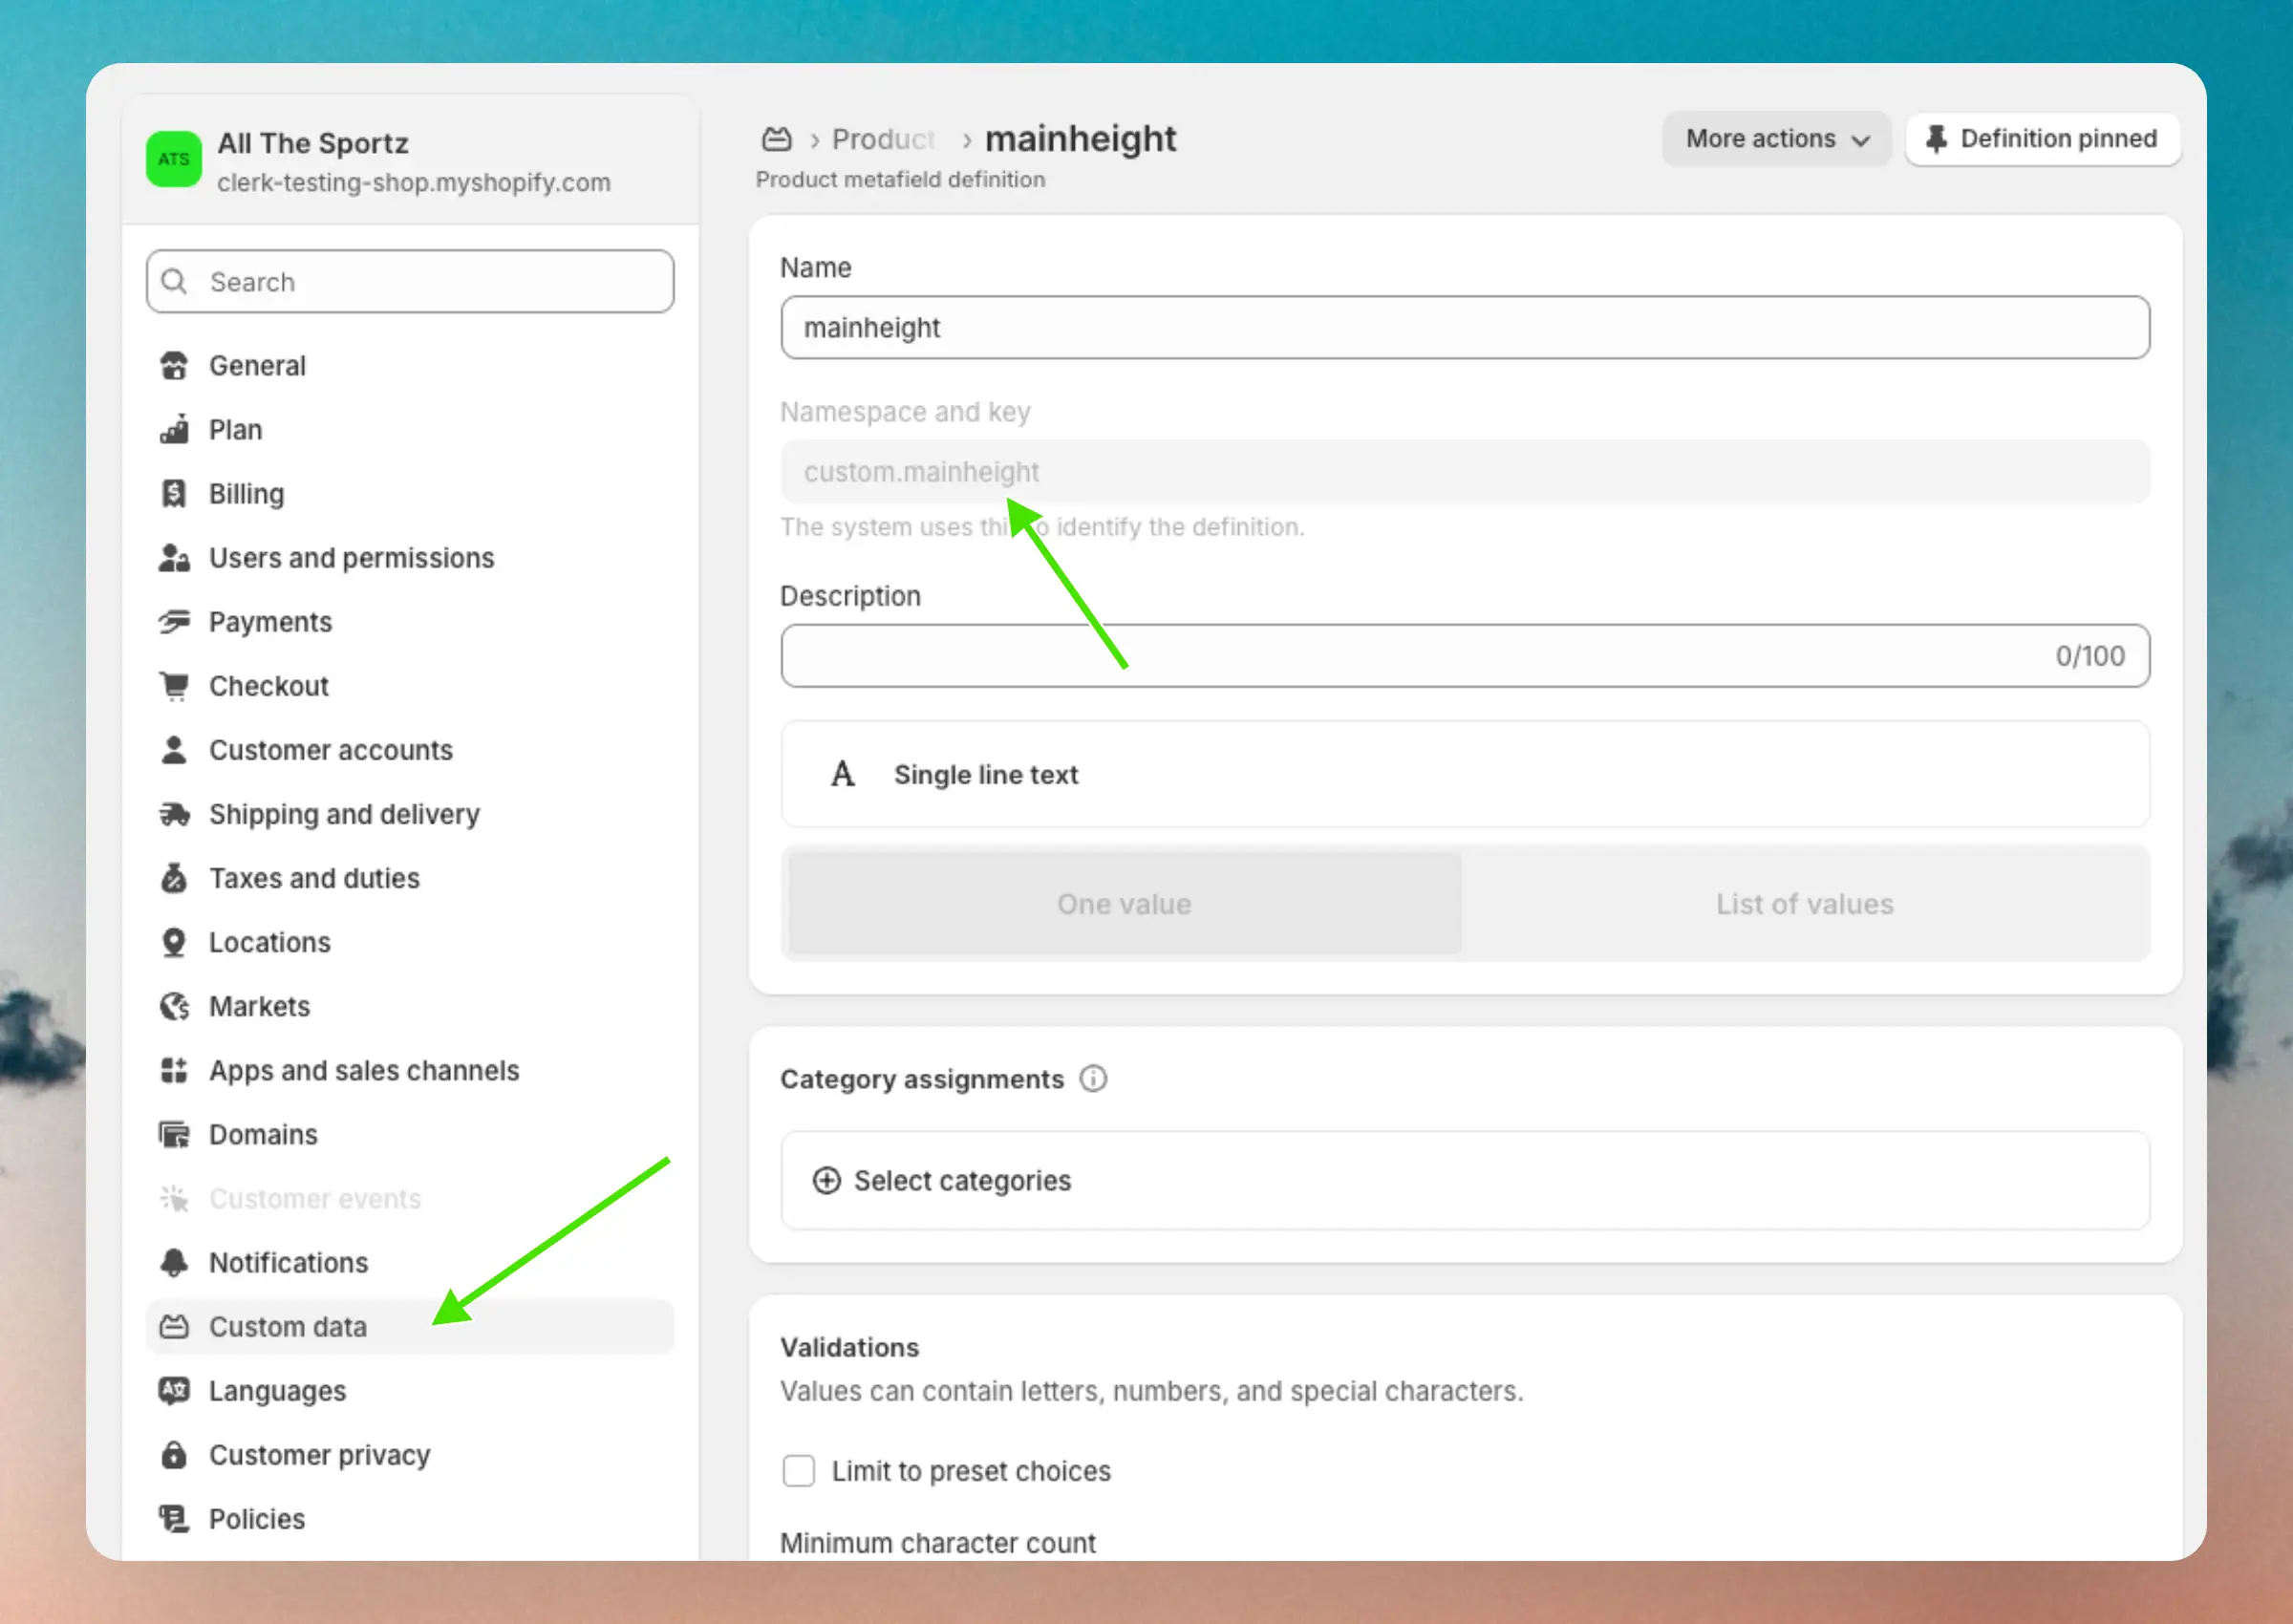
This will usually be all lowercased. For example, the attribute “Sizes” should be “sizes”.
You do not need to include the namespace - Clerk.io will find it automatically based on the key.
In Shopify, you can often find these keys by finding your attribute in Settings > Custom data > Products/Variants:
Sync subscribers #
Shopify supports managing subscribers directly in the platform.
These can easily be synced with Clerk.io.
When activated, we will import that attribute “subscribed: true” for any email address that is subscribed in Shopify.
This can then be used for Auto-Email.
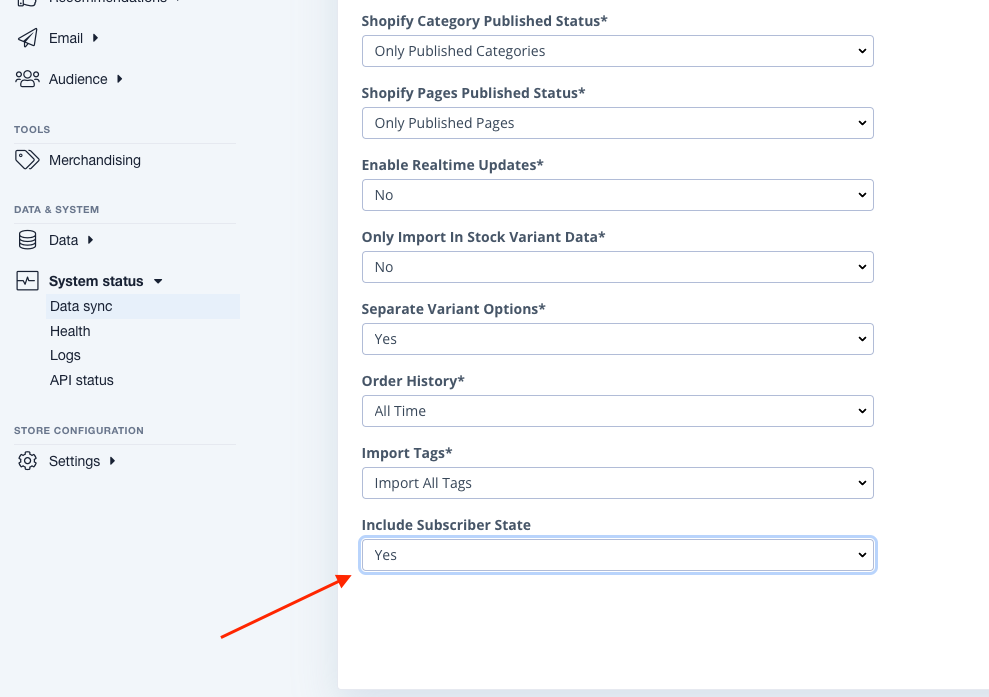
Simply go to your my.clerk.io store, then Data -> Configuration and set Include Subscriber State to Yes. Then click Save and start a new sync.
If you want to use an unsubscribe link for customers, then each customer which is pulled from a Shopify backend has a unsub_url attribute which can be used for the auto email designs in the unsubscribe field: {{customer.unsub_url}}
The Webhooks API version must be set to at least 2022-04, where this support was added. You can check this in the app you created for Clerk.io in the Dev Dashboard under Settings.
Legacy Custom App #
From January 2026, Shopify no longer allows creating custom apps directly in the Shopify admin for stores. Existing custom apps continue to work, but this method should only be used if you already have a custom app set up. For all other setups, use the Developer Dashboard method above.
If you have an existing custom app and need to use or modify it, select Shopify (Legacy Custom App) as the Sync Method in my.clerk.io > Data > Configuration.
These steps only apply if your Shopify store still has access to create custom apps in the Shopify admin.
- In Shopify, go to Settings > Apps > Develop Apps.
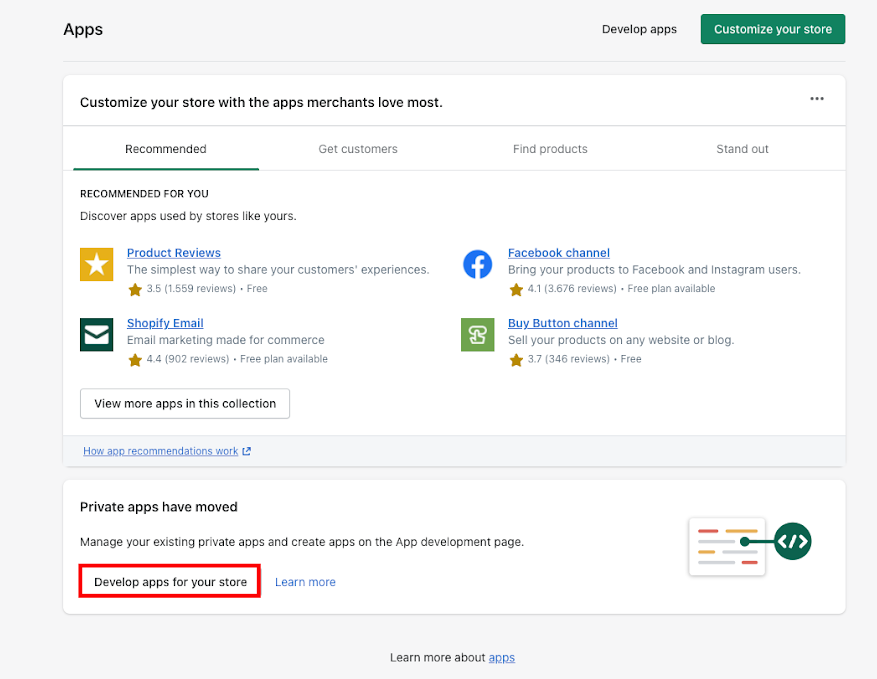
Click Create app, name it “Clerk.io”, choose the App developer, then click Create app again.
Click Configuration → Admin API integration → Configure.
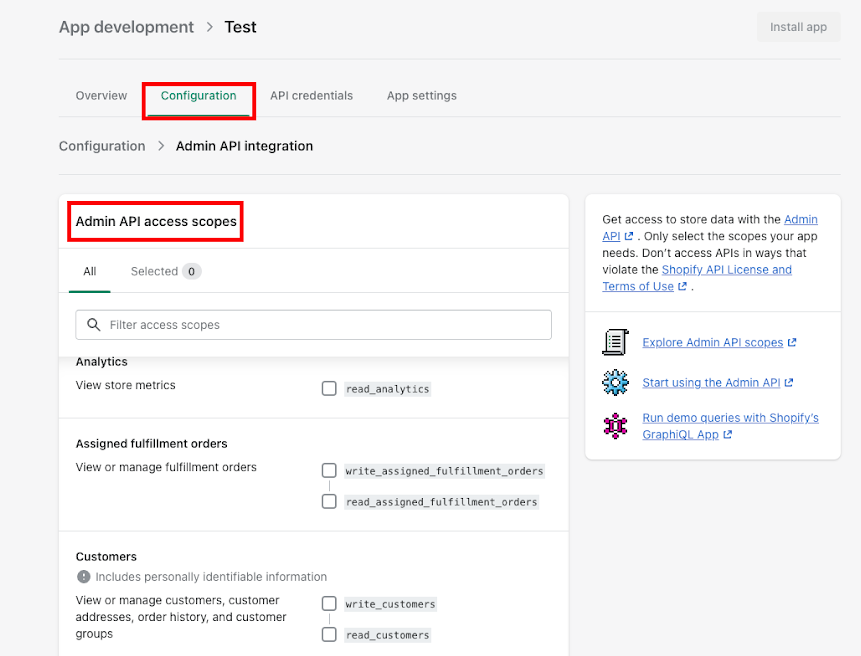
Under Admin API access scopes, grant Read access (scopes starting with
read_) to the following. For Customers, set it to Read and write (includeswrite_customers).Why do we need write access? Clerk.io only reads data, but Shopify requires the
write_customersscope to access customer marketing URL fields (for example to synccustomer.unsub_url).You can paste the following string directly into the input field to add all scopes at once:
read_all_orders,read_customers,write_customers,read_inventory,read_locales,read_locations,read_markets,read_markets_home,read_metaobjects,read_online_store_pages,read_orders,read_products,read_publications,read_content,read_translationsOr you can choose them individually:
- Customers (
read_andwrite_) - Inventory (
read_) - Locales (
read_) - Locations (
read_) - Markets (
read_) - Markets Home (
read_) - Metaobjects (
read_) - Online Store Pages (
read_) - Orders (
read_) - All Orders (
read_) - Products (
read_) - Publications (
read_) - Store Content (
read_) - Translations (
read_)
- Customers (
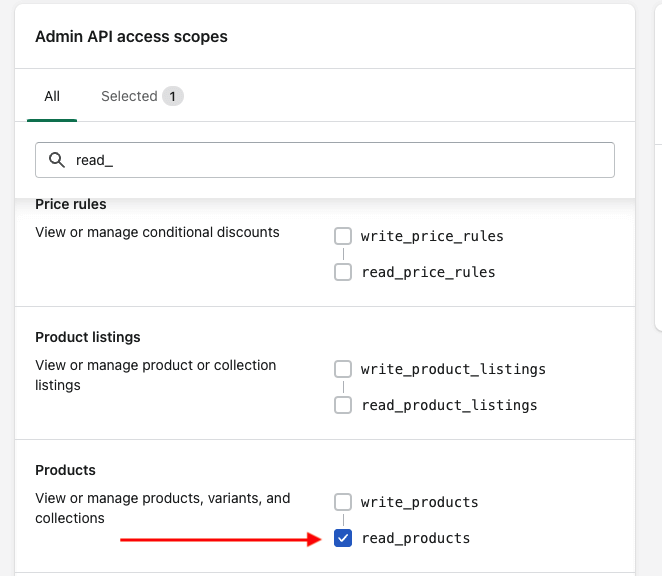
Click Save, then Install App → Install.
Open API Credentials and copy your Shopify Domain and the app’s API Key, Access Token and Secret Key.
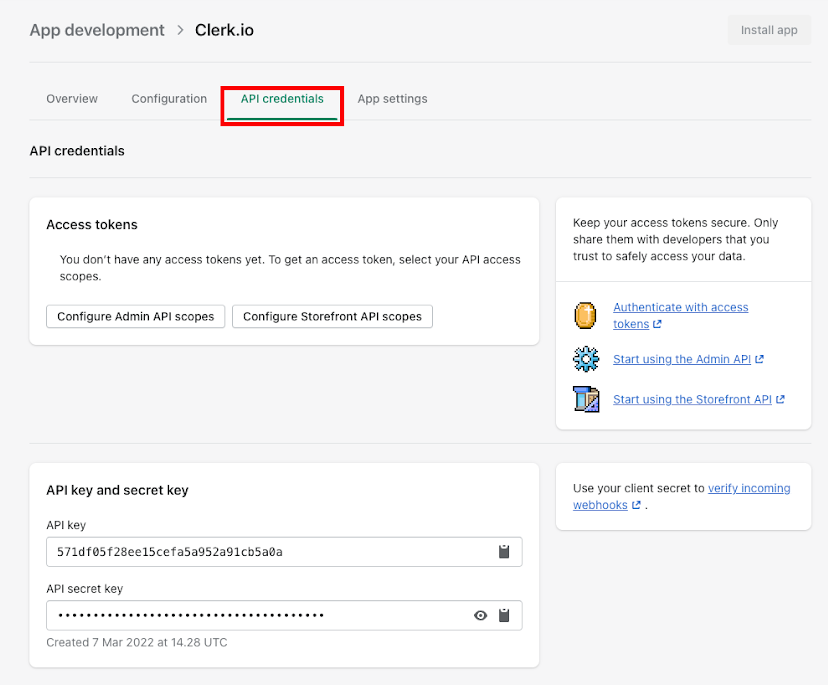
Go to my.clerk.io > Data > Configuration. Under Sync Method, select Shopify (Legacy Custom App).
Paste these values into the form. Choose a default image size if prompted, then click Start Sync.