Umbraco
Sync Data
Learn how to sync and customize data from your Umbraco store
Sync your Umbraco products, categories, orders, customers, and pages to Clerk. This guide covers setting up data synchronization.
Before syncing data, make sure you have installed and configured the Clerk.io connector in your Umbraco backoffice. See the Get Started guide for installation instructions.
Set up Sync #
To sync your Umbraco store data with Clerk, you need to configure the feed URLs in Clerk.
Log in to my.clerk.io
Navigate to System Status > Data sync
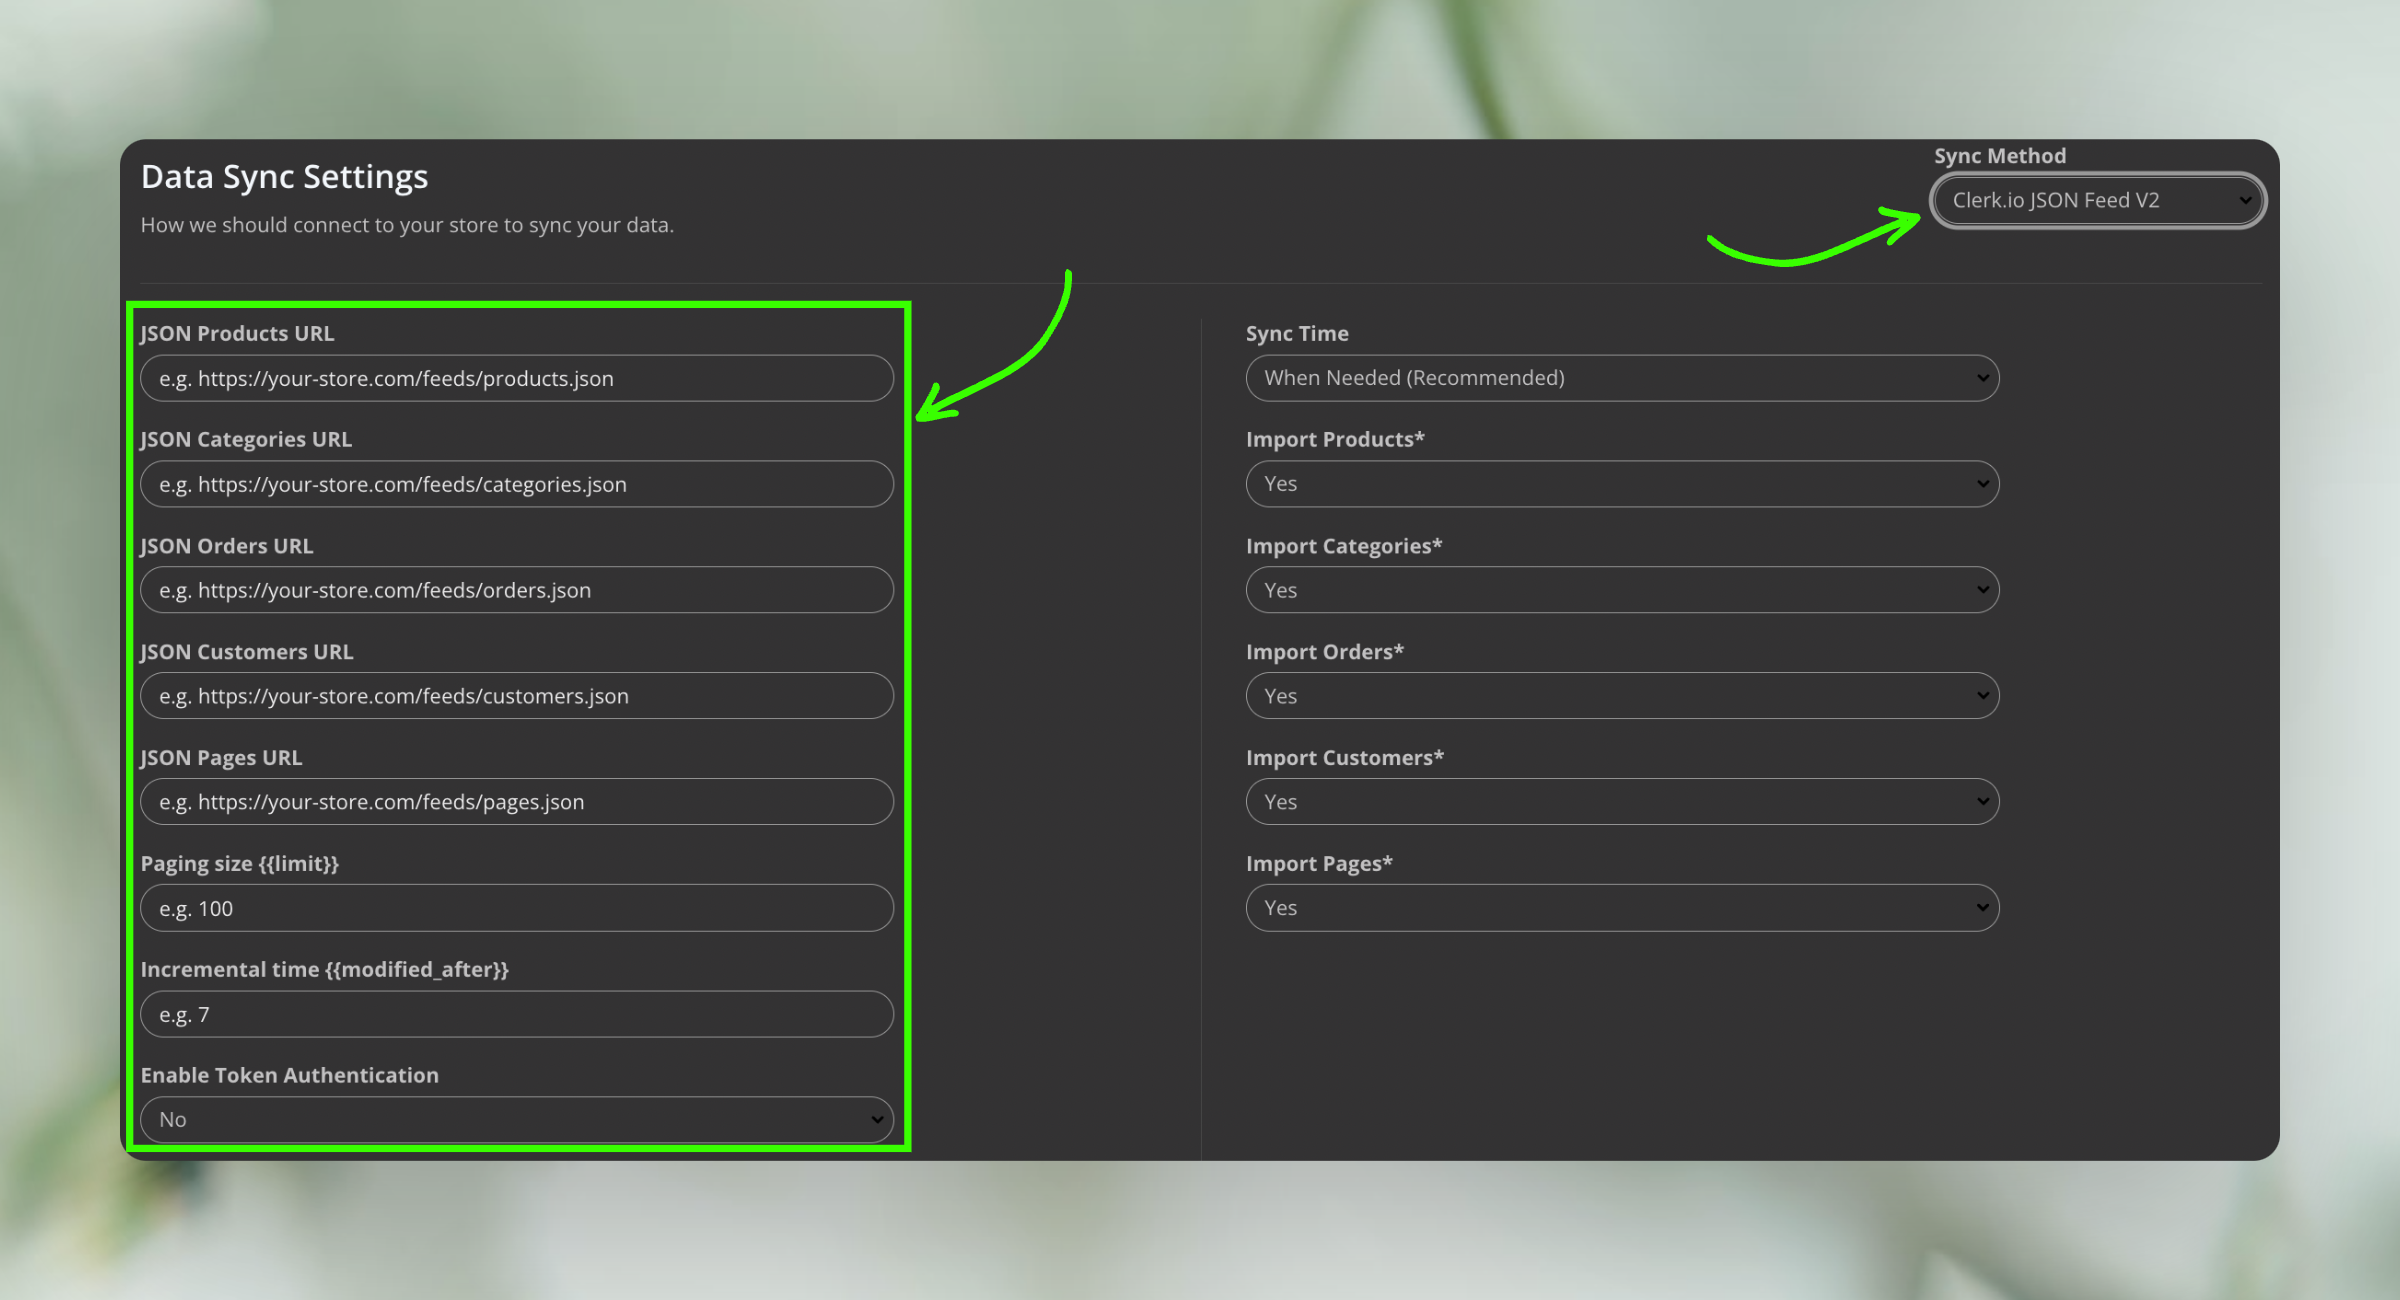
Choose Sync Method, selecting Clerk.io JSON Feed v2
Fill out the information: A set of fields will be displayed, including “JSON Product URL”, “JSON Categories URL”, “JSON Orders URL” and others. Refer to the screenshot below for guidance.
- JSON Product URL - {your site url}/clerk/products.json
- JSON Category URL - {your site url}/clerk/categories.json
- JSON Orders URL - {your site url}/clerk/orders.json
- JSON Customers URL - {your site url}/clerk/customers.json
- JSON Pages URL - {your site url}/clerk/pages.json