Plugin
Configure your WooCommerce plugin settings, manage data sync options, and customize search, recommendations, and logging features. This guide covers all available settings and options.
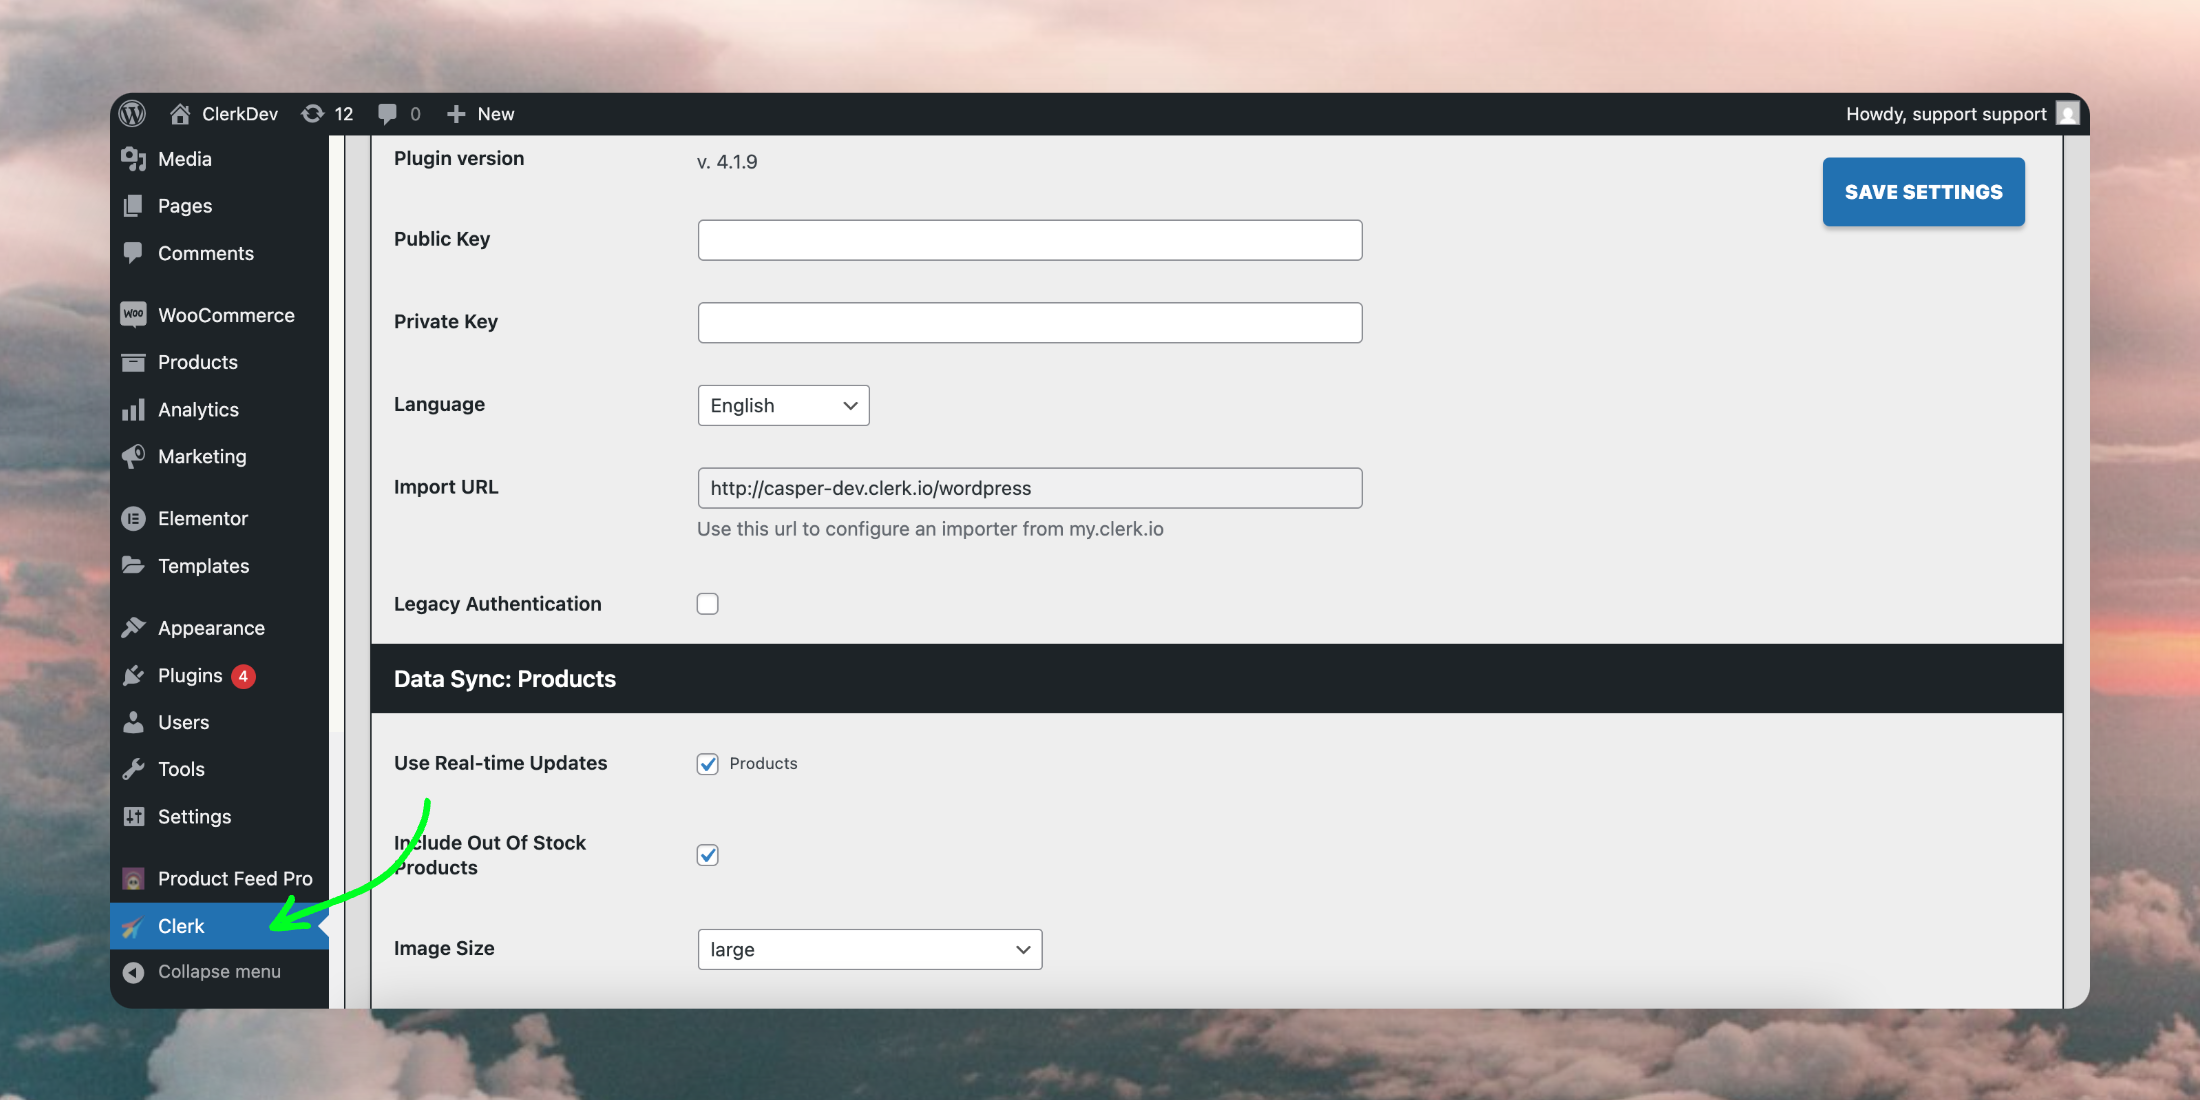
Once the plugin is successfully installed in WooCommerce, it will appear in the side menu of your backend:
General #
Here is a explanation of every option in the General section:
Plugin Version: The version of the Clerk plugin currently installed. Here you can find the latest release.
Public Key: Enter your Public key, found in my.clerk.io Developers > API keys.
Private Key: Enter your Private Key, created in my.clerk.io Developers > API keys.
Language: Choose the correct language of the domain.
Import URL: The URL used by Clerk to sync the data. Add this in your my.clerk.io account under Data > Configuration in the Store URL field.
Data sync: products #
In this section, you can customize how Product data is synced with Clerk. Below is an explanation of each option:
Use Real-Time Updates: Sync your data to Clerk in real-time once changes are made in WooCommerce.
Include Out Of Stock Products:** When enabling this option, Clerk will import products which are “Out Of Stock”.
Image Size: Choose the size of the image imported in Clerk. If in doubt, choose large, then manage the size directly inside Clerk Design.
Additional Fields: Here, you can add a comma-separated list of any additional Product Data attribute you’d like to sync to Clerk from your WooCommerce store.
Strip/Trim Split Attributes: When Strip is unchecked, all spaces within strings are removed (e.g. ’ Option 1’ = ‘Option1’). When Trim is checked, only leading and trailing spaces are removed, preserving internal spaces (e.g. ‘Option 1’ = ‘Option 1’).
Additional Fields Raw: Enter any attributes you have already added to Additional Fields, to import these values as-is, preventing commas from splitting them into lists during import.
Data sync: pages #
In this section, you can customize how Pages data is synced with Clerk. Below is an explanation of each option:
Use Real-Time Updates (Pages): to sync your pages to Clerk in real-time once changes are made in WooCommerce.
Include Pages: When enabled Clerk will import all pages included in WooCommerce > Pages > All Pages.
Page Additional Fields: Attribute slugs added here are imported for each page.
Page Additional Types: Sync additional page types, including custom ones. Enter a comma-separated list to add multiple types.
Data sync: customers #
In this section, you can customize how Customers data is synced with Clerk. Below is an explanation of each option:
Include Customers: Enabling will import Customers to Clerk.
Collect Basket: Enabling this will allow Clerk to collect information on products added into the basket. For example, activate this option when you are using the Abandoned Basket trigger.
Collect Emails: Enabling this will allow Clerk to collect and import Customers Email addresses from WooCommerce.
Collect Emails Signup Message: Writing text here will allow you to have a checkbox at checkout where we subscribe the email within my.clerk.io. Collect Emails must be enabled to use this feature. If left blank, the checkbox will not be active.
Extra Customers Fields: A comma separated list of the additional attribute for Customers Data to include during sync.
Data sync: orders #
There is only one option, Disable Order Synchronization, which disables orders from being sent to Clerk during the daily sync when active.
Clerk will still collect them in real-time from visitors.
Live search settings #
In this section, you can customize and activate the Live Search. Below is an explanation of each option:
Enabled: Enables your Clerk Live Search.
Include Suggestions/ Categories / Pages: This let’s you control whether Clerk should find matching Suggestions, Categories or Pages to show on the Live Search.
Number of Suggestions / Categories / Pages: This let’s you decide how many possible matches to return for each type.
Pages type: Select which type of pages results in the dropdown, e.g. Blog Posts, CMS Pages or All.
Dropdown Positioning: Choose the position of the Live Search dropdown results.
Live Search Input Selector: Enter the input selector which is a class or ID for the input field used for searching.
Live Search Form Selector: Enter the form selector which is a class or ID for the form that sends search requests.
Element: Enter the name of your Live Search Elements. It is listed within the Element embed code as your data template name,
data-template= YOUR-ELEMENT-NAME. Usually “live-search”, e.g.:
<span class="clerk"
  data-template="@live-search"
  data-instant-search="INSERT_SEARCH_INPUT_CSS_SELECTOR_HERE"
  data-instant-search-suggestions="6"
  data-instant-search-categories="6"
  data-instant-search-pages="6"
  data-instant-search-positioning="right">
 </span>
Search settings #
In this section, you can customize and activate the Search Page. Below is an explanation of each option:
Enabled: Enables your Clerk Search Page.
Search Page: Select the CMS page to use as a target for the Clerk Search.
Include Categories / Pages: This let’s you control whether Clerk should find matching Categories or Pages to show on the Search Page.
Number of Categories / Pages: This let’s you decide how many possible matches to return for each type.
Pages type: Select which type of pages results in the dropdown, e.g. Blog Posts, CMS Pages or All.
Element: Enter the name of your Search Page Element from the Element embed code in my.clerk.io. Usually “search-page”.
No results text: Enter the text you’d like to display on the Search Page if a search returns no results here.
Load more button text: Enter the text for the “Load More” button.
Faceted navigation #
Enabled: Enables your Clerk Facets in Search Page.
Add Custom Attribute: Type in here the name of an attribute you’d like to include in your facets, then click “Add”.
Facet Attributes: Once added, the attribute appears in this section. Here, you can set its display title, define its position in the facet list, and check the Show box to include it in your facets.
Design: Enter the ID of the facet design. It can be found in my.clerk.io > Search > Design.
Powerstep settings #
In this section, you can customize and activate the Powerstep after a customer has added a product to cart. Below is an explanation of each option:
Enabled: Enable the Clerk Powerstep.
Powerstep Type: Choose the type of Powerstep you’d like to enable from the dropdown menu, like “page” or “popup”.
Powerstep Page: Select the CMS page to use as a target for the Clerk Powerstep.
Contents: Enter the name of your Power Step Element from the Element embed code in my.clerk.io.
Filter Duplicates: Activating this will ensure that each banner shows completely unique products.
Enable Custom Texts: When enabled, it allows you to add texts to the Powerstep.
Back Button: Enter the text you want to display on your Back button, which allows users to return to the previous page.
Cart Button: Enter a text for the button that redirects to the cart page.
Product Title: Enter a text message on the Powerstep Title.
Keep Add To Cart Params: Enabling this option ensures that the query parameters related to adding items to the cart are retained when redirecting to the Powerstep page. This helps maintain the selected product details during the process.
Exit intent settings #
In this section, you can customize and activate the Exit Intent.
An Exit Intent is a type of popup that appears when a user is about to leave a website. Below is an explanation of each option:
Enabled: Enable your Clerk Exit Intent element by checking this box.
Element: Enter the name of the Exit Intent Element you’ve created for your store. Usually “exit-content”.
Category, product, cart #
In this section, you can customize and activate the Recommendations for Category, Product and Cart pages. Below is an explanation of each option:
Enabled: Enables your Clerk Category, Product and Cart Recommendations elements.
Element: Enter the name of the Element you’ve created in my.clerk.io for your store. It’s usually already filled.
Filter Duplicates: Activating this will ensure that each banner shows completely unique products.
Defer Injection: Only for Product Settings, enabling this will inject the Recommendations on product page only after the page content is already rendered.
Category / Product / Cart ID Shortcode: These shortcodes allow you to easily insert Clerk embedcodes if you want to customise their placements with editors like WPBakery and Elementor. For example:
<span class="clerk"
   data-template="product-page-alternatives"
   data-products="[[clerk_product_id]]">
</span>
Additional scripts #
In this section, you can add and activate any additional JS Scripts. Below is an explanation of each option:
Enabled: Enables the additional script inserted in the following box.
JS Code: If enabled, it will run the script added in this box together with Clerk.js.
Logging #
In this section, you can enable and customise the Logs regarding errors and or warnings from Clerk. Below is an explanation of each option:
Enabled: Enables the Logging feature.
Log level: Here you can select the chosen type of logging.
Only Errors: Will log any errors that stops the module from working correctly.
Error + Warn: Also logs warnings that are not causing the module to stop working, but might be necessary to fix as well.
Error + Warn + Debug: Logs everything that the module interacts with. This should not be enabled on a live webshop as it will slow down the site.
Log to: This will log everything to My.Clerk.io in Developers > Logs.
Upgrading #
Best Practice: Always create backups of modified files before upgrading to ensure you can restore previous versions if needed.
If you are using a version before 2.0.0, upgrading will break your Designs, since Clerk.js 2 will be used.
If using an older version, follow this guide instead.
Upgrading the Plugin can be done directly from the WooCommerce backend, following these steps:
Start by going to Plugin > Installed Plugins and search for Clerk.
Click on Update Now:
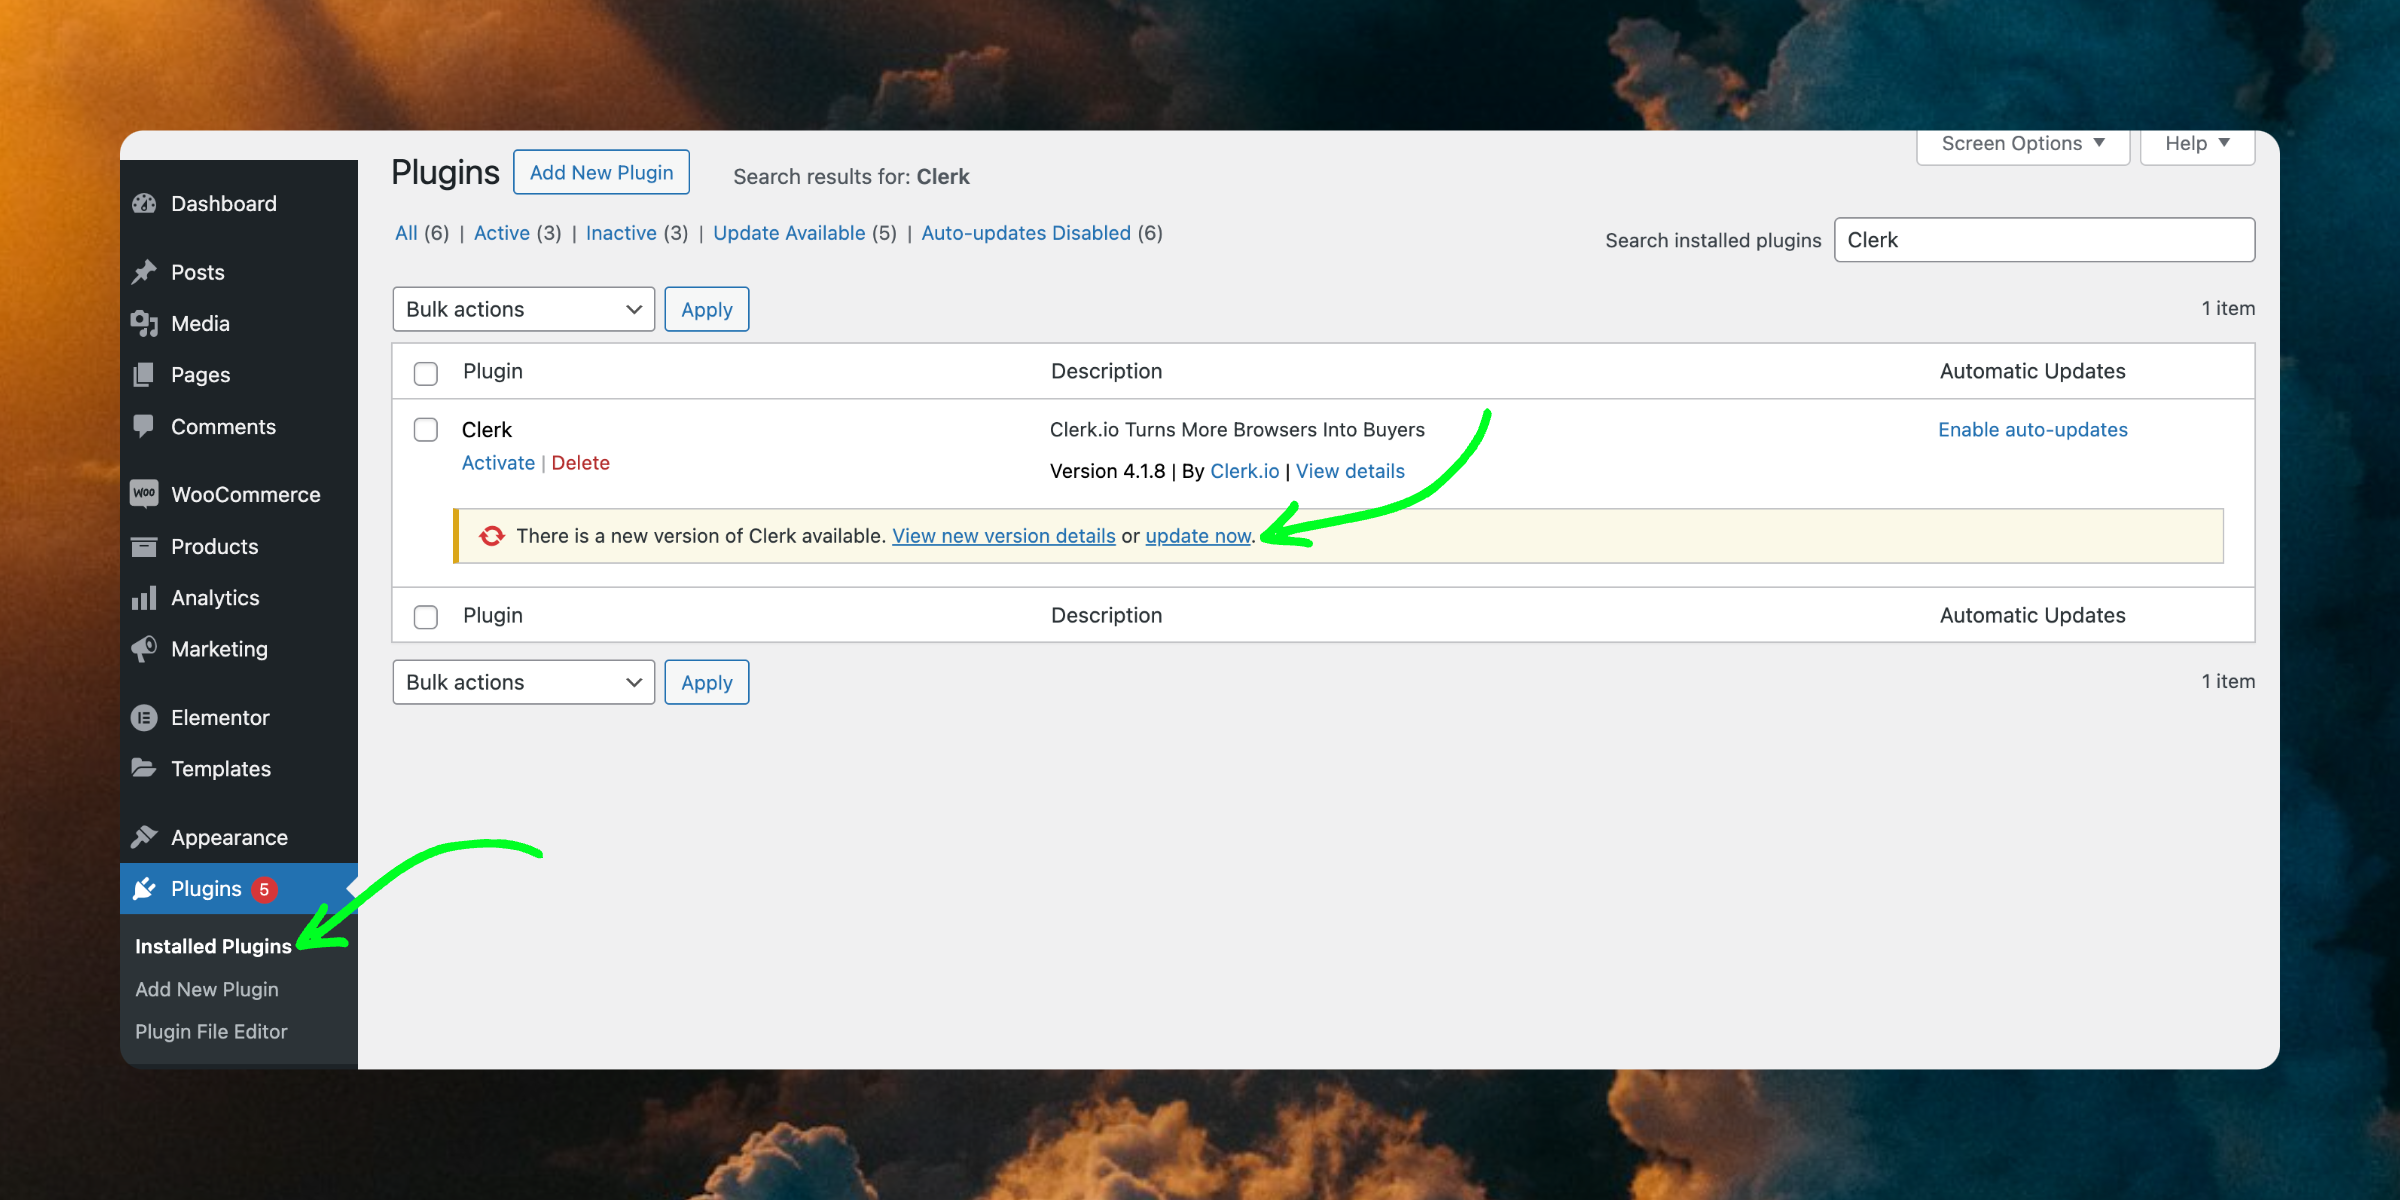
If you already have the latest version, this button will simply say Active.