Using the Clerk.io Extension with Magento 2
Platforms:
Data Sync Settings Overview
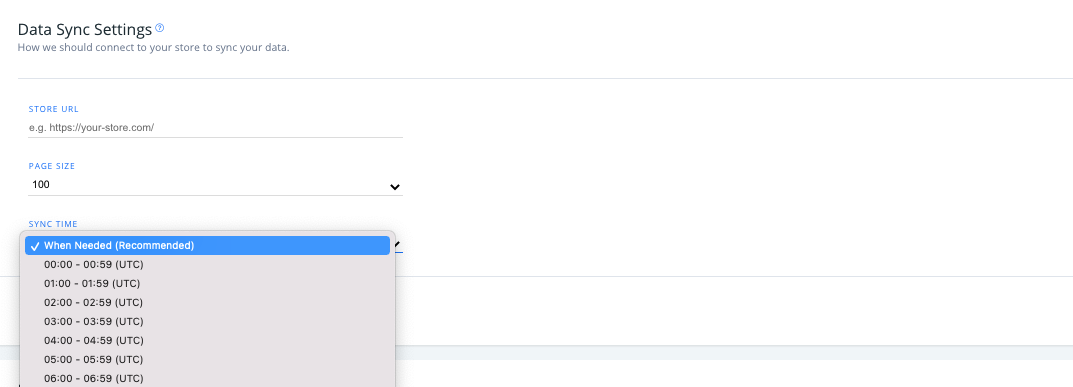
To access and modify your Magento 2 data settings in Clerk.io, head over to my.clerk.io, click “Data” from the left-side menu, then scroll down to “Data Sync Settings”.
Note: Information about the Magento 2 Clerk.io extension, available through the Magento admin portal, is later in this article.
Here, you can set your store’s URL, the page size of your data syncs, as well as the time of day when your data should sync to Clerk.io (the default is “when needed”).
Extension Settings
If you are using v6.7.0 or a later version of the extension, you will be able to access the below settings in two ways after adding your Public and Private Keys to the extension:
- Through the Magento2 backend in Stores > Settings > Configuration > Clerk > Configuration
- Through my.clerk.io, under Settings > Extensions
It does not matter where you make the changes, as the extension will sync with any changes made in my.clerk.io and vice versa.
In my.clerk.io you will also be able to see your current version of the extension, your platform, and the PHP version.
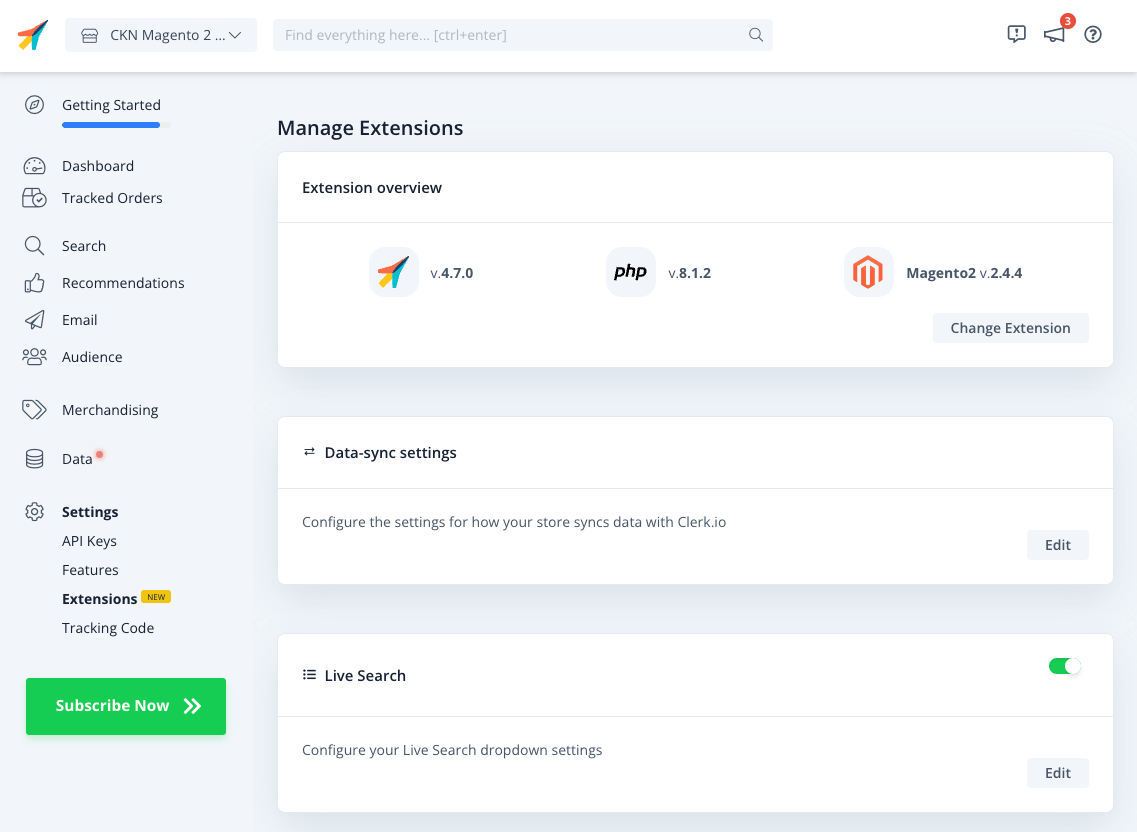
Simply click “Edit” on any setting, to see the available options:
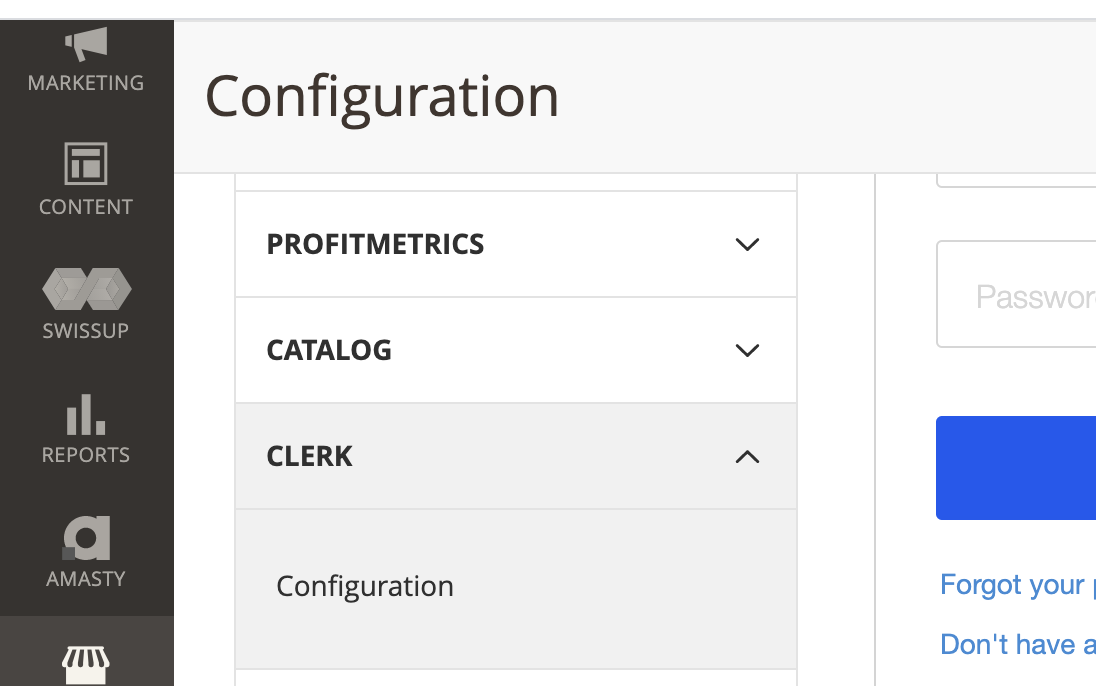
Magento 2 Extension - Overview
To access your Clerk.io extension in the Magento 2, log into your webshop’s admin portal, then follow the path Stores > Settings > Configuration > Clerk > Configuration
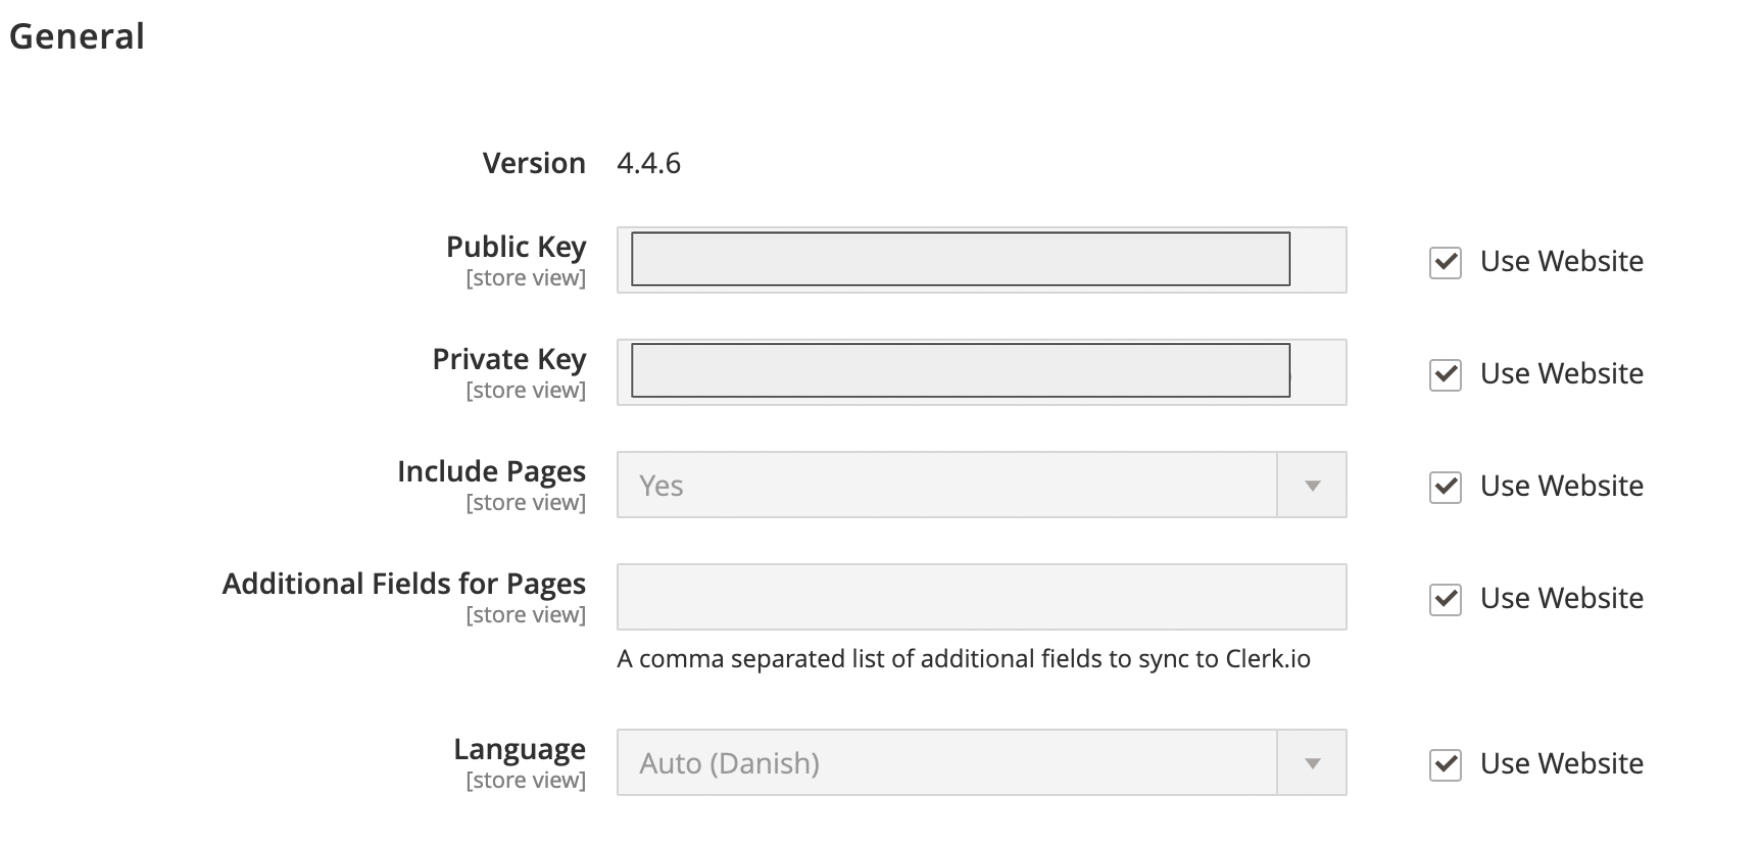
General Settings
You’ll find your Clerk.io Extension version number, as well as your store’s public and private API keys in the General section.
To include Pages in your data sync with Clerk.io, choose “Yes” in the next dropdown, and type in any additional fields you’d like to include with your page data (such as images or page type) as comma separated values.
You can also set the default language for your synced store data in the final dropdown in General.
Synchronization Settings
In the Synchronization section of the Clerk.io plugin, you have the option to customize your synced customer, order, basket, and product data.
Options are greyed out and unavailable for updating when using the website data, indicated by the checked box on the right of each section. Simply uncheck the appropriate box to modify.
Use Real-time Updates: choose “Yes” to enable real-time updates to your data synced with Clerk.io.
Collect Emails: select “Yes” here to sync customer emails
Collect Baskets: to collect basket data and sync to Clerk.io, select “Yes” here
- To add any additional basket data fields, include these as comma-separate values in the “additional fields” section below.
In the next two dropdowns, select “yes” to only synchronize saleable products, and/or only synchronize product with visibility to Clerk.io
Should you need to disable order synchronization, you can do so by choosing “Yes” in this dropdown.

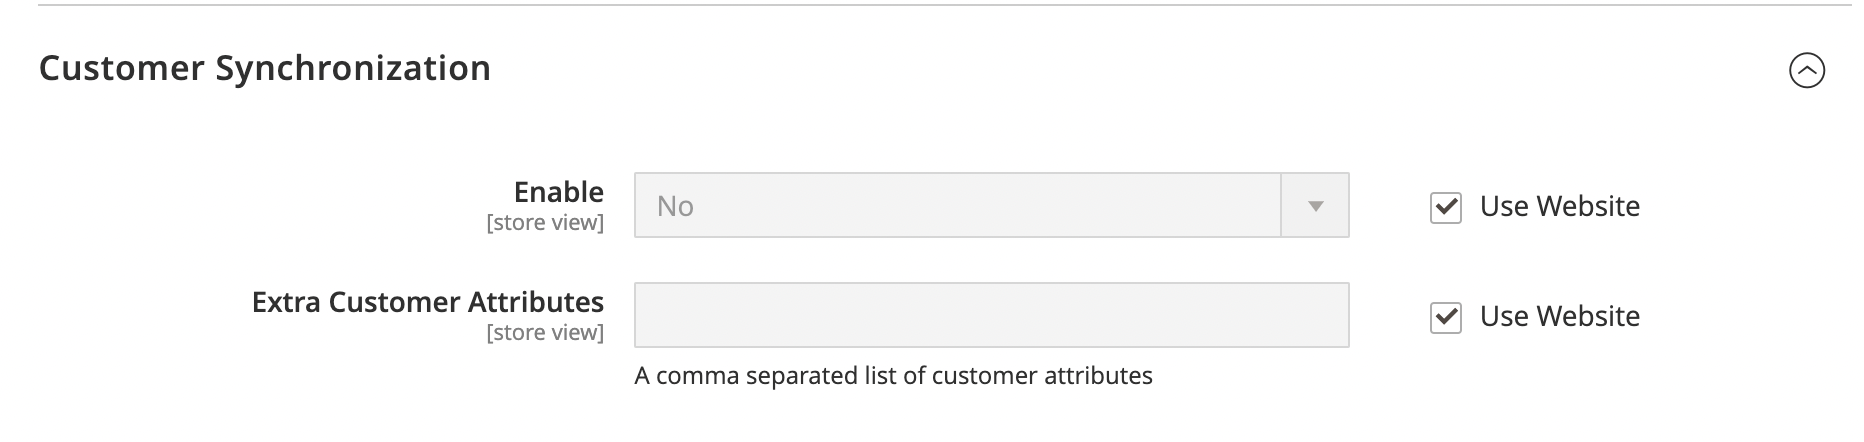
Customer Synchronization Settings
Enable customer data syncs by choosing “Yes” from the dropdown in this section. If you have any extra customer attributes you’d like to include in the Clerk.io sync, type in their values in the text box here as a comma-separated list.
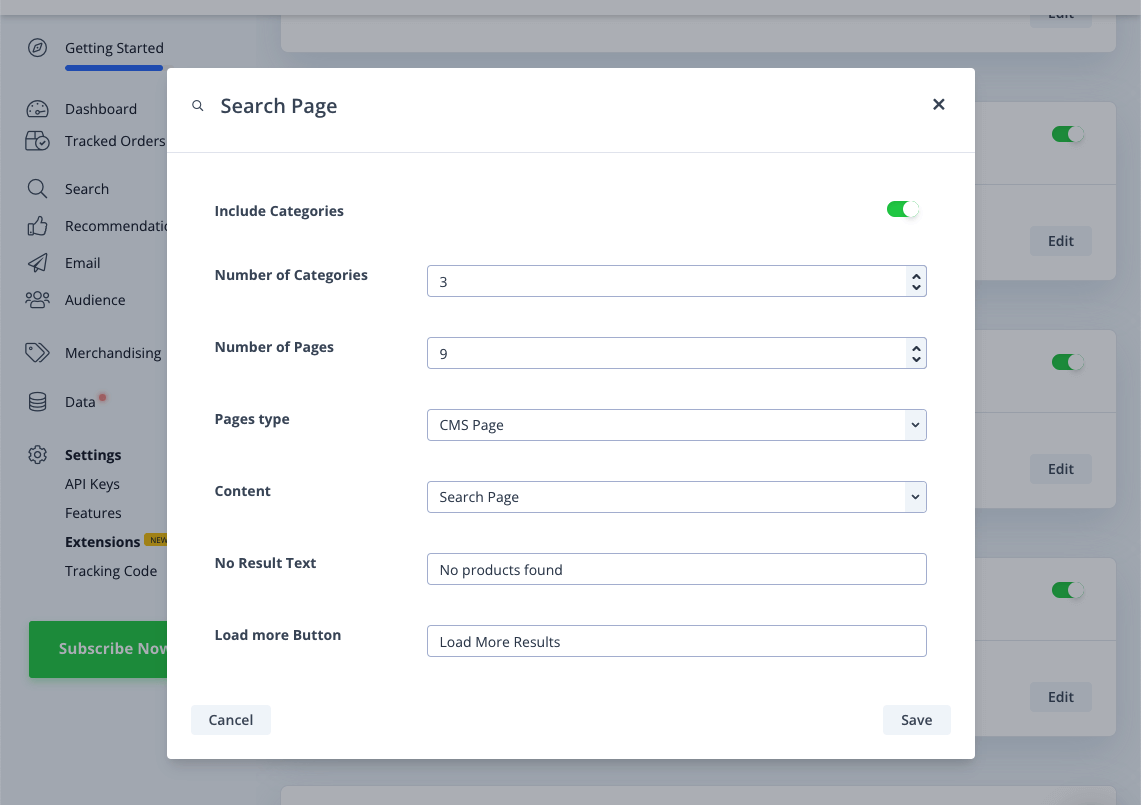
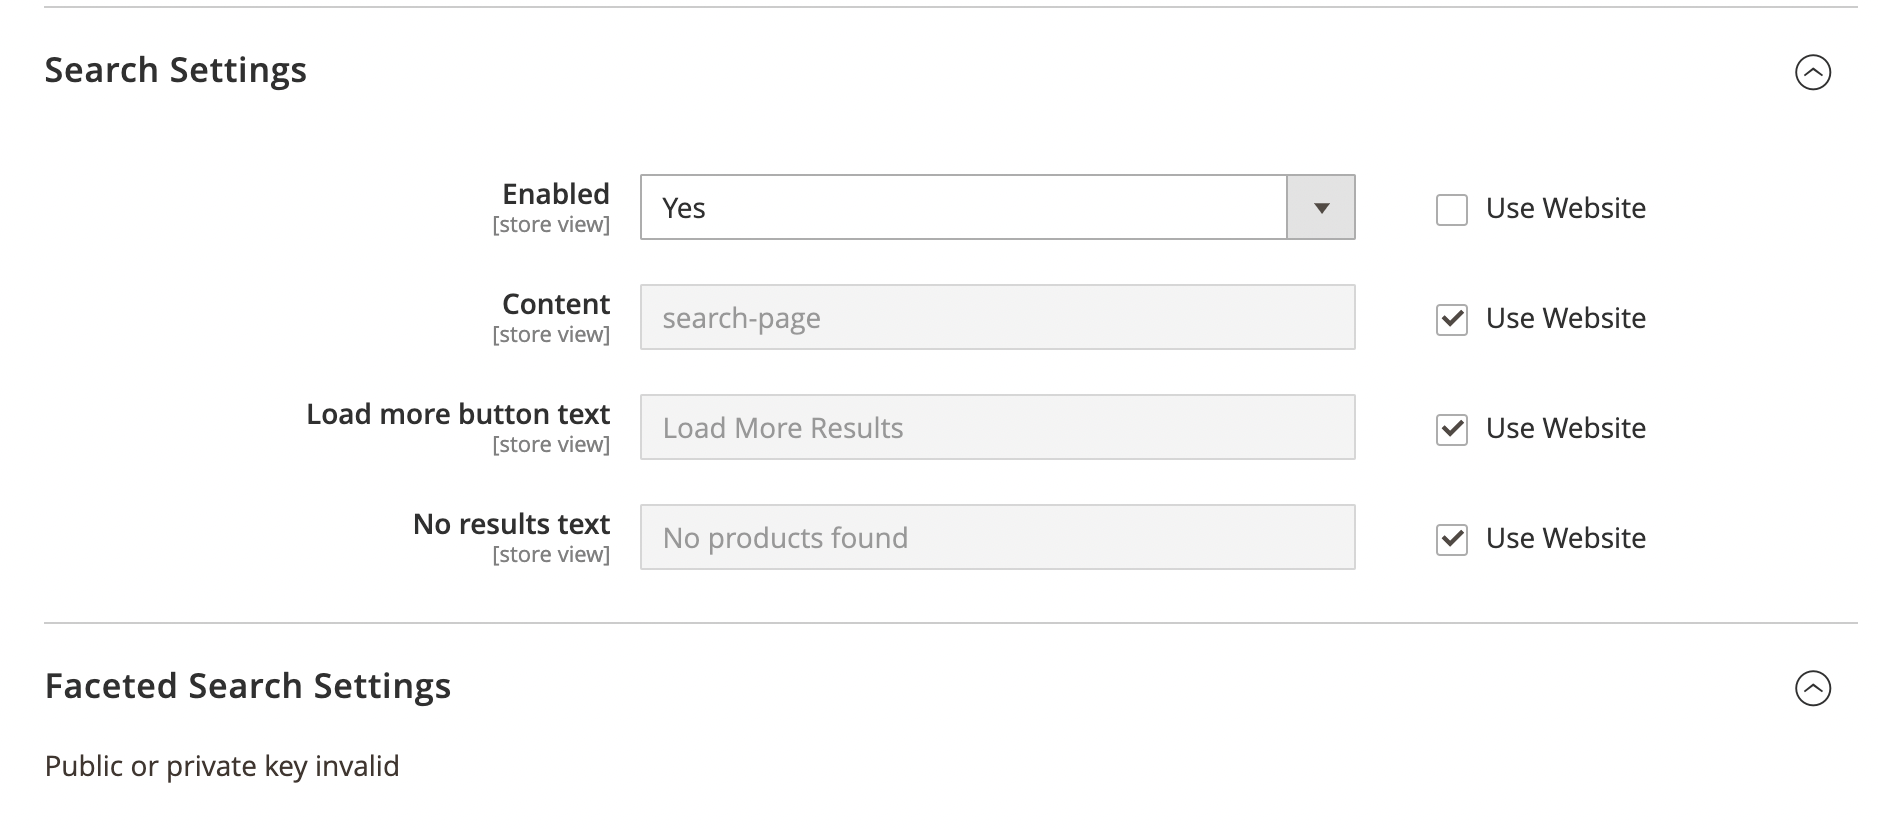
Search Settings
Enable your store’s Search Page by choosing “Yes” in the dropdown here.
After selecting “Enabled”, enter your Search Page Content name, which matches the data-template field found in the embed code of your Content in my.clerk.io. In this example, search-page.
You can set the " load more" and " no results" text displayed by typing the desired phrase in these text boxes.
Live Search Settings
After selecting “Enabled” from the dropdown to enable Live Search, select whether or not you want Categories displayed within your search results.
- You can also select the number of search suggestions, categories, and content results to show within Live Search in addition to your product results.
You also have the option to choose what page types display as search results, for example “CMS Pages”, “Blog Posts”, or “All”.

You can choose the position of the live search dropdown from your search box with Dropdown Positioning.
Provide the Content name for your live search next, which can be found next to data-template in your Live Search embed code within your my.clerk.io Content. This is likely live-search.
Last, you have the option to provide your Live Search Input Selector and Form Selector, which can be found by inspecting your webshop’s search box with your browser, and identifying the ID or class associated with its input and form.
- In this example, #search as the input selector, and using the website is chosen for identifying the form selector.
Faceted Navigation
To add facets to your Search Page, first be sure to select “Enabled” box under Faceted Navigation.
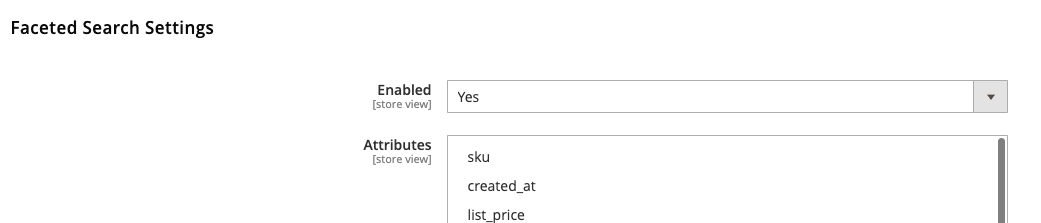
Click on the attributes you would like to add to your facets and click save config.
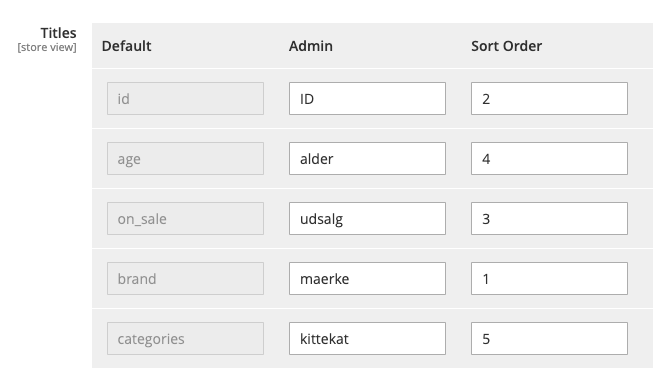
Once added, your added attributes will appear under Titles. In this section, you can create the Title to be display for that facet, and what position in the list of facets you’d like that attribute to appear.
Note: You are now able to call the data for categories and pages in your Search page in the same way you would in your Live search, giving you a larger range of information to engage your customers with. For more information you can check here.
Customising Your Search Page Facets
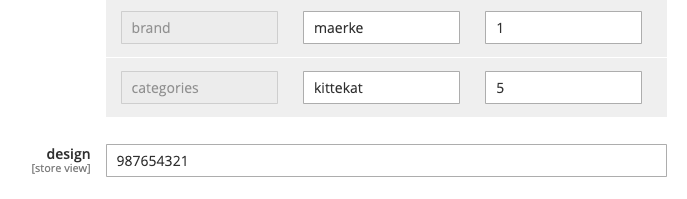
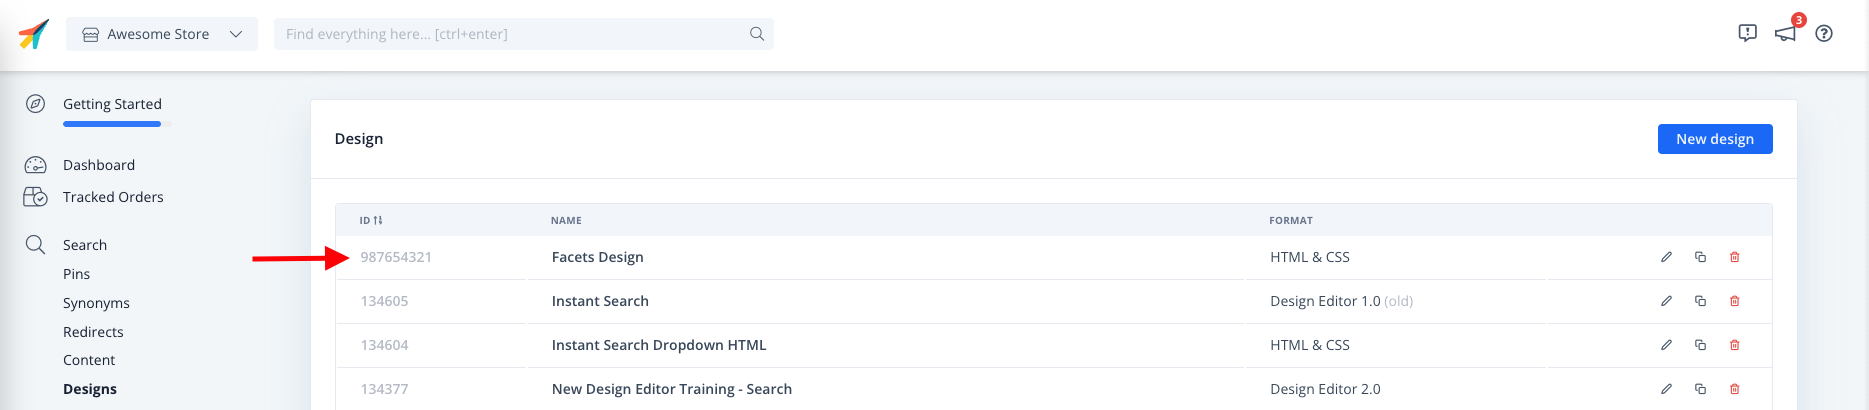
Clerk.io allows you to style your search page facets from within the design and you can display this by referencing it with the design ID field.
The design ID can be found in the Clerk.io backend, on the far left column of each design on the design overview page and in the bottom left of the page once you enter the design to edit.
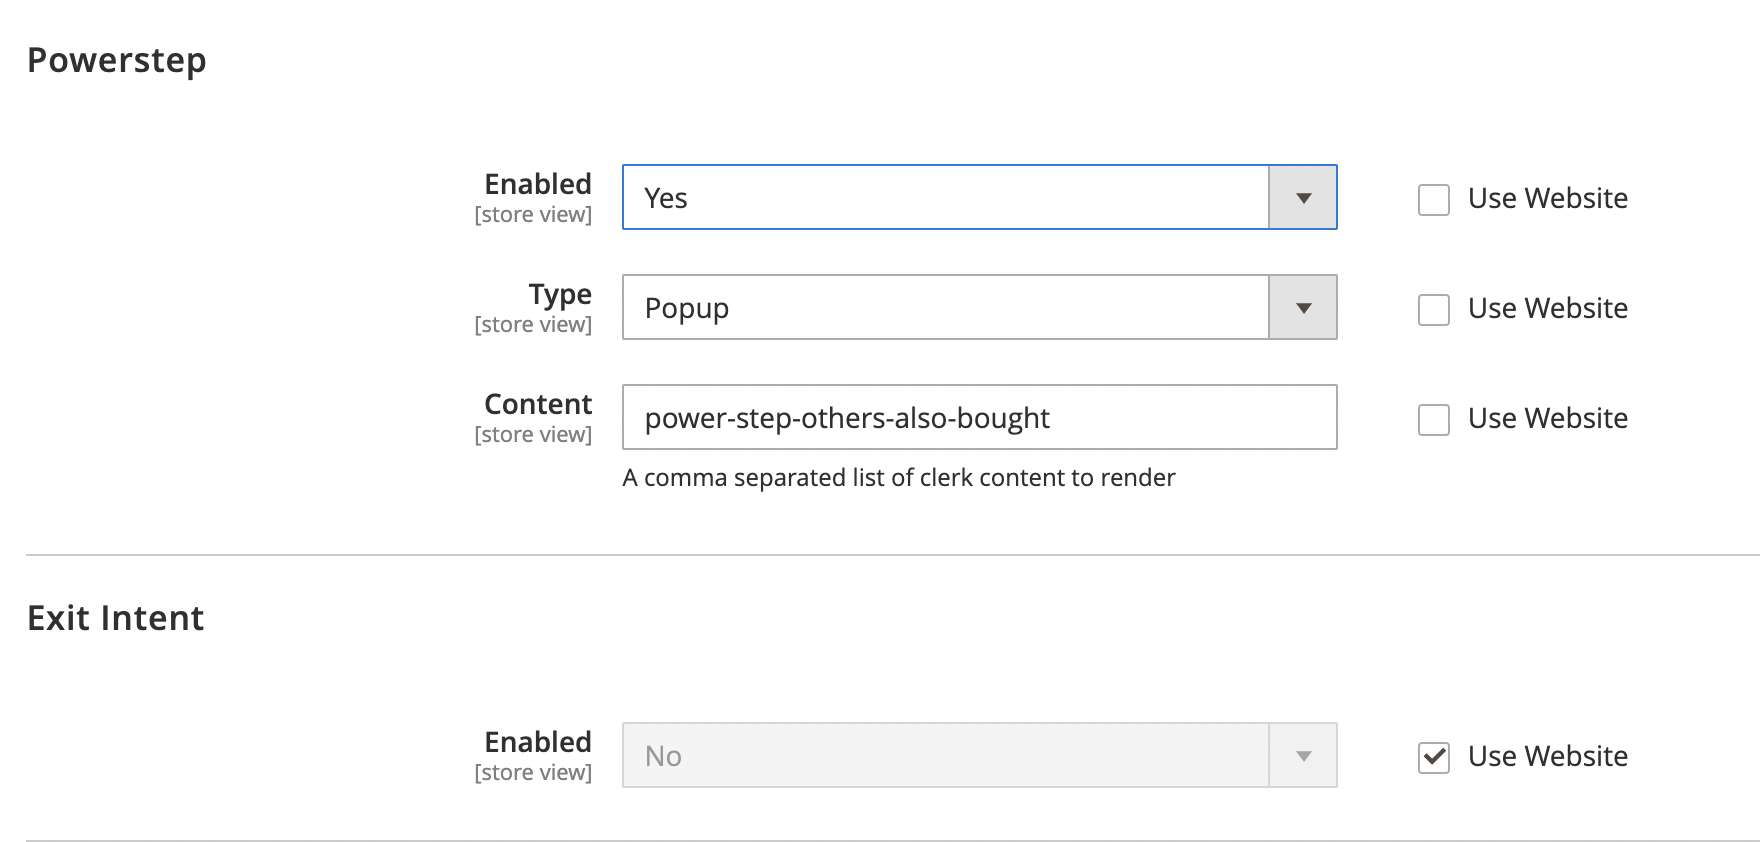
Powerstep and Exit Intent Settings
Similar to Search, enable your Clerk.io Powerstep by selecting “Yes” from the dropdown, then choose the type of powerstep you’d like to appear (either Page or Popup).
Provide the Content name for your Powerstep, which is found next to data-template in the embed code within your my.clerk.io Powerstep Content, power-step-others-also-bought in this example.
Follow the same process as above for enabling your Exit Intent, and identifying and adding the appropriate Exit Intent Content.
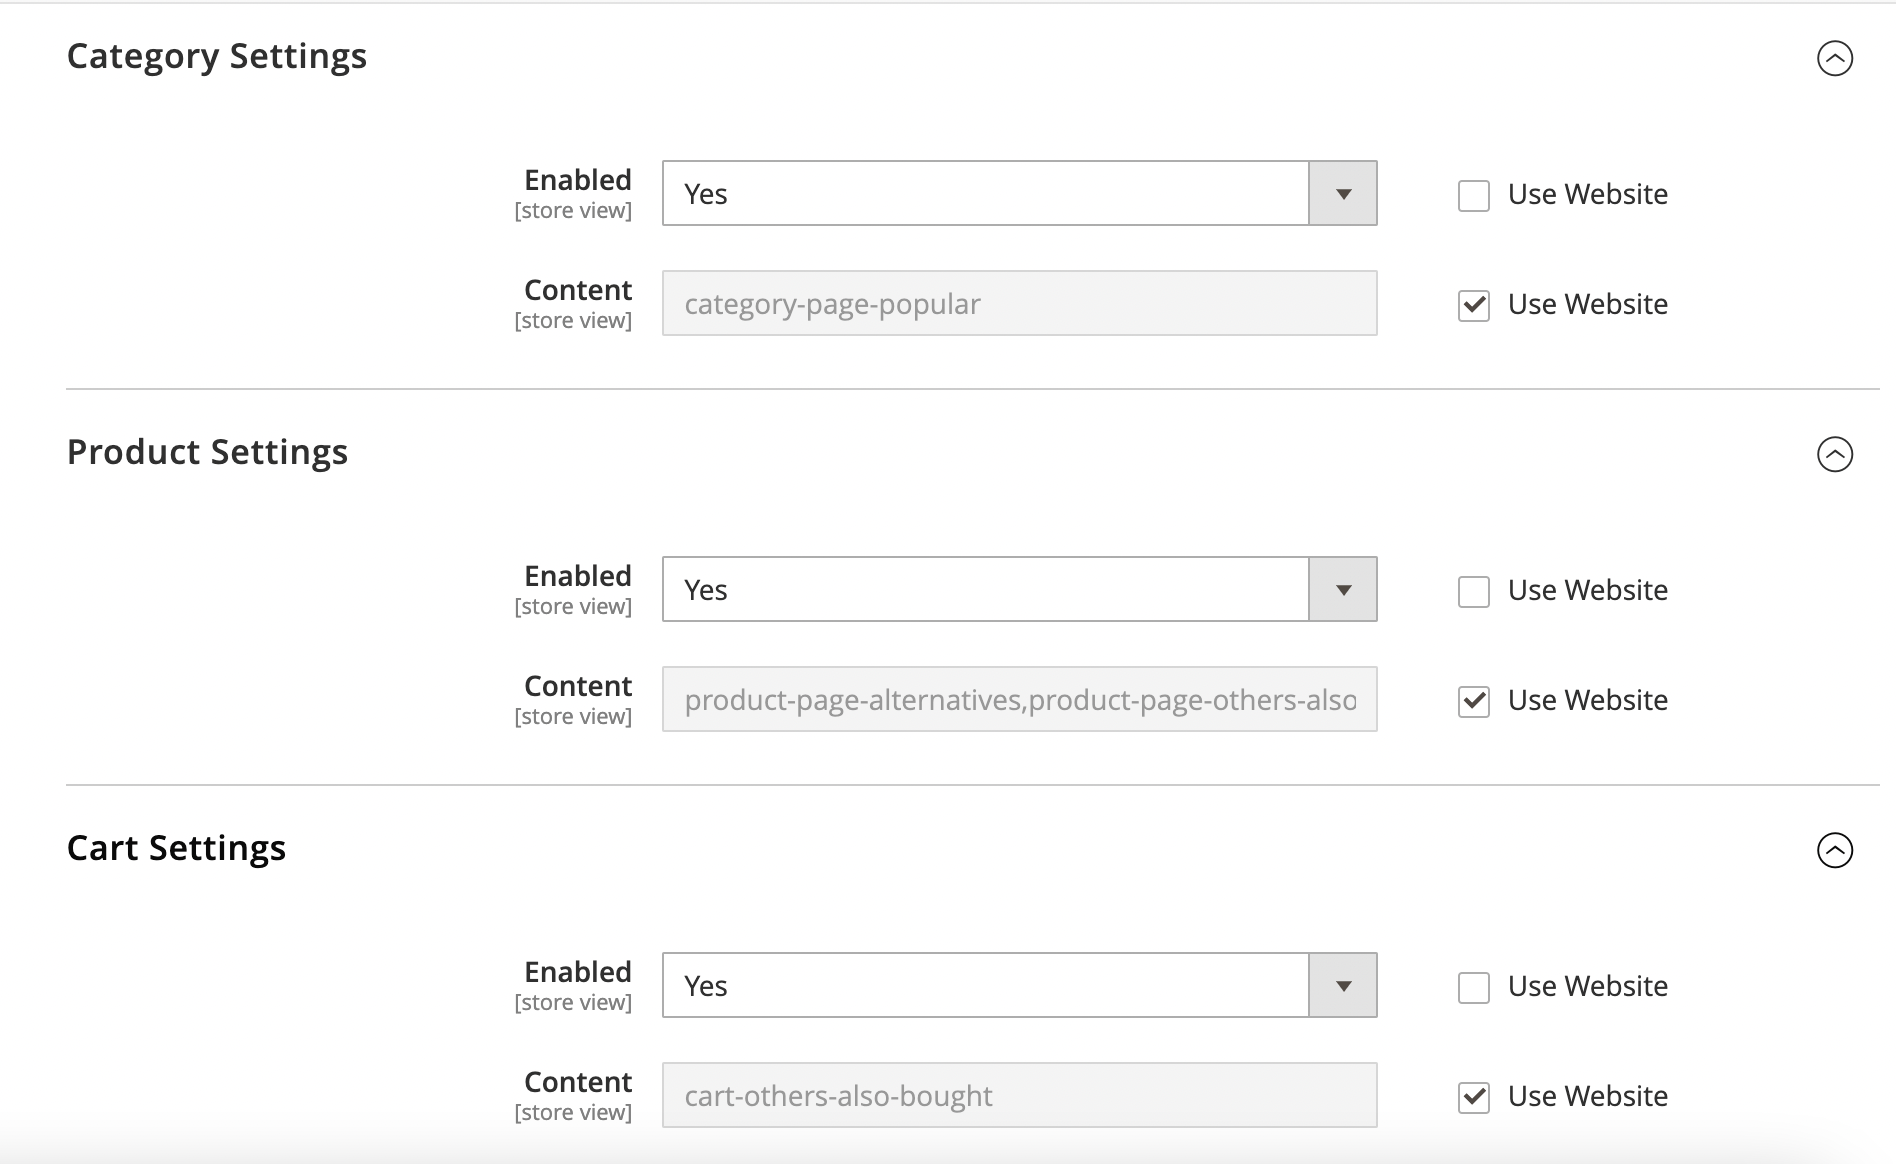
Category, Product, and Cart Page Settings
Also similar to Search, enable your Clerk.io Product, Category, and Cart Page Settings by selecting “Enabled” from the appropriate dropdowns.
- Just like the Search functionalities, you can find the content name next to data-template in the embed code within my.clerk.io > Recommendations > Content.
- In this example, we’ve enabled Product Page, Category Page, and Cart Page settings, and included category-page-popular as our Category Page content, product-page-alternatives and product-page-others-also-bought on our Product Page, as well as cart-others-also-bought as our Category Page content.