Cookieless
May 1, 2023
We believe everyone deserves privacy and a great shopping experience.
That’s why we’ve chosen to publicly disclose our tracking technology, enabling everyone to create a more private internet.
This article explains how our cookieless technology allows visitors to stay private while receiving a personalized experience, while also providing you with detailed analytics.
...Get Started
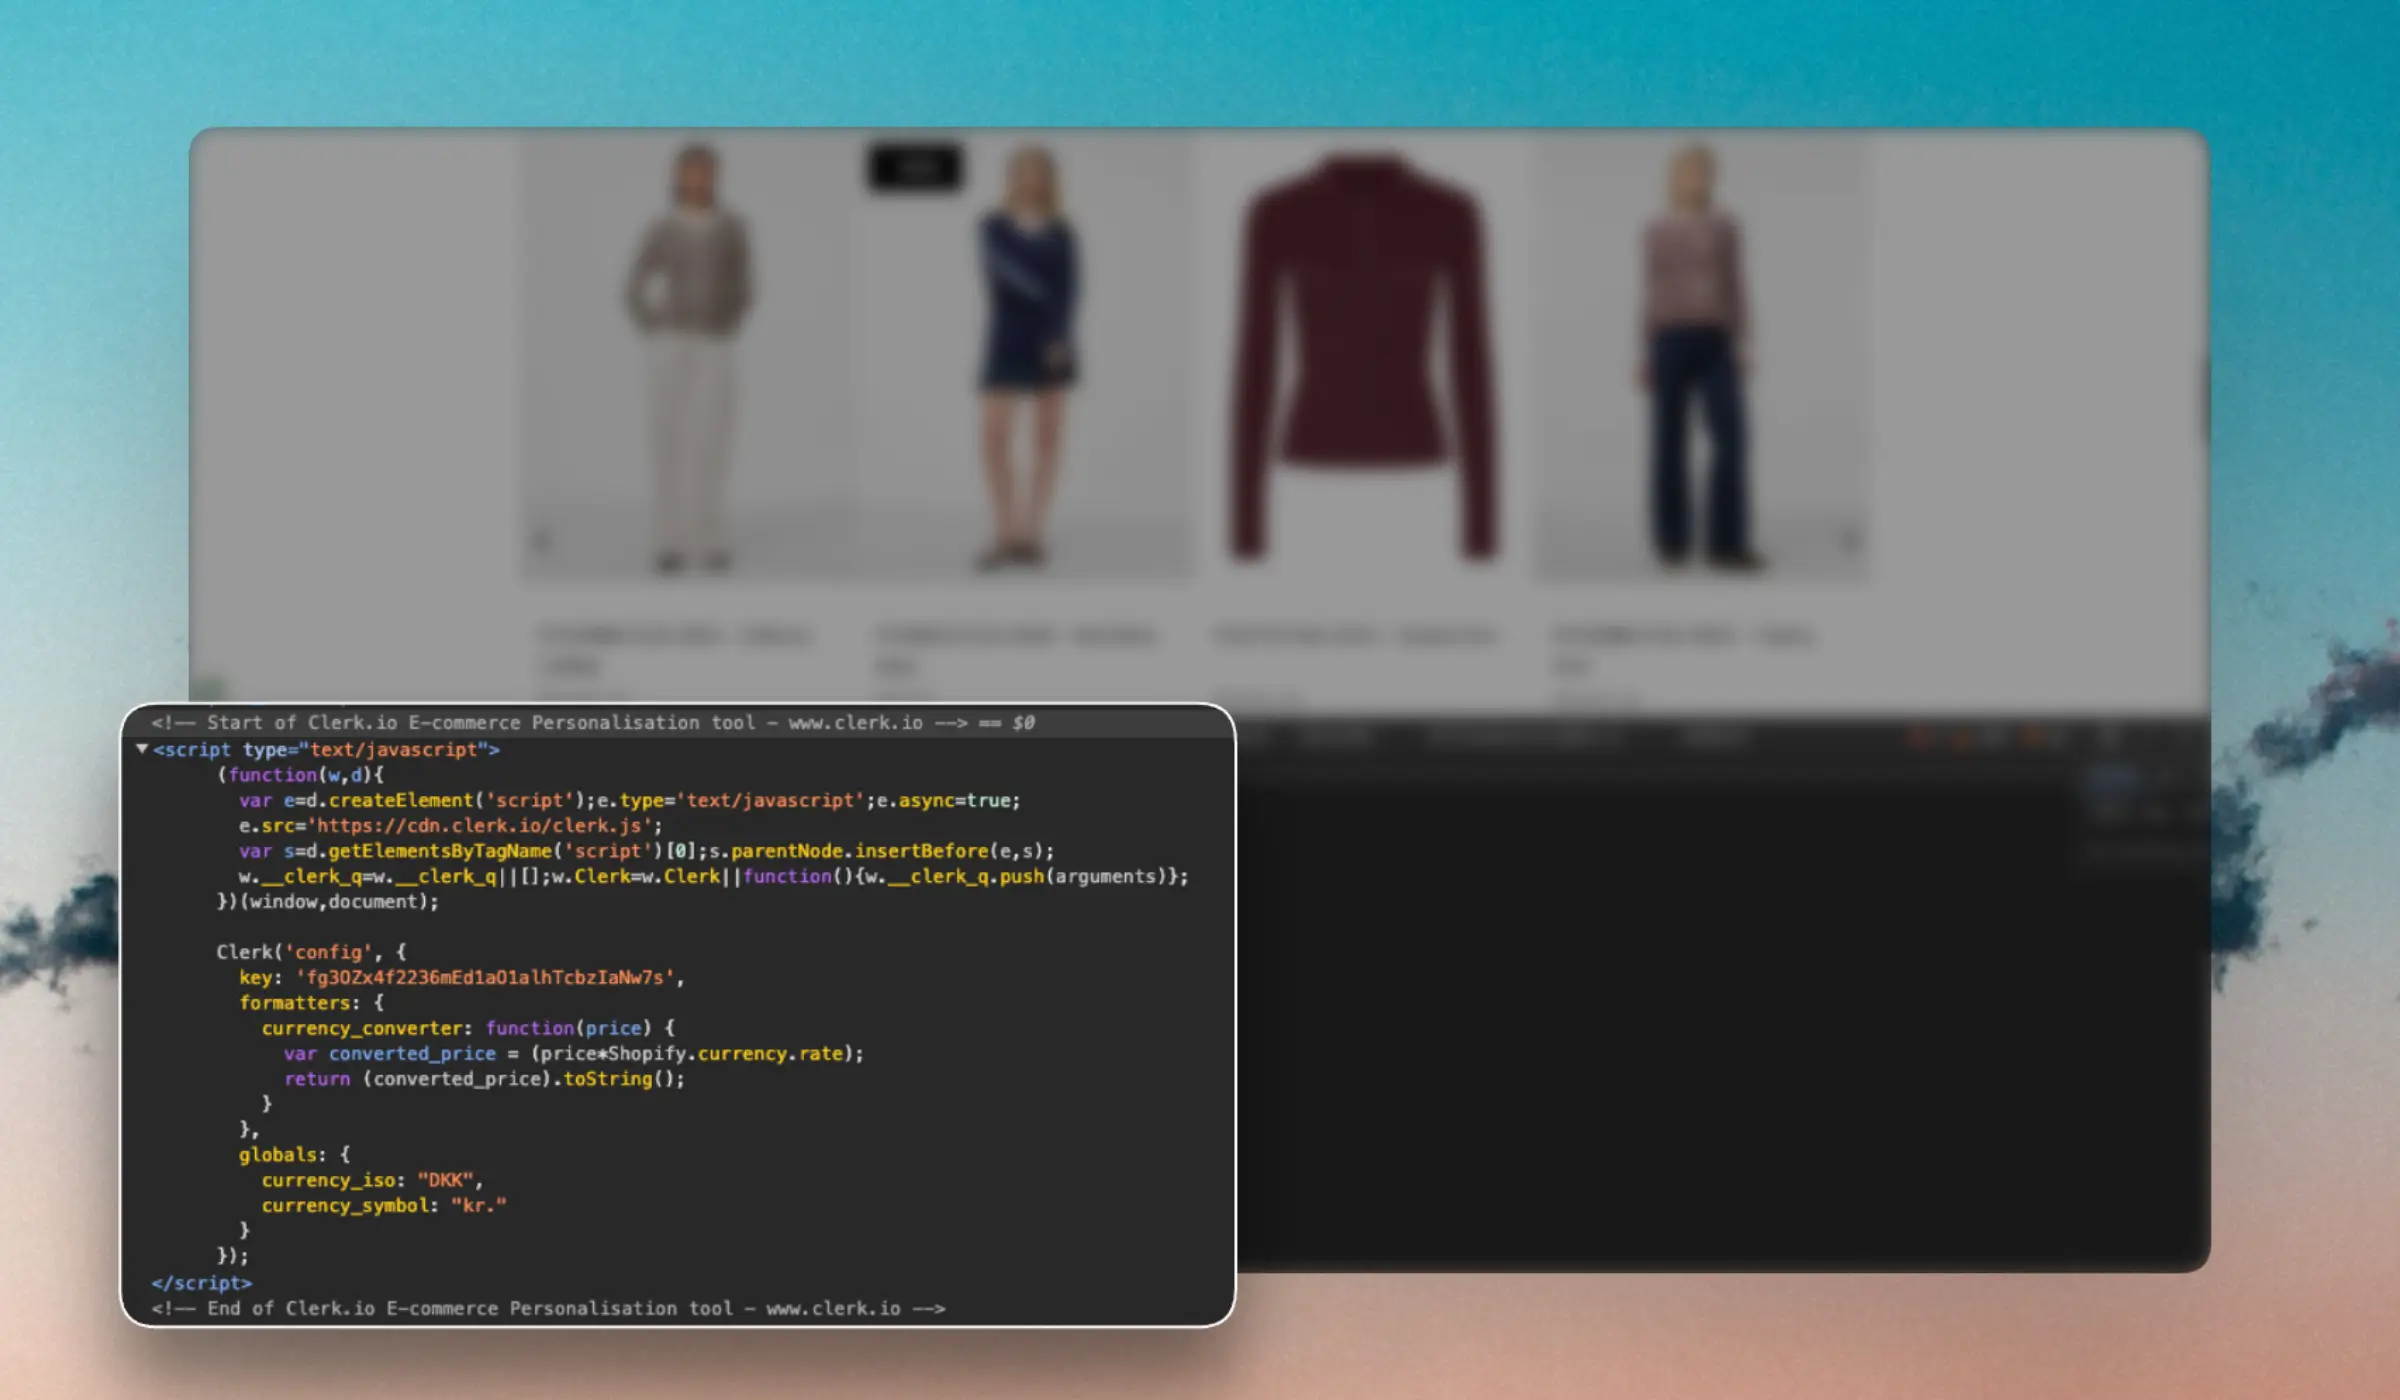
When Clerk does not have a prebuilt extension or integration for a given webshop platform, we refer to it as a custom platform.
The biggest difference is that custom platforms should sync with a Data Feed and insert Clerk.io results into the frontend.
This guide explains how to install Clerk on a custom platform using Clerk.js. This is the recommended approach as it takes care of much of the heavy lifting in terms of tracking and API calls.
...Overview
Integration #
Clerk.io integrates with your BigCommerce store through the BigCommerce integration. This integration enables seamless data synchronization between BigCommerce and Clerk.io.
Setup #
The integration can be configured by following the steps in the Get Started guide.
Supported Versions #
The integration is API account based and supports any version of BigCommerce.
Data Flow #
When the integration is configured, it automatically sets up API endpoints to fetch the following data from BigCommerce:
...Overview
App #
Clerk.io integrates with your Dandomain Classic store through the Dandomain Classic App. This App enables seamless data synchronization between Dandomain Classic and Clerk.io.
Setup #
The App can be installed and configured by following the Get Started guide.
Supported Versions #
The App supports any version of Dandomain Classic.
Data Flow #
When the App is configured, it automatically sets up API endpoints to fetch the following data from Dandomain Classic:
...Overview
SDK #
Clerk.io integrates with your DynamicWeb store through the DynamicWeb SDK. This SDK includes the files for the REST API that enables seamless data synchronization between DynamicWeb and Clerk.io.
Setup #
The SDK can be configured by following the instructions in the Get Started guide.
Supported Versions #
The SDK is API-based and therefore supports any version of DynamicWeb.
Data Flow #
When the SDK is configured, it sets up REST API endpoints to fetch the following data from DynamicWeb:
...Overview
Plugin #
Clerk.io integrates with your JTL store through the plugin. This plugin enables seamless data synchronization between JTL and Clerk.io while allowing you to incorporate Clerk.io elements into your store effortlessly.
Setup #
The installable plugin can be downloaded and installed by following the instructions in the Get Started guide as well as the documentation made by Solution 360.
Supported Versions #
The plugin supports JTL-Shop version 5.1 + (and the included libraries). For any other version, you can still implement Clerk.io by following the Custom Integration guide. Check the Solution 360 changelog for additional updates and information.
...Overview
Integration #
Clerk.io integrates with your Lightspeed store through the integration. This integration enables seamless data synchronization between Lightspeed and Clerk.io while allowing you to incorporate Clerk.io elements into your store effortlessly.
Setup #
The integration can be configured by following the instructions in the Get Started guide.
Supported Versions #
The integration is API-based and therefore supports any version of Lightspeed.
Data Flow #
When the Integration is installed and configured, it automatically sets up API endpoints to fetch the following data from Lightspeed:
...Overview
Extension #
Clerk.io integrates with your Magento 1 store through the extension. This extension enables seamless data synchronization between Magento 1 and Clerk.io while allowing you to incorporate Clerk.io elements into your store effortlessly.
Setup #
The extension can be installed and configured by following the instructions in the Get Started guide.
Supported Versions #
The extension supports Magento 1 version up to 1.9.
Data Flow #
When the Extension is installed and configured, it automatically sets up API endpoints to fetch the following data from Magento 1:
...Overview
Extension #
Clerk.io integrates with your Magento 2 store through the extension. This extension enables seamless data synchronization between Magento 2 and Clerk.io while allowing you to incorporate Clerk.io elements into your store effortlessly.
Setup #
The extension can be installed and configured by following the instructions in the Get Started guide.
Supported Versions #
The extension supports Magento 2 version up to 2.4.x.
Data Flow #
When the Extension is installed and configured, it automatically sets up API endpoints to fetch the following data from Magento 2:
...