Email Recs
Prepare Mergetags #
Clerk.io needs to retrieve the email address of a recipient from the email client to show personalised recommendations.
In some cases this requires you to enable this tag to be captured.
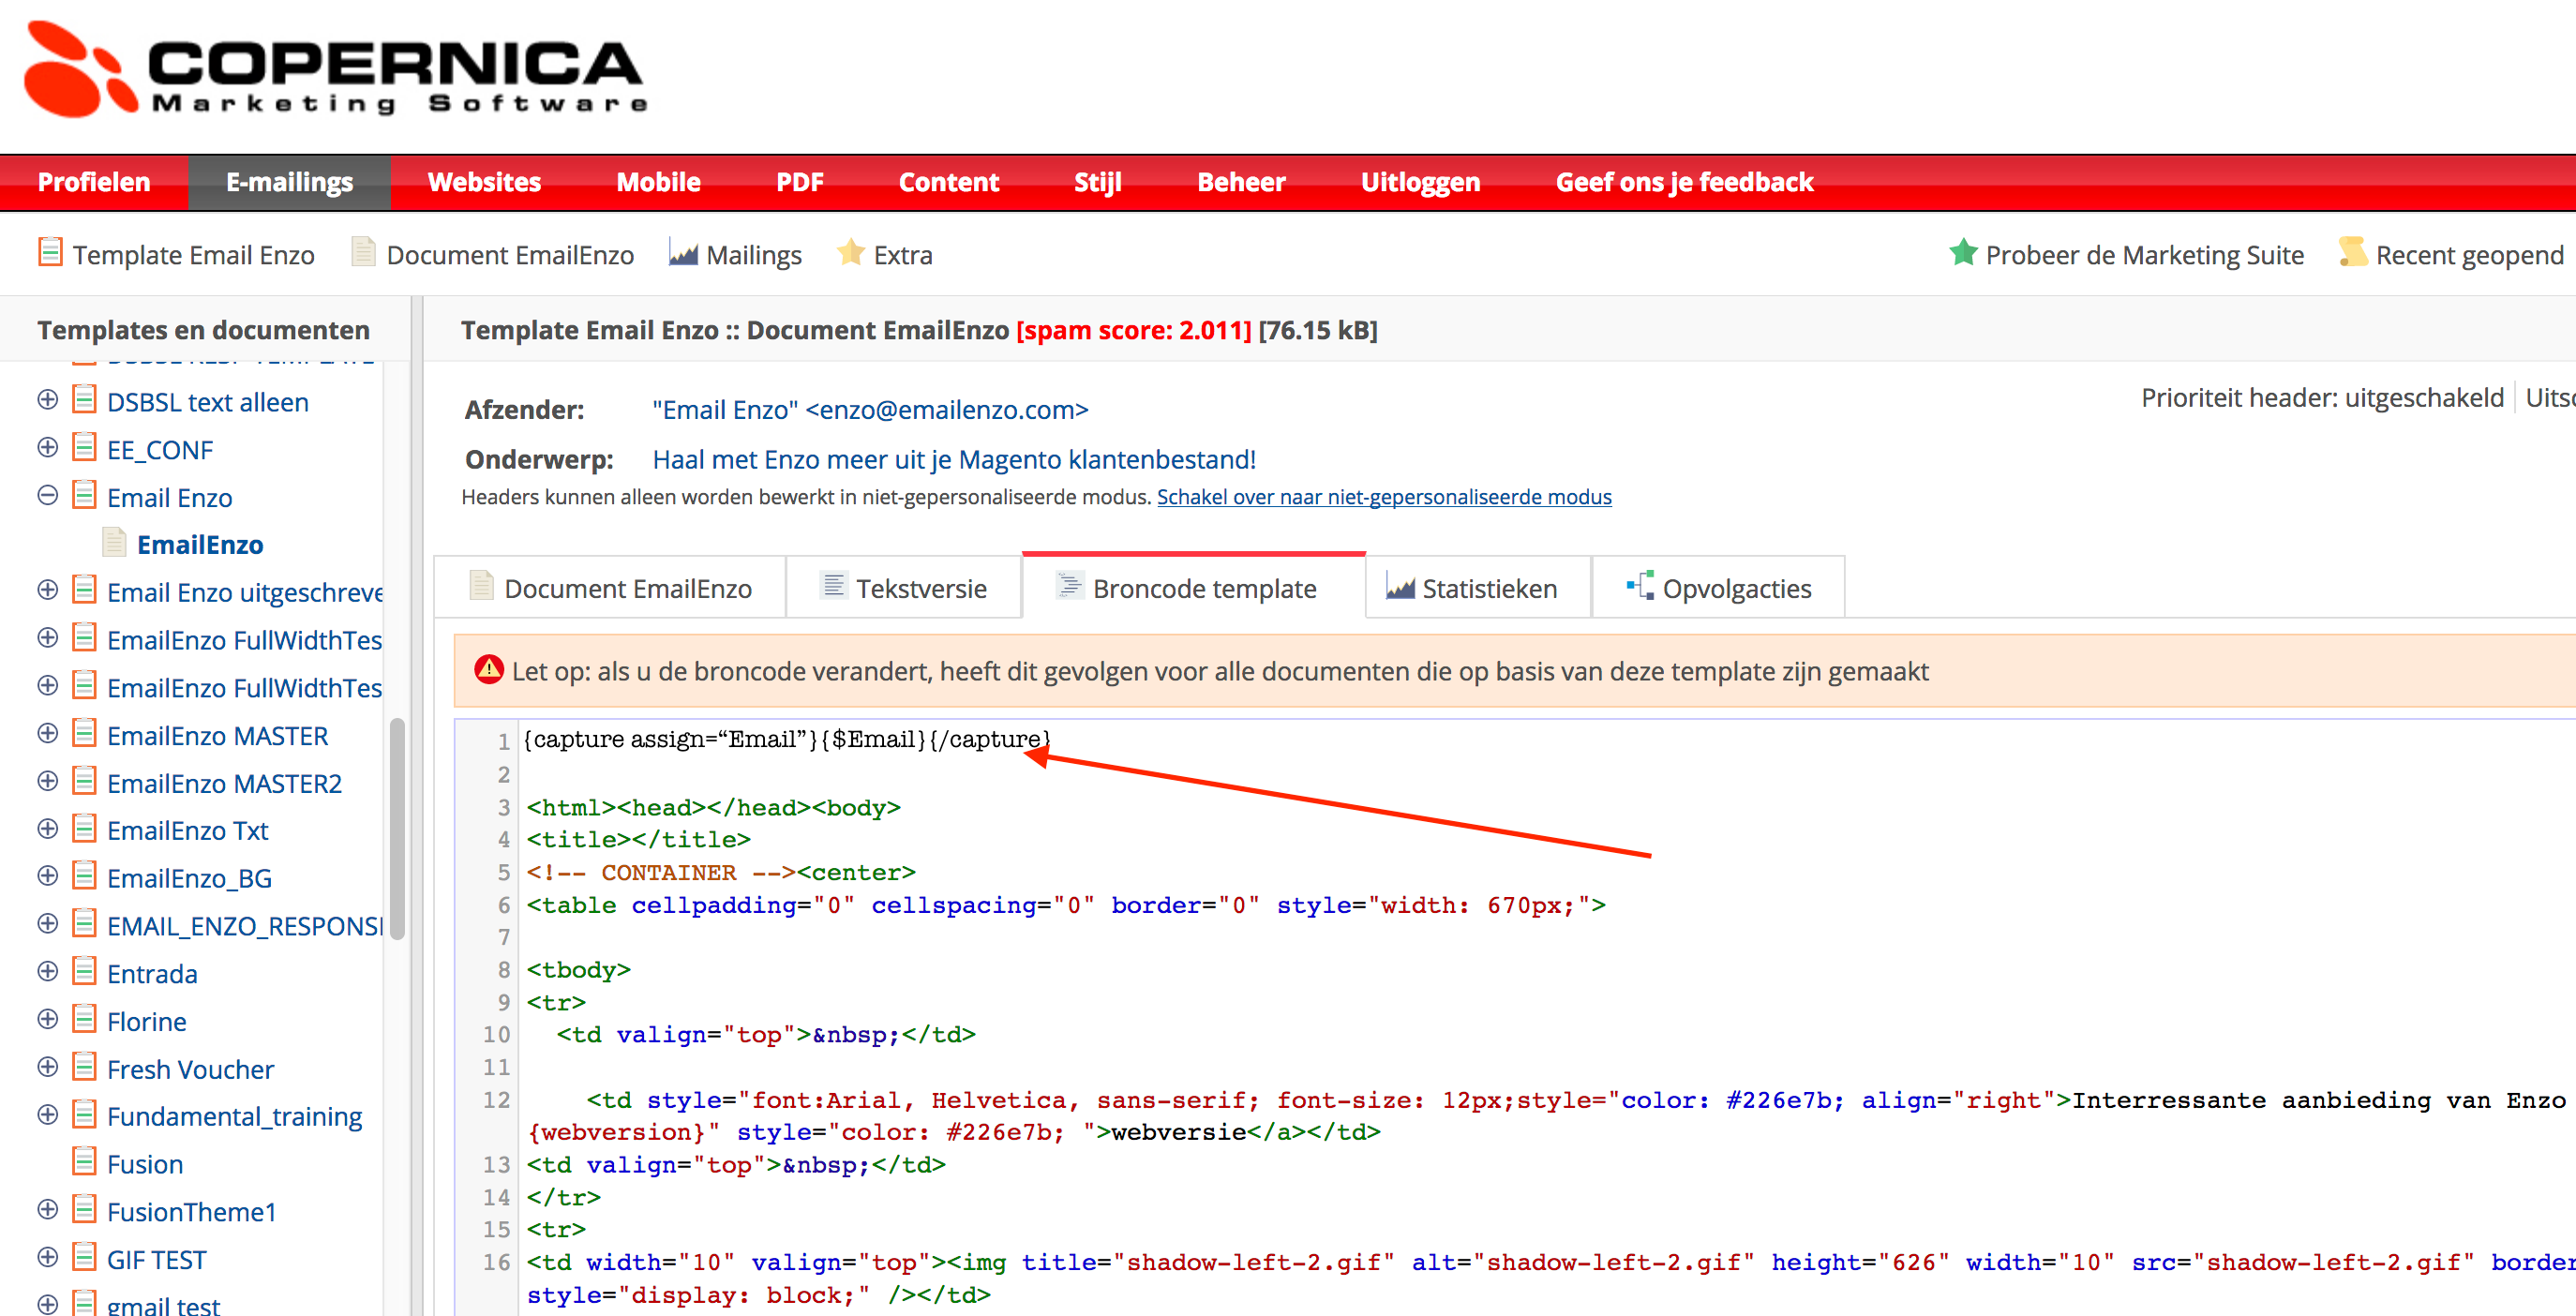
Navigate to Emails and choose an email from the list.
In here, go to the section where you can manipulate the HTML.
In here, insert {capture assign=“Email”}{$Email}{/capture} in the top:
Sync Data
Clerk never pushes new email addresses to Active Campaign. We update existing contacts and lists, based on email addresses already in the platform.
Configure Integrations #
Follow these steps to set up the sync:
In my.clerk.io, go to Settings > Integrations
Click New Exporter and choose Copernica. This will give you access to the fields you need to fill out.
...
Dandomain Classic
Dot Digital
Email Recs
Before you start!
DotDigital requires Advanced Personalisation to be activated for the embedcodes to work.
1. Create an Email Design #
The first thing you have to do is create a Design for your emails. You can create as many different designs as you want and each Design can be used across many different recommendations blocks.
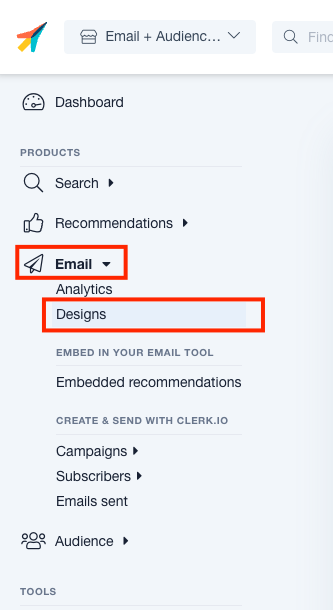
1. In my.clerk.io backend, head to the menu on the left hand side. Click Email -> Designs.
...Drip
Email Recs
Before you start!
Make sure that you have made the initial integration on the webshop so that Clerk.io is synced with your product catalog and order history.
1. Create an Email Design #
The first thing you have to do is create a Design for your emails. You can create as many different designs as you want and each Design can be used across many different recommendations blocks.
- In my.clerk.io backend, head to the menu on the left hand side. Click Email -> Designs.
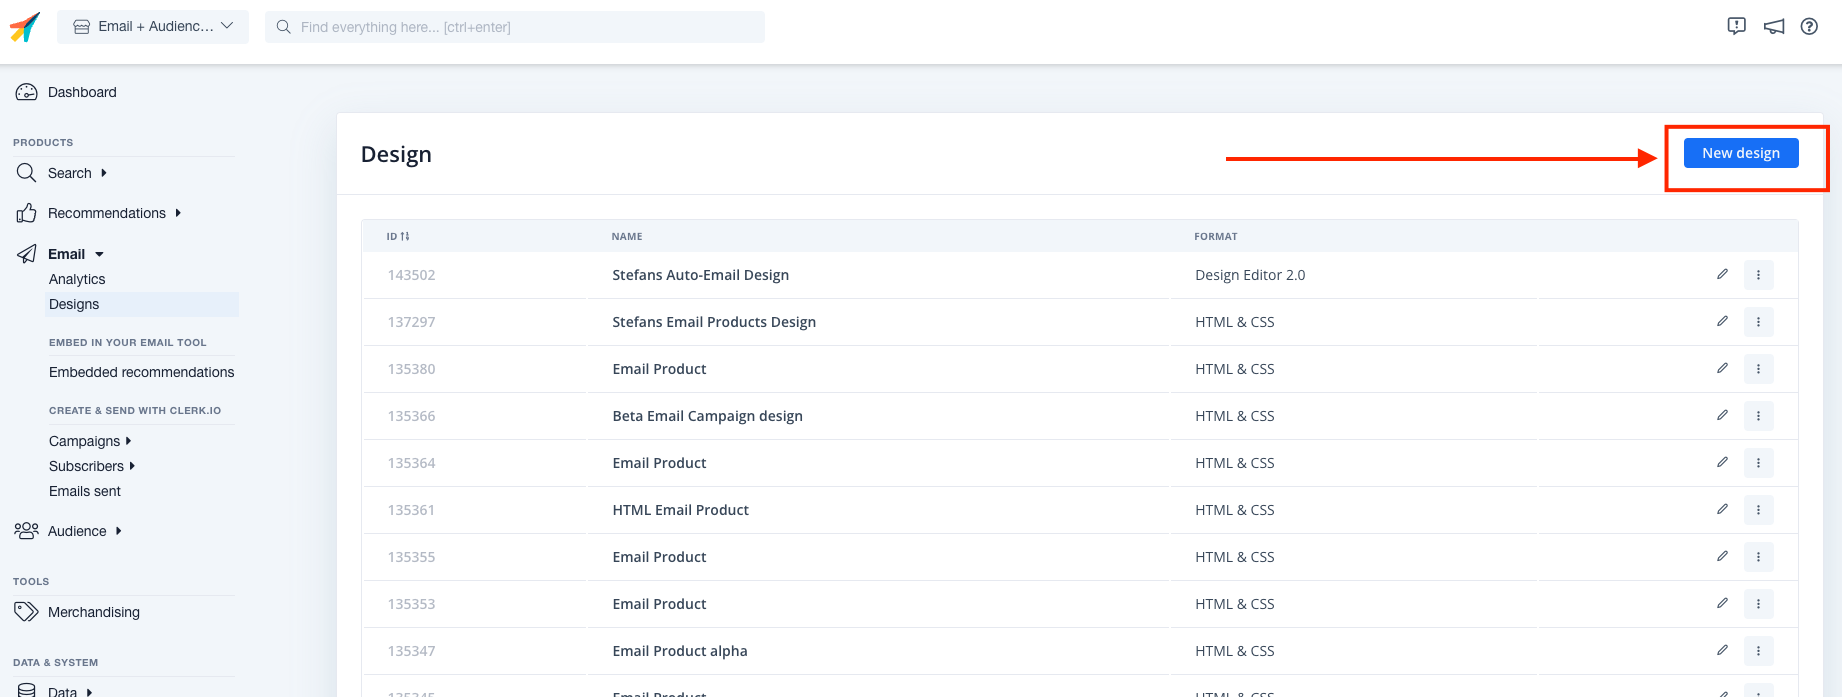
- Click New Design.
3. Select the design type, the type of content and Name the design. Then click Create Design.
...Sync Data
Integration Setup #
To maintain Audiences in Drip, you need your Drip Account ID and Drip API Token.
In my.clerk.io, go to Settings > Integrations and click New Exporter.
From the dropdown, select Drip and give it a name of your choice.
In Drip, go to Settings > General Info. Your Account ID should be visible here.
- You can also find the account ID in your URL at
https://www.getdrip.com/XXXXXX/dashboard XXXXXXis your account ID.
- You can also find the account ID in your URL at
Copy this to the Account ID field in my.clerk.io.
...