General
#
Website Content makes it easy to work with Recommendations and Search results.
The
Designs are stored at Clerk.io, and you only need to insert a small embed code into the page where you want products to show. This can be done by using the
Embedded Code section or the
Injection section.
Any number of Content blocks can be based on a single Design, or you can create separate Designs for each Content.
...Creating an Email Design
#
In my.clerk.io, go to Email -> Designs.
Click New Design and give it a name.
Choose Email, and optionally, pick either a starting Design.
Style the email Design to your liking.
Click Update Design.
Choosing a Product Logic
#
Go to Email -> Content, and create a new Content block.
In the Content Page, under Choose Product logic, you can choose what type of recommendations to show:
...
Overview
#
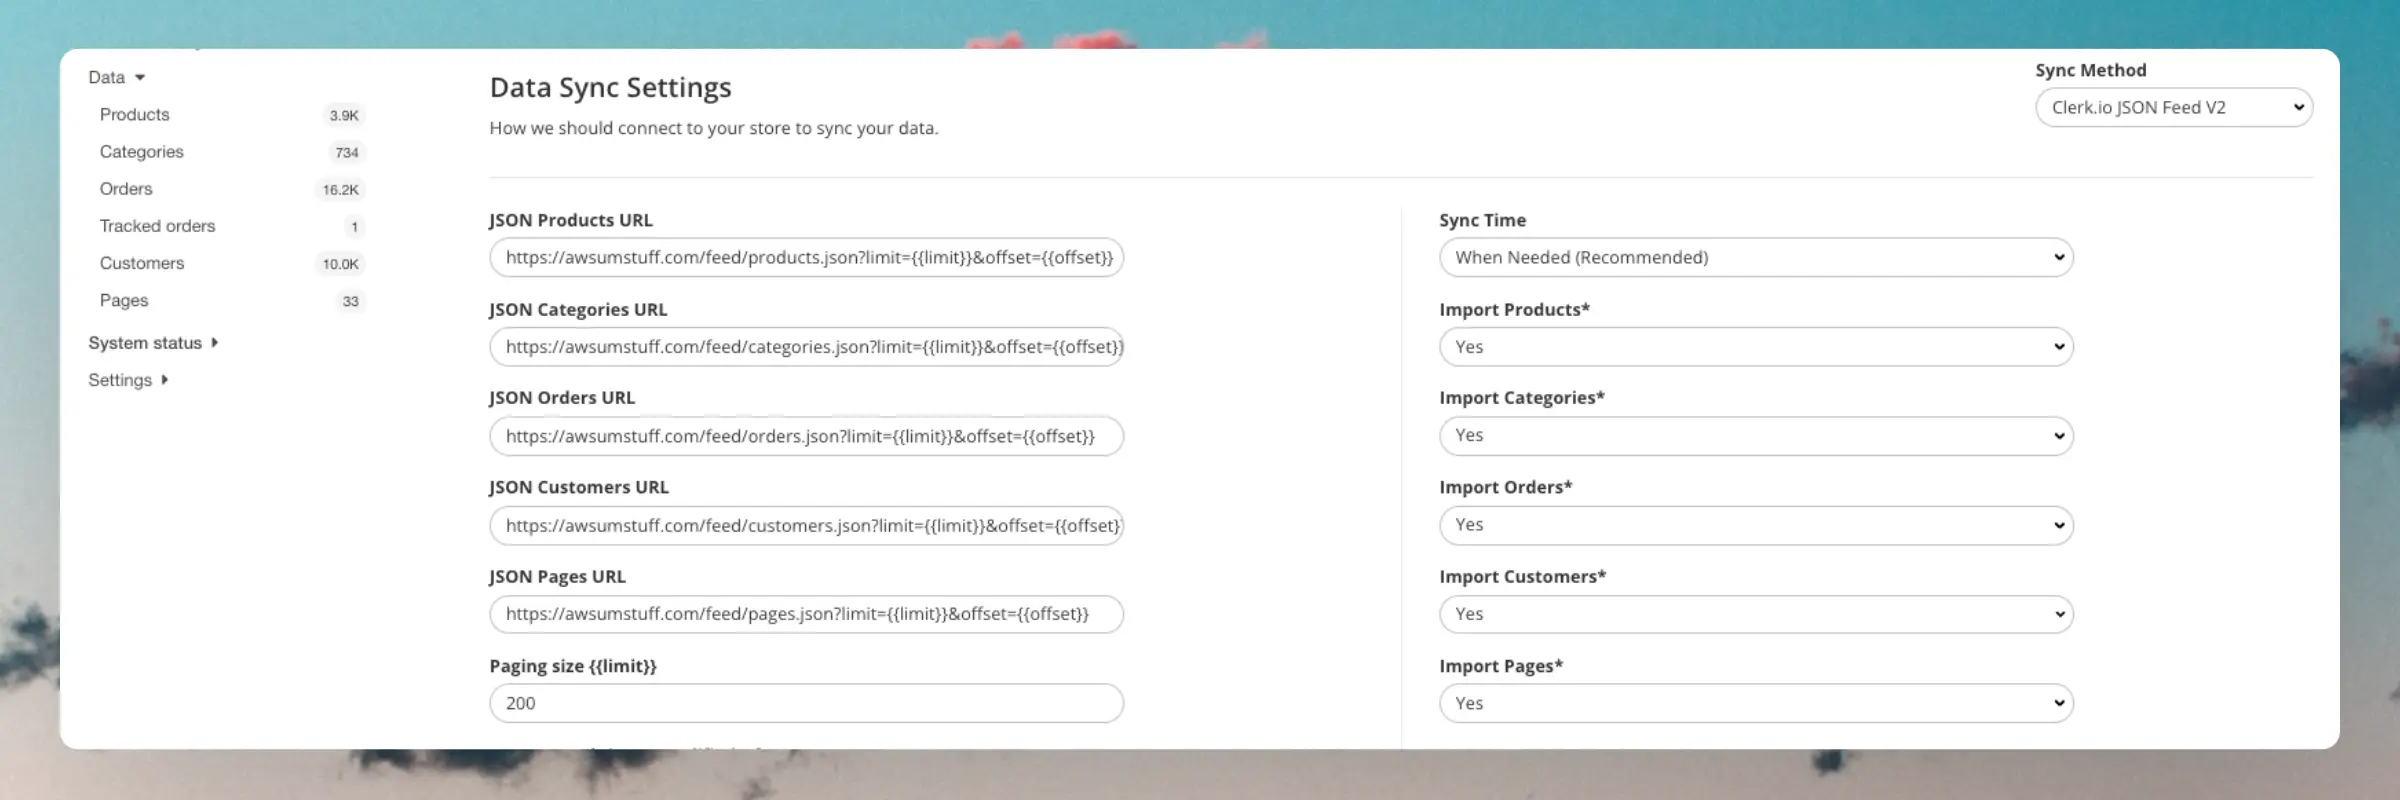
Regardless of your eCommerce platform, and whether we have an integration or not, you can always sync data with Clerk.io through one or more feeds in JSON format.
We support two different variations of the feeds:
- Multiple files for different objects
- A single file containing all objects
The two solutions use the same object structure, but have various features available for securing and importing them, which are outlined in this guide.
...Connecting your Store
#
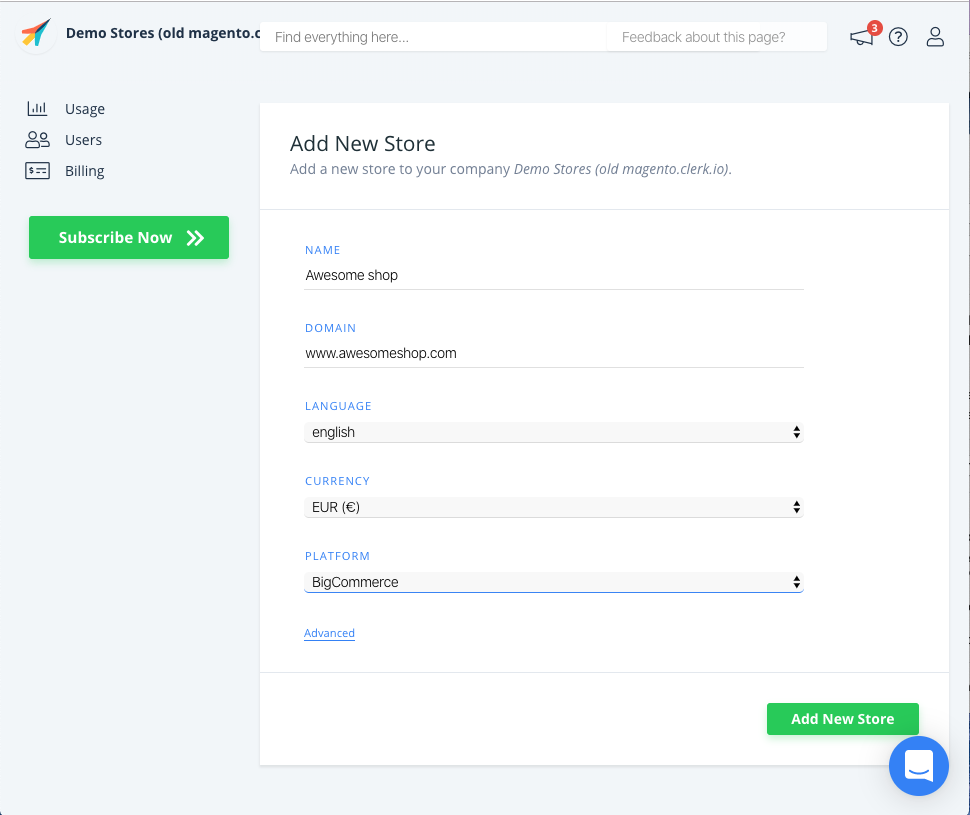
1. Add Store
#
After logging in to
my.clerk.io, the first thing you need to do is add your store:
Write the Name and Domain of your online store.
Choose the Language and Currency, and Choose BigCommerce as the Platform.
Click Add Store.
To successfully configure your BigCommerce store you will need to go to the backend of your online store and in the Advanced Settings->API Accounts. From here you will create a new API Account:
...Connecting your Store
#
The first step of installing Clerk.io, is connecting your store with your
Clerk.io account.
After following these simple steps you will be able to see your Demo Store, which gives you a personal overview of how
Clerk.io will work on your webshop, before setting up the rest of the system.
1. Add Store
#
After logging in to
my.clerk.io, the first thing you need to do is add your store:
...Installing SDK
#
Setup Data Sync
#
The SDK gives you the tools to get started with building indexes for Clerk. You should be sure to build the indexes regularly with scheduled tasks so Clerk is kept up-to-date. We recommend updating them at least once a day.
For synchronisation of data to Clerk.io, we have to set up a REST API, with access to the necessary data. (Products, Orders, Categories, Pages and Customers).
...Connecting your Store
#
The first step of installing Clerk.io, is connecting your store with your
Clerk.io account.
After following these simple steps you will be able to see your Demo Store, which gives you a personal overview of how
Clerk.io will work on your webshop, before setting up the rest of the system.
1. Add Store
#
After logging in to
my.clerk.io, the first thing you need to do is add your store:
...Connecting your Store
#
After following these simple steps you will be able to see your Live Demo, which gives you a personal overview of how
Clerk.io will work on your webshop, before setting up the rest of the system.
1. Add Store
#
After logging in to
my.clerk.io, the first thing you need to do is add your store:
...Connecting your Store
#
The first step of installing Clerk.io, is connecting your store with your
Clerk.io account.
The video belows shows you what to do, step-by-step. Use the rest of the guide as a reference :)
After following these simple steps you will be able to see your Live Demo Store, which gives you a personal overview of how
Clerk.io will work on your webshop. Reach out to your Clerk.io contact person to see the Live Demo.
...Connecting your Store
#
The first step of installing Clerk.io, is connecting your store with your
Clerk.io account.
After following these simple steps you will be able to see your Demo Store, which gives you a personal overview of how
Clerk.io will work on your webshop, before setting up the rest of the system.
1. Add Store
#
After logging in to
my.clerk.io, the first thing you need to do is add your store:
...