Each Clerk setup is configured on a
Store in my.clerk.io. This will contain all the data you upload, and allow you to interact with it through its Public API key.
If it is the first time you login in my.clerk.io, you will be prompted to create a New Store. Follow this guidelines:
Insert a Name, usually the name of the Store.
In Domain insert the website url.
Choose a language.
Choose a currency.
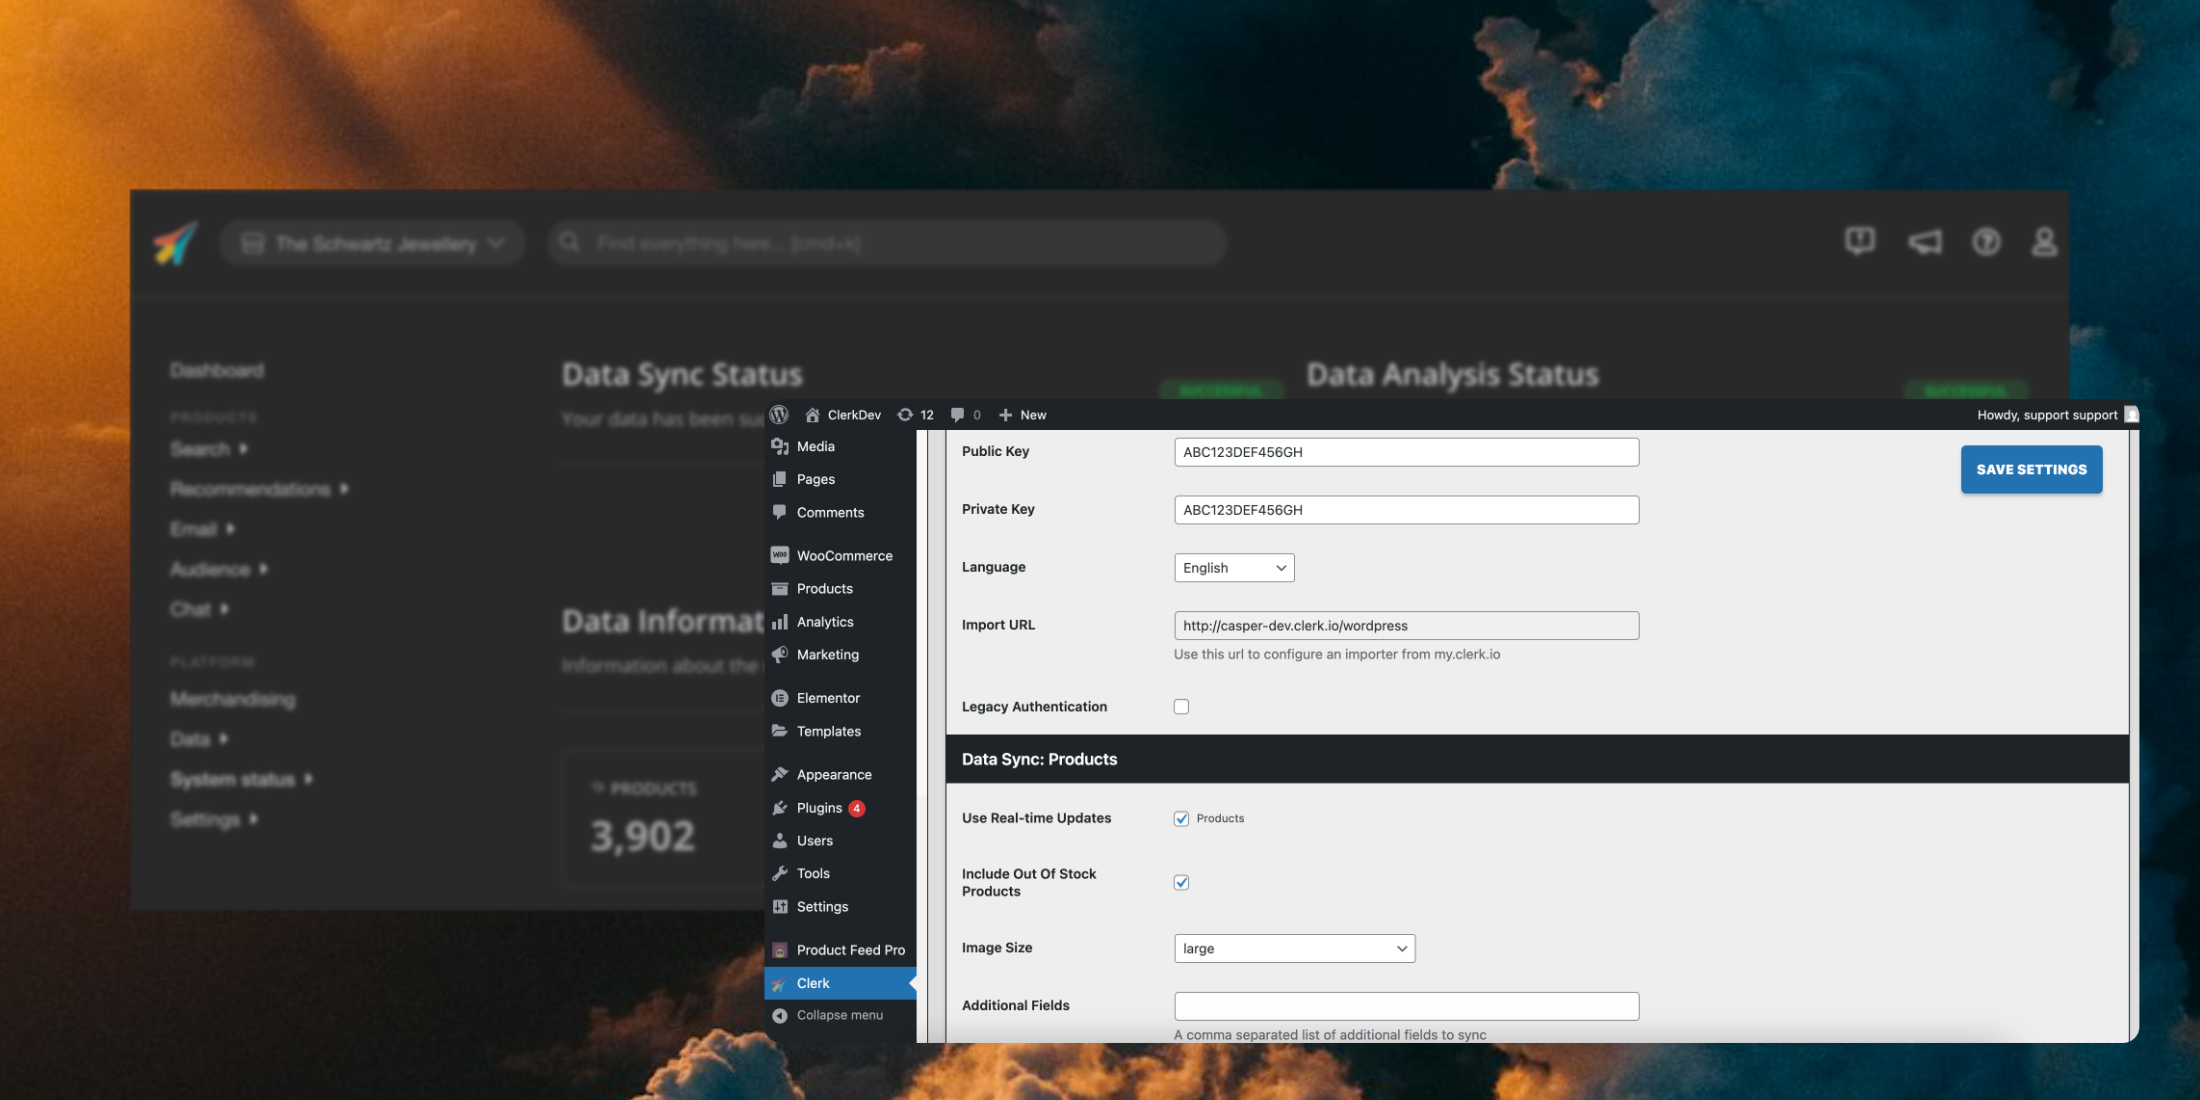
Choose a platform, in this case WooCommerce.
(Optional) Specify the type of Store.
If you need to set up
multiple languages, webshops or domains, each should have their own Store. You can
copy your configuration to new Stores after doing the first setup.
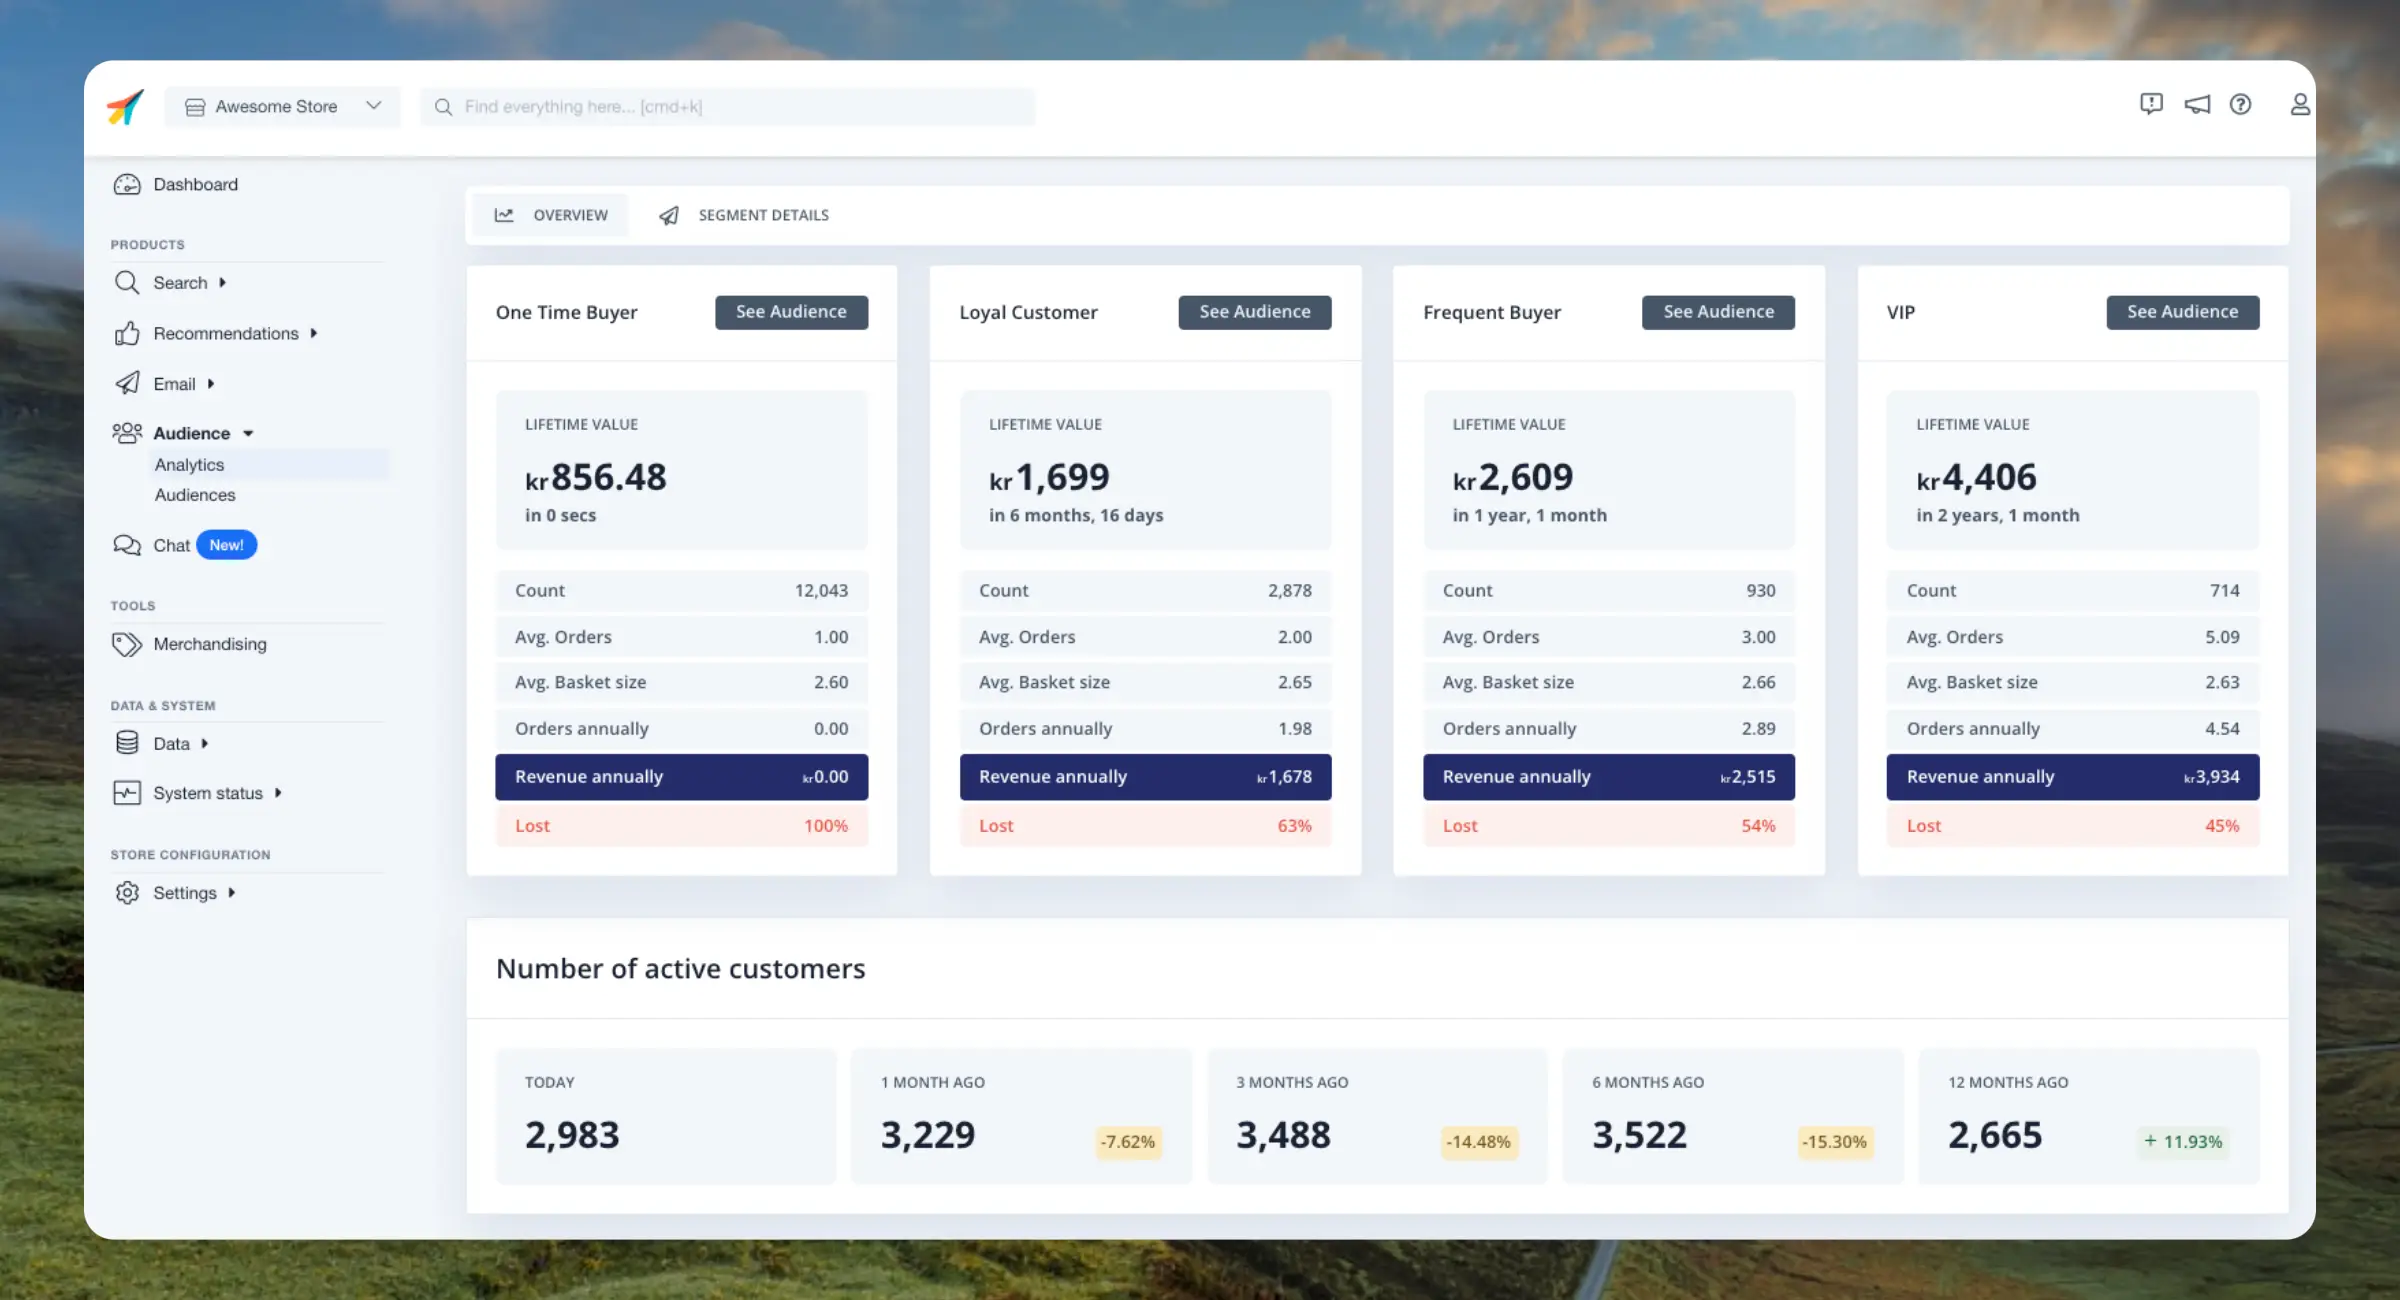
This dashboard breaks down your customers into groups based on their purchase frequency and life cycle. This helps you identify potential risks of losing customers but also oppurtunities of reactivating customers.
Clerk.io
Customers are divided into 4 groups based on their purchase frequency and the revenue they generate.
These groups are dynamic which means they will change as your customer behaviour changes over time. The groups always reflect the current order history that Clerk has access to.
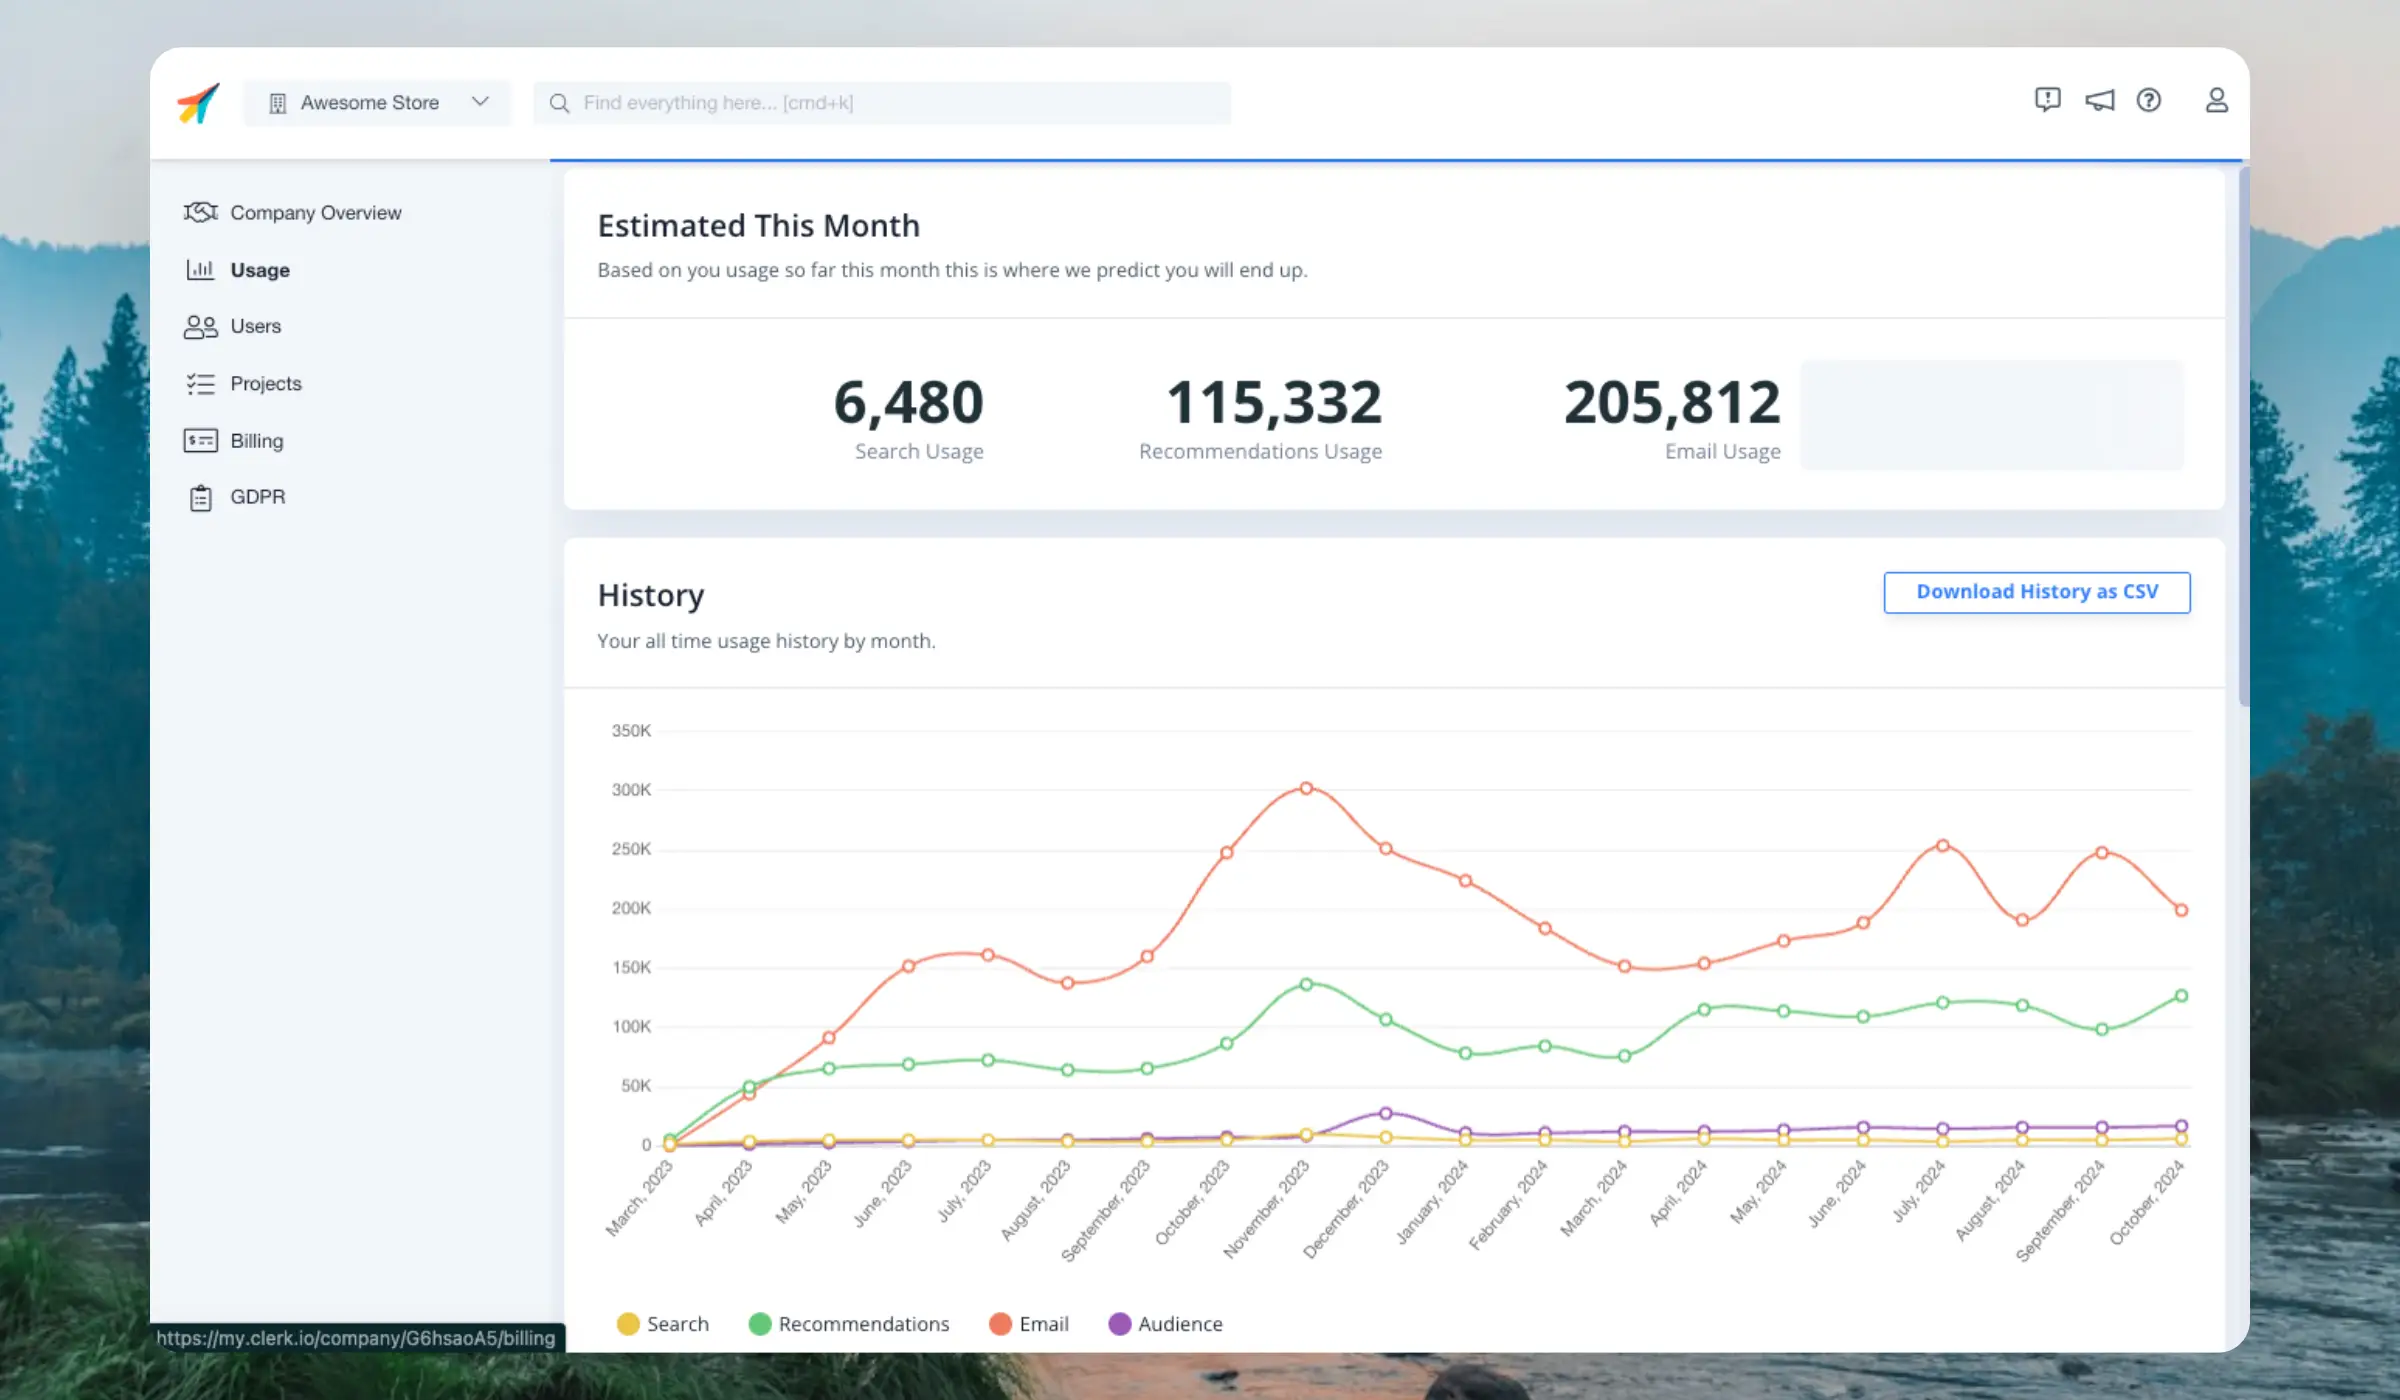
Fairness is important to us, so we only count usage when we successfully deliver results back. If a search, recommendation or email returns no results, no usage is counted.
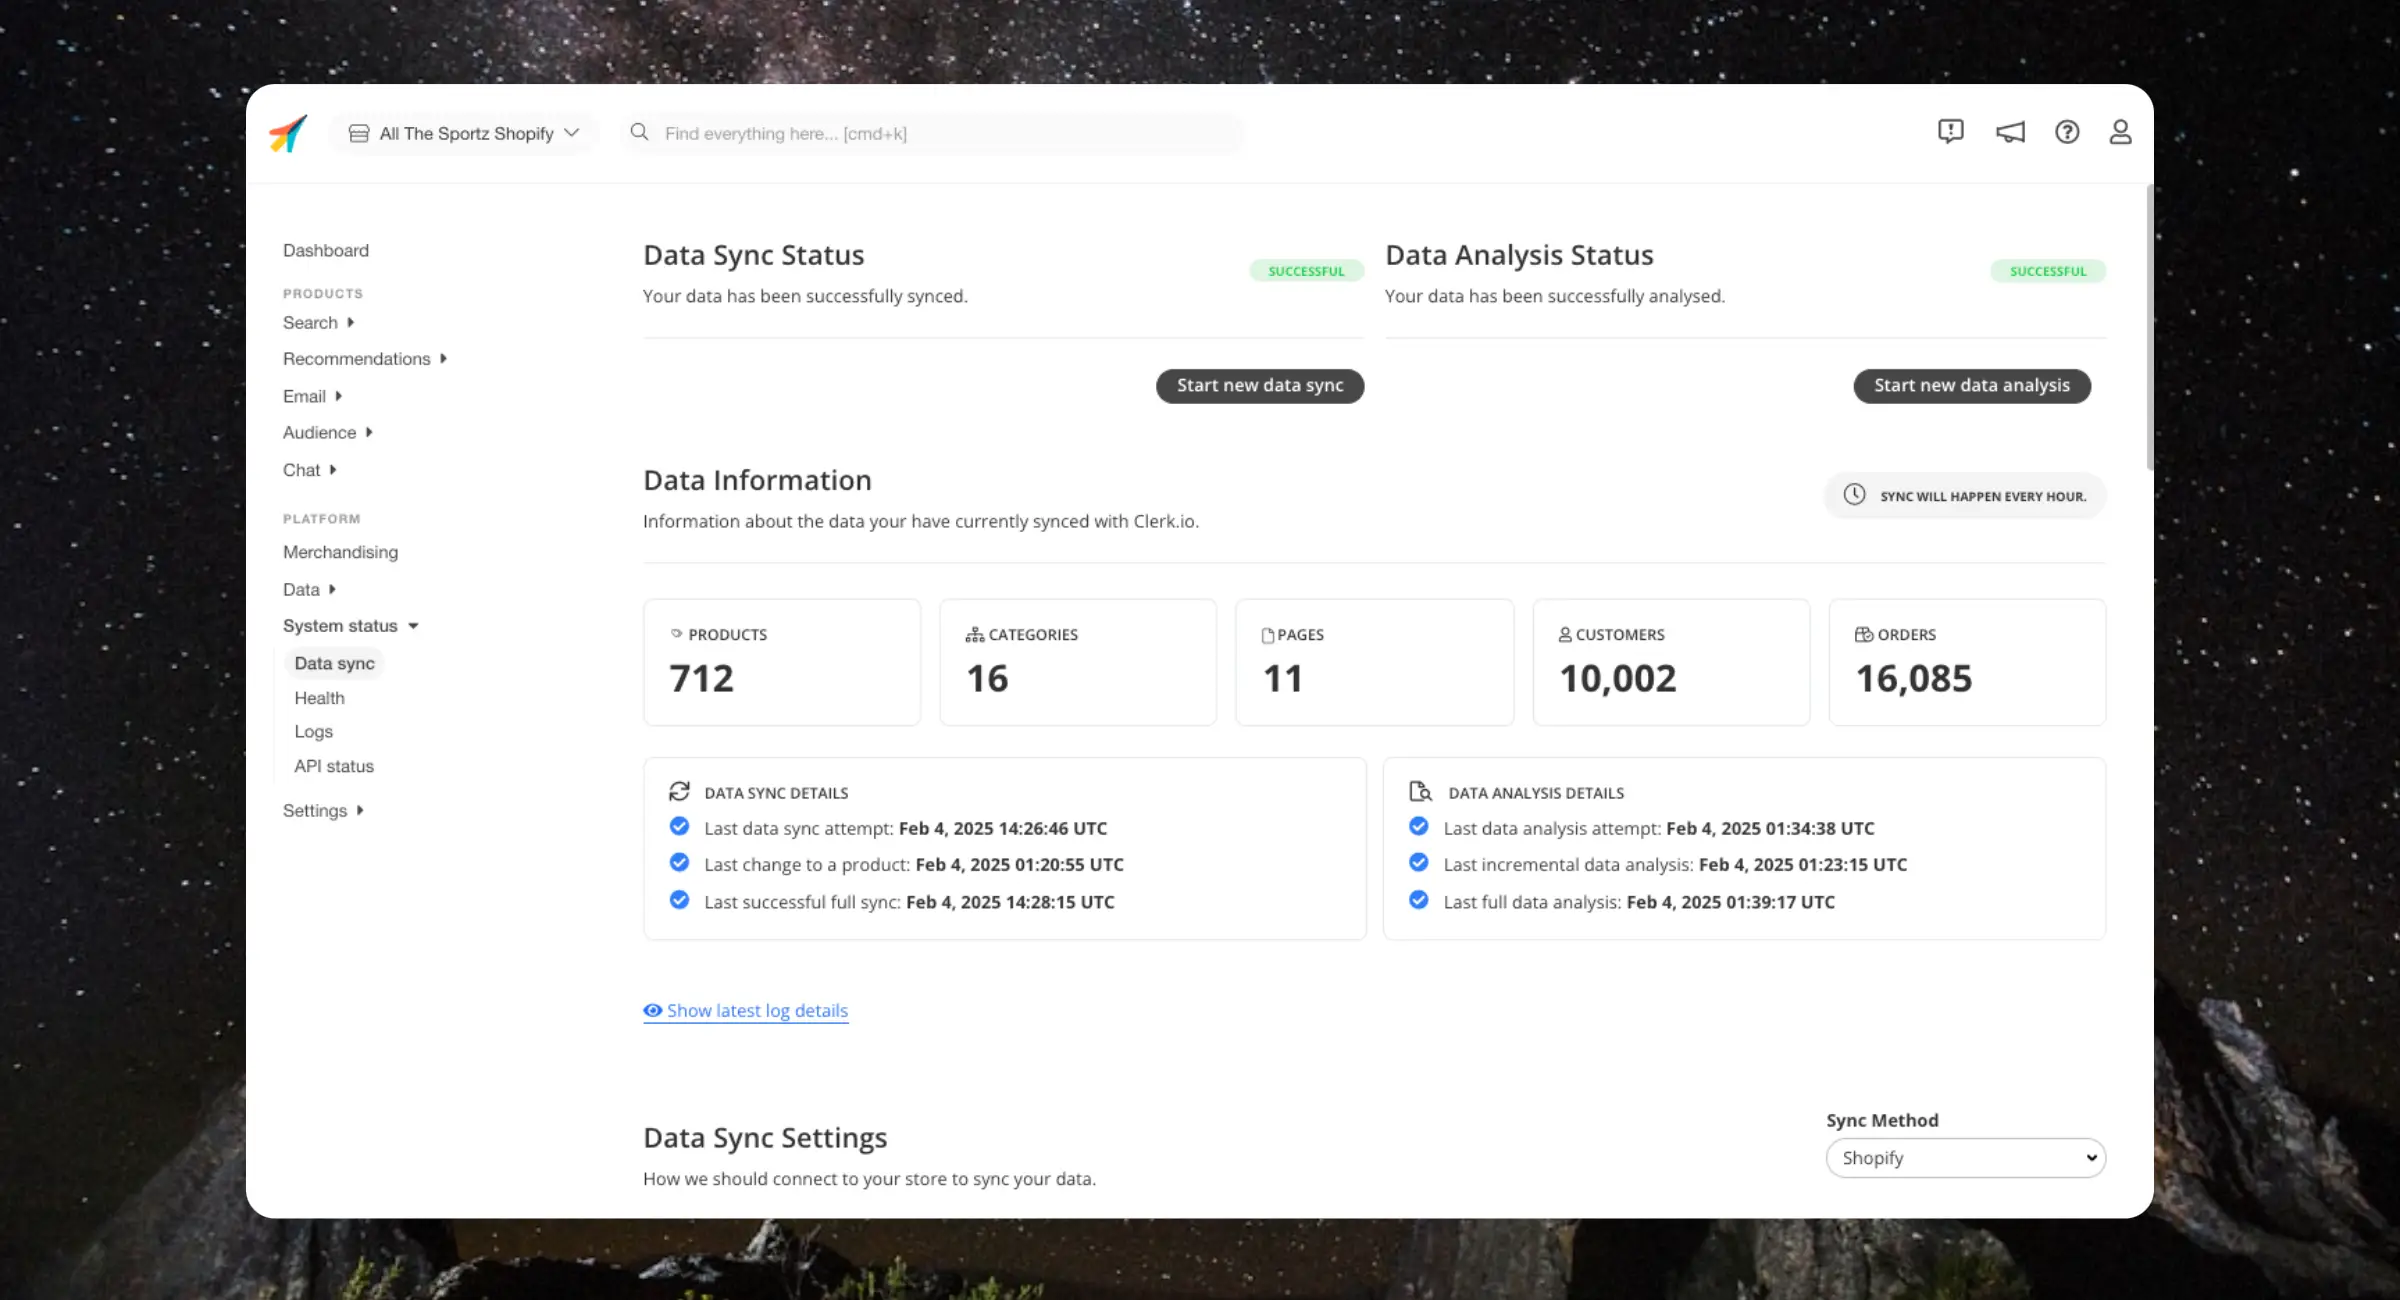
This section provides quick insights into the state of your sync:
The number of products, categories, pages, orders, and customers that have been imported
Timestamps for when a sync or analysis was last attempted and completed
Timestamps for when a sync or analysis last registered a change to a product
The Sync Details relate to when Clerk last fetched data from the webshop, while the Analysis Details relate to when Clerk last processed and saved the data.
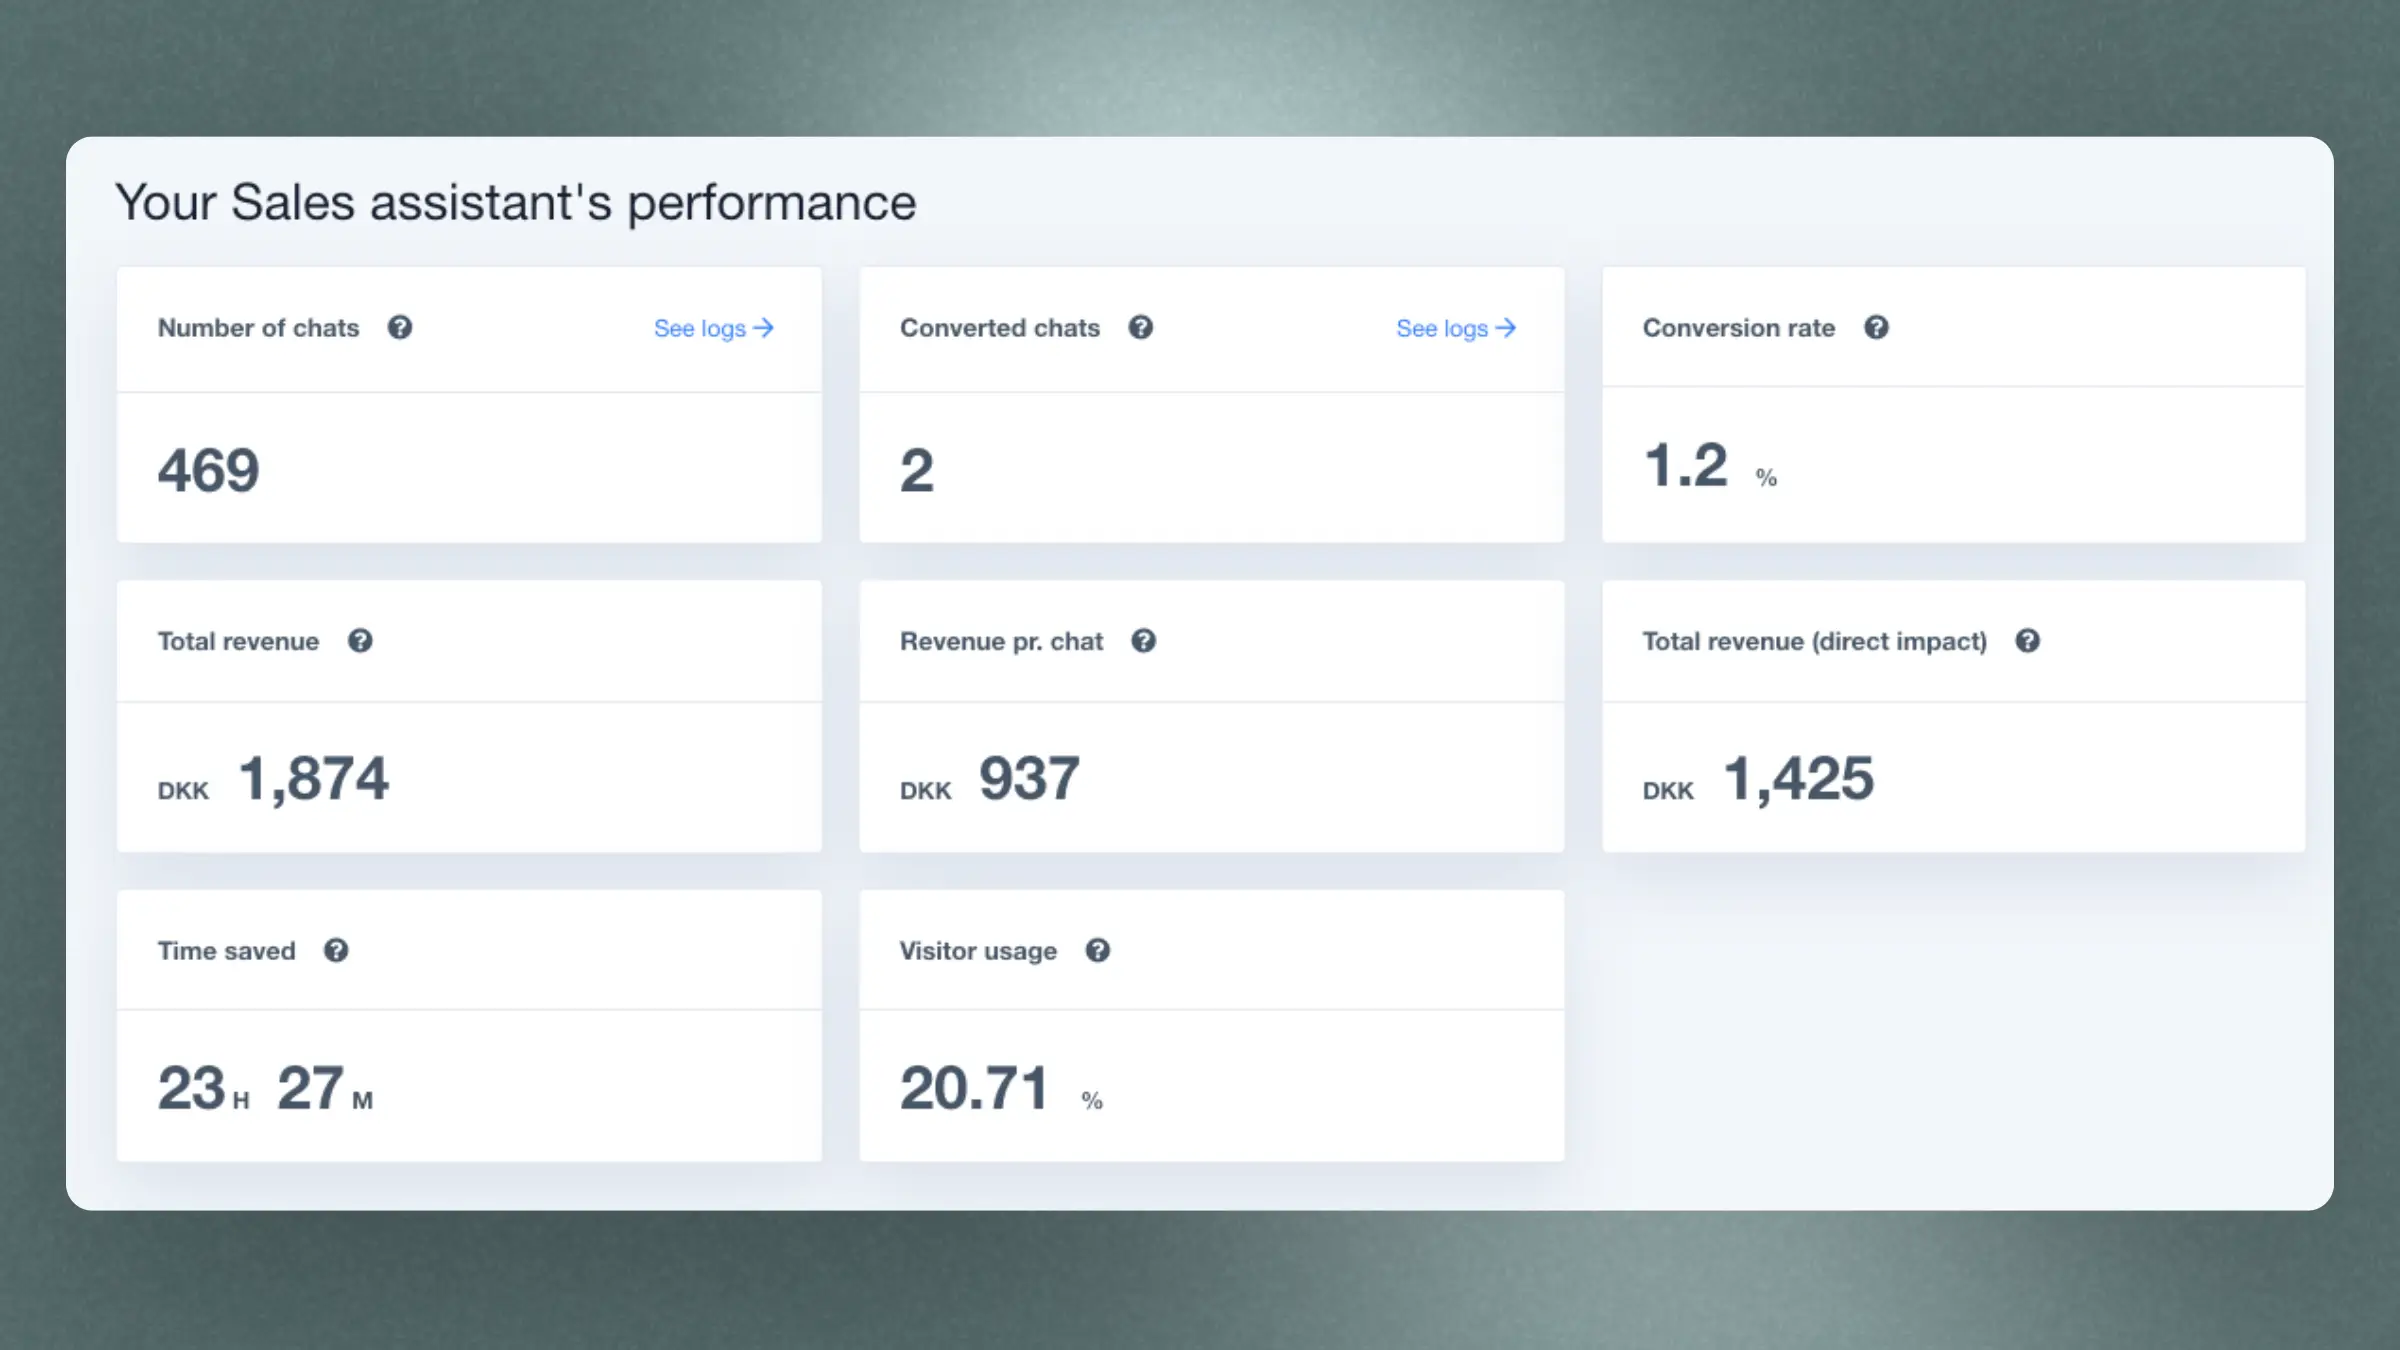
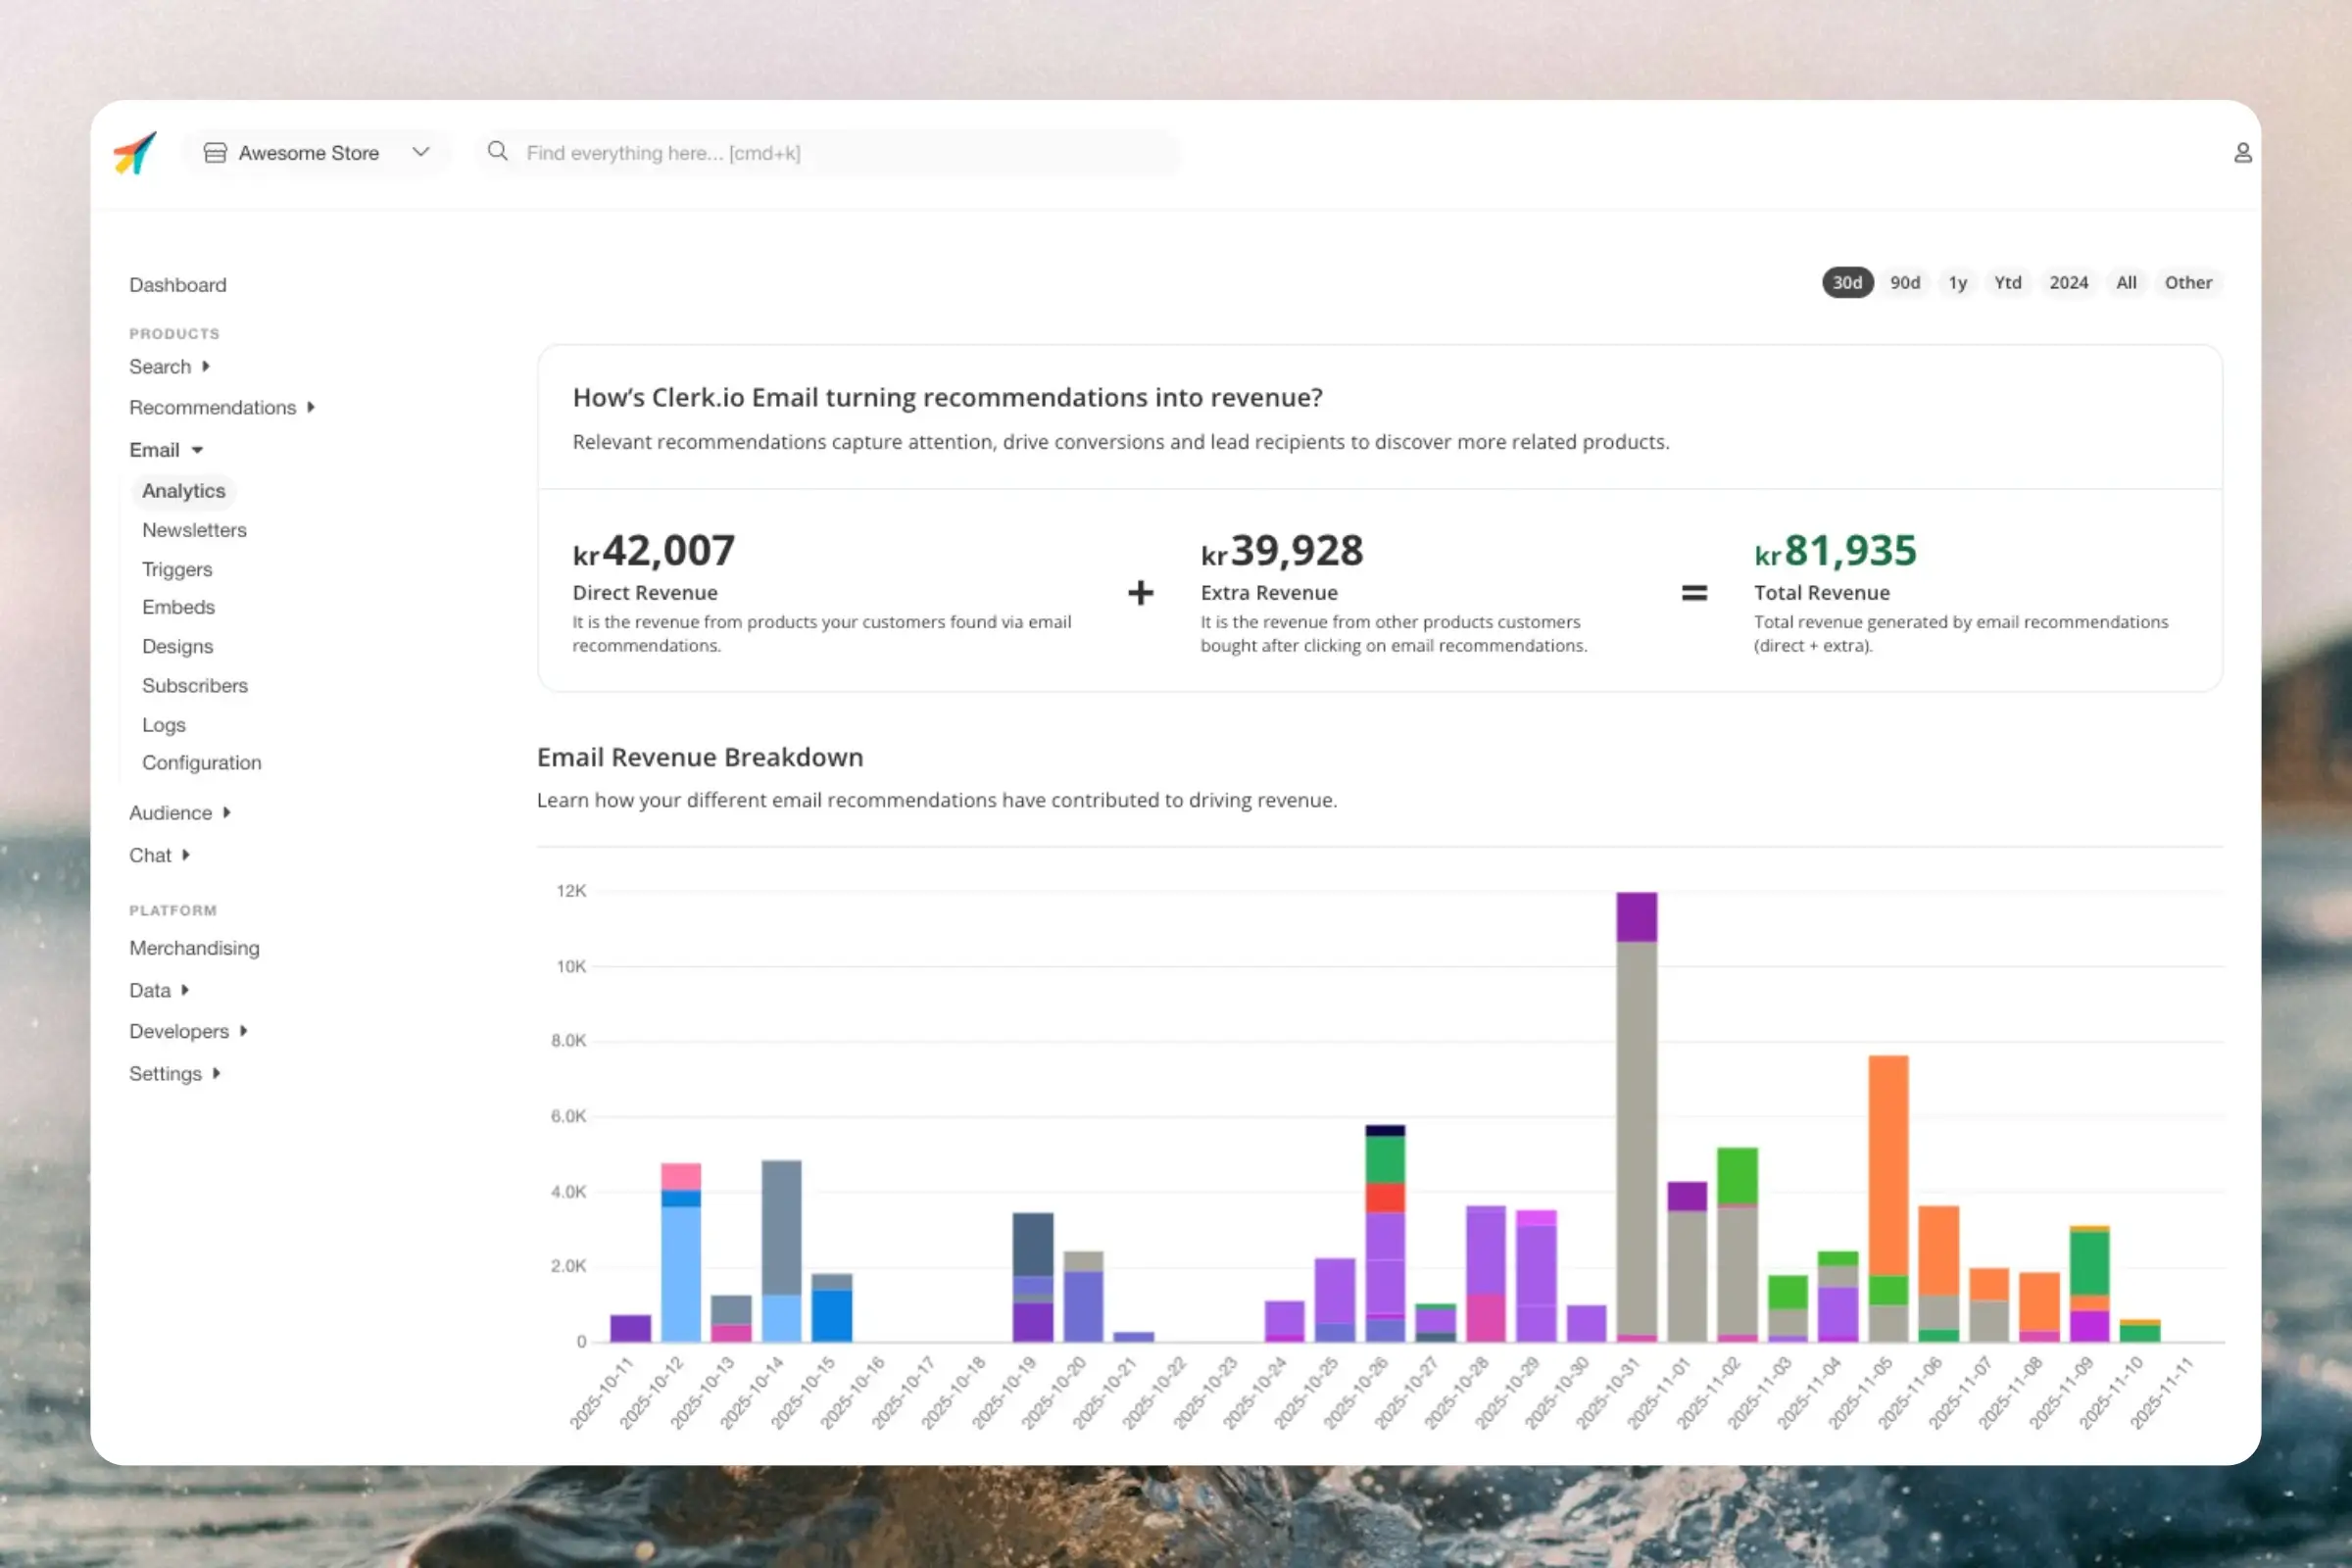
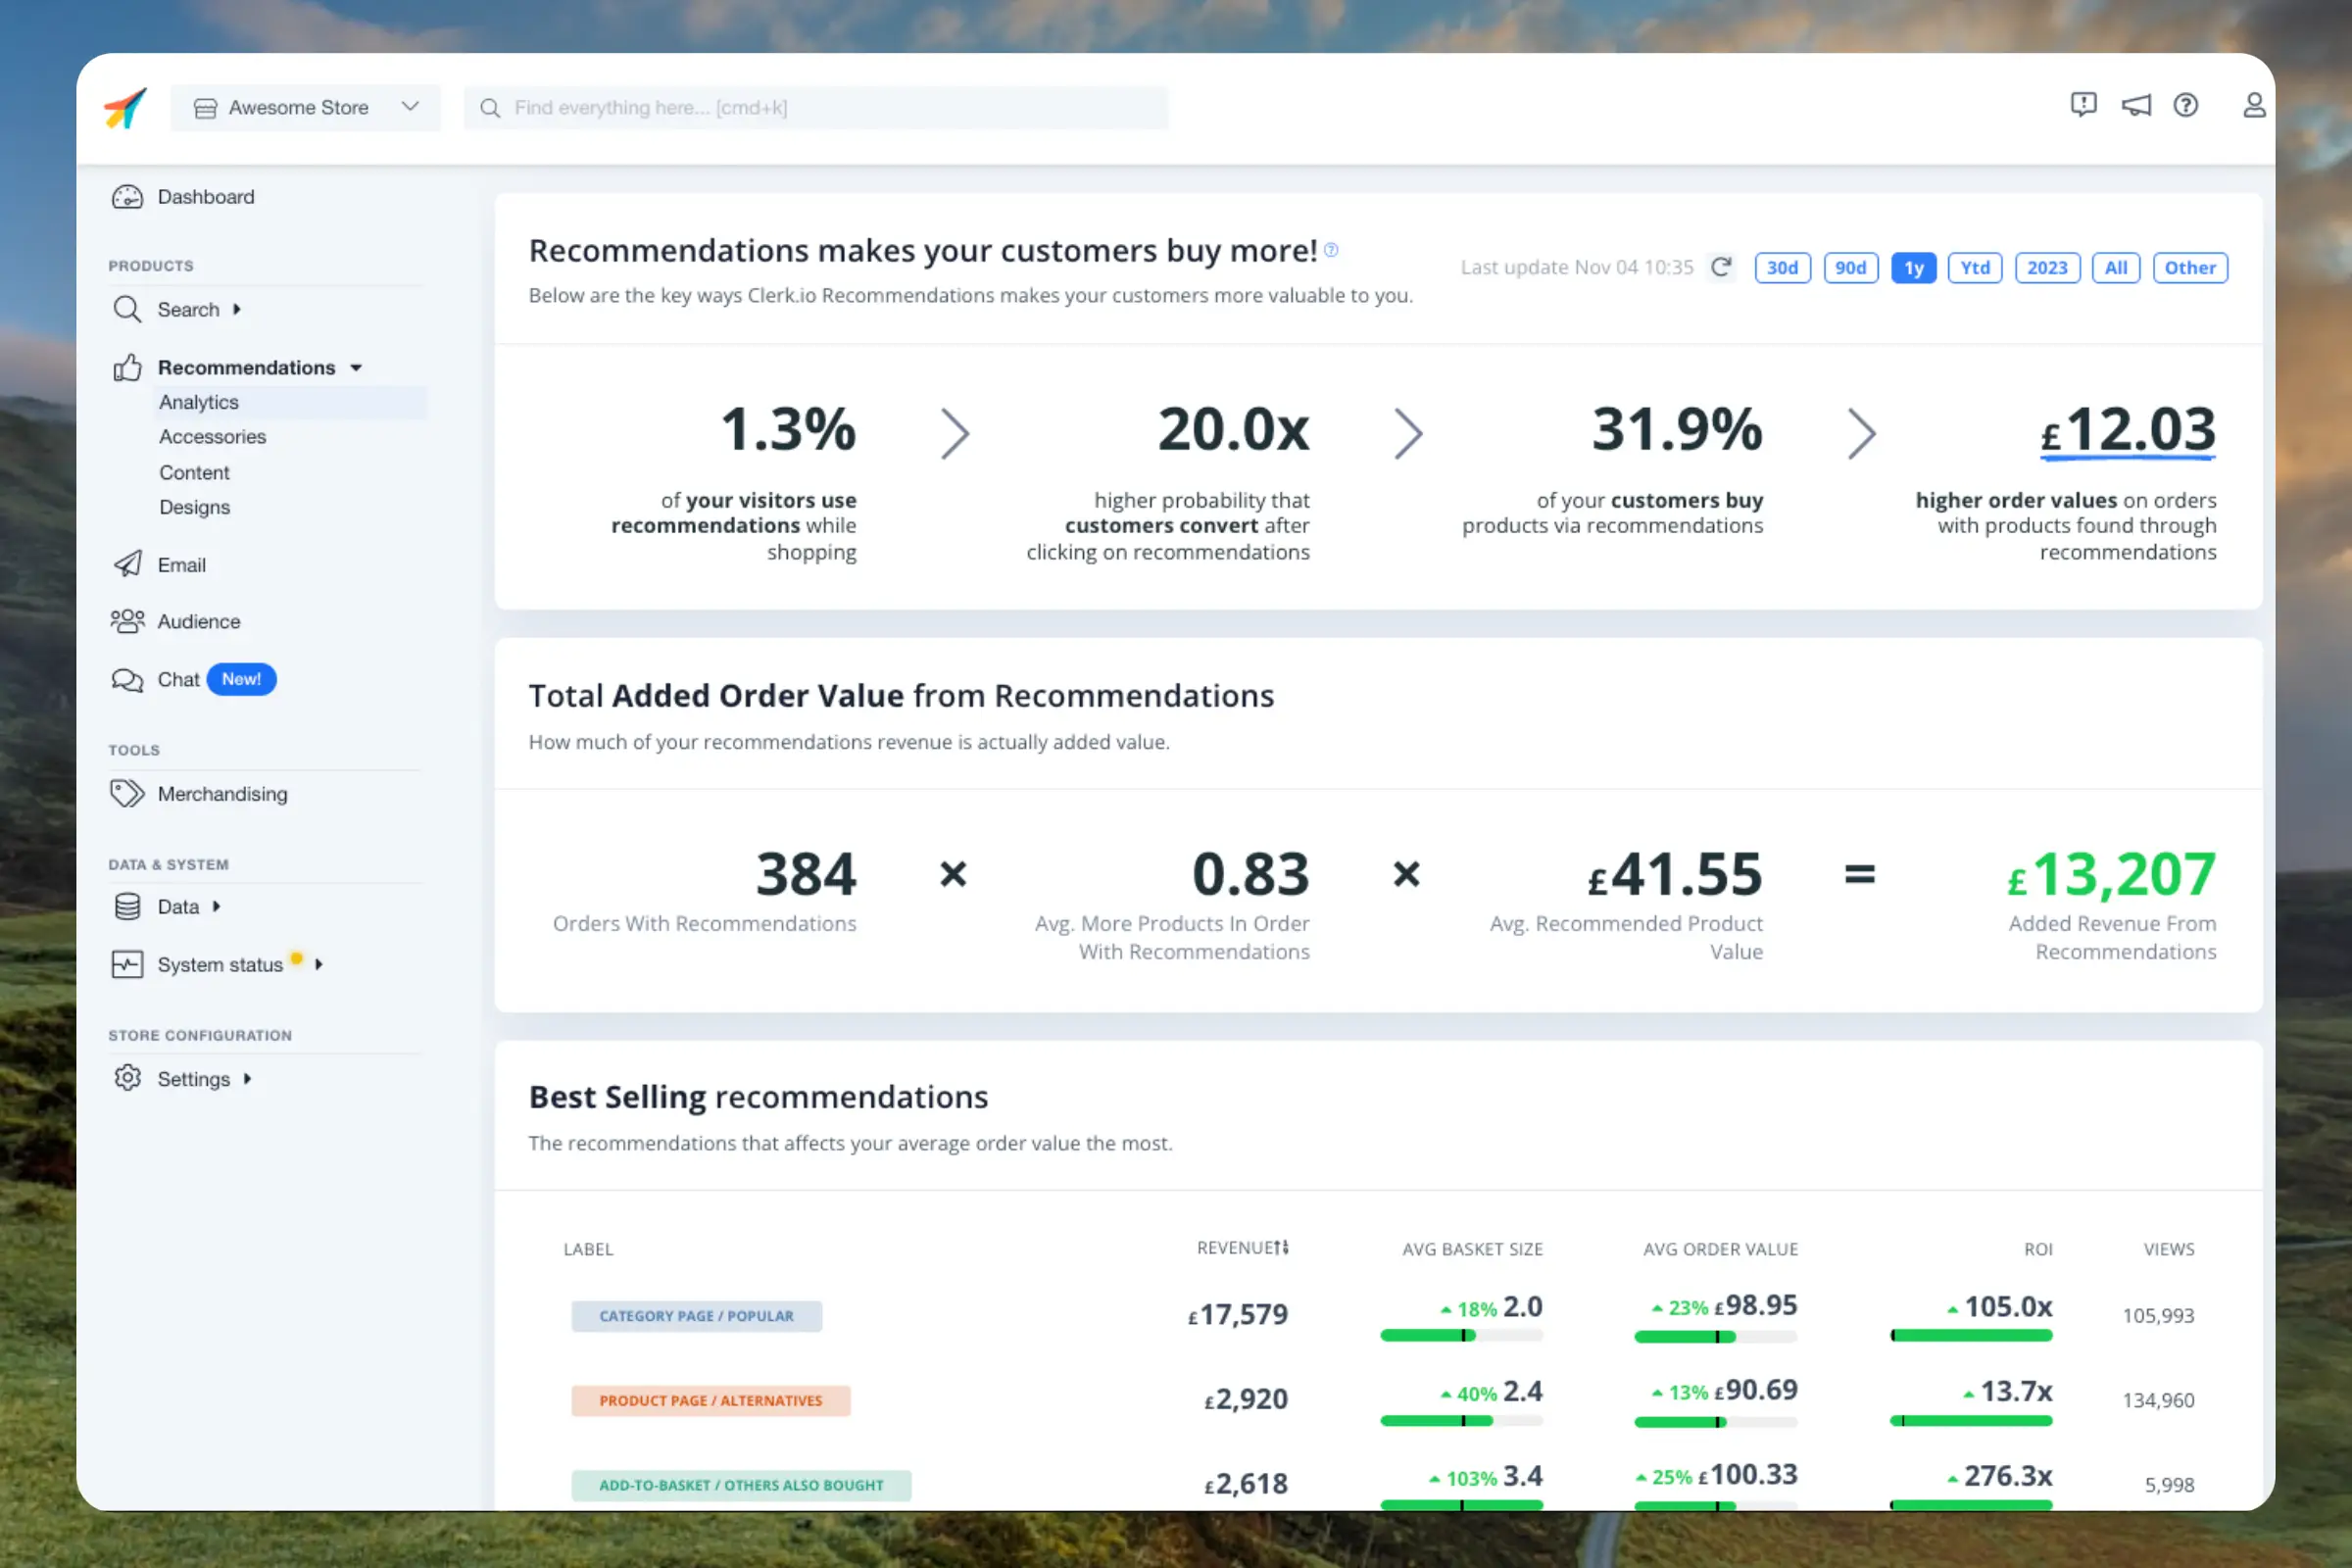
This dashboard gives you a thorough overview of how your recipients use your Clerk-enhanced emails, both in terms of what works and what needs to be improved.
By default, the dashboard shows the performance over the last 30 days, but this can be customised with the date-range selector in the top right corner.
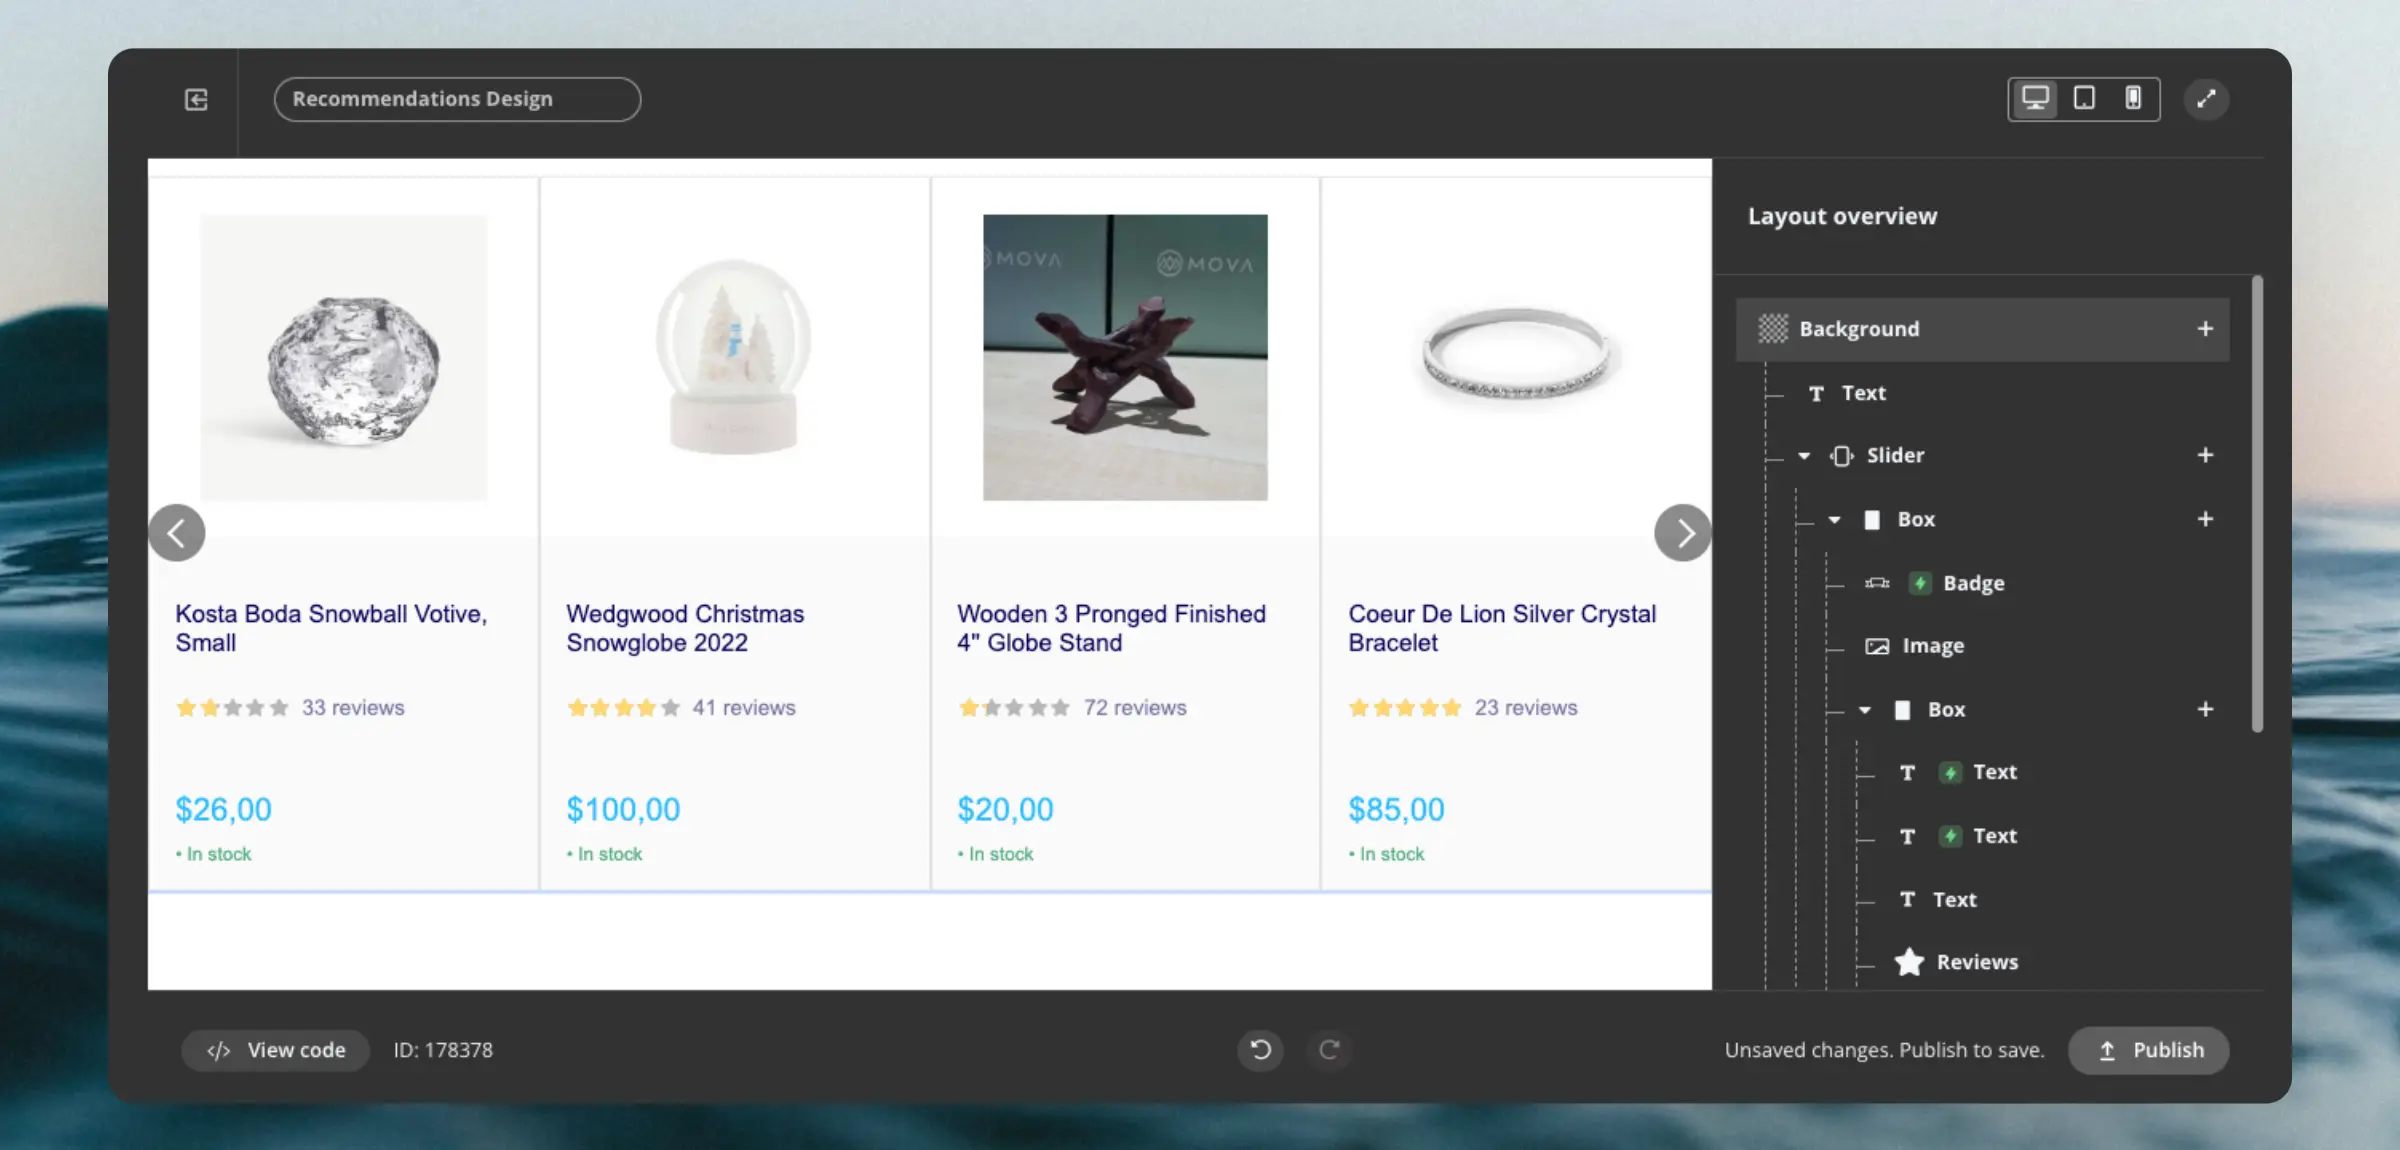
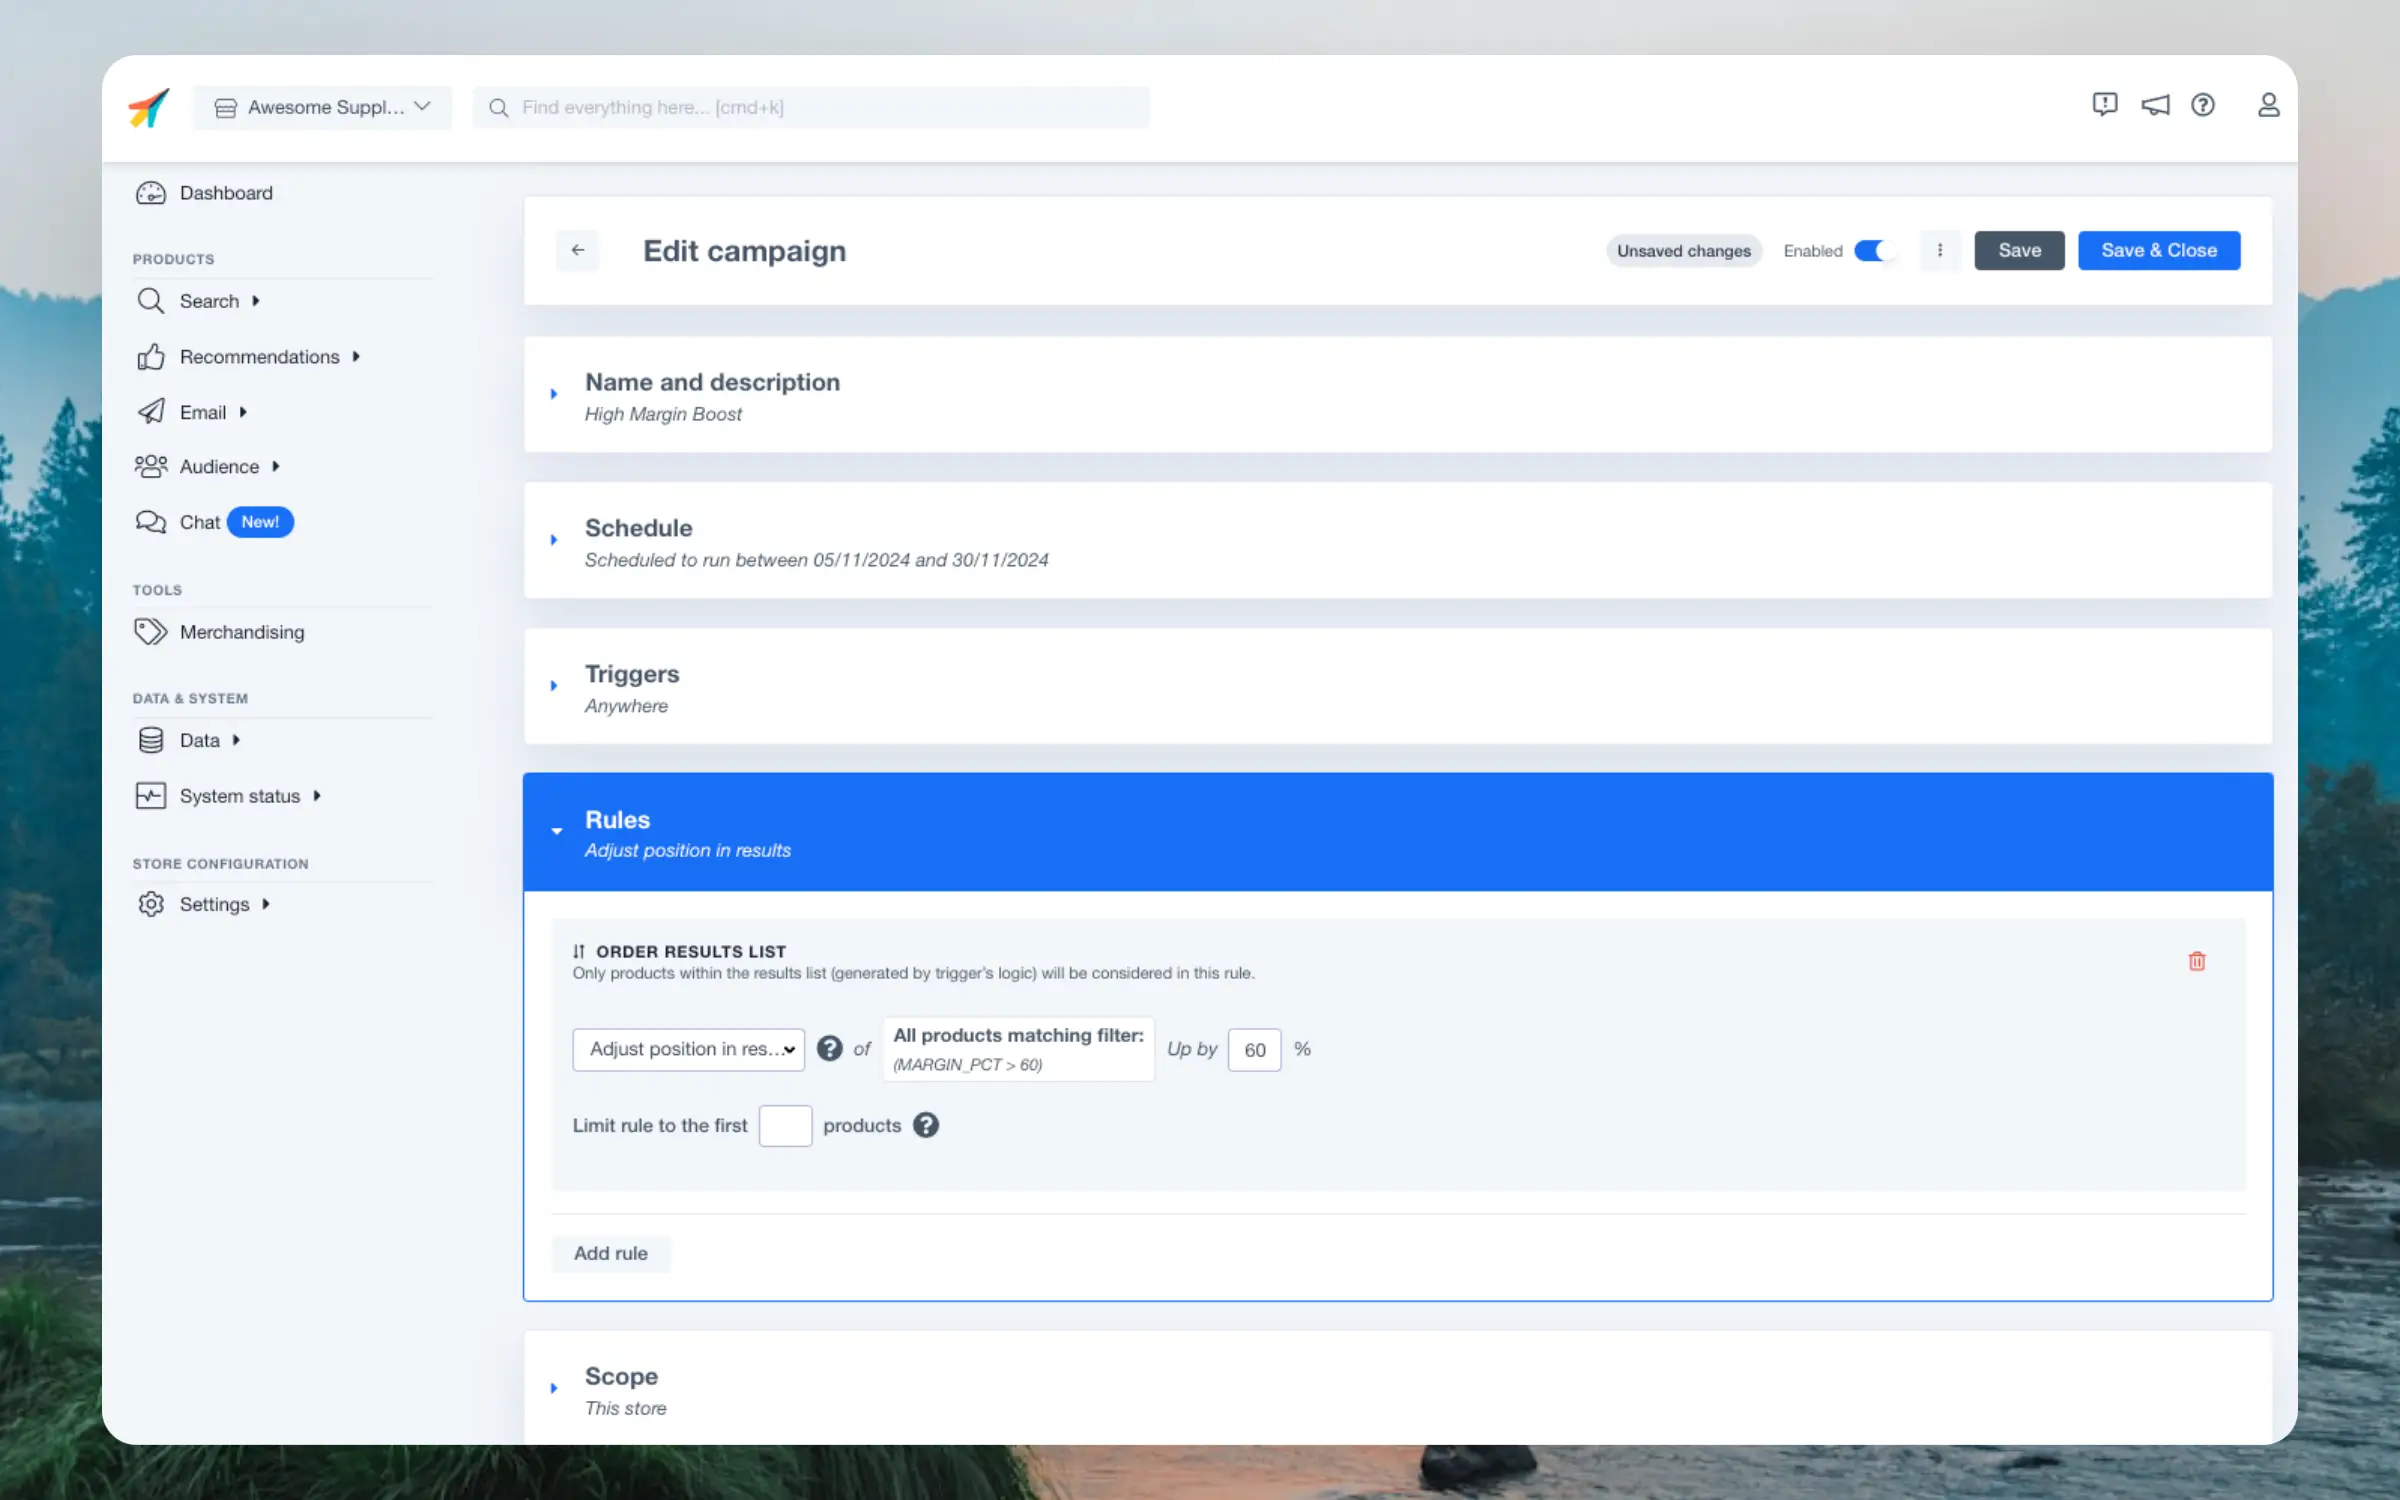
Merchandising gives you a high degree of control over the products shown by Clerk, like boosting products on sale, prioritising specific brands, hiding out-of-stock products and much more.
Campaigns always have a Name of your choice. Optionally, you can add a Description for reminding yourself and your colleagues of the campaigns purpose.
Decide whether a campaign should run indefinetely or during a specific timeframe. Scheduling is particularly useful if you only want to influence results during a period like the week of Black Friday or during your Christmas sales.
By default, the dashboard shows the performance over the last 30 days, but this can be customised with the date-range selector in the top right corner.