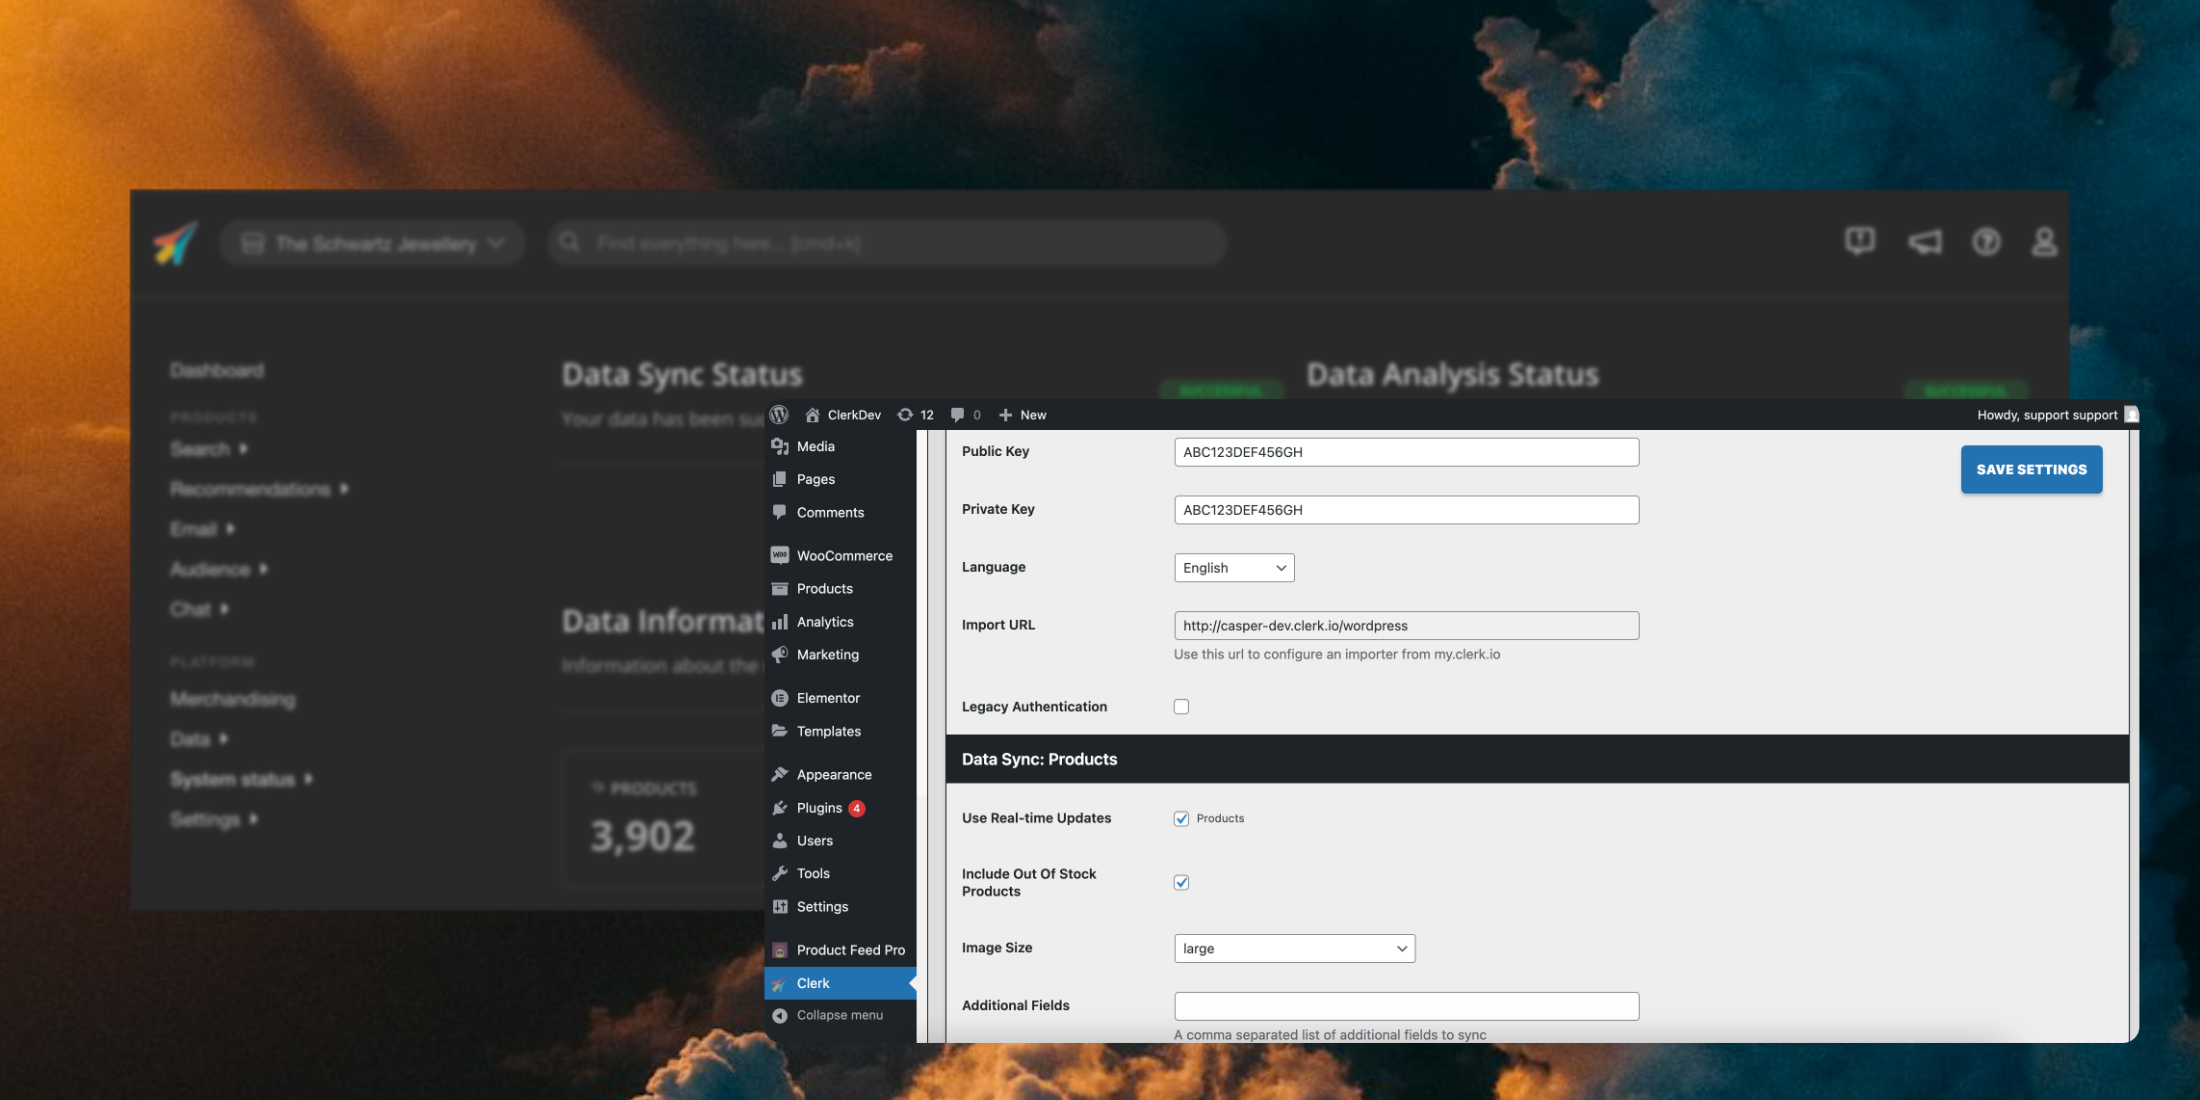
The first step of installing Clerk.io, is connecting your store with your Clerk.io account.
After following these simple steps you will be able to see your Demo Store, which gives you a personal overview of how
Clerk.io will work on your webshop, before setting up the rest of the system.
Get Clerk up and running on your WooCommerce store in just a few steps. This guide walks you through creating your Store, installing the plugin, and syncing your data.
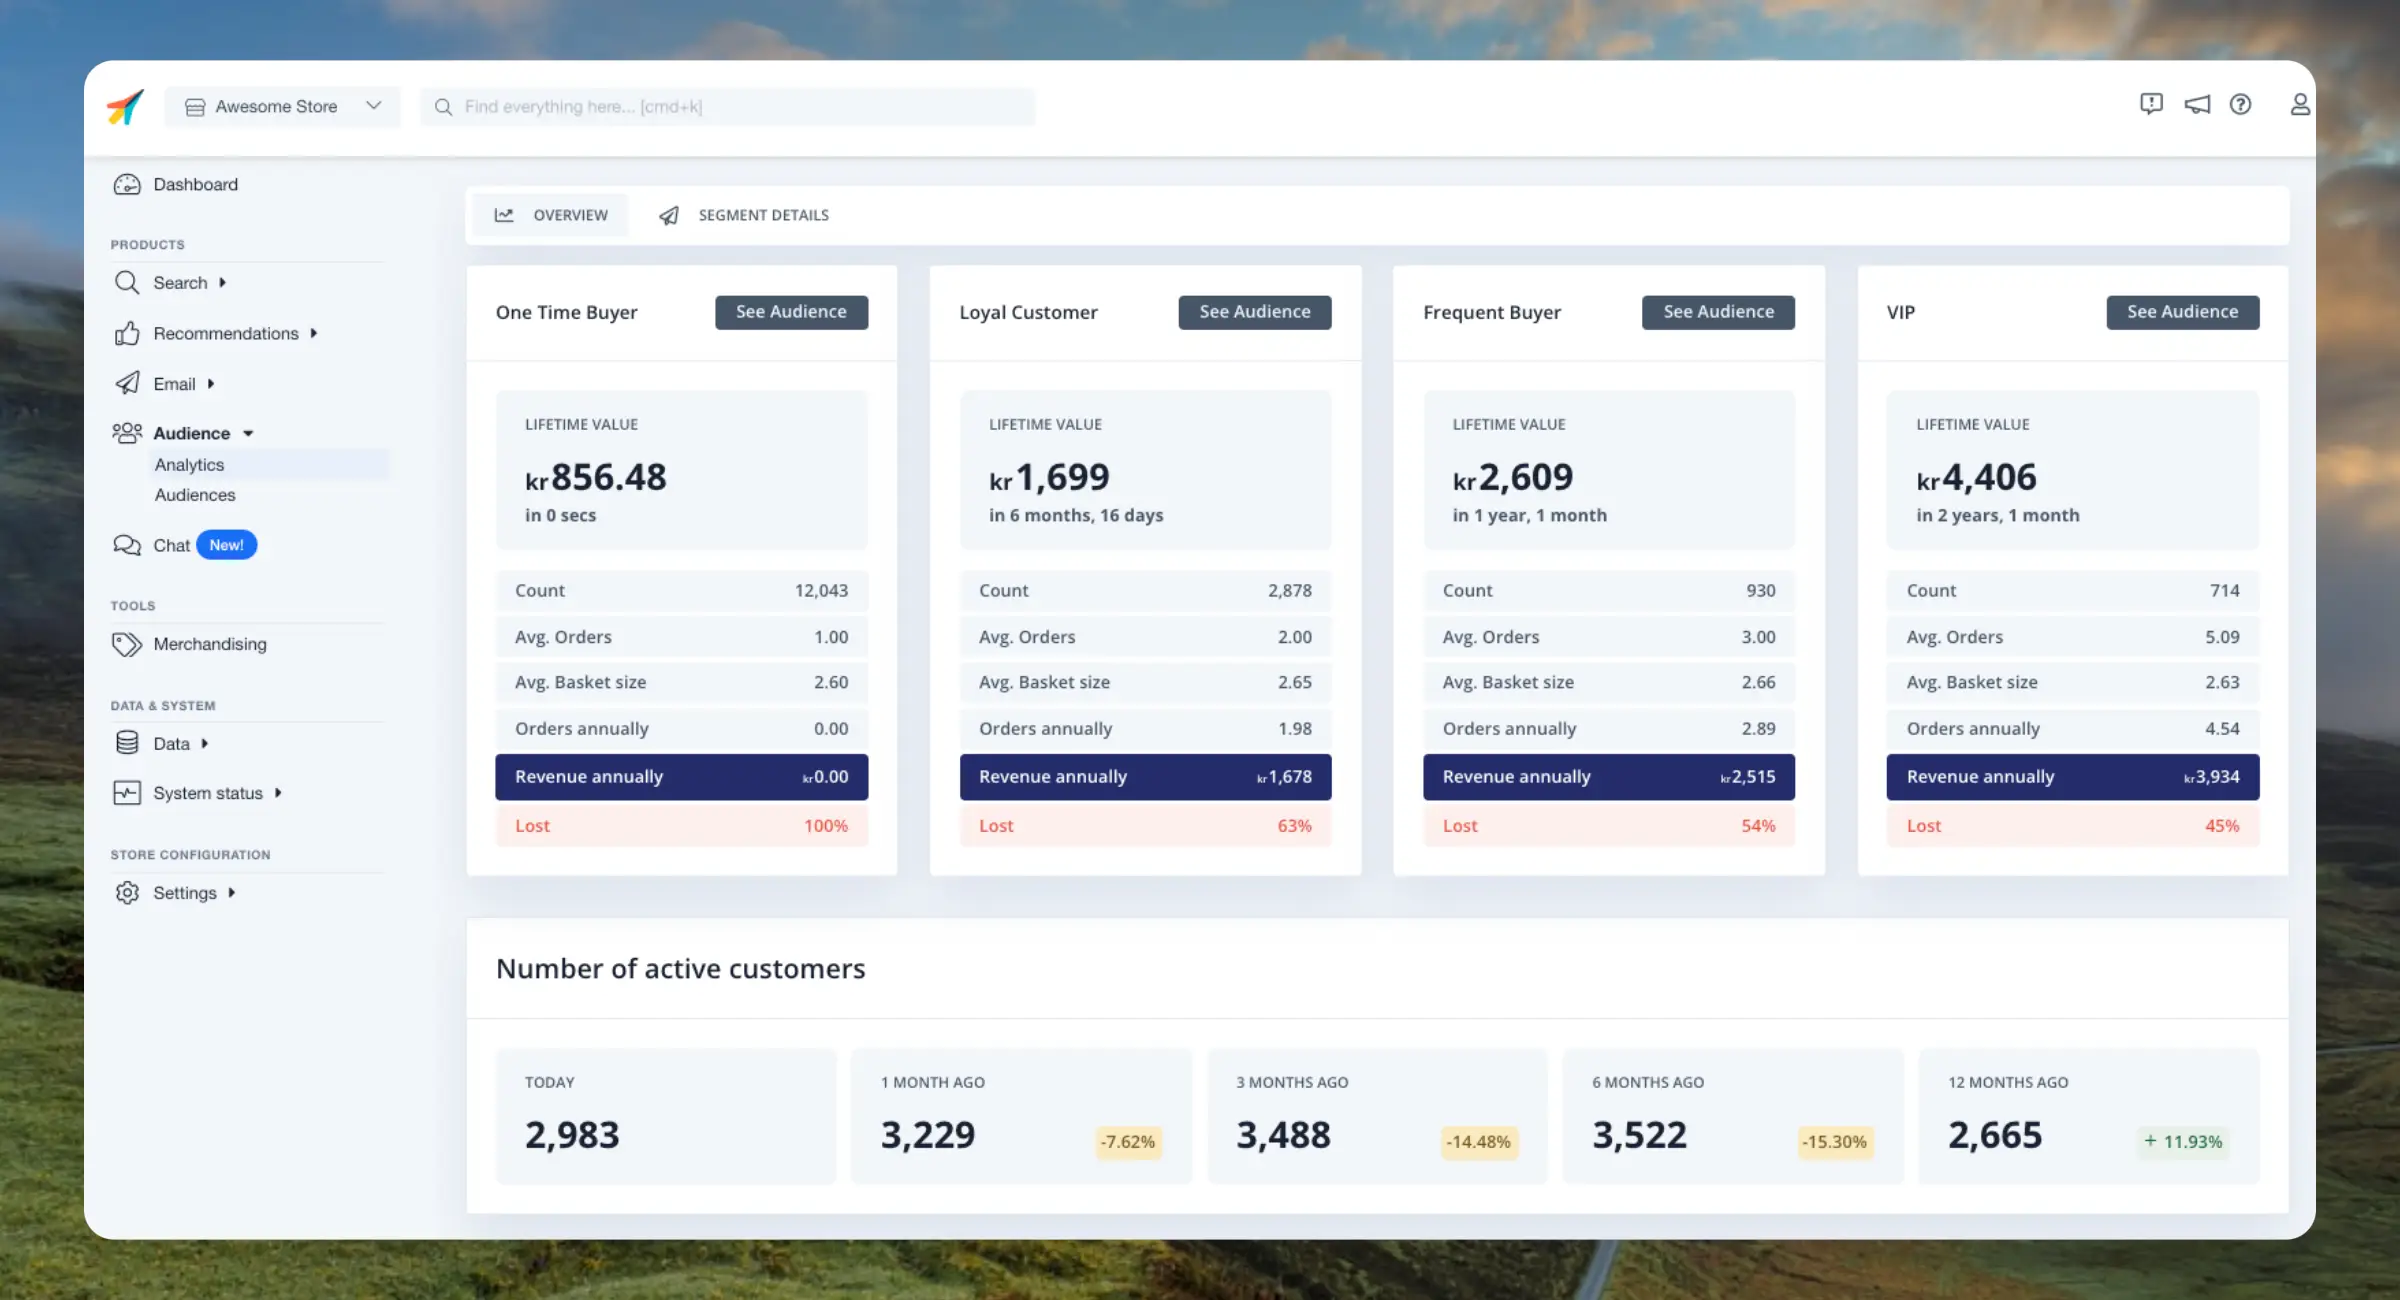
This dashboard breaks down your customers into groups based on their purchase frequency and life cycle. This helps you identify potential risks of losing customers but also oppurtunities of reactivating customers.
Clerk.io
Customers are divided into 4 groups based on their purchase frequency and the revenue they generate.
These groups are dynamic which means they will change as your customer behaviour changes over time. The groups always reflect the current order history that Clerk has access to.
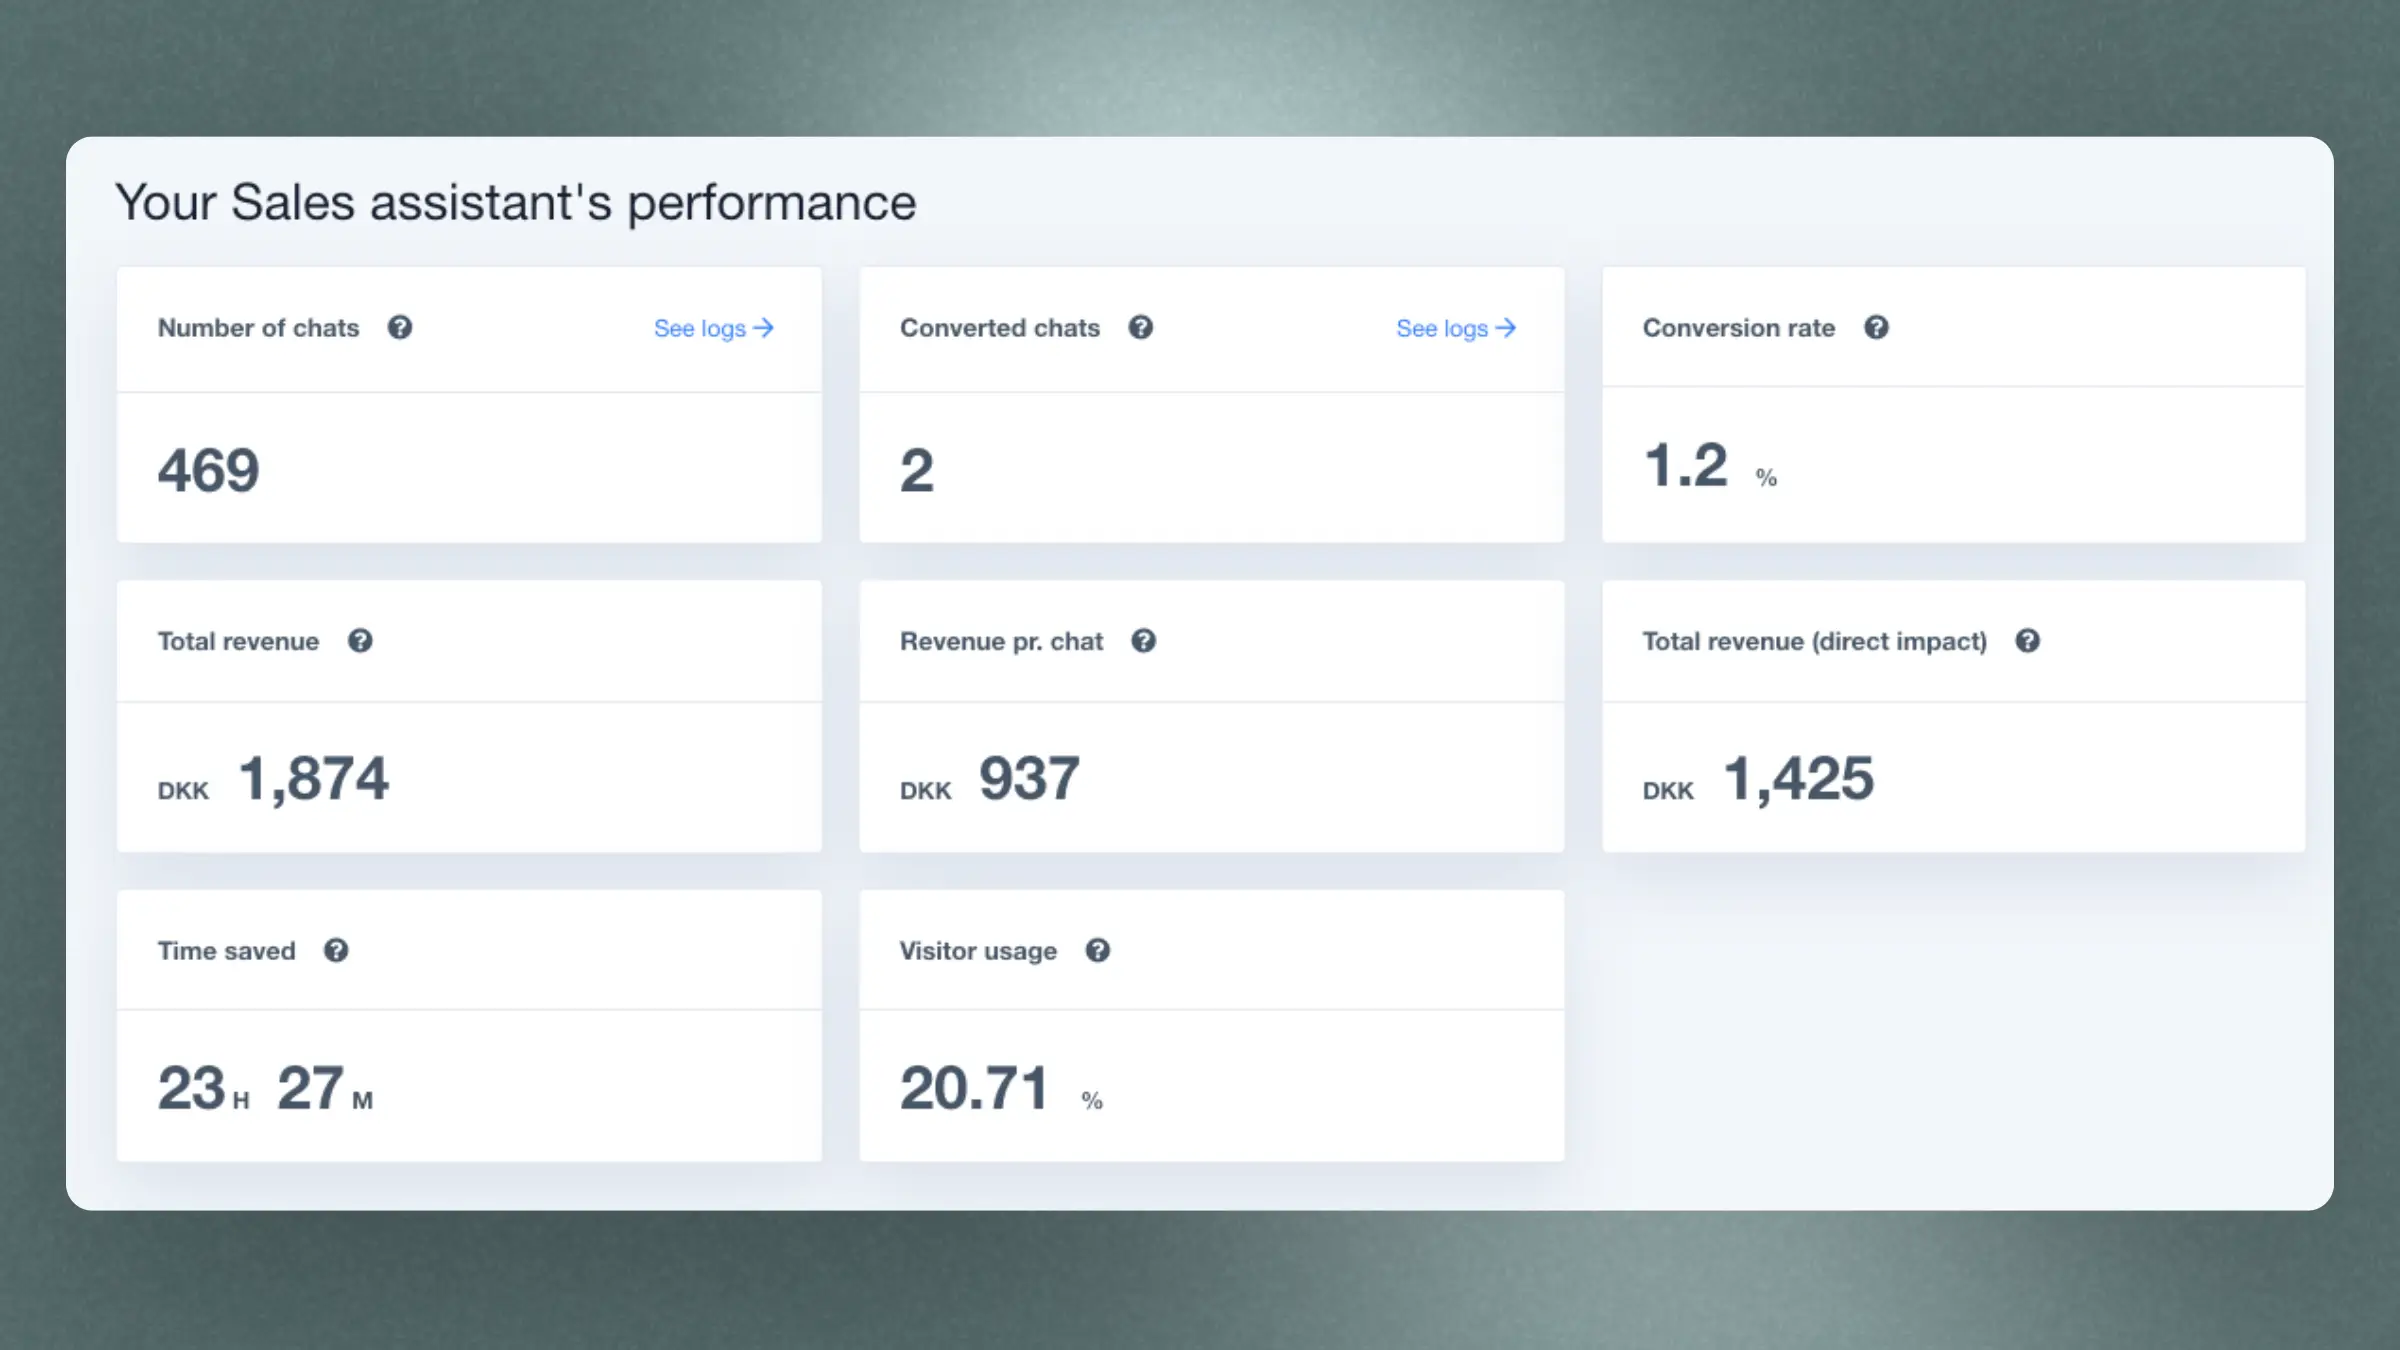
The overview cards show Chat activity for the selected period:
Chat conversations: Conversations started during the period.
Time saved: An estimate based on five minutes for each conversation that Chat marked as solved. This is a typical support-chat handle time, not a measured duration.
Revenue after a chat: The full order value from people who chatted and later bought, including orders where they did not click a product in Chat.
Revenue from products they clicked: Revenue from products visitors clicked in Chat. This is the same Chat number shown on Home.
Revenue after a chat is the full order value. Revenue from clicked products is included in that value, so do not add the two figures together.
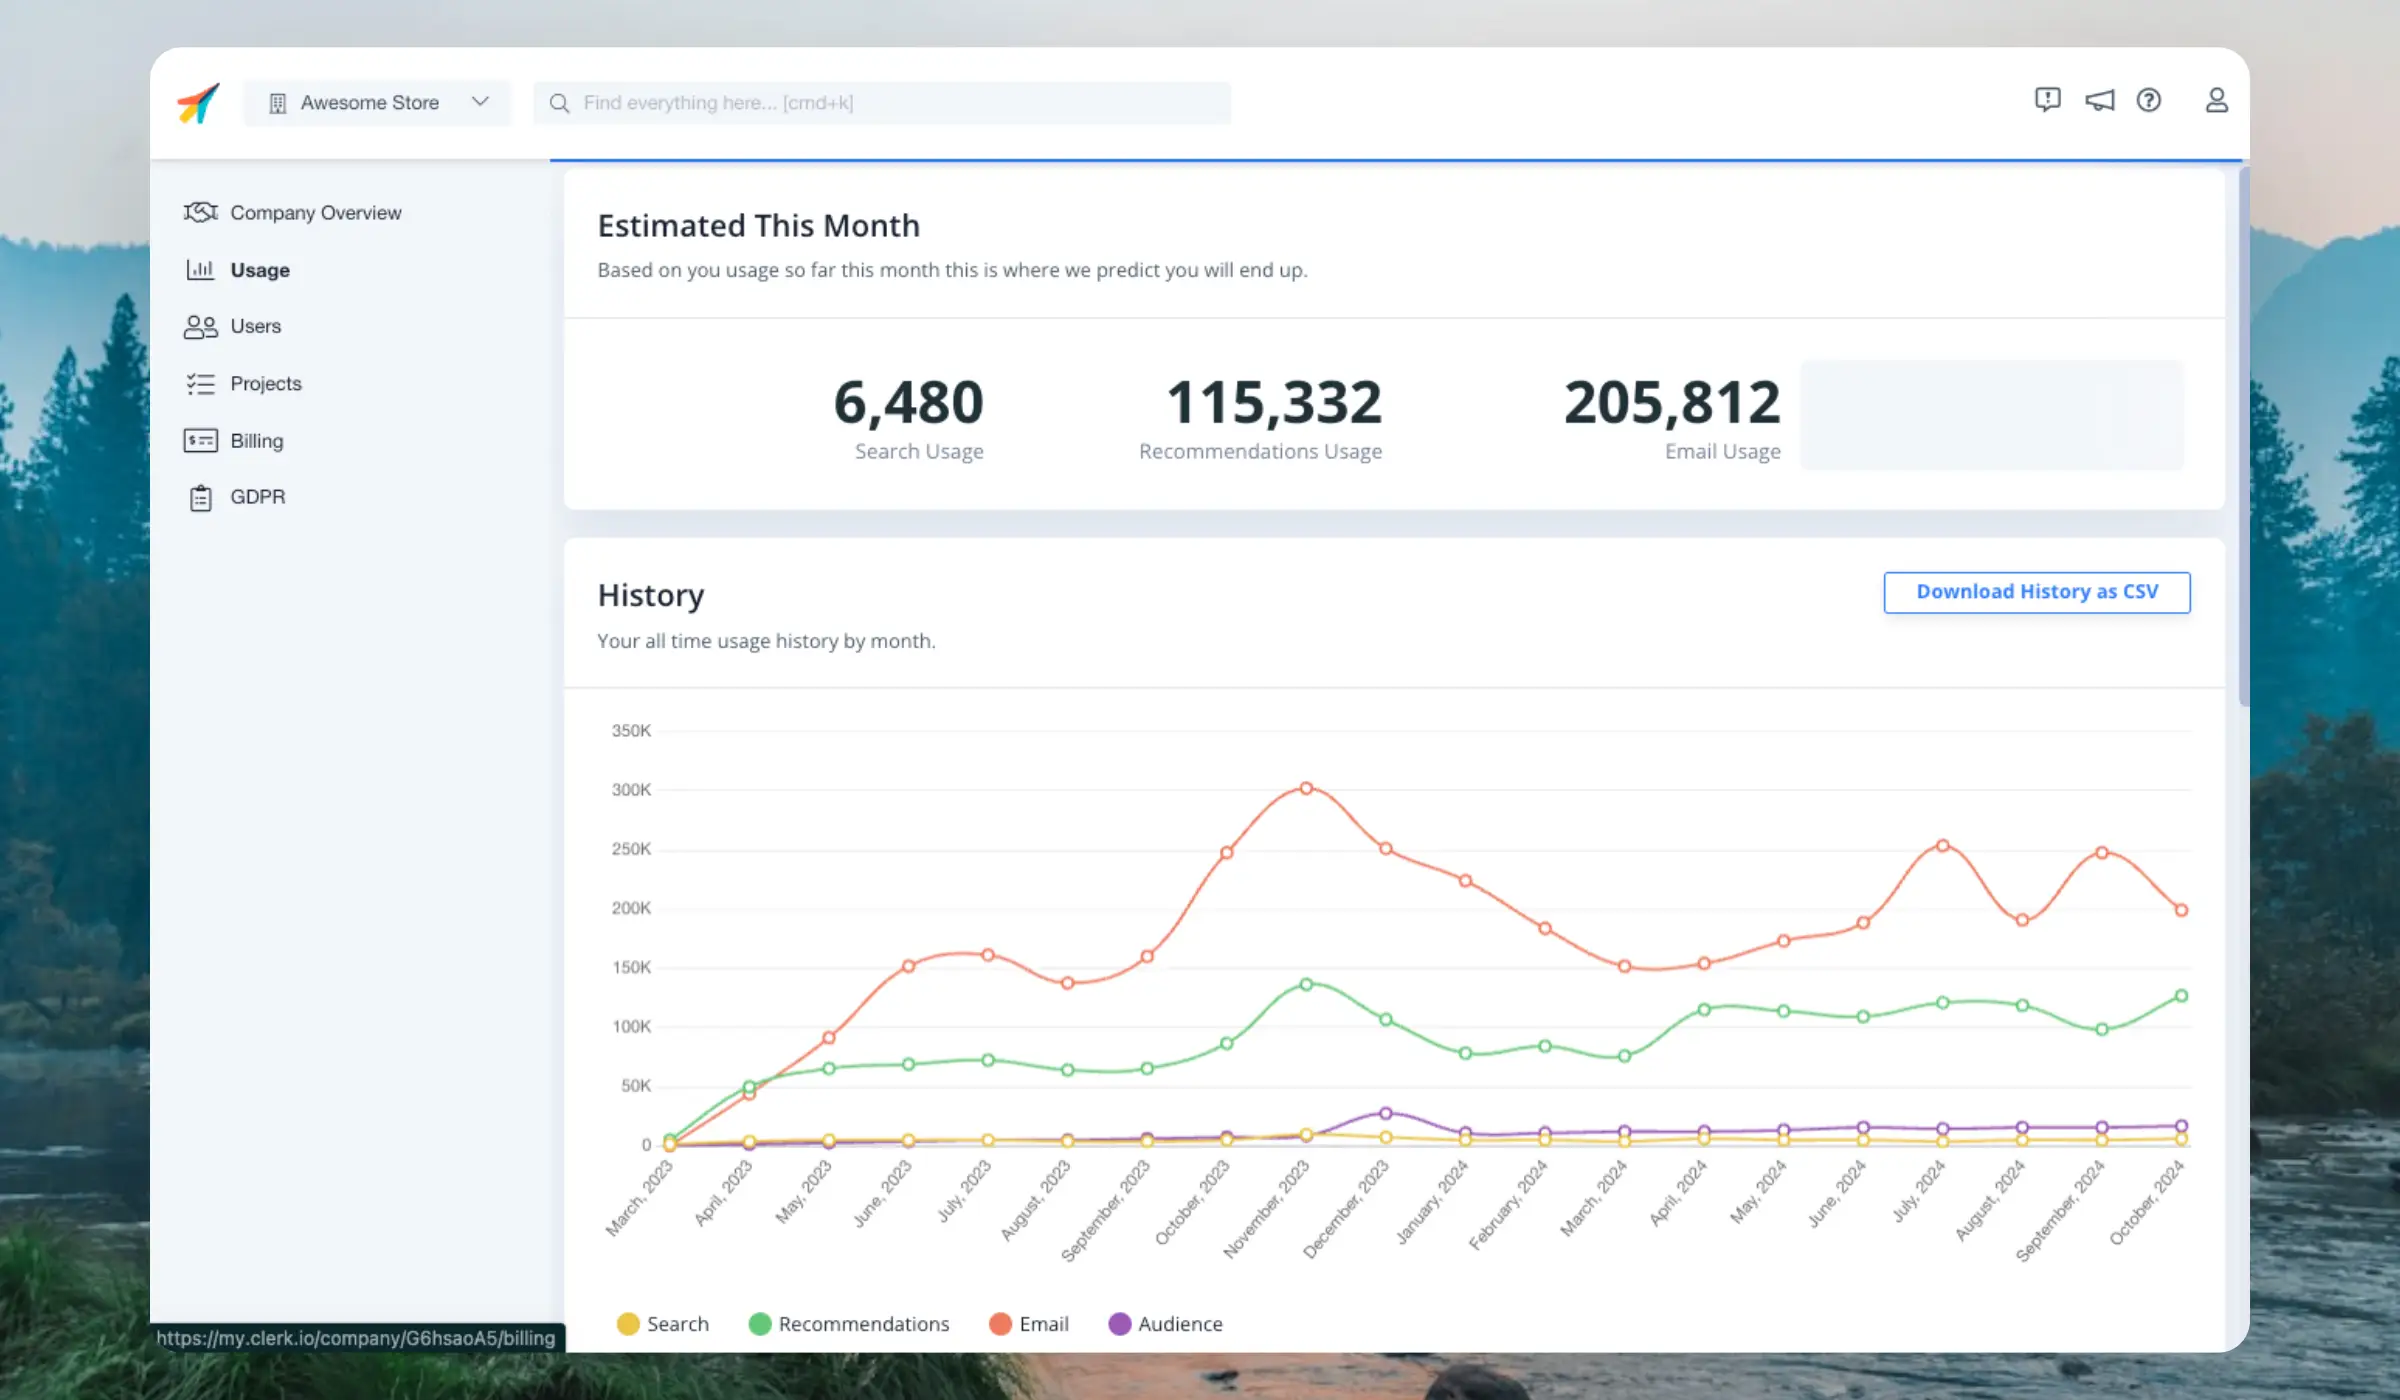
On the Usage page you can see your full usage history for each Clerk product and the estimated usage for the coming month.
Navigate to the Usage page by clicking the Store dropdown in the upper left corner and then COMPANY NAME > Usage, or simply by searching for Usage in the top of the page.
Fairness is important to us, so we only count usage when we successfully deliver results back. If a search, recommendation or email returns no results, no usage is counted.
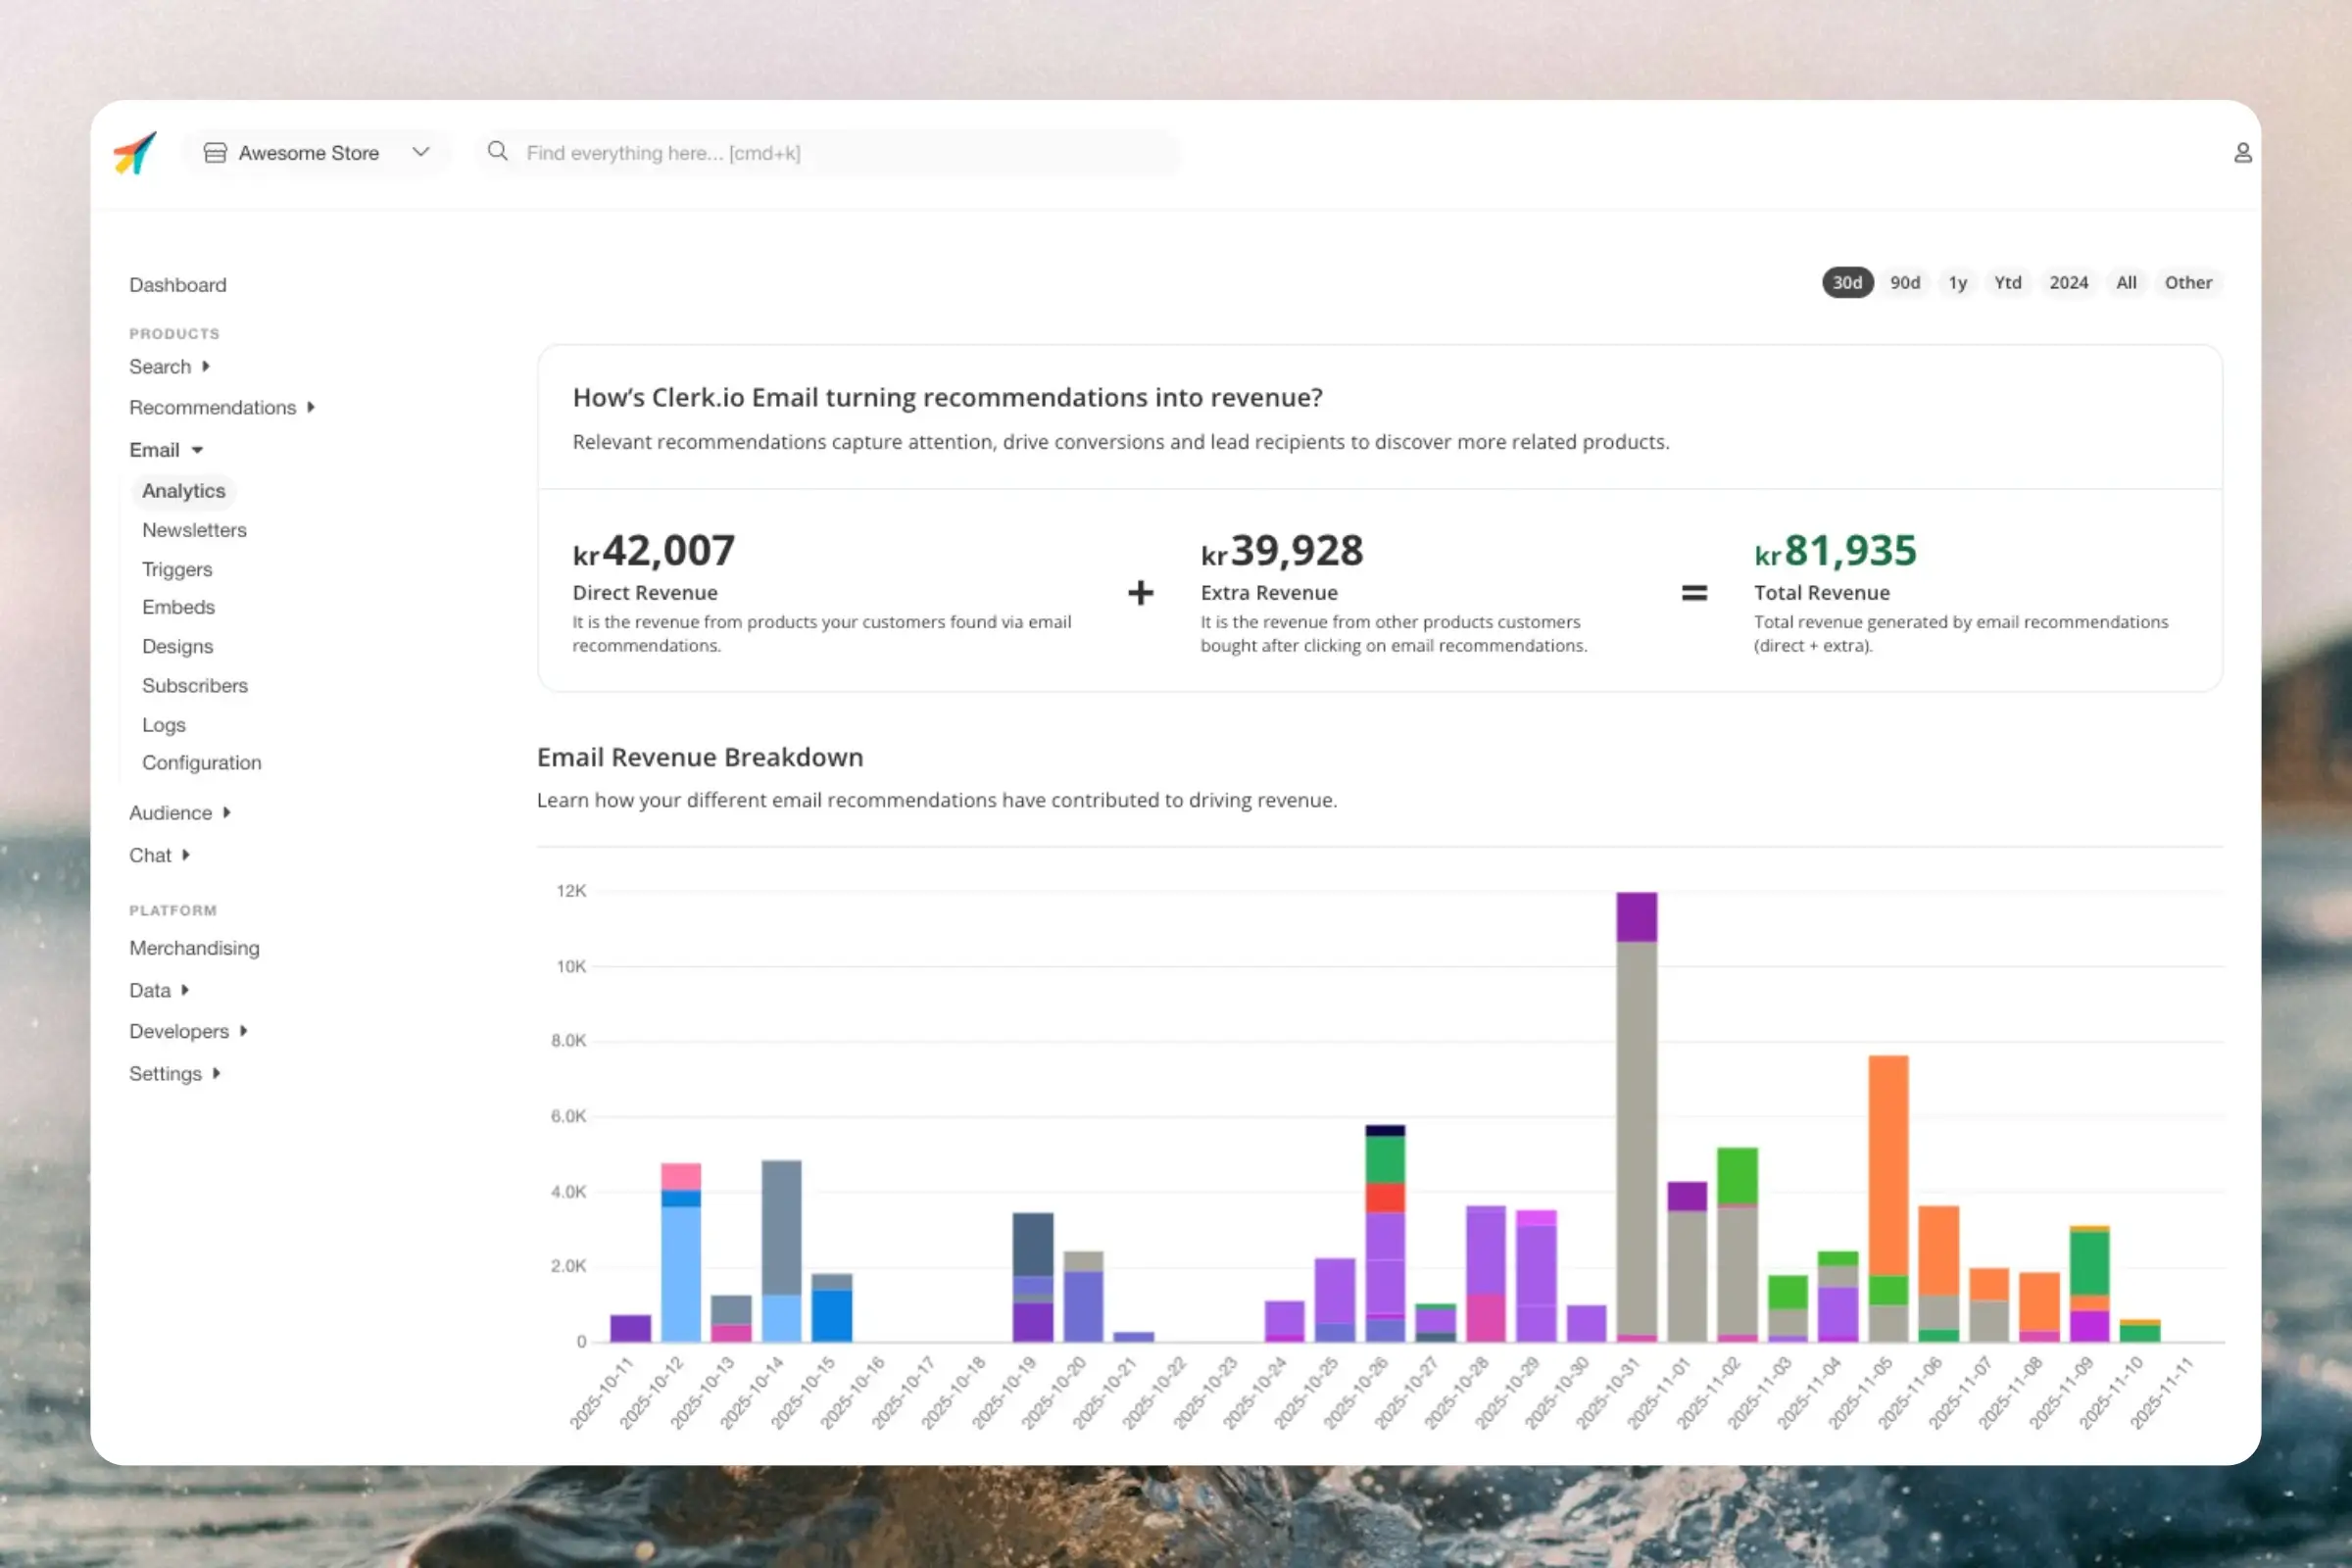
Email Analytics shows the revenue and engagement connected to your Clerk-enhanced emails. It separates products clicked in an email from the rest of the order.
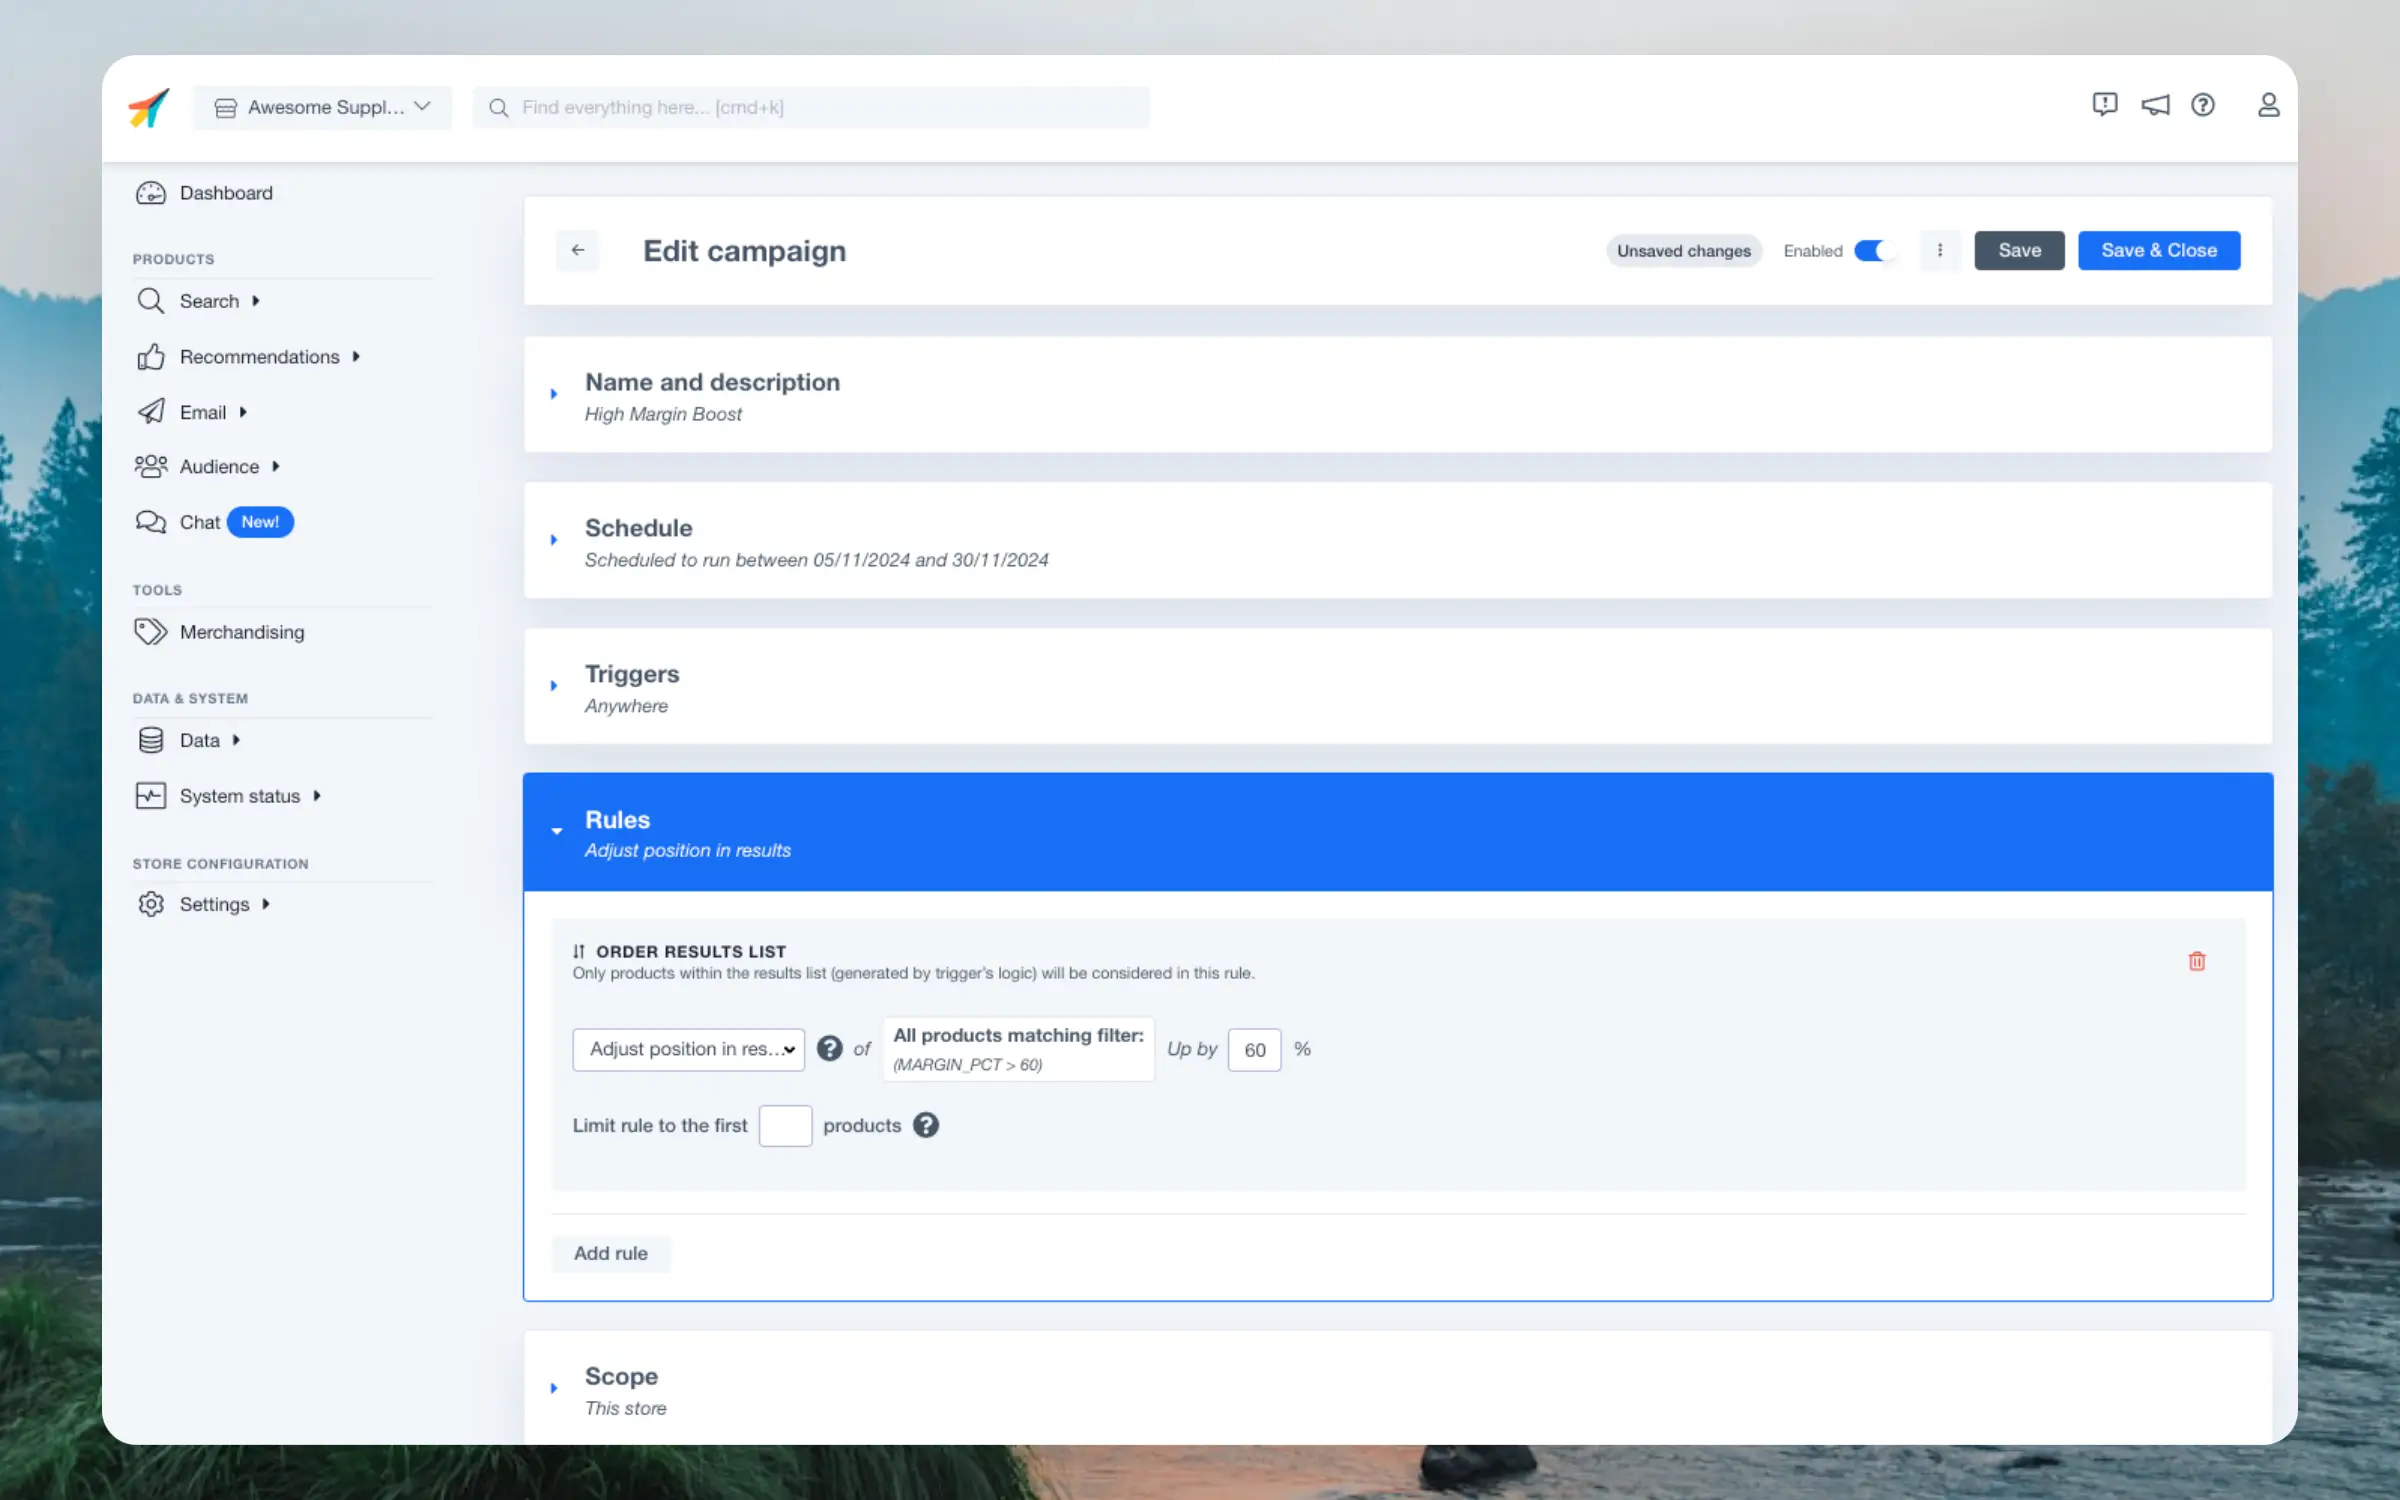
Merchandising gives you a high degree of control over the products shown by Clerk, like boosting products on sale, prioritising specific brands, hiding out-of-stock products and much more.
Campaigns always have a Name of your choice. Optionally, you can add a Description for reminding yourself and your colleagues of the campaigns purpose.
Decide whether a campaign should run indefinetely or during a specific timeframe. Scheduling is particularly useful if you only want to influence results during a period like the week of Black Friday or during your Christmas sales.