Installation von Sales-Tracking auf Smartweb / HostedShop
Senden Sie dynamisch Aufträge an Clerk.io.
Platforms:
Gehen Sie im Smartweb Admin zu Module → Kasse → checkout-approved.tpl
Fügen Sie den folgenden Sales-Tracking-Code am Ende der Datei ein, kurz vor dem abschließenden
{% raw %}{if !empty($page.orderId)}
    {entity controller=order assign=order id=$page.orderId userId=false statusId=false}

    {* Order Customer entity *}
    {entity controller=orderCustomer assign=orderCustomer orderId=$page.orderId}

    {* Order Lines collection *}
    {collection controller=orderLine assign=orderLines orderId=$page.orderId repay=false}

    {* Group order collection by class *}
    {$orderList = $orderLines->groupByClass()}

    {assign var=products value=''}

    {if $orderLines->getActualSize() gt 0}
        {if isset($orderList['CollectionOrderLine'])}
            {foreach $orderList.CollectionOrderLine as $orderLine}
                {$products = $products|cat:{ldelim}|cat:' "id": '|cat:$orderLine->ProductId|cat:', "quantity": '|cat:$orderLine->Amount|cat:', "price": '|cat:$orderLine->Price|cat:{rdelim}}

                {if !$orderLine@last}
                    {$products = $products|cat:', '}
                {/if}
            {/foreach}
        {/if}
    {/if}

    <span
        class="clerk"
        data-api="log/sale"
        data-sale="{$page.orderId}"
        data-email="{$orderCustomer->Email}"
        data-customer="{$user->Id}"
        data-products='[{$products}]'>
    </span>
{/if}{% endraw %}
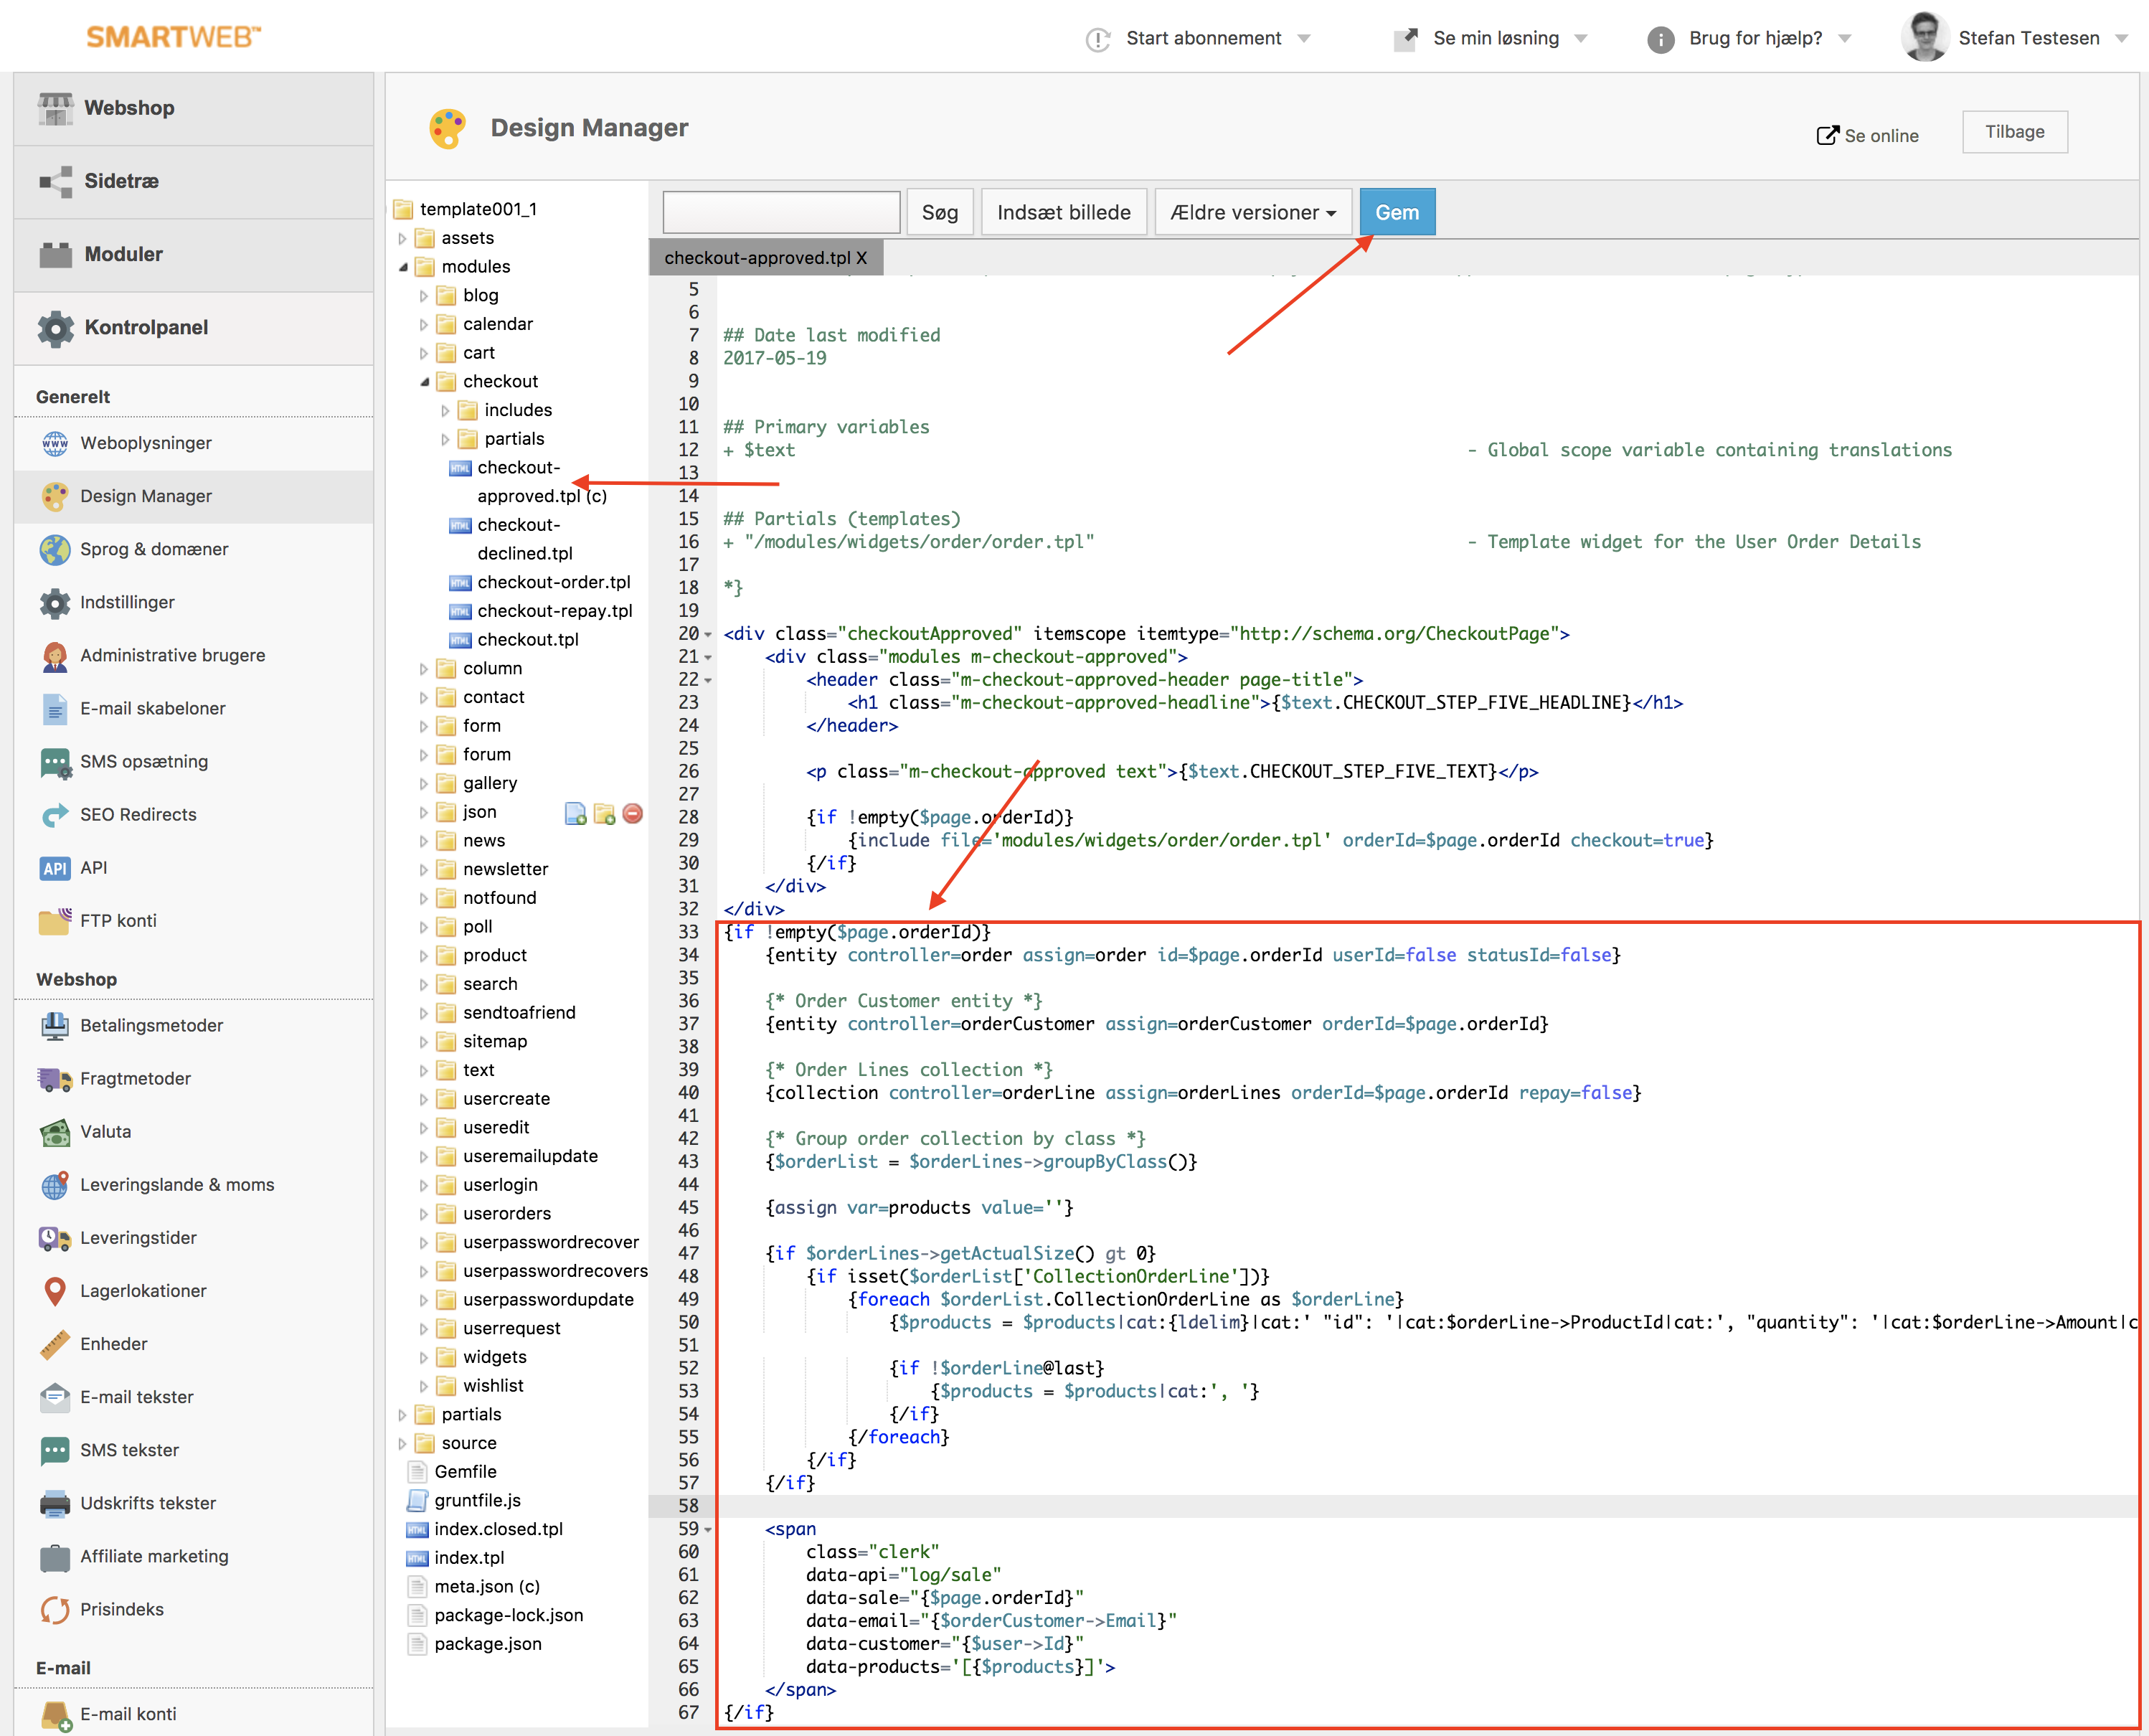
4. Klicken Sie auf Gem, um Ihre Änderungen zu speichern.