Embedding Subscriber Forms on your Website
Products:
Clerk.io allows you to host subscribers directly in the platform.
A great way to get new subscribers is to add an easy way of letting them sign up to newsletters, directly from your website.
Your new sign up form will look like the this out-of-the-box: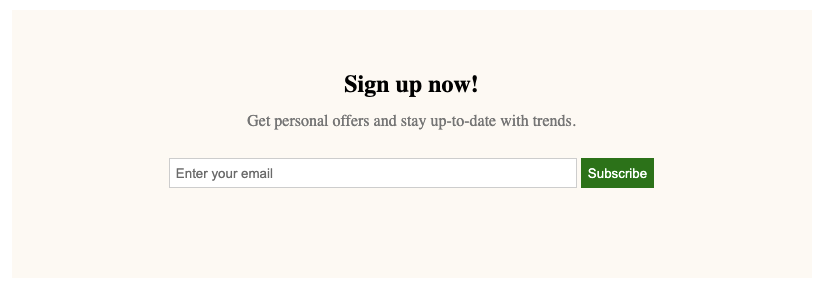
Embedding a general sign up form
This form will sign visitors up to all emails sent from Clerk.
Simply copy the below embed code and insert it in your webshop where you want it to show:
<div class="clerk-sign-up">
   <h2 class="clerk-sign-up-headline">Sign up now!</h2>
   <div class="clerk-sign-up-subtitle">Get personal offers and stay up-to-date with trends.</div>
   <div class="clerk-input-wrapper">
      <input type="text" id="clerk-add-subscriber-input" placeholder="Enter your email"></input>
      <button id="clerk-add-subscriber-btn" onclick="add_subscriber()">Subscribe</button>
   </div>
   <div id="clerk-subscribe-message"></div>
</div>

<script>
   function add_subscriber(){
      var clerk_btn = document.getElementById("clerk-add-subscriber-btn");
      var clerk_input = document.getElementById("clerk-add-subscriber-input");
      var clerk_message = document.getElementById("clerk-subscribe-message");
      Clerk("call","subscriber/subscribe", {
         email: clerk_input.value
      },
      function(response){
         clerk_message.style.color = "#008001";
         clerk_message.innerText = "You are now subscribed!";
         clerk_btn.innerText = "Subscribed!";
         clerk_btn.style.opacity = "0.5";
         clerk_btn.disabled = true;
      },
      function(response) {
         clerk_message.style.color = "#EE360E";
         clerk_message.innerText = "Could not subscribe. Please try again.";
      }
   )};
</script>
<style>
   #clerk-add-subscriber-input {
      height: 28px;
      width: 50%;
      padding: 0px 0px 0px 6px;
      border: 1px solid #D3D3D3;
   }

   #clerk-add-subscriber-btn {
      height:  30px;
      width: auto;
      background-color: #008001;
      border:  1px solid #008001;
      color: white;
      cursor: pointer;
   }

   #clerk-subscribe-message {
      height: 20px;
      margin: auto;
      text-align: center;
   }

   .clerk-sign-up {
      width: 50%;
      padding: 60px 0px 60px 0px;
      max-width: 800px;
      min-width: 500px;
      margin: 40px auto 40px auto;
      background-color: #FEFAF4;
   }

   .clerk-sign-up-headline {
      margin: 0px 14px 14px 14px;
      text-align:  center;
   }

   .clerk-sign-up-subtitle {
      margin: 14px 14px 28px 14px;
      text-align: center;
      color: #808080;
   }

   .clerk-input-wrapper {
      margin: 10px auto 10px auto;
      text-align: center;
   }

   .clerk-input-label {
      margin:  5px 0px 5px 0px;
   }
</style>
The code contains 3 parts:
- An HTML block that shows the form. This can be freely styled if needed.
- A script that takes the visitors email address and adds them as a subscriber in Clerk.
- A CSS section thats styles the form. This can also be freely styled if needed.
Embedding a sign-up form for a specific list
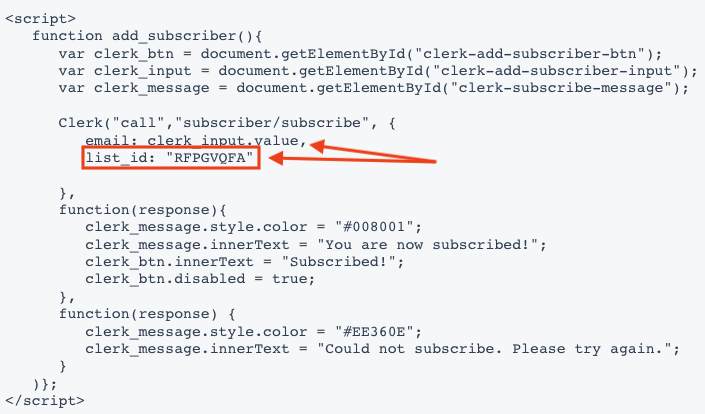
Clerk.io also allows you to work with lists of recipients that can be used for specific email campaigns like special offers, unique brand interests etc.
To configure the sign-up form for a specific list, you need the List ID which can be found in my.clerk.io > Email > Subscribers > Lists.
Add list_id containing the ID of your list, to the script found above.
Remember the comma after “clerk_input.value”: