Exporting Audiences to Apsis
Audience can be setup to automatically sync a group of customers to Apsis so your lists are always up to date.
You only have to setup the sync once, and then Apsis will be kept updated with the Audiences you have chosen, even as they change from day to day.
1. Create API key in Apsis
1.1 Start by logging in to your Apsis backend and go to Konto

1.2 Click Integration.
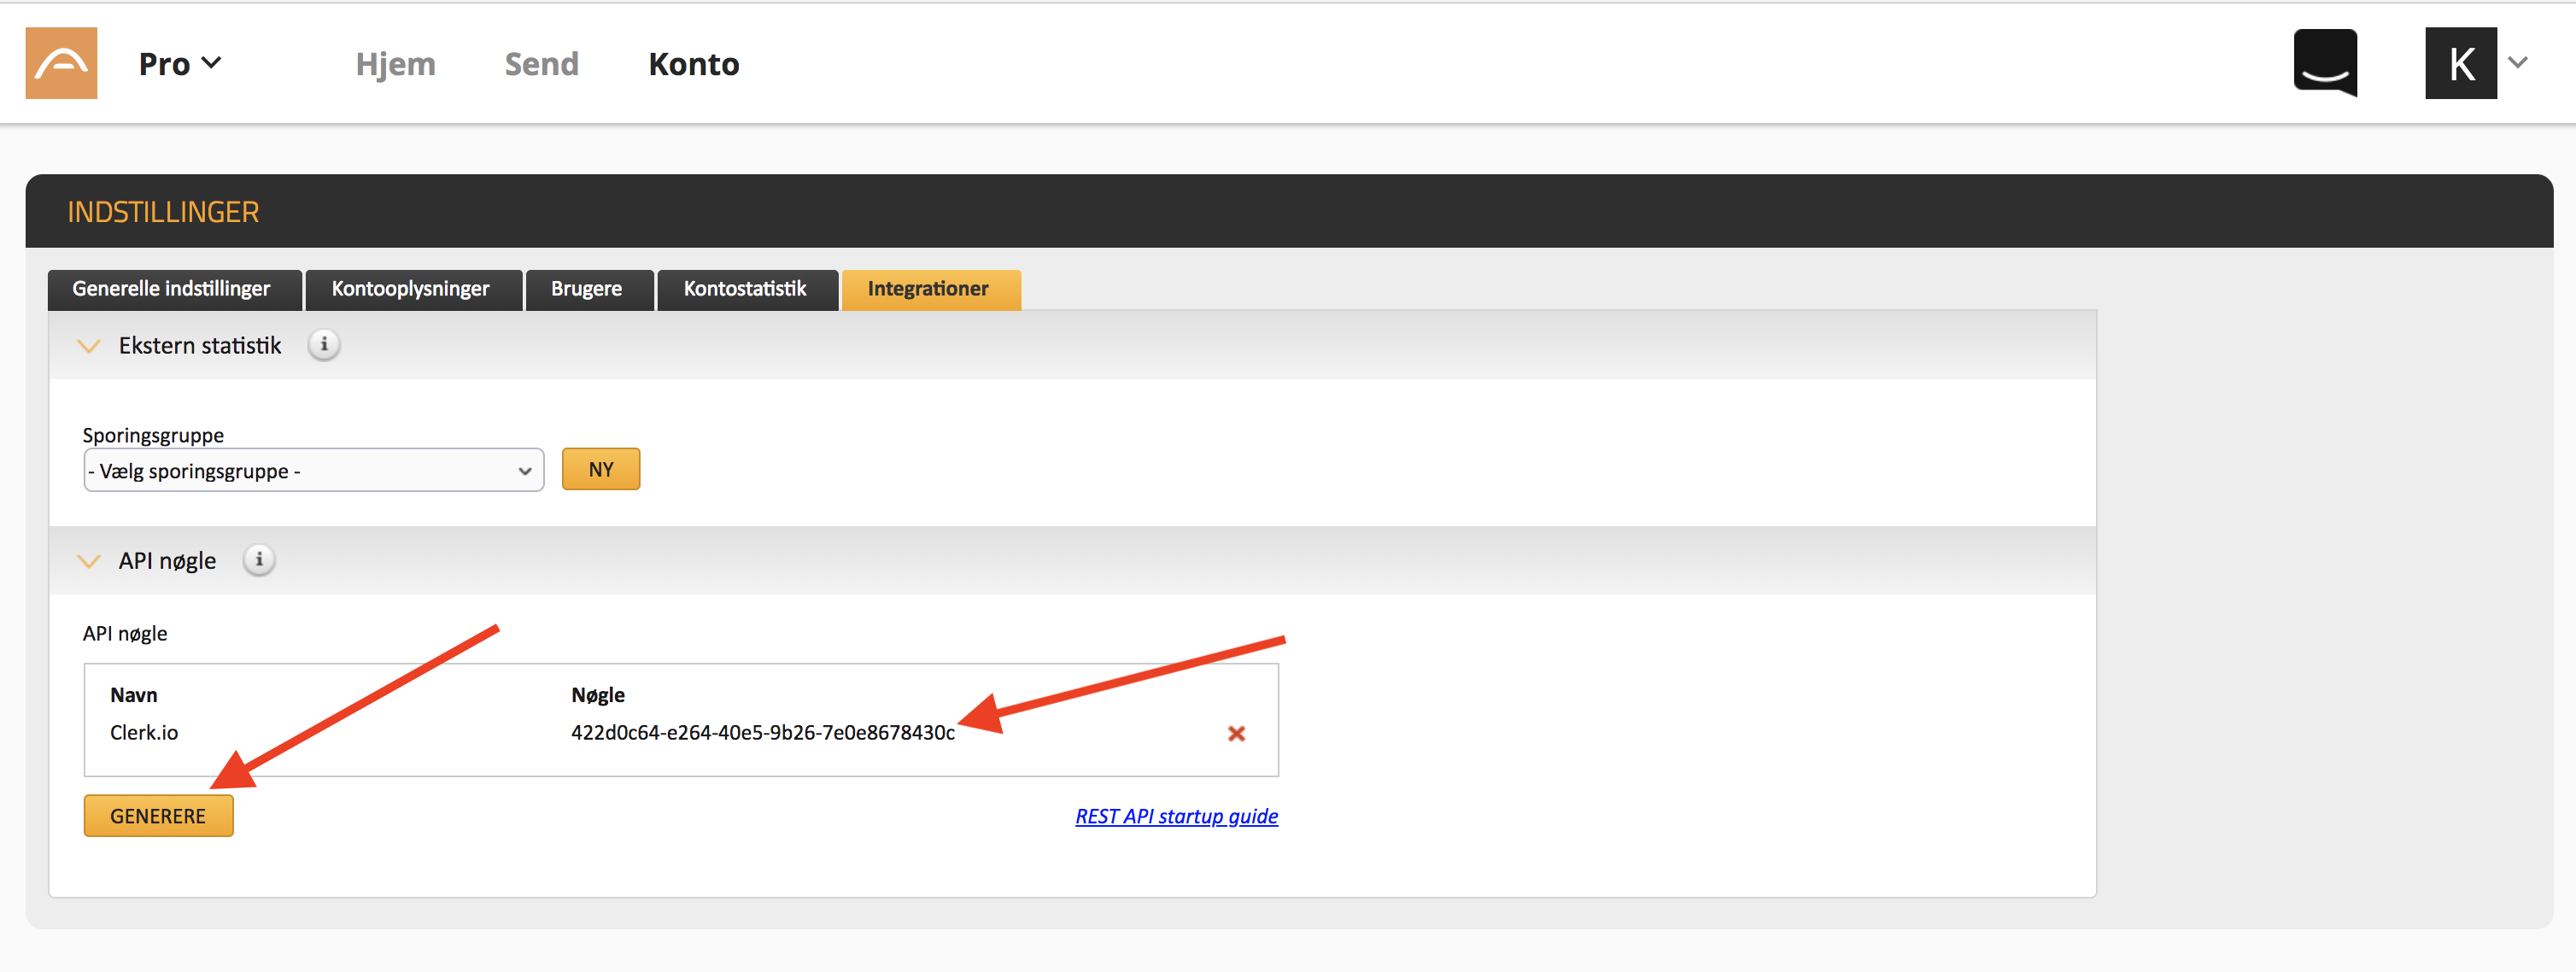
1.3 Click Generere to generate a new set of API keys. Give the keys the name Clerk.io.
2. Setting up the Exporter
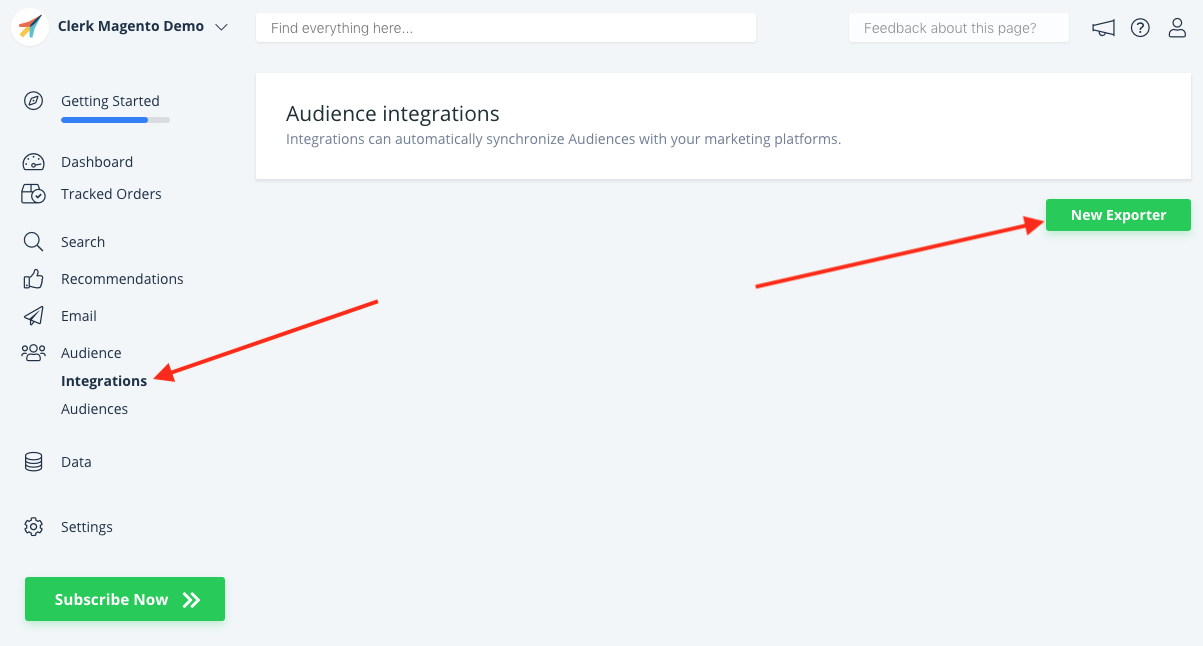
2.1 In my.clerk.io go to Audience -> Integrations and click New Exporter in the bottom of the page.
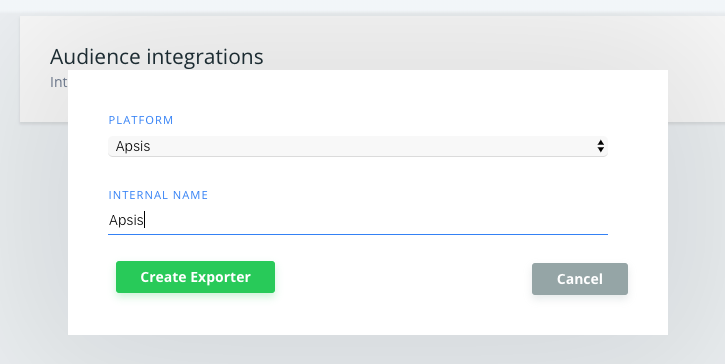
2.2 Choose Apsis from the dropdown and give it a name. Then click Create Exporter.
2.3 Click the Apsis Exporter you created.
2.4 Copy the API Key from Apsis to the Exporter settings, and insert the Sender Name and Sender Email of your choice, from your company. NOTE: Apsis takes around 10 minutes to initialise the API keys, so you might get a “Not Authenticated” error until then. Simply wait a few minutes and try again.
2.5 Click Update Settings to initialise the Exporter.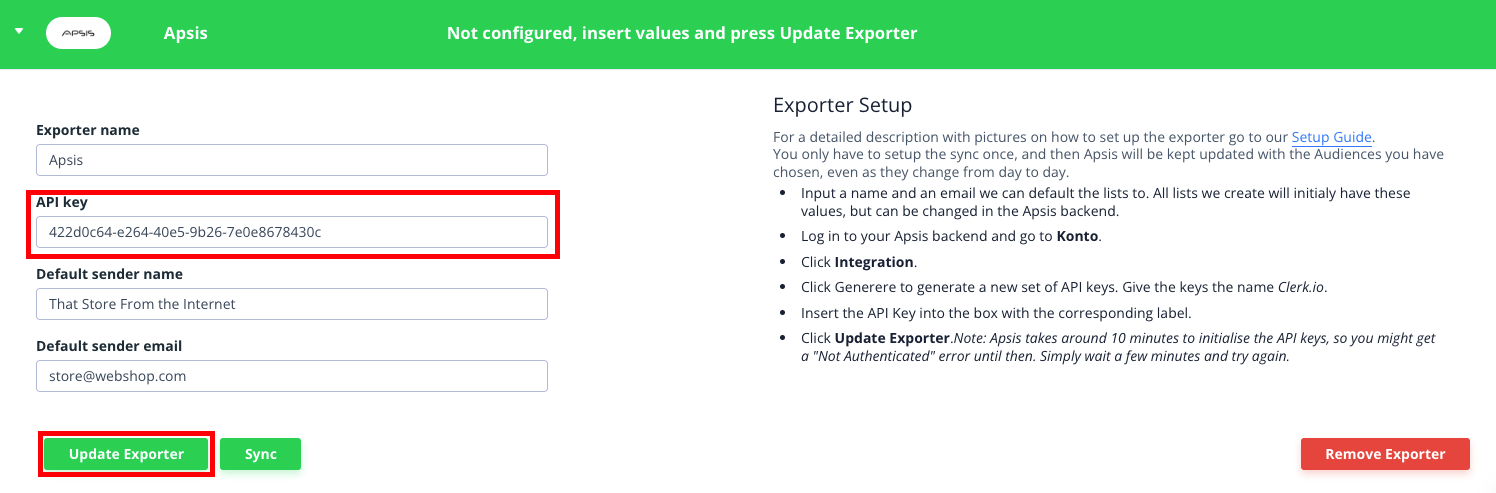
3. Syncing Audiences
3.1. Go to Target Audience.
3.2. Create any Audience you want and open the Export tab
3.3. Under Export, check SYNC WITH for Apsis.
3.5 Click Save Audience.
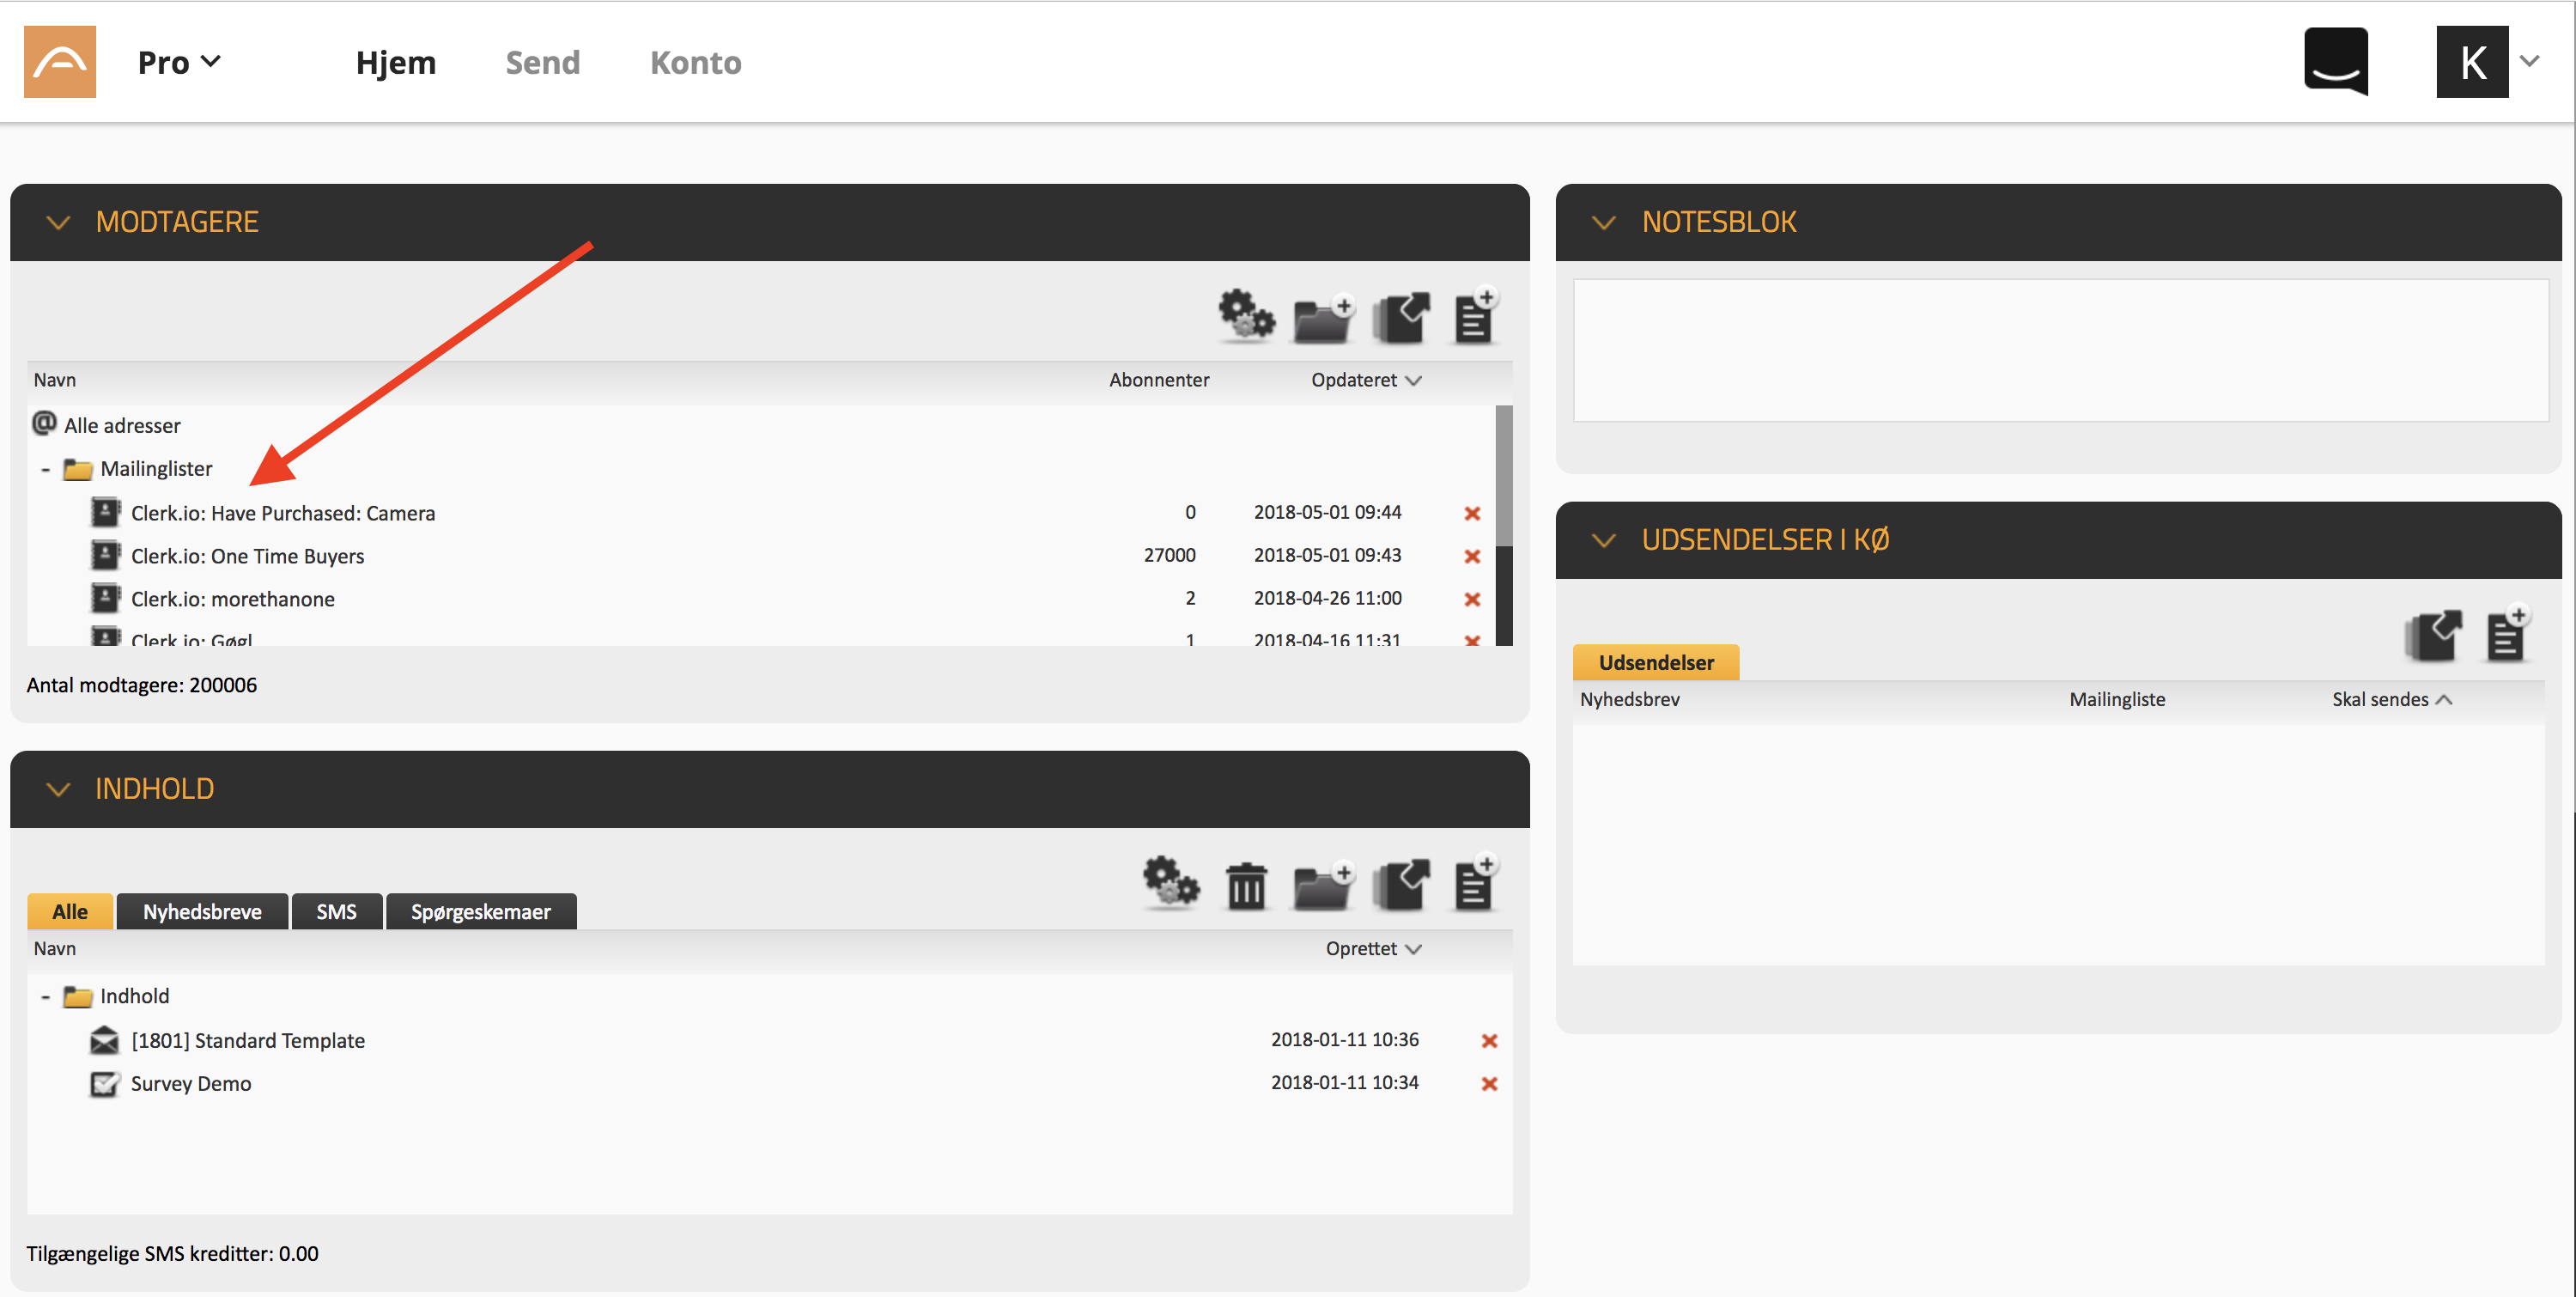
3.6 Apsis will now sync the Audience. It might take a little while for it to finish. Afterwards your Audience will show up in Mailinglister in Apsis.
3.7 You can follow this procedure for all the Audiences you want to export to Apsis.
And thats it! Apsis will now be kept up-to-date, every day with any Audience you create and sync.