Exporting Clerk.io Audiences to MailChimp
Clerk Audience can be setup to automatically sync a group of customers to MailChimp so your Mailchimp audiences are always up to date.
You only have to setup the sync once, and then MailChimp will be kept updated with the Clerk Audiences you have chosen, even as they change from day to day.
Follow these steps to setup the sync.
1. In Mailchimp
1.1. Start by going to Audience in the side menu.
1.2. Under Audience, choose All contacts.
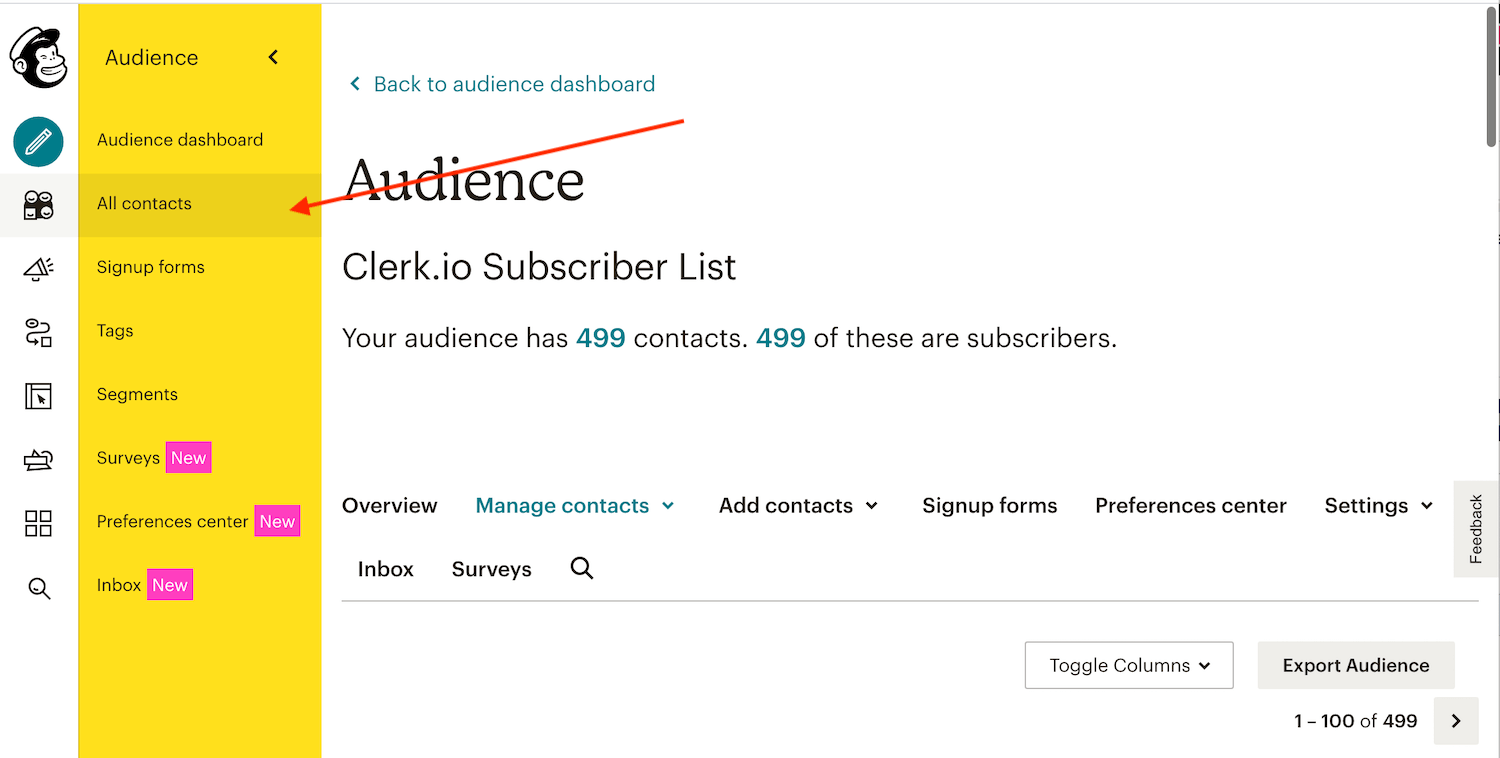
1.3. Choose the Mailchimp audience of customers that are subscribed to your emails. Note down the name of this Mailchimp audience. You will need it later.
IMPORTANT: Your Mailchimp audiences must contain email addresses of your recipients as Clerk Audience can only sync with existing emails on the Mailchimp Audience.
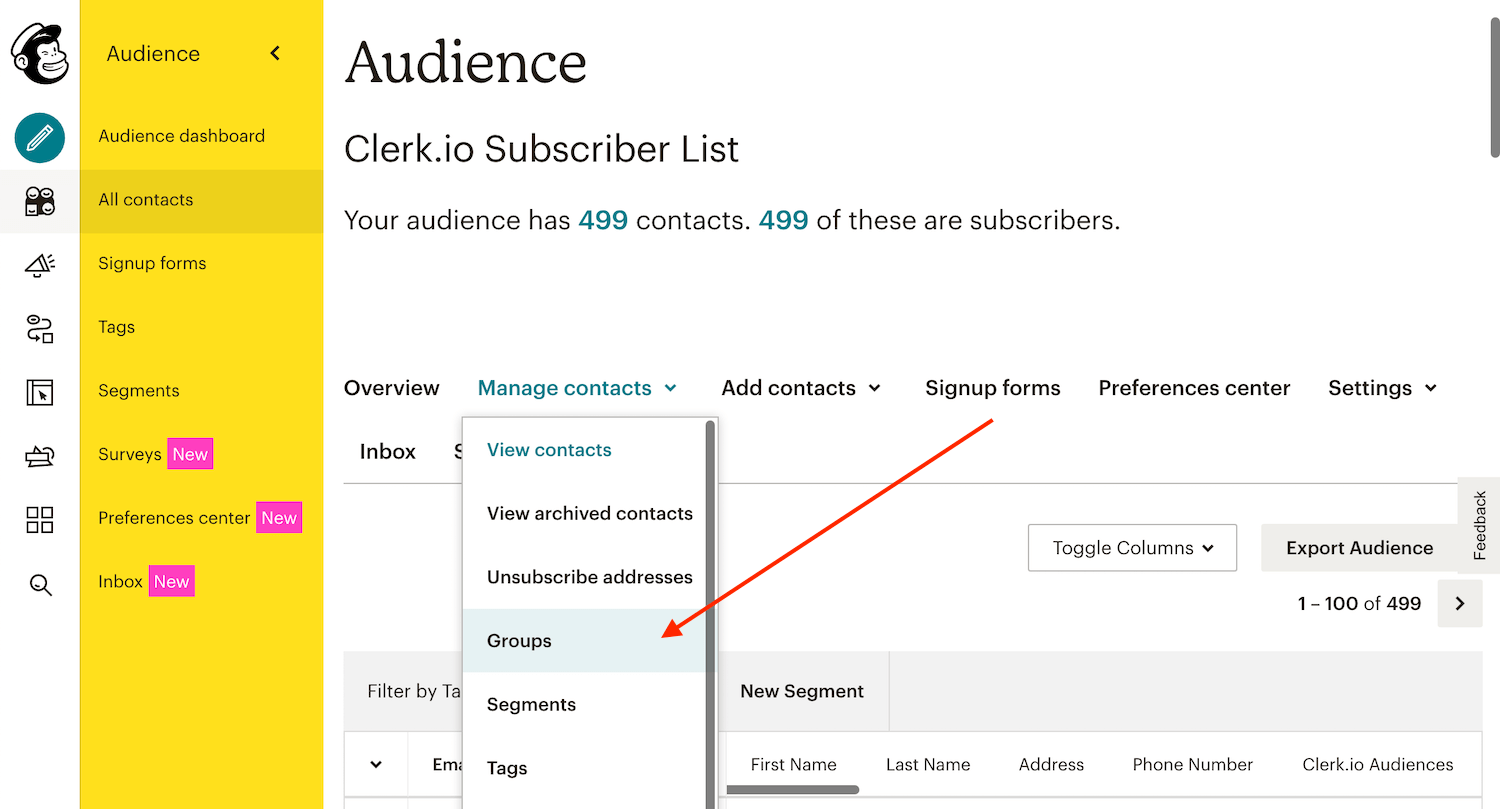
1.4. On the Mailchimp Audience page, go to Manage Contacts -> Groups.
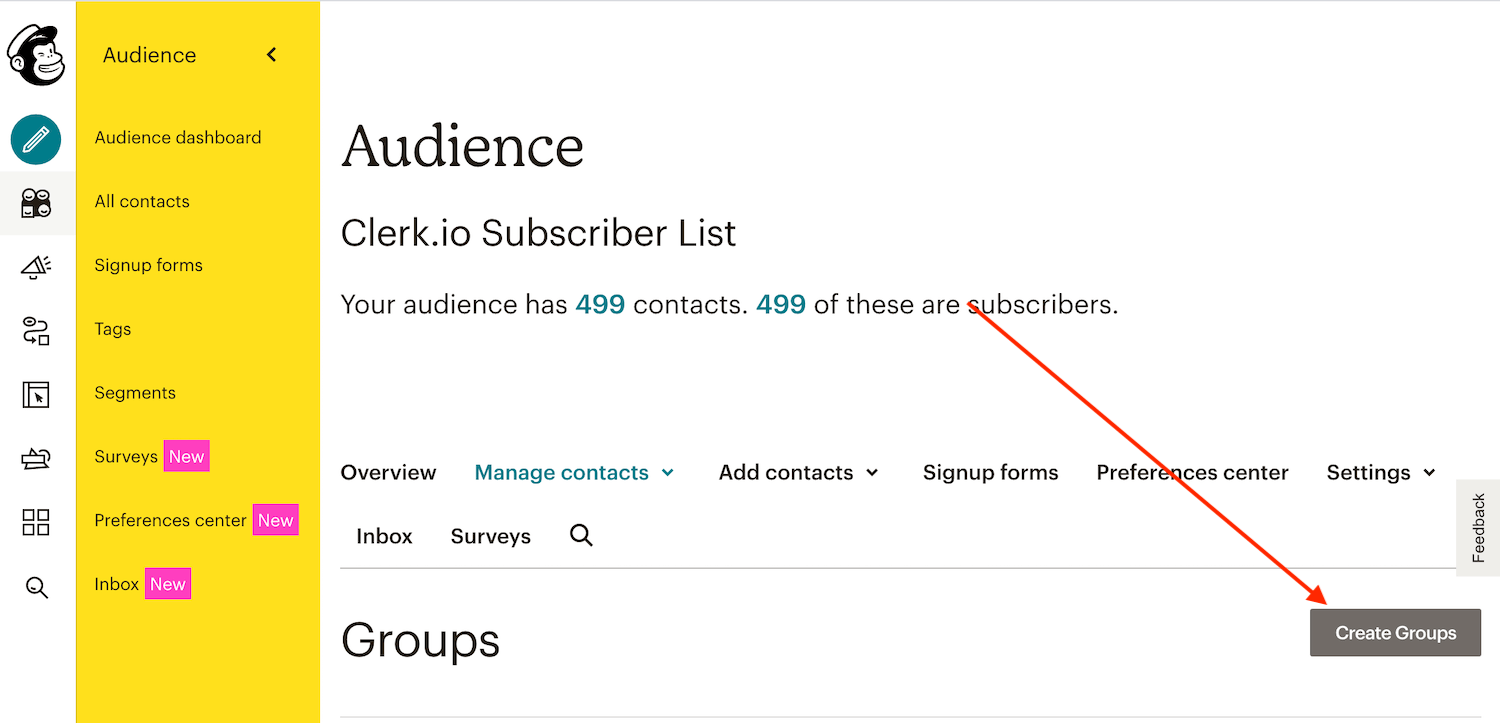
1.5. Click on Create Groups.
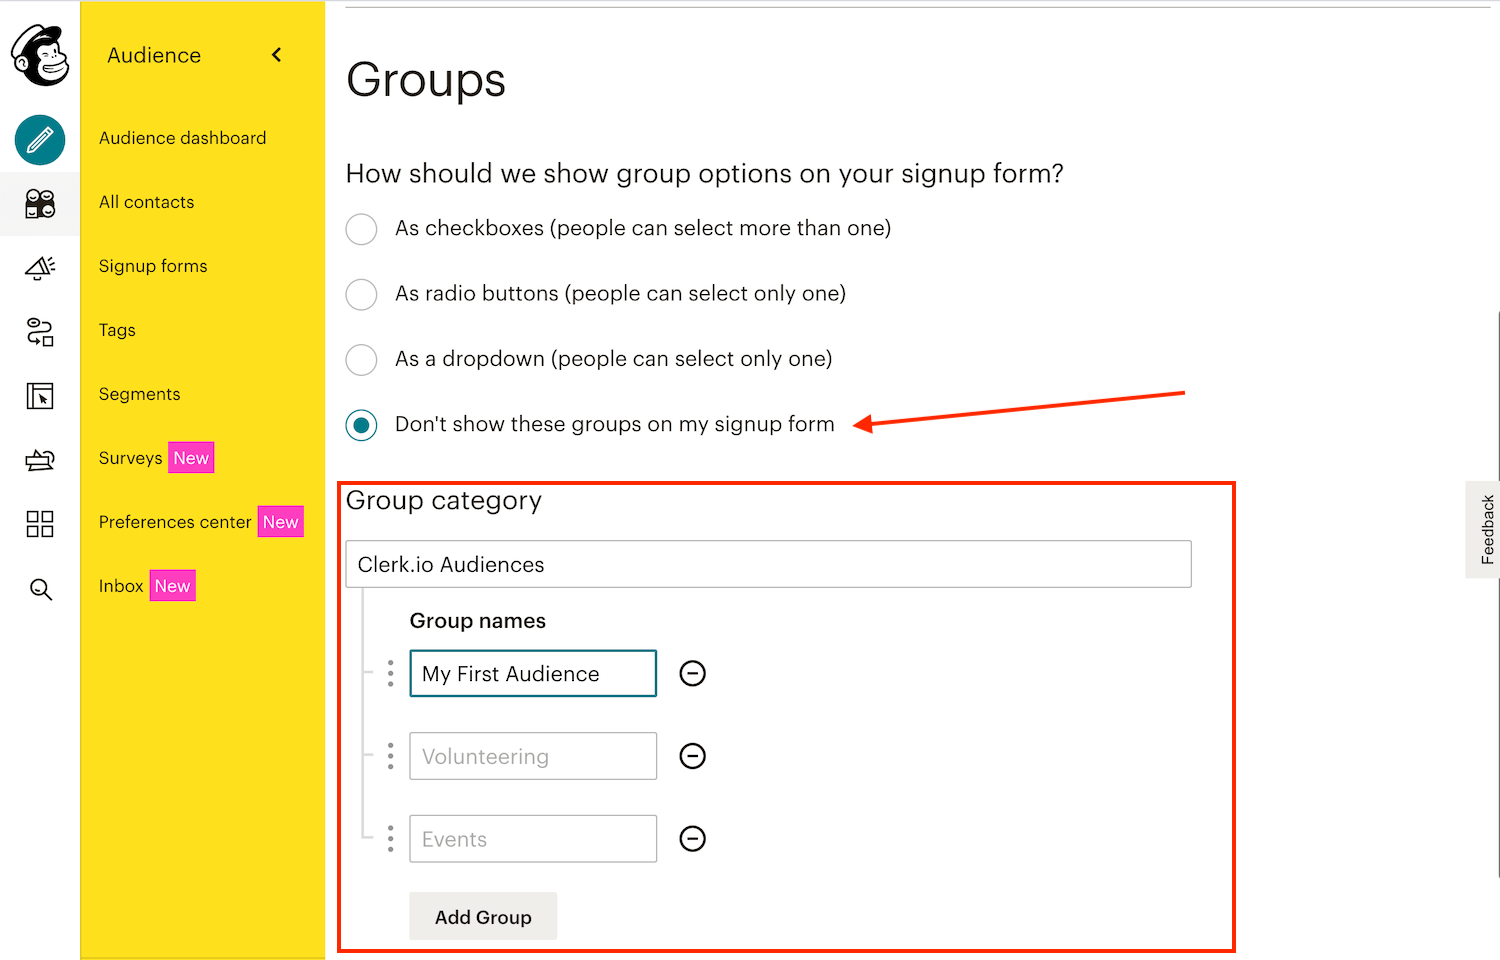
1.6. Choose " Don’t show these these groups on my signup form".
1.7. Give the group a Category name. Usually this should just be Clerk.io Audiences so you can keep track of where it comes from.
Note down the name of this category. You will need it later.
1.8. Give the first group a name. MailChimp needs this to create the group, but it can be deleted afterwards.
1.9. Click Save.
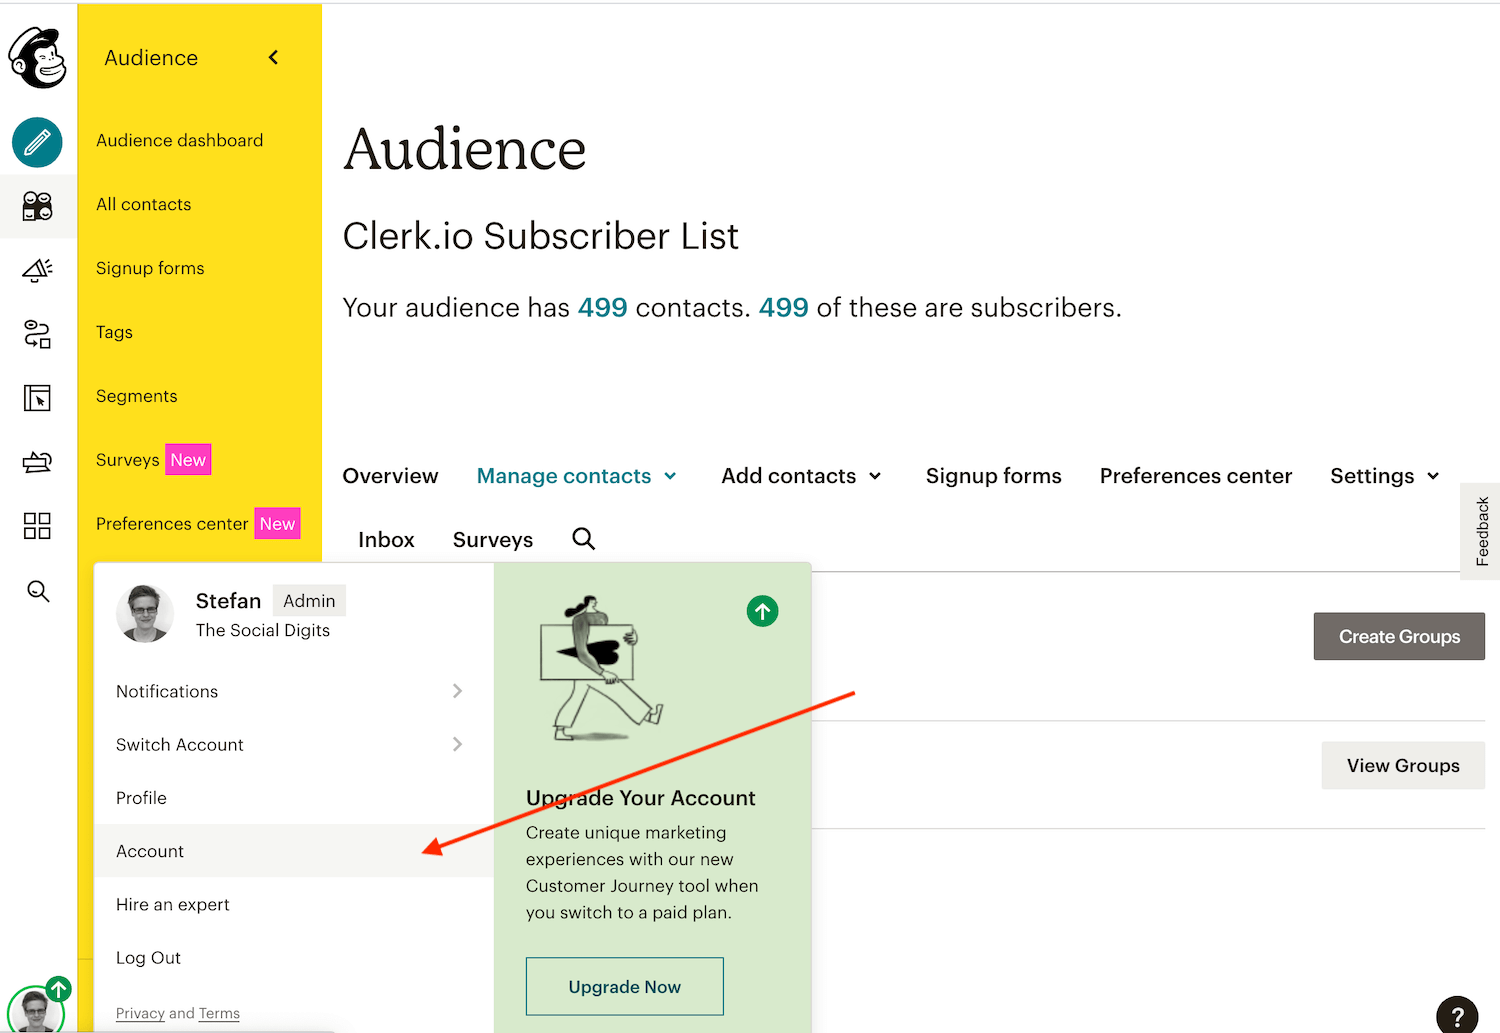
1.10. In the lower right corner, click your user name and then choose Account from the dropdown.
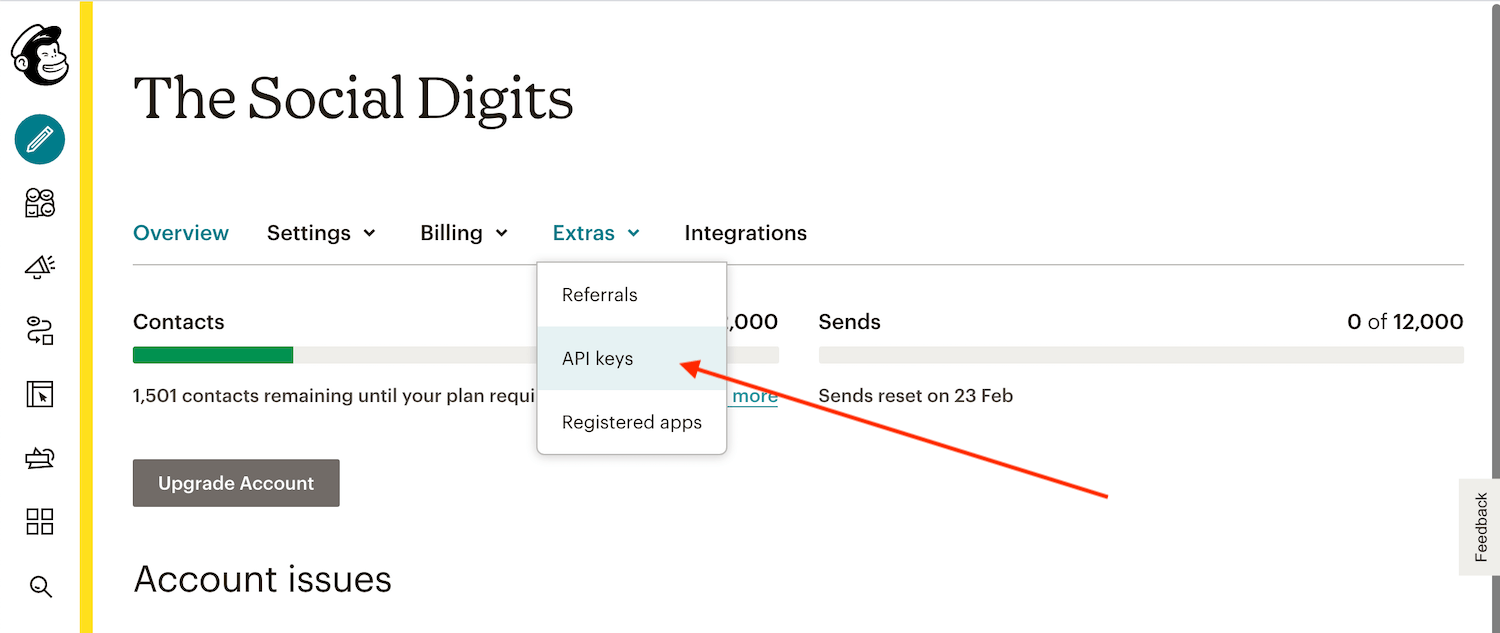
1.11. Click the Extras tab and choose API Keys.
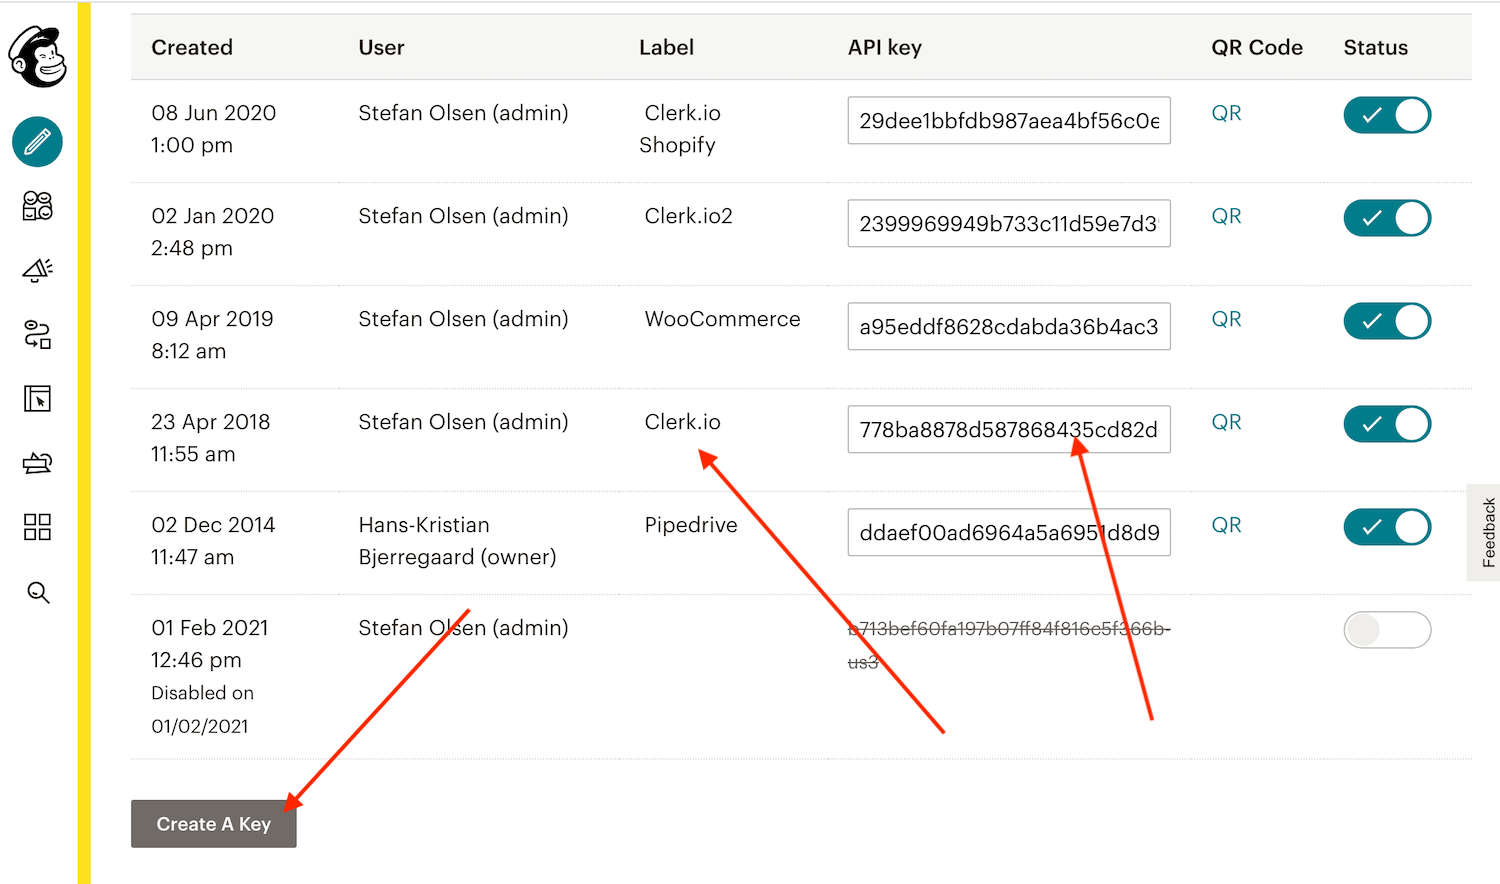
1.12. Click Create A Key and label it Clerk.io.
Copy the API key. You will need it later.
2. In the Clerk.io Dashboard
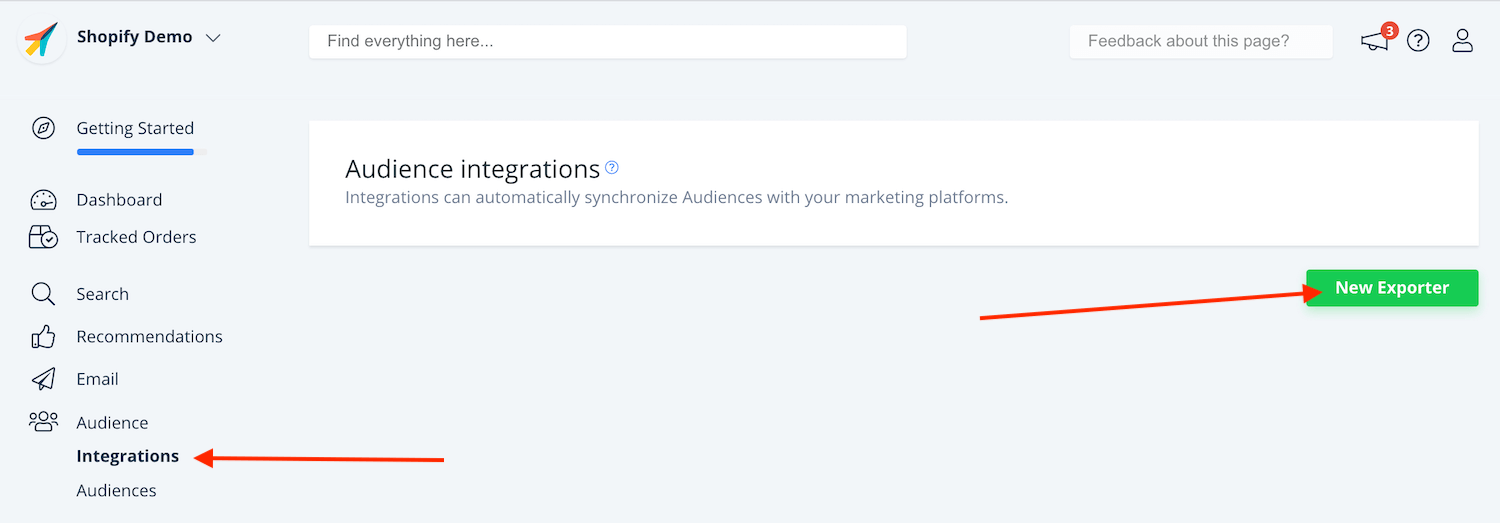
2.1. Go to Audience -> Integrations in the side menu and click New Exporter
2.2. Choose MailChimp from the Platform dropdown and name the exporter.
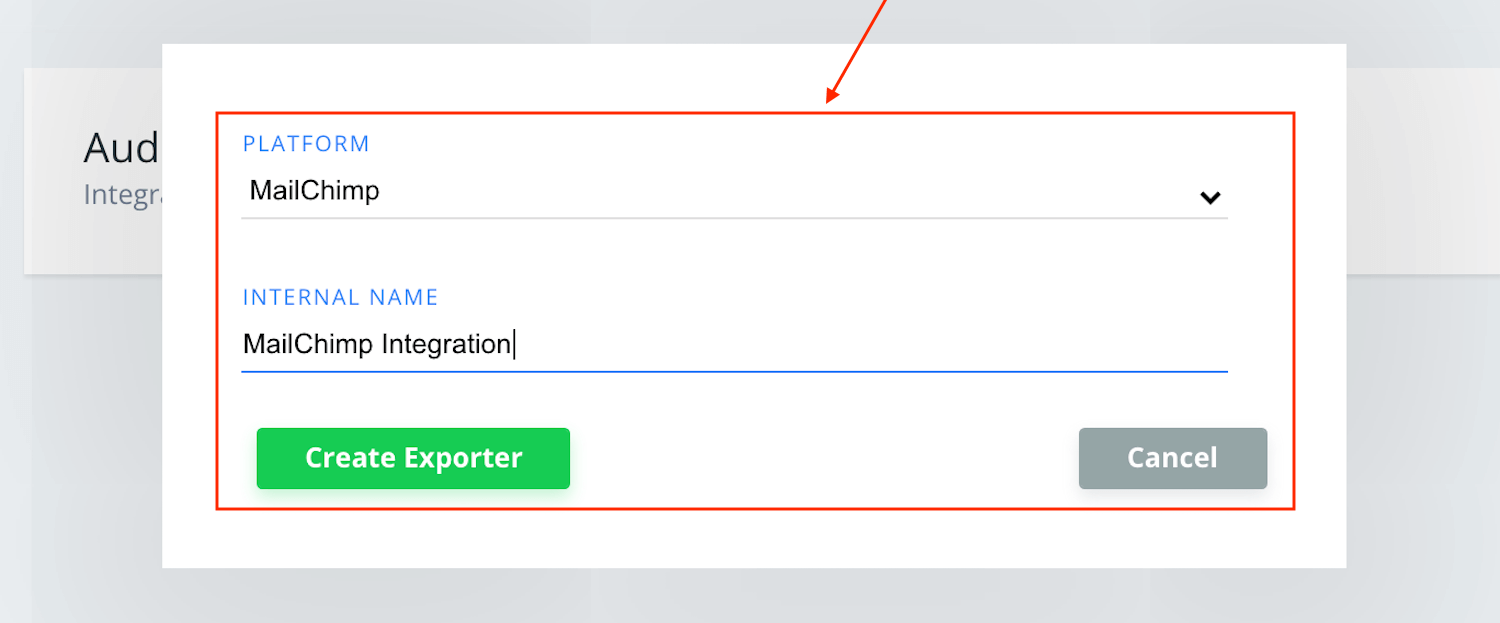
2.3. Click Create Exporter.
2.4. Click on your Exporter in the bottom of the page, to configure it.
2.5. Insert the API key(from step 1.10), the name of the Subscriber List/ Contacts (from step 1.2), and the name of the Category you created (from step 1.5) from MailChimp.
2.6. Finally, click Update Settings.
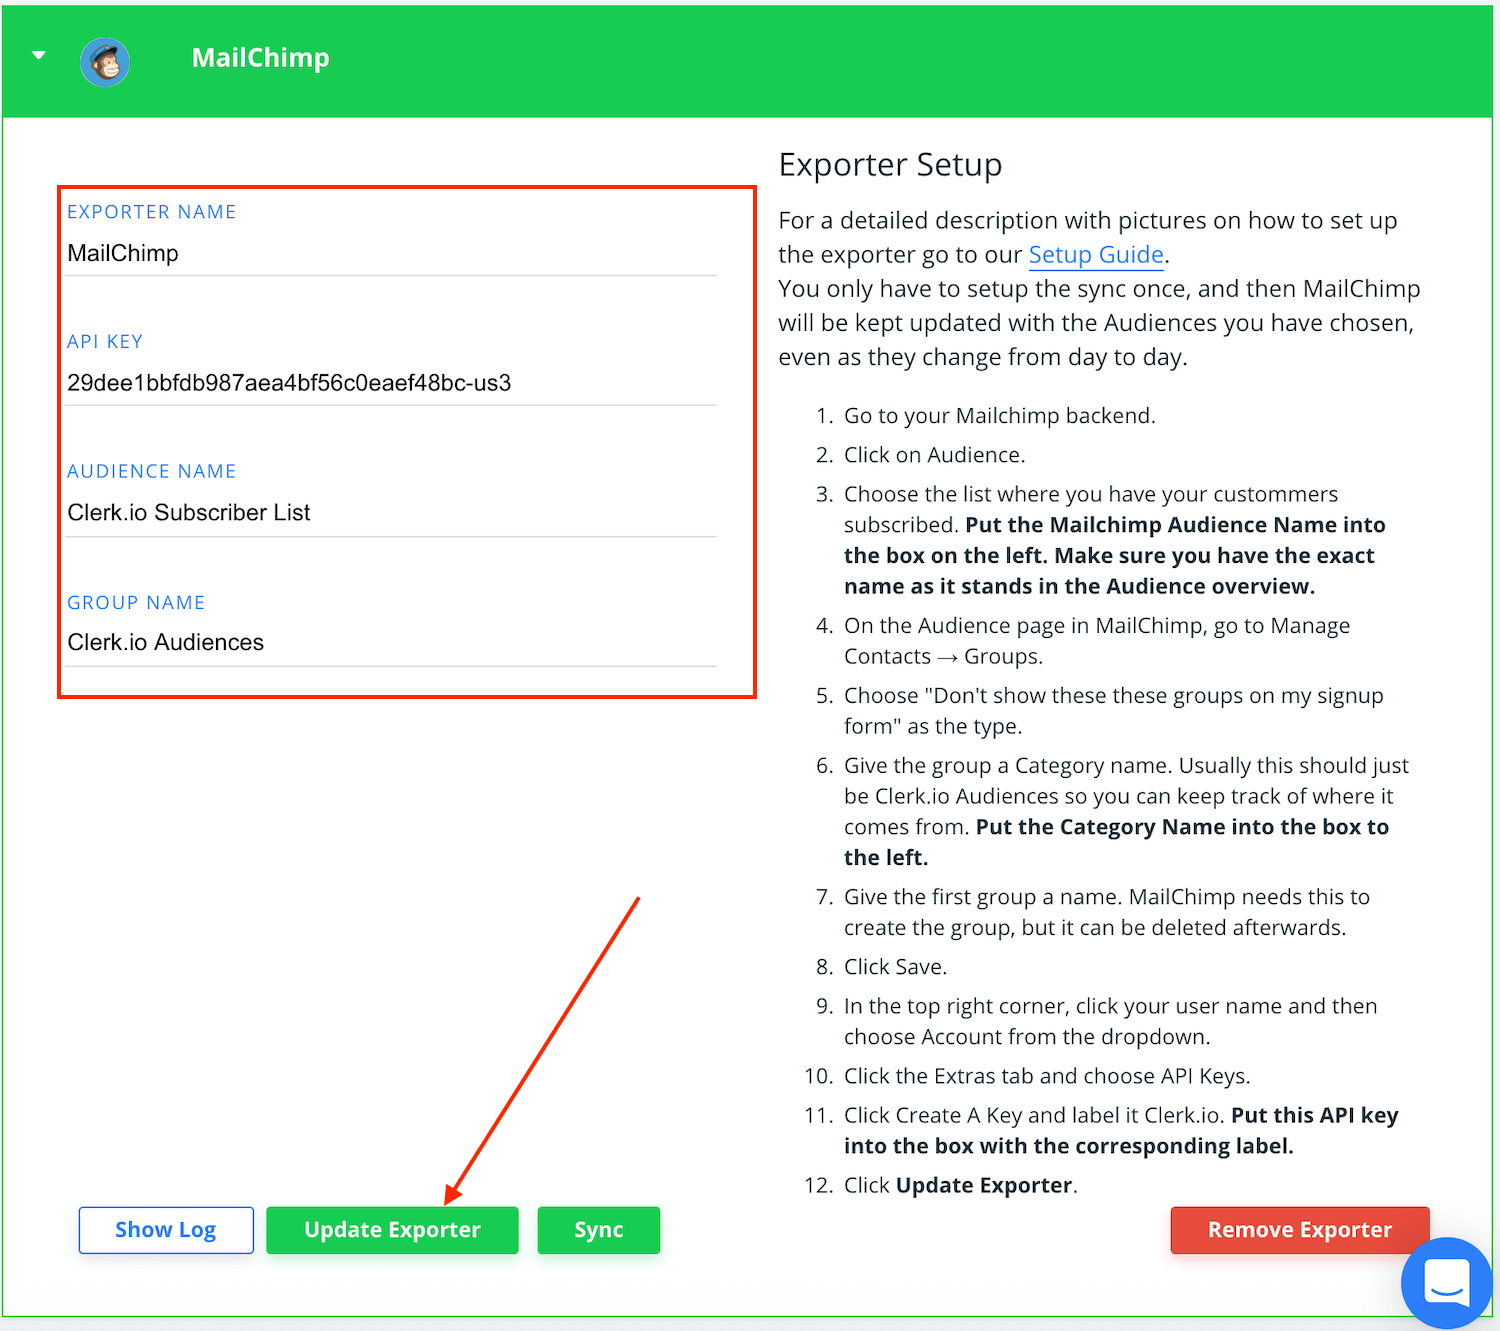
2.7. Your Exporter should turn green when it has been updated.
3. Syncing Clerk.io Audiences
3.1. Go to Target Audience.
3.2. Create any Clerk Audience you want and open the Export tab.
3.3. Under Synchronize Audience check SYNC for MailChimp.
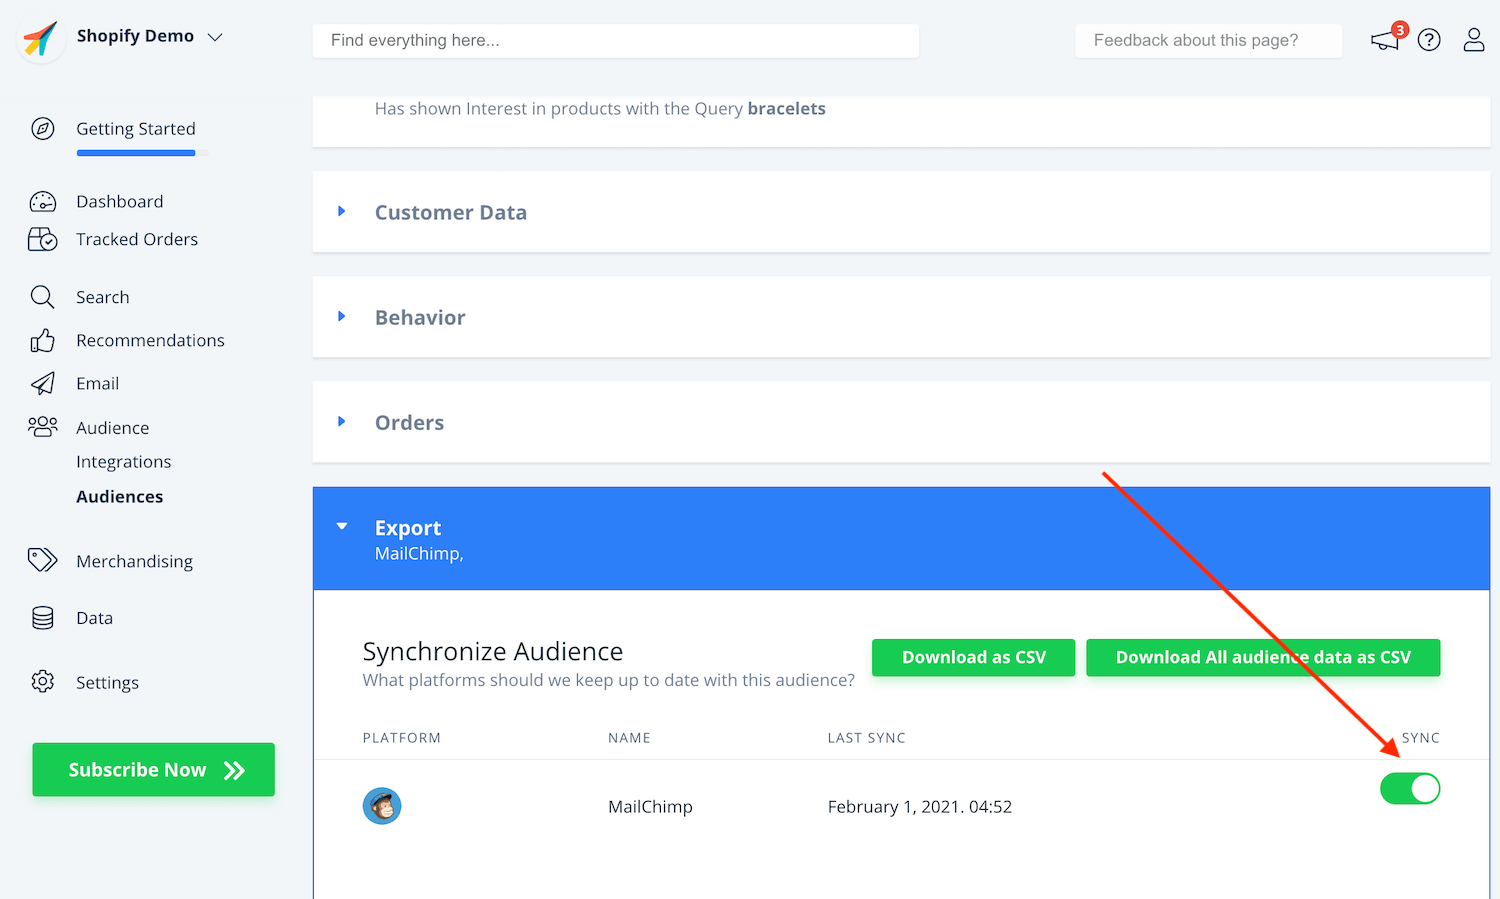
3.4. Click Create/Update Audience.
3.5. MailChimp will now sync the Clerk Audience. It might take a little while for it to finish. Afterwards your Clerk Audience will show up in your Mailchimp Audience Group.
3.6. You can follow this procedure for all the Clerk Audiences you want to export to MailChimp.
And thats it! MailChimp will now be kept up-to-date, every day with any Clerk.io Audience you create and sync.