Get Started
Get Clerk up and running on your BigCommerce store in just a few steps. This guide walks you through connecting your store, installing tracking scripts, and syncing your data.
Connecting your store #
After following these simple steps you will be able to see your Live Demo, which gives you a personal overview of how Clerk will work on your webshop, before setting up the rest of the system.
Add store #
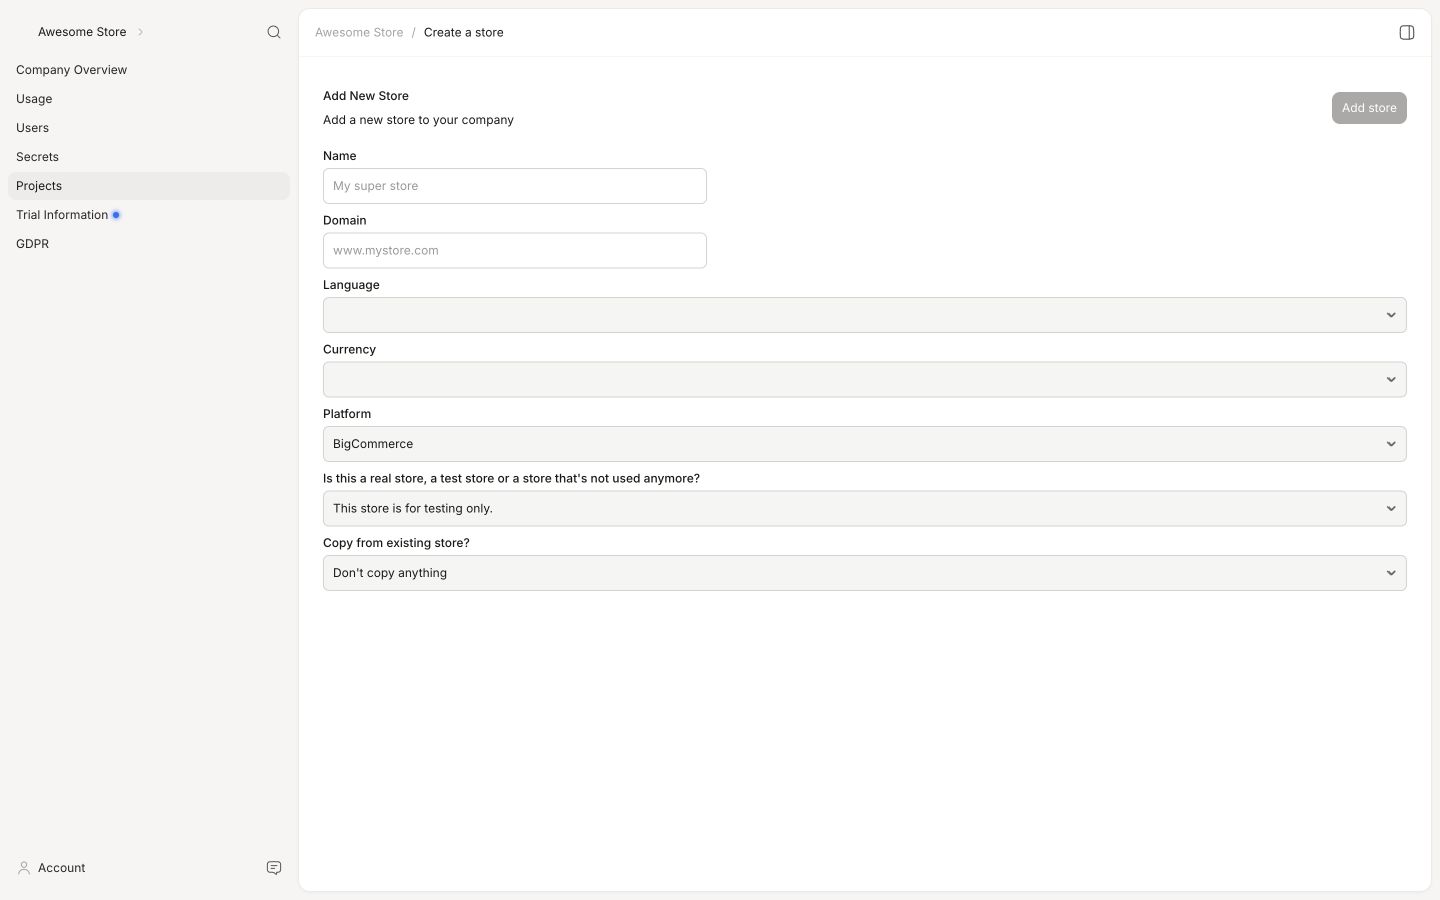
After logging in to my.clerk.io, the first thing you need to do is add your store:
Write the Name and Domain of your online store.
Choose the Language and Currency, and Choose BigCommerce as the Platform.
Click Add Store.
Install visitor tracking #
In BigCommerce, you must be logged in as the Store Owner to access these settings.
In your BigCommerce admin, go to Storefront > My Themes > Advanced > Edit Theme Files.
In the left sidebar, open templates > layout > base.html and paste the tracking script in the
<head>section just before</head>.
<!-- Start of Clerk.io E-commerce Personalisation tool - www.clerk.io -->
<script type="text/javascript">
  (function (w, d) {
    var e = d.createElement('script');
    e.type = 'text/javascript';
    e.async = true;
    e.src = 'https://cdn.clerk.io/clerk.js';
    var s = d.getElementsByTagName('script')[0];
    s.parentNode.insertBefore(e, s);
    w.__clerk_q = w.__clerk_q || [];
    w.Clerk = w.Clerk || function () { w.__clerk_q.push(arguments); };
  })(window, document);

  Clerk('config', { key: 'insert_api_key' });

  // Clerk.js Context
  Clerk('context', {
    product: {{#if cart.items}}[
      {{#each cart.items}}
        "{{product_id}}"{{#unless @last}},{{/unless}}
      {{/each}}
    ]{{else}}{{#if product.id}}"{{product.id}}"{{else}}null{{/if}}{{/if}},

    category: {{#if category.id}}"{{category.id}}"{{else}}null{{/if}},
    page: {{#if page_type}}"{{page_type}}"{{else}}null{{/if}}
  });
  {{#if customer.email}}
  Clerk('call', 'log/email', { email: '{{customer.email}}' });
  {{/if}}
</script>
<!-- End of Clerk.io E-commerce Personalisation tool - www.clerk.io -->
Replace INSERT_PUBLIC_API_KEY with your Public Key found in my.clerk.io > Developers > API Keys.
- Click Save & apply file.
Install order tracking #
In your BigCommerce admin, go to Settings > Advanced > Data Solutions.
Enable Affiliate Conversion Tracking and click Save.
Open Affiliate Conversion Tracking and click Connect if BigCommerce asks you to enable the connection.
Paste the following into the bottom Conversion Tracking Code and click Save.
<!-- Start of Clerk.io E-commerce Personalisation tool - www.clerk.io -->
<script type="text/javascript">
  (function (w, d) {
    var e = d.createElement('script');
    e.type = 'text/javascript';
    e.async = true;
    e.src = 'https://cdn.clerk.io/clerk.js';
    var s = d.getElementsByTagName('script')[0];
    s.parentNode.insertBefore(e, s);
    w.__clerk_q = w.__clerk_q || [];
    w.Clerk = w.Clerk || function () { w.__clerk_q.push(arguments); };
  })(window, document);
  Clerk('config', { key: 'INSERT_PUBLIC_API_KEY' });
</script>
<!-- End of Clerk.io E-commerce Personalisation tool - www.clerk.io -->

<!-- Start of Clerk sales tracking -->
<script>
  Clerk('call', 'log/sale/bigcommerce', { sale: '%%ORDER_ID%%' });
</script>
<!-- End of Clerk sales tracking -->
Replace INSERT_PUBLIC_API_KEY with your Public Key found in my.clerk.io > Developers > API Keys..
Sync data #
Syncing data connects your BigCommerce store to Clerk, allowing Clerk to access your products, orders, customers, and other store information. This enables Clerk to provide personalized recommendations and search results based on your actual store data. Follow the steps in the Sync Data guide to set up the data sync.
Previewing elements #
To get started with previewing Clerk elements in your webshop, you’ll need to first access the theme you’ve used to add Clerk.
Log in to your BigCommerce admin portal, then open Storefront > My Themes.
Find your theme, click its three-dot menu, then choose Customize.
After clicking “Customize”, you’ll then be given the option to select a theme style to customize.
Choose the style that matches your theme. For example, choose Light for a light theme.
Choose the theme style, then click “Continue.”
Once you’re on the Preview page, be sure to select “Preview” at the top of the screen.
Use the menu in the top-left corner to select the webshop page you want to preview.
Note:
In preview mode, BigCommerce does not allow you to carry variables to a clicked-through page.
For example, if you add products to cart in Preview, they will not be in the cart once you click through.
To test Clerk elements that require variables moving page-to-page, be sure to “hard code” those variables to test.
For example, set your search query to a specific keyword, or choose a specific product ID added to cart.