Sync Data
Sync your BigCommerce products and attributes to Clerk. This guide covers customizing product data and choosing which products to import.
Set up Sync #
To sync your BigCommerce store data with Clerk, you need to create an API account in BigCommerce and configure it in Clerk.
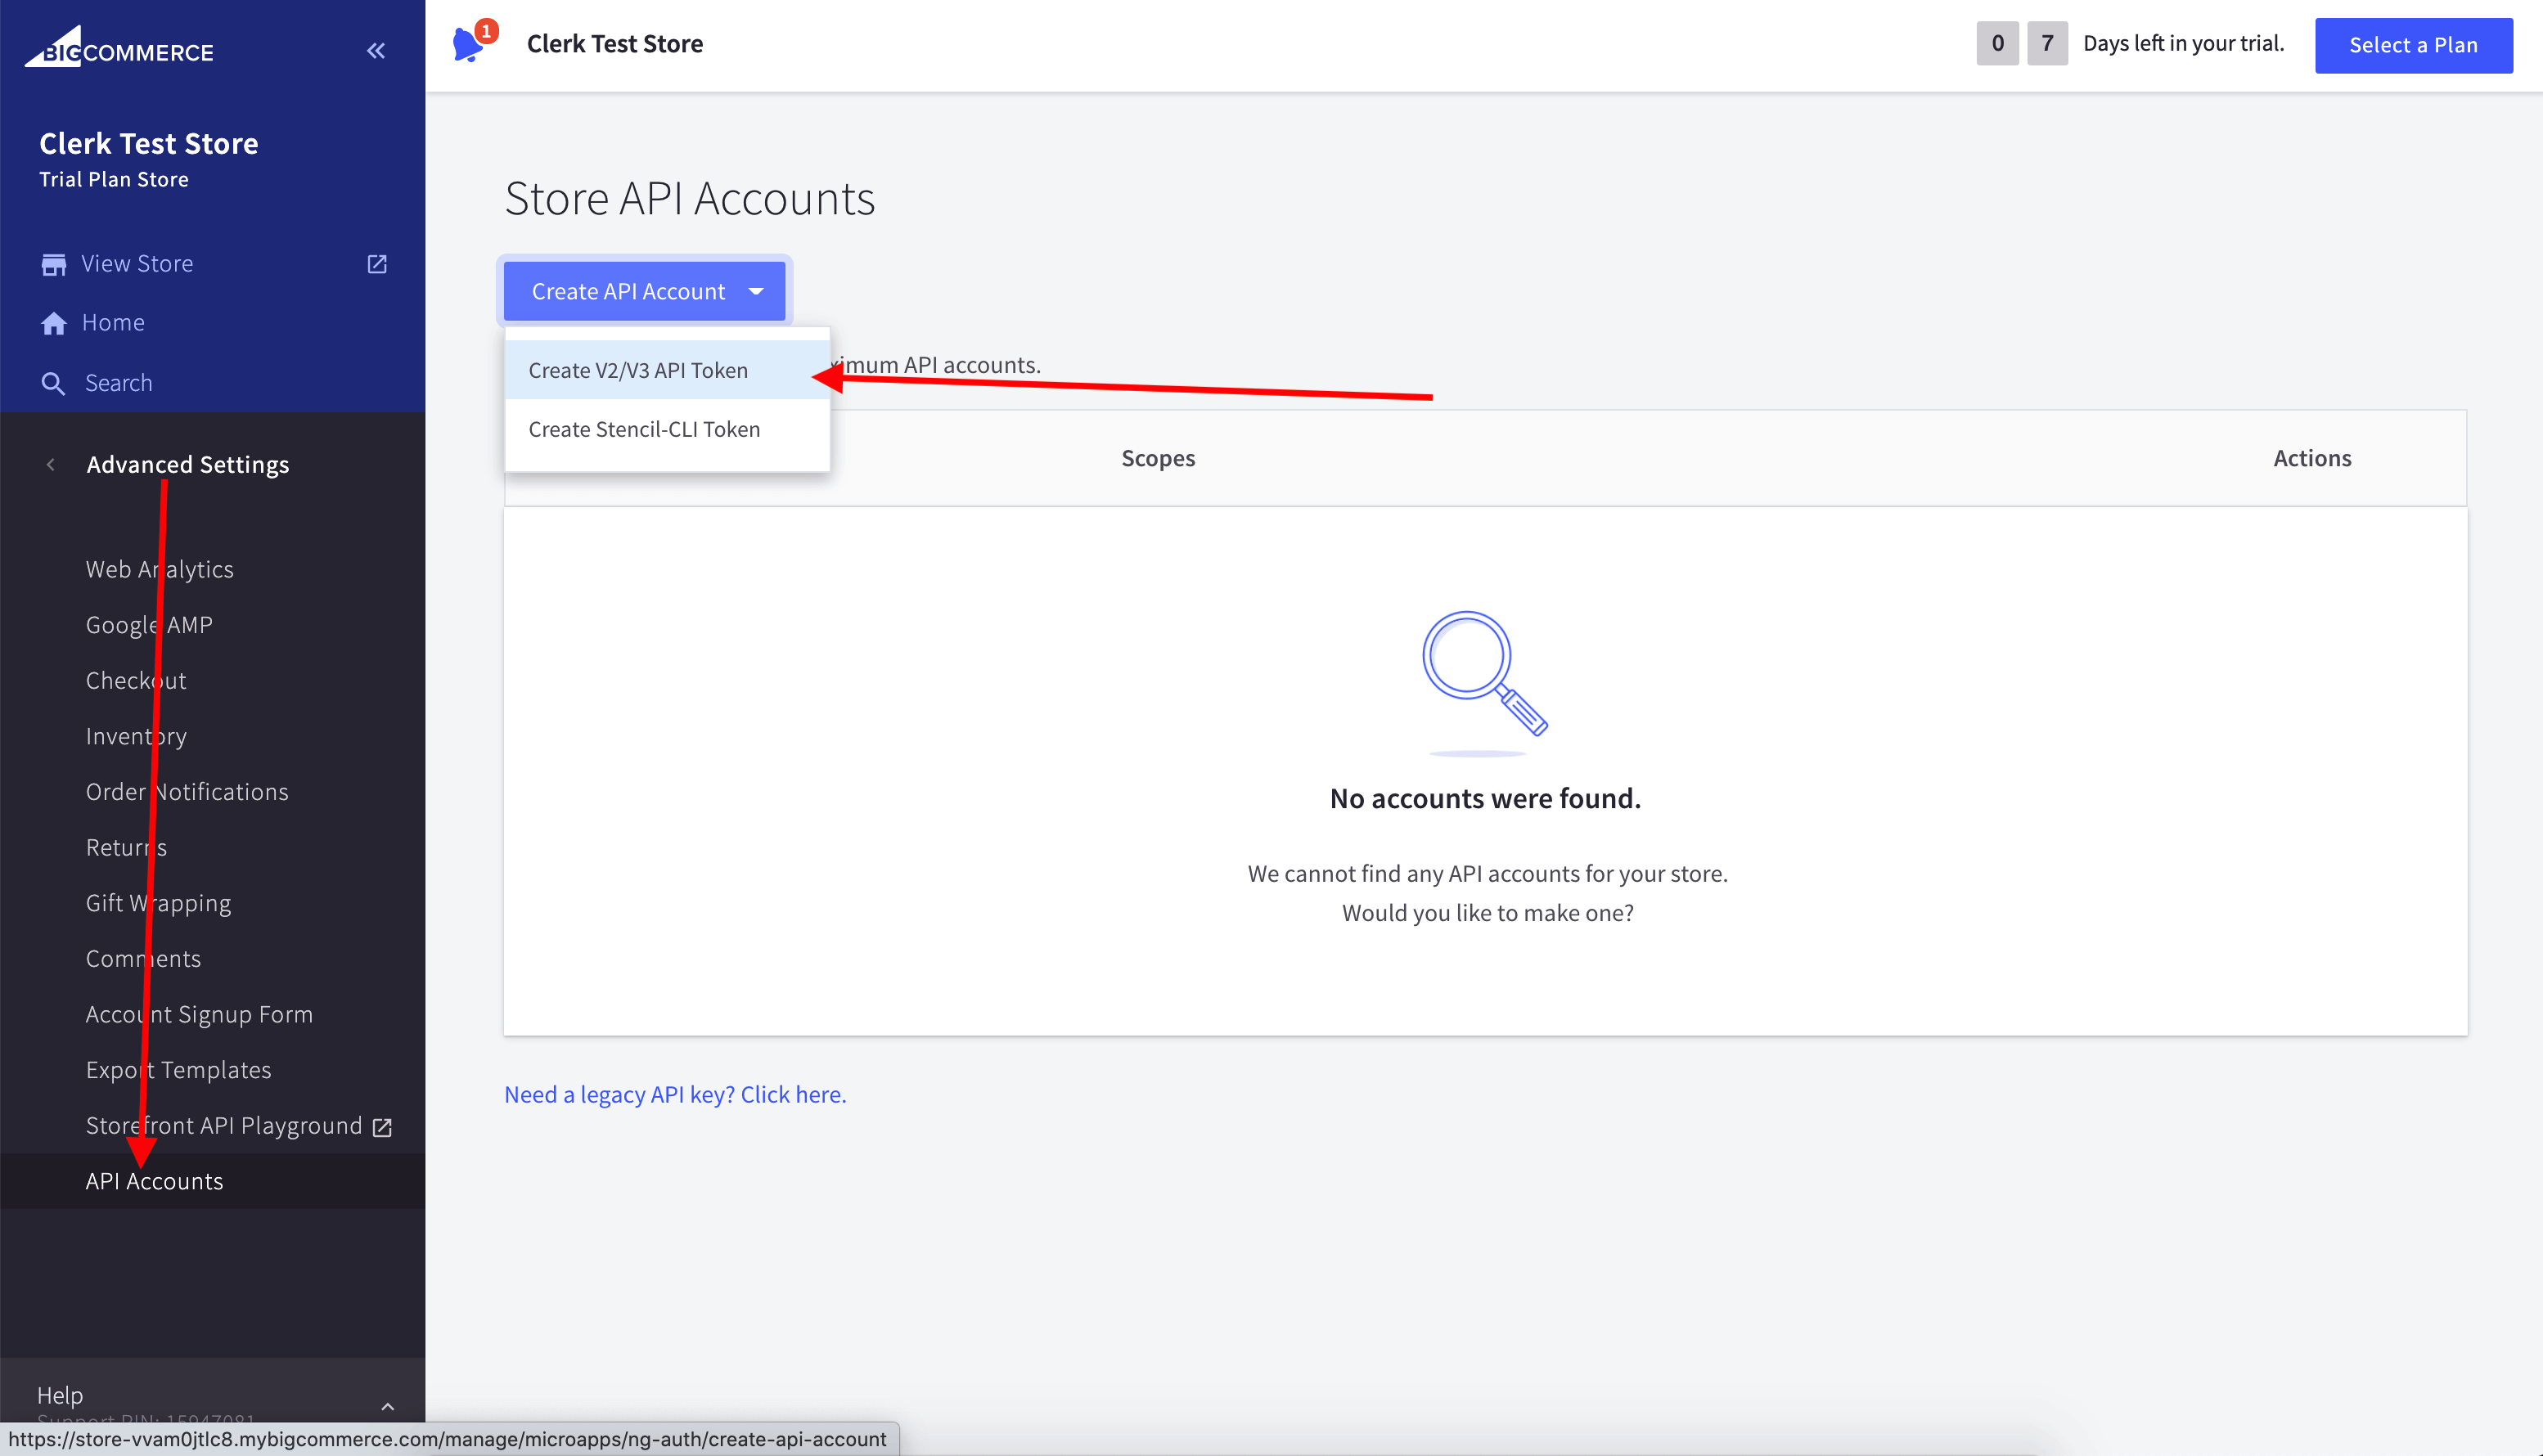
In your BigCommerce admin, go to Advanced Settings > API Accounts.
Click Create API Account and choose Create V2/V3 API Token.
Name it “Clerk.io” and grant read‑only access to:
Content
Information & Settings
Orders
Order Transactions
Products

After configuring the API account, you simply need to synchronise your store.

In Clerk, go to my.clerk.io > Data > Configuration and select BigCommerce as your sync method.
Paste the Store Hash, Client ID, Client Secret, and Access Token into the BigCommerce configuration and Save.
After saving, start a data sync when you are ready.
Choosing product data #
Access your Data Sync Settings by logging into my.clerk.io > Data > Configuration.
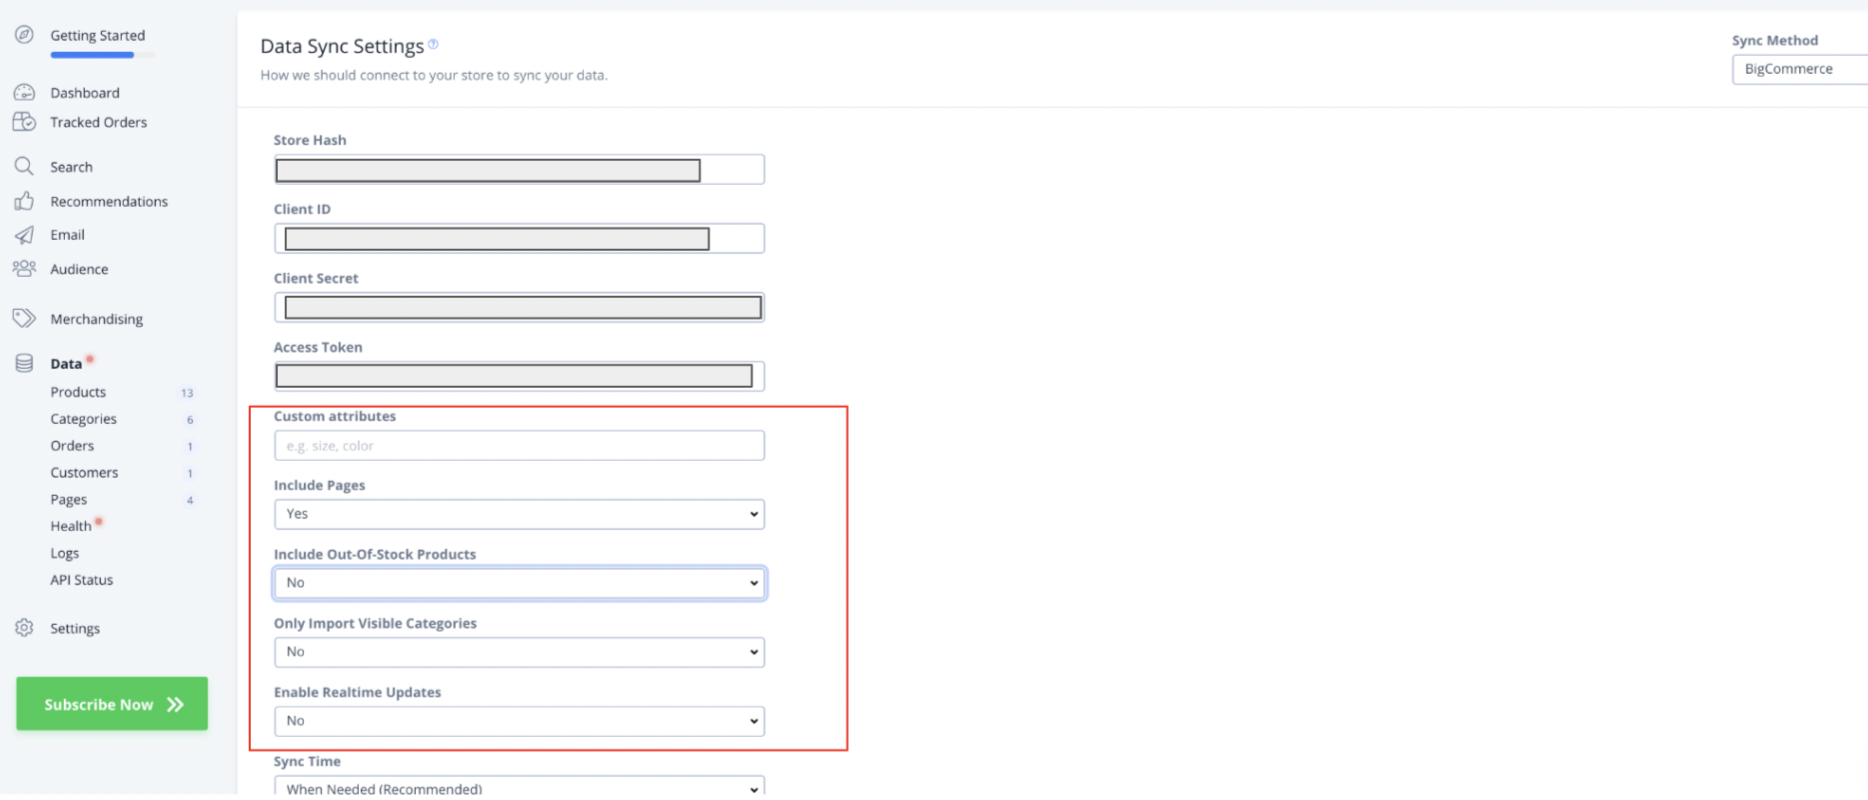
From here, you can customize your product data by:
Adding Custom Attributes for your products using the text box. Type in the custom variables used in your BigCommerce store that you’d like to add as comma-separated values.
Including out-of-stock Products: to include out-of-stock products in your Clerk data, select “Yes” from the dropdown here.
Only import visible Categories: to choose whether or not you import all categories or only visible categories to Clerk from your webshop, select the appropriate choice from the dropdown here.
Enable real-time updates: to enable real time updates from BigCommerce to your Clerk synced products, select “Yes” from this dropdown.