Get Started
Get Clerk up and running on your JTL store in just a few steps. This guide walks you through connecting your store, configuring the plugin, and syncing your data.
Connecting your store #
The first step of installing Clerk is connecting your store with your Clerk account.
After following these simple steps you will be able to see your Demo Store, which gives you a personal overview of how Clerk will work on your webshop, before setting up the rest of the system.
Add store #
After logging in to my.clerk.io, the first thing you need to do is add your store:
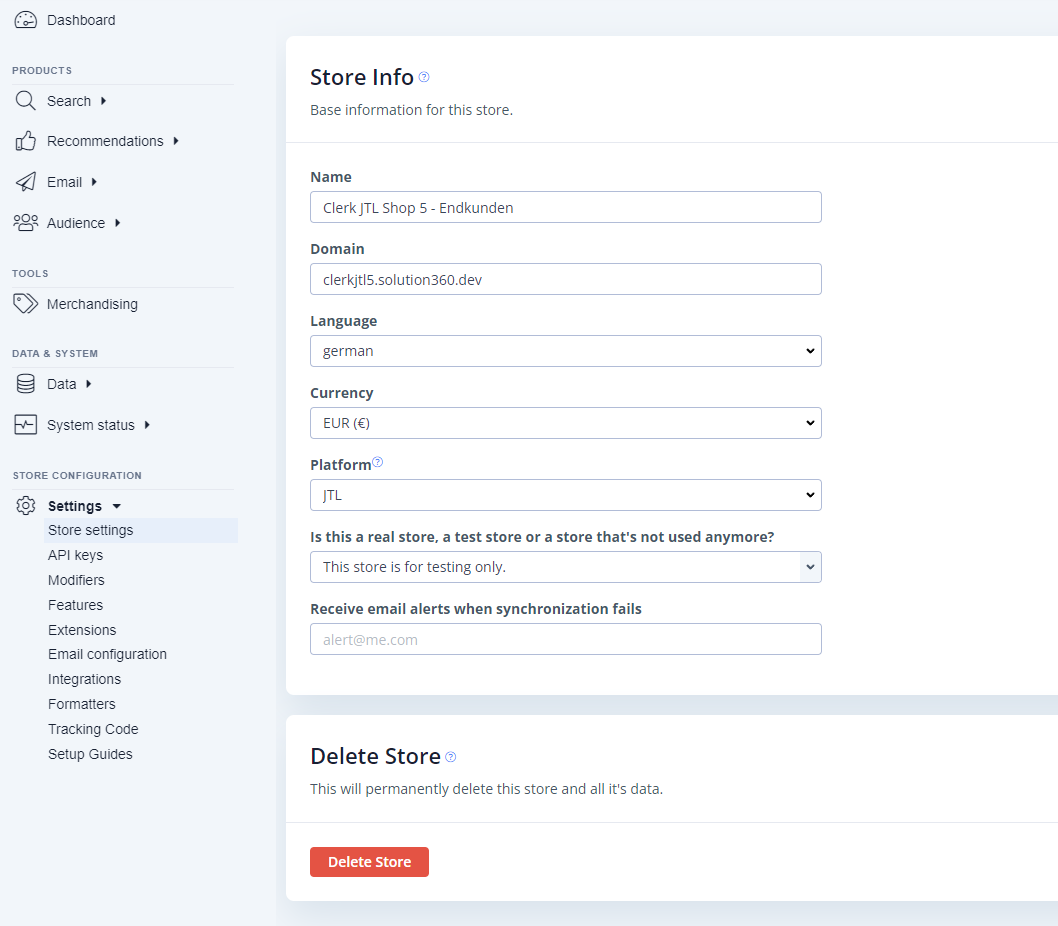
Write the Name and Domain of your webshop.
Choose JTL as the Platform and choose your Currency.
Click Add Store.
Once the store is created, then an email about your public and private keys will be sent to the owner of the accounts email.
Configure connection #
From the main menu of the Setup Guide, click Install Extension:
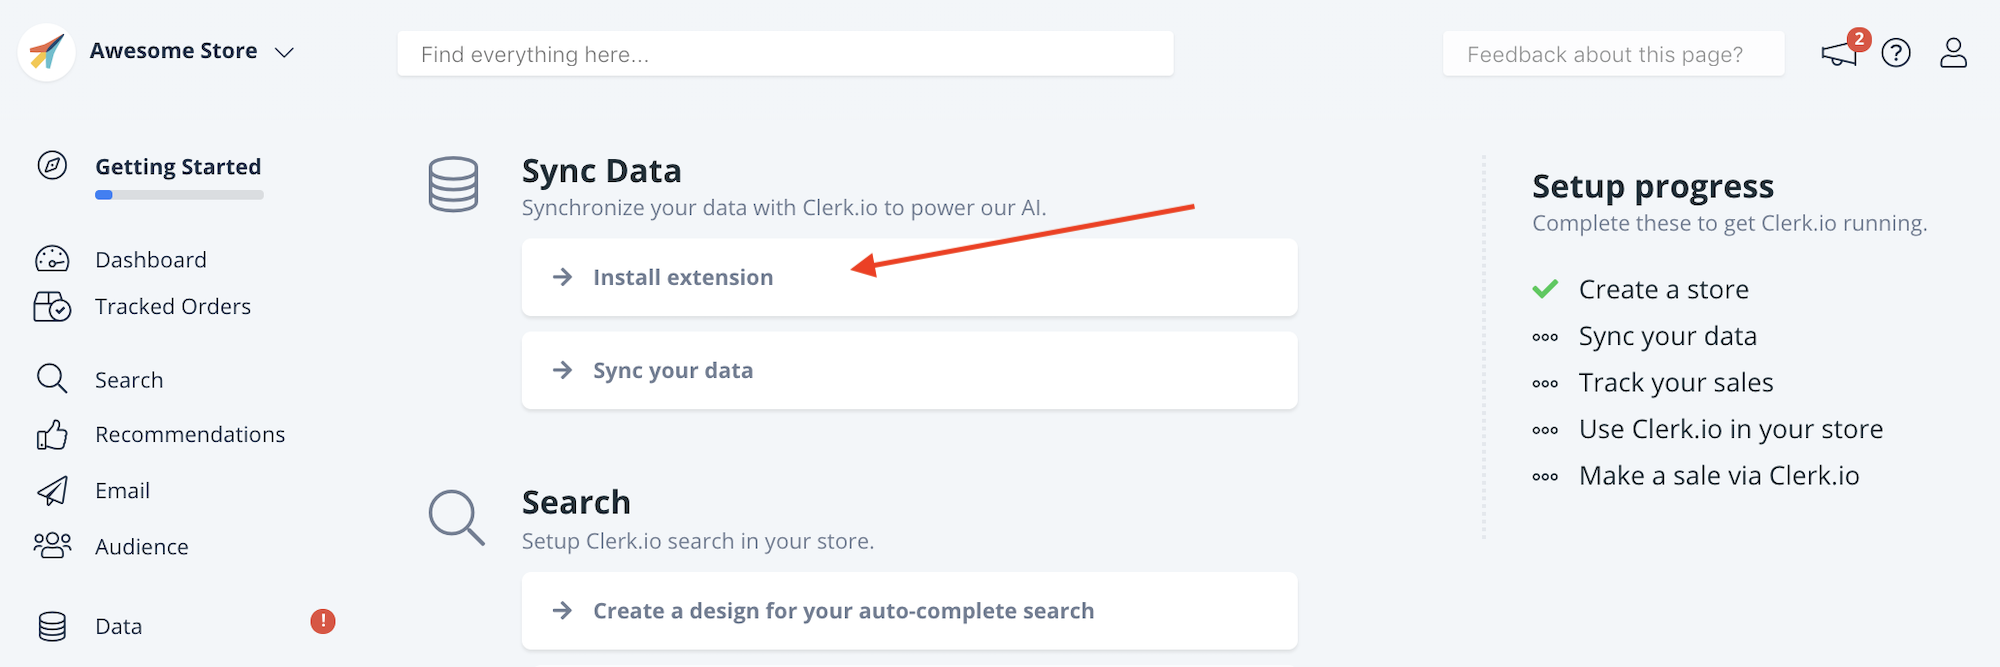
The next page shows what you need to do, to configure the JTL connection.
Go to your Clerk plugin in the JTL backend and add the public and private keys from the clerk store into their respective fields.
Sync store #
After allowing access, you simply need to synchronise your store.
Go back to the Setup Guide and click Sync Your Data:

Write in your stores details and click Start Sync.
The JTL feed url should be made based on this guide Creation of Data Feeds in JTL.
Full installation example #
IMPORTANT: You should have installed the plugin (S360 CLerk) in your JTL backend under Plugins
This documentation will guide you through the following steps:
Adding a store #
Each Store in Clerk is an isolated environment with its own data, API keys and Dashboard.
The first thing you will need to do when setting up your Clerk account, is to create your first Store:
After this, the Setup Guide will walk you through the rest of the setup.
Note that each time a store is created, then an email with public and private keys will be sent to the owner of the company account. This is used to create secure access between Clerk and JTL.
Installing tracking scripts #
With the S360 Clerk plugin, you can enable both visitor and order tracking scripts which will be injected to parts of the webshop:
The Visitor Tracking script, that initialises Clerk. This has to be injected inside of the header of the webshop.
The Order Tracking script that allows tracking of orders in realtime. This is usually installed on the order confirmation page.
You can enable them inside the JTL plugin under ALLGEMEIN section:
When both scripts are inserted, Clerk will been initialised.
Syncing your store #
To show results, Clerk must sync with the products, categories, sales, pages and customers from JTL in a generated data feed.
This is done by setting up a data feed that allows the data to be accessed regularly.
This is further explained in this guide Creation of Data Feeds in JTL.
When the data feed has been generated and added to your Data sync settings under System Status in your my.clerk.io backend.
Adding search and recommendations #
Frontend elements in Clerk consist of two parts:
A Design that controls the visual presentation of products. This can be changed to match any styling you want or you can use some of our standard design templates Template Design to use in Clerk.
Most often you will use 3 Designs: One for Instant Search, the Search page and Recommendations.
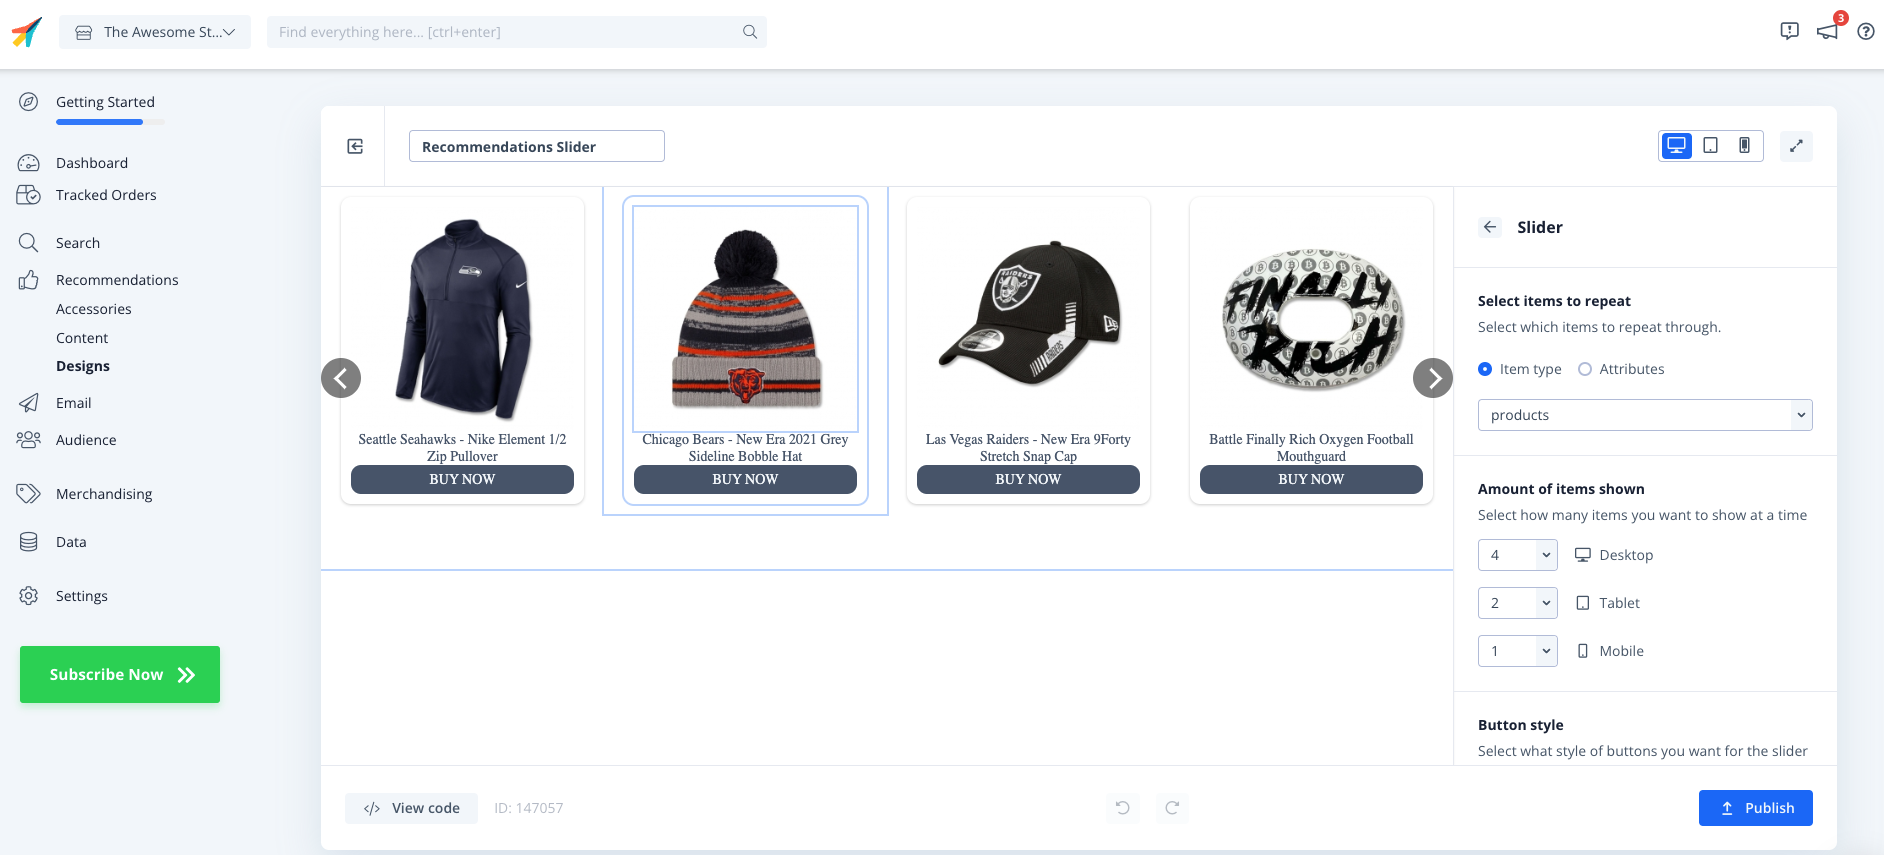
- An Element with an attached embedcode that displays the products. Each element has a specific name in its embedcode which you want to add to the respective fields name Clerk TemplateName. This is used to communicate between your webshop and the respective clerk element.
The Setup Guide will walk you through where each element needs to be placed in most JTL setups.
At the end of your setup then the settings in the plugin should look like this. The following pictures are merely for demonstration purposes.

| Option | Meaning |
|---|---|
| API Key | Your API key received from Clerk |
| Private Key | Your legacy private API key provided by Clerk. Required to restrict access to the data feed. |
| Language | Language of the data feed |
| customer group | Prices for the customer group |
| Currency | Currency in the data feed |
| Faceted design | Design of the facets |
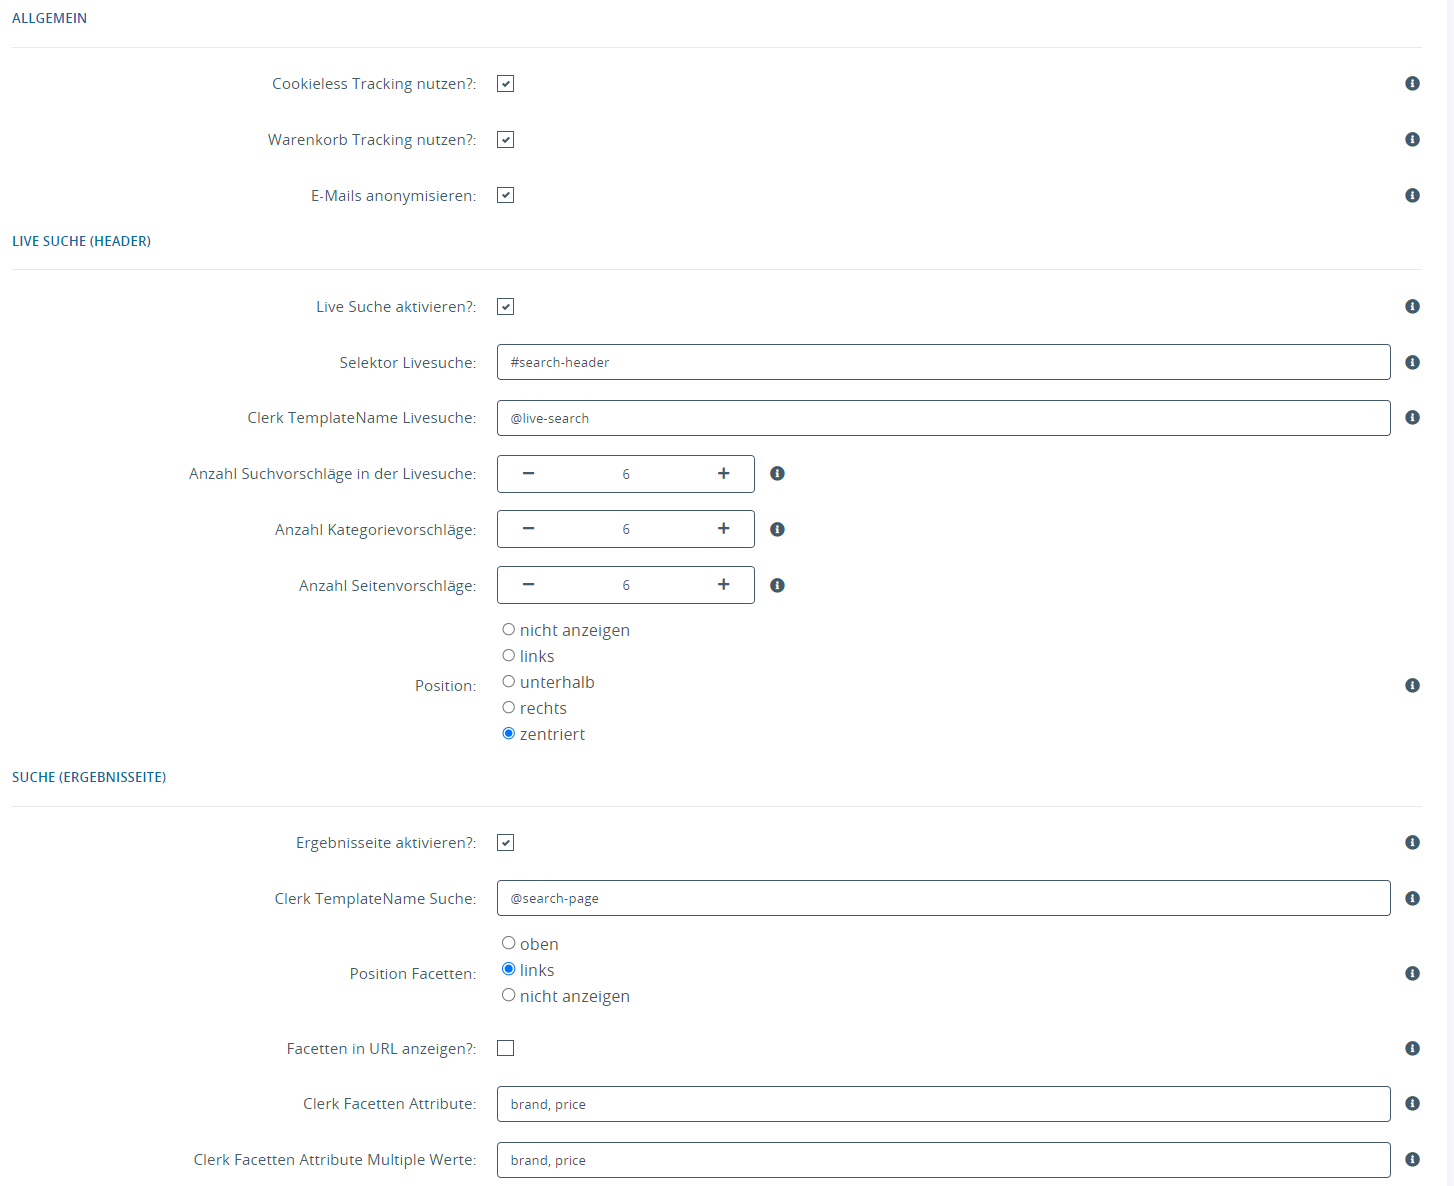
| Component | Option | Meaning |
|---|---|---|
| Generally | Use cookieless tracking | Tracking without the use of cookies |
| Use shopping cart tracking? | Informs Clerk about changes to the shopping cart (general tracking of the shopping cart) | |
| Anonymize emails | Email addresses are transmitted to Clerk anonymously (as a hash). | |
| Live Suche (Header) | Activate live search? | If deactivated, the Clerk Live search will not be displayed in the frontend. |
| Selektor Livesearch | Live search selector independent of Clerk | |
| Clerk TemplateName Livesuche | Template for the live search (Clerk Backend → Search → Elements → Live search → Insert into website → In the code the value from “data-template="@WERT’”) | |
| Number of search suggestions in the live search | Number of search suggestions to be displayed | |
| Number of category suggestions | Number of category suggestions to be displayed | |
| Number of page suggestions | Number of page suggestions to be displayed | |
| Position | Position of the live search result in relation to the selector | |
| Search (results page) | Activate results page? | If deactivated, the Clerk results page will not be displayed in the frontend. |
| Clerk TemplateName Search | Template for live search (Clerk Backend → Search → Elements → Search → Insert into website → In the code the value from “data-template="@WERT’”) | |
| Position facets | Position of the facets | |
| Show facets in URL | Show facets in URL | |
| Clerk Facets Attribute | Comma-separated list of available facets (JTL features) | |
| Clerk Facets Attributes Multiple Values | Comma-separated list of available facets with multiple values (JTL characteristics for OR filtering) |
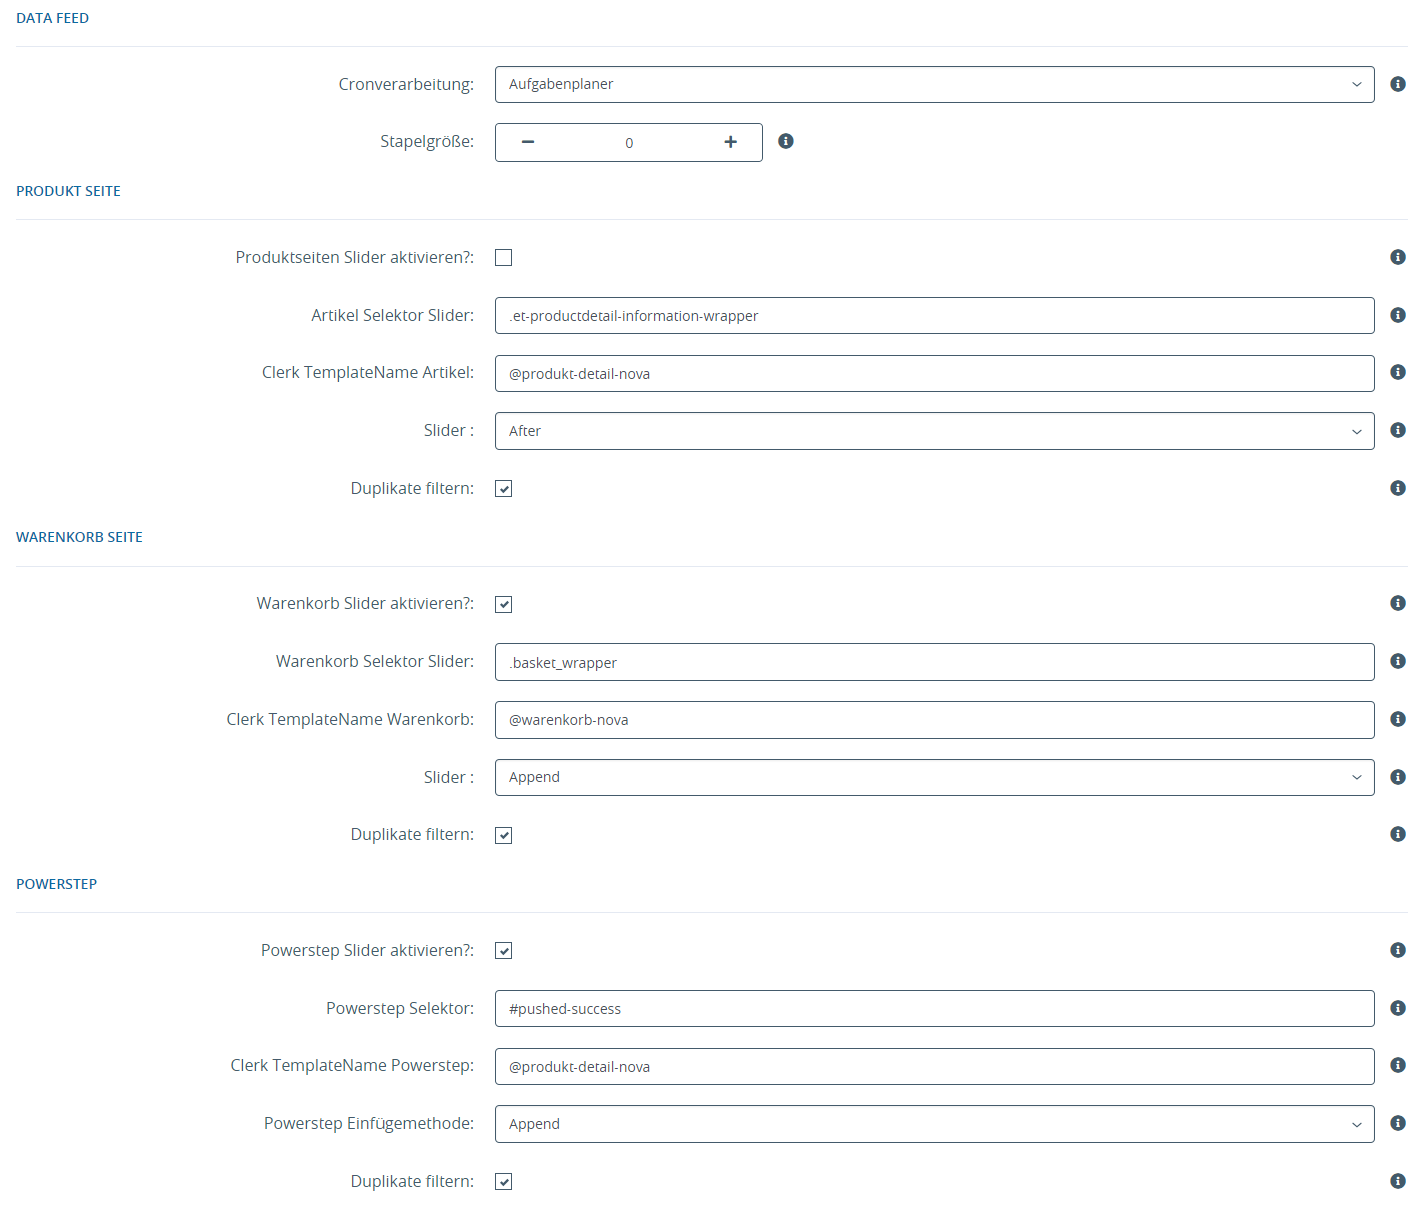
| Component | Option | Meaning |
|---|---|---|
| Data Feed | Cron processing | How the cron should be triggered to generate the data feed (explained in more detail in the section Possibilities of data feed creation) |
| Batch size | Batch size of the feed’s products (explained in more detail in the batch size section) | |
| Product page | Activate product page slider? | If deactivated, the slider on the product page will not be displayed in the frontend. |
| Article selector slider | Selector for the article slider independent of Clerk | |
| Clerk TemplateName Article | Names of the slider templates to be output. Multiple template names can be specified as a comma-separated list. | |
| Slider Insert method | How to add the slider to the selector (After, Append, Before, Prepand, ReplaceWith) | |
| Filter duplicates | Prevents subsequent sliders from containing products from previous sliders (default: Yes) | |
| Shopping cart page | Activate shopping cart slider? | If deactivated, the slider on the shopping cart page will not be displayed in the frontend. |
| Shopping cart selector slider | Selector for the shopping cart slider independent of Clerk | |
| Clerk TemplateName Shopping Cart | Names of the slider templates to be output. Multiple template names can be specified as a comma-separated list. | |
| Slider Insert method | How to add the slider to the selector (After, Append, Before, Prepand, ReplaceWith) | |
| Filter duplicates | Prevents subsequent sliders from containing products from previous sliders (default: Yes) | |
| Powerstep | Activate Powerstep Slider? | If deactivated, the slider in the power step is not played in the frontend. |
| Powerstep Selector | Selector for the Powerstep Slider independent of Clerk | |
| Clerk TemplateName Powerstep | Names of the slider templates to be output. Multiple template names can be specified as a comma-separated list. | |
| Powerstep insertion method | How to add the slider to the selector (After, Append, Before, Prepand, ReplaceWith) | |
| Filter duplicates | Prevents subsequent sliders from containing products from previous sliders (default: Yes) |

| Component | Option | Meaning |
|---|---|---|
| Category page | Activate category page slider? | If deactivated, the slider on the category page will not be displayed in the frontend. |
| Kategorie Selektor Slider | Selector for the category slider independent of Clerk | |
| Clerk TemplateName Shopping Cart | Names of the slider templates to be output. Multiple template names can be specified as a comma-separated list. | |
| Slider Insert method | How to add the slider to the selector (After, Append, Before, Prepand, ReplaceWith) | |
| Filter duplicates | Prevents subsequent sliders from containing products from previous sliders (default: Yes) | |
| Exit Intent | Enable Exit Intent Slider? | If deactivated, the exit intent is not displayed in the frontend. |
| Clerk TemplateName Exit Intent | Template for the exit intent |
Multiple domains #
The easiest way to implement Clerk in multiple domains in standard setups is by creating a separate Store for each domain in my.clerk.io, and then syncing them with each of your JTL language domains.
This way, you can separate products, sales, currencies etc. to keep track of each domain.
Start by creating your main Store and follow the Setup Guide to connect your Store to Clerk, and choose the Recommendations and/or Search Results you that you want to display on your webshop.
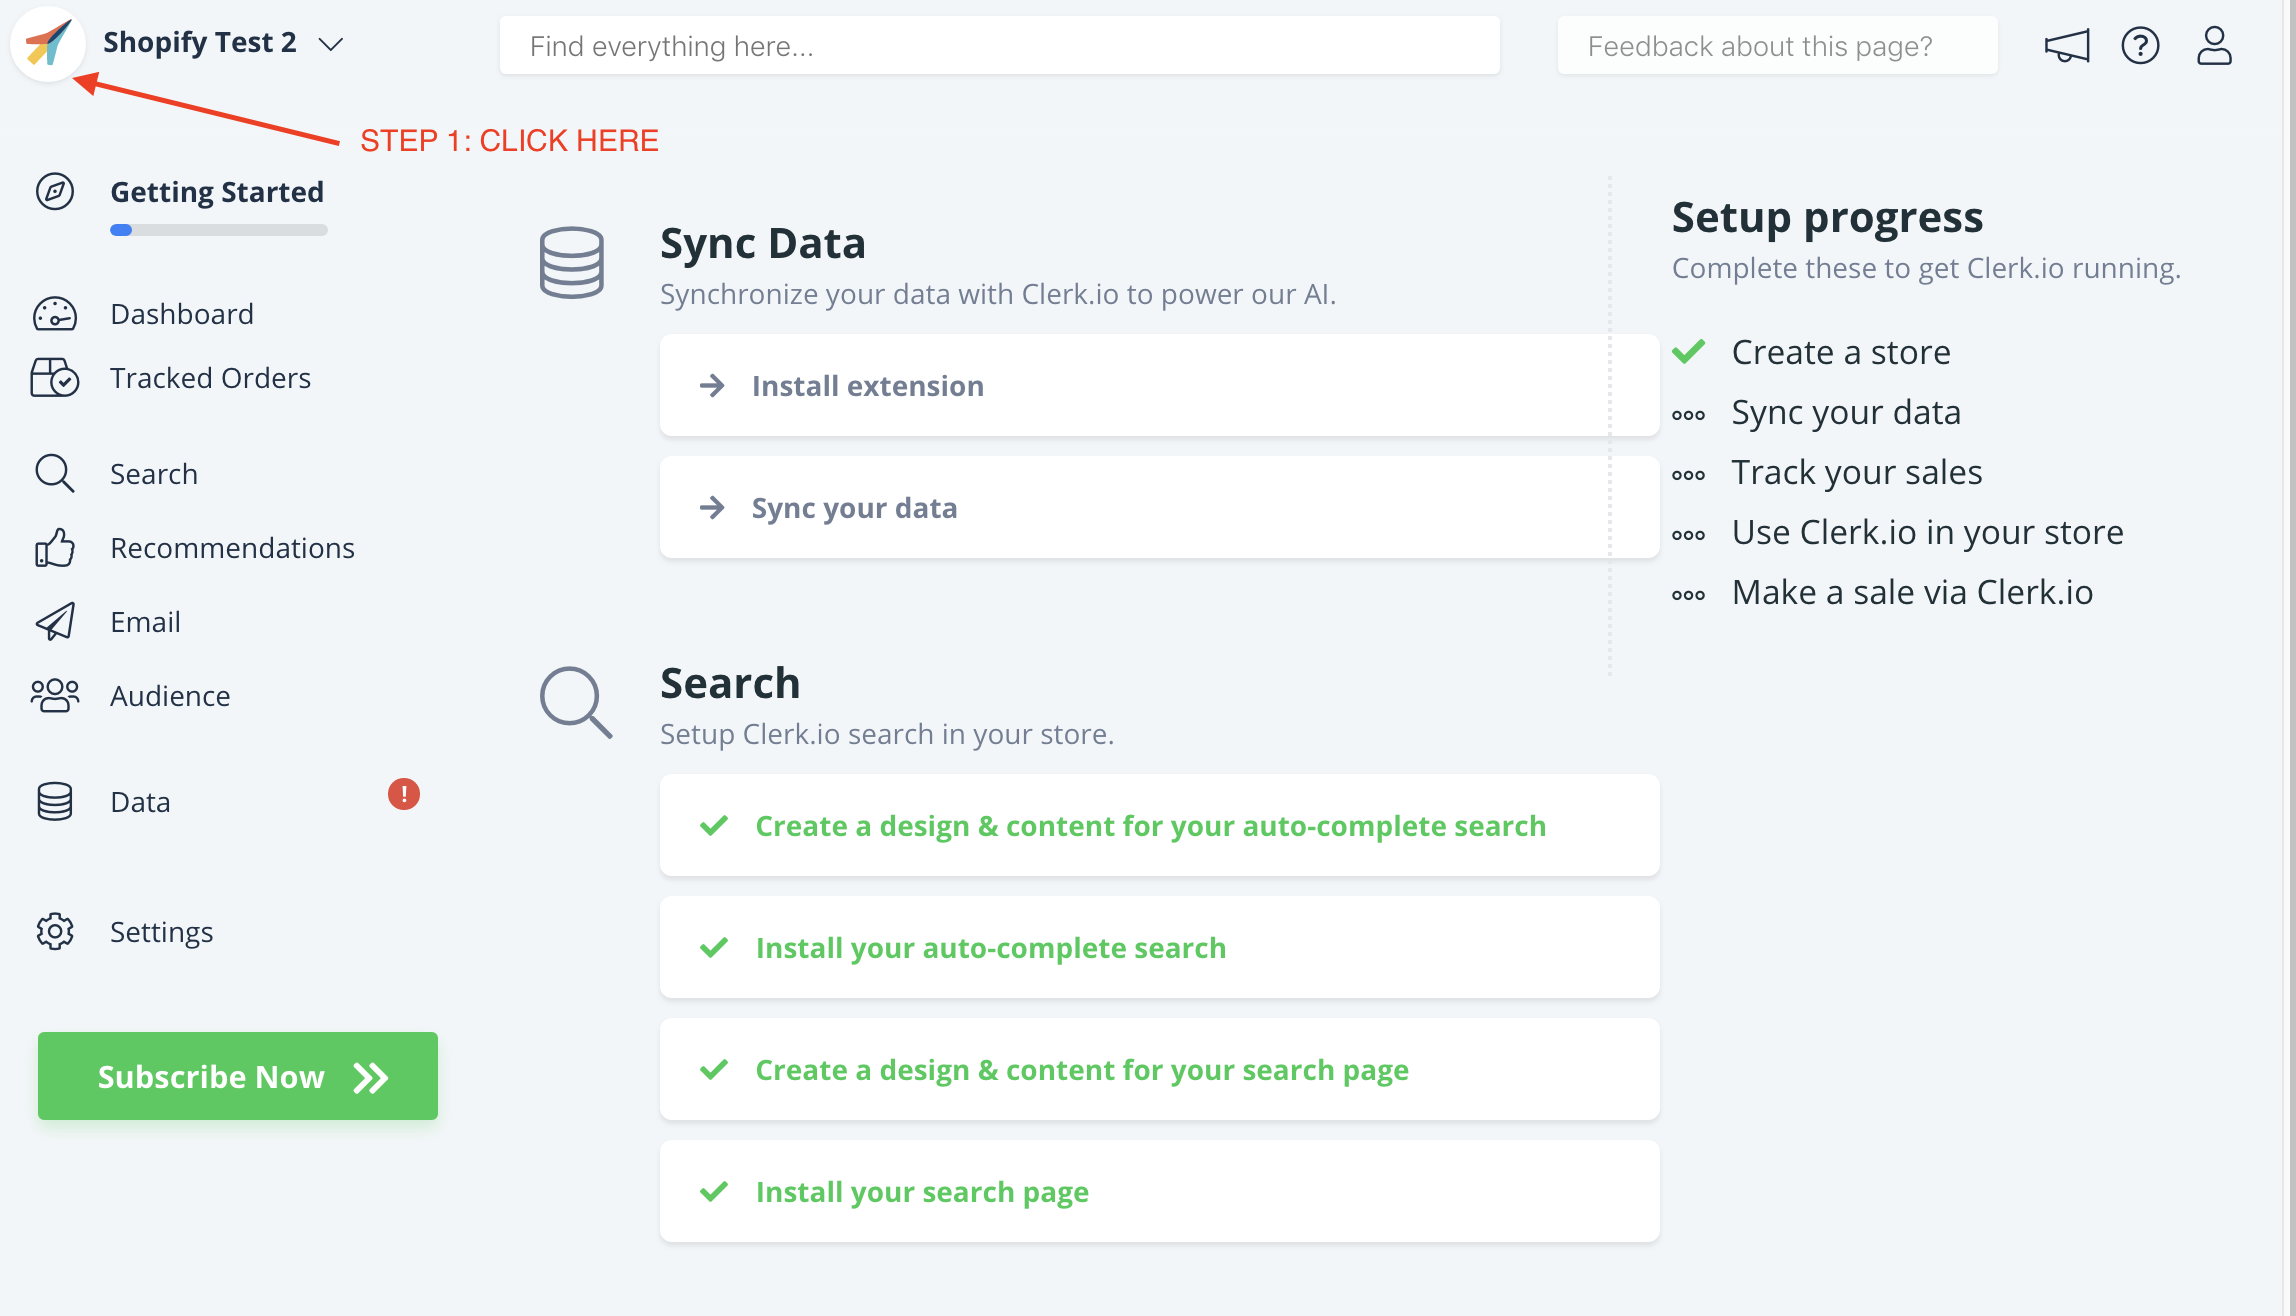
When you are done with the initial setup, go back to the start page of my.clerk.io (by clicking the Clerk logo in the upper left side corner of the side-menu) and then click "+ Add new store" the last option of the scroll down list (generally under you the existing store(s) and your company name):
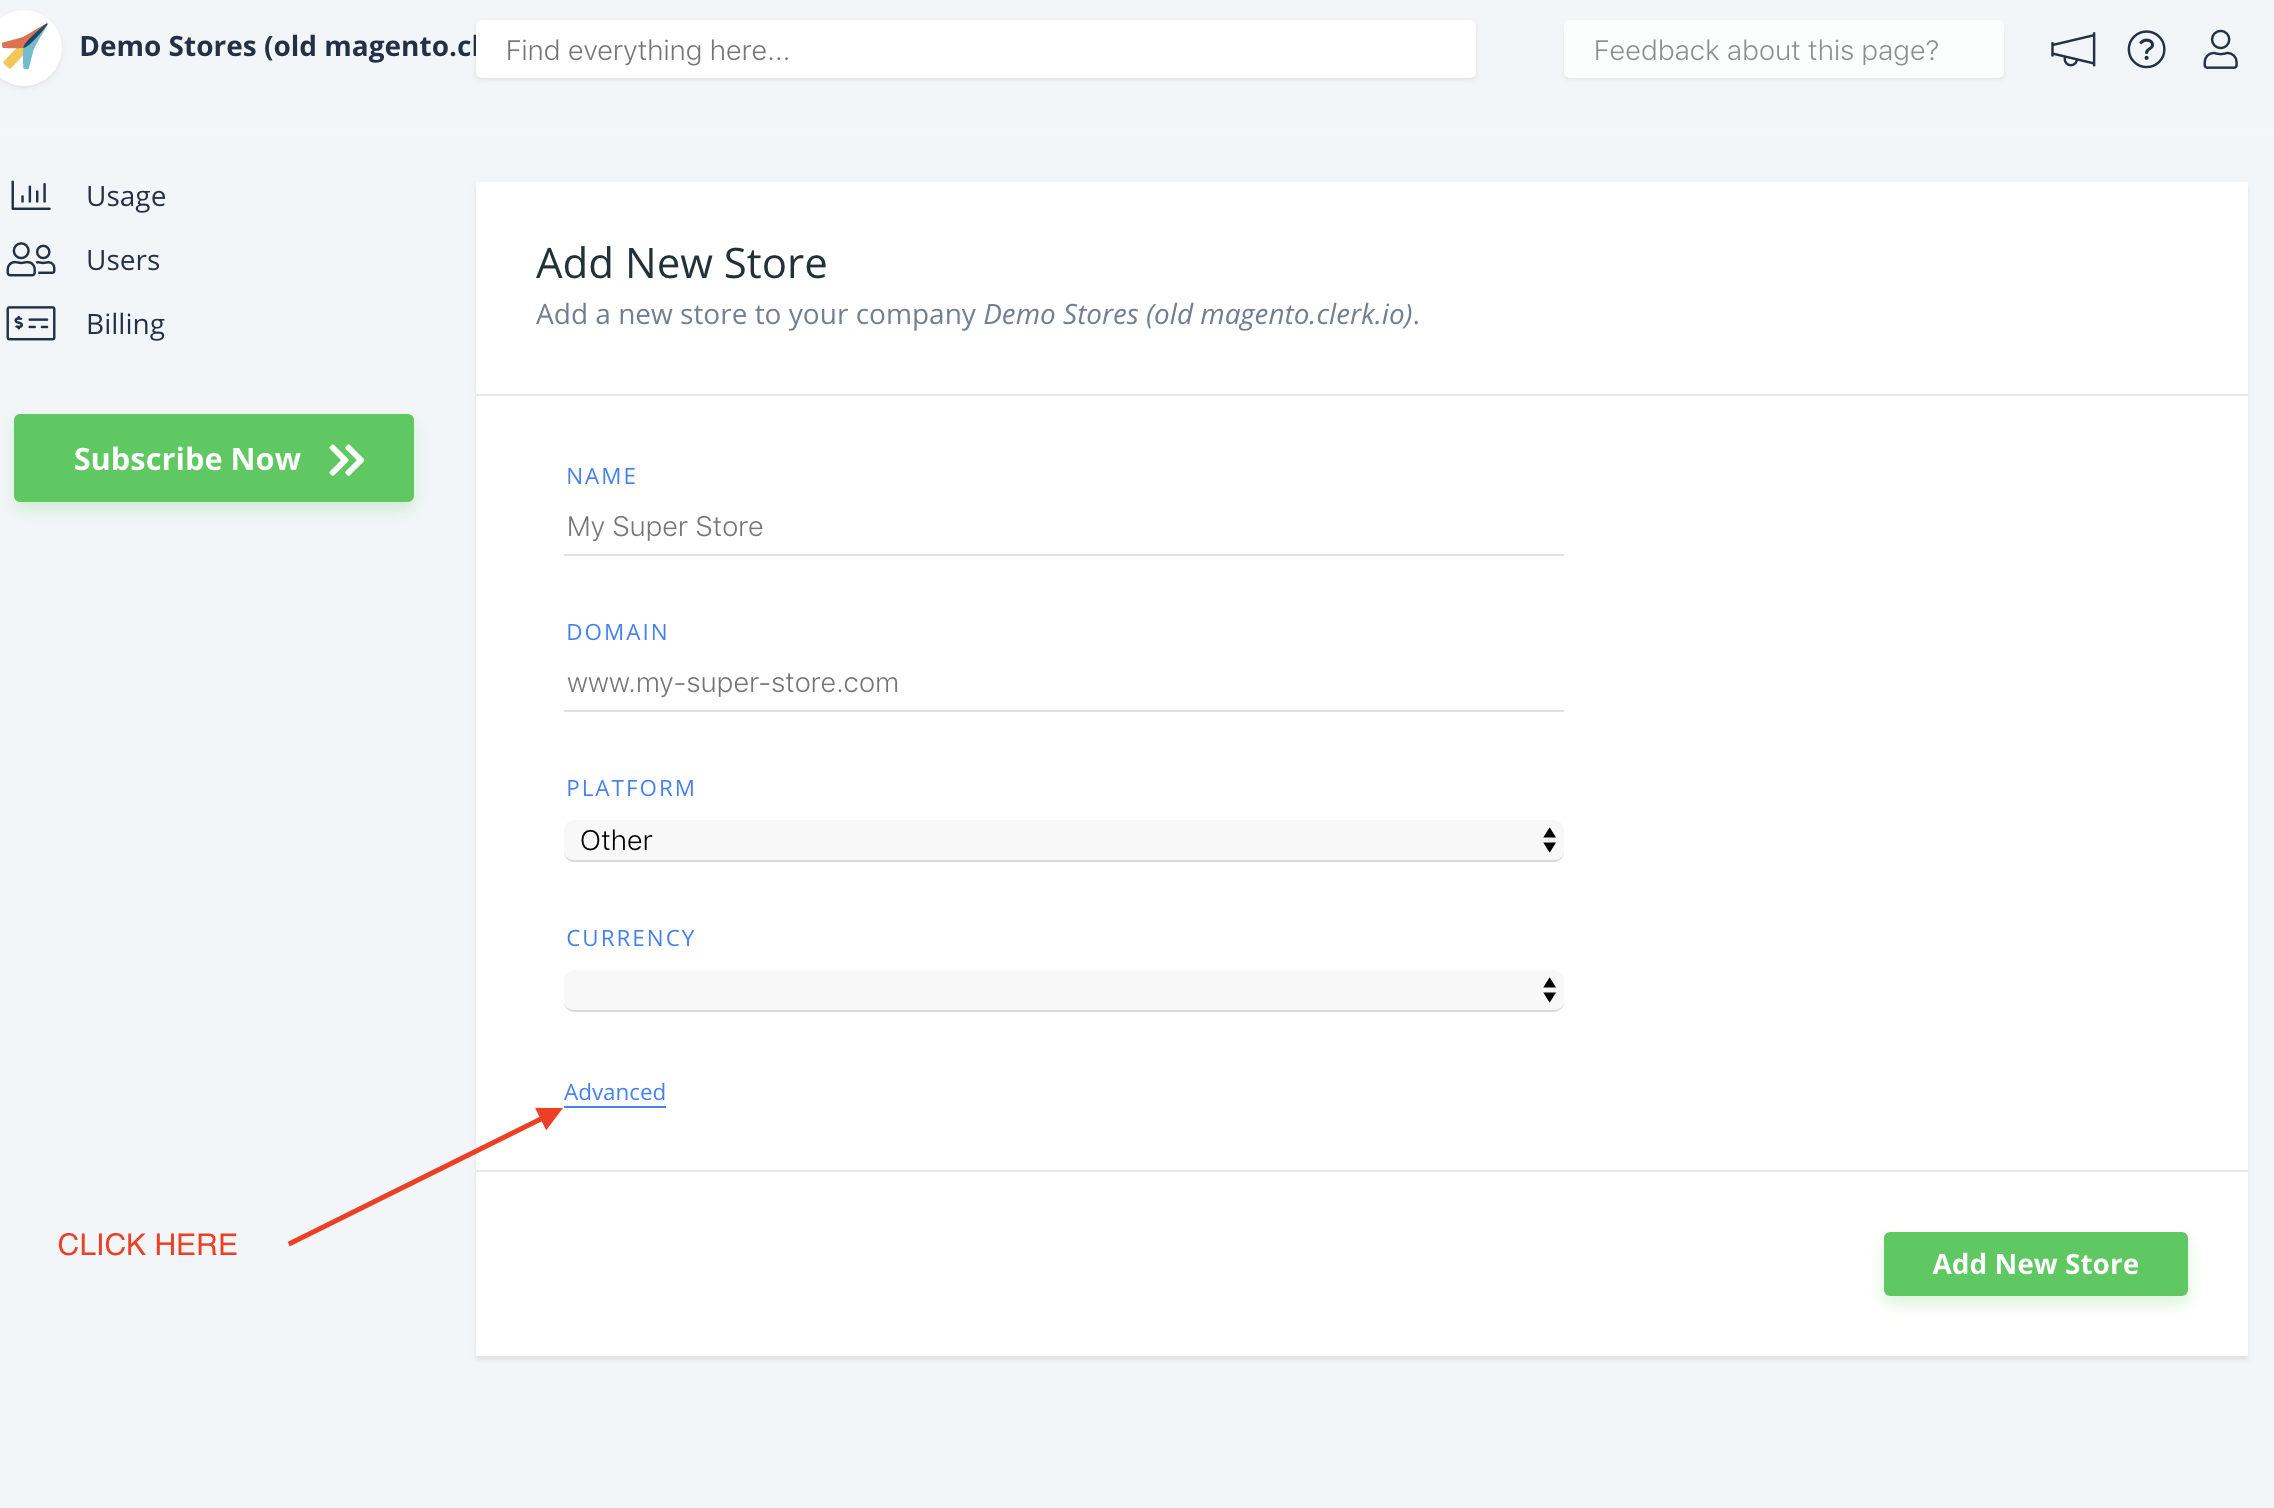
- On the Add New Store page, click Advanced to see all settings.
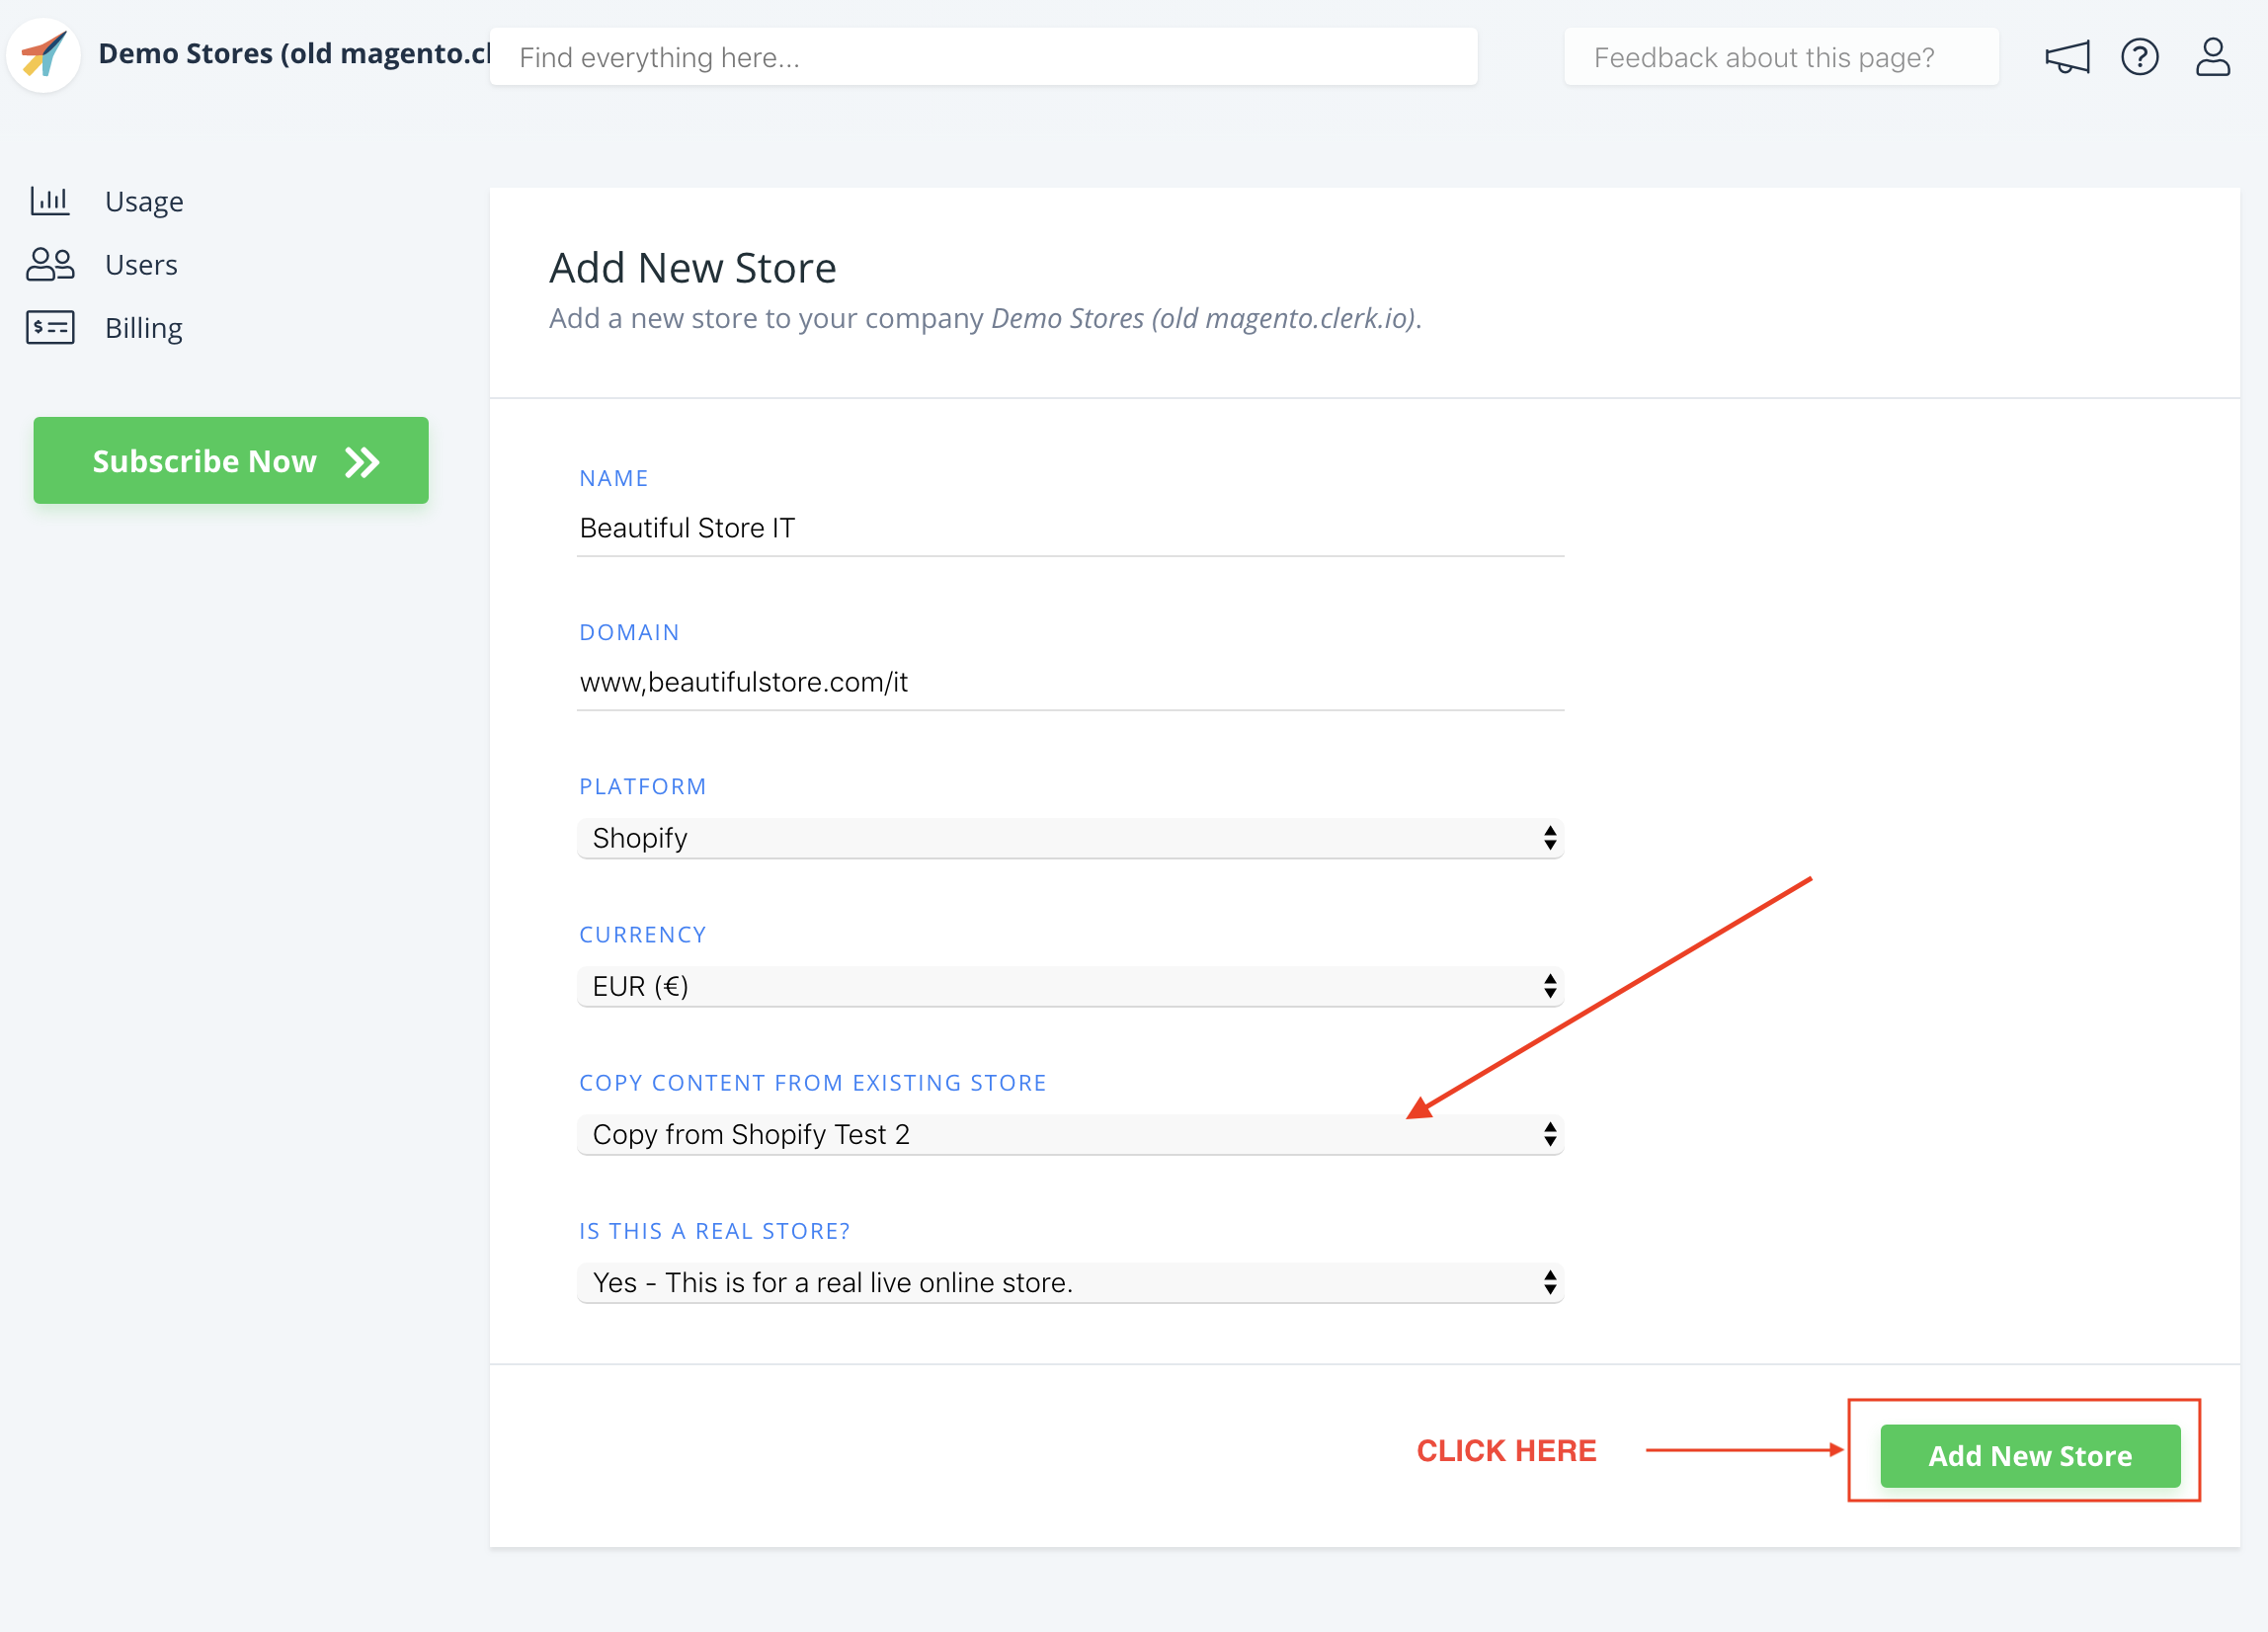
- Fill in the details of your domain, and choose your main Store from the Copy Elements From Existing Store dropdown, then click Add Store. This will carry over the Elements and Designs from your main Store.
- Now you can follow the Setup Guide again, to activate Clerk by clicking on Getting Started, to Sync Data for the new domain.
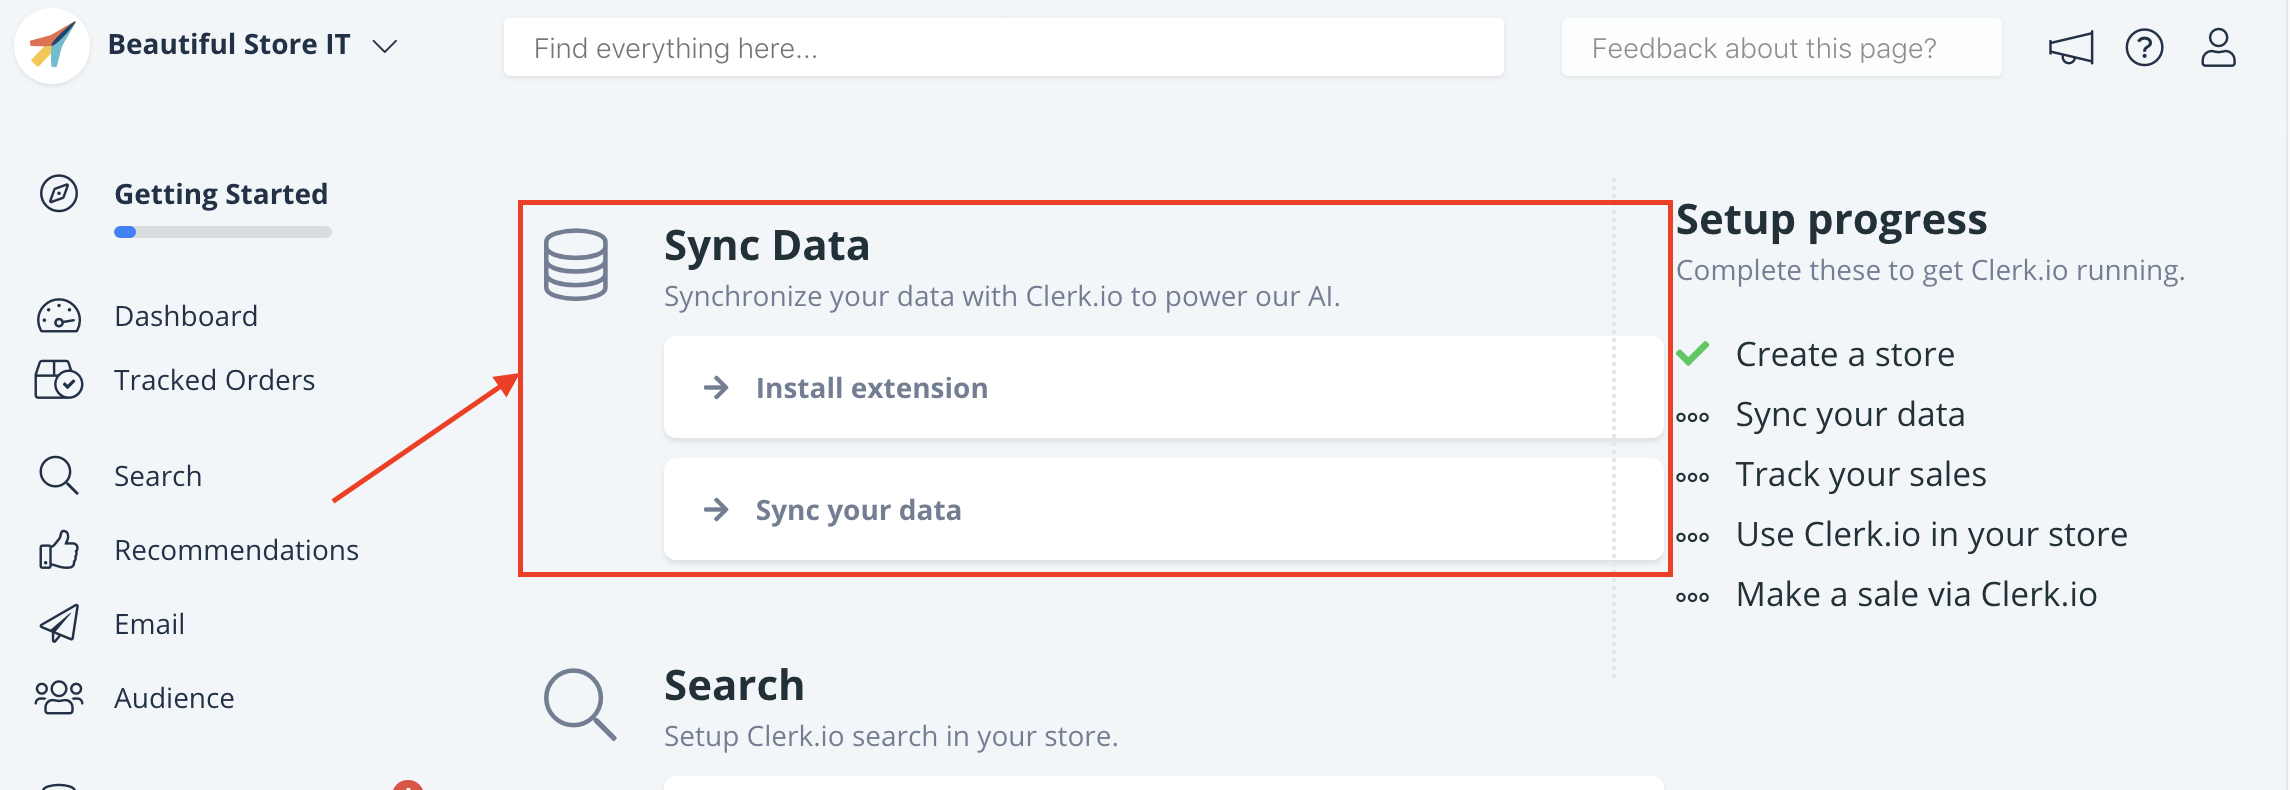
This will allow you to sync your domain with your Store at my.clerk.io through the Setup Guide.
When Data Sync has finished, your domain is ready and using the same setup as your main Store.
Repeat this process for every one of your JTL language domains. Remember to translate Headlines, in Element-> Edit -> Select Design to the right language as well.