Get Started
Get Clerk up and running on your Lightspeed store in just a few steps. This guide walks you through connecting your store, installing tracking scripts, and syncing your data.
Connecting your store #
After following these simple steps you will be able to see your Live Demo, which gives you a personal overview of how Clerk will work on your webshop, before setting up the rest of the system.
Add store #
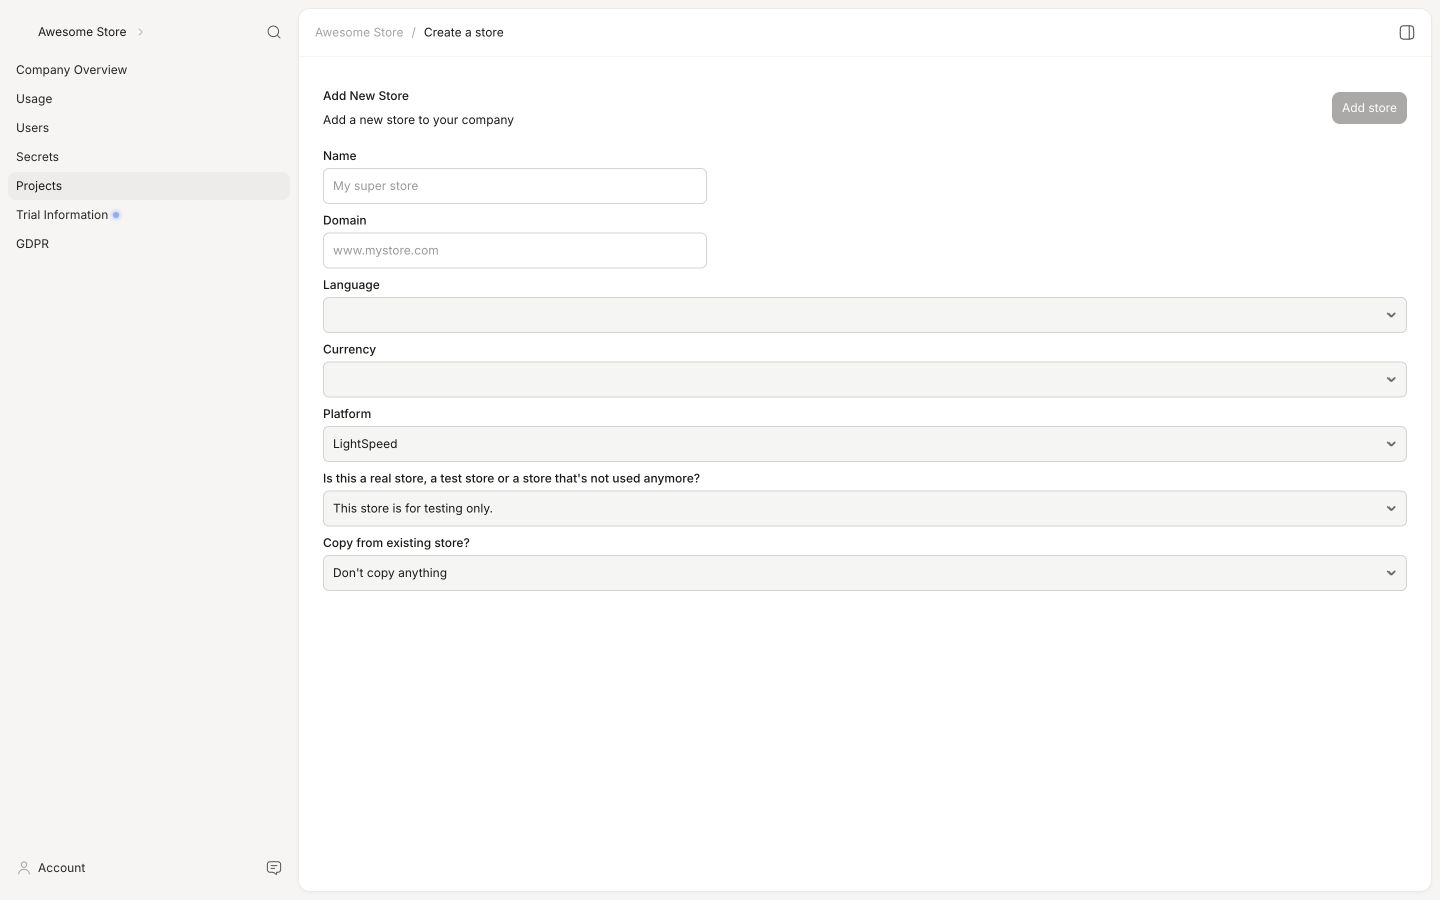
After logging in to my.clerk.io, the first thing you need to do is add your store:
Write the Name and Domain of your webshop.
Choose Lightspeed as the Platform and choose your Currency.
Click Add Store.
Install tracking scripts #
The Clerk tracking script uses Lightspeed Liquid variables to read store data like currency and product context. Because of this, the script must be placed in a theme file where Liquid is processed.
Visitor tracking #
In your Lightspeed backend, go to Design > Theme Editor > Advanced > Edit Code.
Under Snippets, click Add a new snippet, name it
clerk-tracking.rain, and click Done.Add the following script to
clerk-tracking.rain, and replaceINSERT_PUBLIC_API_KEYwith your Public Key from my.clerk.io > Developers > API Keys.
<!-- Clerk.io Visitor Tracking (Lightspeed) -->
<script type="text/javascript">
  (function(w,d){
    var e=d.createElement('script'); e.type='text/javascript'; e.async=true;
    e.src='https://cdn.clerk.io/clerk.js';
    var s=d.getElementsByTagName('script')[0]; s.parentNode.insertBefore(e,s);
    w.__clerk_q=w.__clerk_q||[]; w.Clerk=w.Clerk||function(){w.__clerk_q.push(arguments)};
  })(window,document);

  Clerk('config', {
    key: 'INSERT_PUBLIC_API_KEY',
    formatters: {
      convert_currency: function(price) {
        const rate_raw = '{{ 100 | money }}'.replace(/[^0-9.]/g, '');
        const rate = parseFloat(rate_raw) ? (parseFloat(rate_raw) / 100) : 1;
        return rate * price;
      }
    },
    globals: {
      currency_iso: '{{ shop.currency2.code }}',
      currency_symbol: '{{ shop.currency2.symbol }}'
    }
  });
  // Clerk.js Context
  Clerk('context', {
    product: {% if product.id %}'{{ product.id }}'{% else %}null{% endif %},
    category: {% if collection.category_id %}'{{ collection.category_id }}'{% else %}null{% endif %},
    page: {% if product.id %}null{% else %}{% if collection.category_id %}null{% else %}'{{ template }}'{% endif %}{% endif %}
  });

  {% if page.account.email %}
  Clerk('call', 'log/email', { email: '{{ page.account.email }}' });
  {% endif %}
</script>
Click Save.
Open layouts > custom.rain and add the following include where the visitor-tracking script should load, normally just before the closing
</head>tag. Click Save.
{% include 'snippets/clerk-tracking.rain' %}
The cart and thank-you pages in Lightspeed use a separate theme file called fixed.rain. This file does not inherit scripts from custom.rain, so Clerk.js will not load on those pages unless the snippet is included there too.
- Open layouts > fixed.rain in the same Theme Editor and add the same include just before the closing
</head>tag.
{% include 'snippets/clerk-tracking.rain' %}
- Click Save.
Order tracking #
In your Lightspeed backend, go to Settings > Website-Settings > Web Extras.
Find the Tracking box and insert the Clerk order tracking code.
<span
  class="clerk"
  data-api="log/sale"
  data-sale="{{ order.information.number }}"
  data-email="{{ order.customer.email }}"
  data-customer="{{ order.customer.id }}"
  data-products='[{% for product in order.products %}{"id":{{ product.product_id }},"quantity":{{ product.quantity }},"price":{{ product.base_price_incl }}}{% if not loop.last %},{% endif %}{% endfor %}]'>
</span>
- Click Save.
If orders are still not tracked #
Some Lightspeed themes do not load Clerk.js from custom.rain and fixed.rain during checkout. If the clerk-tracking.rain snippet is included in both files and orders are still not tracked, add the contents of the visitor tracking snippet to Web Extras as well.
Go to Settings > Website-Settings > Web Extras and find the Tracking box.
Paste the contents of
clerk-tracking.rainimmediately above the Clerk.io order tracking code.Click Save.
Only use this placement when the standard theme-file setup does not track orders. Whether it is needed depends on the active Lightspeed theme.
Multiple languages #
Use this setup when one Lightspeed eCom (C-Series) shop has language paths such as /nl/, /en/, /de/, and /fr/, and each language uses a separate Clerk.io store.
Configure the public key in Rain, before Clerk.js loads. Lightspeed renders shop.language on the server, so every page receives exactly one correct key before the browser loads Clerk.js.
This is more reliable than switching keys with client-side JavaScript. A browser-side switch can race with Clerk.js loading or initialise Clerk.io with the wrong store first.
Replace the contents of clerk-tracking.rain with the following visitor tracking loader. Replace every placeholder with the matching store’s Public Key from my.clerk.io > Developers > API Keys.
{% set clerk_key = 'INSERT_NL_PUBLIC_API_KEY' %}

{% if shop.language == 'en' %}
  {% set clerk_key = 'INSERT_EN_PUBLIC_API_KEY' %}
{% elseif shop.language == 'de' %}
  {% set clerk_key = 'INSERT_DE_PUBLIC_API_KEY' %}
{% elseif shop.language == 'fr' %}
  {% set clerk_key = 'INSERT_FR_PUBLIC_API_KEY' %}
{% elseif shop.language == 'nl' %}
  {% set clerk_key = 'INSERT_NL_PUBLIC_API_KEY' %}
{% endif %}

<!-- Clerk.io Visitor Tracking (Lightspeed multilingual) -->
<script type="text/javascript">
  (function(w, d) {
    var e = d.createElement('script');
    e.type = 'text/javascript';
    e.async = true;
    e.src = 'https://cdn.clerk.io/clerk.js';
    var s = d.getElementsByTagName('script')[0];
    s.parentNode.insertBefore(e, s);
    w.__clerk_q = w.__clerk_q || [];
    w.Clerk = w.Clerk || function() { w.__clerk_q.push(arguments); };
  })(window, document);

  Clerk('config', { key: '{{ clerk_key }}' });
</script>
The initial Dutch key is the fallback. Change it to the Public Key for the shop’s default language if Dutch is not the fallback language. Do not use or expose a Private Key in Rain, page source, or browser JavaScript.
shop.language is Lightspeed’s active visitor-language variable. Read Lightspeed’s
Rain variable reference and Clerk.io’s
Clerk.js configuration reference for the underlying variables and configuration.
Keep the include in both layouts > custom.rain and layouts > fixed.rain, immediately before the closing </head> tag. fixed.rain covers checkout and other off-limits pages, and Clerk.js must run there for sales tracking on the confirmation page.
Each page must have only one Clerk.js loader and one Clerk.io configuration. Remove or replace any static Clerk.io configuration in fixed.rain, custom.rain, or Tracking/Web Extras. Otherwise, a static key can configure Clerk.io before the language-specific key.
Verify each language #
For each configured language:
Open a page in that language and inspect the rendered page source. Confirm the
Clerk('config')key is the expected language-specific Public Key.Confirm the relevant Clerk.io Elements load results from that language’s Clerk.io store.
Where sales tracking is relevant, place a controlled test order and confirm the sale is tracked in the matching language store.
Sync data #
Syncing data connects your Lightspeed store to Clerk, allowing Clerk to access your products, orders, customers, and other store information. This enables Clerk to provide personalized recommendations and search results based on your actual store data. Follow the steps in the Sync Data guide to set up the data sync.