Extension
Configure your Magento 1 extension settings, manage data sync options, and customize search, recommendations, and logging features. This guide also covers installation via Toolbox Script, upgrading, and uninstalling.
Installing with toolbox #
The Clerk Toolbox Script has been developed to make it easy to install the Clerk extension in your Magento webshop, without using Magento Connect.
The Toolbox Script will be run directly from a terminal.
We suggest these: - Apple: iTerm, you will have to download it from the Internet; - Windows: Command Prompt, its already installed in your computer.
The script also creates a backup of the Magento folder so it can be restored if something goes wrong.
What you need #
In order to install it, you need SSH or SFTP access to your webshop, including your Username, Password and Domain.
Navigating to folder #
- Start by logging in to your Magento server through a terminal, by using your Username and Domain like this:
ssh Stefan@mywebshop.com
You will be prompted to type in the password for your User (the terminal will not give you any feedback while typing the password, but its registering it anyway).
Navigate to the root folder of Magento. Often you can do this by writing:
cd /var/www/html
and writing:
ls
This will give you a list of folders, to help you find the right one:

In the list of folders look for the right folder, in this case it would be magento1.
At this point what you need to do is to get in the folder, you can do so by writing:
cd NAME_FOLDER
NAME_FOLDER is substituted by the real name of the folder.
Installing extension #
- When you are in your Root Folder, you need to download the Toolbox Script with this line:
sudo wget https://raw.githubusercontent.com/clerkio/clerk-magento/master/clerk_toolbox_magento.sh
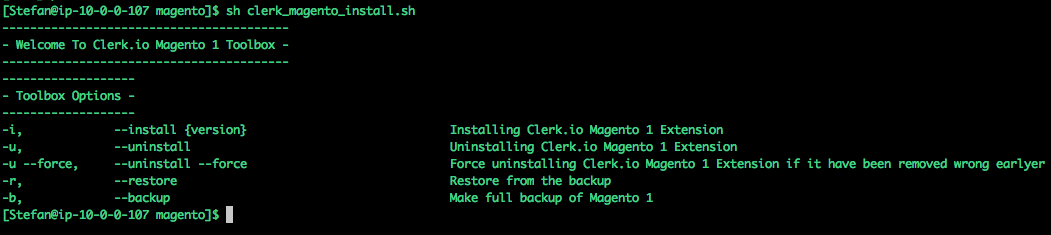
- Afterwards, type this line to see a list of the available options within the Toolbox:
sh clerk_toolbox_magento.sh
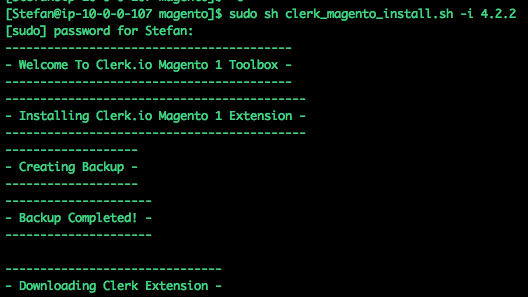
- Since you want to install the extension, you will use -i along with the version. Type this line where x.x.x is the version you want to install:
sudo sh clerk_toolbox_magento.sh -i x.x.x
- You will now be prompted to type in your password. After doing this, the script will backup your Magento1 folder and start installing the extension:
- Done! Now the extension is installed, and you can configure it in your Magento1 backend.
Optional commands #
Uninstalling The Toolbox also lets you uninstall the extension. You can do it with this line:
sudo sh clerk_toolbox_magento.sh -u
In some cases, if files have been corrupted or are missing, you can do a force uninstall like this:
sudo sh clerk_toolbox_magento.sh -u --force
Restoring In case something goes wrong in your webshop, you can always restore it through the backup that is made when installing the extension.
Use this line to do that:
sudo sh clerk_toolbox_magento.sh -r
Backup When installing the extension, the script will always create a backup first, but you can also create backup separately with this line:
sudo sh clerk_toolbox_magento.sh -b
my.clerk.io settings #
To access your sync settings between Clerk and your Magento 1 extension, head over to my.clerk.io, click “Data” on the left-side menu, then go to “Configuration”.
Here, you’ll find options to customize how your product, customer, and order data syncs with Clerk.
More information on the Magento 1 Extension, accessed through your Magento 1 Admin portal, below.
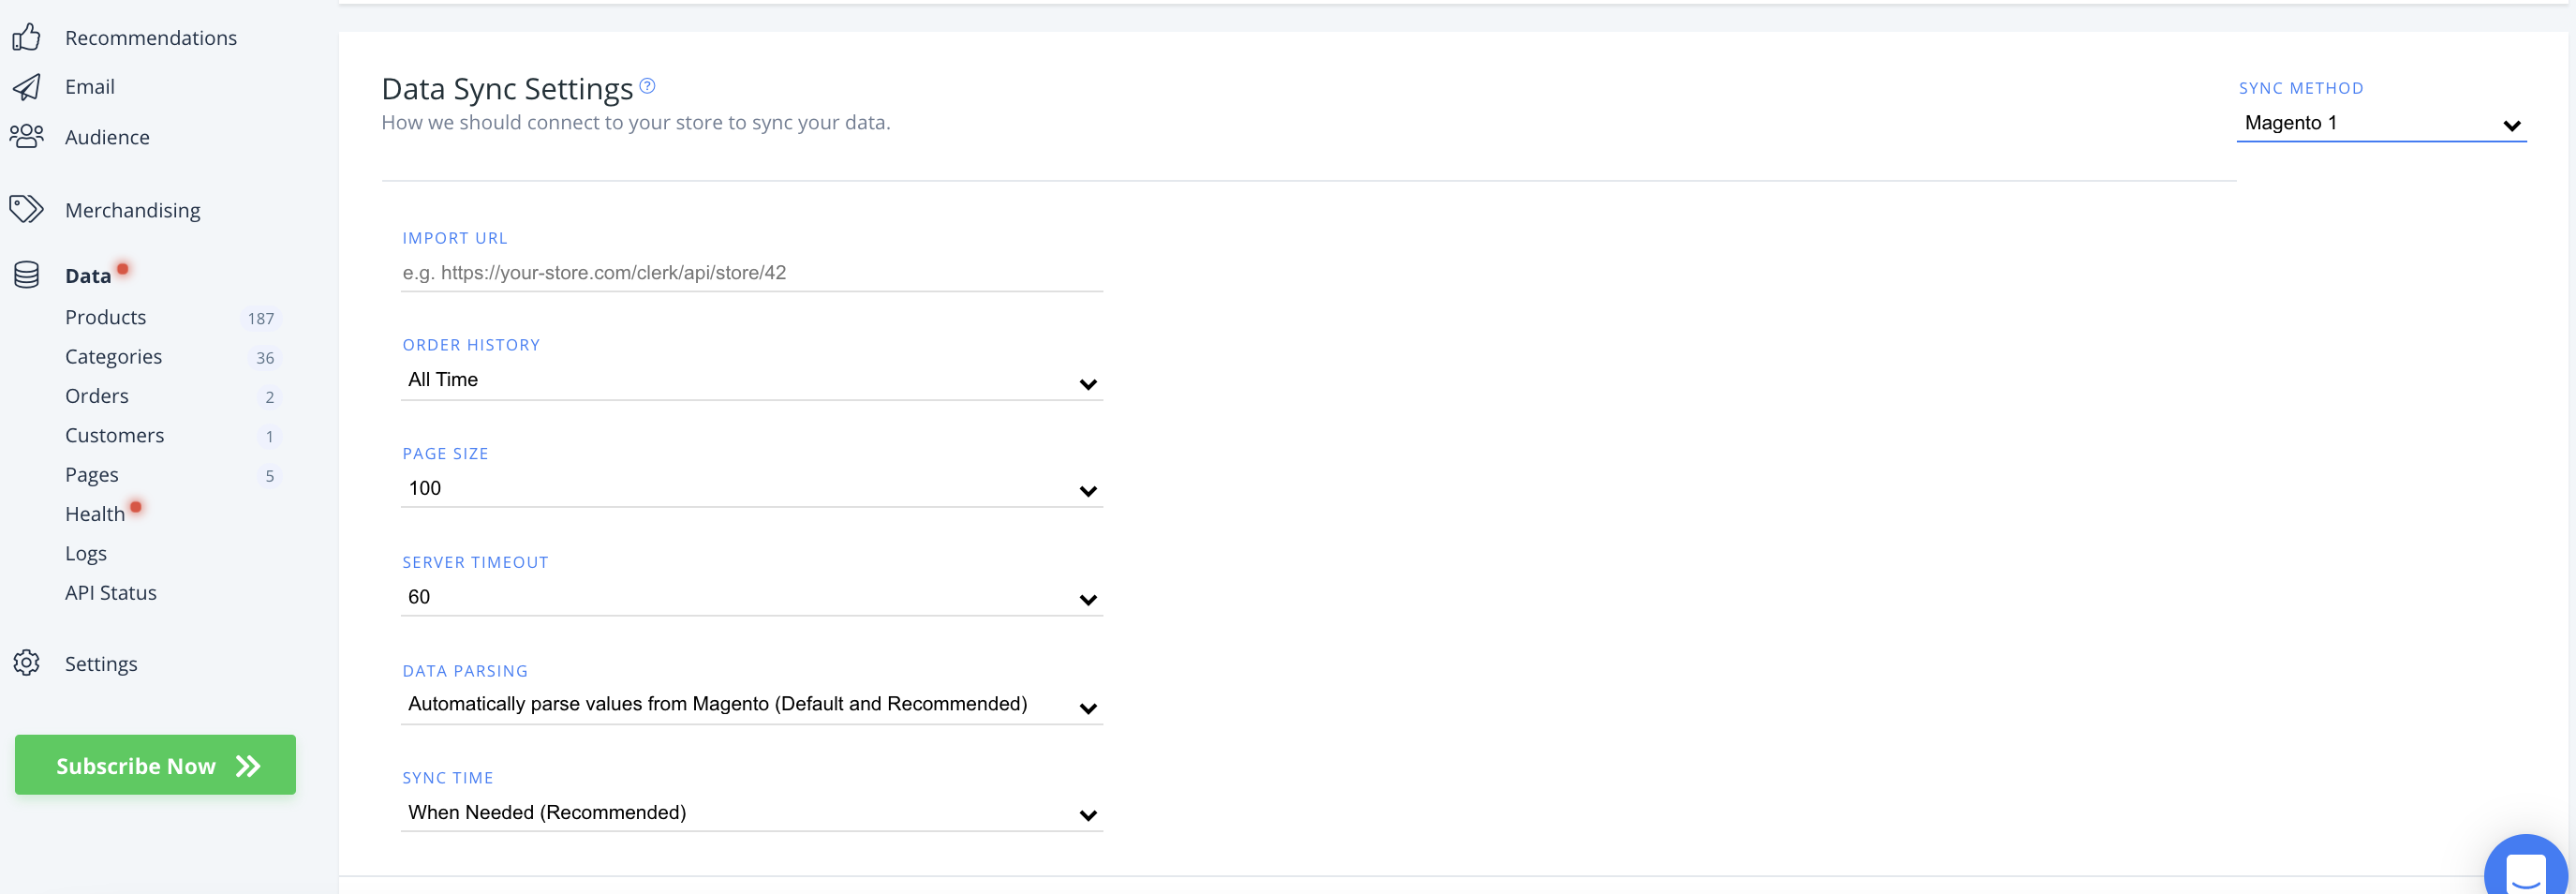
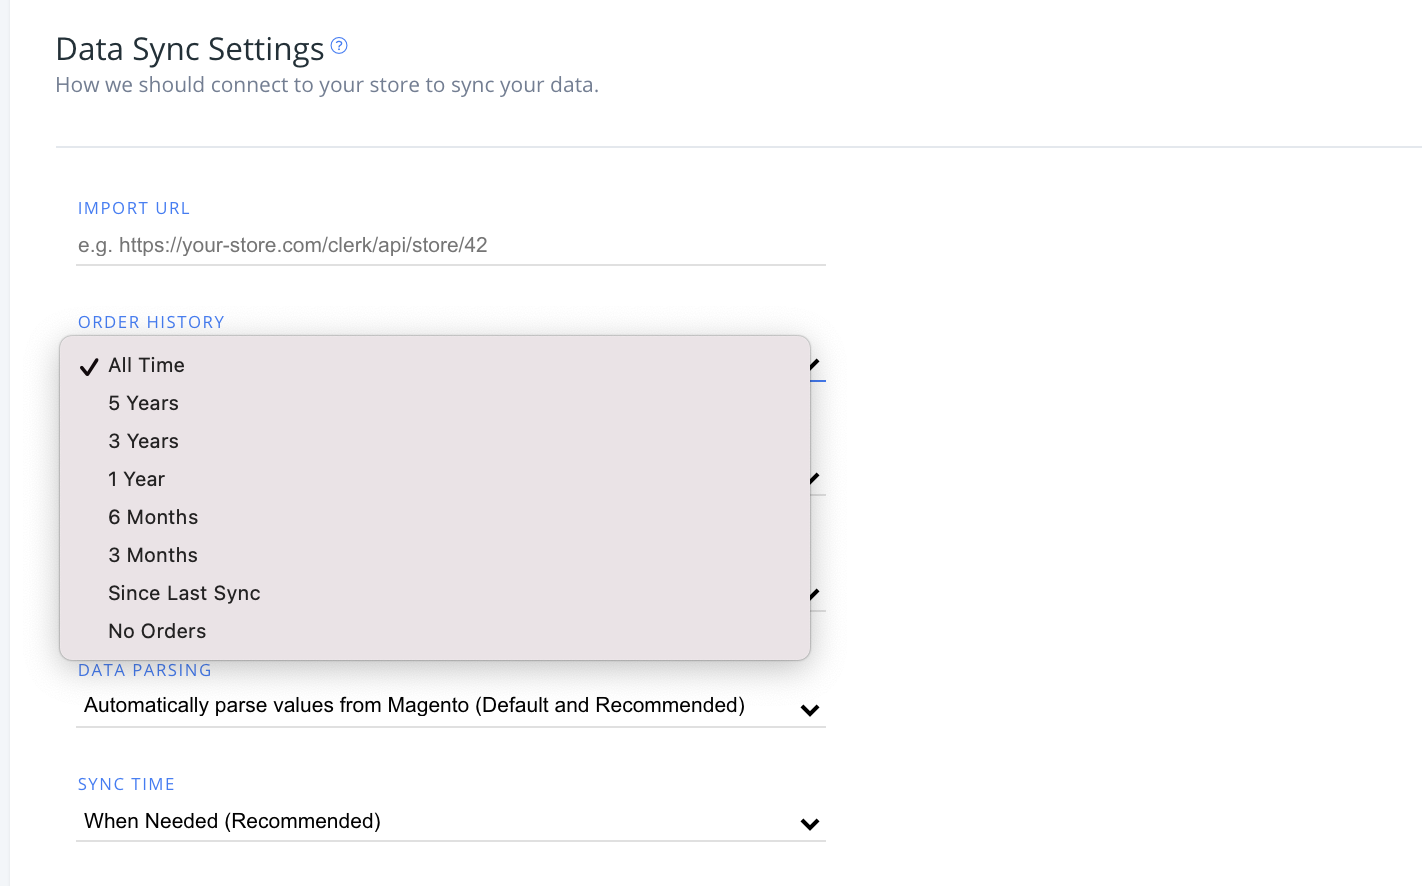
Order history #
Choose the amount of time you’d like to retroactively sync order data from your store to Clerk here.
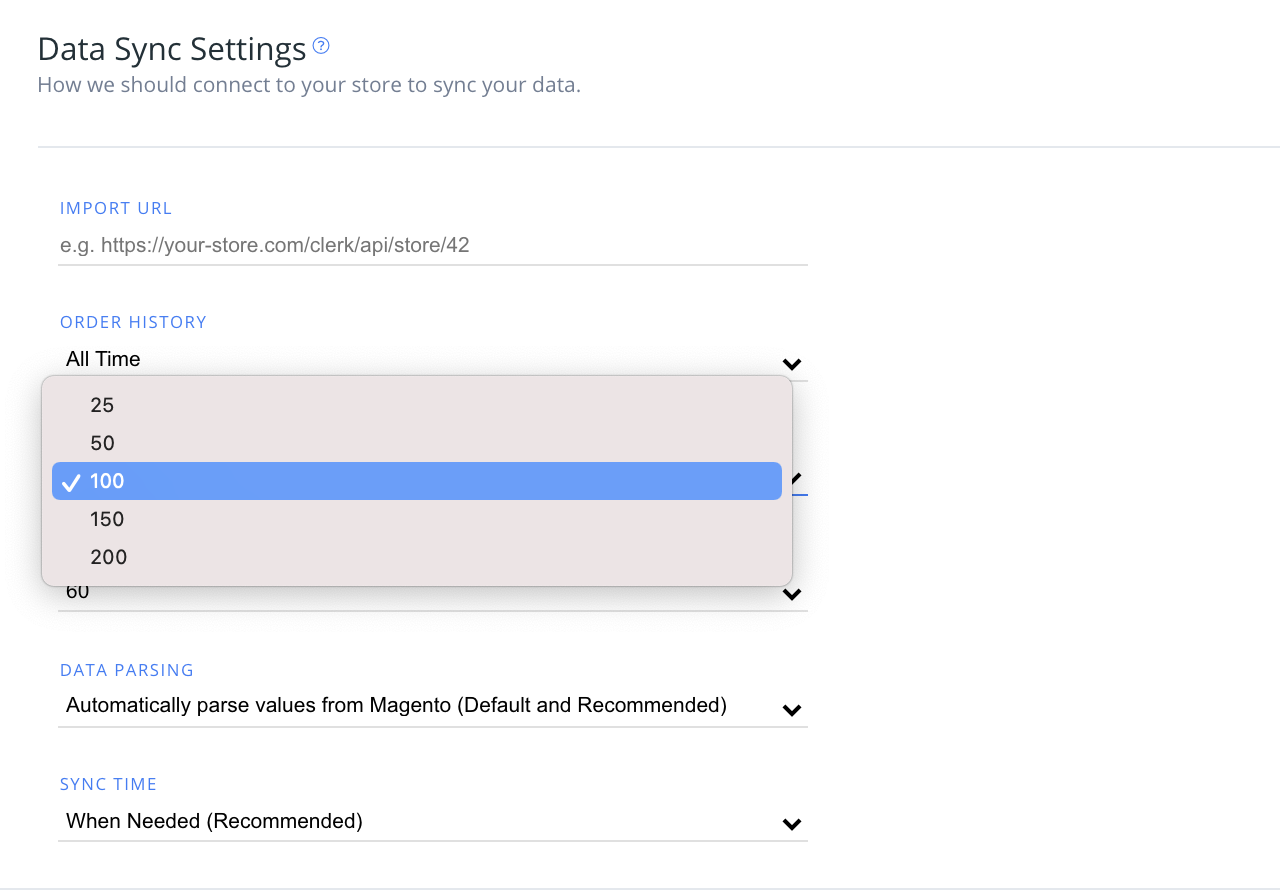
Page size #
Choose the page size of your synced data in the dropdown below.
Smaller page sizes may help avoid host timeouts during sync, while larger page sizes may sync faster.
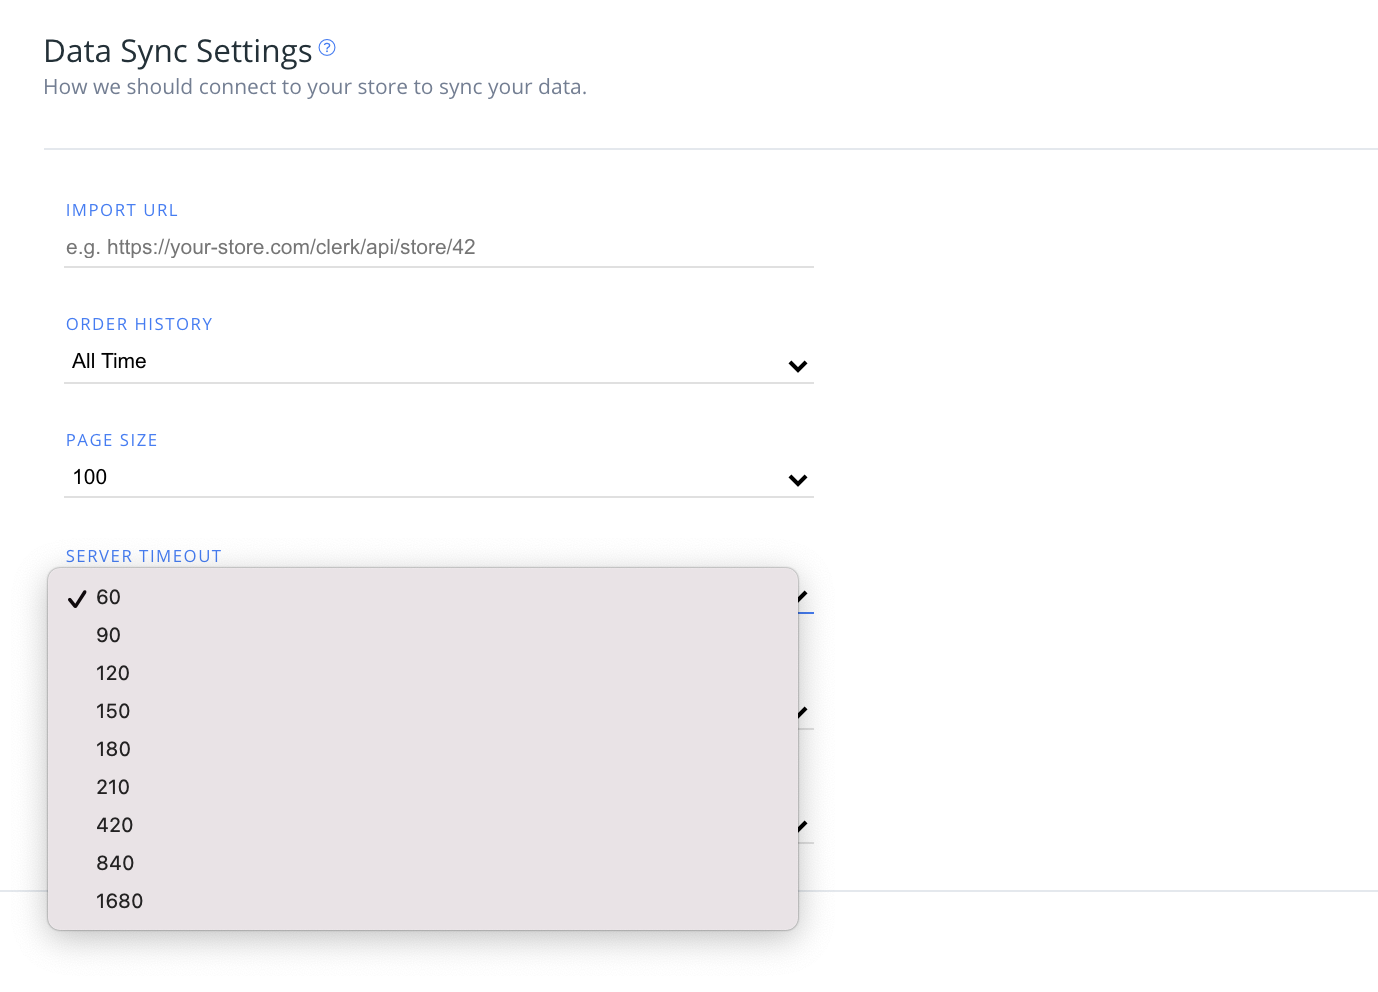
Server timeout #
Set the length of time without a response before the server times out, both to protect your data and to ensure you’ve allowed enough time for larger data sets to sync with Clerk.
Default is 60 seconds.
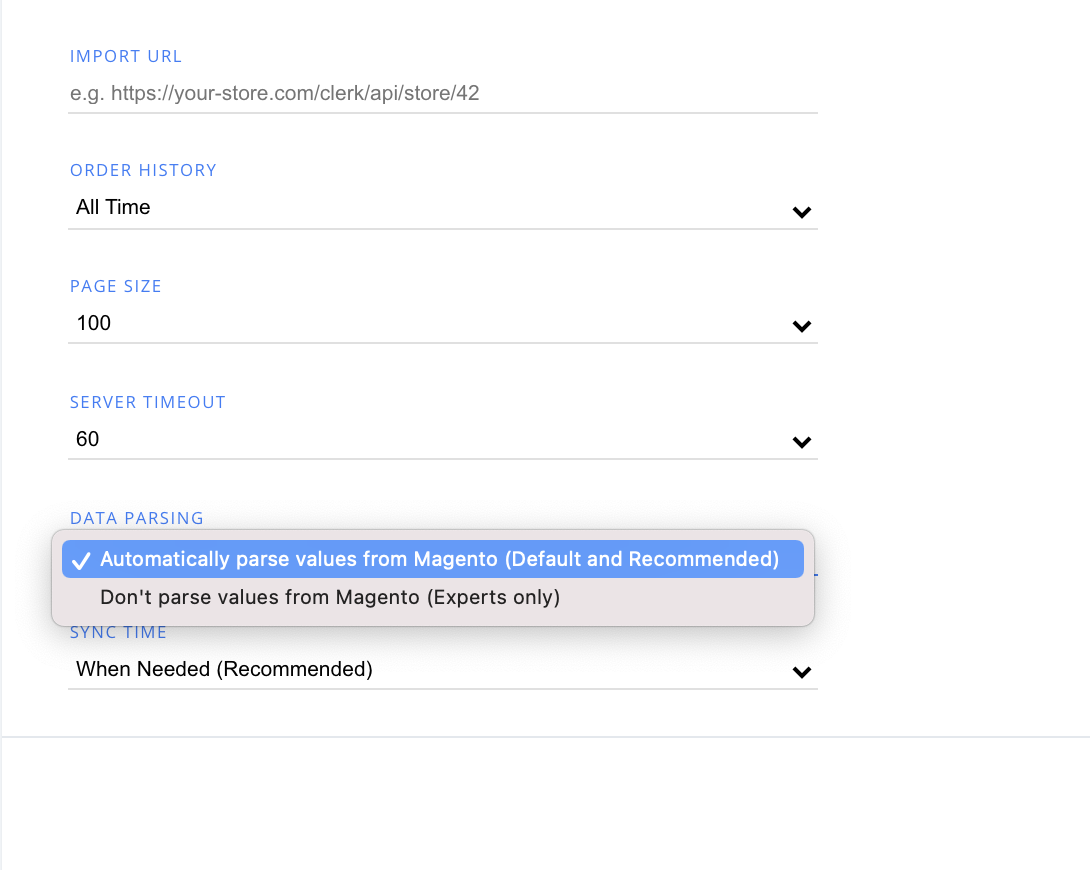
Data parsing #
Choose whether or not you’d like your Magento 1 data to parse values automatically in this section.
Automatic parsing is the default and recommended option.
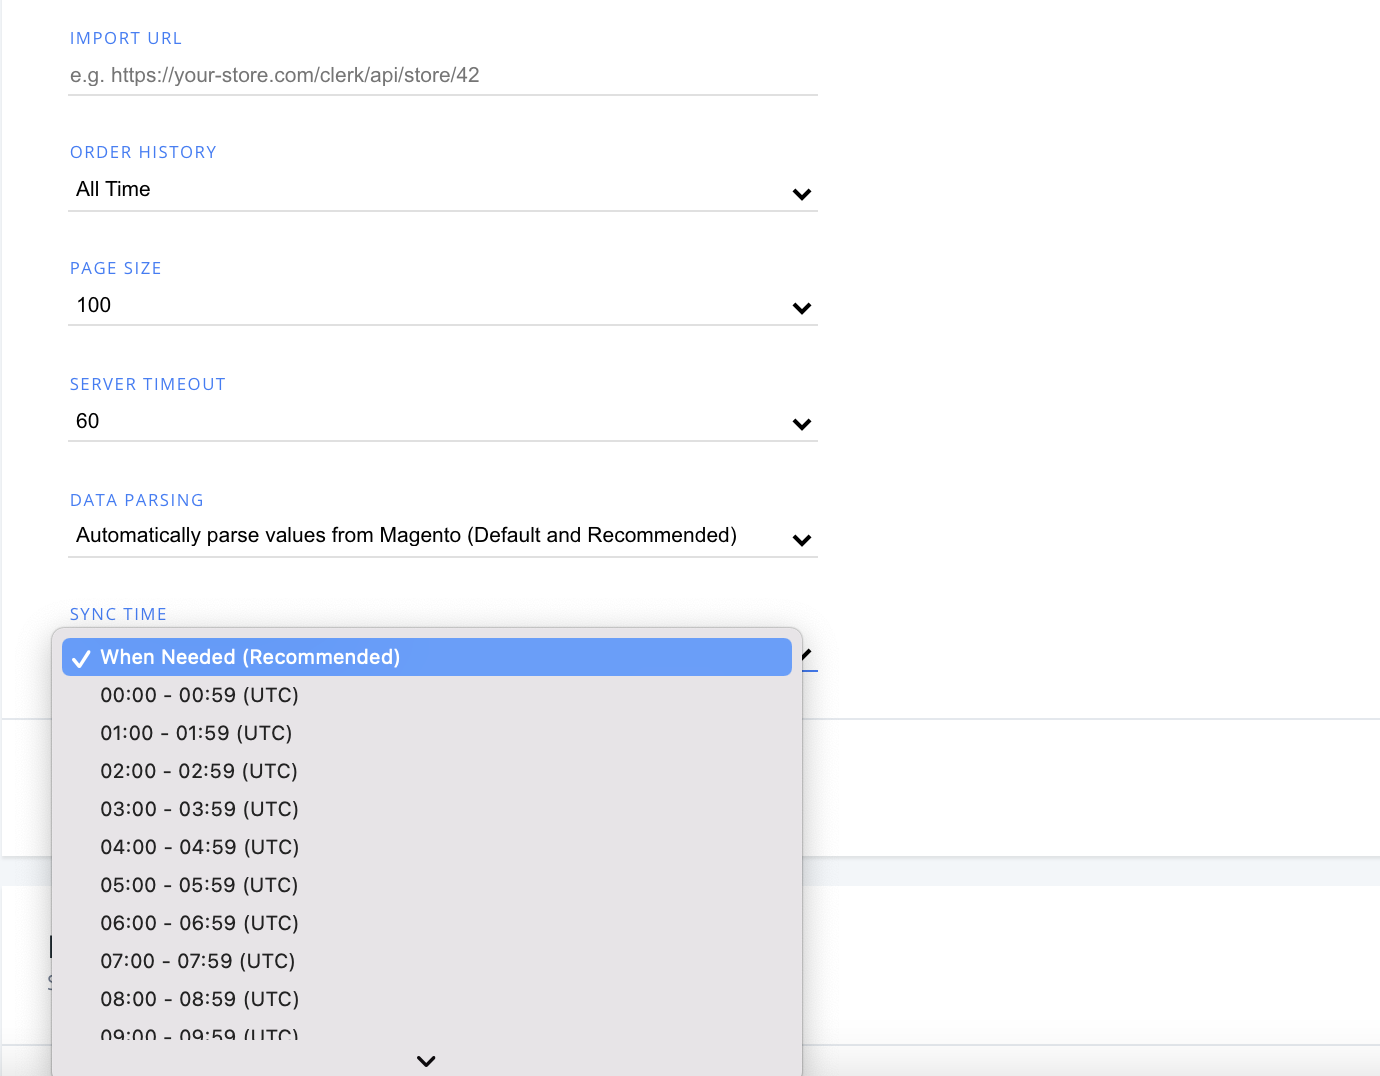
Sync time #
Set the time of day that you’d like your store data to sync with Clerk.
The default is “when needed'.
Extension settings #
If you are using v4.8.0 or a later version of the extension, you will be able to access the below settings in two ways after adding your Public and Private Keys to the extension:
Through the Magento backend in Clerk > Configuration > Settings
Through my.clerk.io, under Developers > Extensions
It does not matter where you make the changes, as the extension will sync with any changes made in my.clerk.io and vice versa.
In my.clerk.io you will also be able to see your current version of the extension, your platform, and the PHP version.
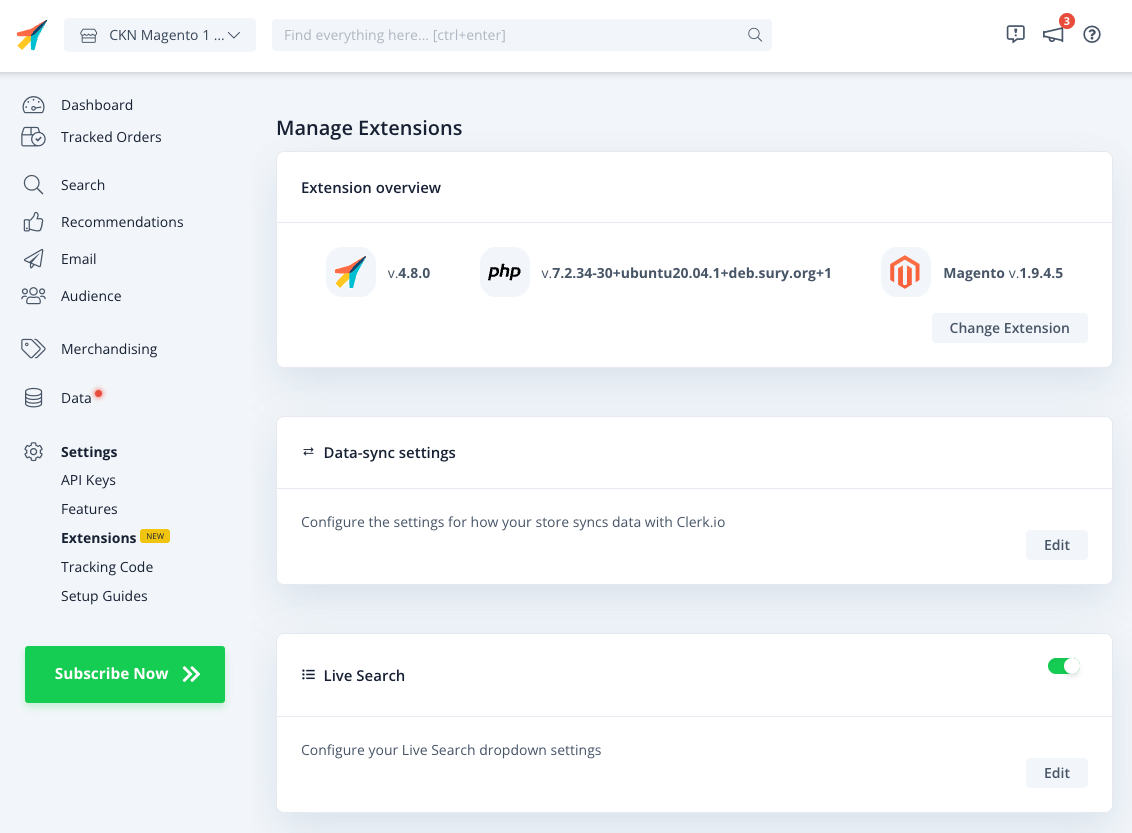
Simply click “Edit” on any setting, to see the available options:
Extension overview #
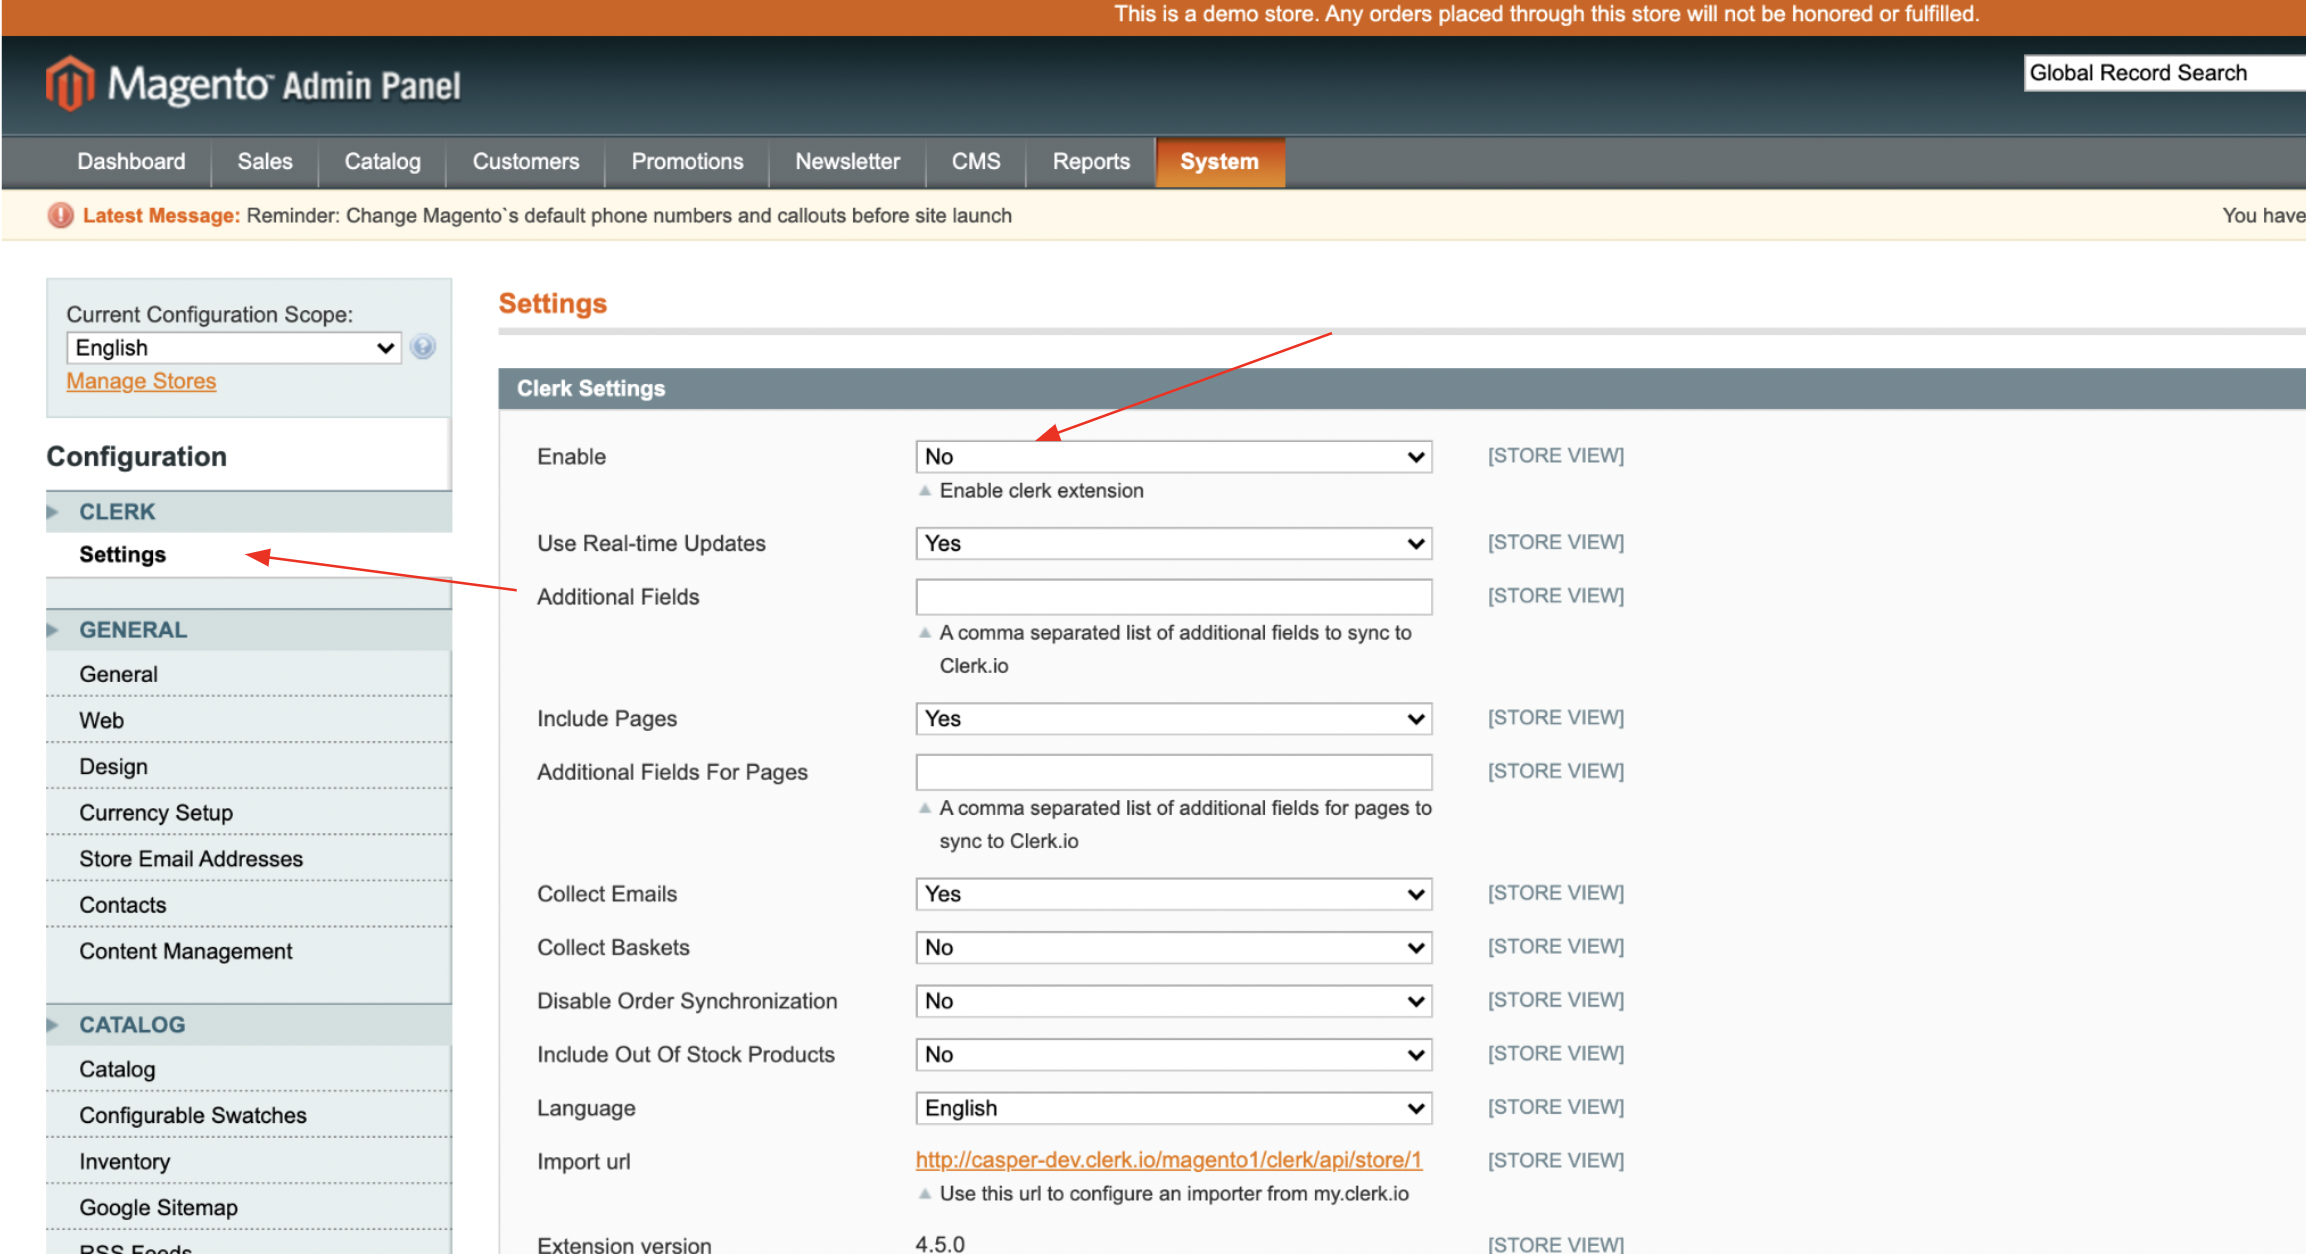
To access your Magento 1 Clerk extension, log into your store’s Admin account, and choose “Configuration” > “Clerk” > “Settings”.
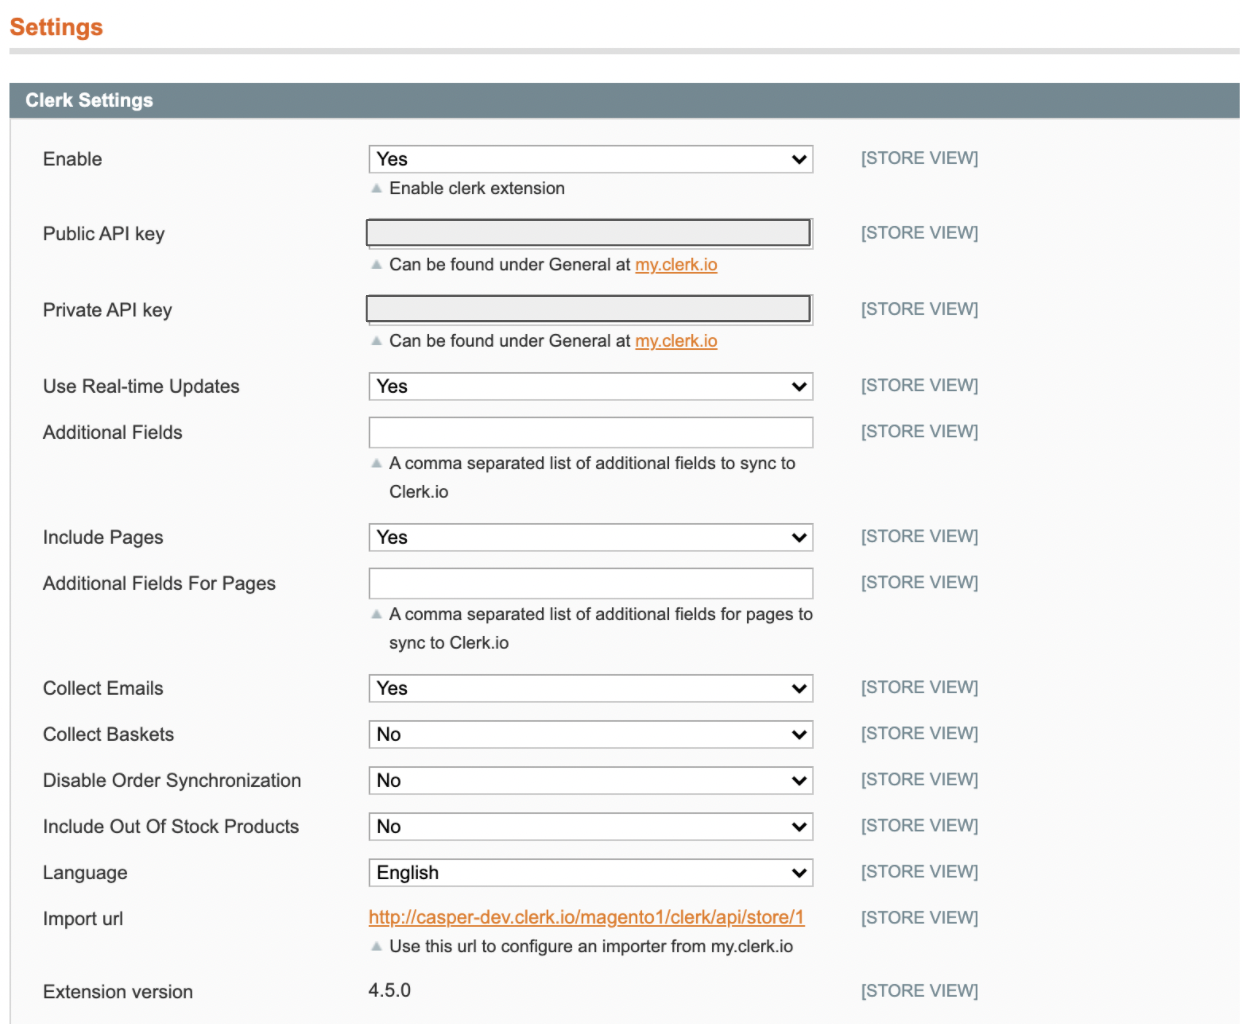
Clerk settings #
Set key parameters within the Clerk Settings section of the Magento 1 extension.
Your ability to enable/disable the Clerk extension, as well as your public and private API keys are also located here.
Real-time Updates:
- Additional Fields
Include Pages
- Additional Fields
Collect Emails and Customer Baskets:
Disable Order Sync:
Include Out-of-Stock Products
Language & Import URL: These were likely set when you first installed the Clerk extension and synced to my.clerk.io. Should these values change, simply choose the new store language or insert the updated Import URL here.
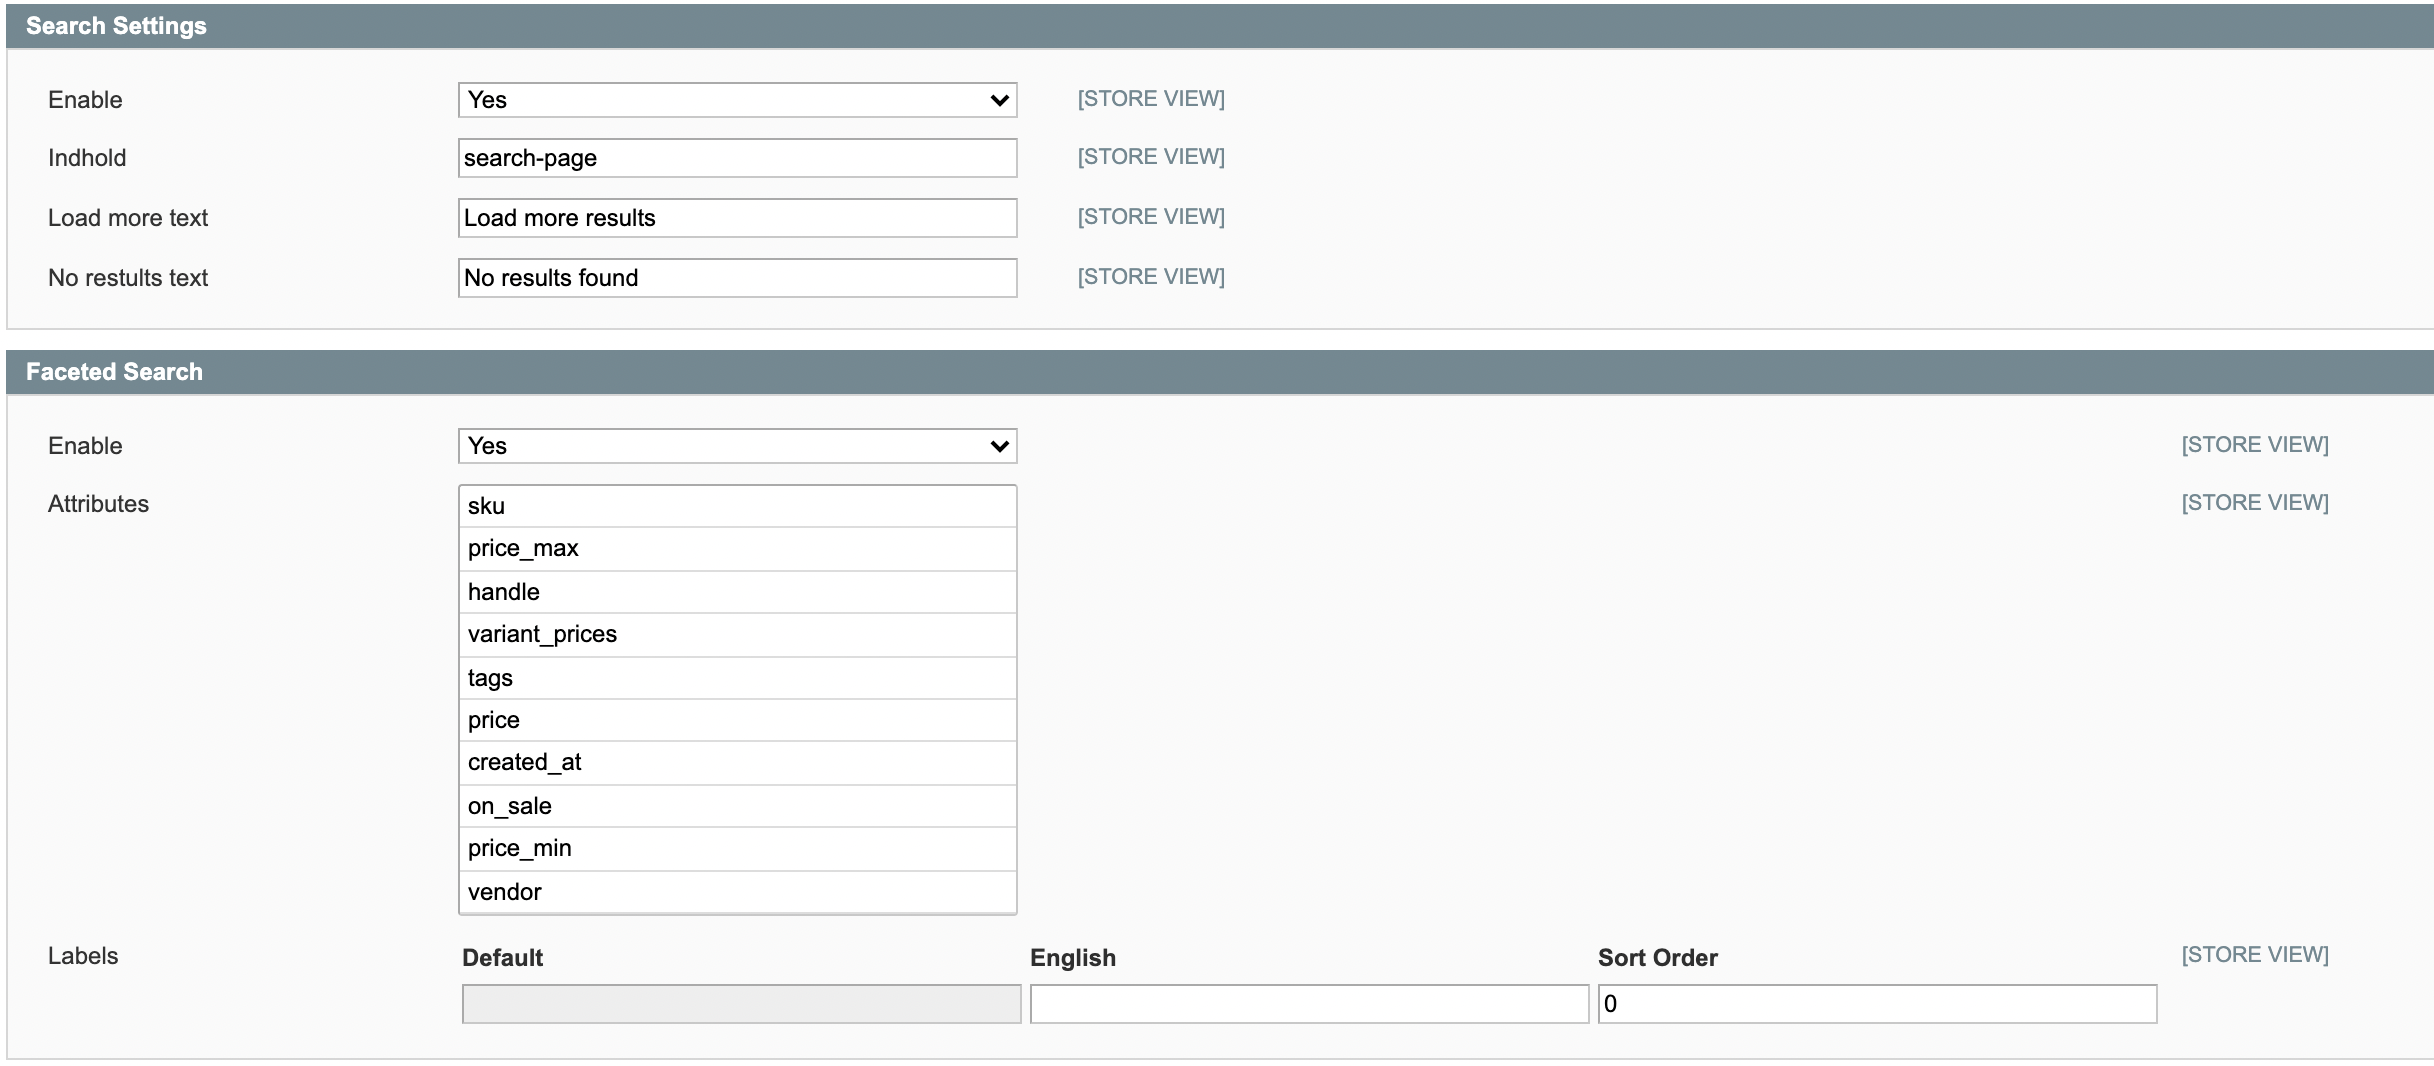
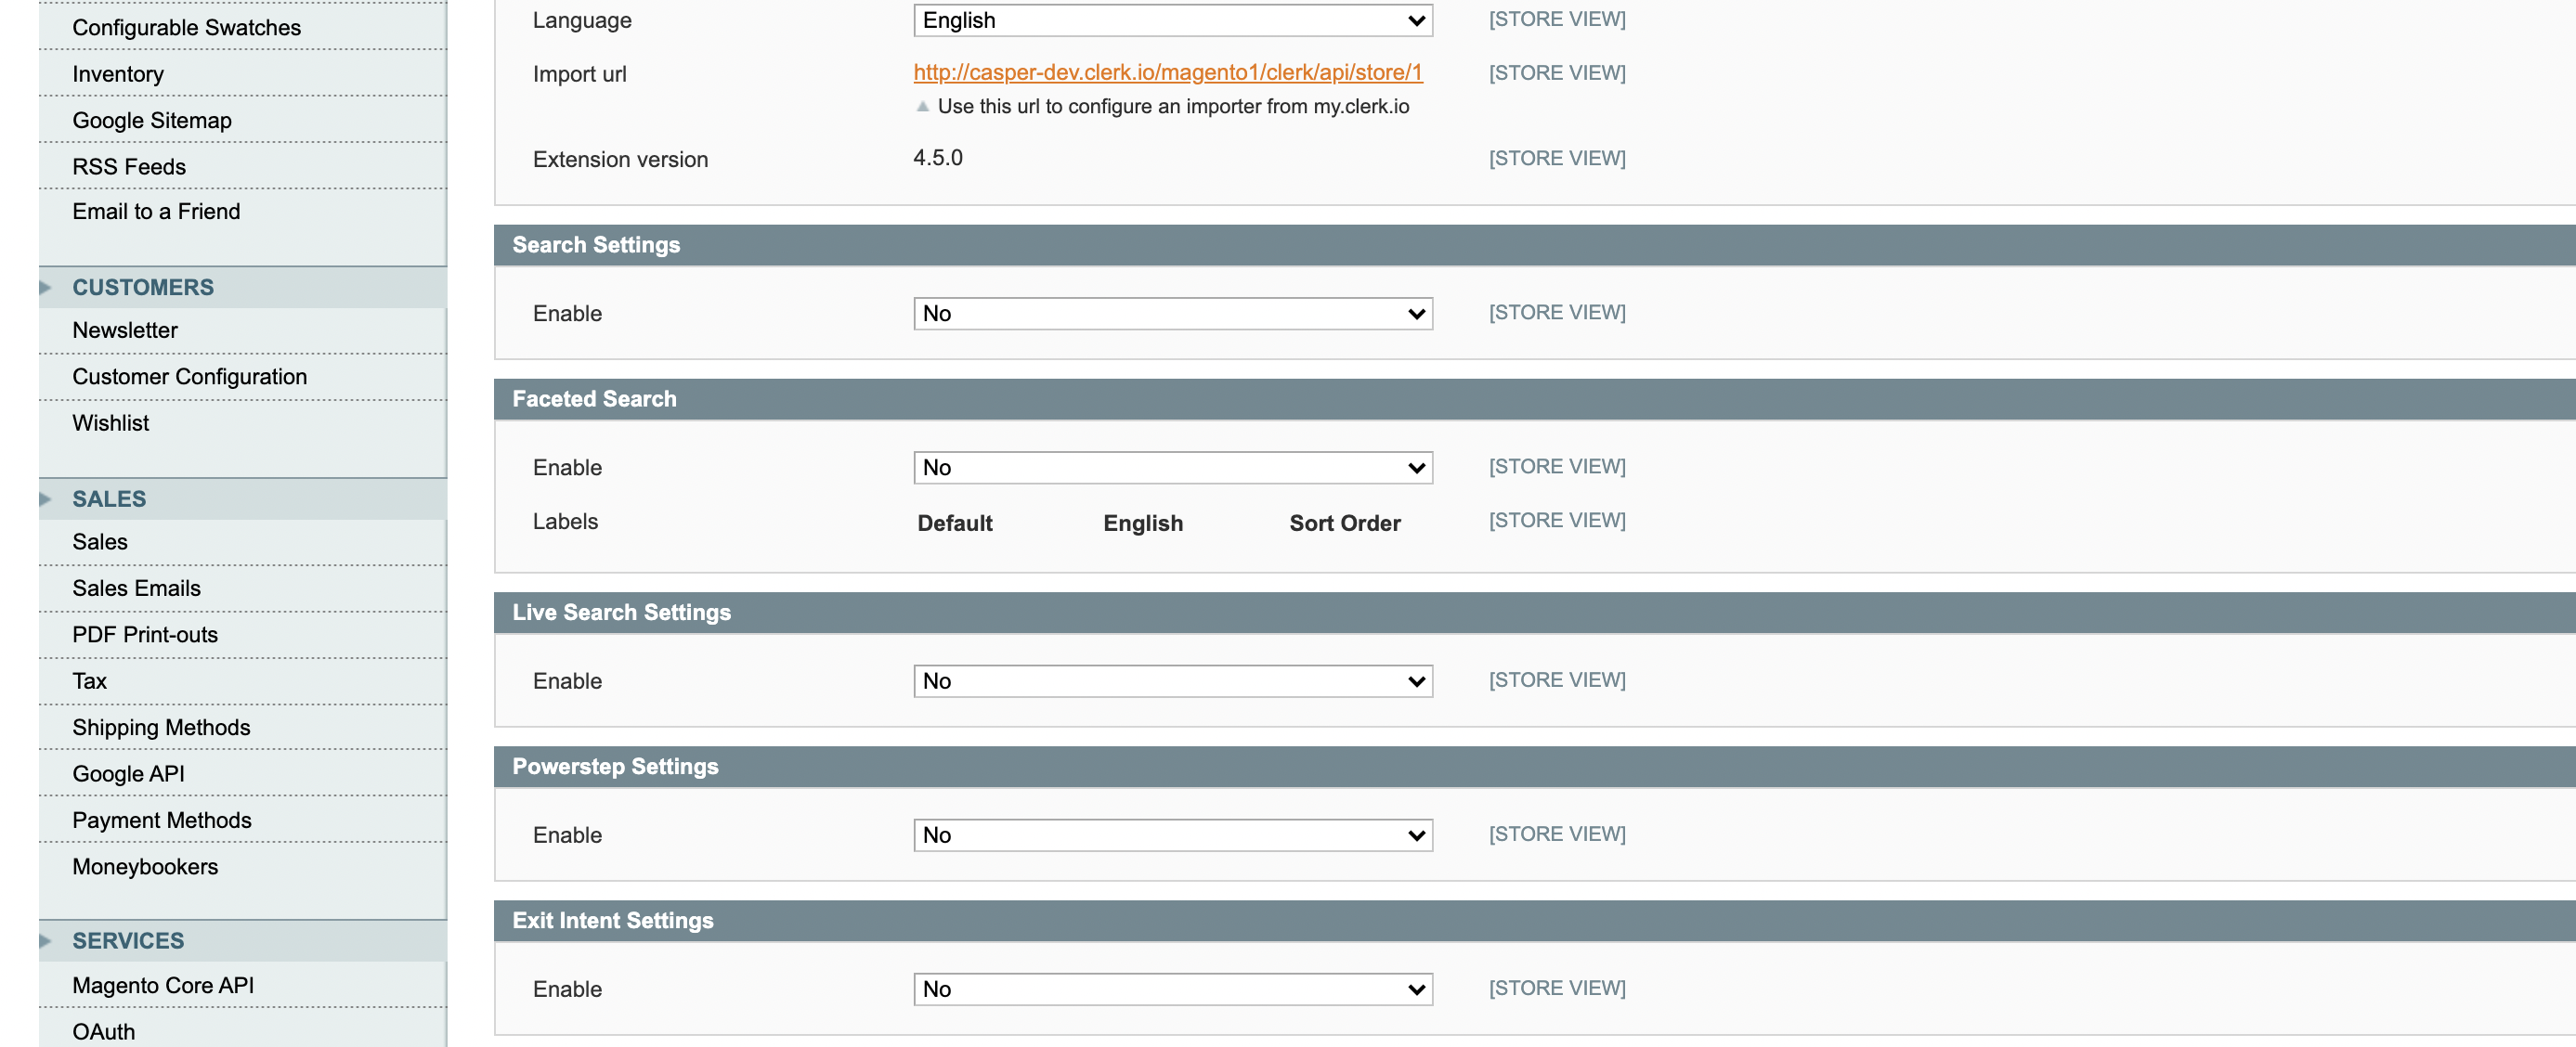
Search settings #
To enable your Clerk Search Page, Search Page Facets, and/or Live Search, select “Yes” from the appropriate dropdown(s).
Search Page Settings:
After selecting “Yes”, options appear to enter your Search Page Element name, which matches the data-template field found in the embed code of your Element in my.clerk.io. In this example, search-page.
You can also set the text for the " Load More” button here, as well as the text shown when no results are found for a query.
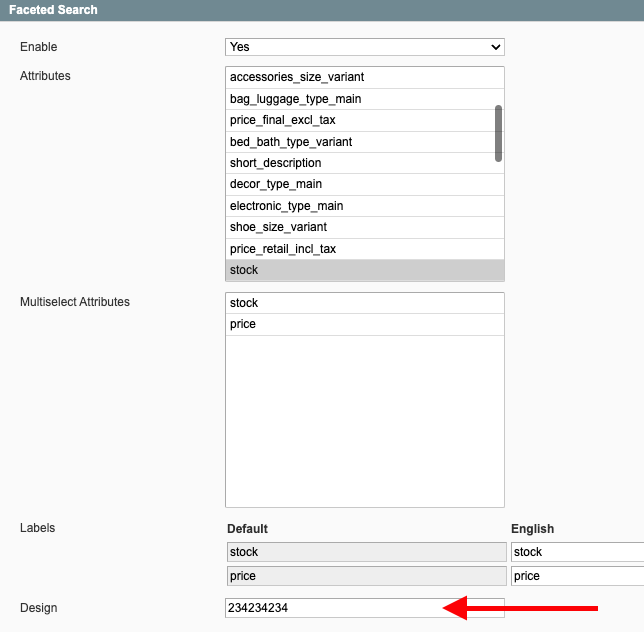
Faceted Search Settings:
- After enabling faceted search, you are given the option to enter the attributes you’d like to appear as facets on your Search Page.
You can also label these facets with the desired names, and choose the order in which each facet appears.
Customising facets #
Clerk allows you to style your search page facets from within the design and you can display this by referencing it with the design ID field.
The design ID can be found in the Clerk backend, on the far left column of each design on the design overview page and in the bottom left of the page once you enter the design to edit.

Note: You are now able to call the data for categories and pages in your Search page in the same way you would in your Live search, giving you a larger range of information to engage your customers with. For more information you can check here.
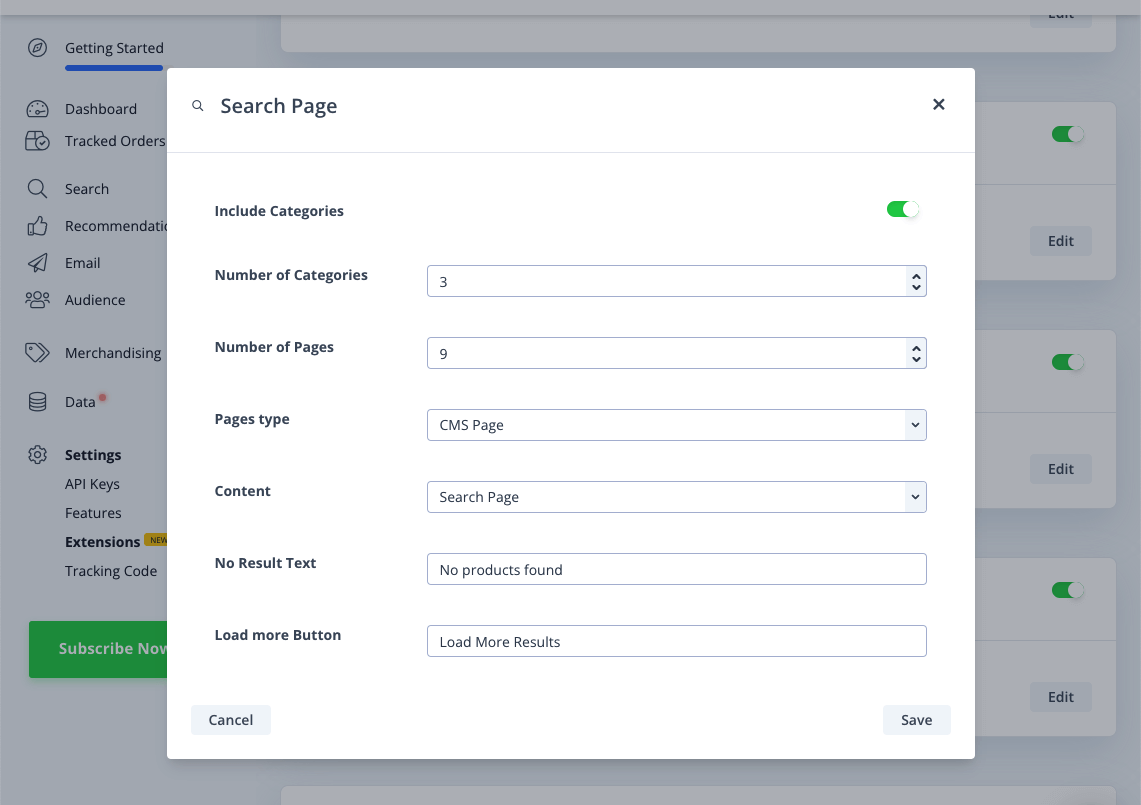
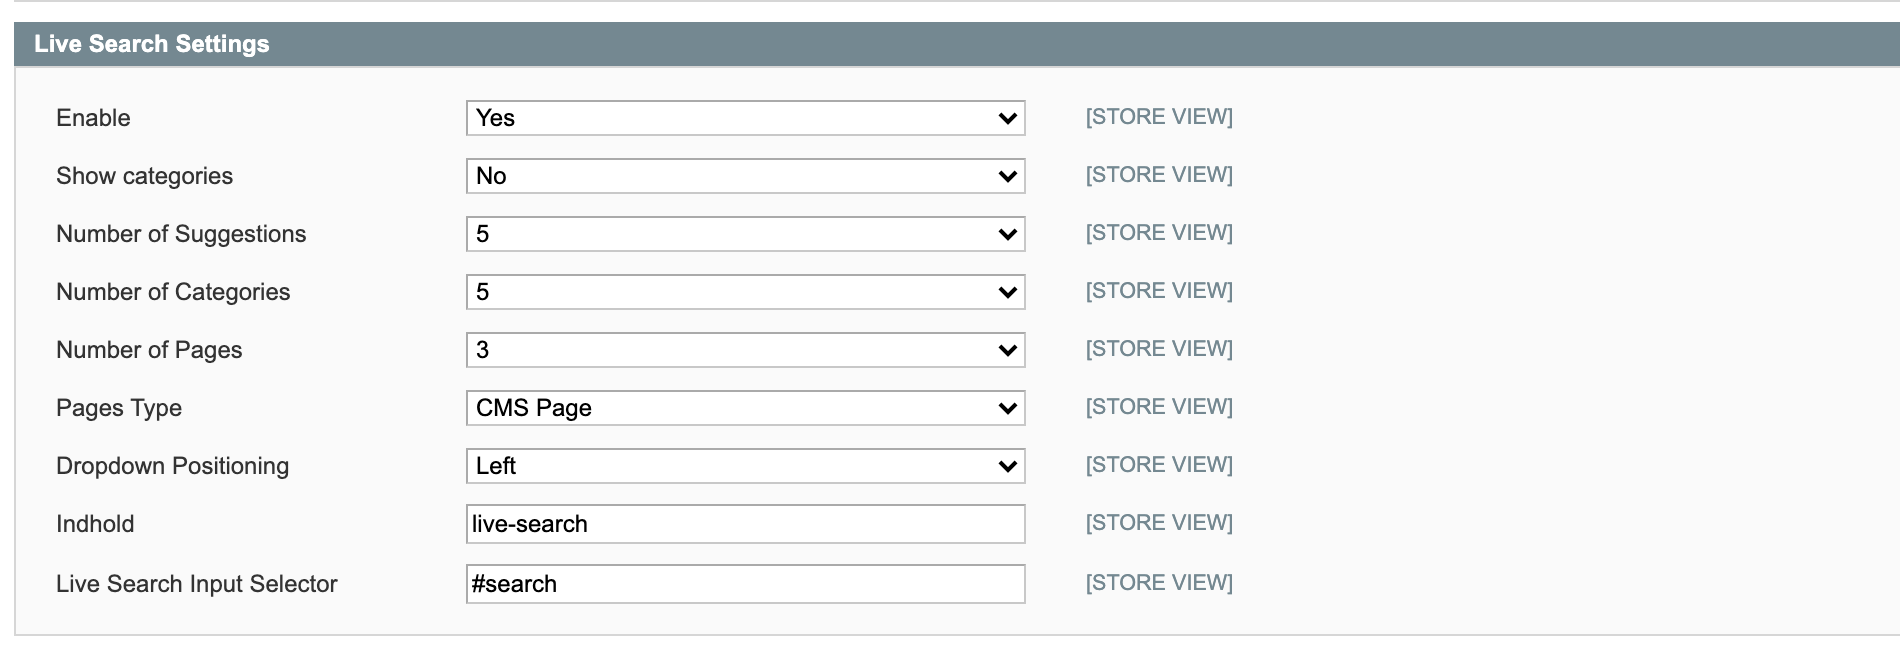
Live Search Settings
After enabling Live Search, you can select whether or not you want Categories to show in your results, as well as the number of search suggestions, categories, and content results to show within Live Search.
You also have the option to choose what page types display as search results, for example “CMS Pages” or “Blog Posts”.
You can choose the position of the live search dropdown from your search box with Dropdown Positioning.
Provide the Element name for your live search next, which can be found next to data-template in your Live Search embed code within your my.clerk.io Element. This is likely live-search.
Last, provide your Live Search Input Selector, which can be found by inspecting your webshop’s search box with your browser, and identifying the ID or class associated with its input. In this example, #search.
Recommendations settings #
Similar to Search, enable your Clerk Powerstep, Exit Intent, Category Page, Product Page, and Cart settings by selecting “Yes” from the appropriate dropdowns.
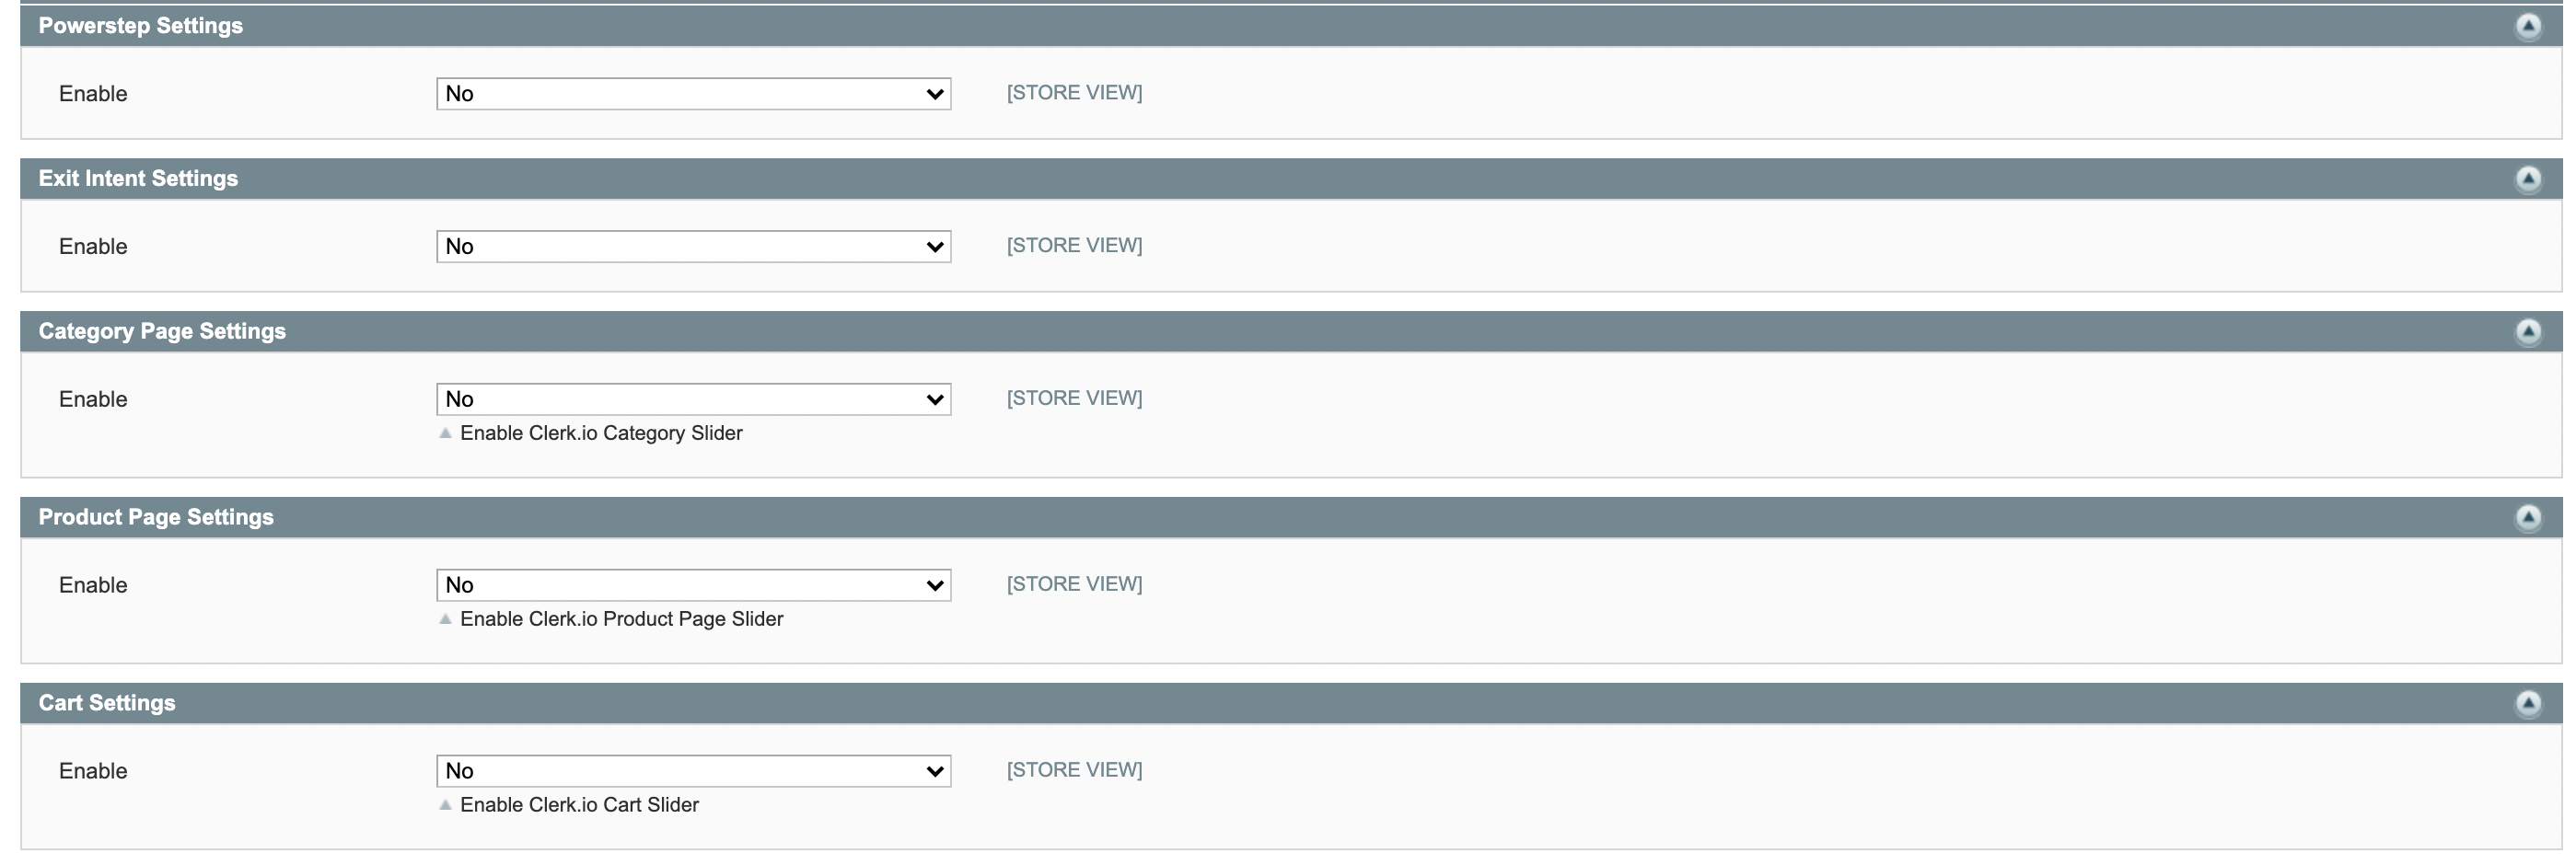
After selecting “Yes” from the appropriate dropdown, you’re provided a box to enter the Element name for the Clerk Recommendations you’d like to include on that page.
Just like the Search functionalities, you can find the element name next to data-template in the embed code within my.clerk.io > Recommendations > Elements. In this example, we’ve enabled Category Page settings, and included category-page-popular as our element.
You can add multiple element names as comma-separated values here, if you’d like to show multiple elements on that page, for example.

Logging #
The Logging settings include:
Logging Level
Only Errors: Will log any errors that stops the module from working correctly.
Error + Warn: Also logs warnings that are not causing the module to stop working, but might be necessary to fix as well.
Error + Warn + Debug: Logs everything that the module interacts with. This should not be enabled on a live webshop as it will slow down the site.
Logging to
File: Will save the log to a file on the Magento server.
my.clerk.io: Will log everything to Developers->Logs in the my.clerk.io backend.
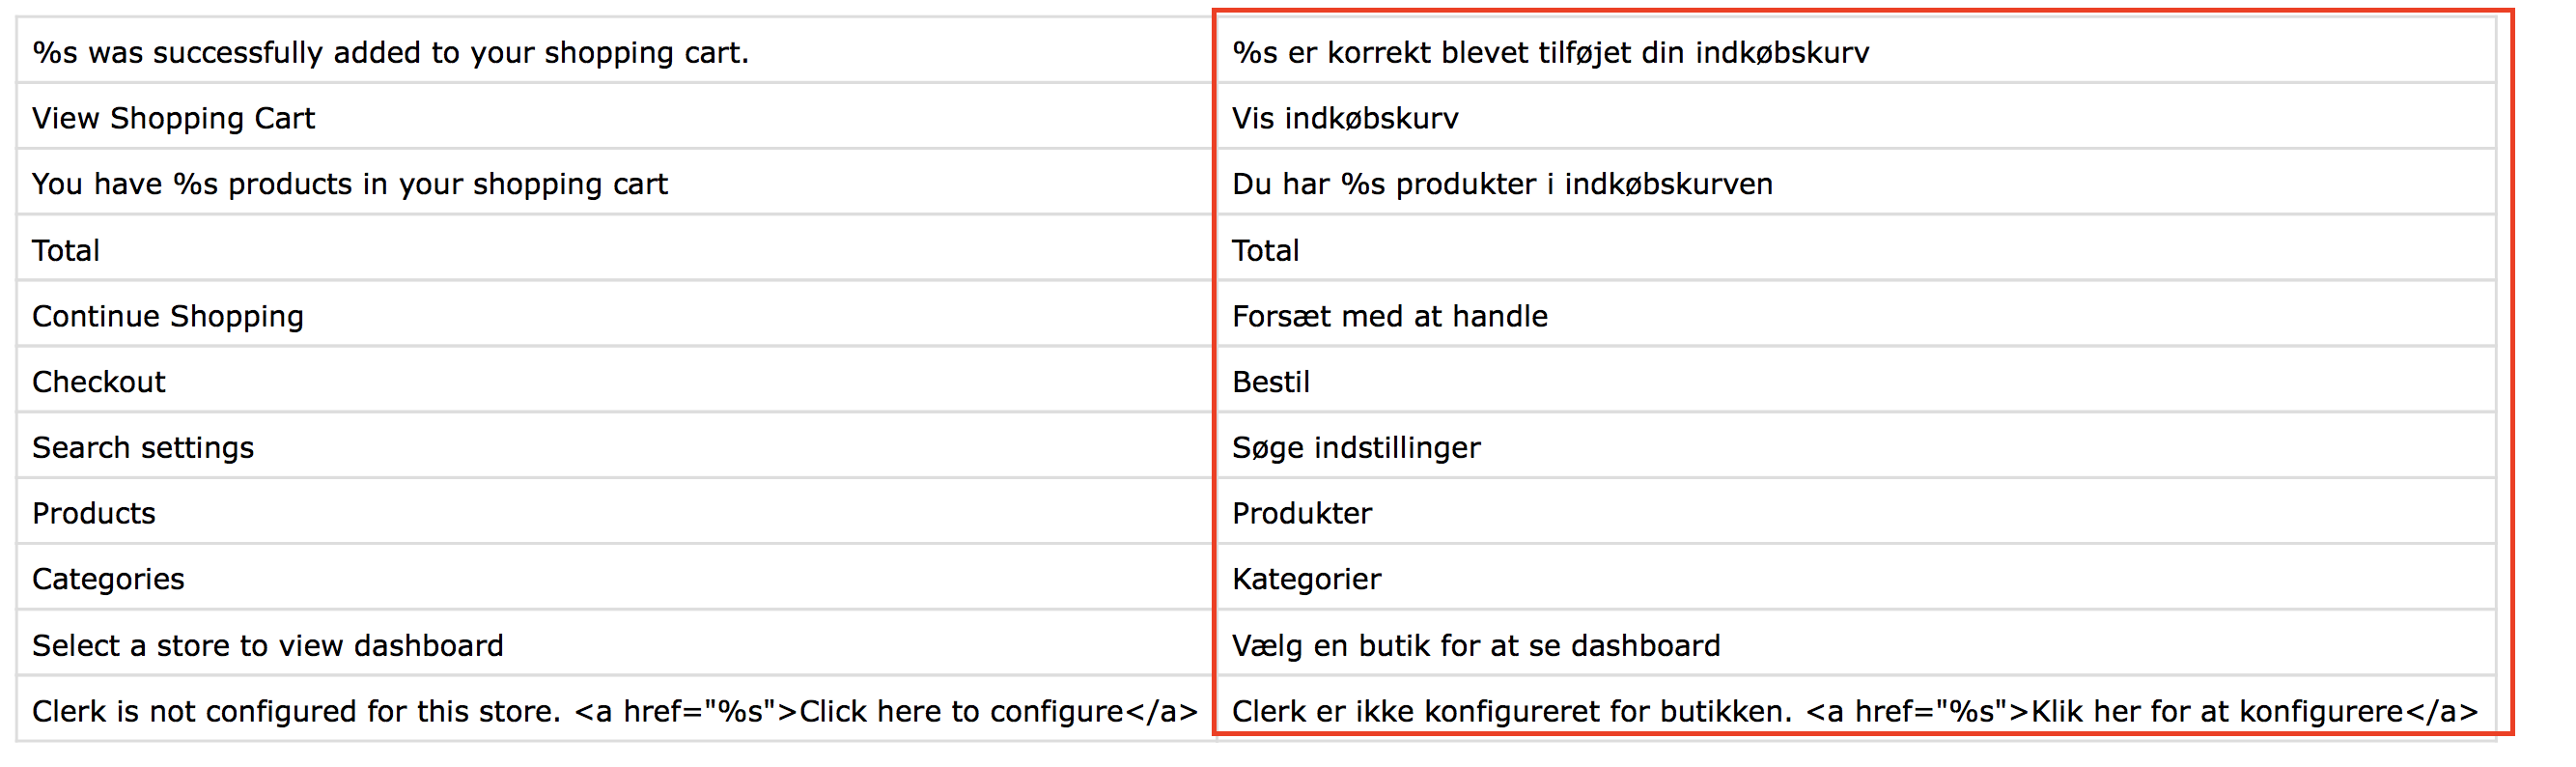
Translating texts #
The Clerk for Magento extension comes built-in with translations for danish, english, dutch and italian.
You can easily add a translation for your language, so the frontend parts are shown correctly.
To do this, you should go to this folder in FTP:
app->locale
Start by going to the Danish folder called da_DA and copy the file Clerk_Clerk.csv.
Find the folder for your language (in the Magento locale folder), and insert the file here.
Now you can translate the texts to your language, in the right side of the CSV file:
Upgrading #
This guide shows you how to upgrade from previous versions of our extension, to the latest one.
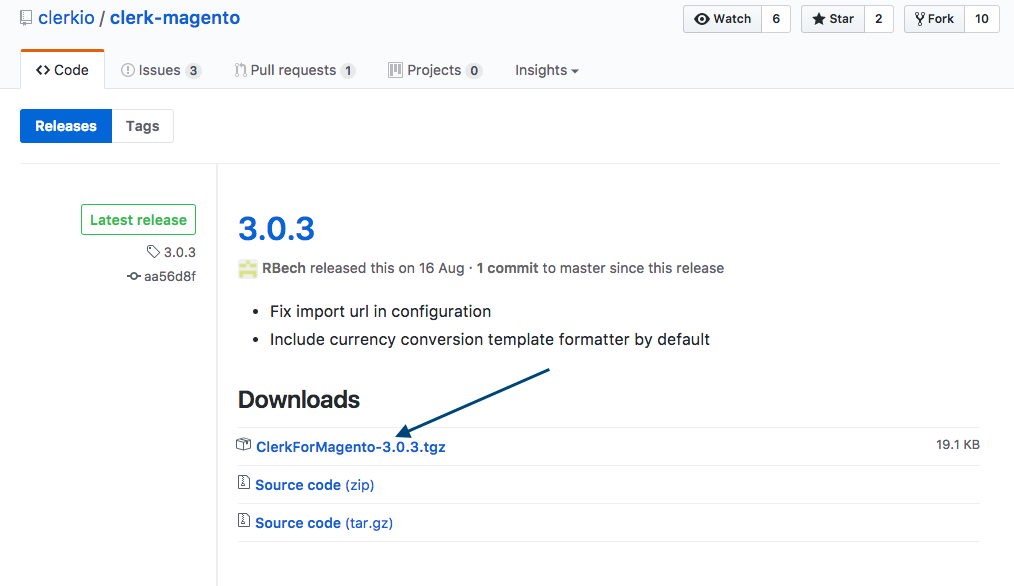
You can download the latest extension from this link:
https://github.com/clerkio/clerk-magento/releases/latest
Save changes #
Before you attempt to upgrade, make sure you have either:
Saved the changed files locally on your FTP or
Made a backup of any changed files, that you can carry over to the new extension.
Usually, the files that most developers change, are Product.php and Productbase.php, which control product attributes.
These files are found here:
app->code->community->Clerk->Clerk->Model->Catalog->Product.php
app->code->community->Clerk->Clerk->Model->Catalog->Productbase.php
Deactivate and uninstall #
Before attempting to upgrade, it is very important that you do this:
- Deactivate the old extension in Magentos System->Configuration->Clerk->Settings page. Simply set Enable to No and click Save Config.
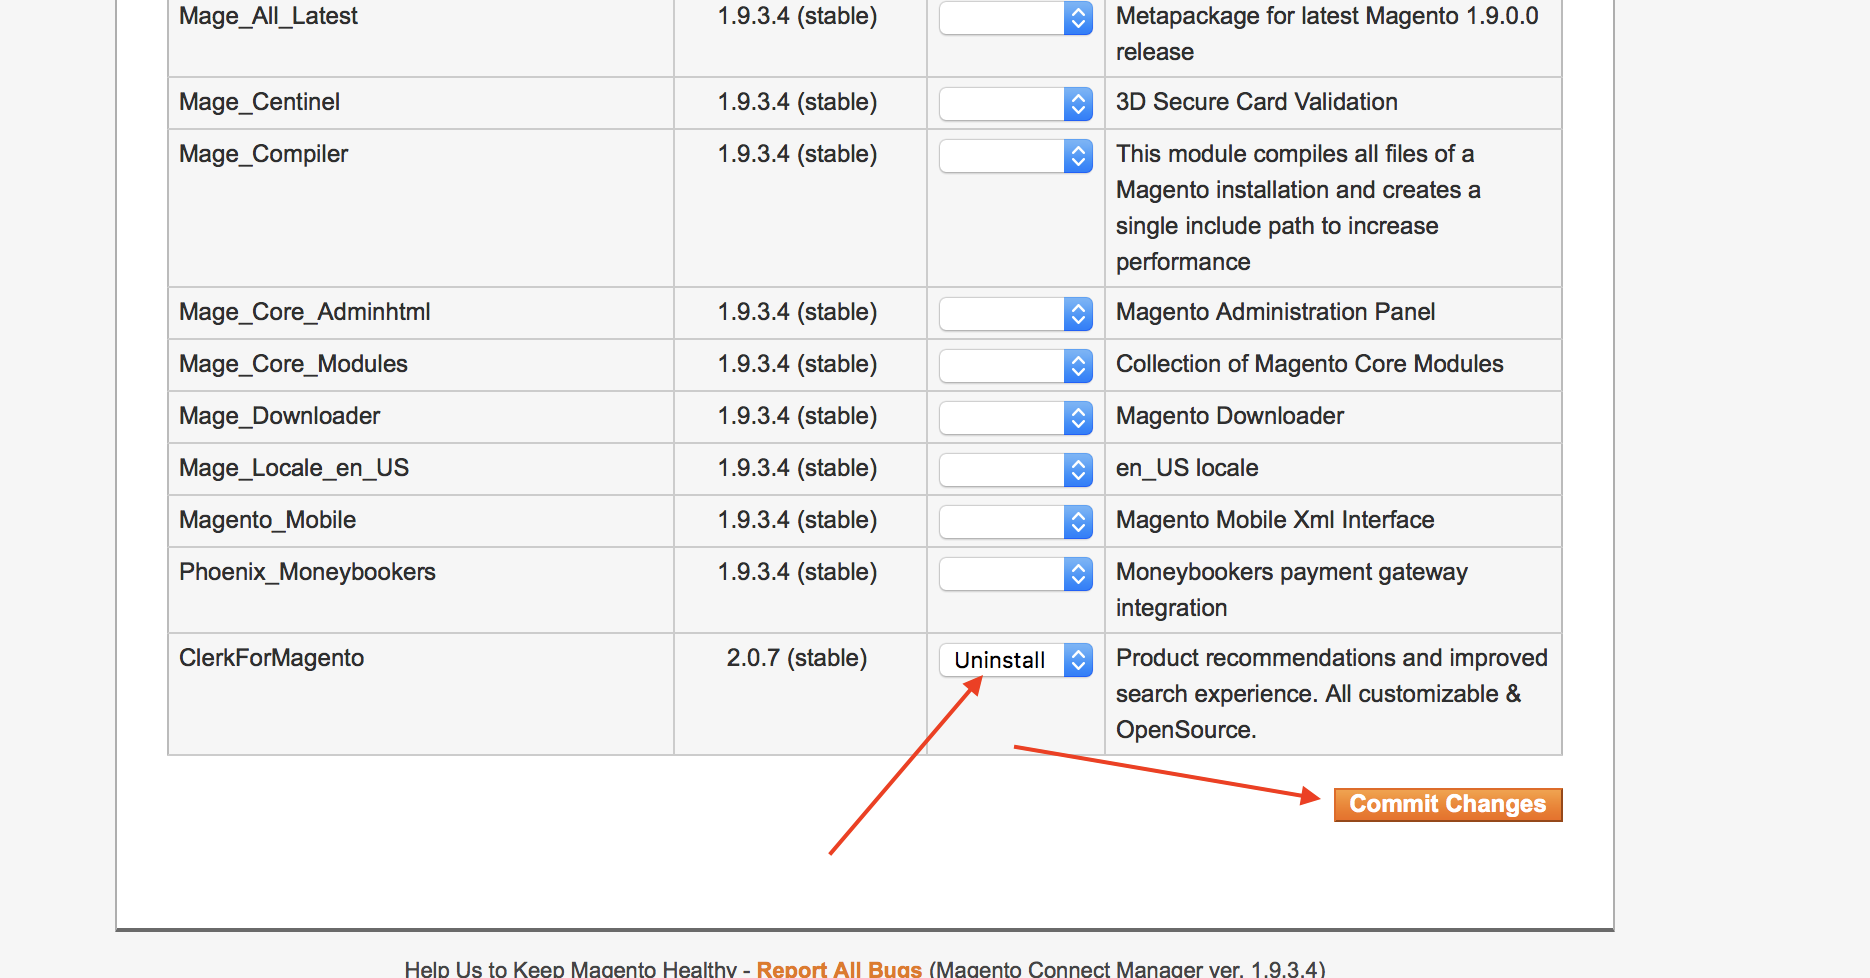
- Afterwards , uninstall it either through Magento Connect or by deleting the files from FTP if you installed it directly here.
Otherwise, your Configuration page might stop functioning and neither extension will work afterwards.
Install latest version #
Lastly, install the latest extension again, and move any files you have backed up, to your FTP server.
Your configuration should be saved, even when installing the new version.
Check System->Configuration->Clerk to make sure that everything is still there.
Now you have the latest version of Clerk for Magento installed!
Uninstalling #
To remove Clerk from your Magento 1 store, you’ll need to disable the extension within your Magento 1 admin portal.
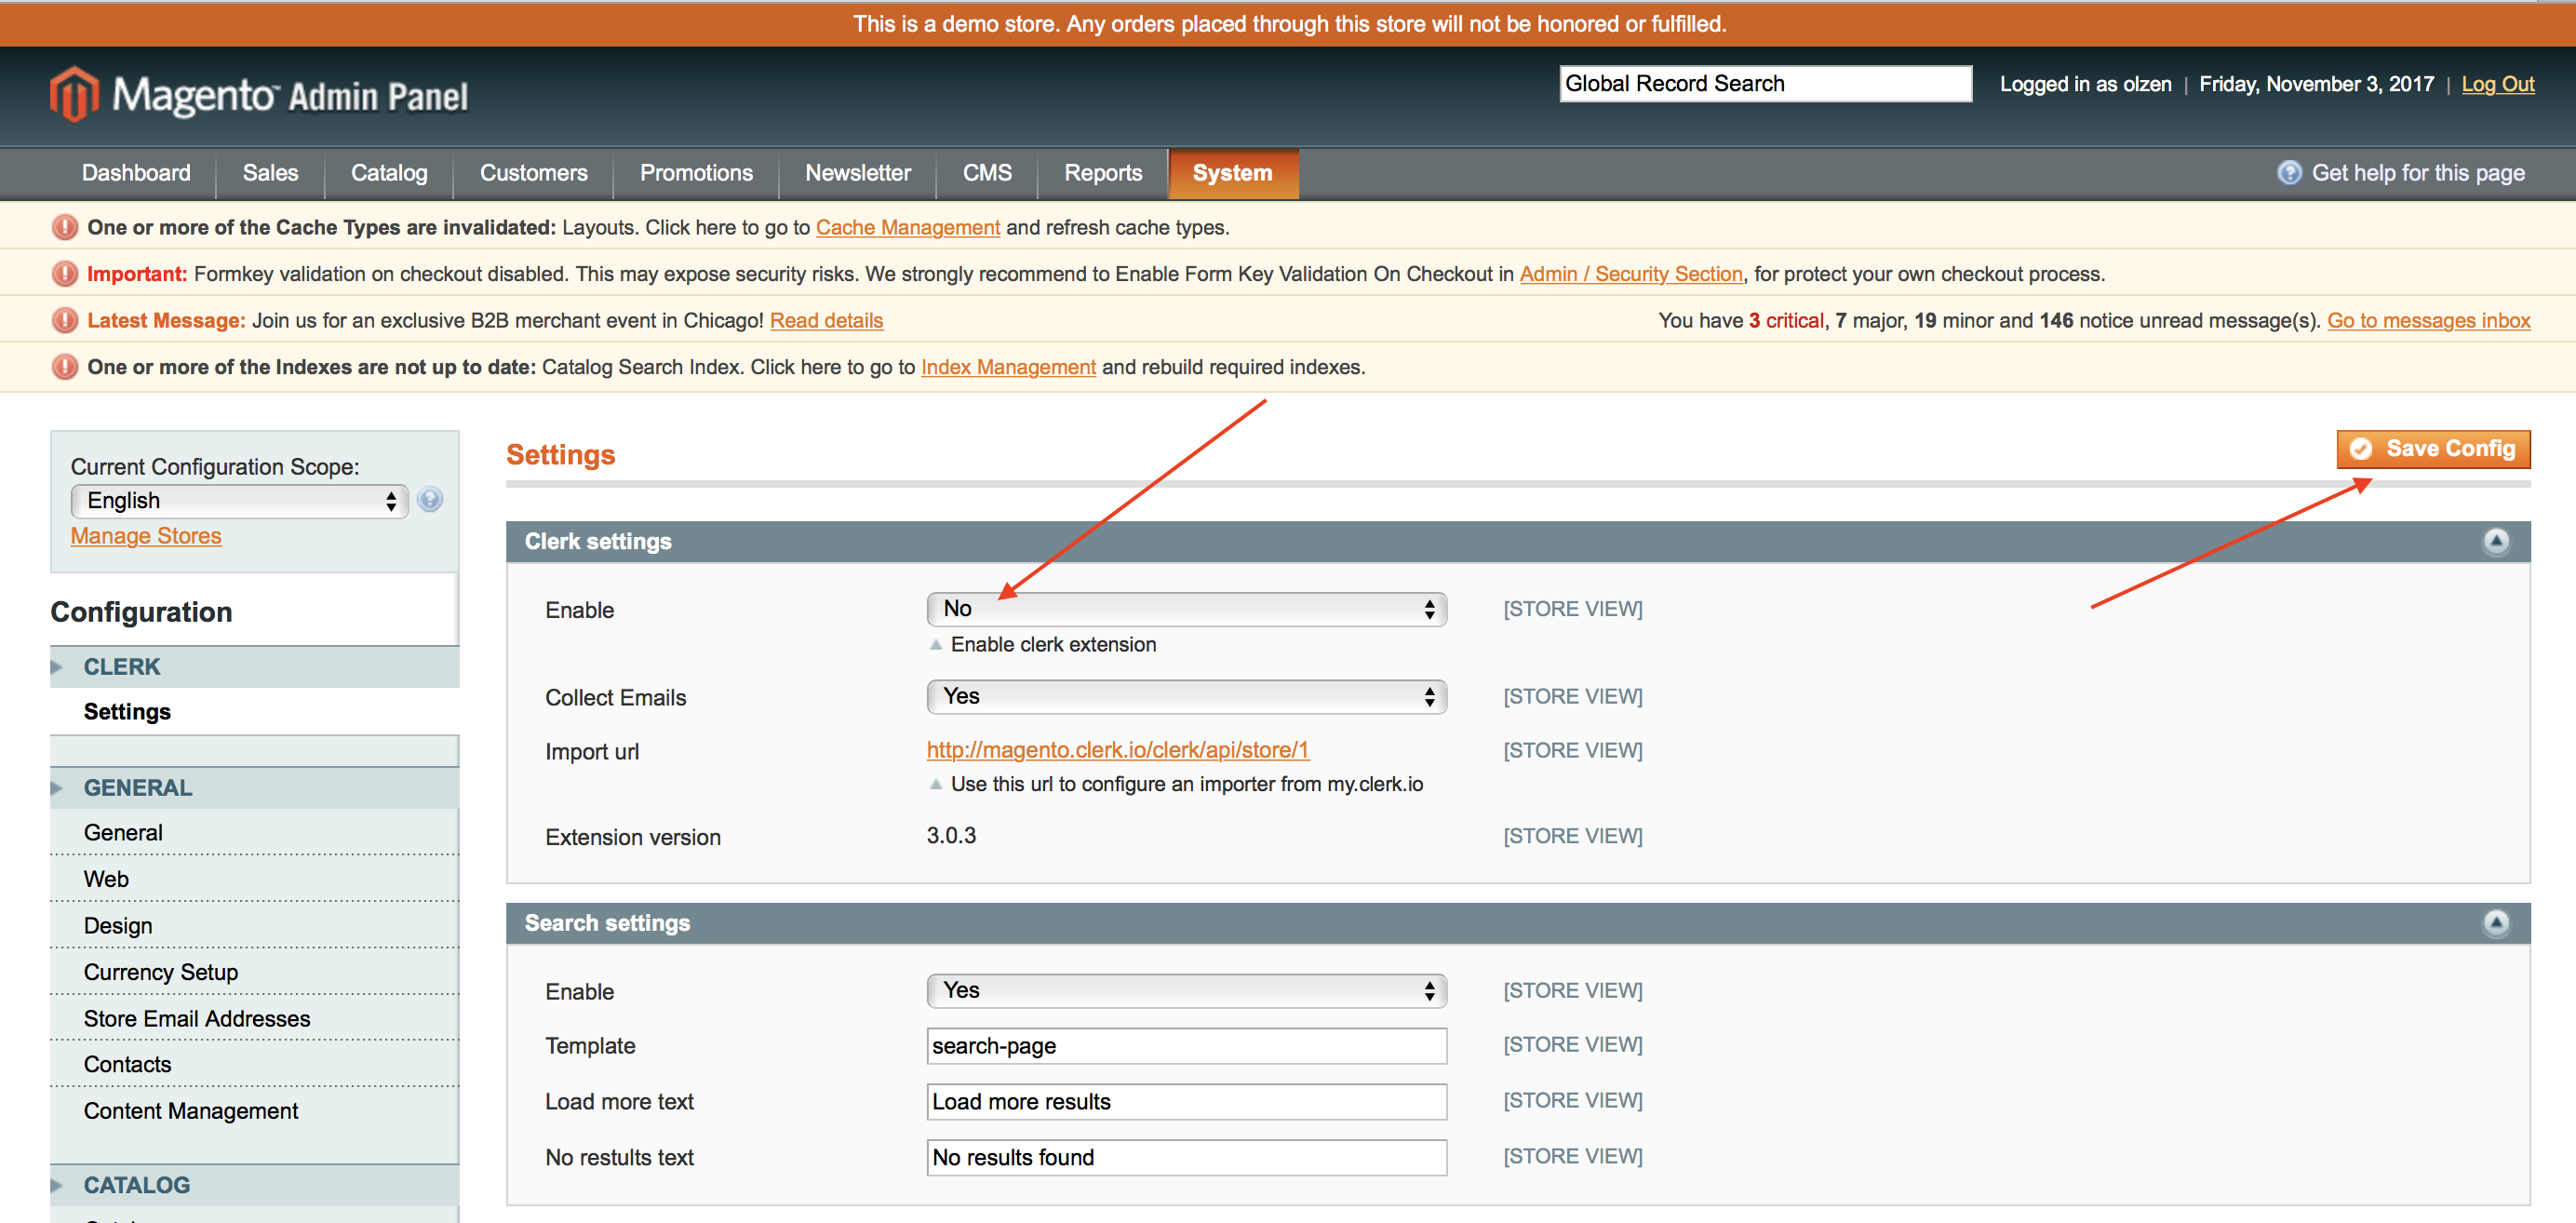
Log into your webshop’s Magento 1 portal, then select " System" > " Configuration" from the top menu.
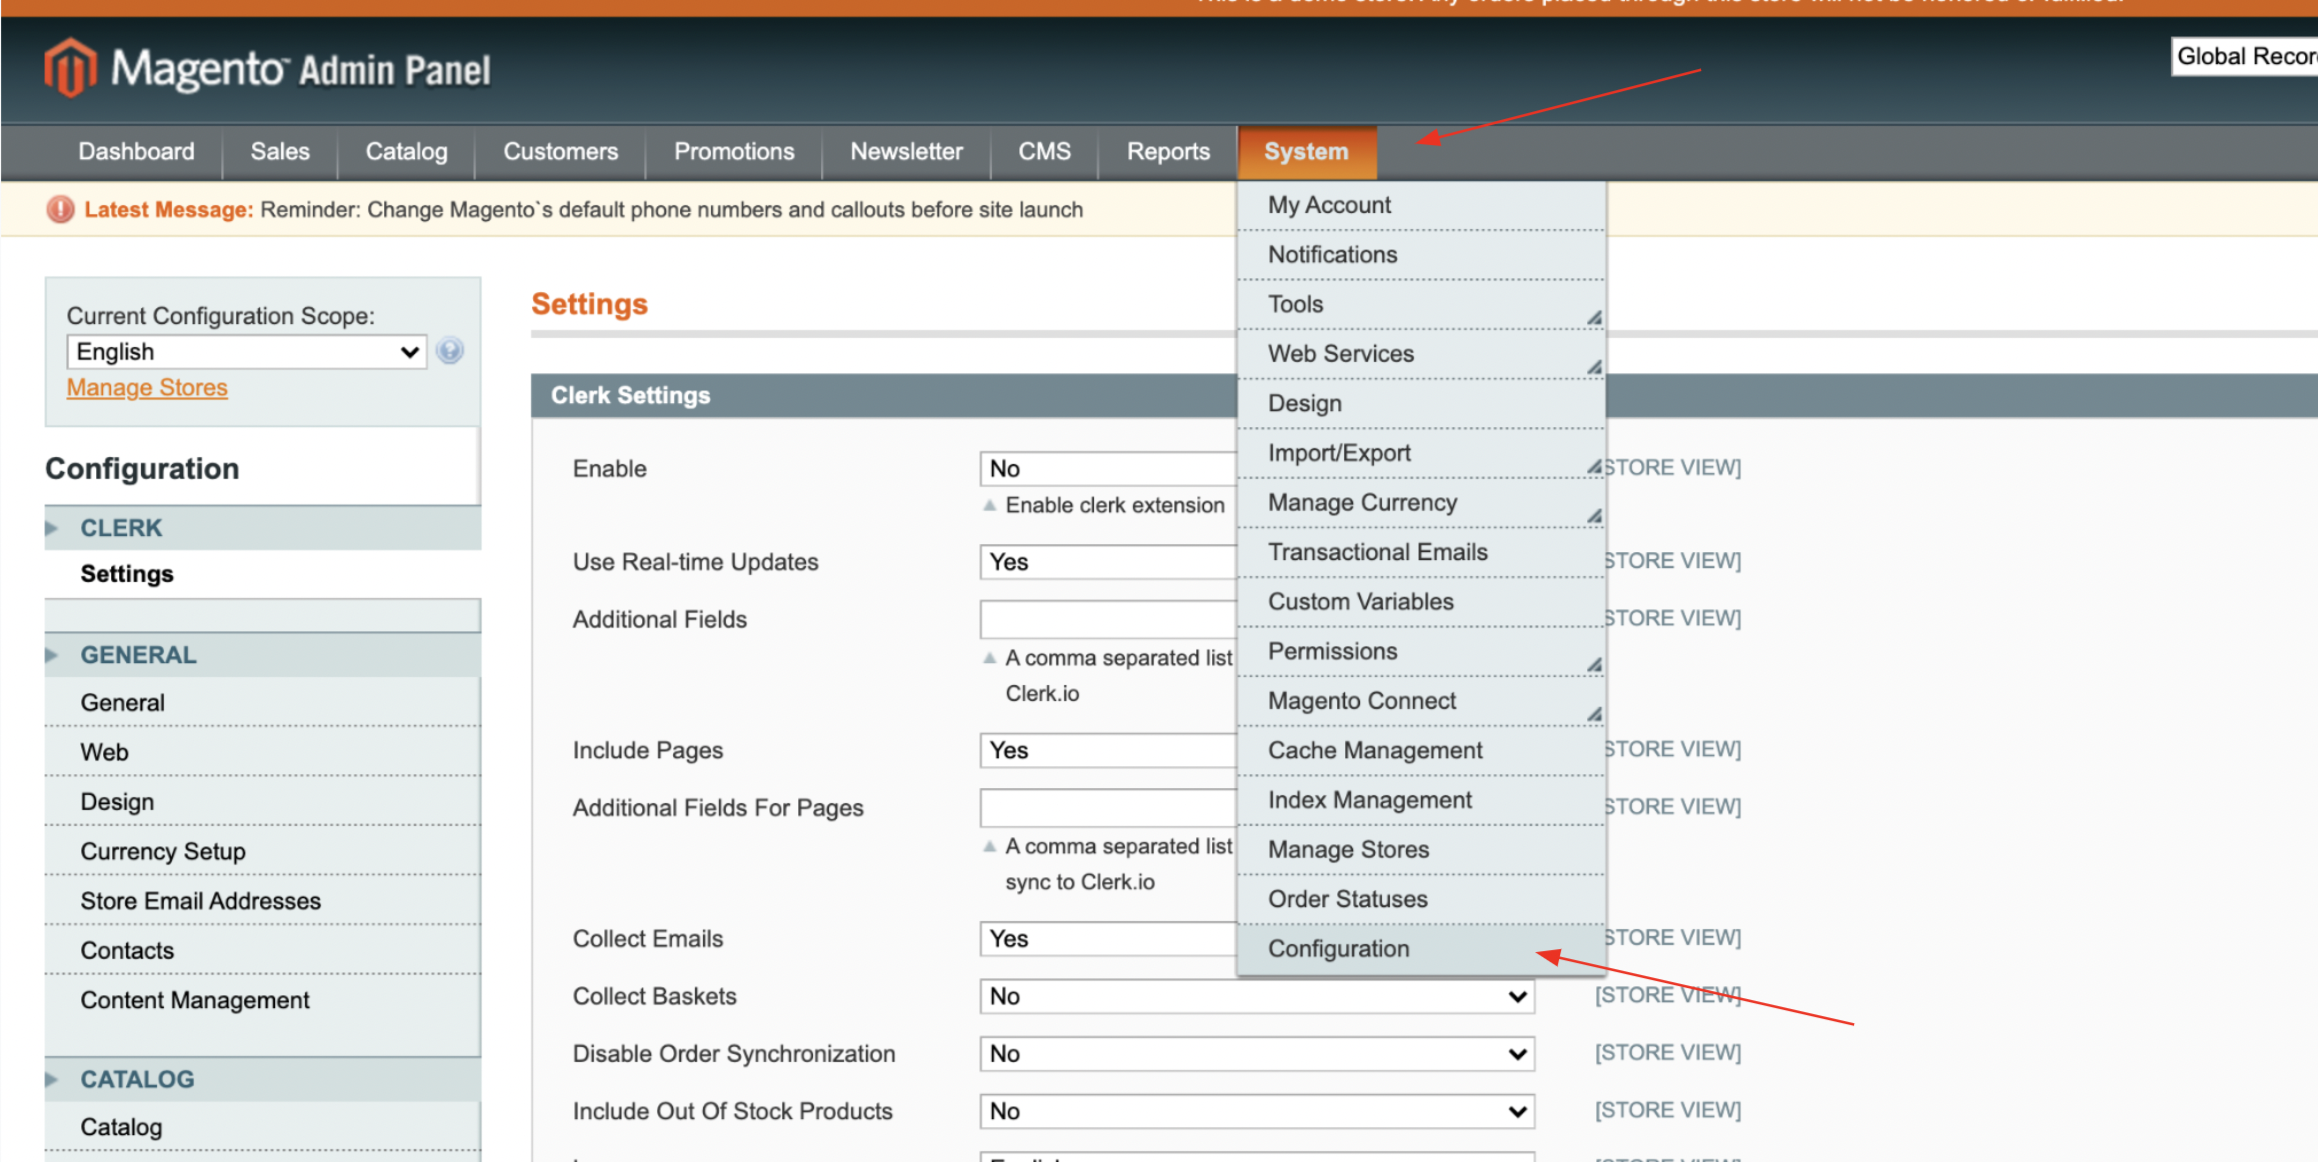
On the next page, find " Clerk" on the left-side menu, and choose " Settings".
From here you’ll see “Clerk Settings” appear. Next to " Enable", select " No" from the dropdown menu to no longer enable the Clerk extension.
If you implemented Clerk using the extension, you can also disable the individual modules by similarly selecting “No” from the relevant Search and Recommendations dropdowns in this section:
If you installed any elements of Clerk directly through your FTP files, be sure to remove the appropriate embed codes from those files.