Extension
Configure your Magento 2 extension settings, manage data sync options, and customize search, recommendations, and logging features. This guide also covers installation via Toolbox Script, upgrading, and uninstalling.
Installing with toolbox #
The Clerk Toolbox Script has been made to make it easy to install the Clerk extension in your Magento webshop without using Magento Connect.
The Toolbox Script will be run directly from a terminal.
We suggest these:
- Apple: iTerm, you will have to download it from the Internet;
- Windows: Command Prompt, it is already installed in your computer.
The script also creates a backup of the Magento2 folder so it can be restored if something goes wrong.
What you need #
In order to install it, you need SSH or SFTP access to your webshop, including your Username and Password.
Navigating to folder #
- Start by logging in to your Magento server through a terminal, by using your Username and Domain like this:
ssh Stefan@mywebshop.com
- You will be prompted to type in the password for your User (the terminal will not give you any feedback while typing the password, but its registering it anyway).
Navigate to the root folder of Magento2. You can do this by writing:
cd /var/www/html
and writing:
ls
This will give you a list of folders, to help you find the right one:

In the list of folders look for the right folder, in this case it would be magento2.
At this point what you need to do is to get in the folder, you can do so by writing:
cd NAME_FOLDER
NAME_FOLDER is substituted by the real name of the folder.
Installing extension #
- When you are in your Root Folder, you need to download the Toolbox Script with this line:
sudo wget https://raw.githubusercontent.com/clerkio/clerk-magento2/master/clerk_toolbox_magento2.sh
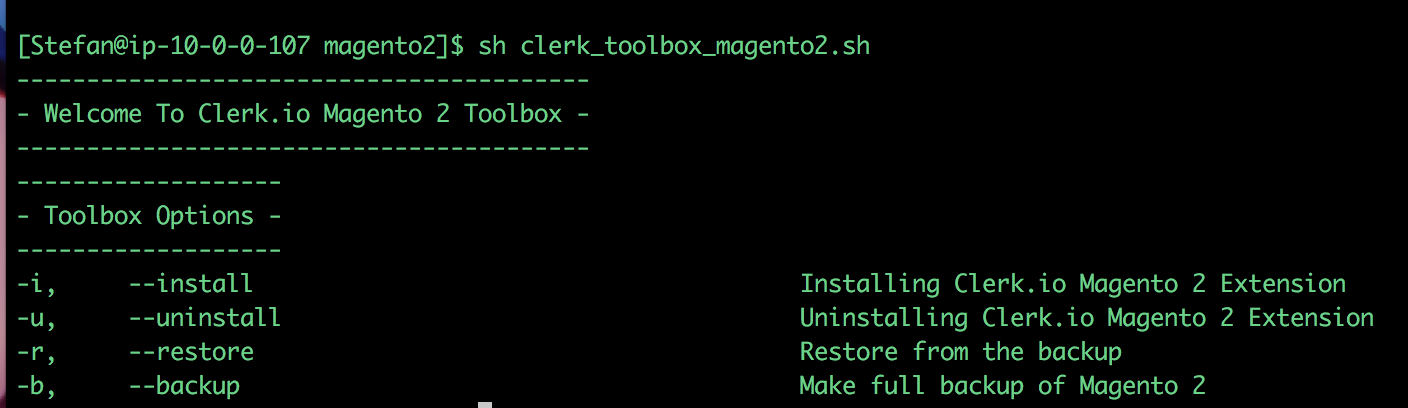
- Afterwards, type this line to see a list of the available options within the Toolbox:
sh clerk_toolbox_magento2.sh
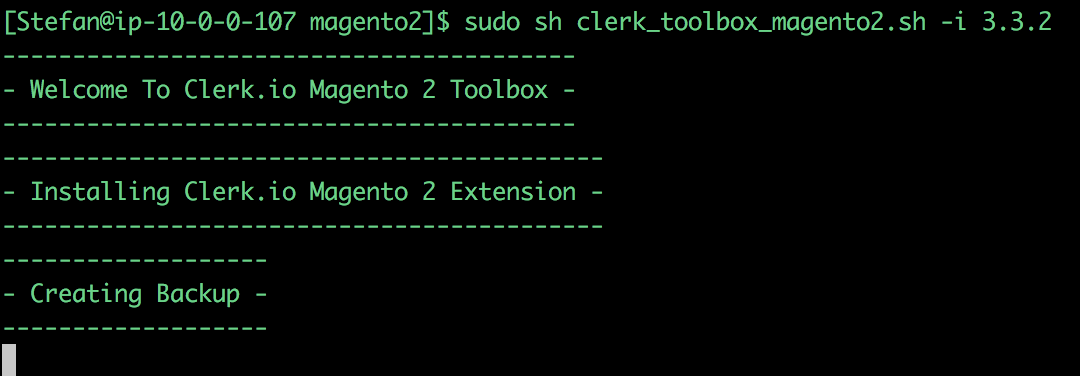
- Since you want to install the extension, you will use -i along with the latest version number of the extension. Type this line:
sudo sh clerk_toolbox_magento2.sh -i
- You will now be prompted to type in your password. After doing this, the script will backup your Magento2 folder and start installing the extension:
- Done! Now the extension is installed, and you can configure it in your Magento2 backend.
Optional commands #
Uninstalling
The Toolbox also lets you uninstall the extension. You can do it with this line:
sudo sh clerk_toolbox_magento2.sh -u
Restoring
In case something goes wrong in your webshop, you can always restore it through the backup that is made when installing the extension.
Use this line to do that:
sudo sh clerk_toolbox_magento2.sh -r
Backup
When installing the extension, the script will always create a backup first, but you can also create backup separately with this line:
sudo sh clerk_toolbox_magento2.sh -b
my.clerk.io settings #
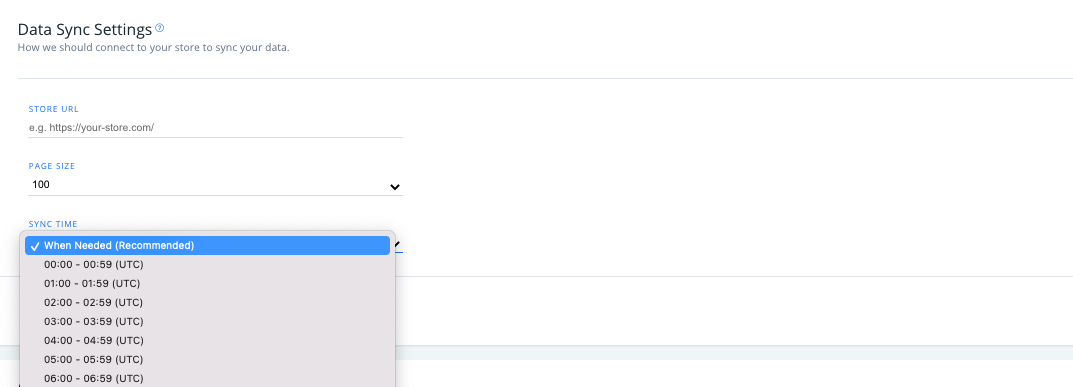
To access and modify your Magento 2 data settings in Clerk, head over to my.clerk.io, click “Data” from the left-side menu, then go to “Configuration”.
Note: Information about the Magento 2 Clerk extension, available through the Magento admin portal, is later in this article.
Here, you can set your store’s URL, the page size of your data syncs, as well as the time of day when your data should sync to Clerk (the default is “when needed”).
Extension settings #
If you are using v6.7.0 or a later version of the extension, you will be able to access the below settings in two ways after adding your Public and Private Keys to the extension:
Through the Magento2 backend in Stores > Settings > Configuration > Clerk > Configuration
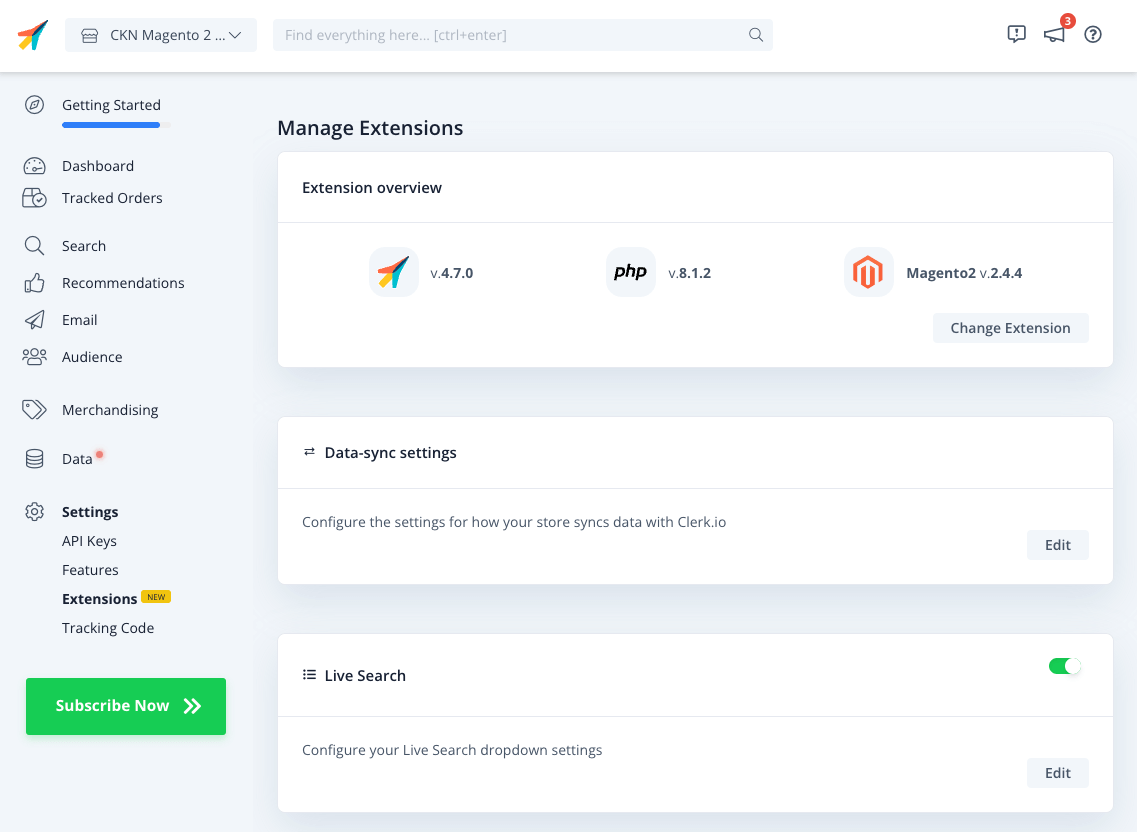
Through my.clerk.io, under Developers > Extensions
It does not matter where you make the changes, as the extension will sync with any changes made in my.clerk.io and vice versa.
In my.clerk.io you will also be able to see your current version of the extension, your platform, and the PHP version.
Simply click “Edit” on any setting, to see the available options:

Overview #
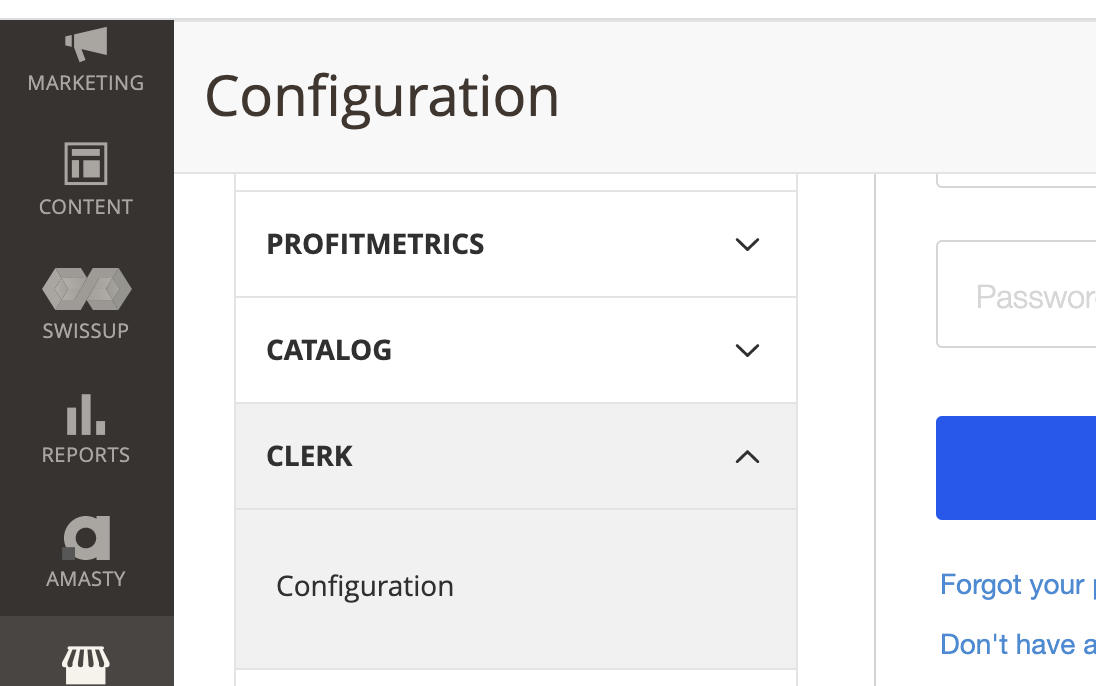
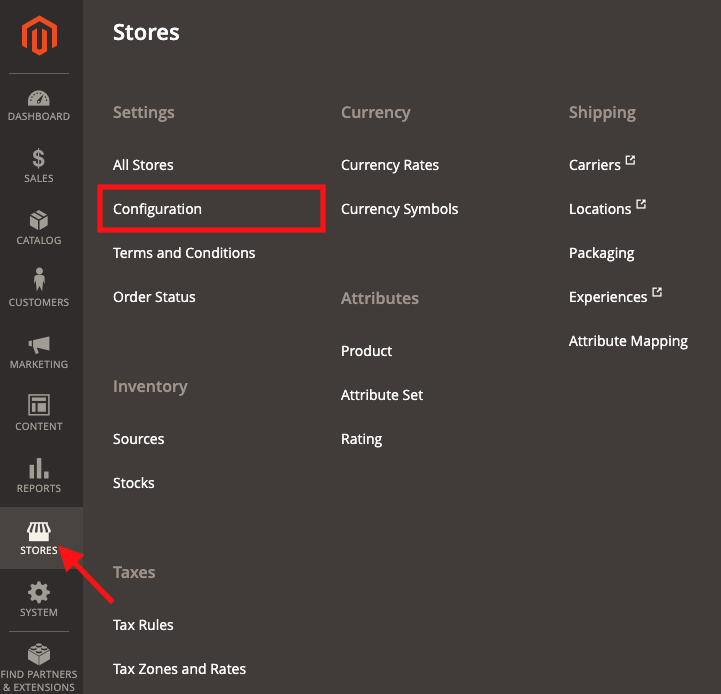
To access your Clerk extension in the Magento 2, log into your webshop’s admin portal, then follow the path Stores > Settings > Configuration > Clerk > Configuration
General #
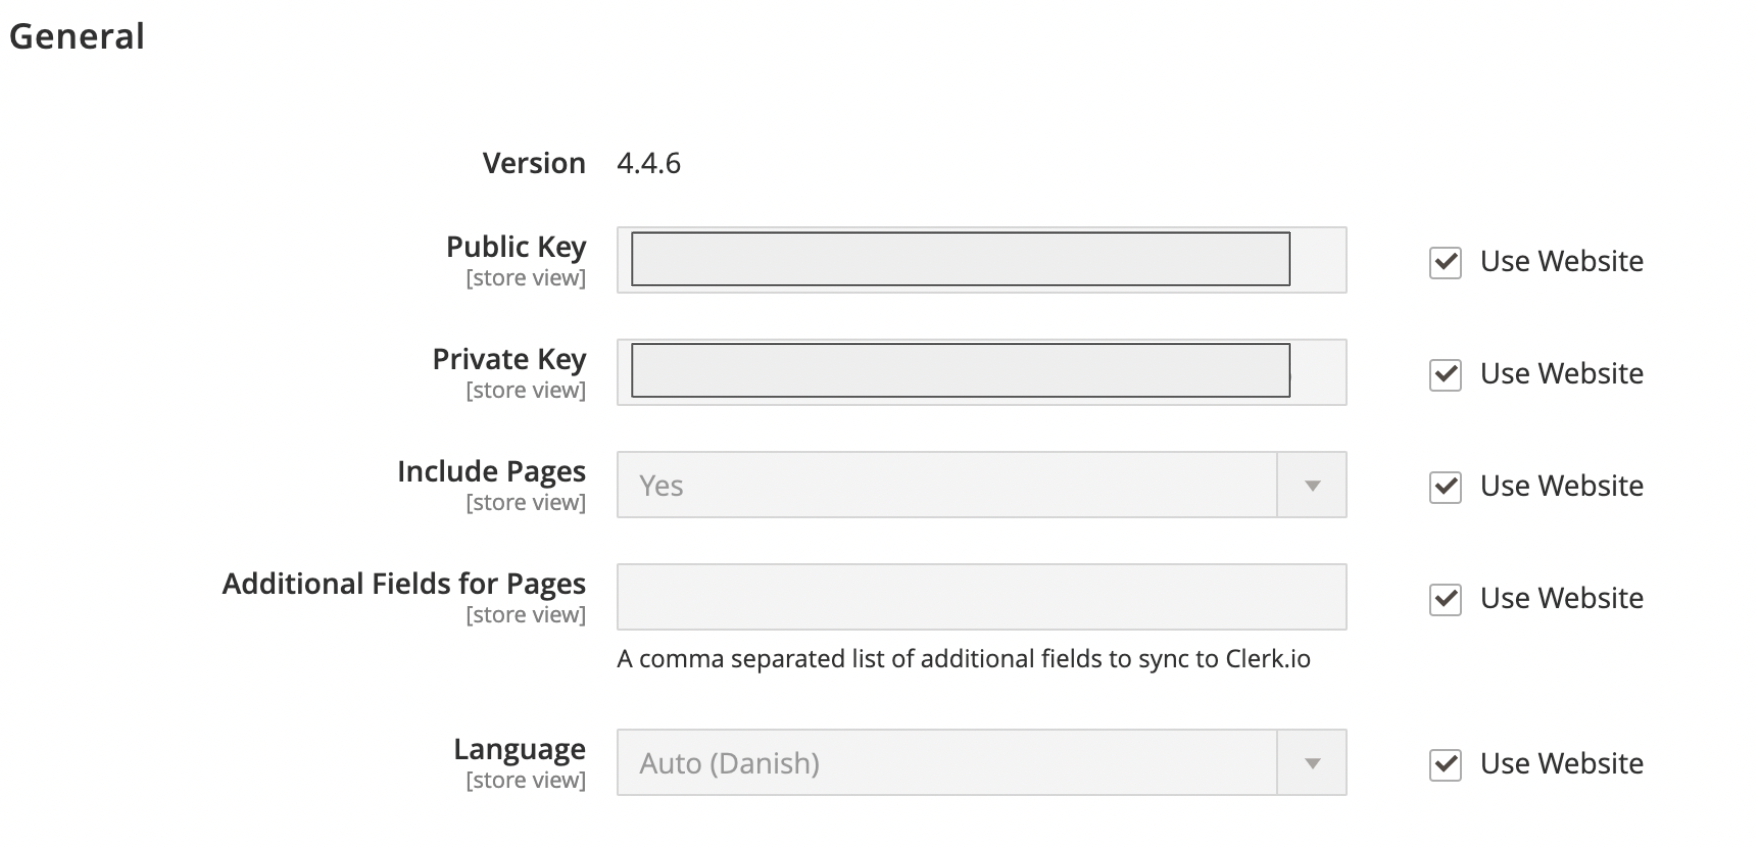
You’ll find your Clerk Extension version number, as well as your store’s public and private API keys in the General section.
To include Pages in your data sync with Clerk, choose “Yes” in the next dropdown, and type in any additional fields you’d like to include with your page data (such as images or page type) as comma separated values.
You can also set the default language for your synced store data in the final dropdown in General.
Legacy Authentication #
This setting controls whether the extension uses JWT header authentication or the older private key method. Disabling this is highly recommended, as JWT provides a more secure and modern authentication flow for all API requests between Magento 2 and Clerk.io.
Store ID #
This is a legacy configuration field that is no longer used in modern installations of Clerk.io. It can safely be ignored, as the extension automatically identifies and handles store scopes using Magento’s native store and website APIs.
Synchronization #
In the Synchronization section of the Clerk plugin, you have the option to customize your synced customer, order, basket, and product data.
Options are greyed out and unavailable for updating when using the website data, indicated by the checked box on the right of each section.
Simply uncheck the appropriate box to modify.
Use Real-time Updates: choose “Yes” to enable real-time updates to your data synced with Clerk.
Collect Emails: select “Yes” here to sync customer emails.
Collect Baskets: to collect basket data and sync to Clerk, select “Yes” here.
In the next two dropdowns, select “yes” to only synchronize saleable products, and/or only synchronize product with visibility to Clerk.
Should you need to disable order synchronization, you can do so by choosing “Yes” in this dropdown.

Additional Fields #
A comma-separated list of additional product attributes you want to synchronize with Clerk.io (for example, color, size, material). This allows you to use these custom attributes in your Clerk.io recommendation designs, search filters, or email campaigns.
Search Non-Indexed Attributes #
When enabled, Clerk.io will perform a deeper query to fetch values for custom attributes not pre-indexed in the standard Magento product collection. This ensures all requested custom fields are successfully synced, though it may require slightly more server resources.
Think of it as sending a very polite assistant to rummage through the dusty back shelves of your warehouse instead of just reading the clipboard by the door.
Track Returned Orders #
Enabling this option allows the extension to listen for credit memo creation in Magento (refunds and returns). It automatically sends information about returned products and quantities back to Clerk.io to keep your recommendations and analytics perfectly accurate.
Image Type #
This dropdown lets you select which Magento image type and dimensions (such as base image, small image, or thumbnail) should be sent to Clerk.io. This is highly useful for matching the image quality and aspect ratio to your store’s specific theme and design.
Customer synchronization #
Enable customer data syncs by choosing “Yes” from the dropdown in this section.
If you have any extra customer attributes you’d like to include in the Clerk sync, type in their values in the text box here as a comma-separated list.
Sync Subscribers #
Enabling this option synchronizes your store’s newsletter subscribers to Clerk.io.
For registered customers who are also newsletter subscribers, the extension automatically updates their existing customer profile with subscribed: true and includes their unique unsubscription link.
For guest subscribers (who signed up for the newsletter but do not have a registered customer account), the extension synchronizes them as independent profiles—which in Clerk.io are identified simply by their email address—with a SUB ID prefix. This ensures your entire subscriber audience is captured without creating duplicate profiles for registered customers. This is extremely useful for building comprehensive email marketing audiences and running personalized email campaigns.
Search #
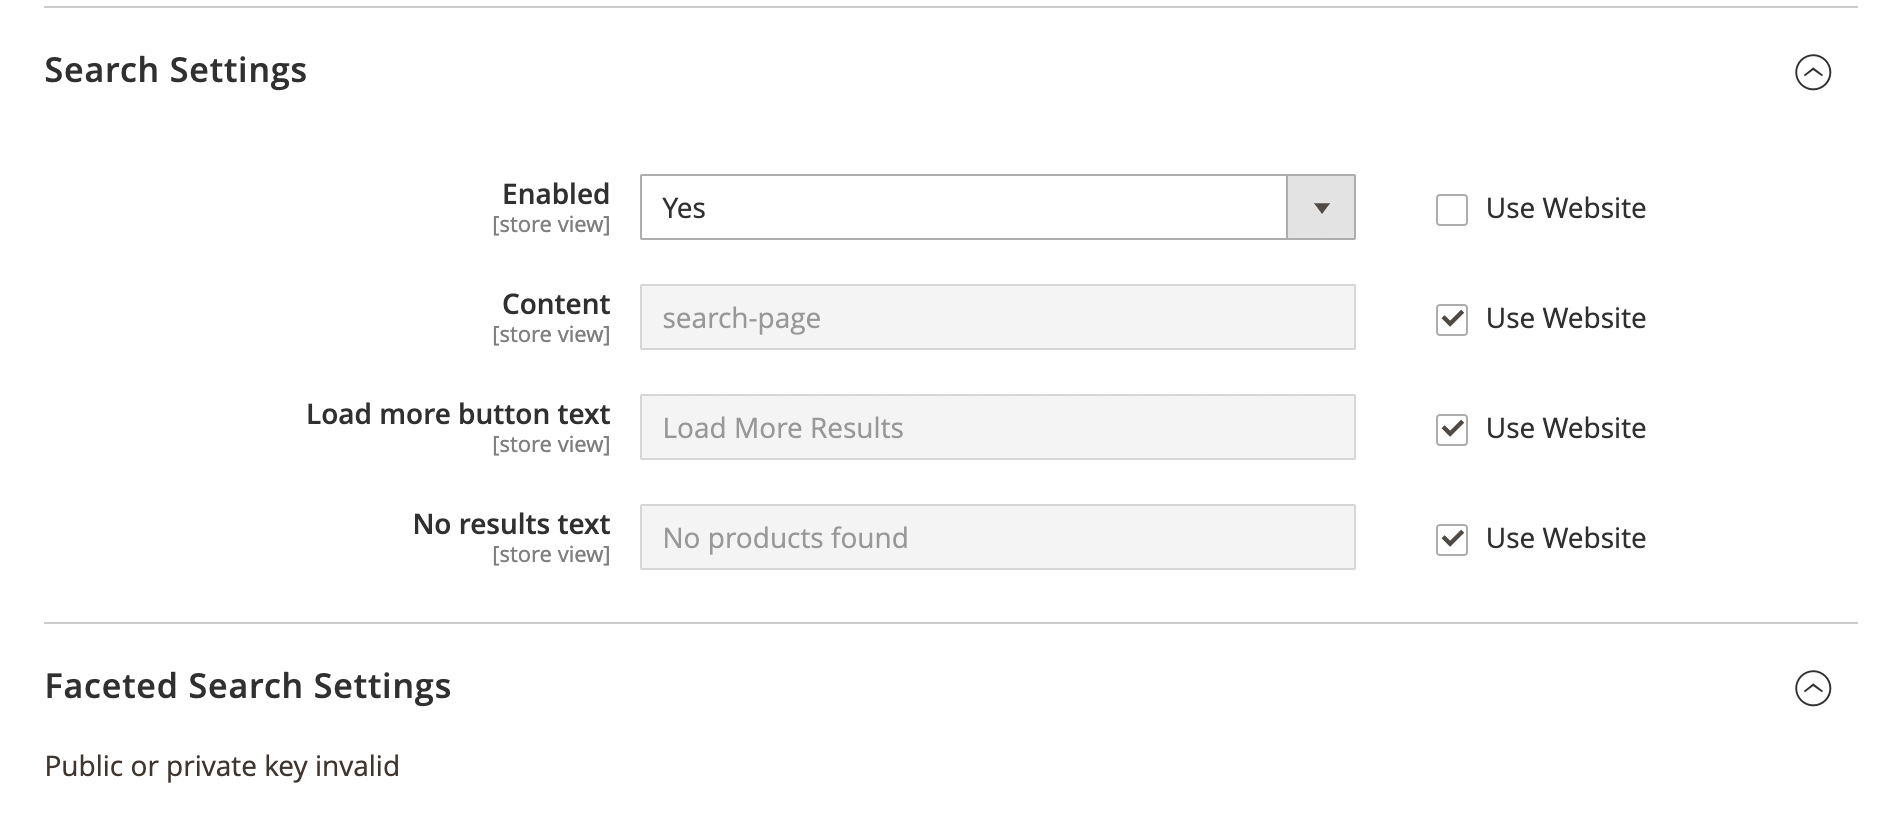
Enable your store’s Search Page by choosing “Yes” in the dropdown here.
After selecting “Enabled”, enter your Search Page Element name, which matches the data-template field found in the embed code of your Element in my.clerk.io. In this example, search-page.
You can set the " load more" and " no results" text displayed by typing the desired phrase in these text boxes.
Include Categories #
Enabling this option includes category results directly on your main search page alongside product results. This helps customers navigate your store more easily by showing relevant collections and categories that match their search query.
Number of Categories #
Sets the maximum number of category results to display on the search page. For instance, setting this to 5 will show up to five matching categories, allowing users to quickly jump to relevant sections of your catalog.
Number of Pages #
Sets the maximum number of CMS or content page results to display on the search page. This is ideal for showing matching blog posts, guides, or informational pages (like return policies) alongside products.
Pages Type #
Filters the types of CMS or content pages that should be displayed in the search results. You can choose to show only standard CMS pages, specific blog posts, or all content pages synced to Clerk.io.
Live search #
After selecting “Enabled” from the dropdown to enable Live Search, select whether or not you want Categories displayed within your search results.
- You can also select the number of search suggestions, categories, and content results to show within Live Search in addition to your product results.
You also have the option to choose what page types display as search results, for example “CMS Pages”, “Blog Posts”, or “All”.
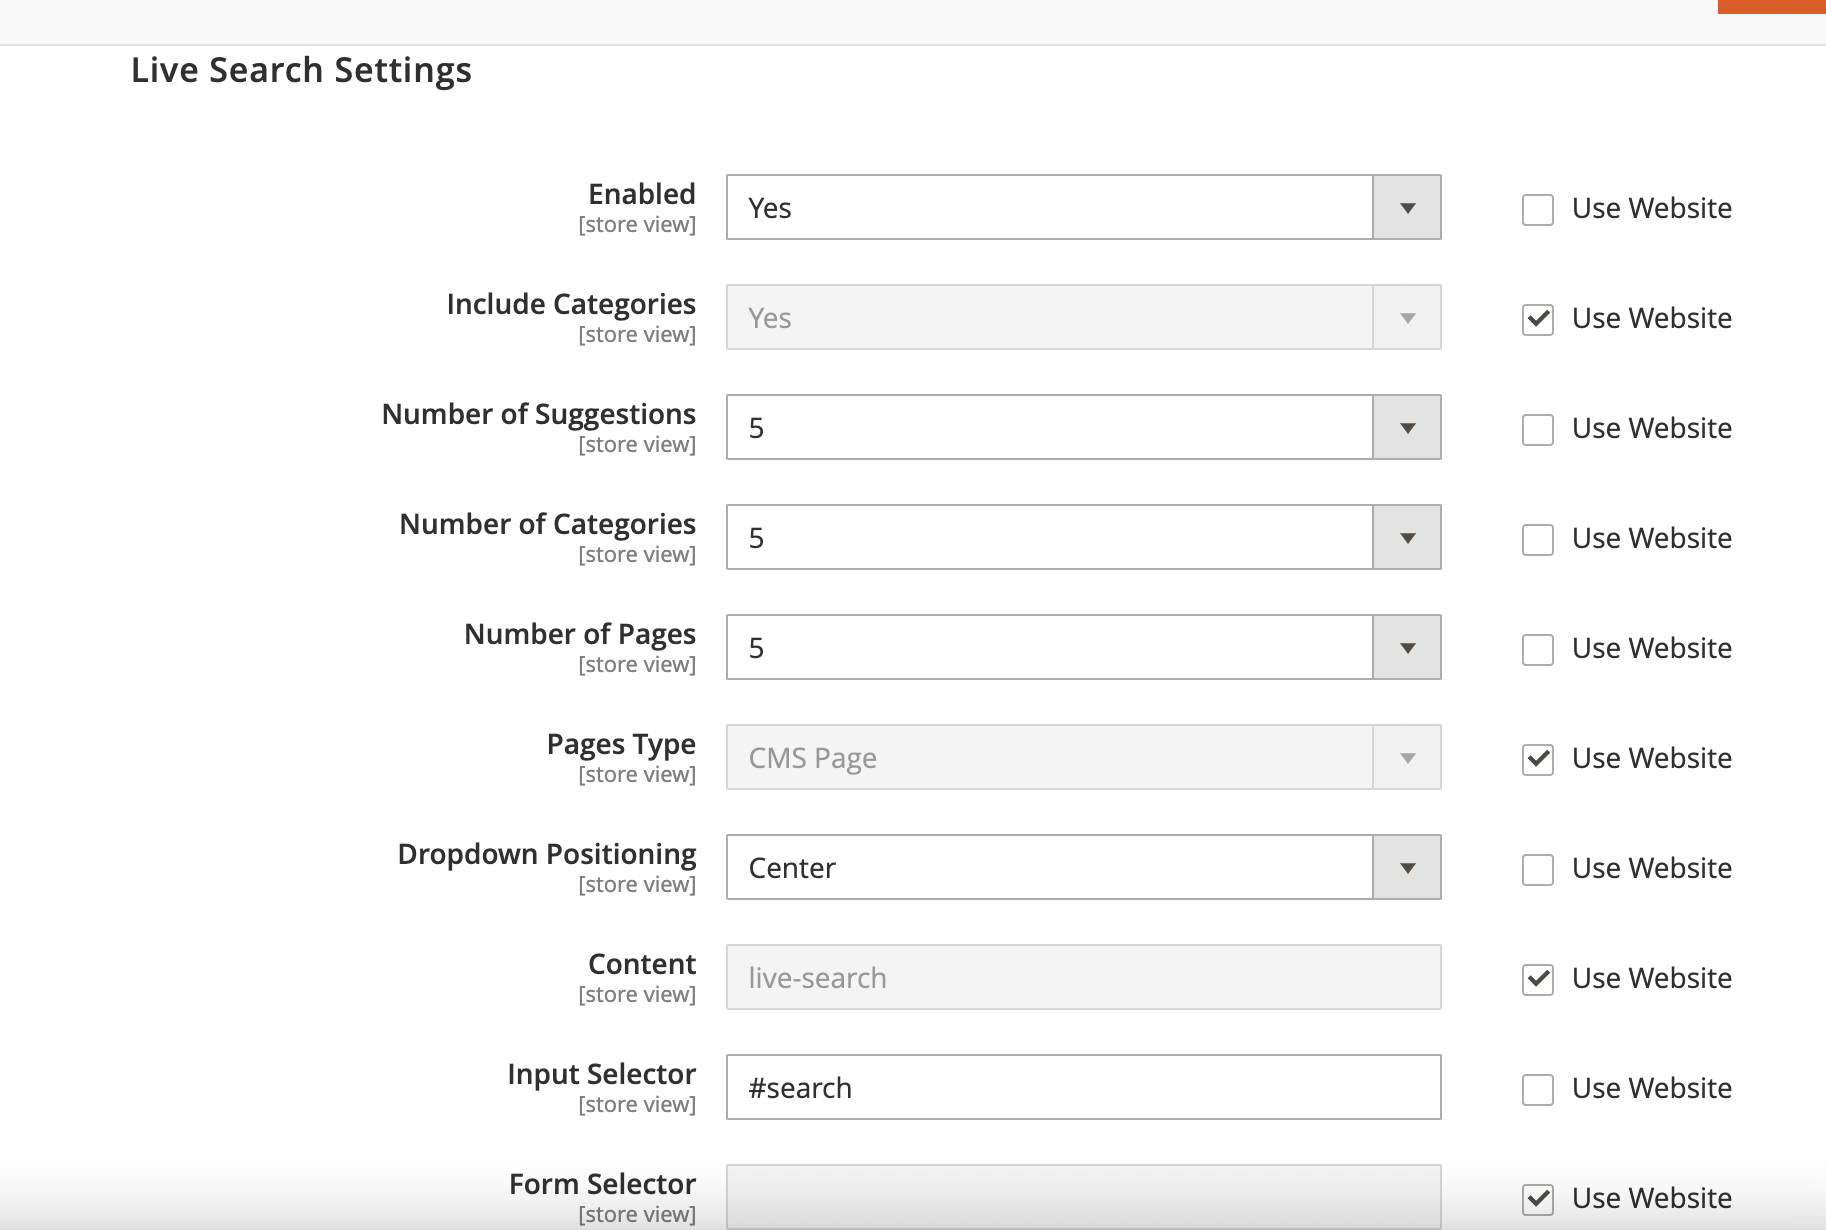
You can choose the position of the live search dropdown from your search box with Dropdown Positioning.
Provide the Element name for your live search next, which can be found next to data-template in your Live Search embed code within your my.clerk.io Element. This is likely live-search.
Last, you have the option to provide your Live Search Input Selector and Form Selector, which can be found by inspecting your webshop’s search box with your browser, and identifying the ID or class associated with its input and form.
- In this example, #search as the input selector, and using the website is chosen for identifying the form selector.
Faceted navigation #
To add facets to your Search Page, first be sure to select “Enabled” box under Faceted Navigation.
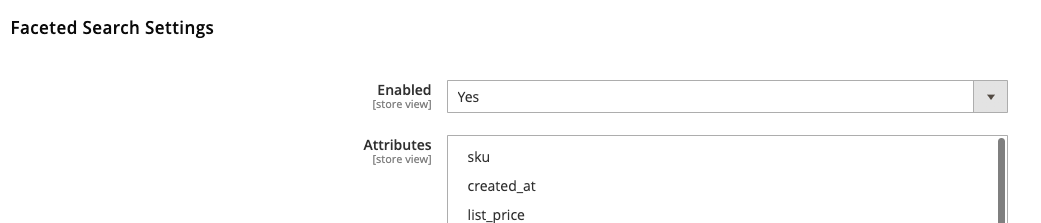
Click on the attributes you would like to add to your facets and click save config.
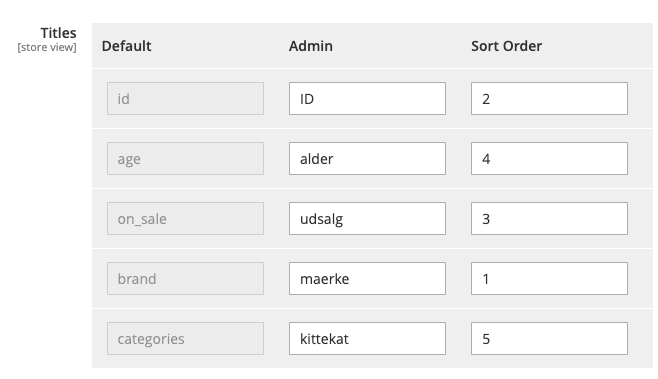
Once added, your added attributes will appear under Titles. In this section, you can create the Title to be display for that facet, and what position in the list of facets you’d like that attribute to appear.
Facets In Url #
When enabled, this appends selected search facets (filters) directly to the browser’s URL query parameters. This allows customers to bookmark, refresh, or share their filtered search results with others while preserving their exact filter state.
Multiselect Attributes #
Allows you to select which search facets should support selecting multiple options simultaneously (such as filtering by both “Red” and “Blue” colors). This provides a much more flexible and user-friendly filtering experience.
Note: You are now able to call the data for categories and pages in your Search page in the same way you would in your Live search, giving you a larger range of information to engage your customers with. For more information you can check here.
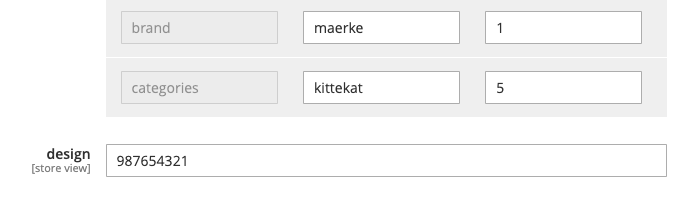
Customising facets #
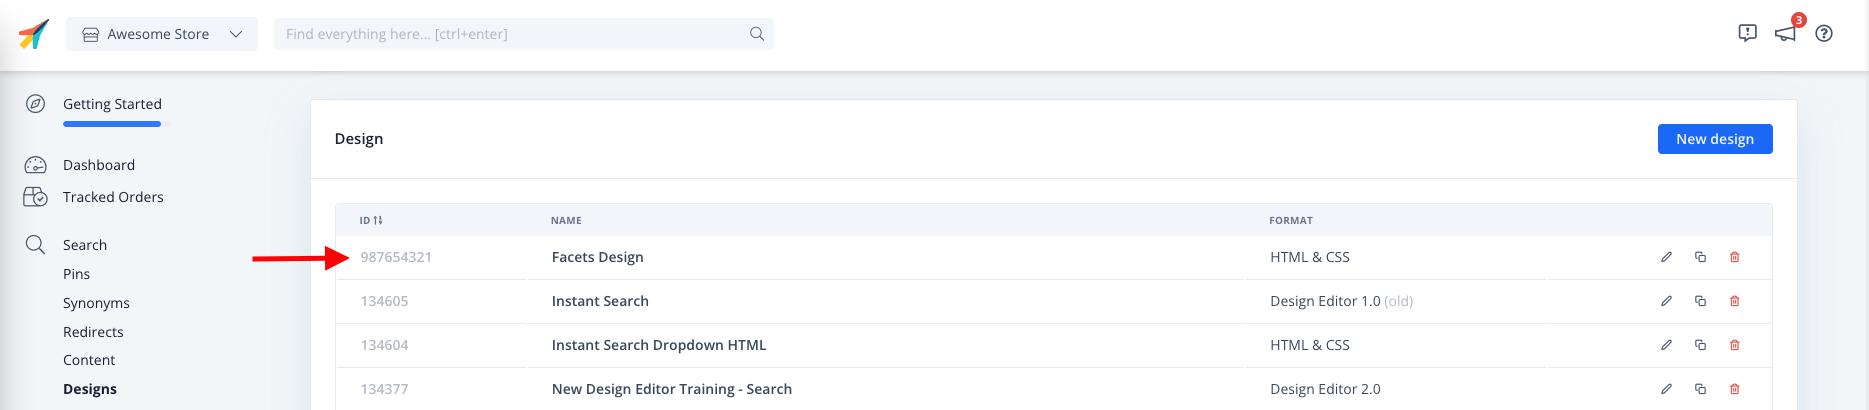
Clerk allows you to style your search page facets from within the design and you can display this by referencing it with the design ID field.
The design ID can be found in the Clerk backend, on the far left column of each design on the design overview page and in the bottom left of the page once you enter the design to edit.
Powerstep and exit intent #
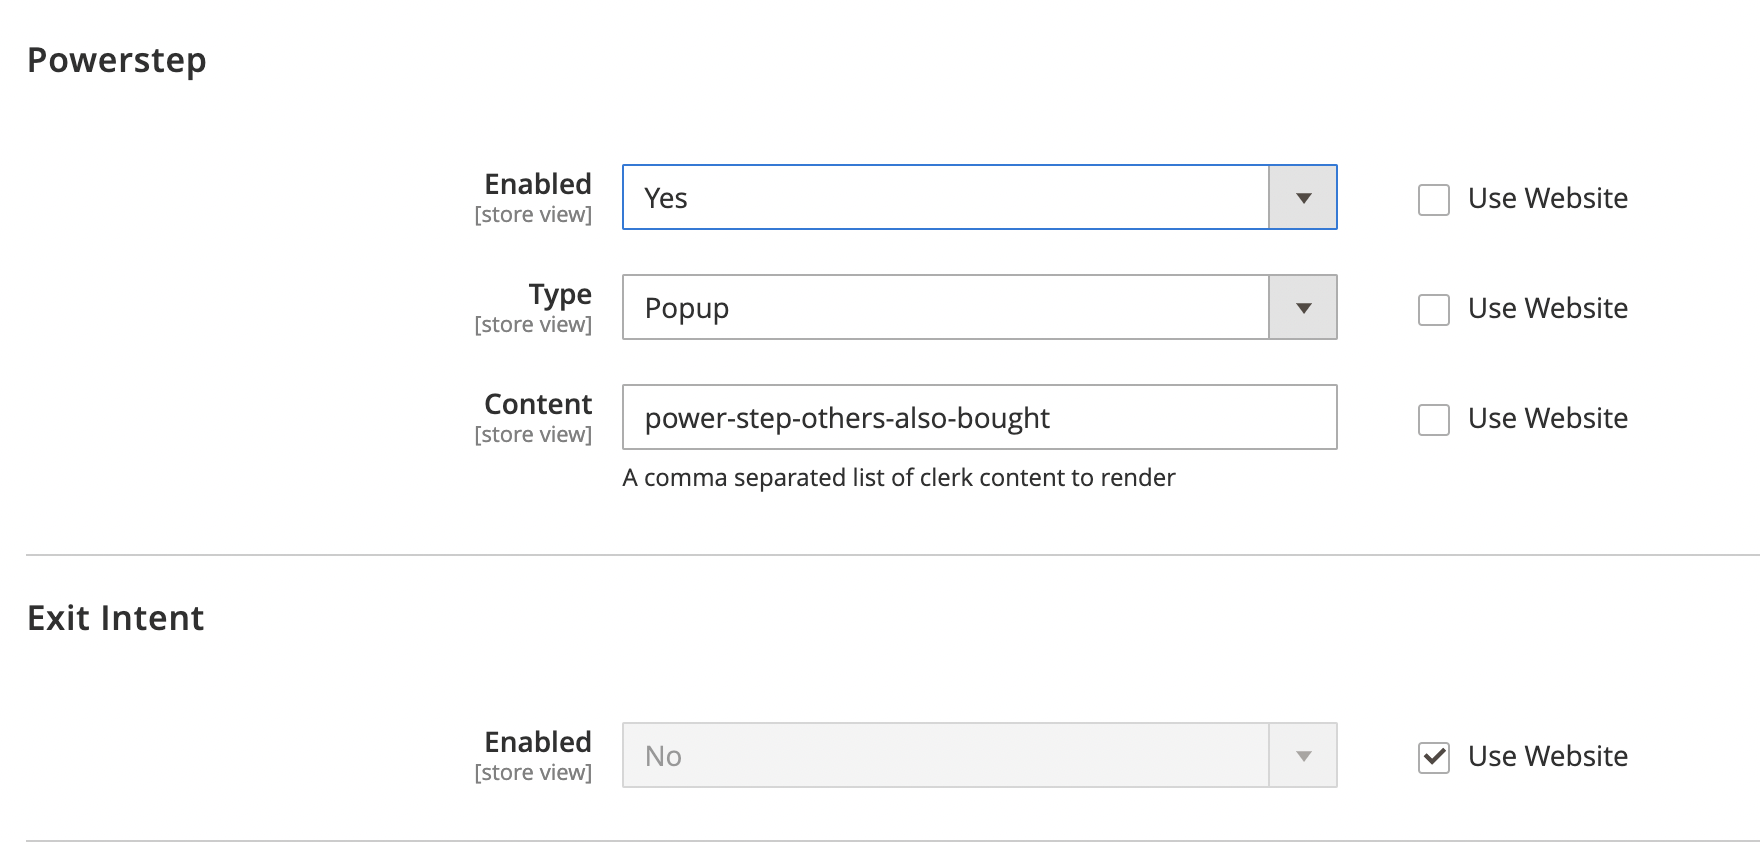
Similar to Search, enable your Clerk Powerstep by selecting “Yes” from the dropdown, then choose the type of powerstep you’d like to appear (either Page or Popup).
Provide the Element name for your Powerstep, which is found next to data-template in the embed code within your my.clerk.io Powerstep Element, power-step-others-also-bought in this example.
Follow the same process as above for enabling your Exit Intent, and identifying and adding the appropriate Exit Intent Element.
Powerstep Filter Duplicates #
Enabling this prevents duplicate products from being recommended across multiple sliders within the Powerstep. If a product is already shown in one slider, Clerk.io will automatically filter it out of subsequent sliders on the same page.
Recommendations #
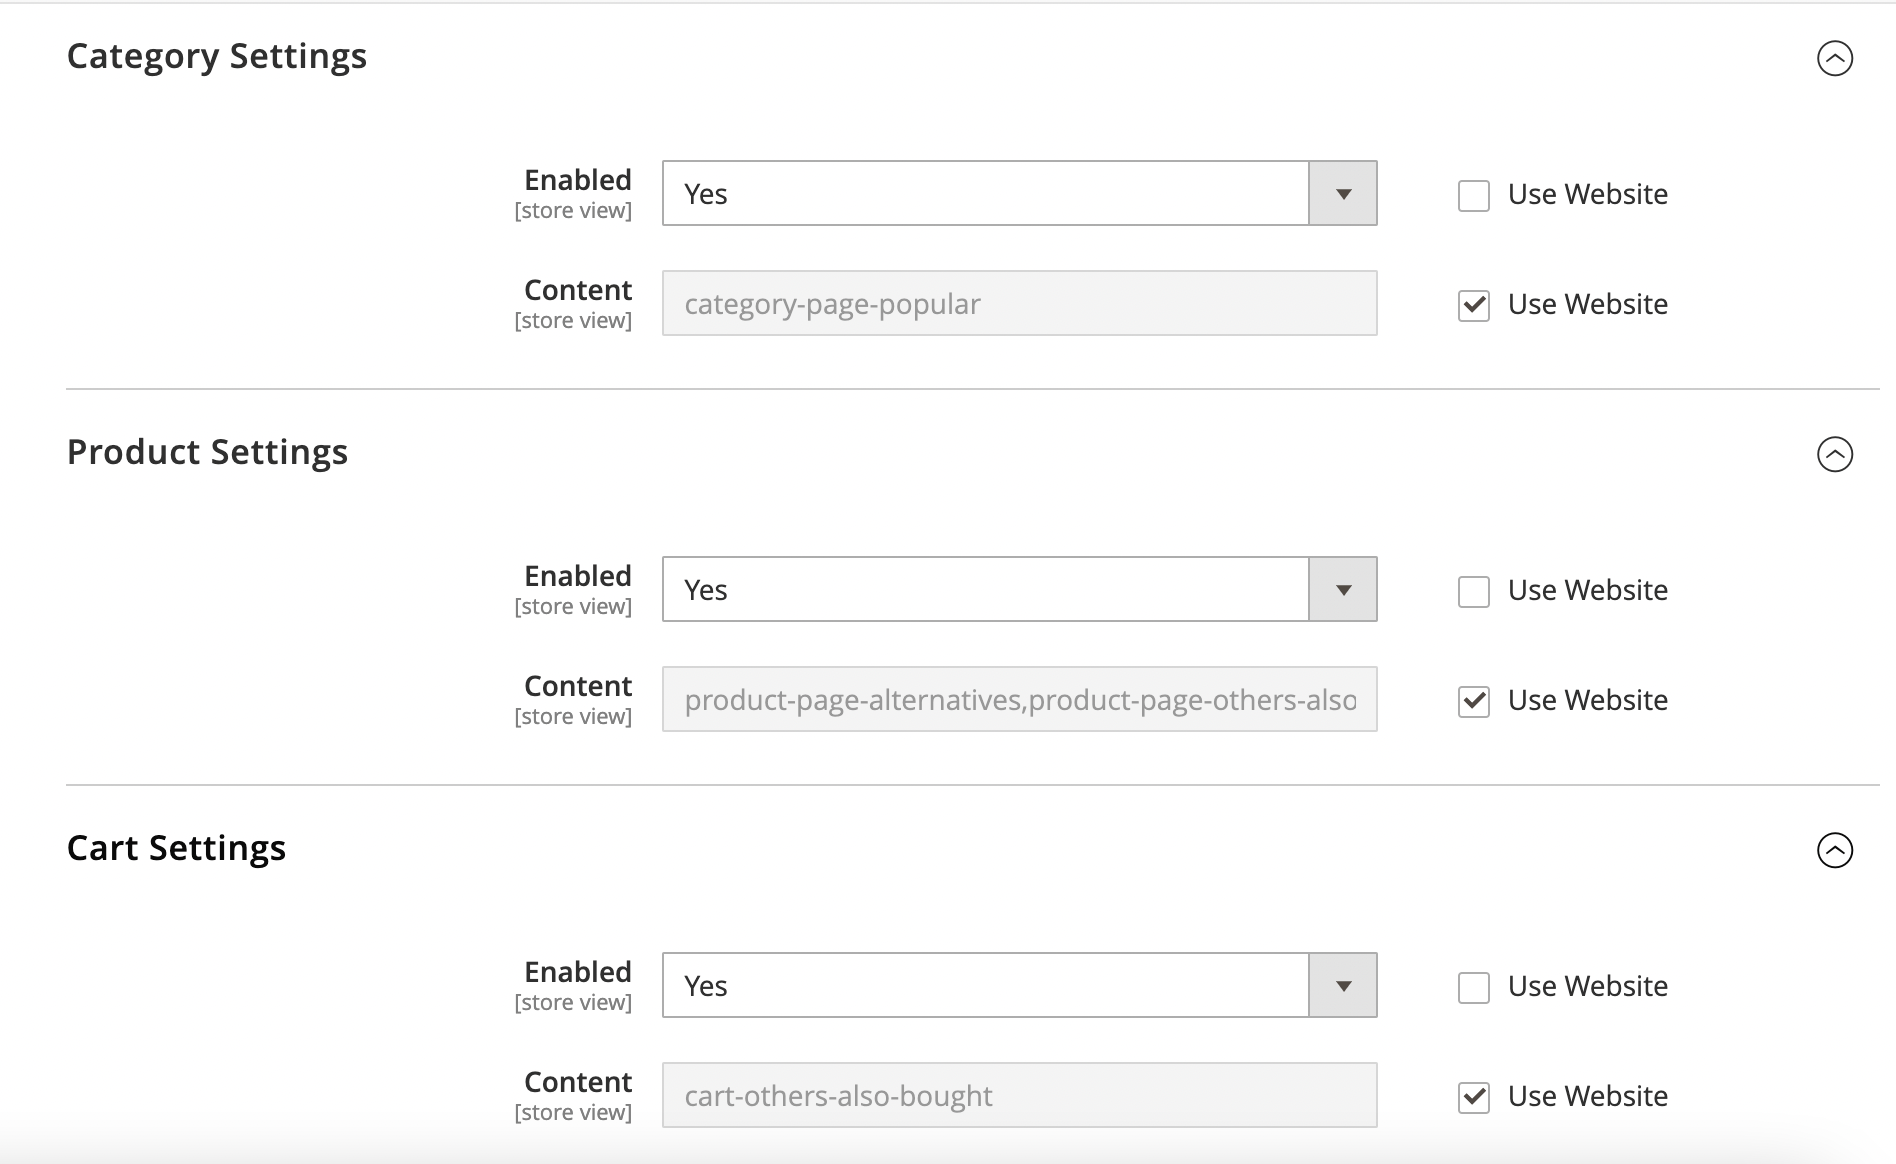
Also similar to Search, enable your Clerk Product, Category, and Cart Page Settings by selecting “Enabled” from the appropriate dropdowns.
Just like the Search functionalities, you can find the element name next to data-template in the embed code within my.clerk.io > Recommendations > Elements.
- In this example, we’ve enabled Product Page, Category Page, and Cart Page settings, and included category-page-popular as our Category Page element, product-page-alternatives and product-page-others-also-bought on our Product Page, as well as cart-others-also-bought as our Category Page element.
Category Filter Duplicates #
Enabling this prevents duplicate products from being recommended across multiple sliders on your category pages. It ensures that customers are presented with a diverse range of products rather than seeing the same item repeated in different sections.
Product Filter Duplicates #
Enabling this prevents duplicate products from being recommended across multiple sliders on your product detail pages. This keeps your recommendations fresh and maximizes the chance of catching the customer’s interest with different items.
Cart Filter Duplicates #
Enabling this prevents duplicate products from being recommended across multiple sliders on the shopping cart page. This is highly effective for cross-selling, as it ensures a wider and more engaging variety of last-minute additions.
After all, if a customer has already declined to buy a neon-green toaster in the first slider, showing it to them three more times before checkout is unlikely to change their mind, and might make them question your store’s sanity.
Logging #
First thing you have to do to change the logging settings is to go into your Magento2 backend and choose Stores => Configuration => Clerk => Configuration:
Find the dropdown called Logging Settings and set your preferred logging settings.
End by clicking Save:
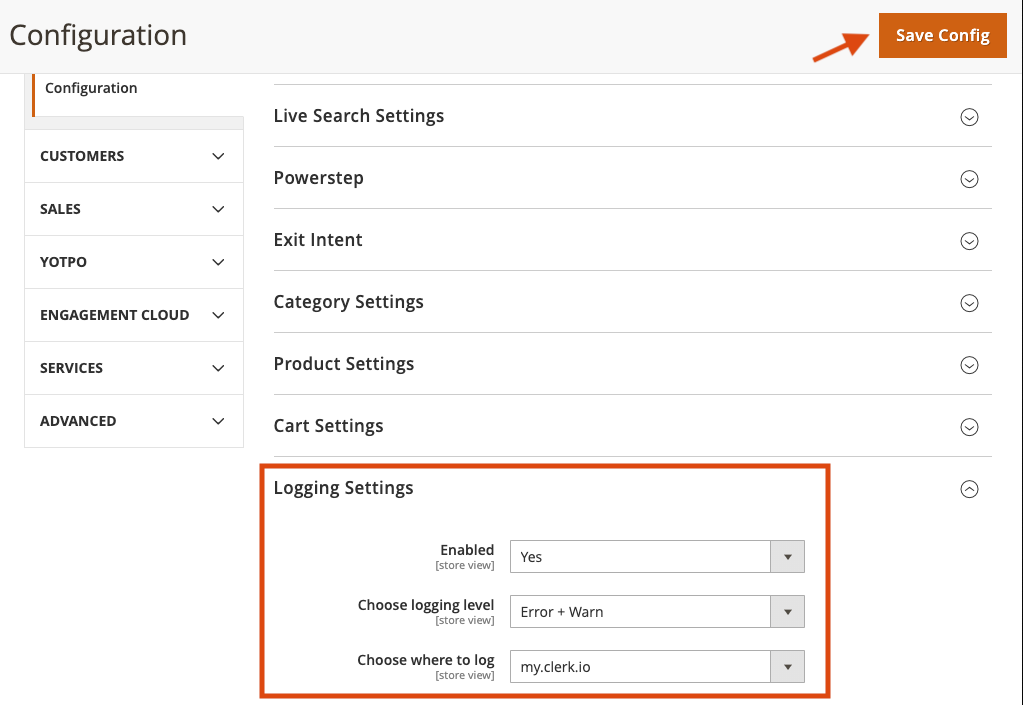
The Logging settings include:
Choose logging Level
Only Errors: Will log any errors that stops the module from working correctly.
Error + Warn: Also logs warnings that are not causing the module to stop working, but might be necessary to fix as well.
Error + Warn + Debug: Logs everything that the module interacts with. This should not be enabled on a live webshop as it will slow down the site.
Choose where to log
File: Will save the log to a file on the Magento2 server.
my.clerk.io: Will log everything to Developers->Logs in the my.clerk.io backend.
Log File Link #
Displays the absolute path to the local log file on your Magento server (typically /var/log/clerk_log.log). This makes it easy for developers or administrators to locate and inspect the raw log files when debugging extension behavior.
Upgrading #
If you are using a version before 3.0.0, upgrading will break your Designs, since Clerk.js 2 will be used. If using an older version, follow this guide instead.
Important: Remember to take backups of any modified files, as they will be overwritten.
Upgrading the Magento 2 extension is done via commandline.
Its done by following these steps:
Login to your server through commandline.
Navigate to your webroot folder (usually " /var/www/your_domain/public_html")
Enable Root Access by typing su and then enter your password.
Type in the following commands in order:
composer update clerk/magento2
php bin/magento setup:upgrade
php bin/magento setup:di:compile
Wait for the extension to finish.
Your Magento 2 is now upgraded to the latest version.
Uninstalling #
Just like when you install extensions in Magento 2, uninstalling needs to be done through Command Line.
Simply type in the following commands in order to remove it:
php bin/magento setup:module:disable Clerk_Clerk
composer remove clerk/magento2