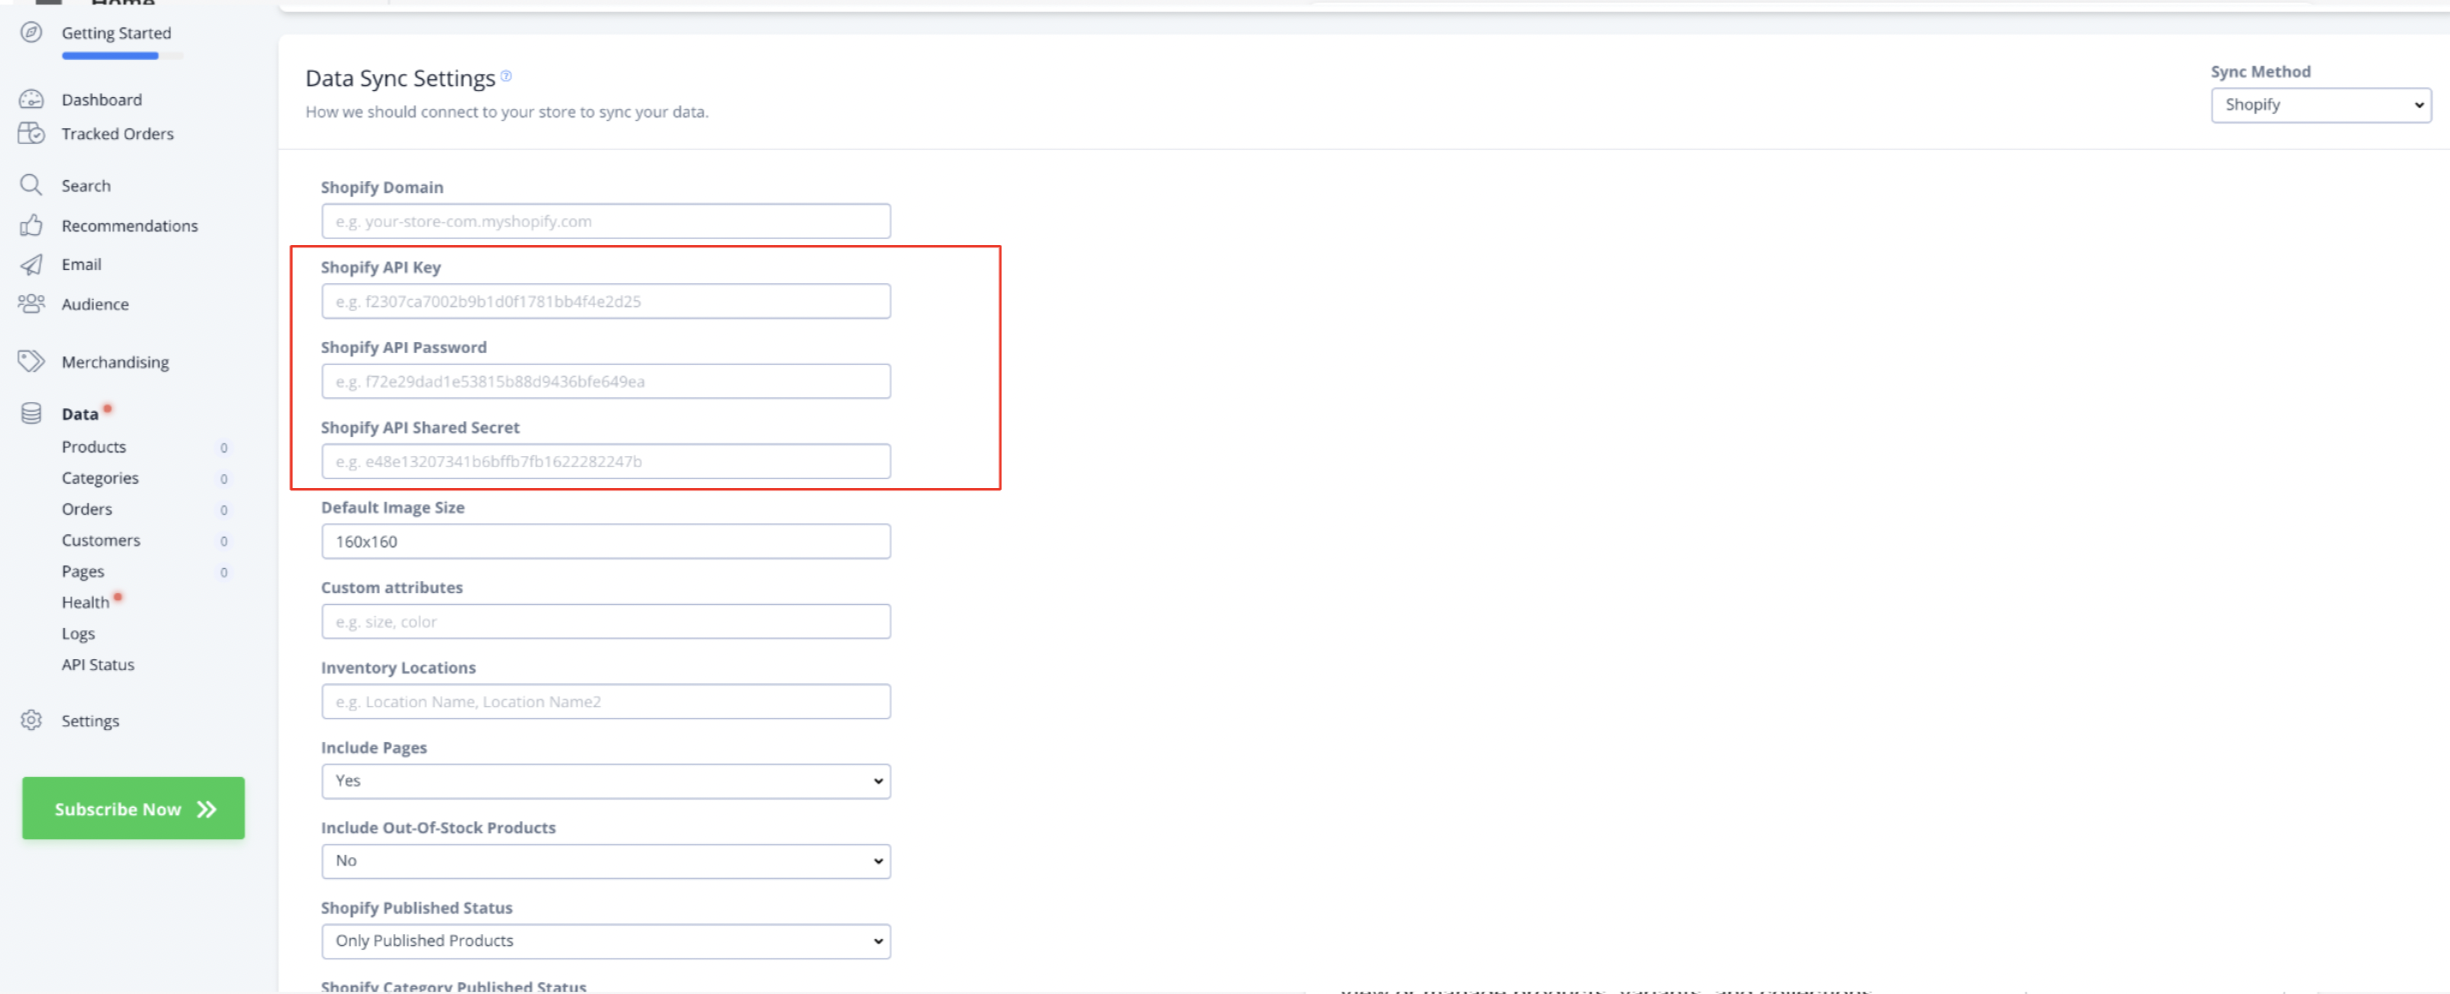
Integration
After entering your store information in your Shopify admin page, you can choose your integration options within my.clerk.io.
Click “Data” in the left-side menu, then go to “Configuration” to view your options.
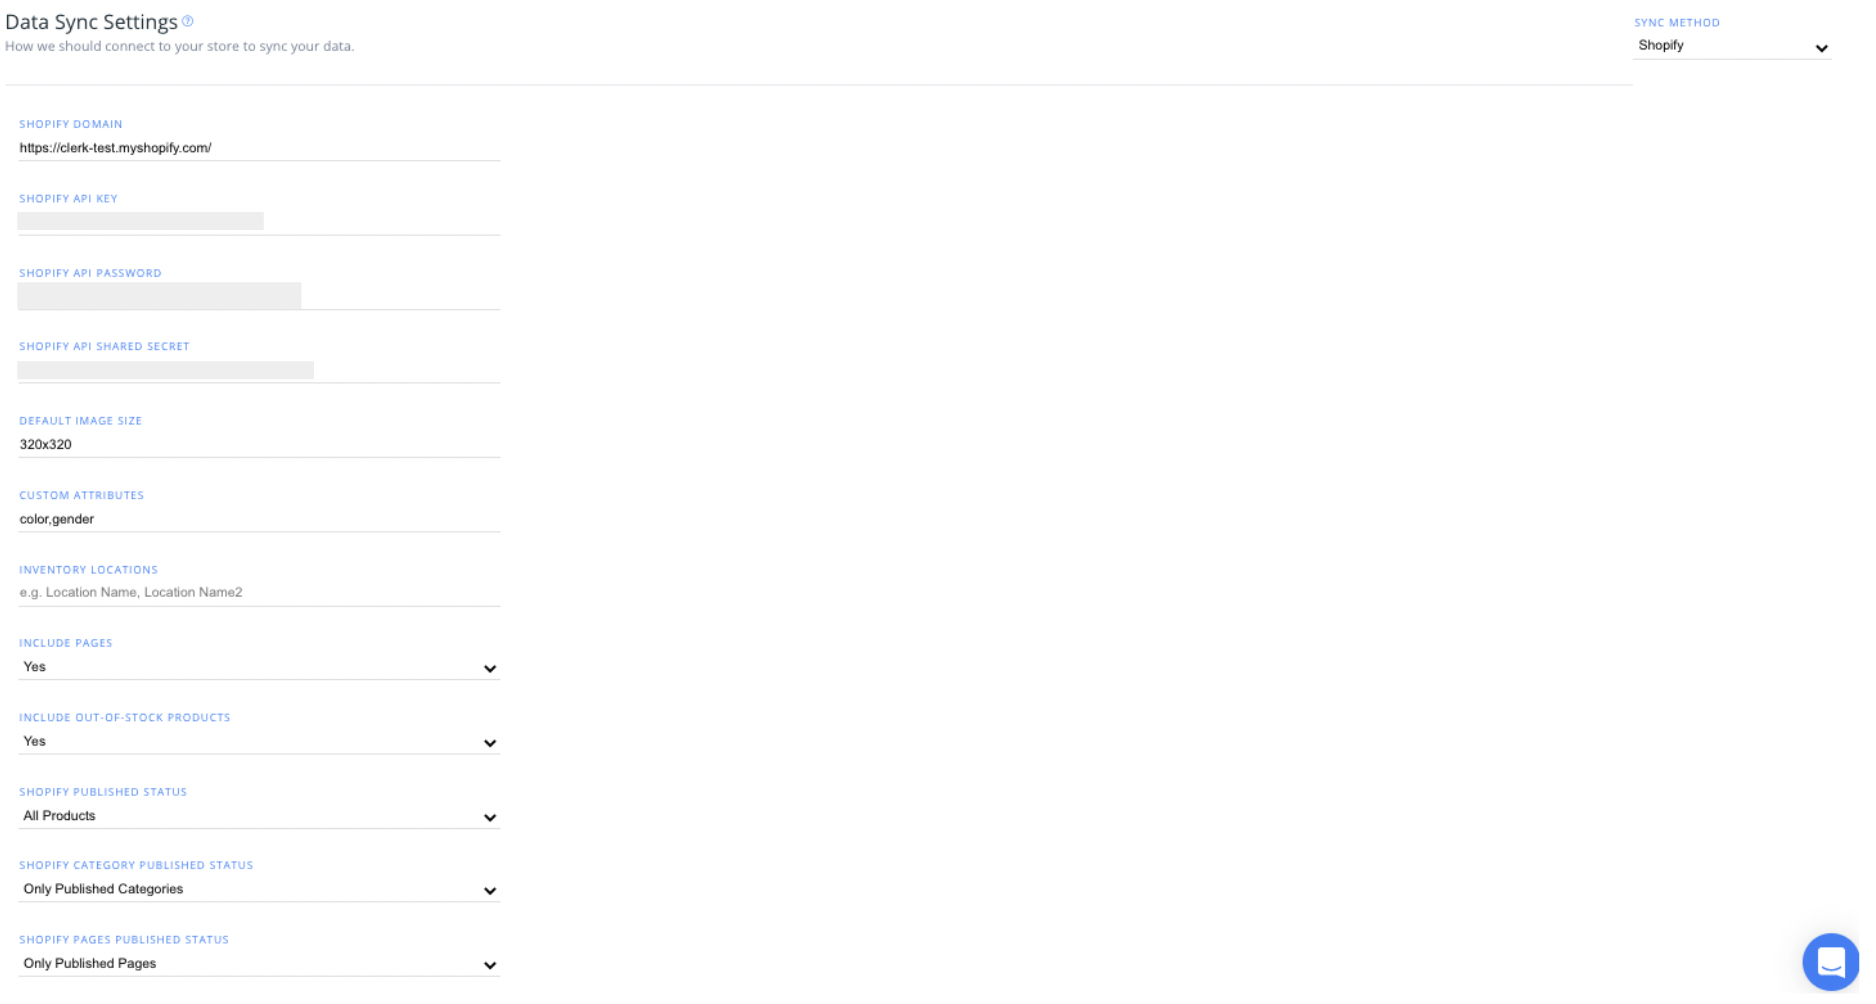
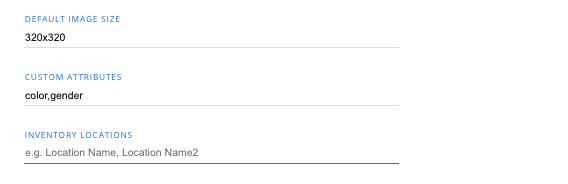
Image size and attributes #
Default Image Size is where you can set the size for the images to be used in your Clerk Elements.
Set your Custom Attributes to be synced with Clerk in the next section, by writing in the custom value names, comma separated.
If you have multiple Inventory Locations to be synced from your store, you can write them in the next section.
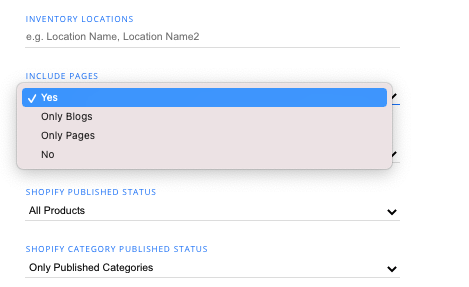
Include pages #
- To include Blogs and/or other Pages in your data sync, select the appropriate option under " Include Pages".
Out-of-stock products #
- Select whether or not you’d like to sync out-of-stock products using the next dropdown.
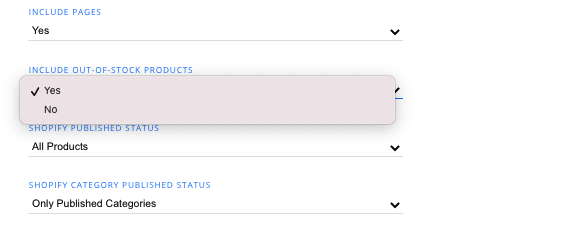
Published status #
- If you want to include only published Products, Categories, or Pages, select the appropriate option from each of the three dropdowns:
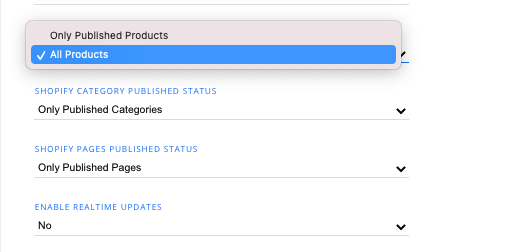
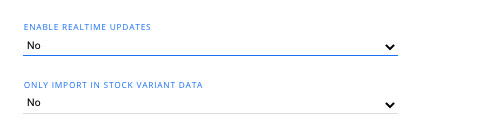
Realtime updates #
- From the next two dropdowns, you have the option to enable real-time updates from your product data synced to Clerk, and then the option to import only stock variant data.
Import tags #
To import your Shopify Tags into Clerk, select the appropriate option from the dropdown here.
If you choose to include or exclude specific tags, you can list those as comma-separated values in the " Specific Tags" text box that appears.
There is also an advanced option to destructure tags which allows you to create new Clerk attributes from tags with a certain prefix.
Destructure Tags Separator should contain the character that separates a tags name from its value. For example, for a tag like
color-blue, the separator should be-. The default value is:.Destructure Tags Prefix is the tags name which will be used to create the attribute. For the tag
color-bluethis should becolor.
The output for the above example would be an attribute named tag_color with the value blue.
Sync time #
- With Sync Time, you can set the time of day when your store data syncs to Clerk. The default option is “When needed”.

Import parcels and orders #
Clerk’s Chat tool is able to answer questions related to orders, including their current status like PREPARING, FULFILLED and more.
Also, using tracking links, called Parcels, they can easily ask about the delivery status of their order.
Choosing Yes for this feature will import the status of each order from Shopify, and the related delivery tracking link, assuming you are using Shopify’s standard feature for managing this.
Uninstalling #
Below you’ll find a guide on removing tracking scripts and general steps to uninstall Clerk from your Shopify store.
Removing tracking scripts #
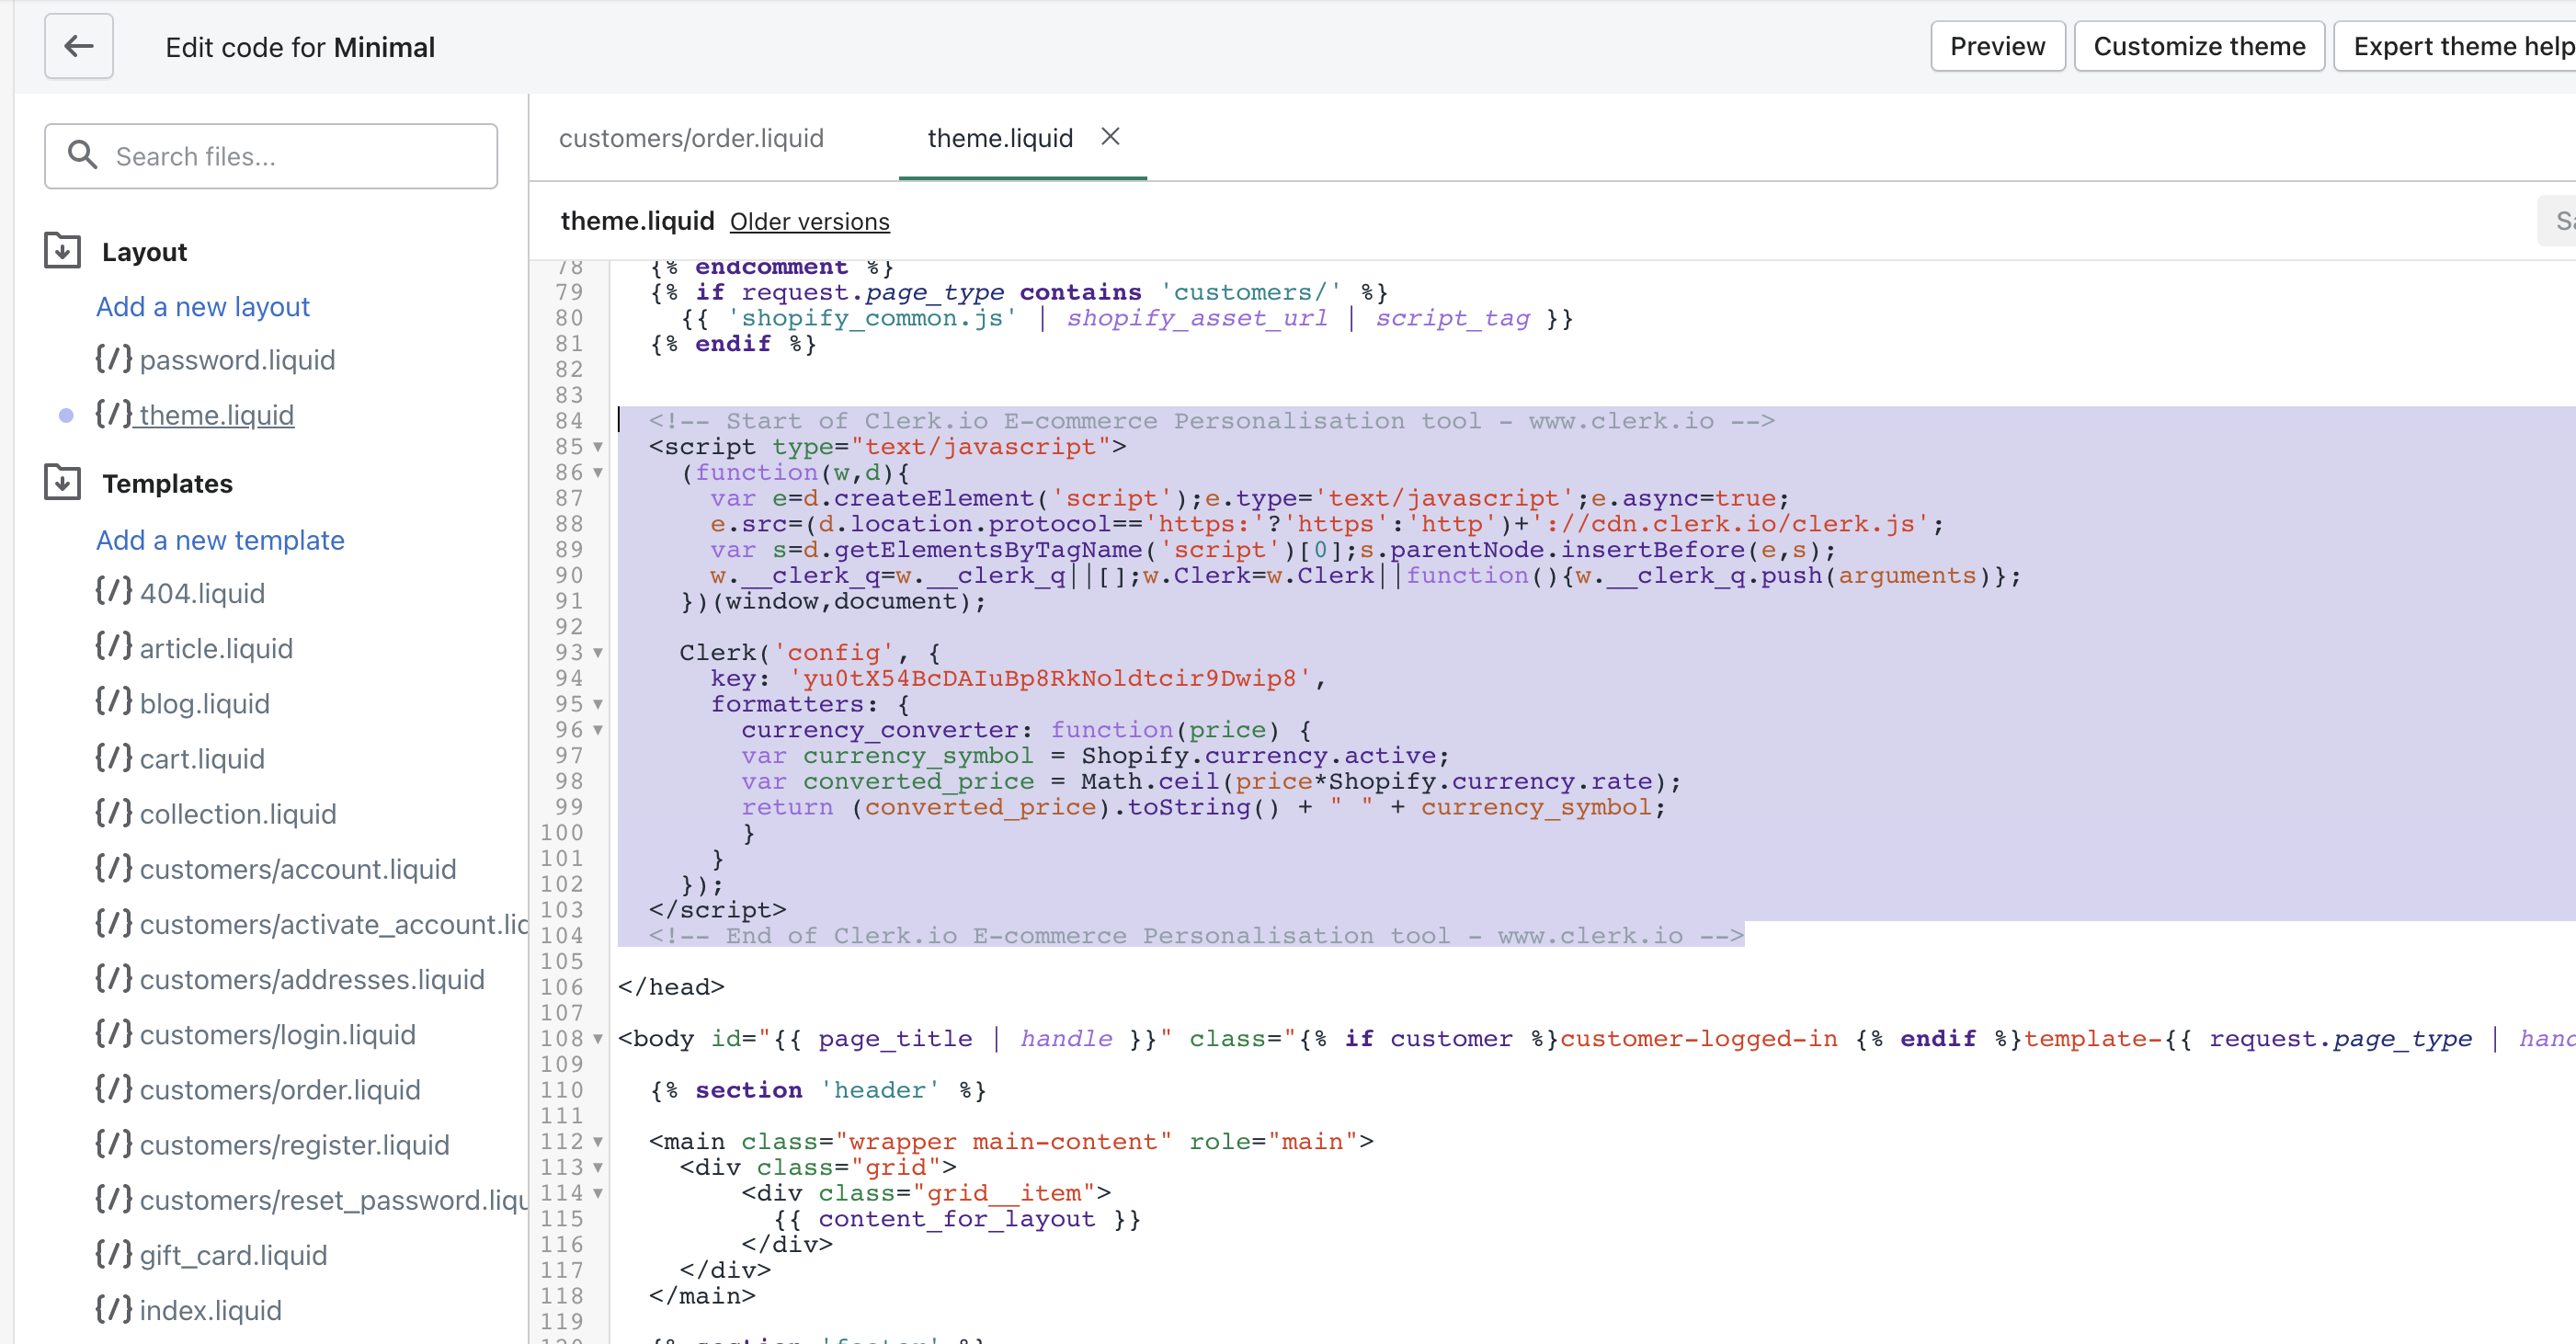
To remove Clerk tracking from your webshop, you’ll need to remove both the Visitor and Sales tracking scripts from your Shopify theme files and " Additional Scripts" section.
- First, you’ll remove your visitor tracking scripts from the theme file where you initially placed the embed code during setup.
Visitor Tracking is likely within the webshop’s “theme.liquid”, “index.liquid” file.
You can access this file by logging into your Shopify admin portal, then select “Online Store” > “Themes”. Then, under “Live Theme”, choose “Edit Code” from the “Actions” dropdown.
Locate your main theme file, then find the Visitor Tracking script, and delete:
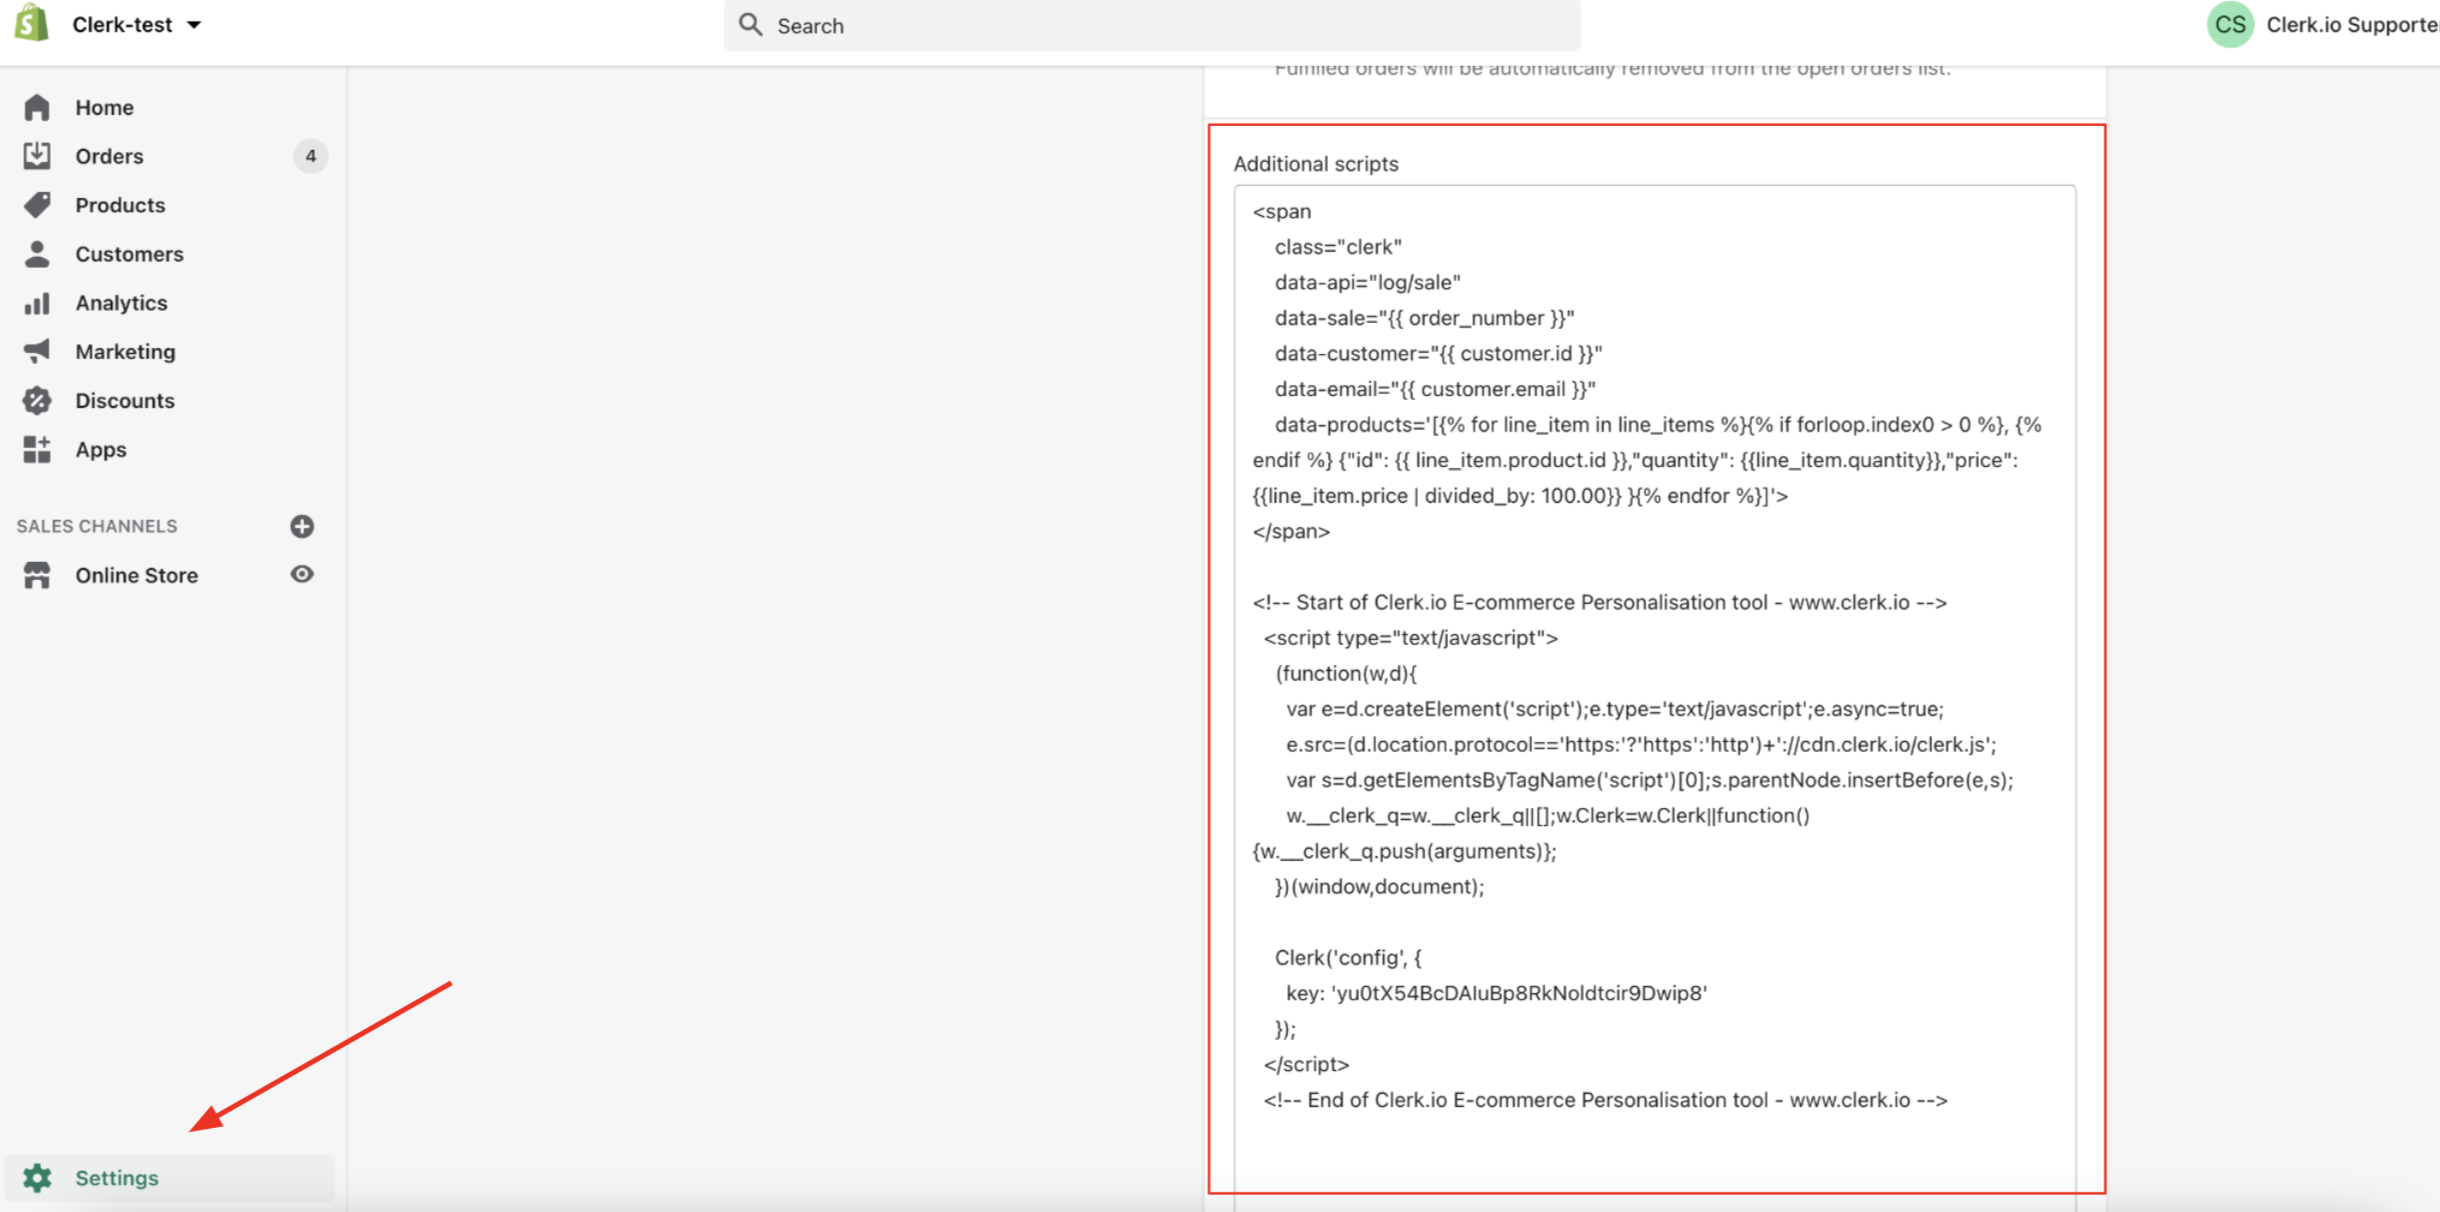
- Next, you’ll need to remove both tracking scripts from the " Additional Scripts" section.
You can find this in your Shopify admin portal by clicking “Settings” at the bottom-left corner. Then, simply delete both scripts from the “Additional Scripts” text box.
Updating private app permissions #
You can also change the permissions for the Clerk private app you created during setup to ensure there is no access to the specified data fields.
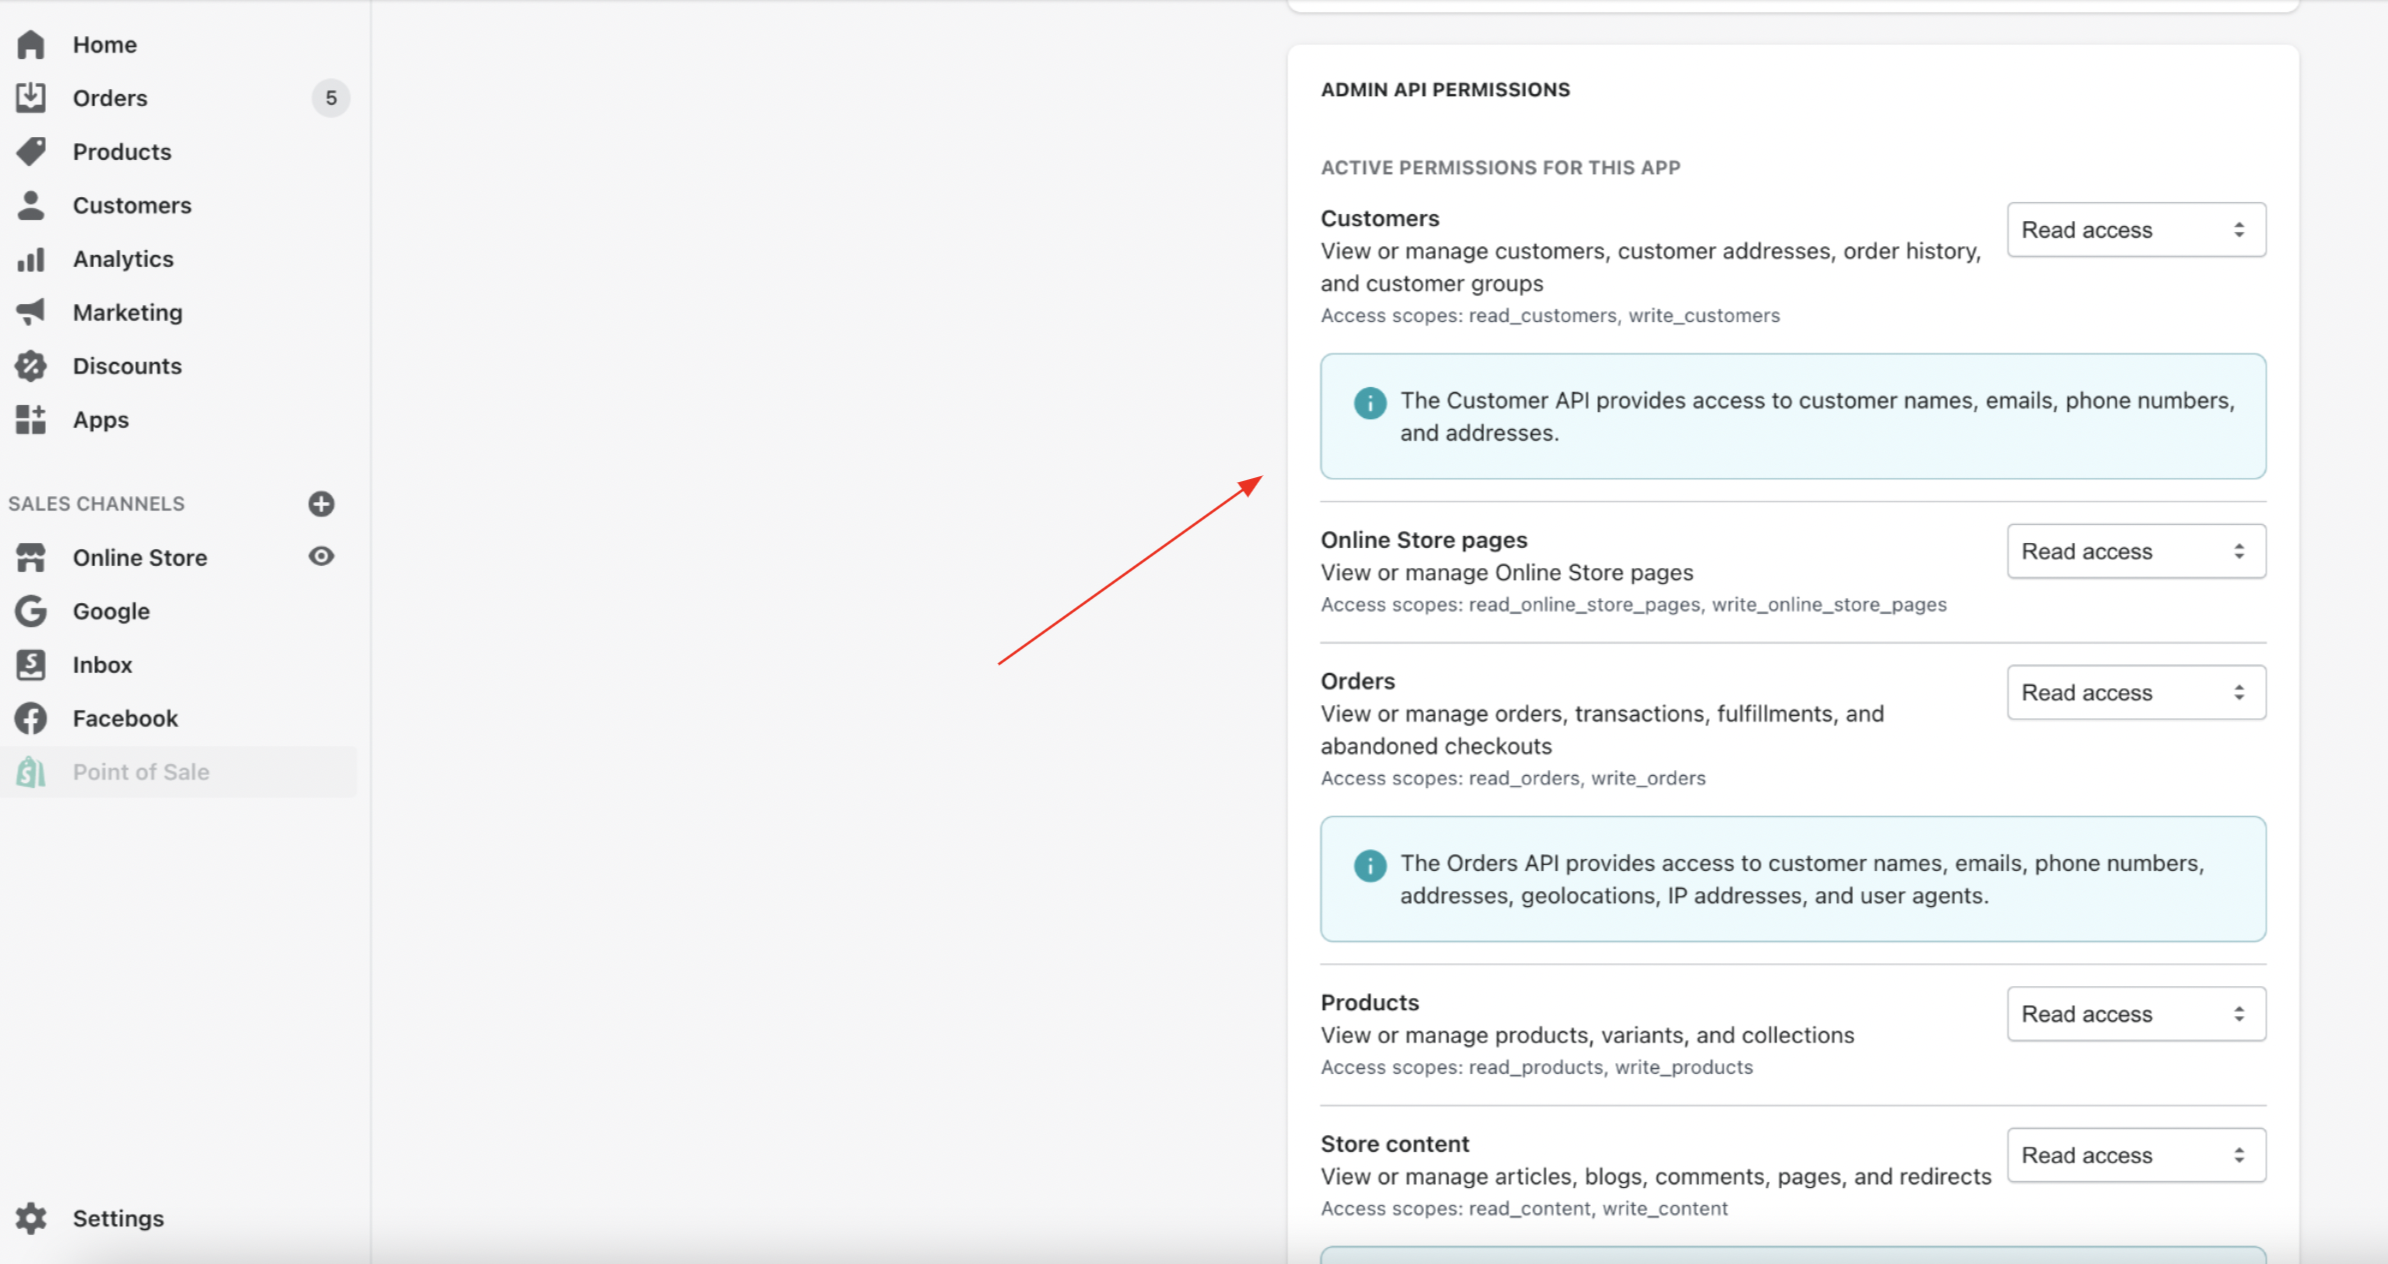
You can find your app’s API permissions by logging into your Shopify admin portal, selecting “Apps” > “Manage Private Apps” > “Clerk.io”.
In “Admin API Permissions”, adjust each of these dropdowns where they currently say “Read Access” to “No Access”:
Updating my.clerk.io #
You can also remove the Shopify API Key, password, and secret from your store’s my.clerk.io backend.
Log in, choose “Data” from the left side menu, and go to “Configuration”. Be sure to click “Save” once done: