Sync Data
Sync your Shopware 6 products and attributes to Clerk. This guide covers setting up data synchronization and customizing product data.
Before syncing data, make sure you have installed and configured the Clerk plugin in your Shopware 6 backend. See the Get Started guide for installation instructions.
Set up Sync #
To sync your Shopware 6 store data with Clerk, you need to create an integration in Shopware and configure it in Clerk.
- In Shopware, go to Settings > System > Integrations.
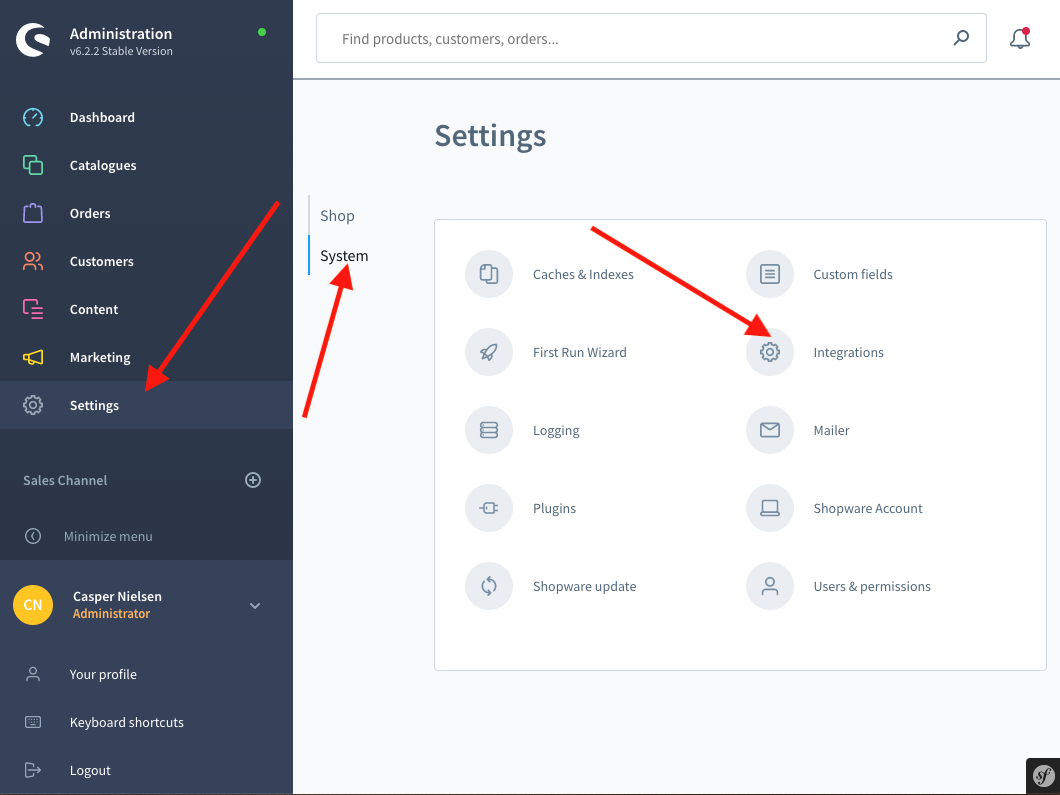
- Click Add integration and name it “Clerk.io”.
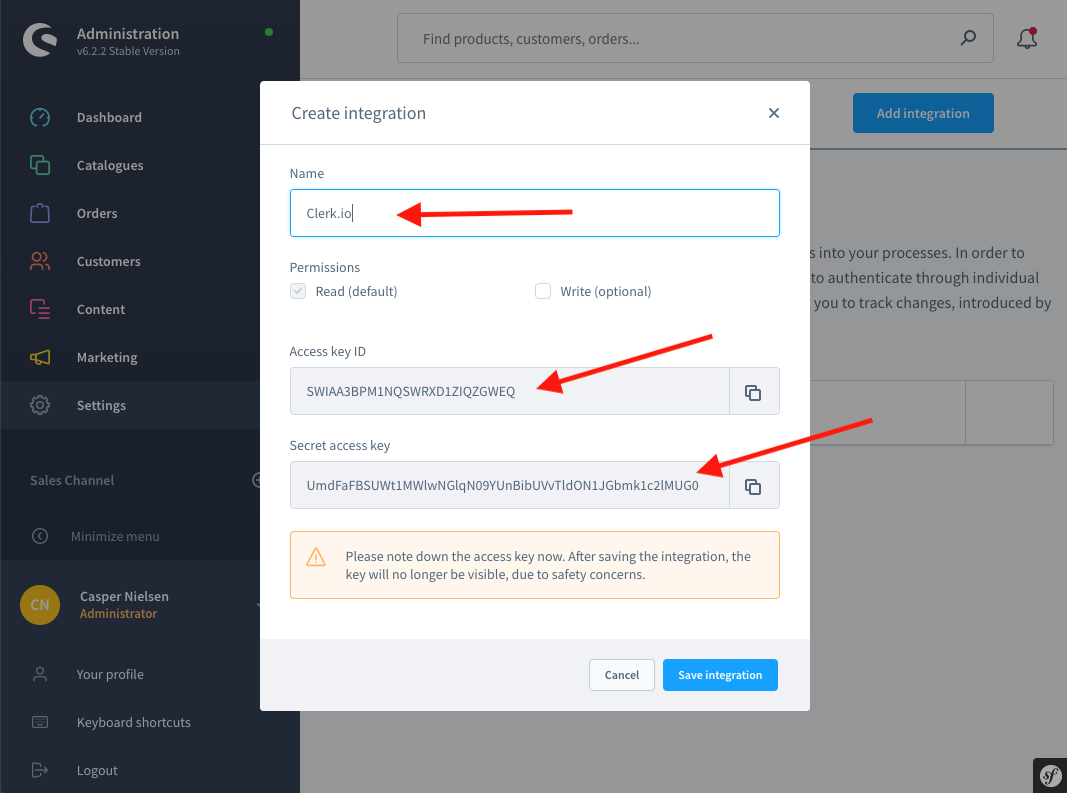
- Copy the Access Key ID and Secret Access Key.
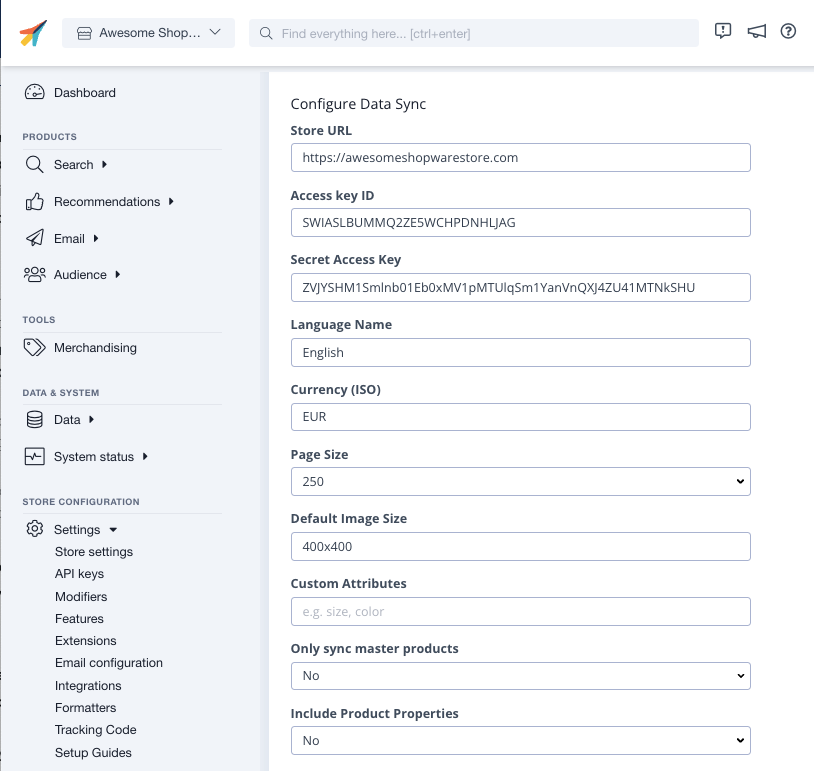
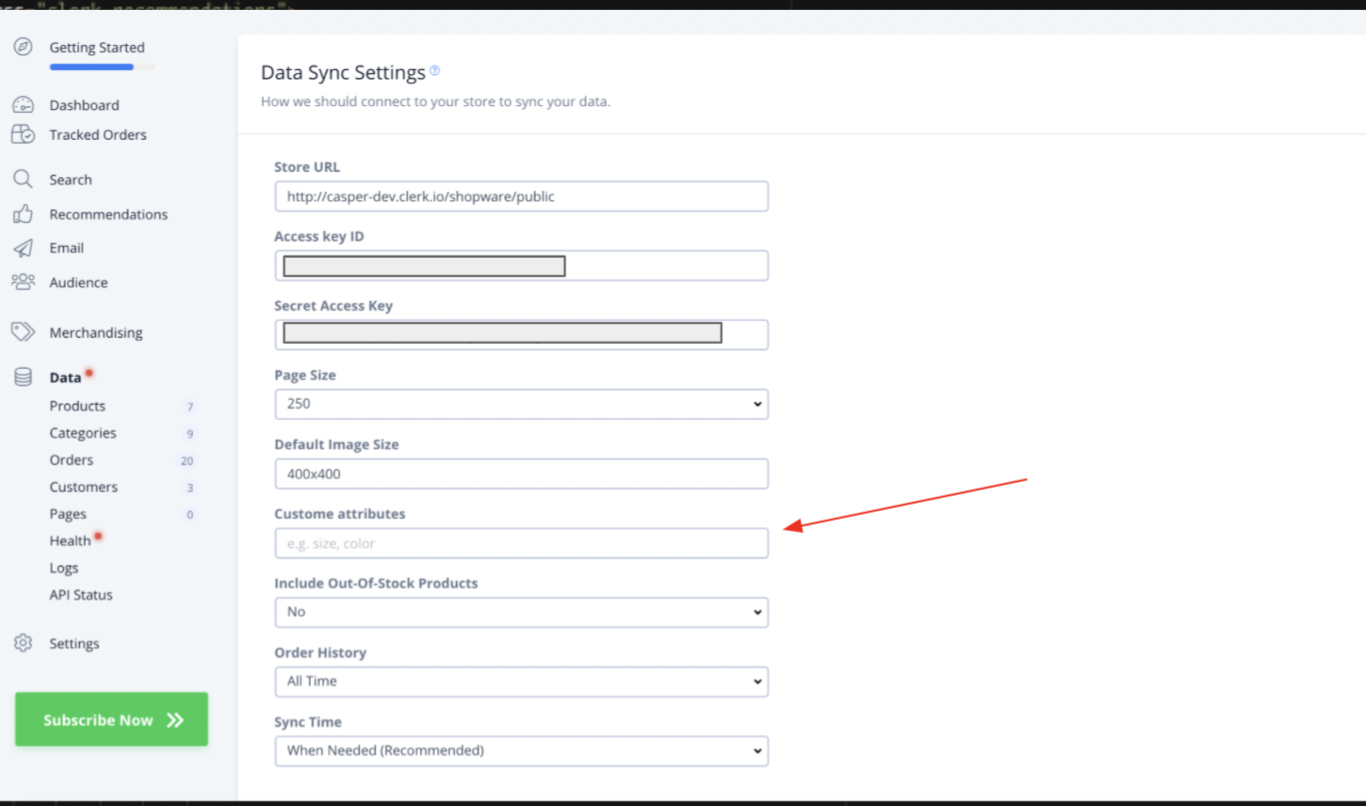
- Go to my.clerk.io > Data > Configuration and paste these keys along with your Store URL.
- If you have multiple languages, identify Language IDs per Shopware docs and sync each store.
- Click Start Sync and wait for the sync to complete.
Customising product data #
In my.clerk.io, choose Data > Configuration, and scroll down to “Custom Attributes”
If you have custom product attributes you’d like to include in your data, type in the attribute value names in the text box below Custom Attributes.
Remember to add these as comma-separate values:
Once these custom data values are added, you’ll be able to use these product attributes in your Clerk.io Designs and Elements.
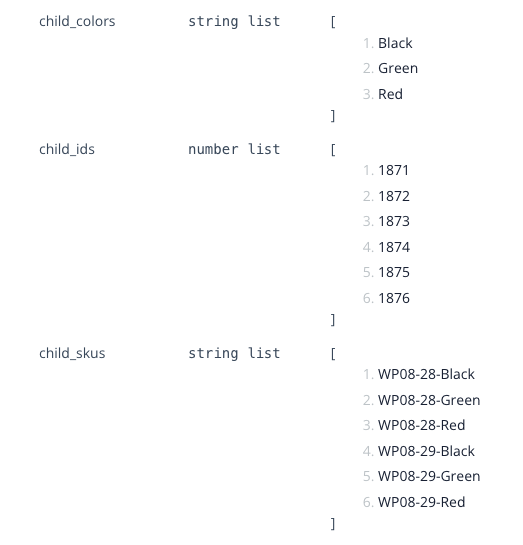
If the attributes you want to send are already available as part of your configurable/grouped products data in your Shopware admin, they can easily be synced on the latest version of your plug-in. They will appear as child_attribute, for example, child_color, child_skus etc.