Get Started
Connecting your Store #
The first step of installing Clerk.io, is connecting your store with your Clerk.io account.
After following these simple steps you will be able to see your Demo Store, which gives you a personal overview of how Clerk.io will work on your webshop, before setting up the rest of the system.
1. Add Store #
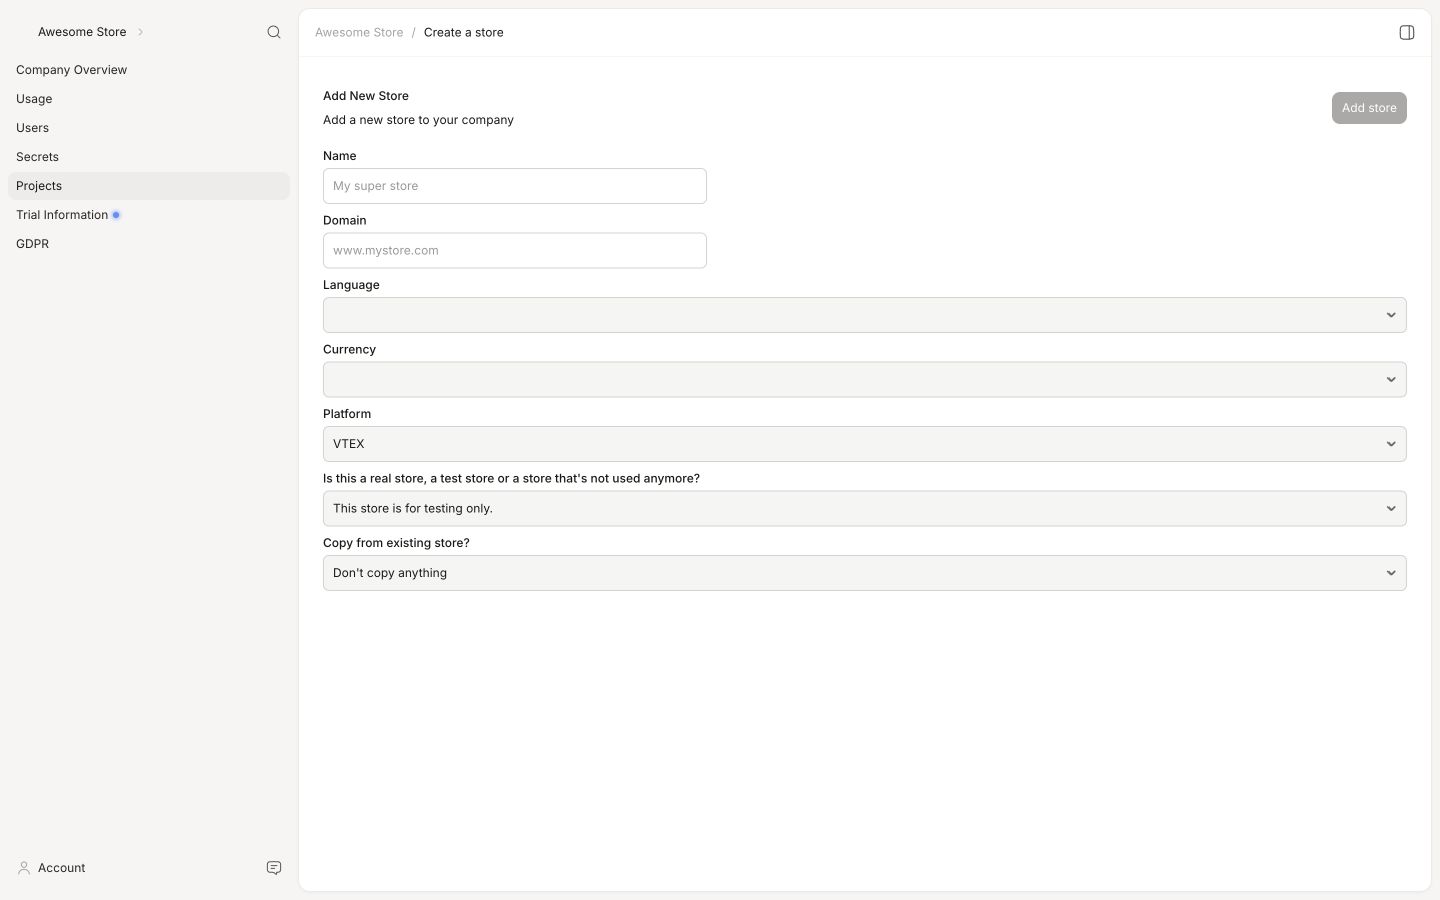
After logging in to my.clerk.io, the first thing you need to do is add your store:
Write the Name and Domain of your webshop
Choose VTEX as the Platform and choose your Currency.
Click Add Store.
2. Install and configure module #
On the vtex cli run vtex install
clerkiopartnerdk.integration-vtex. You can confirm that the app has now been installed by runningvtex lsagain.Access the Apps section in your account’s admin page and look for the ClerkIO Integration box. Once you find it, click on the box. Fill in the Fields as requested. For MultiBinding Sites, click on the enable configuration by binding to match a Clerk Store to each Binding.
Configuration options #
Configure each VTEX binding with the fields below. A binding normally represents one storefront, locale, or sales channel.
Clerk.io Public API Key: The Public Key for the Clerk.io store used on this binding. Find it in my.clerk.io > Developers > API Keys.
Clerk.io Private API Key: The Private Key used to authorize Clerk.io when it requests the data feed for this binding.
Collect User Emails: Enables email tracking for signed-in shoppers and newsletter subscribers on the storefront.
Sales Channel: The VTEX sales-channel ID associated with this binding. The integration uses it to return the correct products and orders.
Default Locale: The locale used when generating the product feed, for example
en-USorpt-BR.Binding Root Path: The binding’s storefront path, without leading or trailing slashes. Leave it empty when the binding has no path. For example, enter
outletfor a storefront served below/outlet/.
- Generate the feeds for products, categories and orders by making a POST request to the following endpoints (replacing accountName, workspace, and bindingID):
Do a GET Request to this following endpoint: https://app.io.vtex.com/clerkiopartnerdk.integration-vtex/v1/{{accountName}}/{{workspace}}/_v/integration-vtex/clerk-feed/{{bindingId}}
It requires VtexIdclientAutCookie to be sent as header.
The first call to the generation of the feed will respond with an empty array. Depending on the size of your store Catalogue the feed might take some time to generate
3. Sync your store #
Syncing data connects your VTEX store to Clerk, allowing Clerk to access your products, orders, customers, categories, and other store information. This enables Clerk to provide personalized recommendations and search results based on your actual store data. Follow the steps in the Sync Data guide to set up the data sync.