Impostazione di un Powerstep in Shopify
Platforms:
Aggiunta del Powerstep
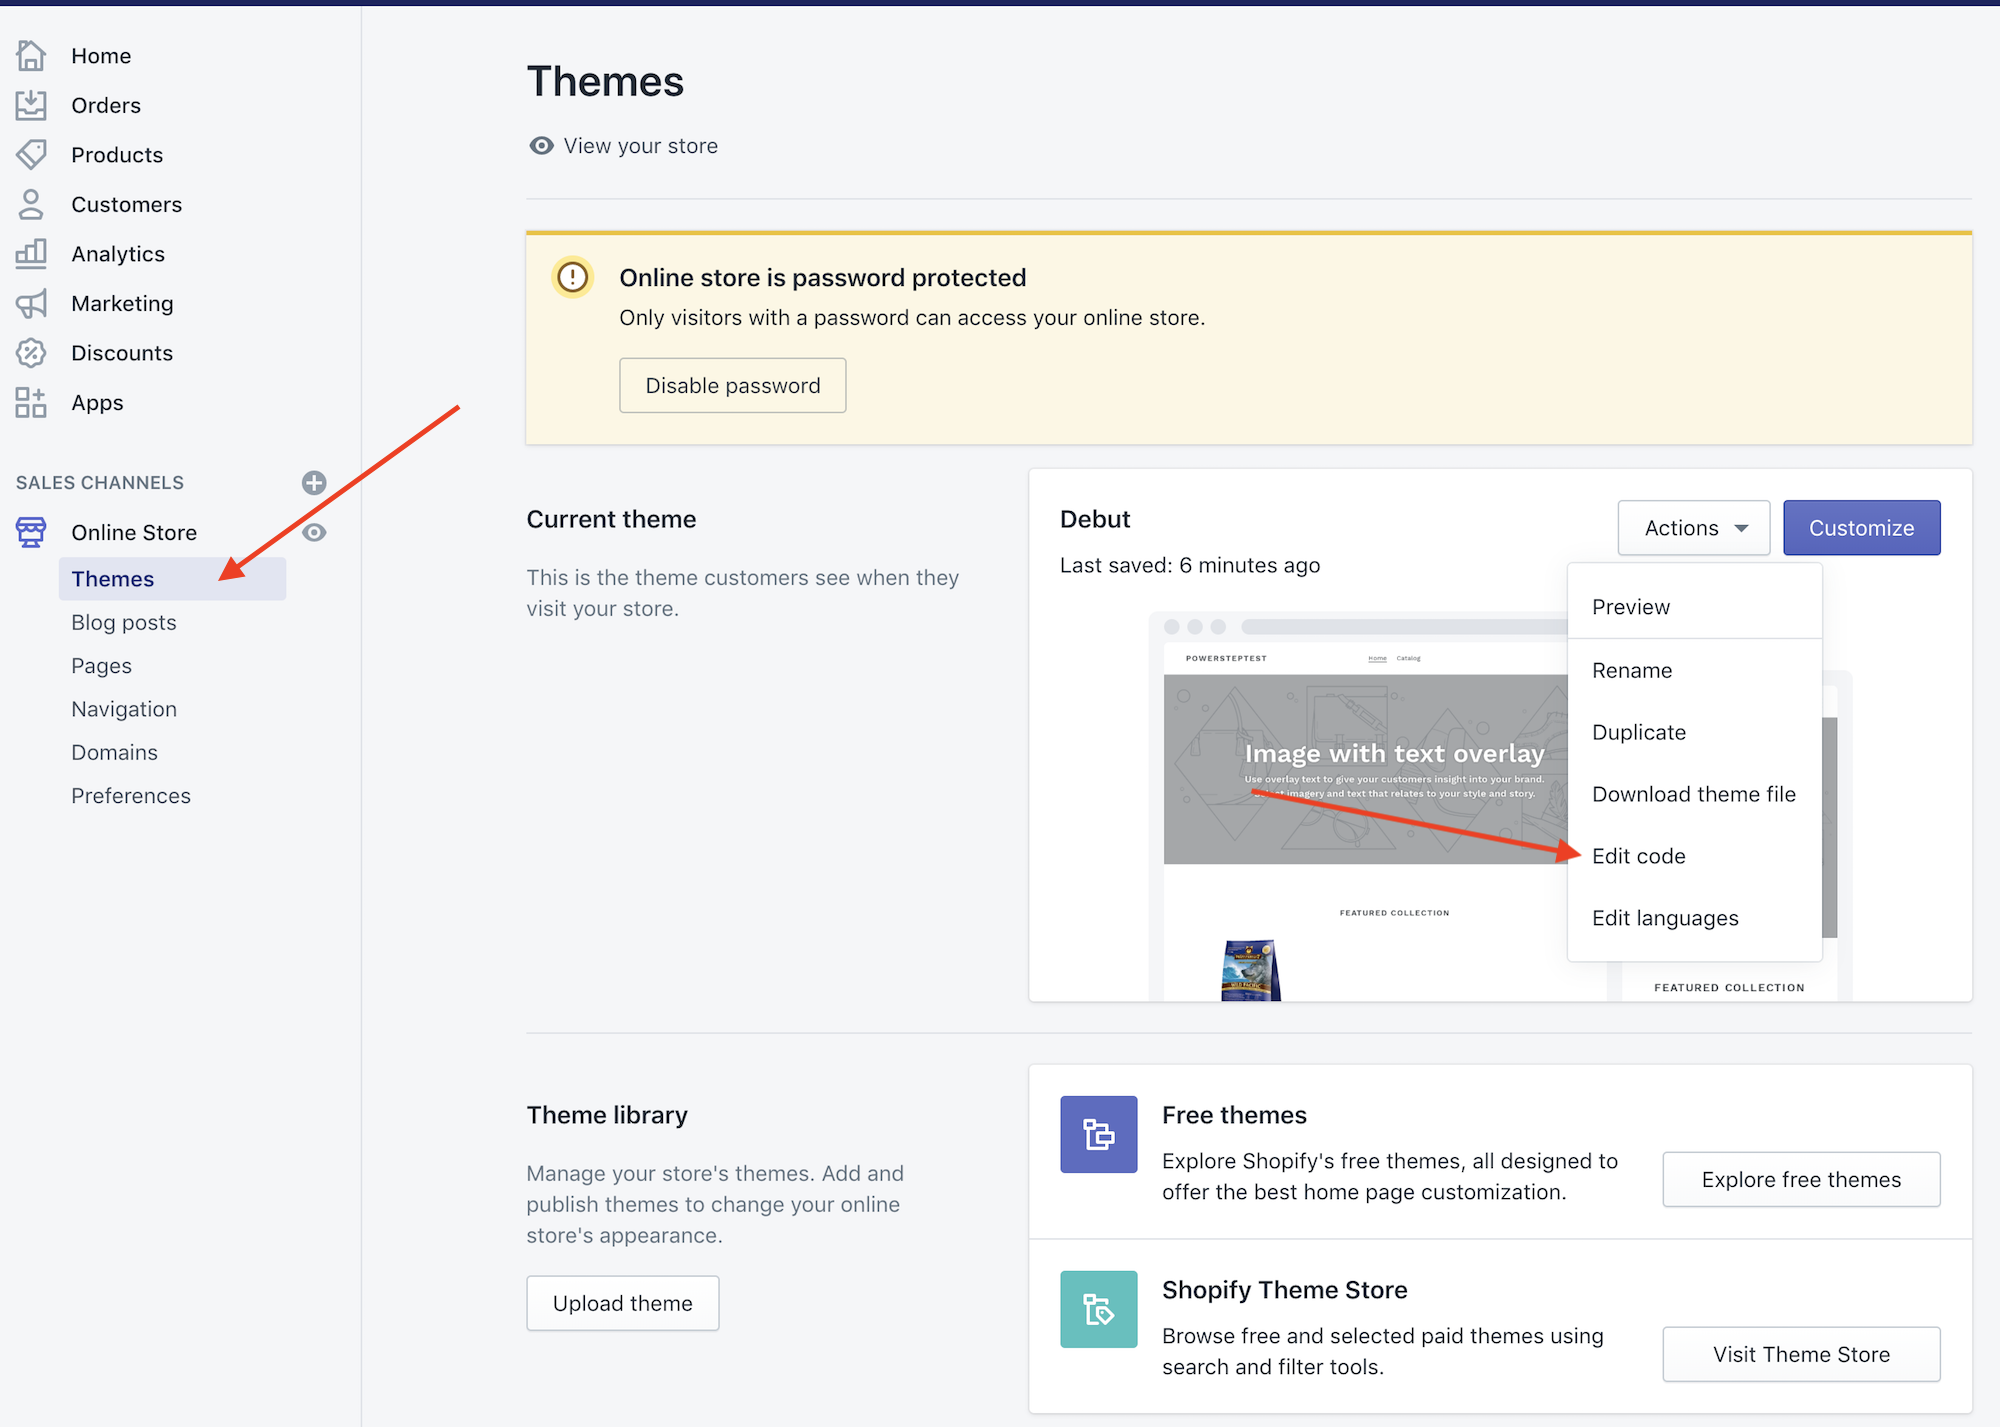
1. Accedere al backend di Shopify e andare in Negozio online -> Temi -> Azioni -> Modifica codice
2. Trovare il file che genera la pagina del prodotto. Di solito è Sections -> product-template.liquid o main-product-liquid.

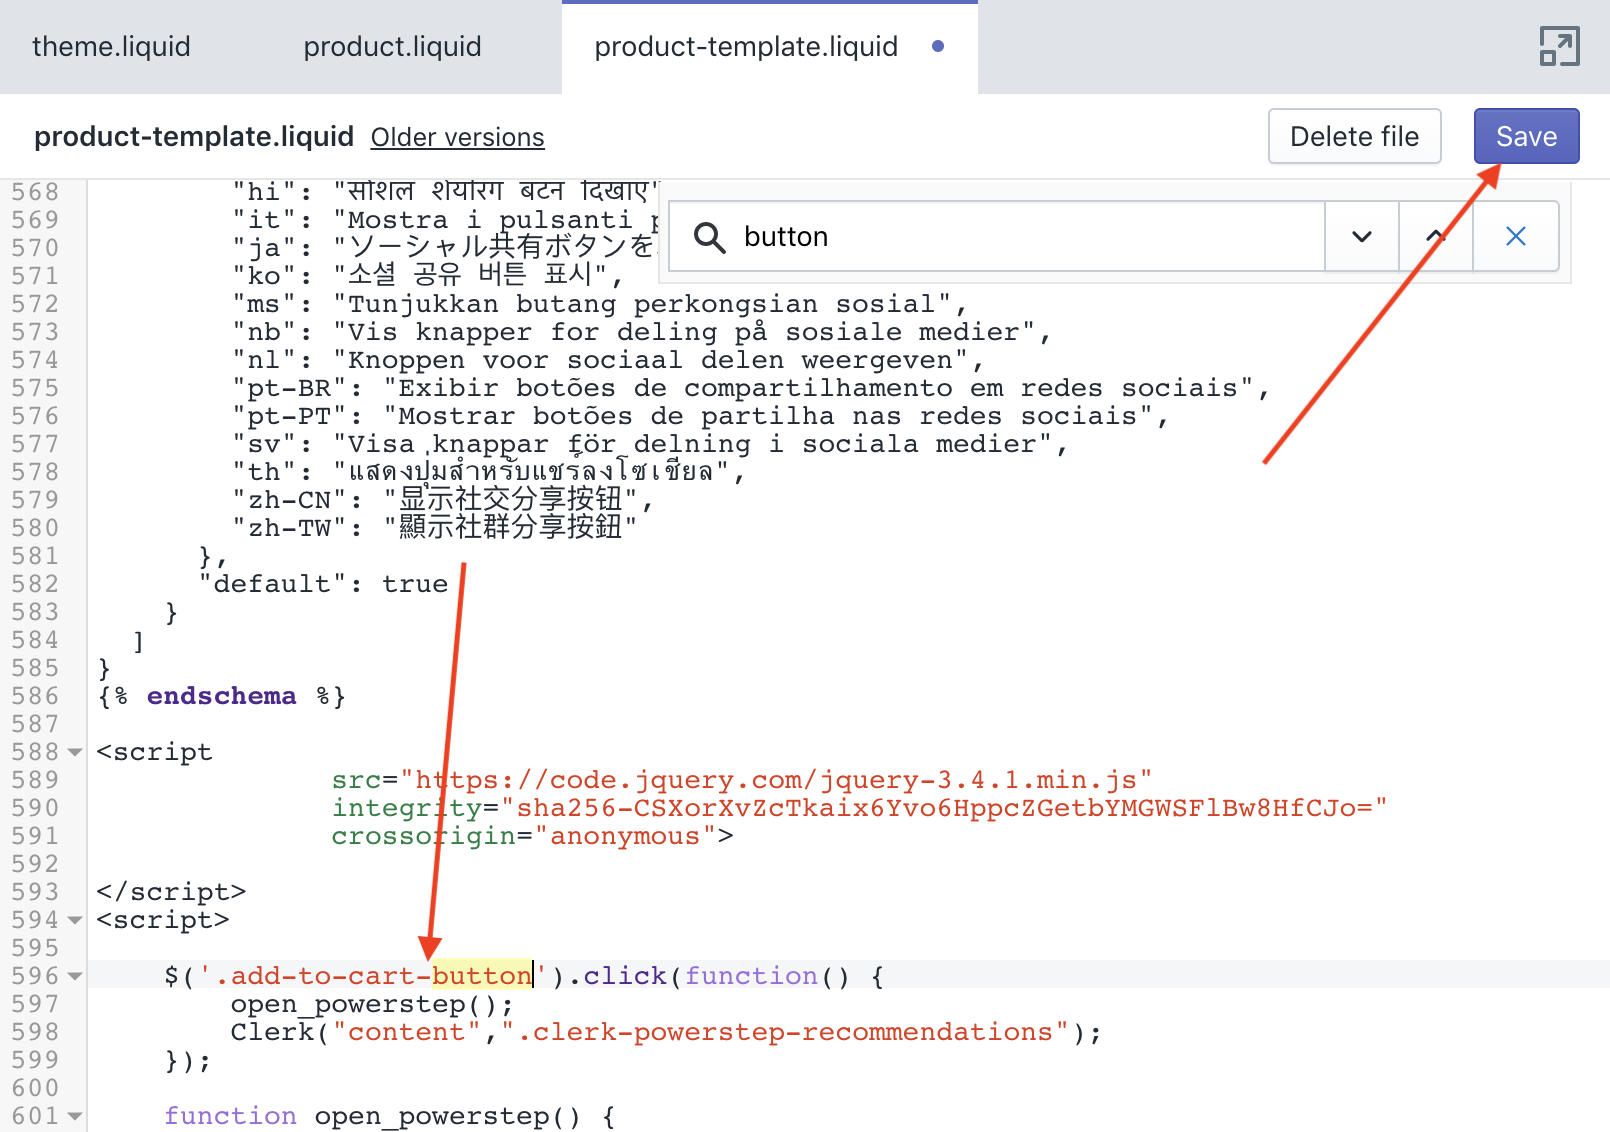
3. Copiare il seguente codice in fondo al file:
<script>
    document.addEventListener('DOMContentLoaded', function(){
    const buyBtn = (document.querySelector('[data-add-to-cart]')) ? '[data-add-to-cart]' : '.product-form__submit';
    const prodPage = (document.querySelector('[data-section-id="product-template"] > div')) ? '[data-section-id="product-template"] > div' : '.product-section > section';
    const clerkPowerstep = document.getElementById('clerk_powerstep');

    document.querySelector(buyBtn).addEventListener('click', open_powerstep);

    function open_powerstep() {
        Clerk('content', '.clerk-powerstep-recommendations');

        clerkPowerstep.style.display = 'block';
        clerkPowerstep.style.padding = '5px 15px';
        clerkPowerstep.classList.toggle('animate_top');

        setTimeout(function(){

            document.querySelector(prodPage).addEventListener('click', close_powerstep);
            document.getElementsByTagName('header')[0].addEventListener( 'click', close_powerstep );

        }, 500);
    }

    });

    function close_powerstep() {
        var clerkPowerstep = document.getElementById('clerk_powerstep');
        //window.location.reload();
        clerkPowerstep.style.display = 'none';
    }
</script>
<style>
    @keyframes top {
        from {
        top: -100%;
        }
        to {
        top: 50%;
        }
    }

    .animate_top {
        animation: top 100 ease-in-out;
        top: 50% !important;
    }
    #clerk_powerstep {
        width: clamp(45ch, 50%, 100ch) !important;
        left: 50% !important;
        transform: translate(-50%, -50%) !important;
        margin: 0px !important;
        border: 3px solid #888 !important;
        border-radius: 2px !important;
        position: fixed;
        top: -100%;
        z-index: 999;
        display: none;
        background-color: white;
        box-shadow: 0px 8px 40px 0px rgba(0,0,60,0.15);
        transition-property: all;
        transition-duration: 1s;
        transition-timing-function: ease-in-out;
    }

    #clerk_powerstep h2 {
        text-align: center;
    }

    .clerk_powerstep_image {
        text-align: center;
        display: flex;
        justify-content: center;
        flex-direction: column;
    }

    .clerk_powerstep_image img {
        object-fit: contain;
        max-height: 240px;
        height: 25vh;
        margin: auto;
    }

    .clerk-popup-close {
        position: absolute;
        right: 5px;
        top: 5px;
        cursor: pointer;
        font-family: Arial;
        font-size: 32px;
        line-height: 1;
        color: gray;
        z-index: 2;
        padding: 3px;
    }
    .clerk_powerstep_header {
        position: relative;
    }

    .clerk_powerstep_wrap {
        position: relative;
        overflow-y: scroll;
        overflow-y: overlay;
        max-height: 80vh;
        -ms-overflow-style: none;  /* IE and Edge */
        scrollbar-width: none;  /* Firefox */
    }
    .clerk_powerstep_wrap::-webkit-scrollbar {
      display: none;
    }
    .clerk_powerstep_actions {
        display: flex;
        flex-direction: row;
        justify-content: space-around;
    }

    .clerk_powerstep_actions button {
        margin: 0 0 10px 0;
    }

    @media only screen and (max-width: 800px){
        .clerk_powerstep_actions {
            display: flex;
            flex-direction: column;
            justify-content: center;
            align-items: center;
        }
    }
</style>

<div style="display: none;" id="clerk_powerstep">
    <span class="clerk-popup-close" onclick="close_powerstep()">✕</span>
    <div class="clerk_powerstep_wrap">
        <div class="clerk_powerstep_header">
        <h2>You added <b><u>{{ product.title }}</u></b> to your cart.</h2>

        </div>

        <div class="clerk_powerstep_image">
        <img src="{{ product.images[0].src | img_url: 'x150', scale: 2 }}" alt="You added <b><u>{{ product.title }}</u></b> to your cart.">
        </div>

        <div class="clerk_powerstep_actions">
            <button class="powerstep_continue button btn" onclick="location.href='{{ routes.cart_url }}';">Continue to Checkout</button>
            <button class="powerstep_close button btn" onclick="close_powerstep();">Continue Shopping</button>
        </div>
        <br>
        <span class="clerk-powerstep-recommendations"
            data-template="@power-step-others-also-bought"
            data-products="[{{product.id}}]">
        </span>
        <span class="clerk-powerstep-recommendations"
            data-template="@power-step-visitor-complementary"
            data-products="[{{product.id}}]"
        ></span>
        <span class="clerk-powerstep-recommendations"
            data-template="@power-step-popular"
            data-products="[{{product.id}}]"
        ></span>
        <span class="clerk-powerstep-recommendations"
            data-template="@power-step-popular-on-sale"
            data-products="[{{product.id}}]"
        ></span>
    </div>
</div>

4. La pagina Powerstep dovrebbe ora apparire quando un prodotto viene aggiunto al carrello.
Regolazione del tipo di carrello nel tema Shopify
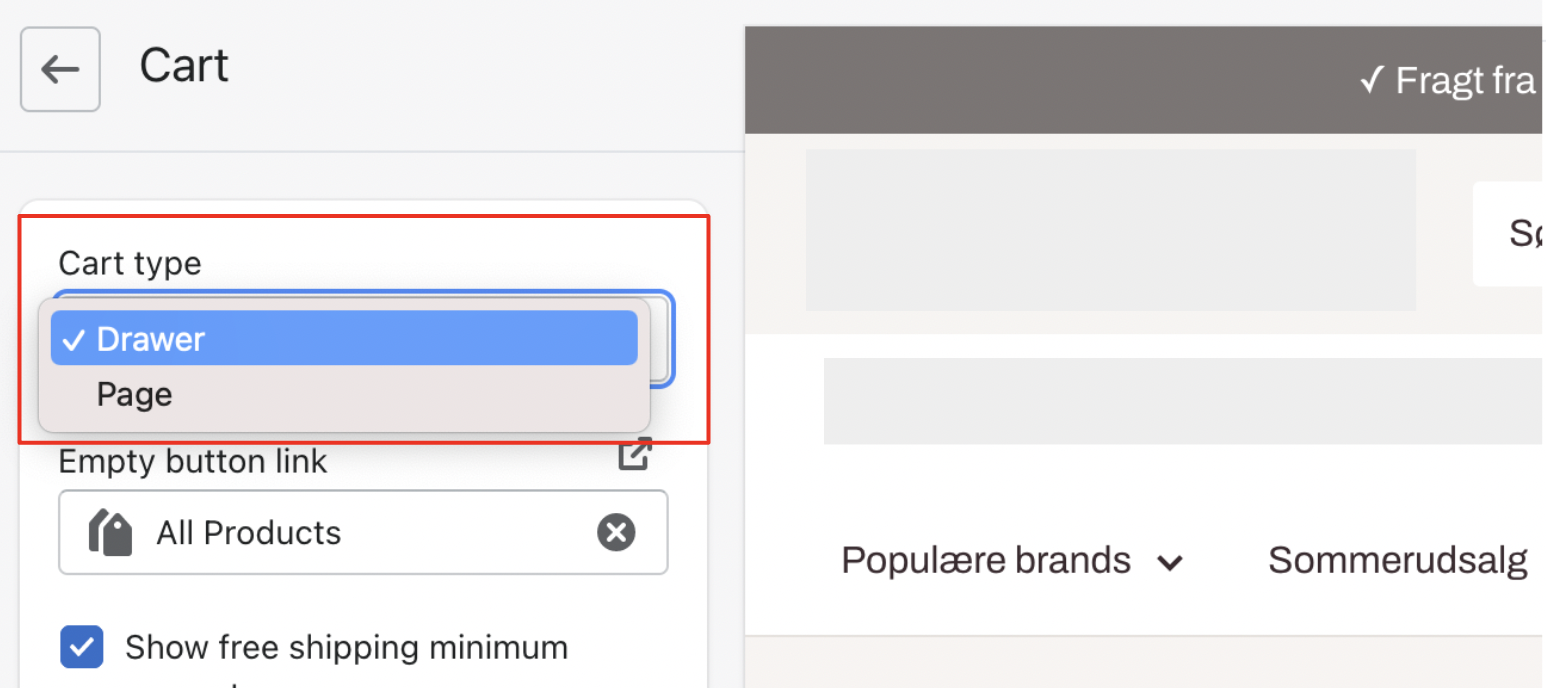
Per modificare il tipo di carrello, seguire il percorso Tema > Personalizza > Impostazioni del tema > Carrello > Tipo di carrello nel backend di Shopify.
Nel menu a tendina Tipo di carrello, assicurarsi di selezionare qualsiasi opzione ad eccezione di “Pagina “. Le opzioni che appaiono nel menu a tendina dipendono dal tema del vostro negozio web e possono includere “Cassetto” o “Popup”, tra le altre.
La scelta di un’opzione diversa da “Pagina” serve a evitare il ricaricamento della pagina con l’attivazione del Powerstep.
Dopo aver creato questi due file, aggiunto le due righe al file del tema e aggiornato il tema del carrello, il Powerstep dovrebbe apparire.
Cosa succede se il mio powerstep non appare?
Se il powerstep non appare, è probabile che il pulsante Aggiungi al carrello abbia una classe o un ID diverso. Ispezionare il pulsante e inserire nel codice la classe/id della classe .product-form__cart-submit.