Converting Clerk.js 1 Designs to Clerk.js 2
Platforms:
Since Clerk.js 2 uses the more flexible template language Liquid, you need to convert the Designs into this language.
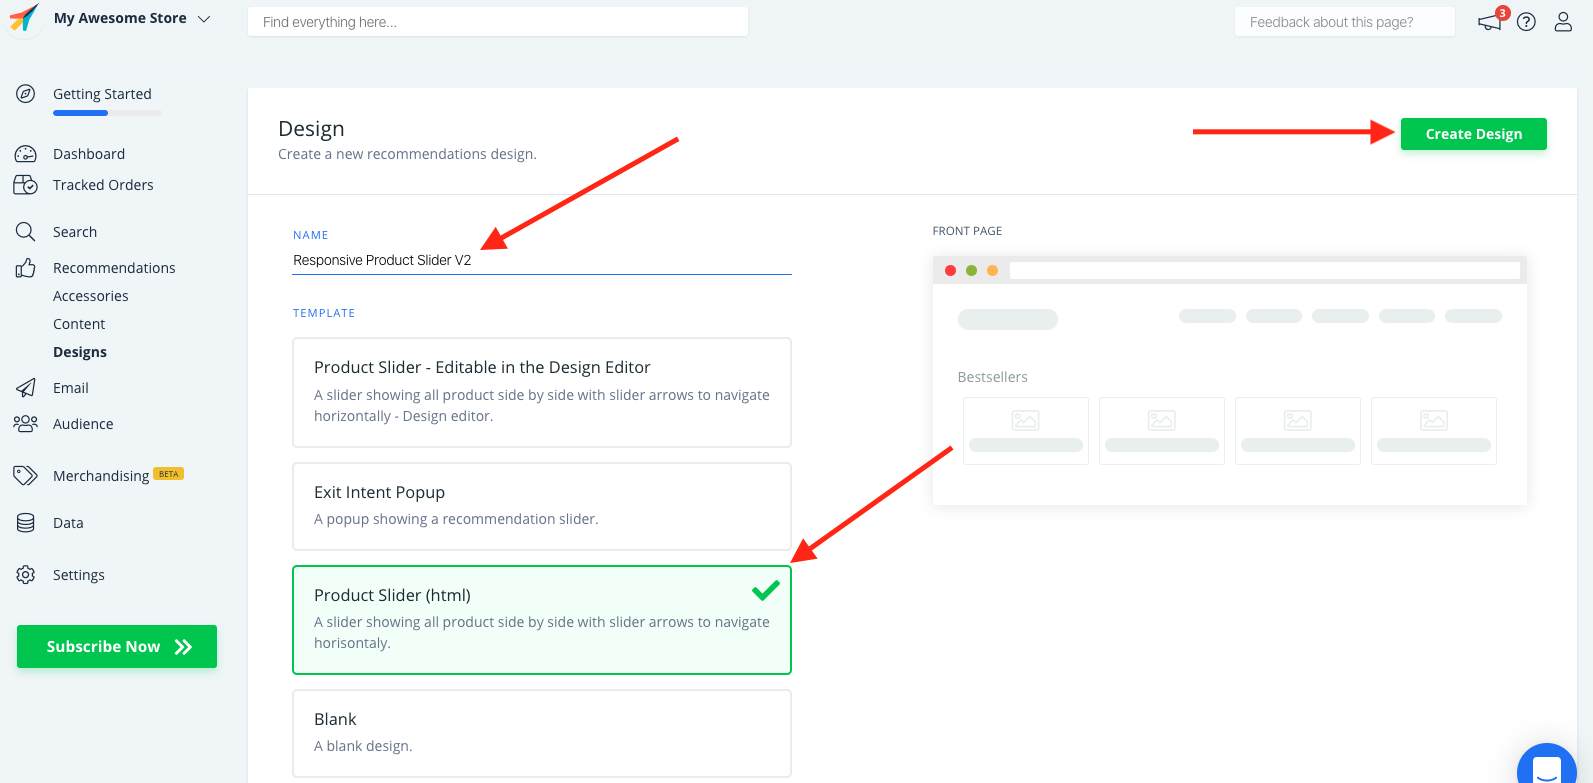
1. Start by going to my.clerk.io -> Recommendations / Search -> Designs and click New Design:

2. Select the design type, the type of content and Name the design (we recommend adding " V2" so its obvious that you are using Clerk.js2). Then click Create Design.
3. Choose as Template the Product Slider (HTML) for the Recommendations, if you are working on the Search designs you will have to pick Instant Search Dropdown (HTML) or Search Page (HTML).
4. When you are done, click Create Design
5. This will give you the HTML and CSS code that you can manually overwrite:

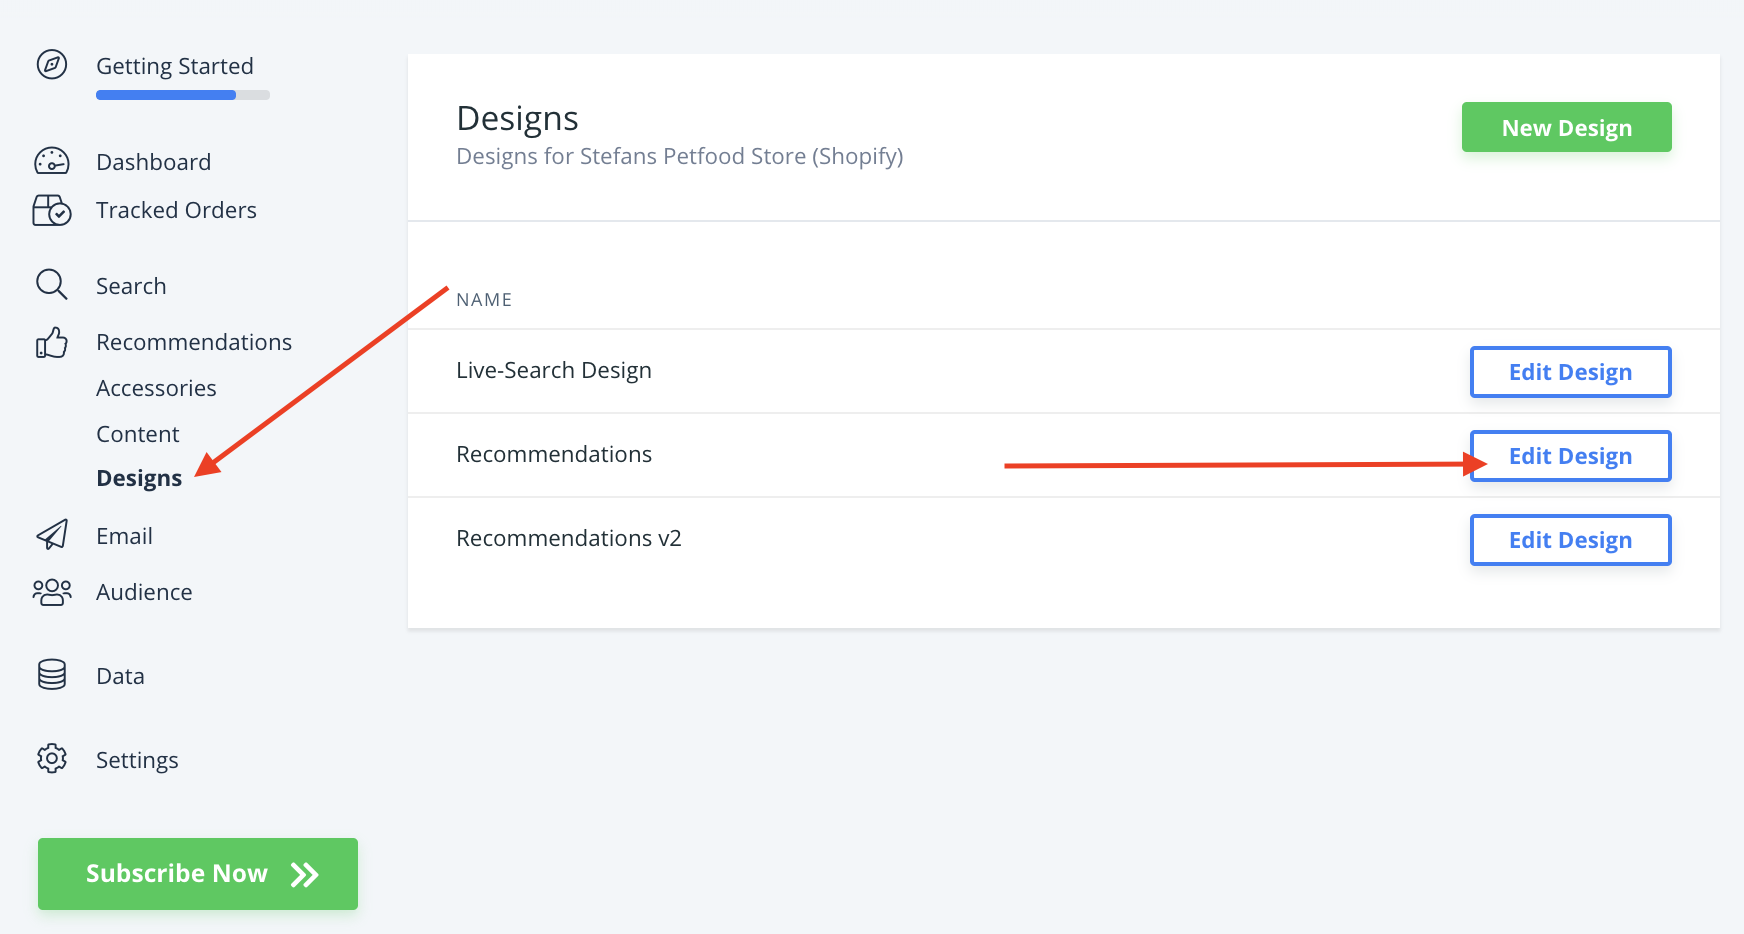
6. Go back to Recommendations / Search -> Designs and click Edit Design for your old Clerk.js 1 Design.
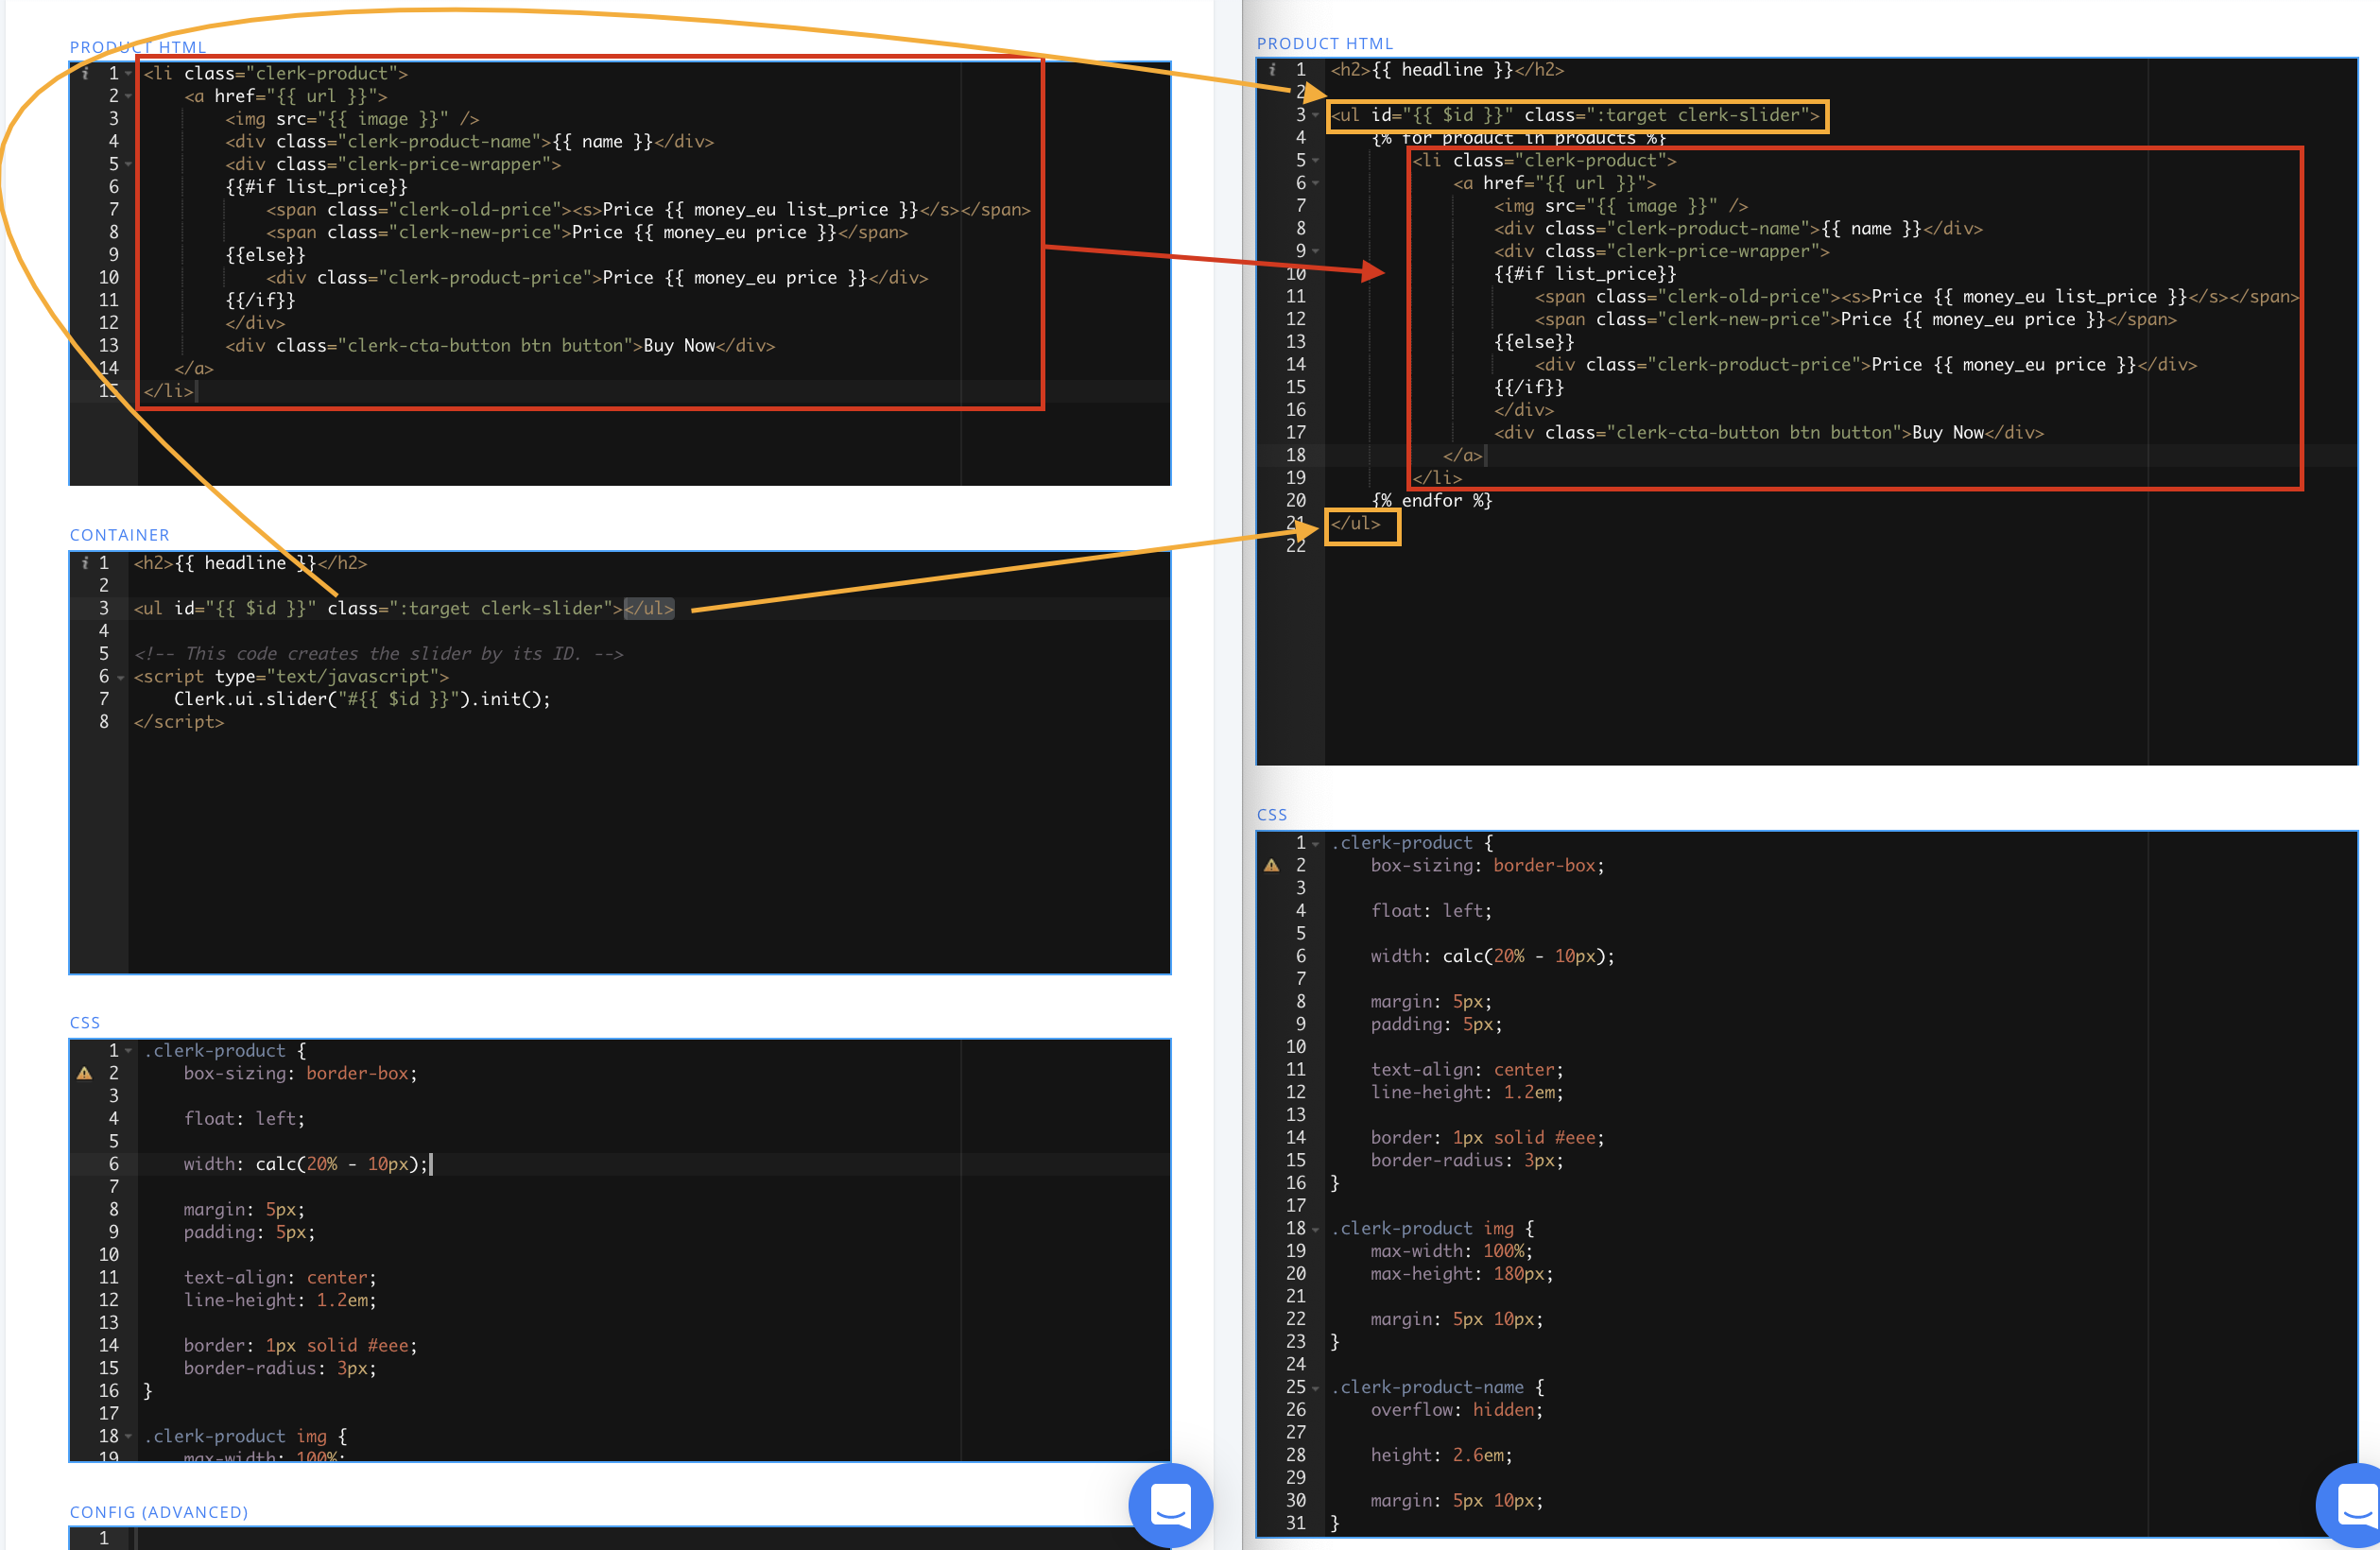
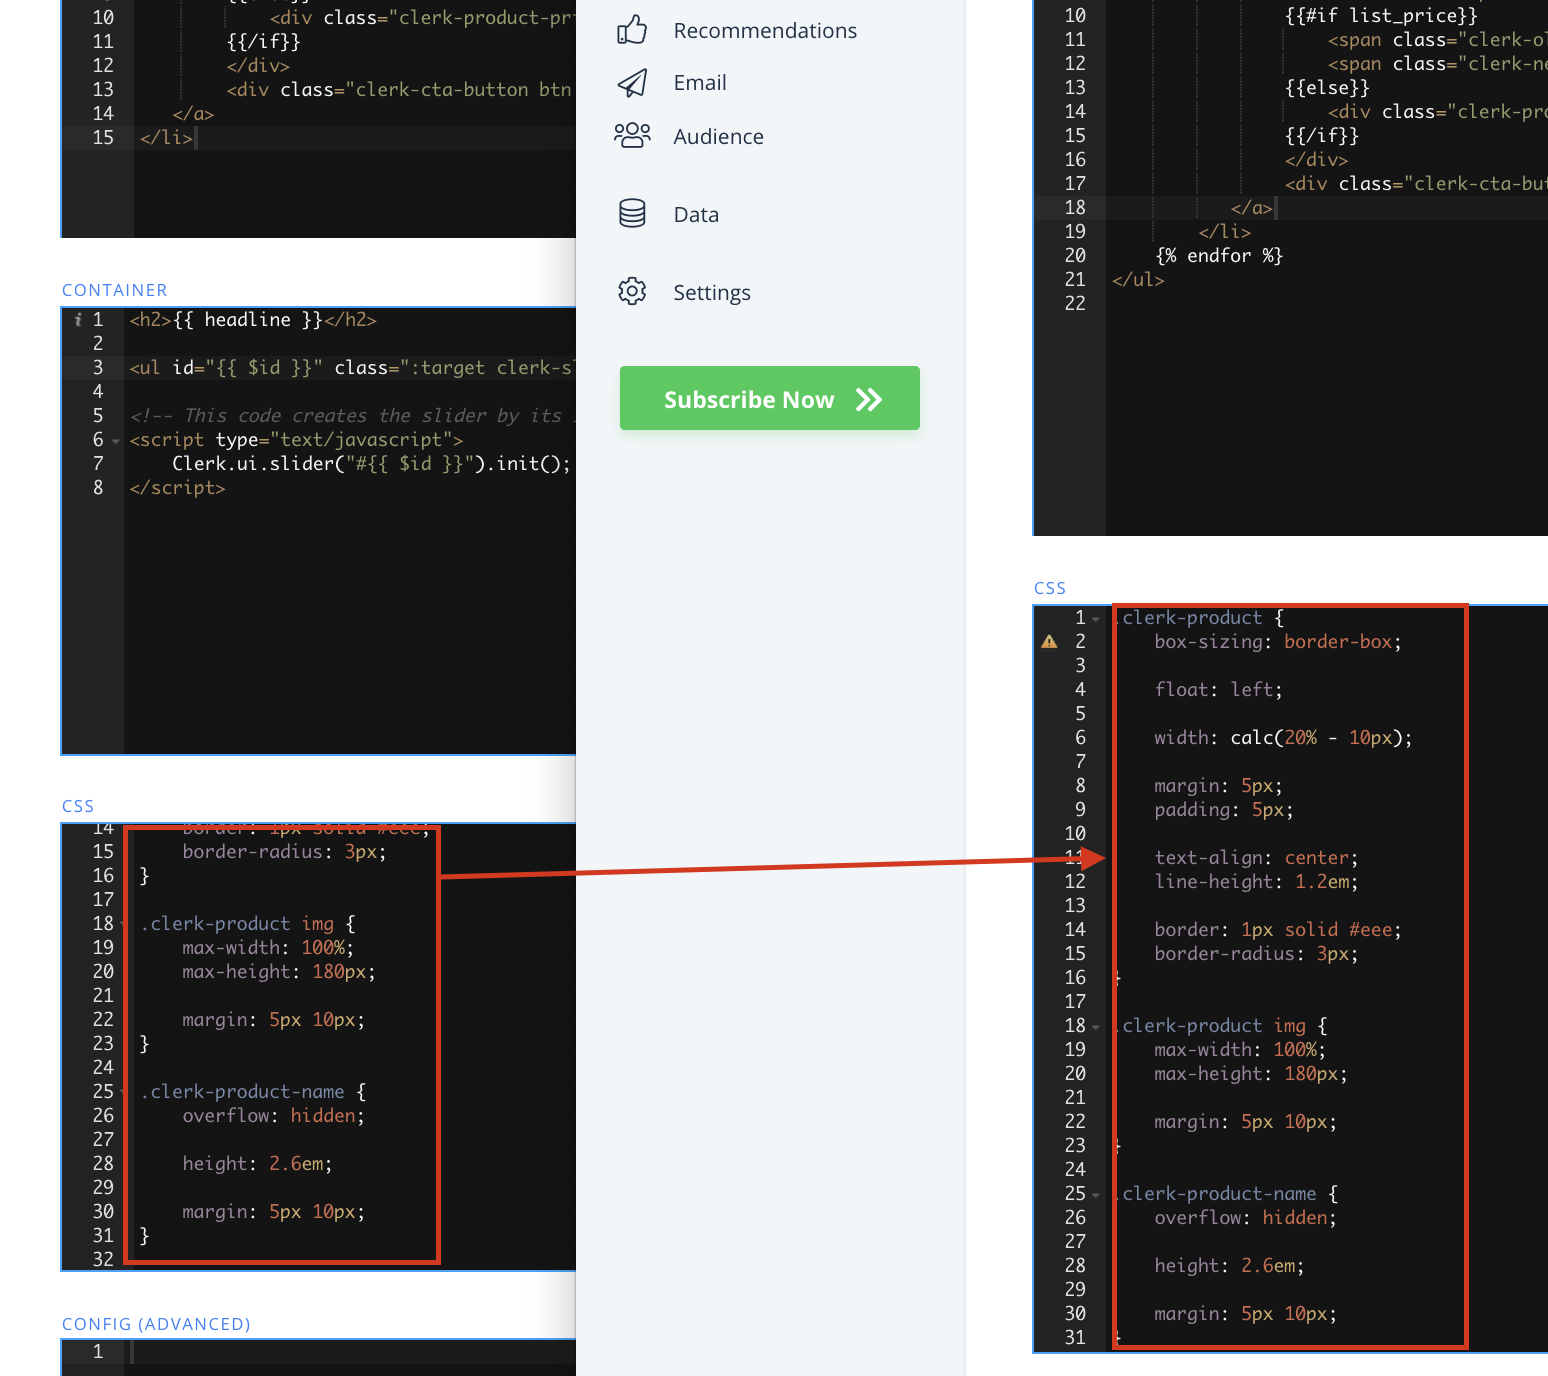
7. Now you need to copy over the old Clerk.js 1 Design to your new Clerk.js 2 Design. You will notice that there is no Container Code in your new one. This is because Liquid uses for loops to render all the products. Copy your old Product HTML inside the for-loop, and you old Container Code around it:
8. Lastly, copy over your CSS as well:
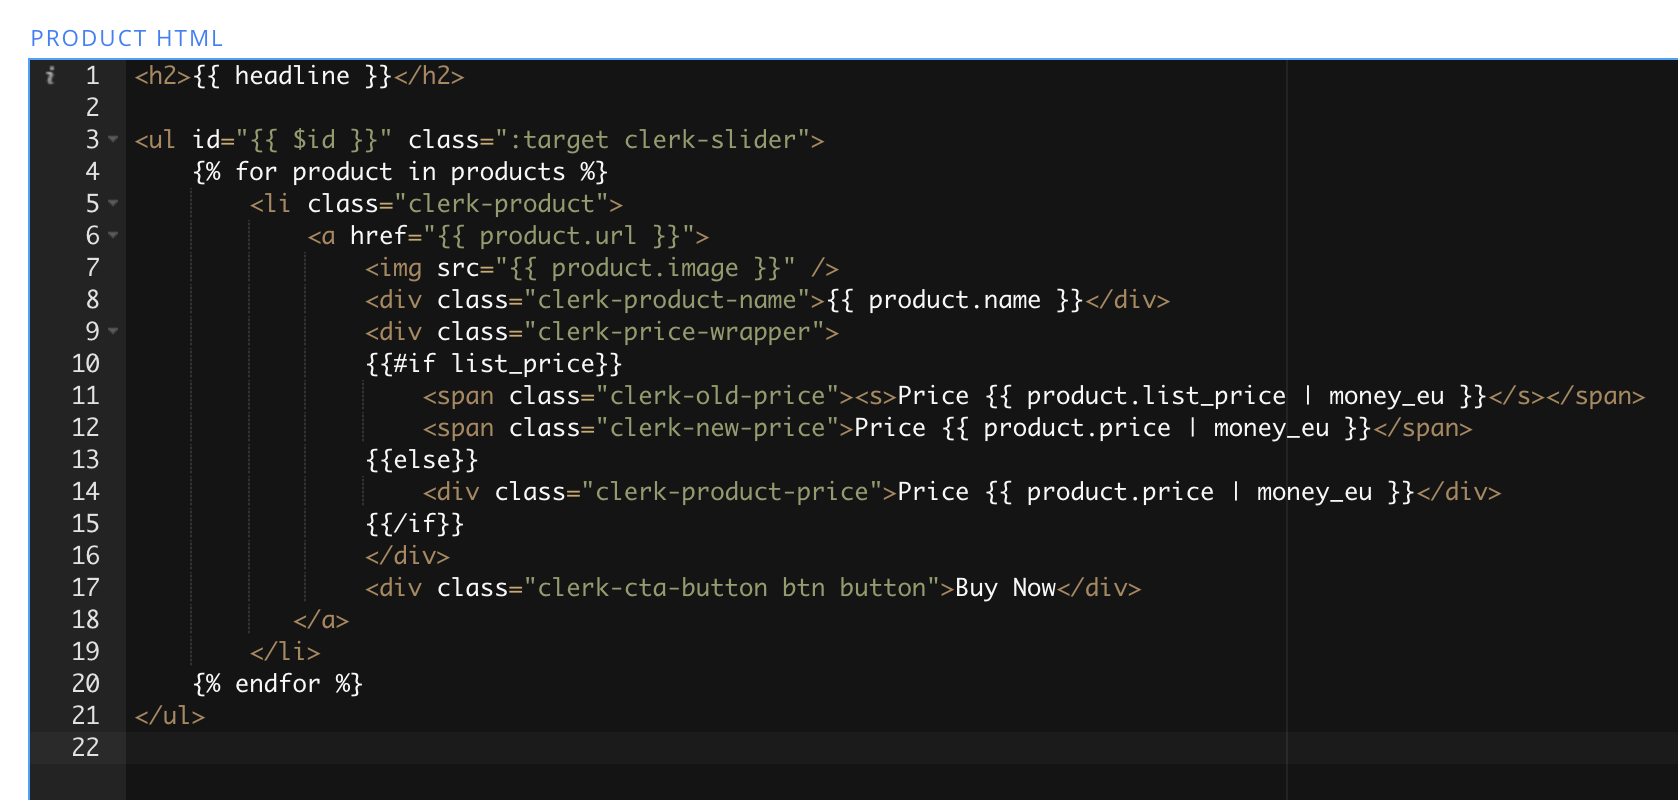
9. Now you need to convert the Design into Liquids syntax. The main difference is that the old Designs used the syntax
{% raw %} {{ formatter attribute }} {% endraw %}
while v2’s syntax is
{% raw %} {{ product.attribute \| formatter }} {% endraw %}
10. Go through all of your attributes and change them to the new format:
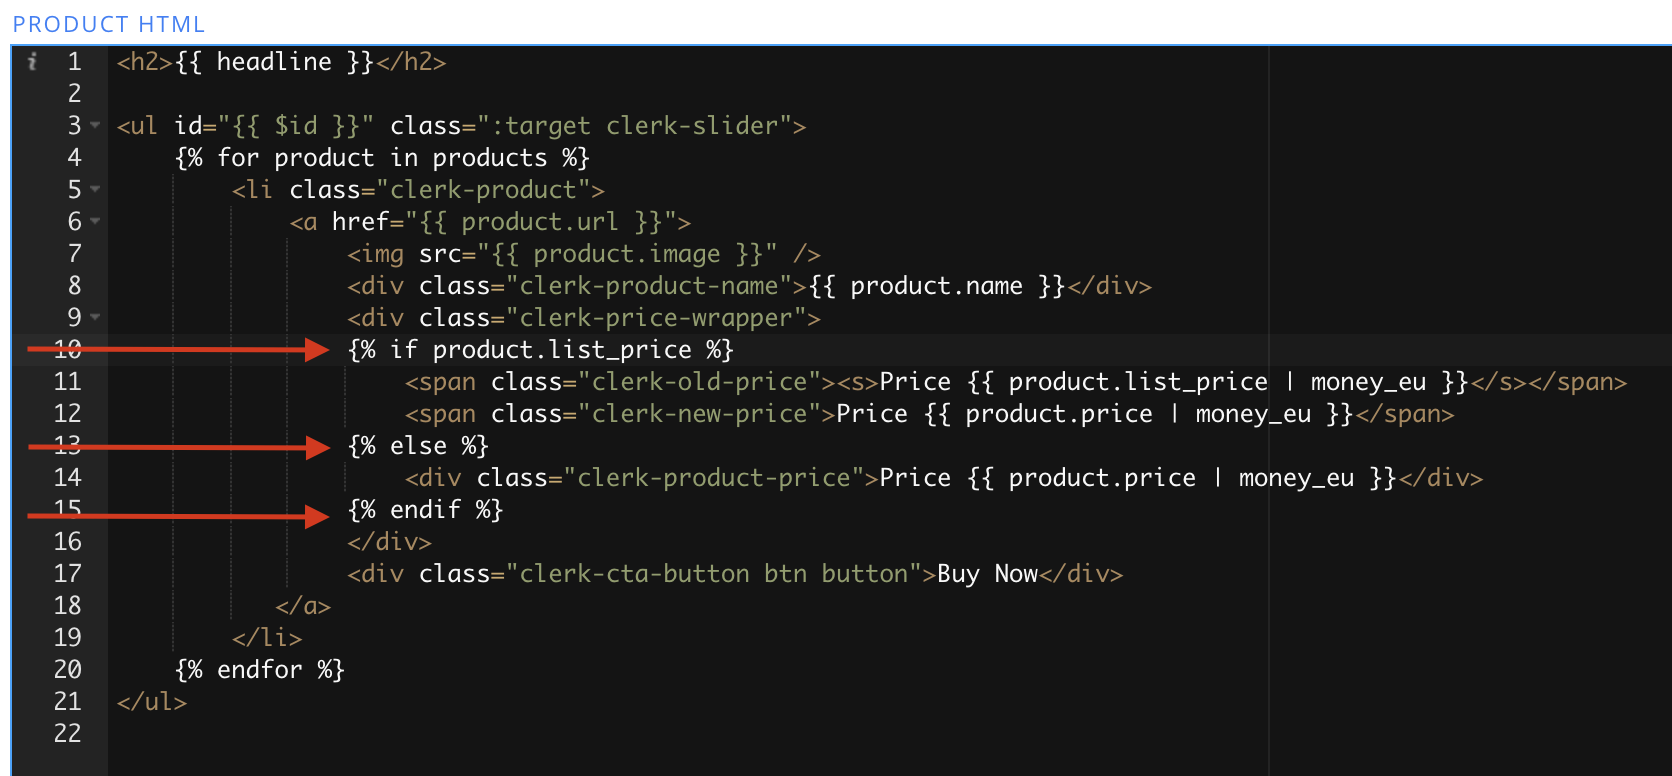
11. If you are using {% raw %} {{#if}} or {{#is}} {% endraw %} statements, these need to be converted as well, to the syntax {% raw %} {% if product.attribute %} {% endraw %} Do something {% raw %} {%else%} {% endraw %} Do something else {% raw %} {% endif %} {% endraw %}:
12. Now click Update Design to save the changes.
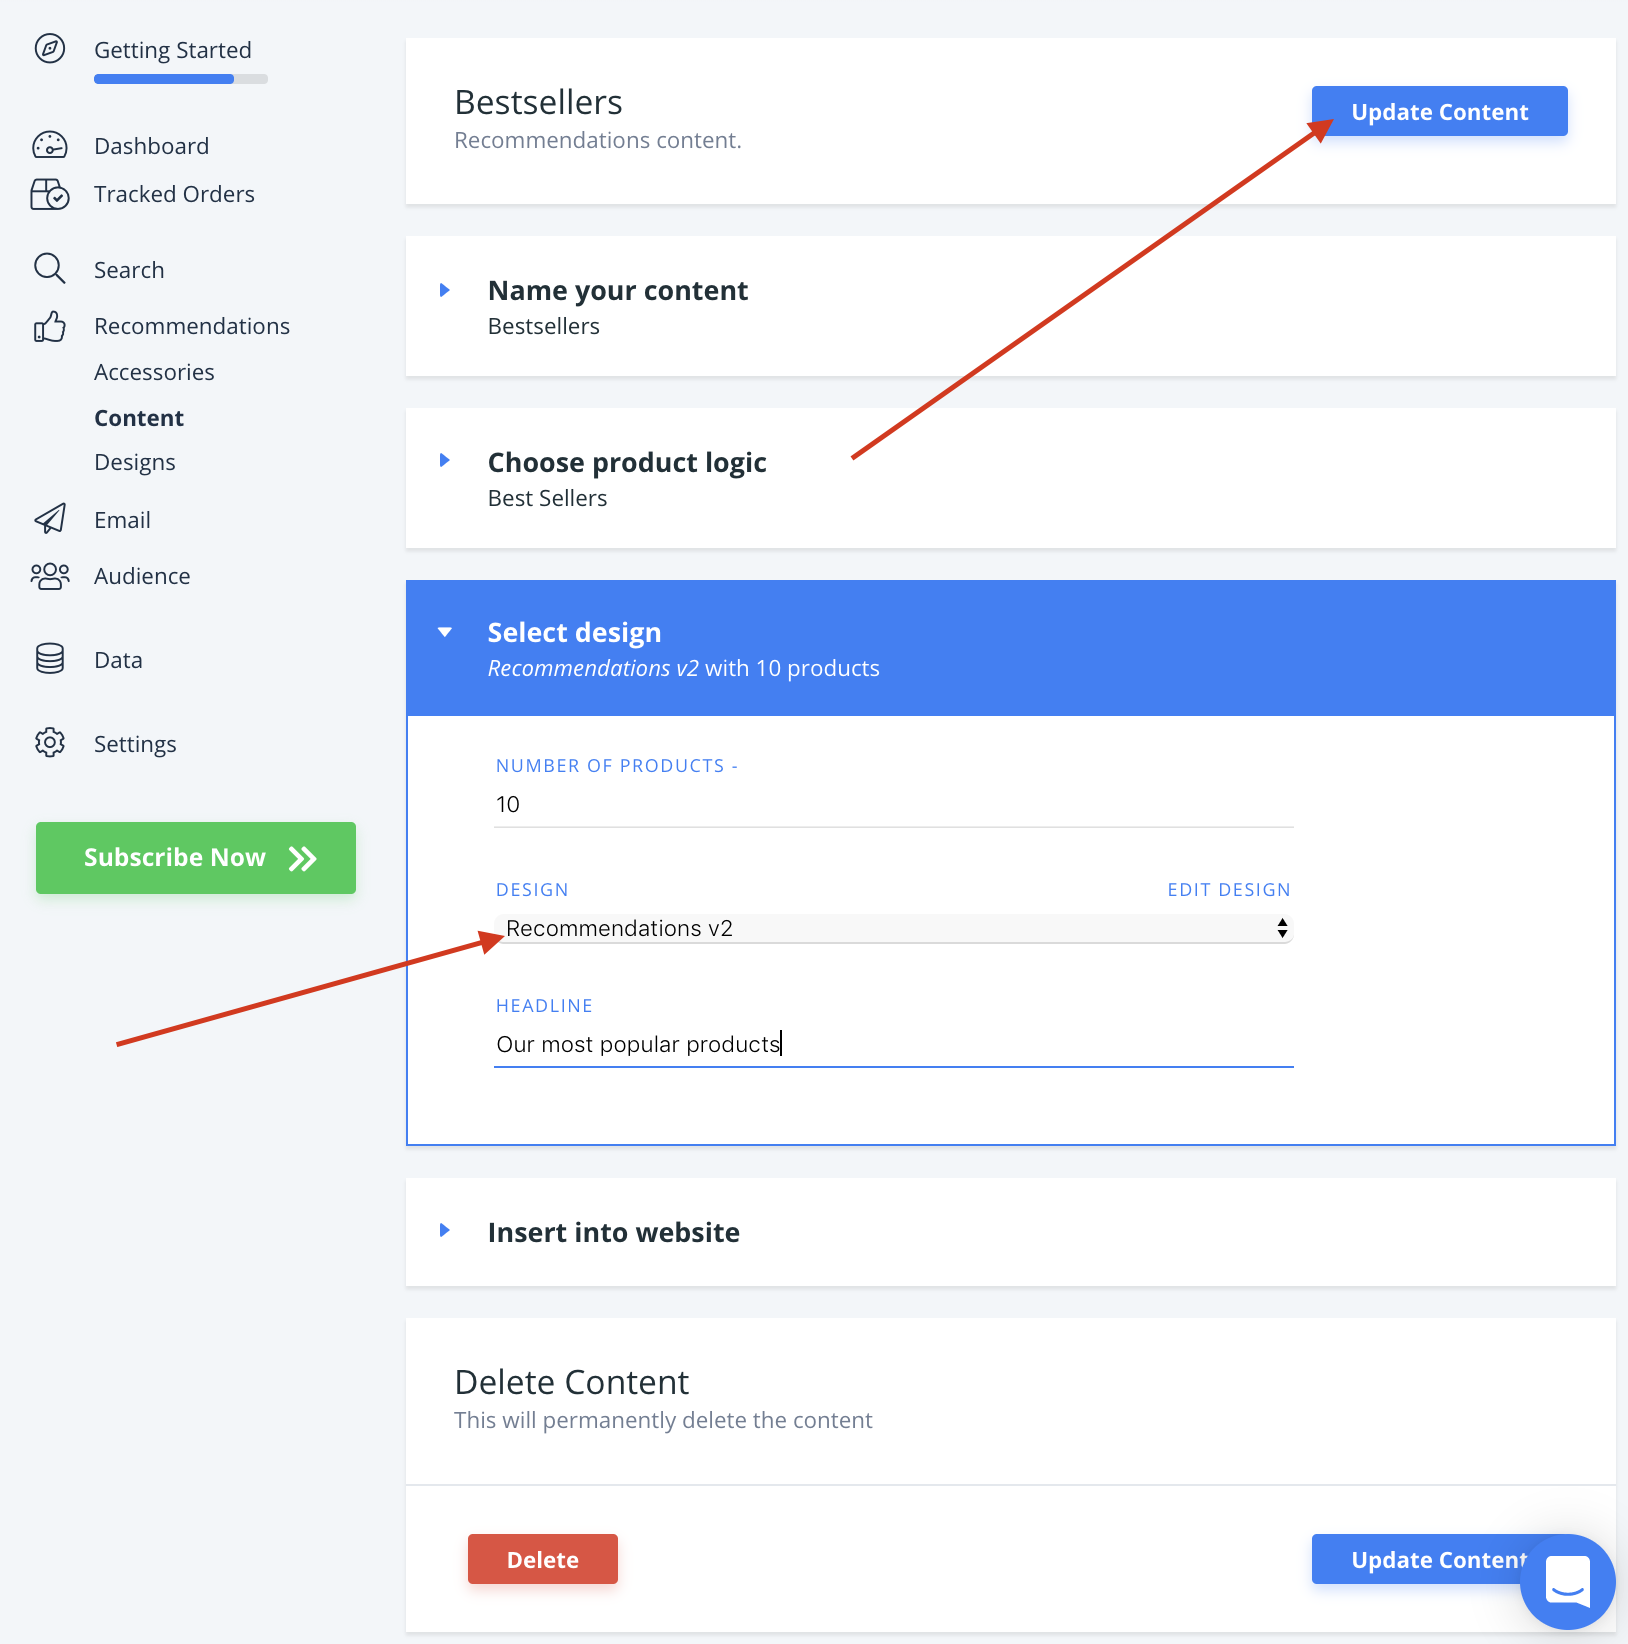
13. Lastly, go to Recommendations / Search -> Content and change your Clerk.io Content to use your new Design.
14. Click Update Content. This will temporarily cause them to not show up on your webshop, until you are done with Step 2. Choose the new Design for all Content that should be updated.