Using Clerk.io with multiple domains in JTL
Platforms:
The easiest way to implement Clerk.io in multiple domains in standard setups is by creating a separate Store for each domain in my.clerk.io, and then syncing them with each of your JTL language domains.
This way, you can separate products, sales, currencies etc. to keep track of each domain.
Start by creating your main Store and follow the Setup Guide to connect your Store to Clerk.io, and choose the Recommendations and/or Search Results you that you want to display on your webshop.
When you are done with the initial setup, go back to the start page of my.clerk.io (by clicking the Clerk.io logo in the upper left side corner of the side-menu) and then click "+ Add new store" the last option of the scroll down list (generally under you the existing store(s) and your company name):

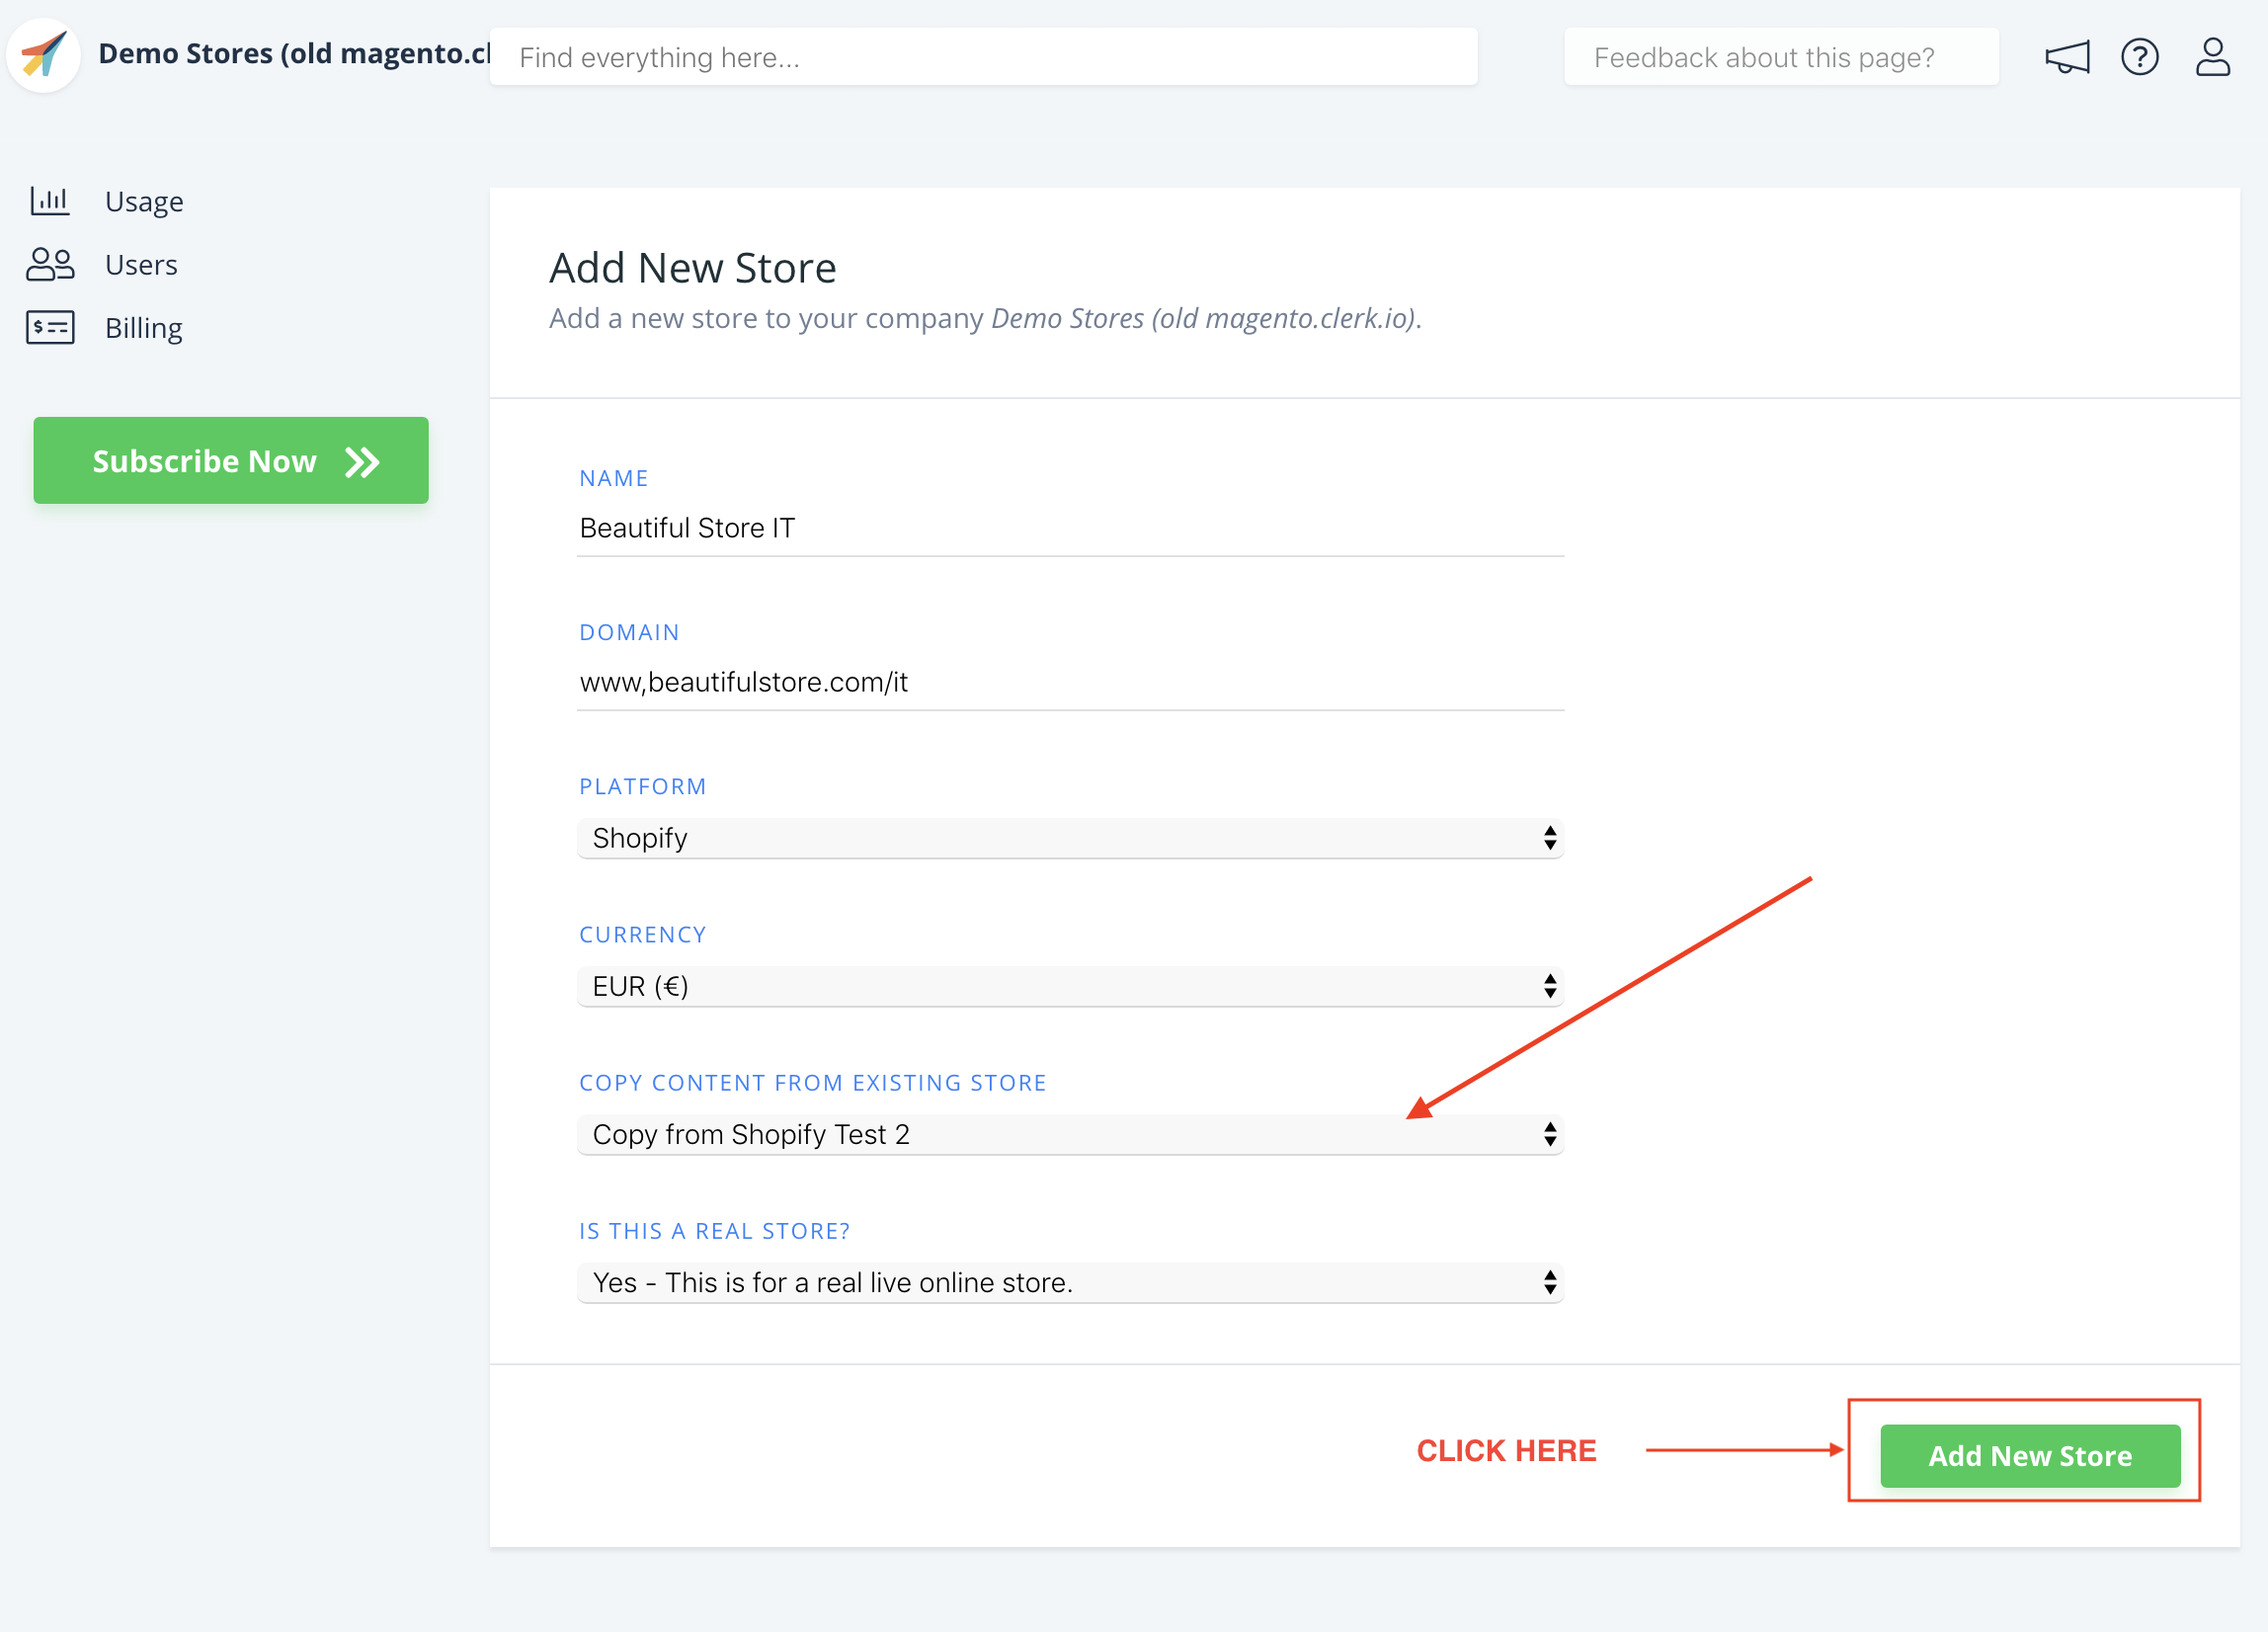
3. On the Add New Store page, click Advanced to see all settings.

4. Fill in the details of your domain, and choose your main Store from the
Copy Content From Existing Store dropdown, then click Add Store.
This will carry over the Content and Designs from your main Store.
5. Now you can follow the Setup Guide again, to activate Clerk.io by clicking on Getting Started, to Sync Data for the new domain.
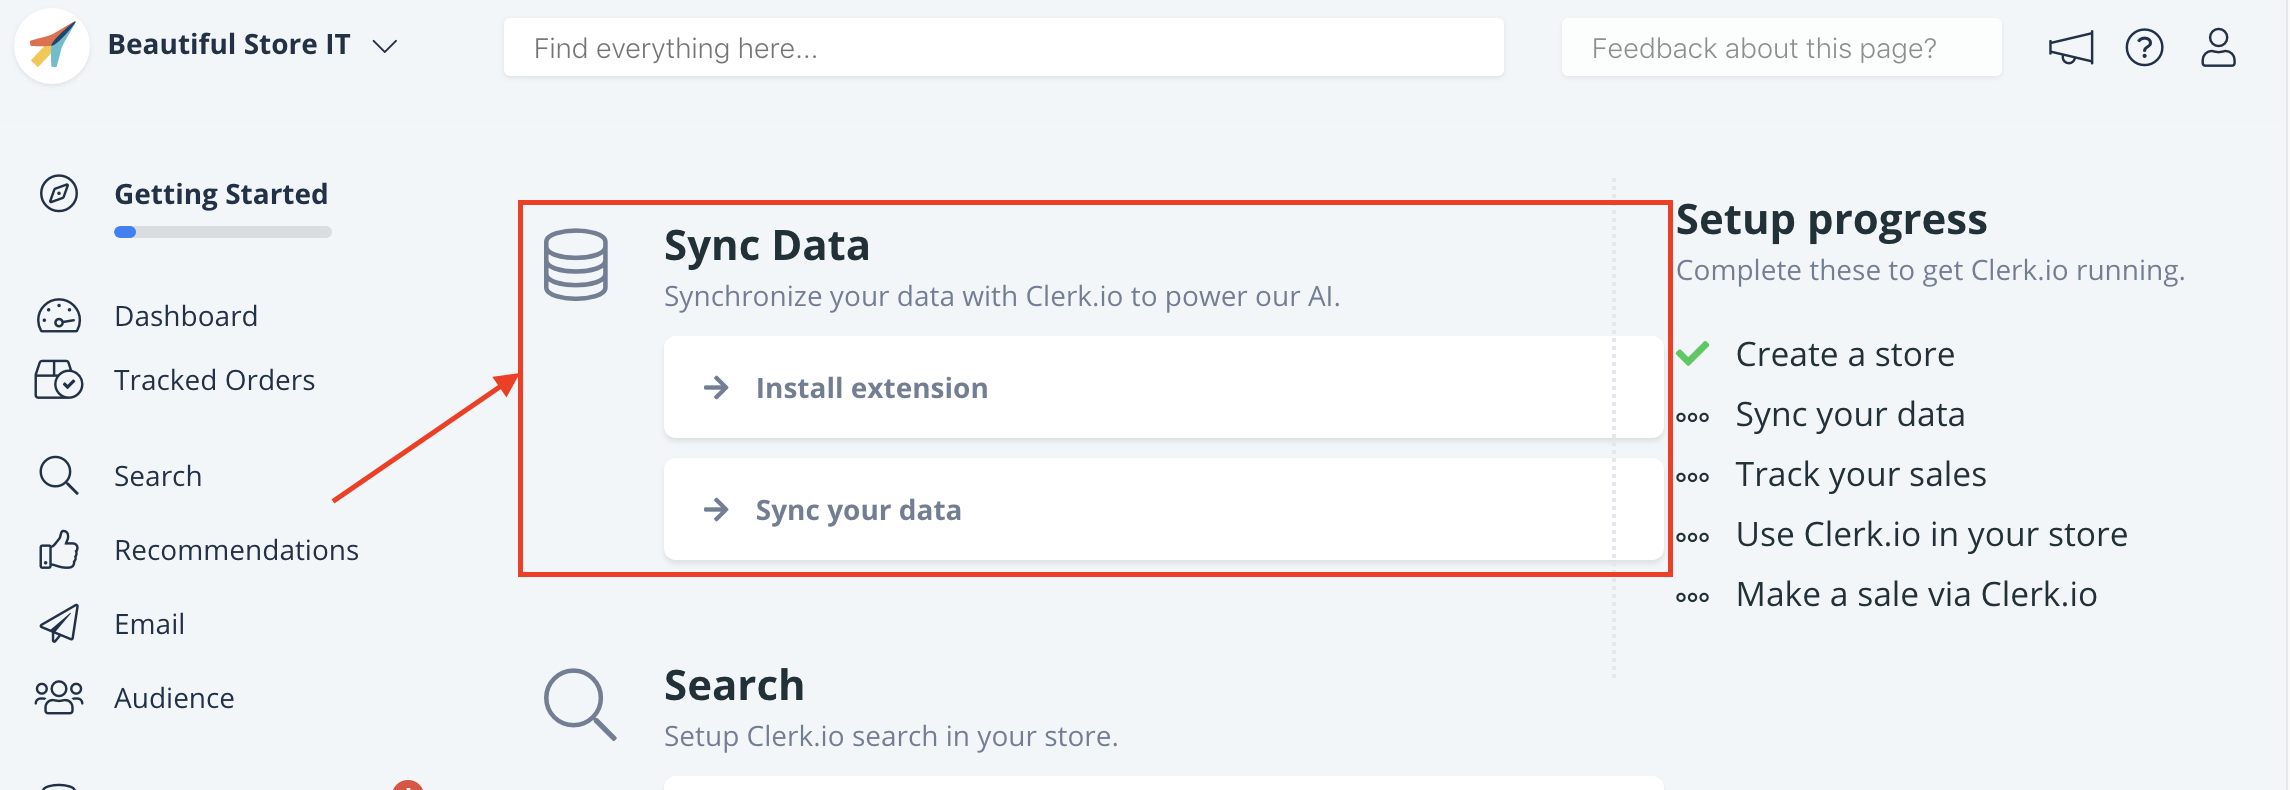
6. This will allow you to sync your domain with your Store at my.clerk.io through
the Setup Guide.
7. When Data Sync has finished, your domain is ready and using the same
setup as your main Store.
8. Repeat this process for every one of your JTL language domains,
Remember to translate Headlines, in Content-> Edit -> Select Design to the right language as well.