Connecting your Lightspeed Store
Platforms:
After following these simple steps you will be able to see your Live Demo, which gives you a personal overview of how Clerk.io will work on your webshop, before setting up the rest of the system.
1. Add Store
After logging in to my.clerk.io, the first thing you need to do is add your store:
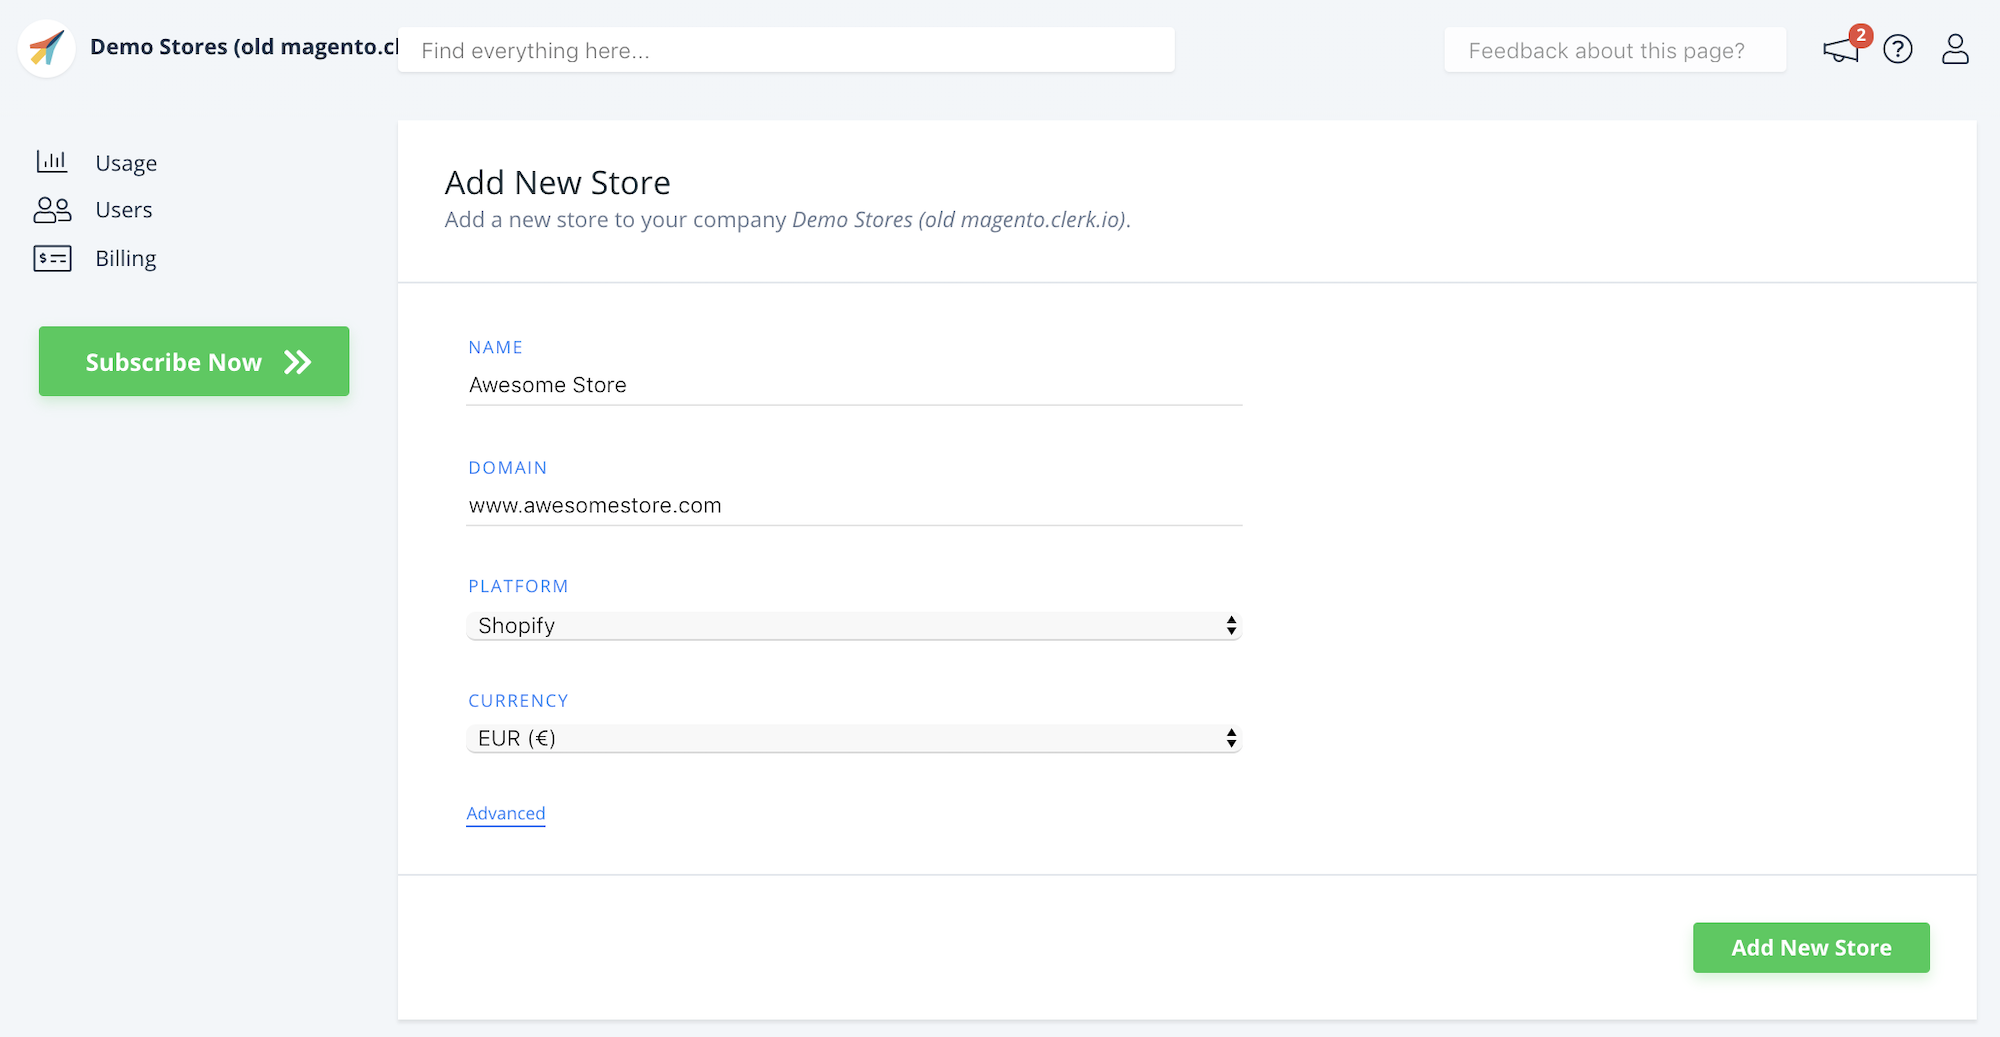
Write the Name and Domain of your webshop
Choose Lightspeed as the Platform and choose your Currency.
Click Add Store.
2. Configure the Lightspeed Connection
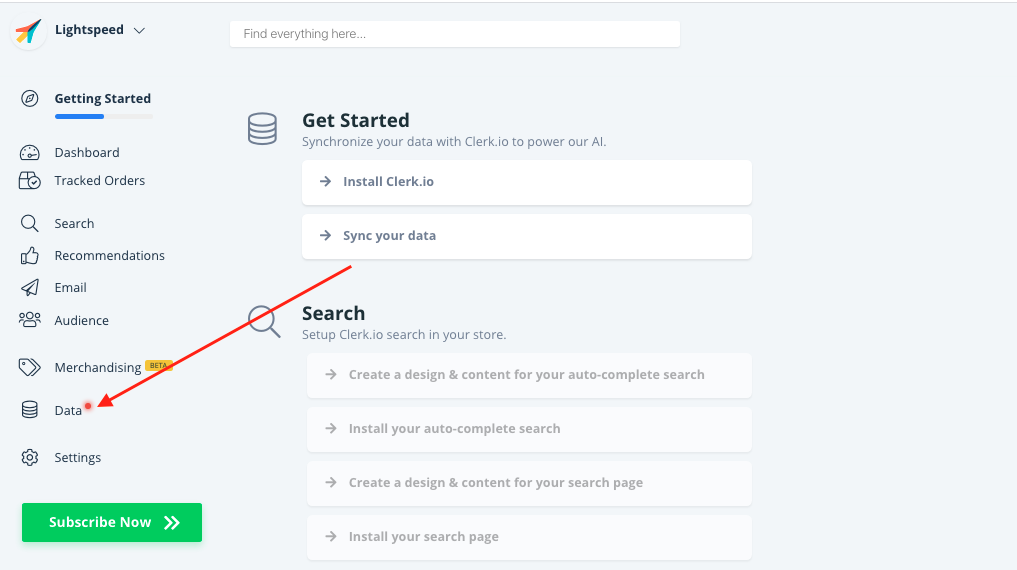
1. From the main menu click on Data:
2. Under Sync Method, choose Lightspeed:
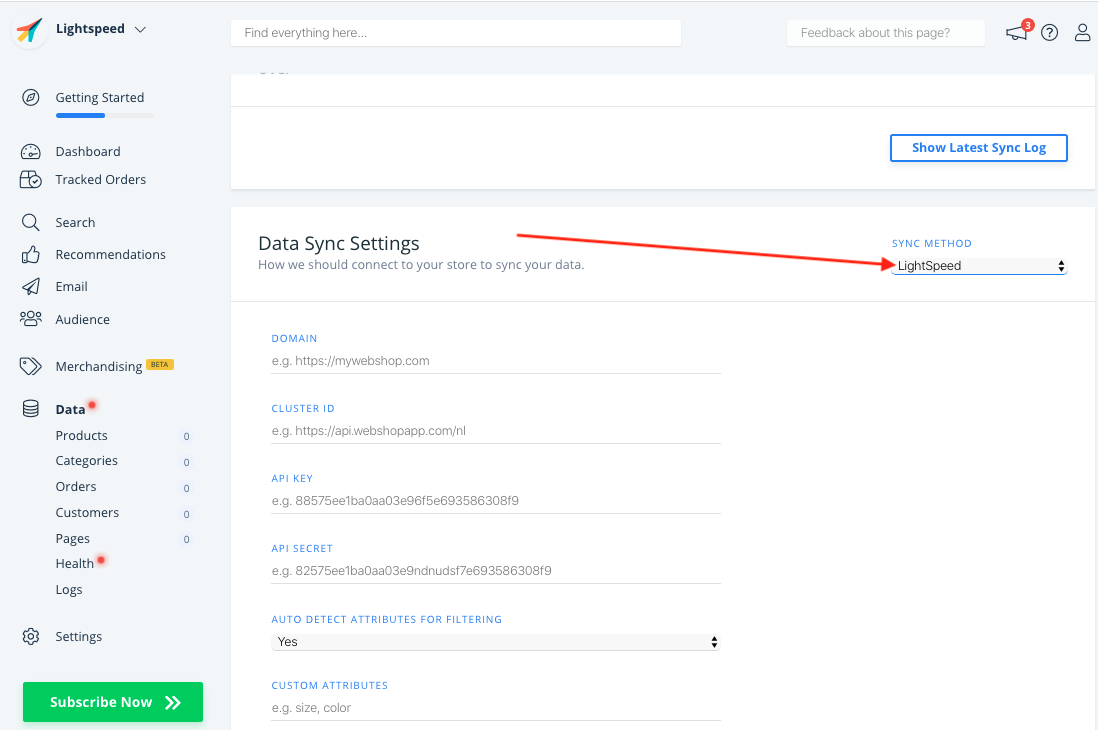
3. Now you need to fill in the information for your Lightspeed account.
Domain
Your webshops URL, for example https://www.beautifulshop.nl/
Cluster ID:
Lightspeed works with Server Clusters depending on where your webshop is located.
Often the cluster is https://api.webshopapp.com/COUNTRY_CODE
For a dutch client, the Cluster ID is https://api.webshopapp.com/nl
API Key / API Secret
The API Key and API Secret are generated by Lightspeed on demand. To get them, simply reach out to Lightspeeds support and they will help you within the day.
4. When you have all the necessary info, insert it into the importer fields:
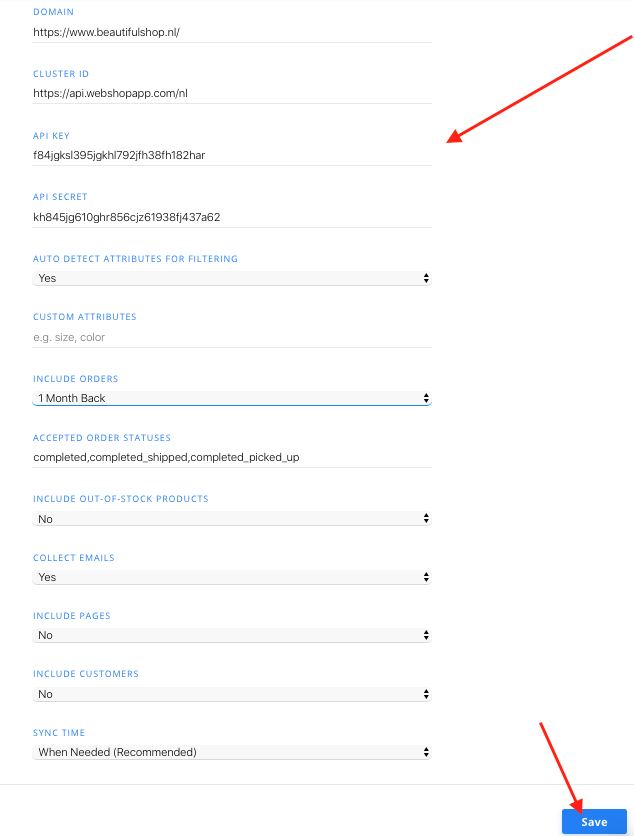
4. Click Save in the bottom right corner
3. Sync your store
1. On the same page, scroll to the top and click Start New Sync
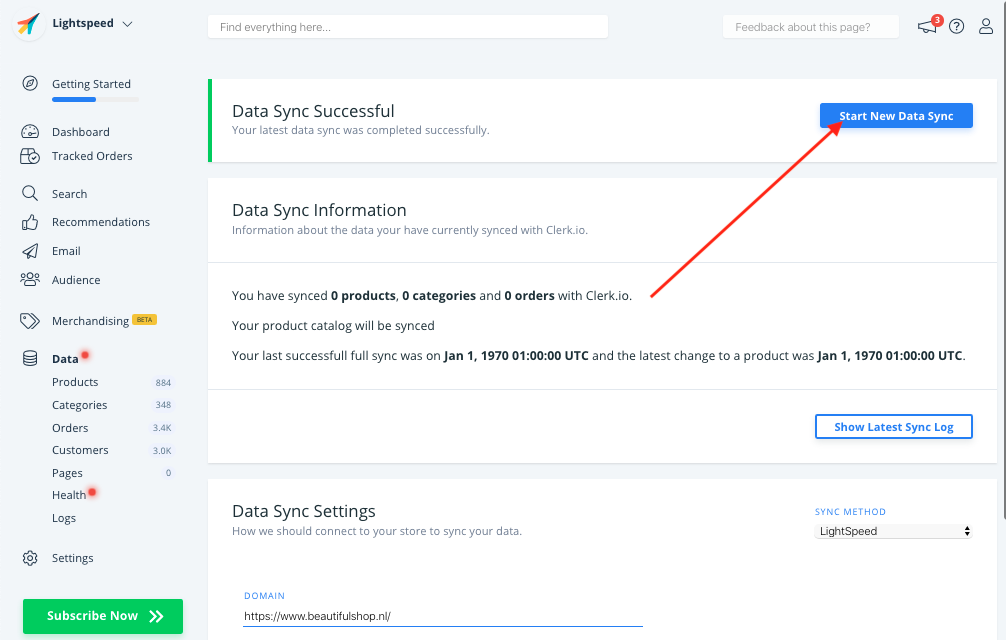
2. This will start the import of your products, categories and sales
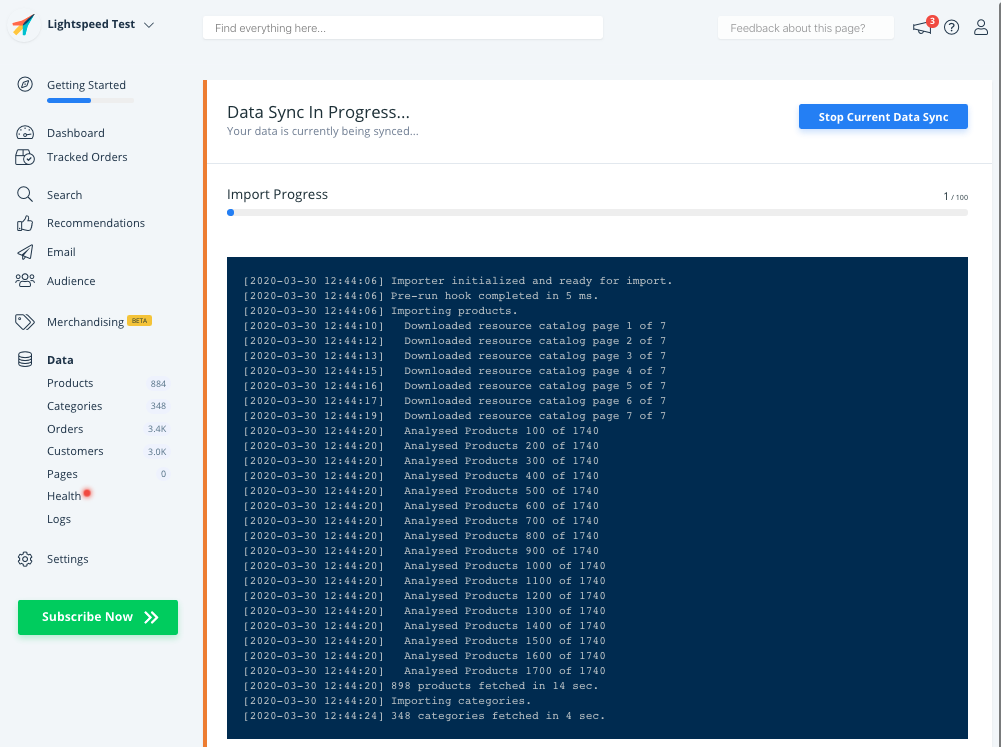
3. You will see a confirmation when the sync has finished:

4. Viewing your Live Demo
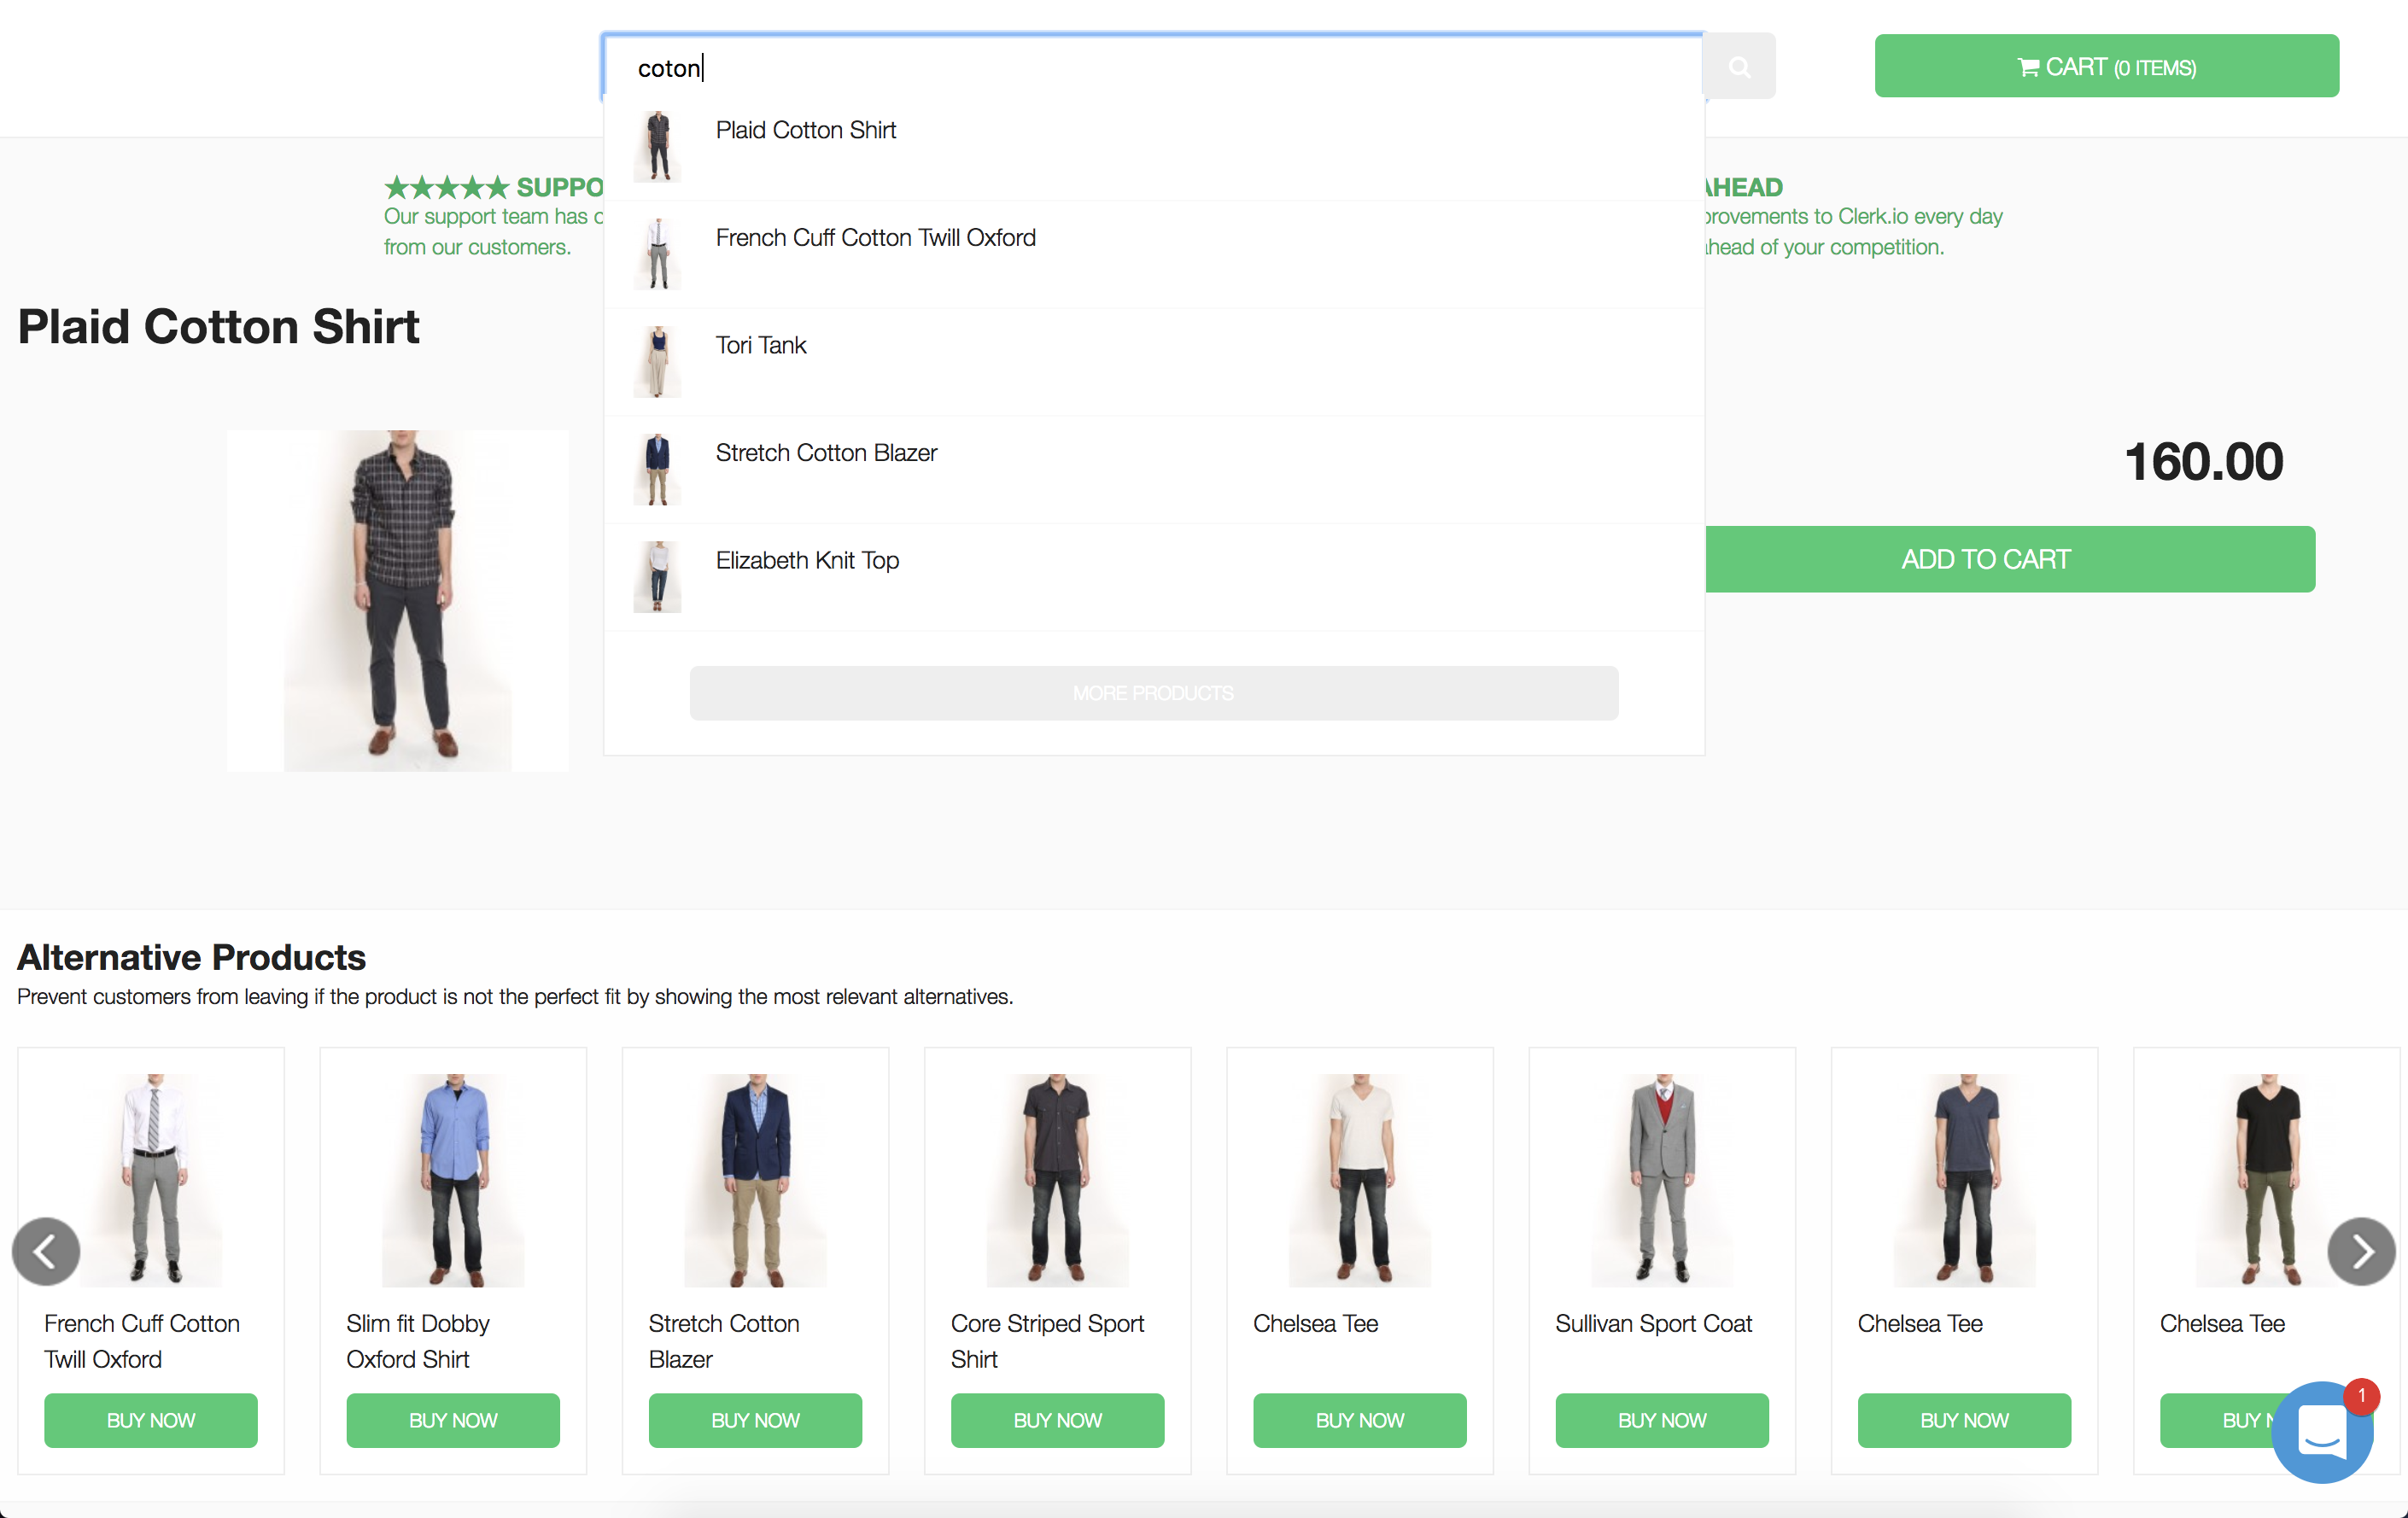
After connecting your store, you have access to your Live Demo, which displays Clerk.io working on your data.
To see it, click Settings in the side-menu, and then Explore Demo Store:
The Live Demo lets you check how Clerk.io will behave when installed on your webshop: