Full Installation of Clerk.io on Shopify
Platforms:
IMPORTANT: Shopify has updated the way Private Apps are added. We are working on a new version of the video. Until then, see how to add a Private App here.
In this video you can get a complete overview of what it takes to setup Clerk.io on a Shopify webshop.
It will guide you through the following steps:
Adding a Store in my.clerk.io
Each Store in Clerk.io is an isolated environment with its own data, API keys and Dashboard. The first thing you will need to do when setting up your Clerk.io account, is to create your first Store:
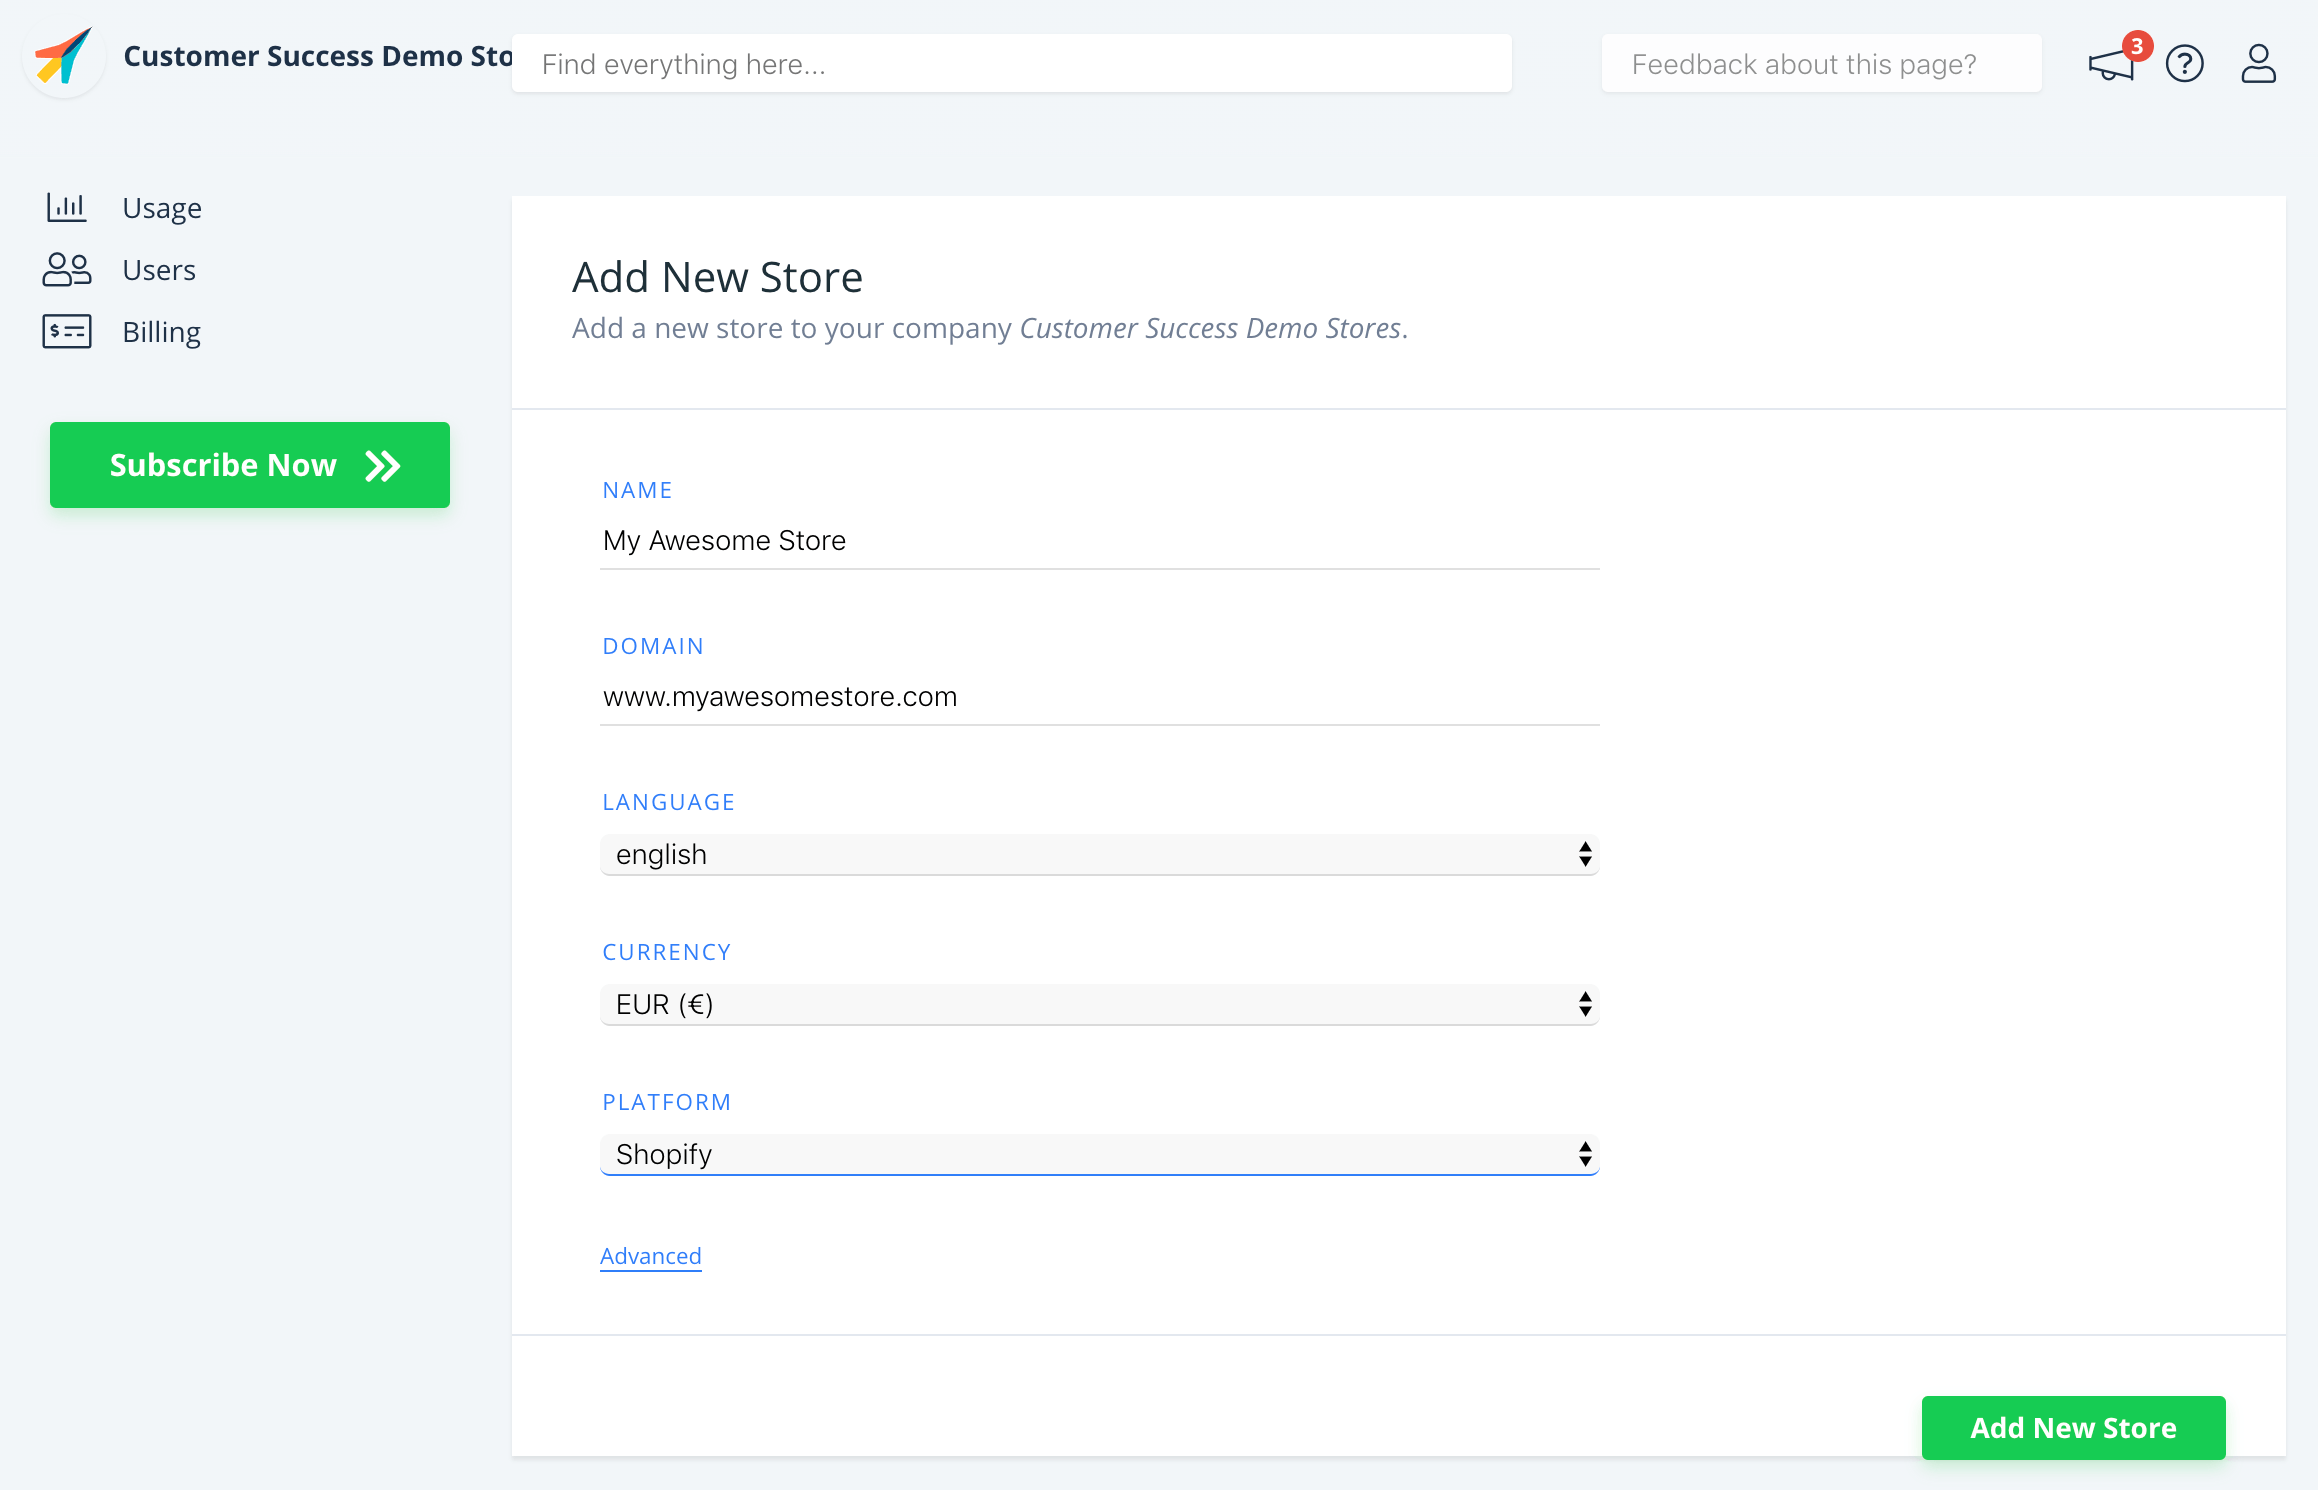
After this, the Setup Guide will walk you through the rest of the setup.
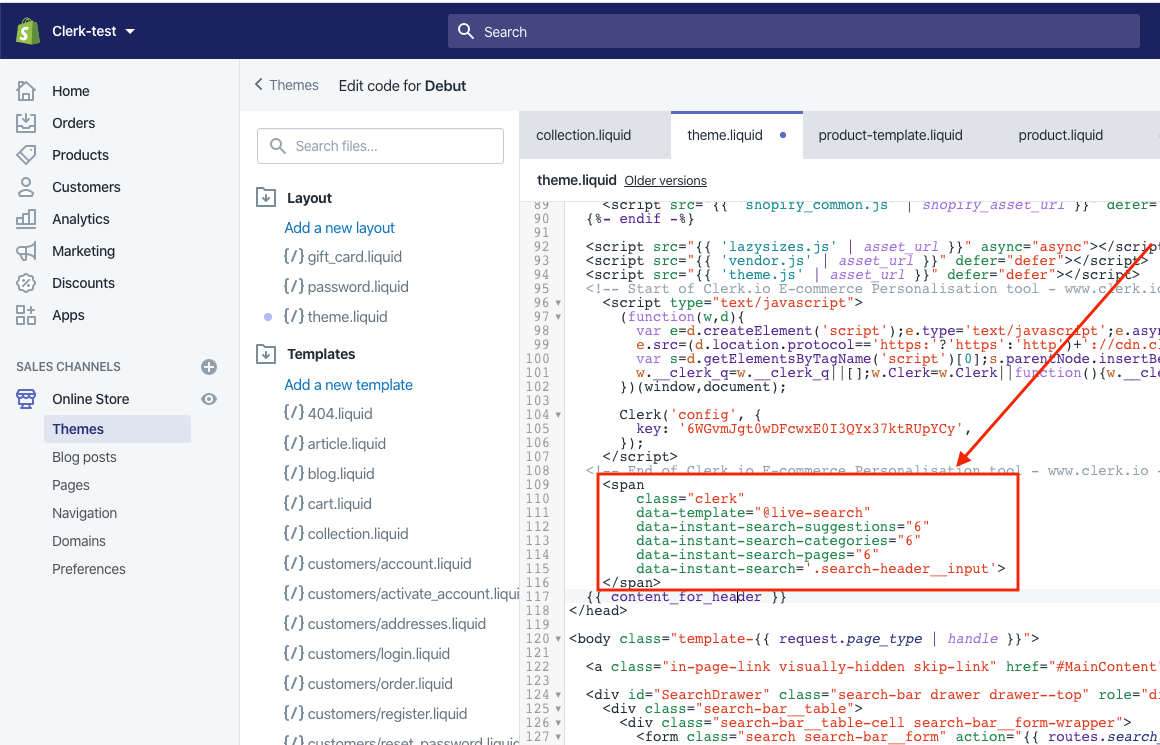
Installing the two tracking-scripts
Clerk.io uses two main scripts to work on a Shopify webshop:
The Visitor Tracking script, that initialises Clerk.io.
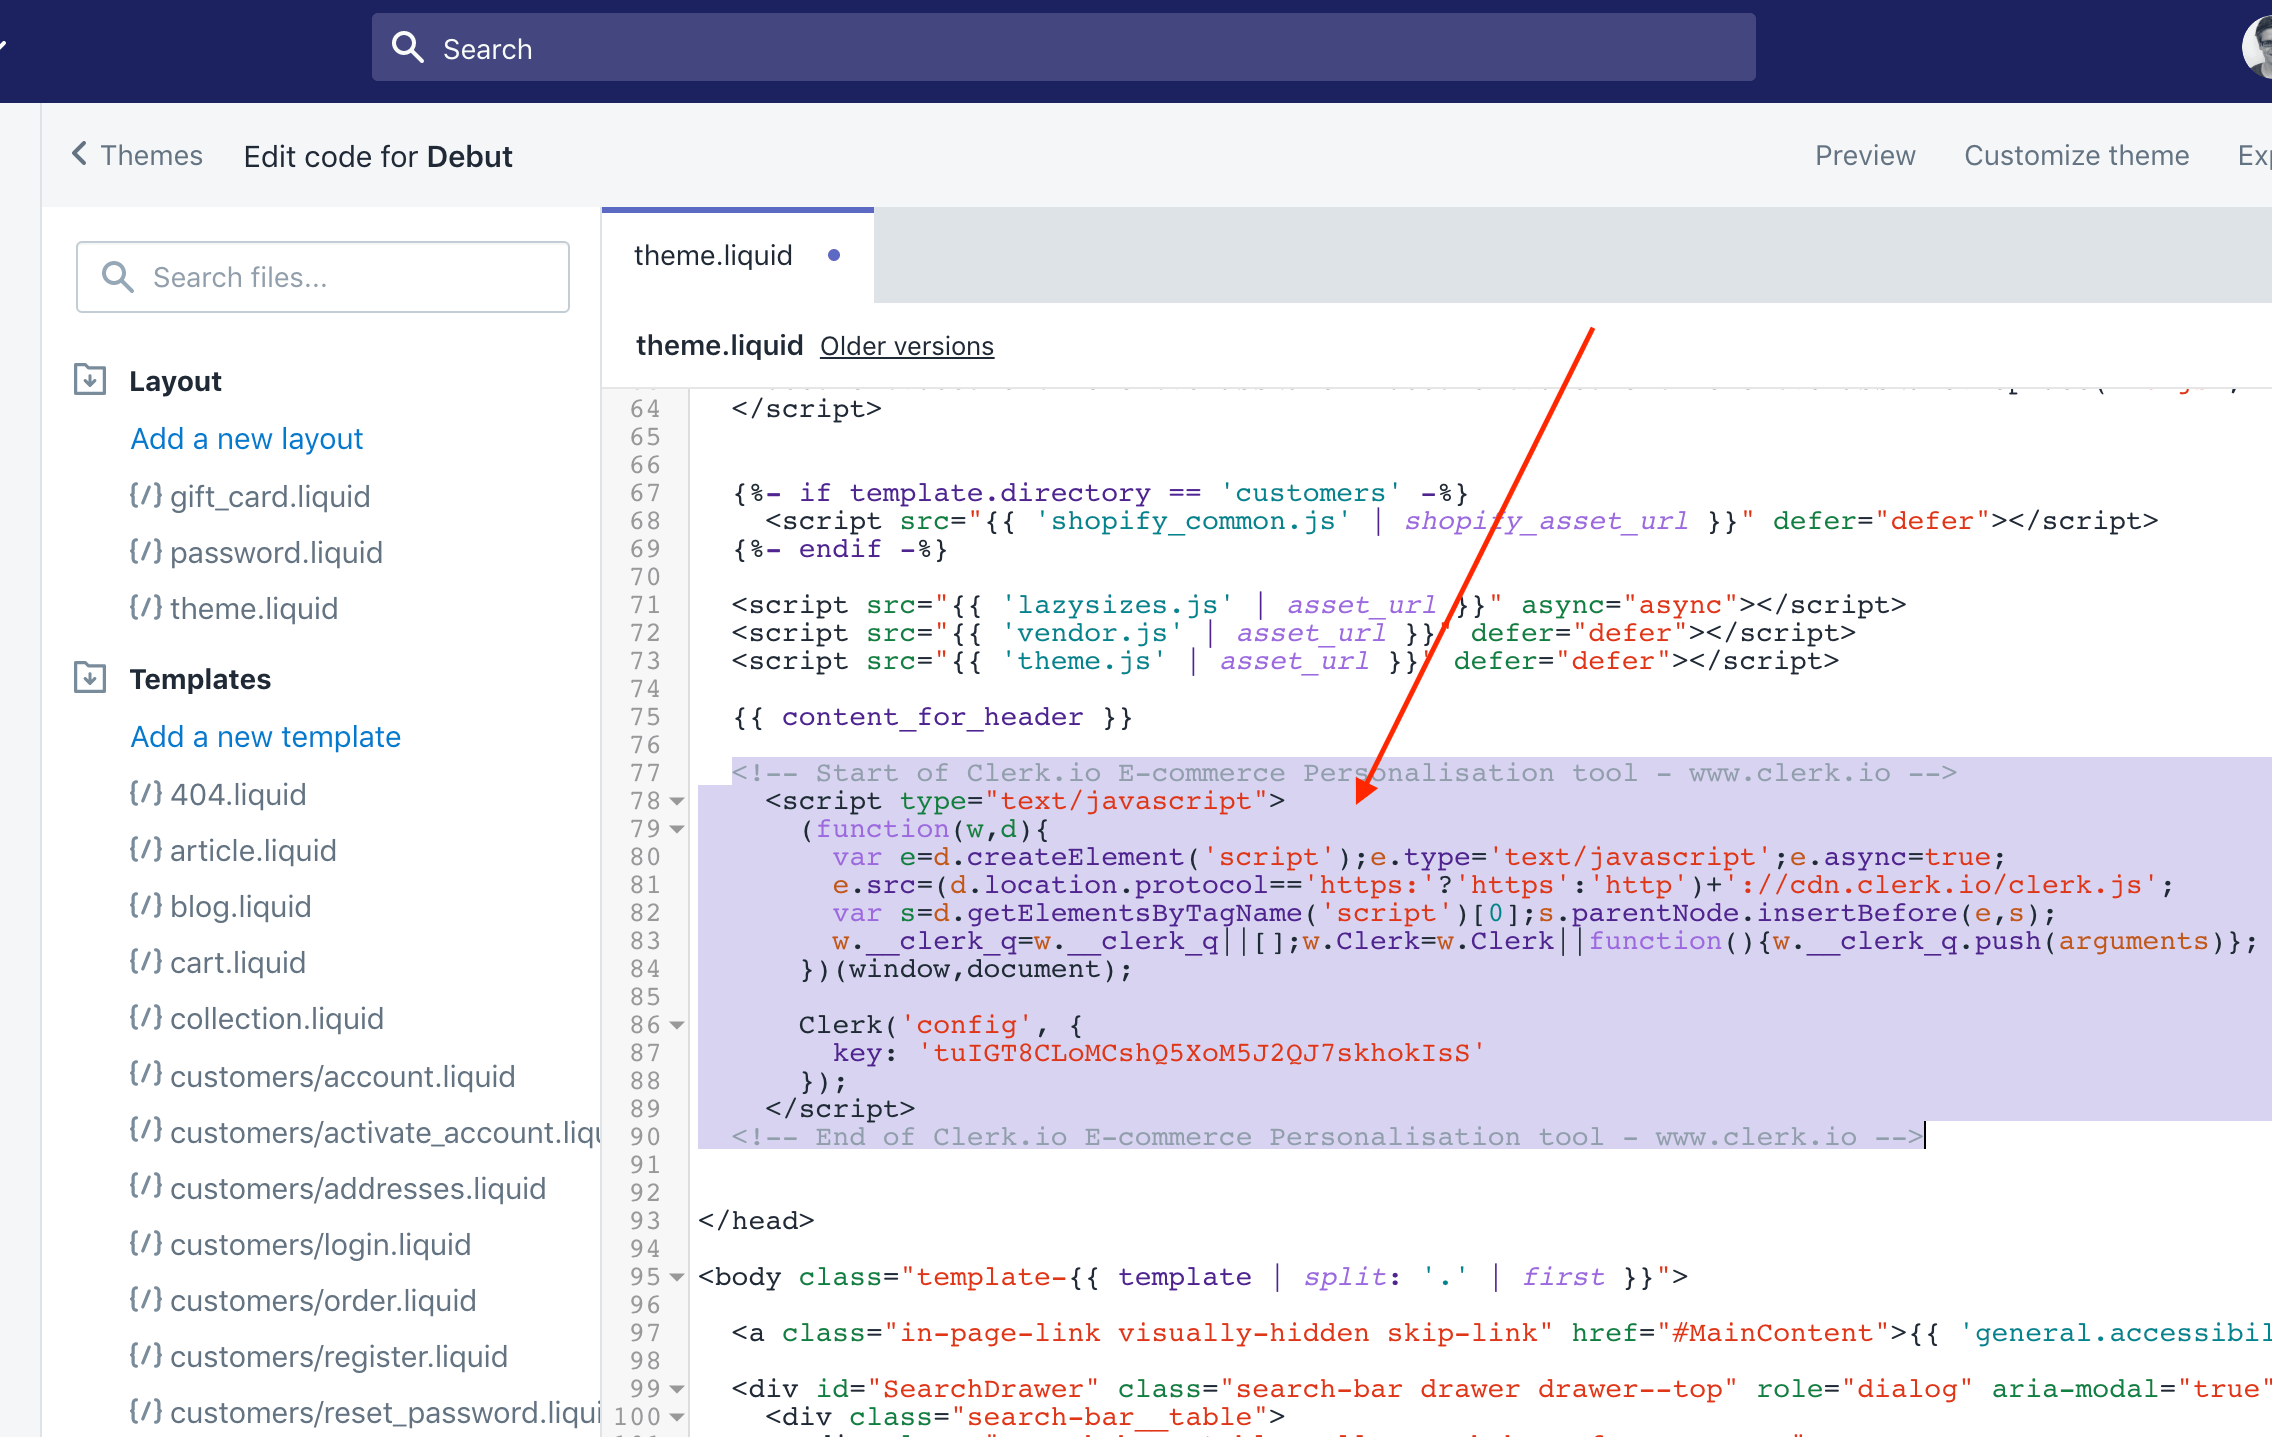
The Order Tracking script that allows tracking of orders in realtime.
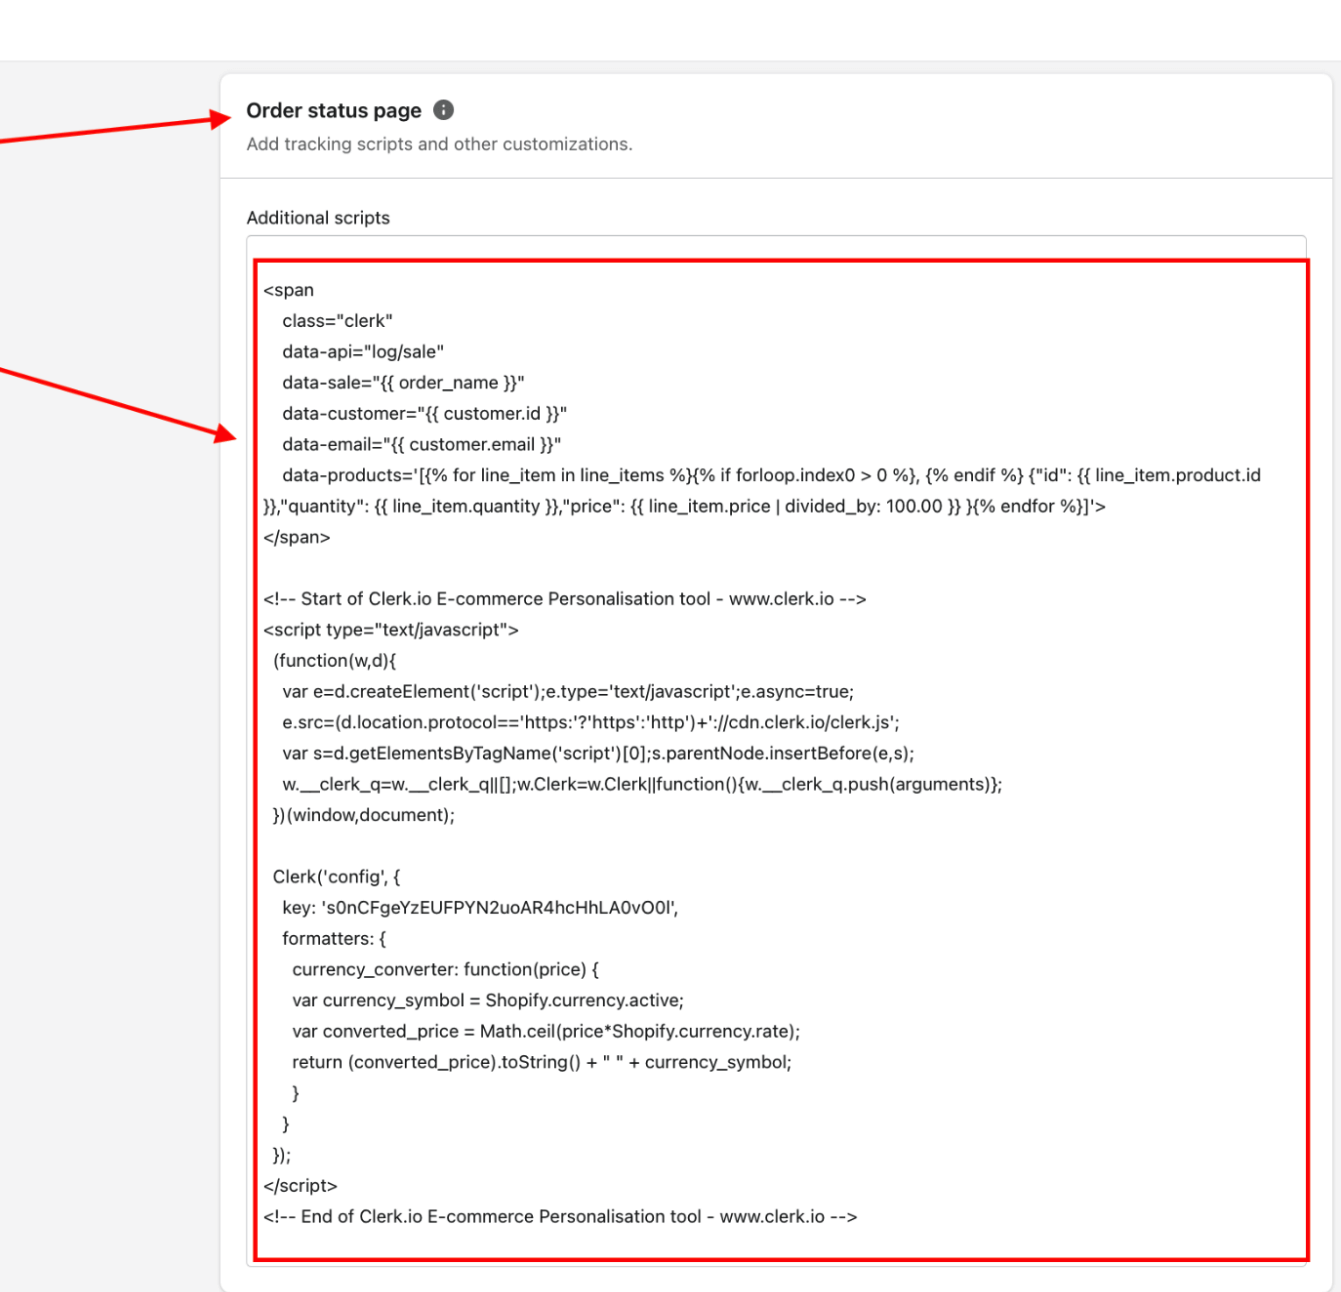
When both scripts are inserted, Clerk.io has been initialised.
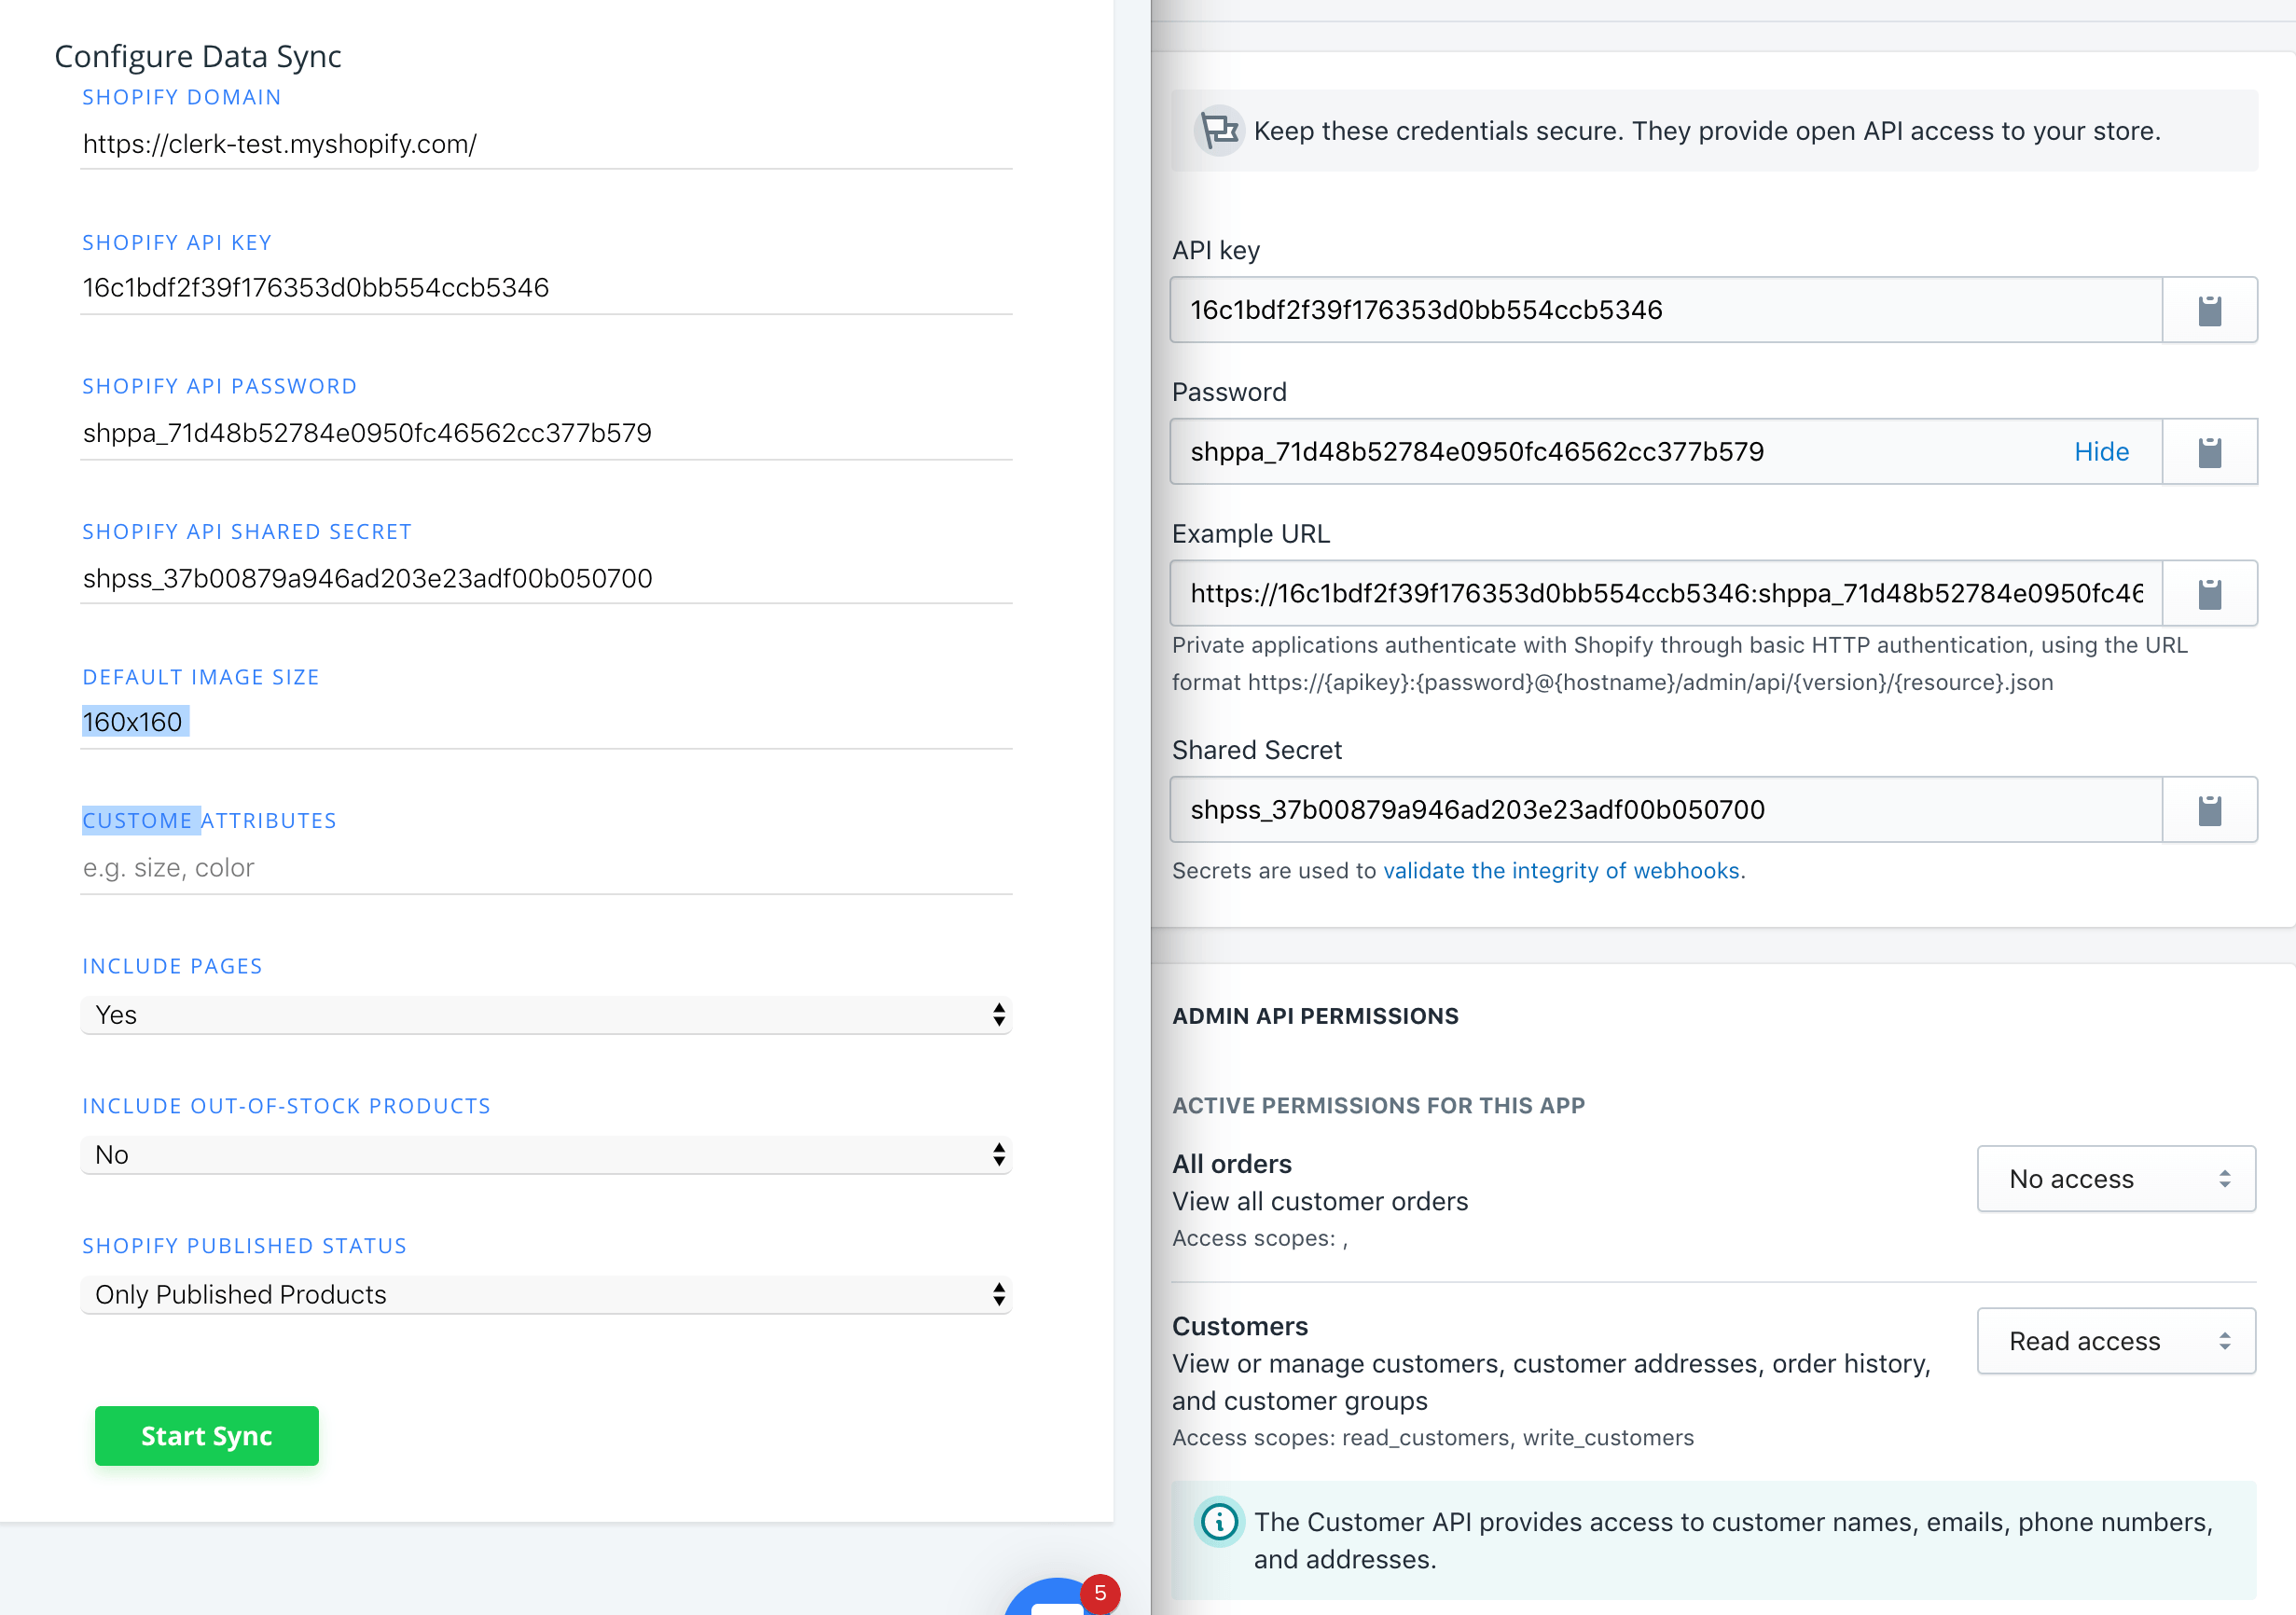
Syncing your Shopify Store with Clerk.io
To show results, Clerk.io must sync with the products, categories, sales, pages and customers from Shopify.
This is done by setting up a Custom App in Shopify that allows the data to be accessed regularly. It is important to allow access to both Customers, Orders and Pages.
When the Custom App has been created, you can configure the Importer for the sync and then run it:
Adding Search and Recommendations
Frontend elements in Clerk.io consist of two parts:
A Design that controls the visual presentation of products. This can be changed to match any styling you want.
Most often you will use 3 Designs: One for Instant Search, the Search page and Recommendations.
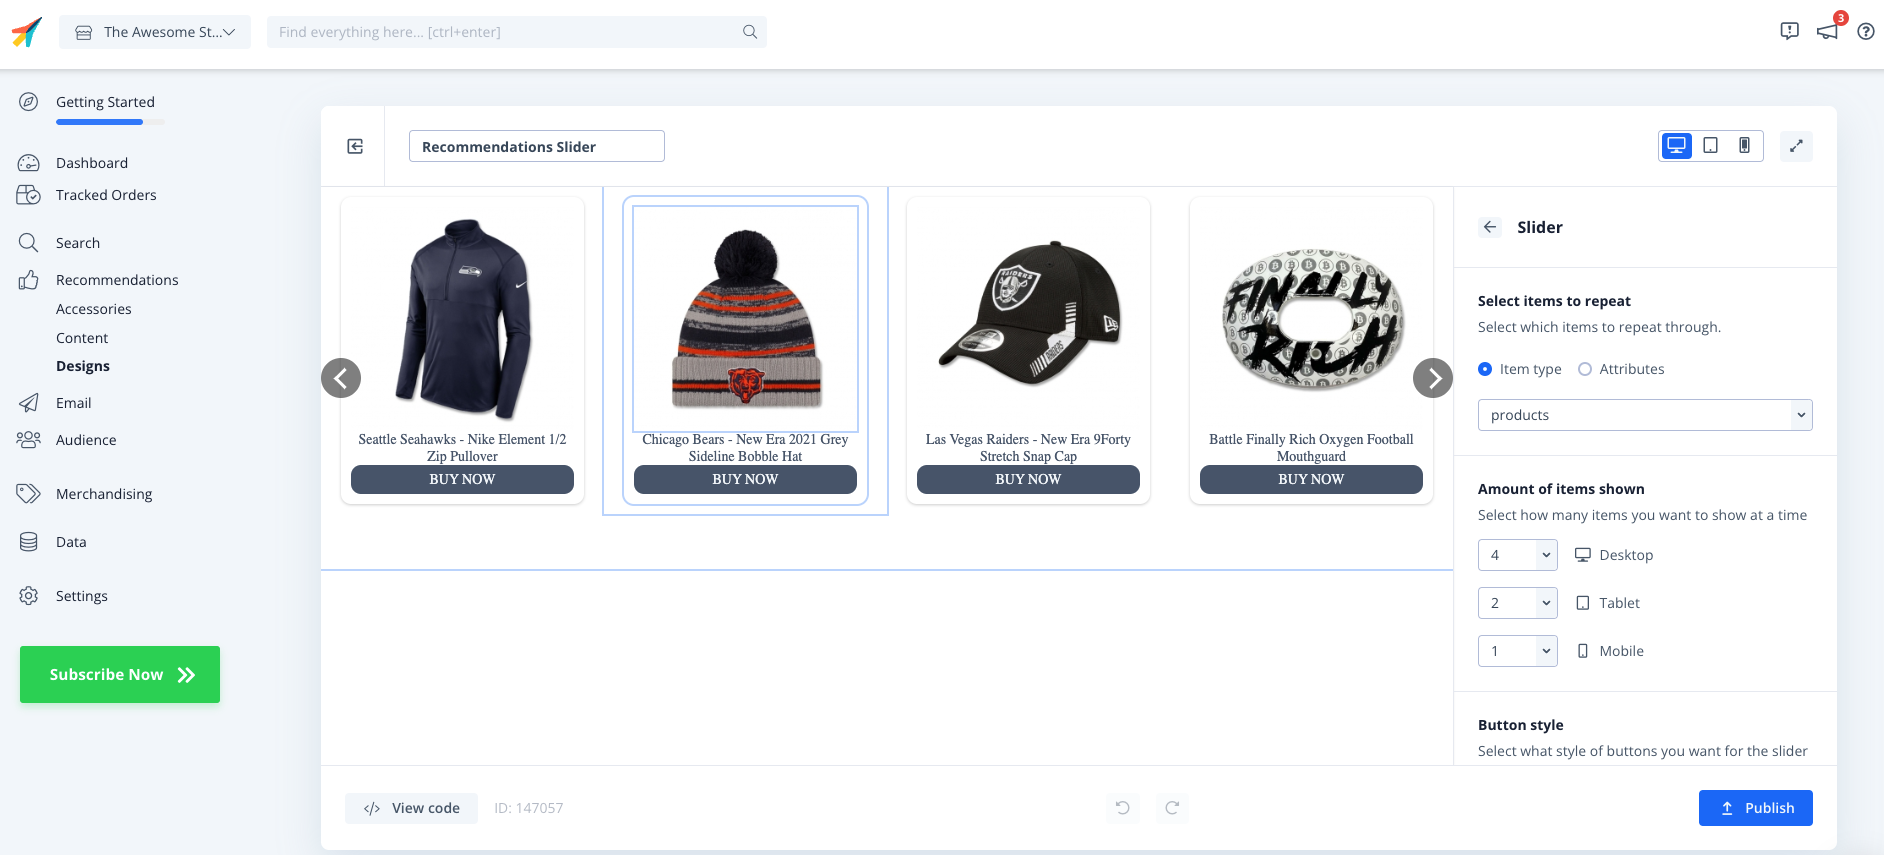
- A Content with an attached embedcode that displays the products. The code should be inserted on the page where you want each element to be displayed.
The Setup Guide will walk you through where each element needs to be placed in most Shopify themes.