Connecting your Shoporama Store
Platforms:
For these steps you need to have both your my.clerk.io and your Shoporama accounts open.
1. Add Store
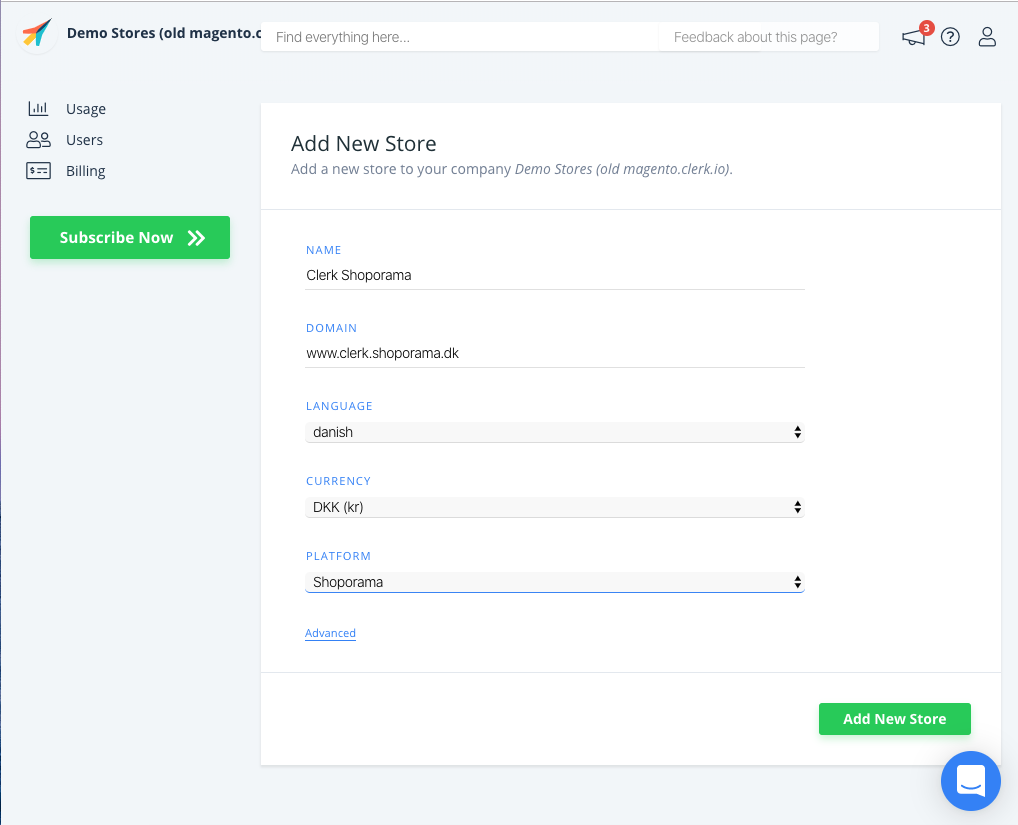
After logging in to my.clerk.io, the first thing you need to do is add your Store:
Write the Name and Domain of your online store.
Choose the Language and Currency, and Choose Shoporama as the Platform.
Click Add Store.
2. Install Visitor Tracking
1. Login to your Shoporama store.
2. Click on the Settings icon in the top right corner and then HTML-Felter
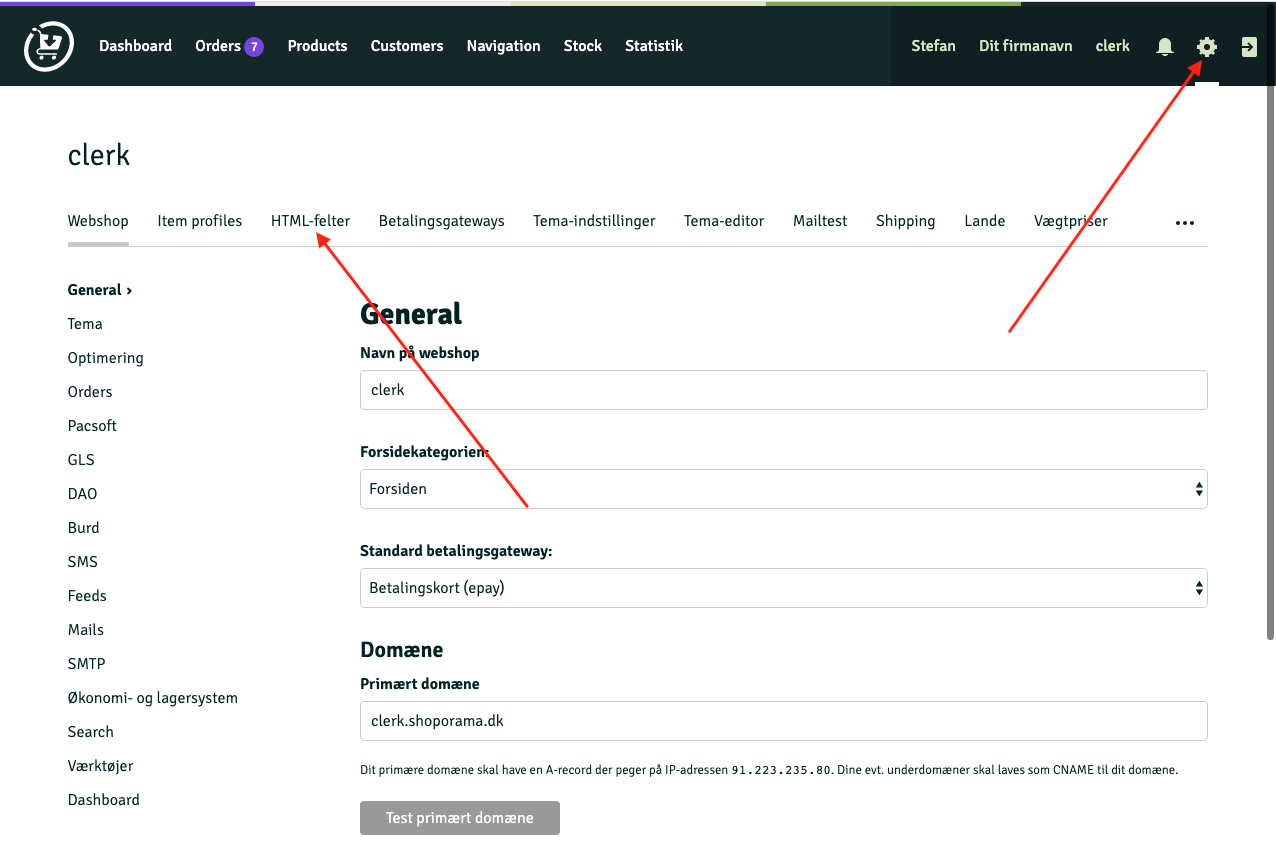
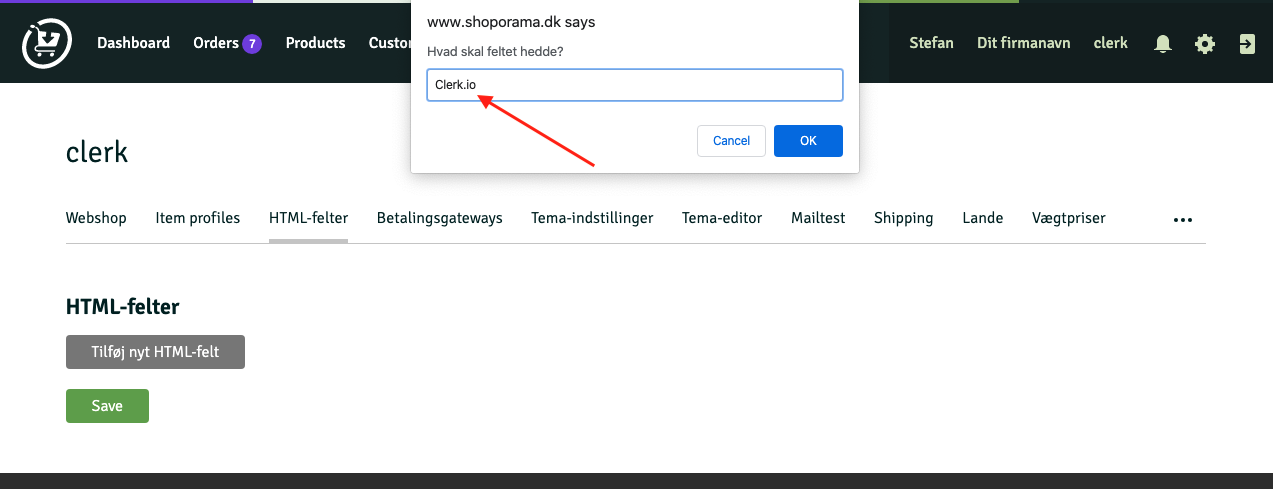
3. Click on Tilføj nyt HTML-felt

4. Name the field Clerk.io:
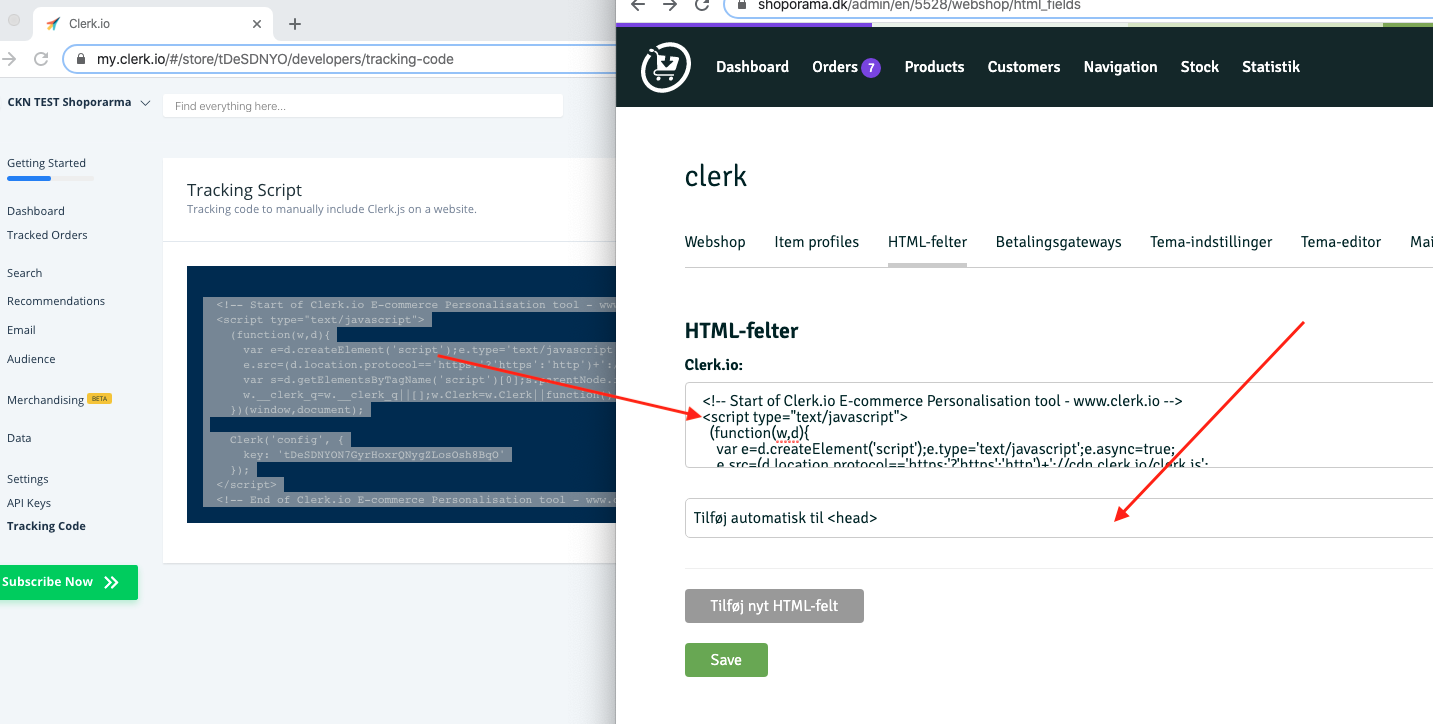
5. Go to my.clerk.io and then Settings -> Tracking Code:
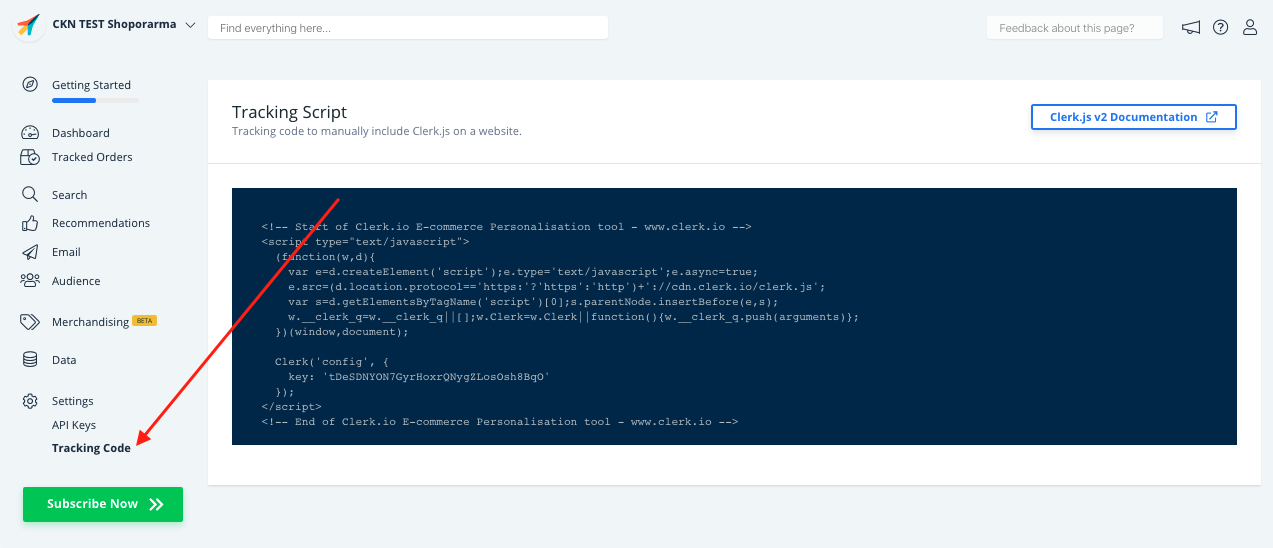
6. Copy this tracking code to the HTML-felt in Shoporama and choose Tilføj automatisk tilin the dropdown:
7. Click Save:
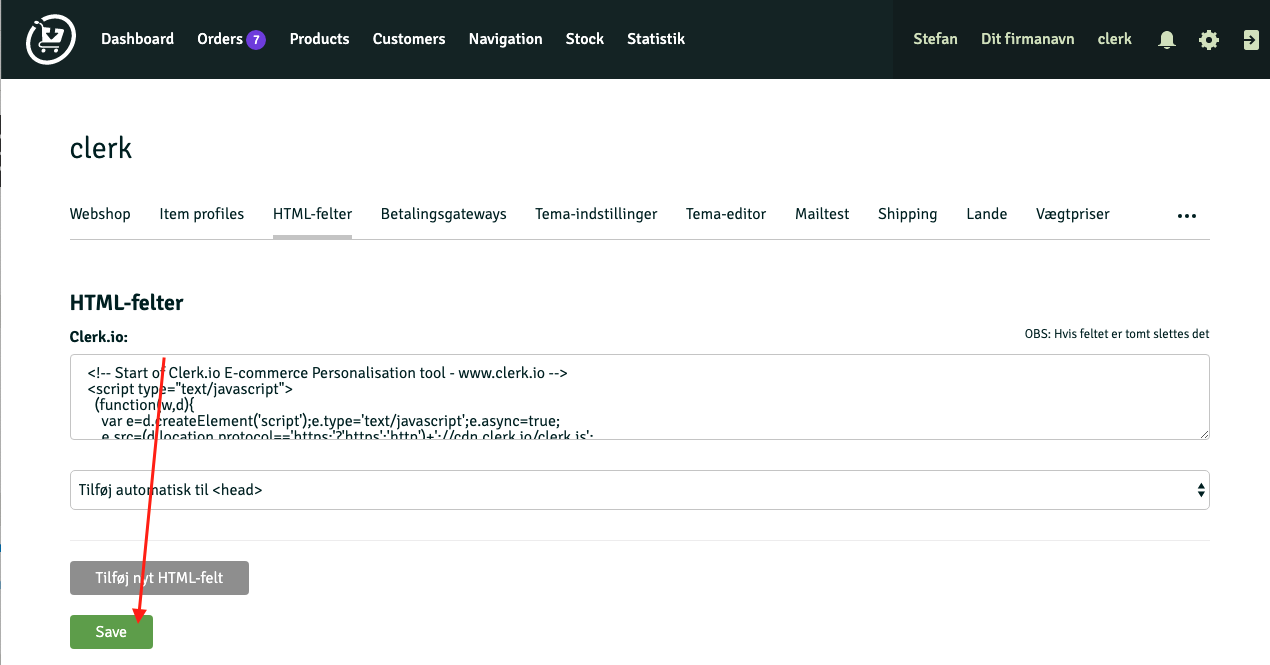
Now Clerk.js is installed!
3. Install Sales-tracking
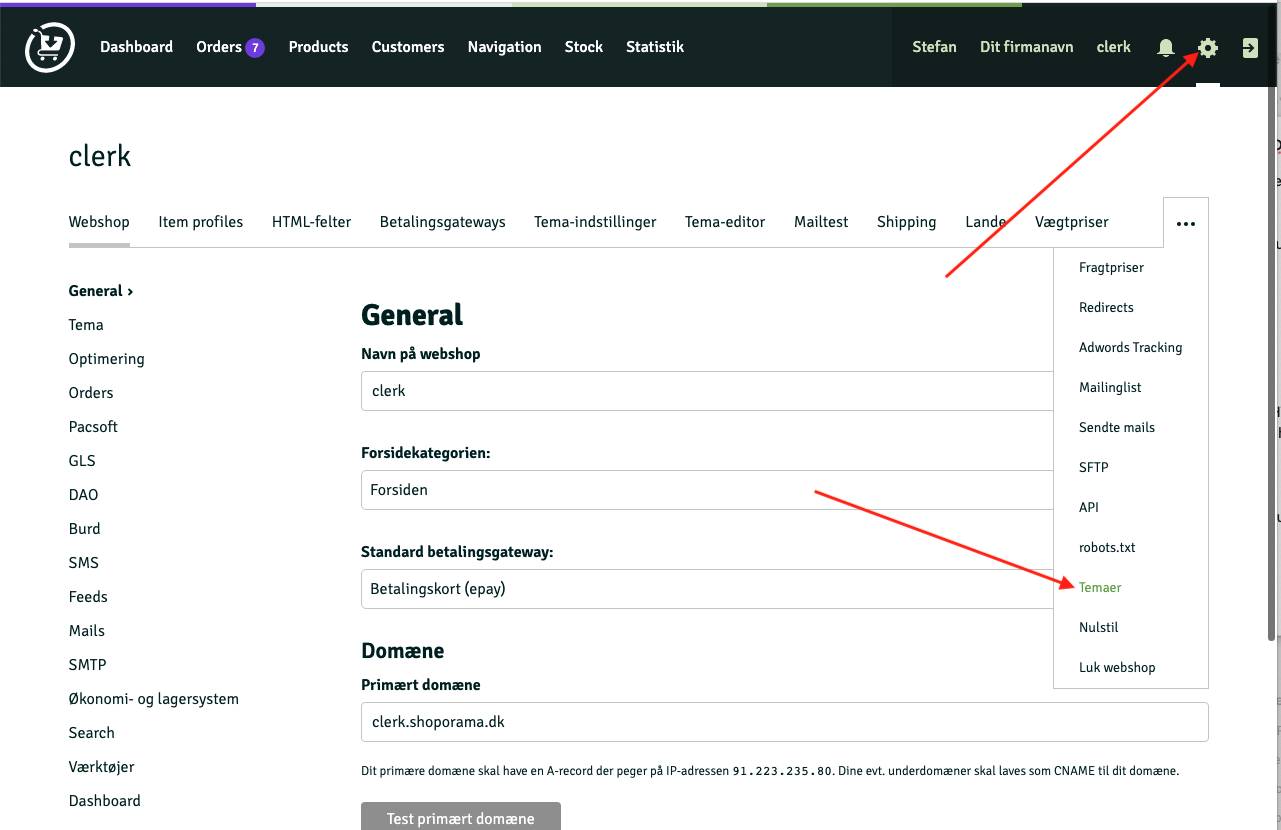
1. Click on the Settings Icon again.
2. Click on " …" in the top-right corner and then Temaer:
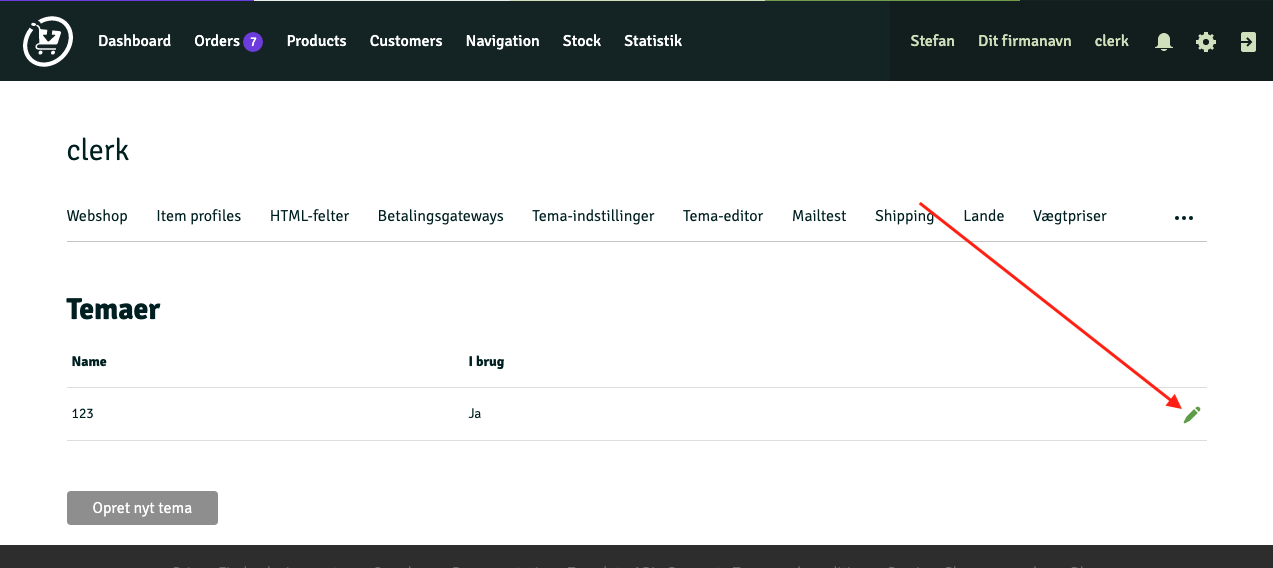
3. Click the pencil-icon for the theme you are using:
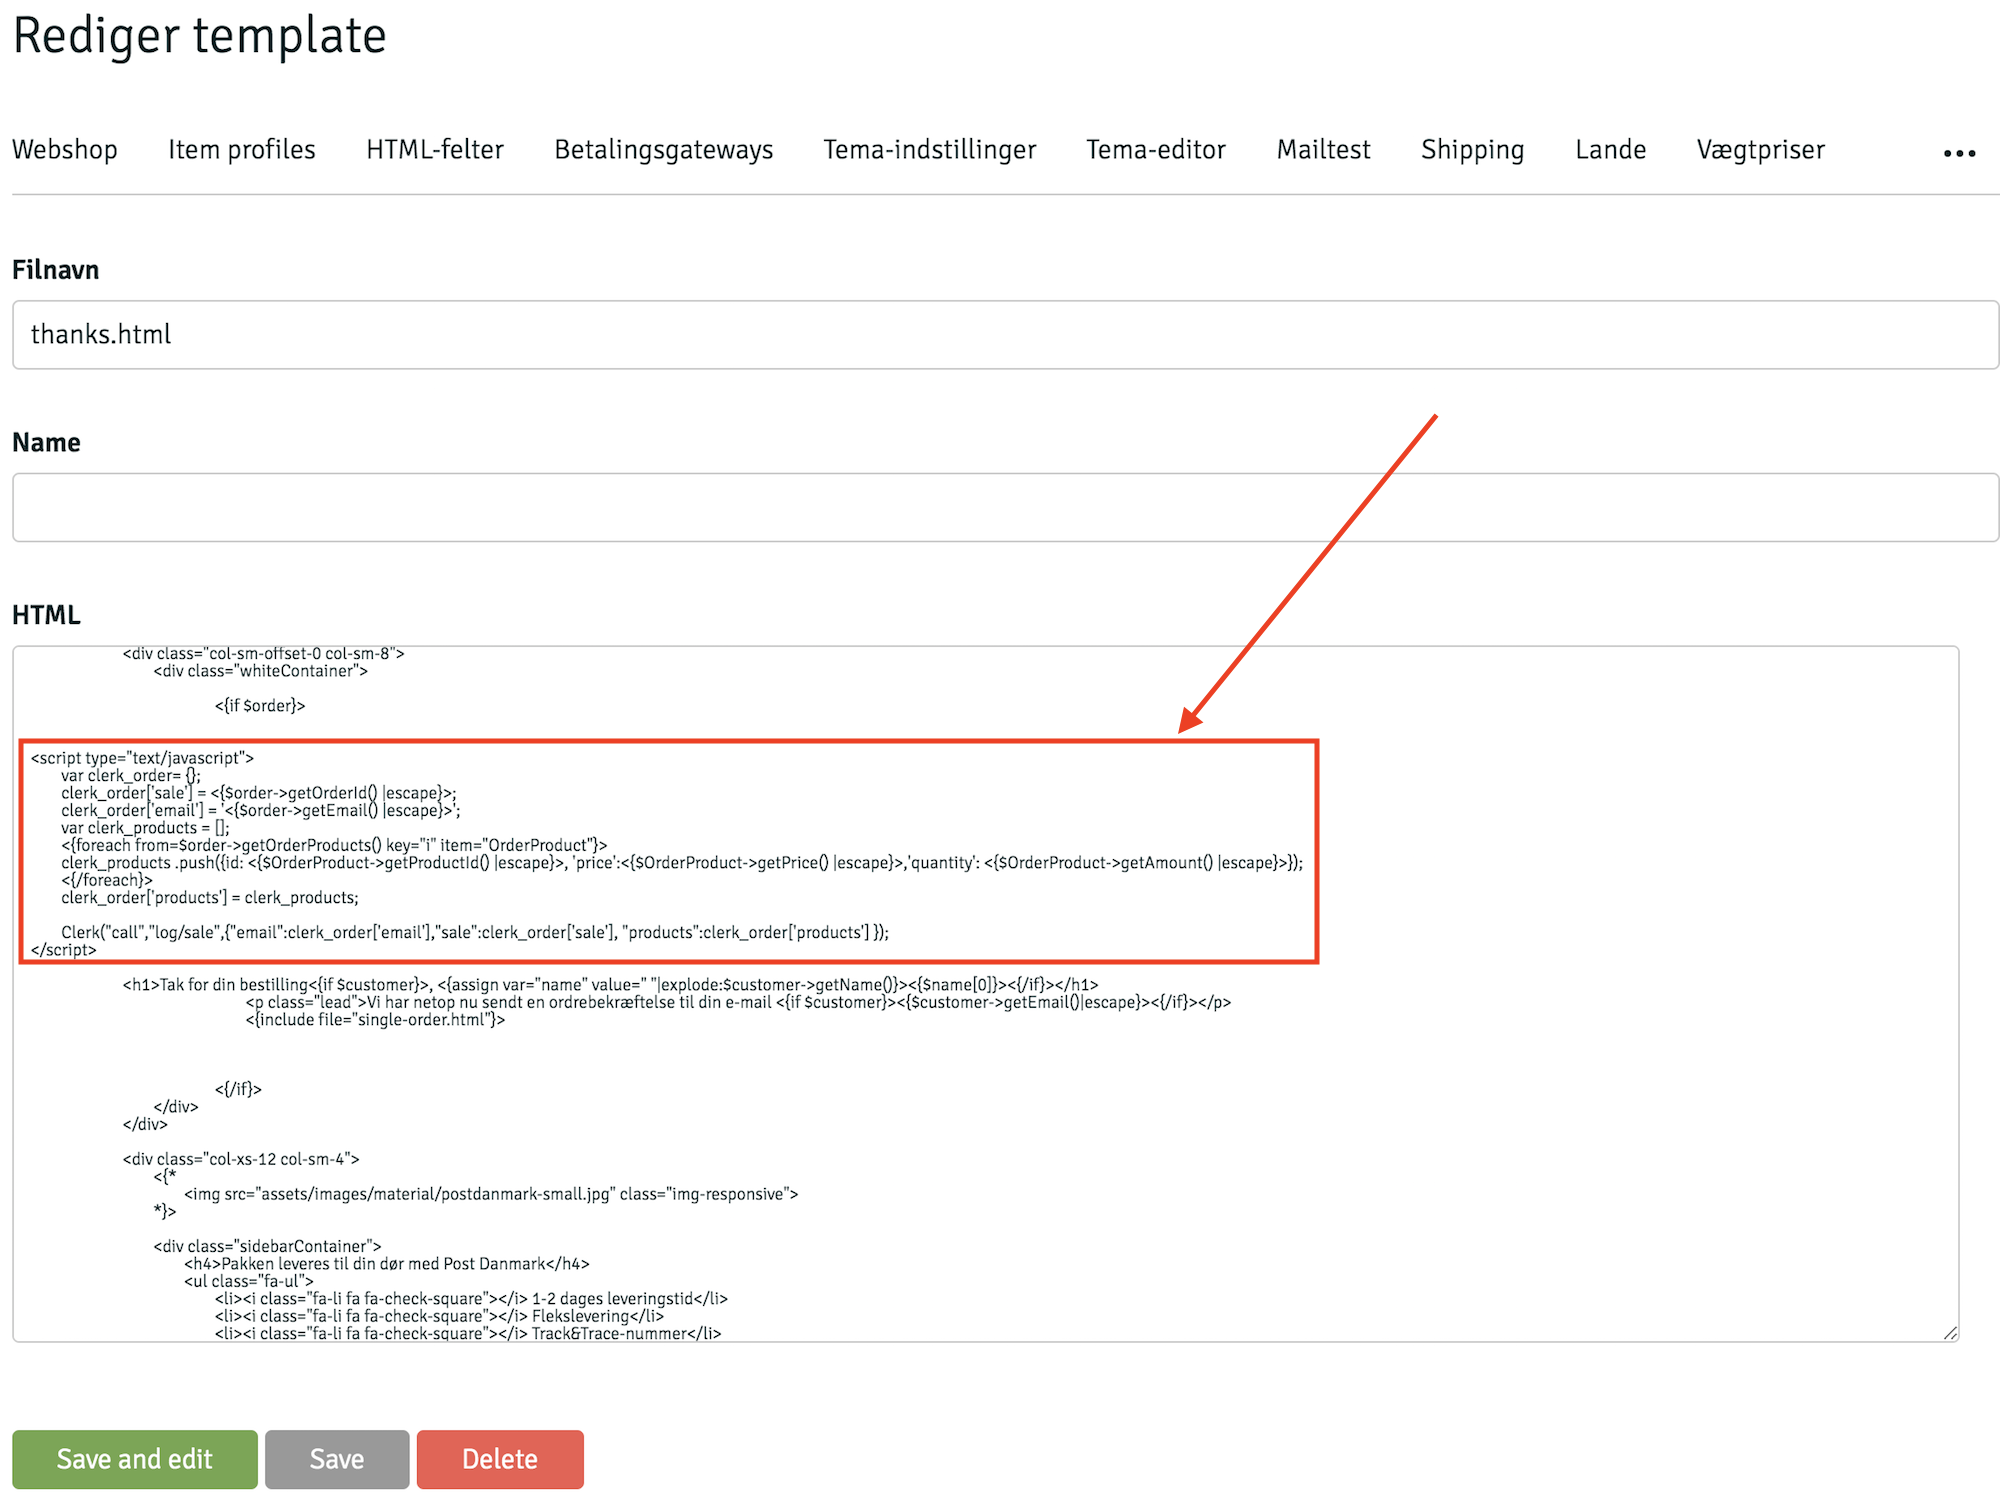
4. Scroll down to find the thanks.html file, and click the pencil-icon next to it:

5. Copy the following script:
<script type="text/javascript">
	var clerk_order= {};
	clerk_order['sale'] = <{$order->getOrderId() |escape}>;
	clerk_order['email'] = '<{$order->getEmail() |escape}>';
	var clerk_products = [];
	<{foreach from=$order->getOrderProducts() key="i" item="OrderProduct"}>
	clerk_products .push({id: <{$OrderProduct->getProductId() |escape}>, 'price':<{$OrderProduct->getPrice() |escape}>,'quantity': <{$OrderProduct->getAmount() |escape}>});
	<{/foreach}>
        clerk_order['products'] = clerk_products;

        Clerk("call","log/sale",{"email":clerk_order['email'],"sale":clerk_order['sale'], "products":clerk_order['products'] });
</script>
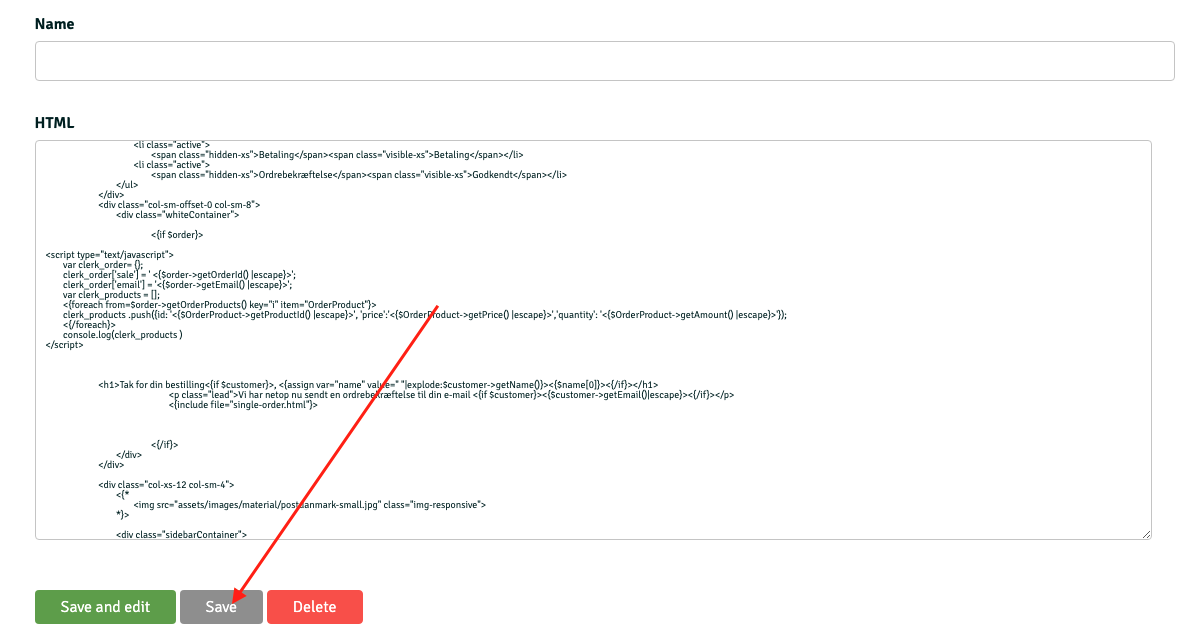
6. In the thanks.html file, find the little piece of code <{if $order}> and insert the script just below it:
7. Click Save:
Sales-tracking is now working!
4. Syncing your store
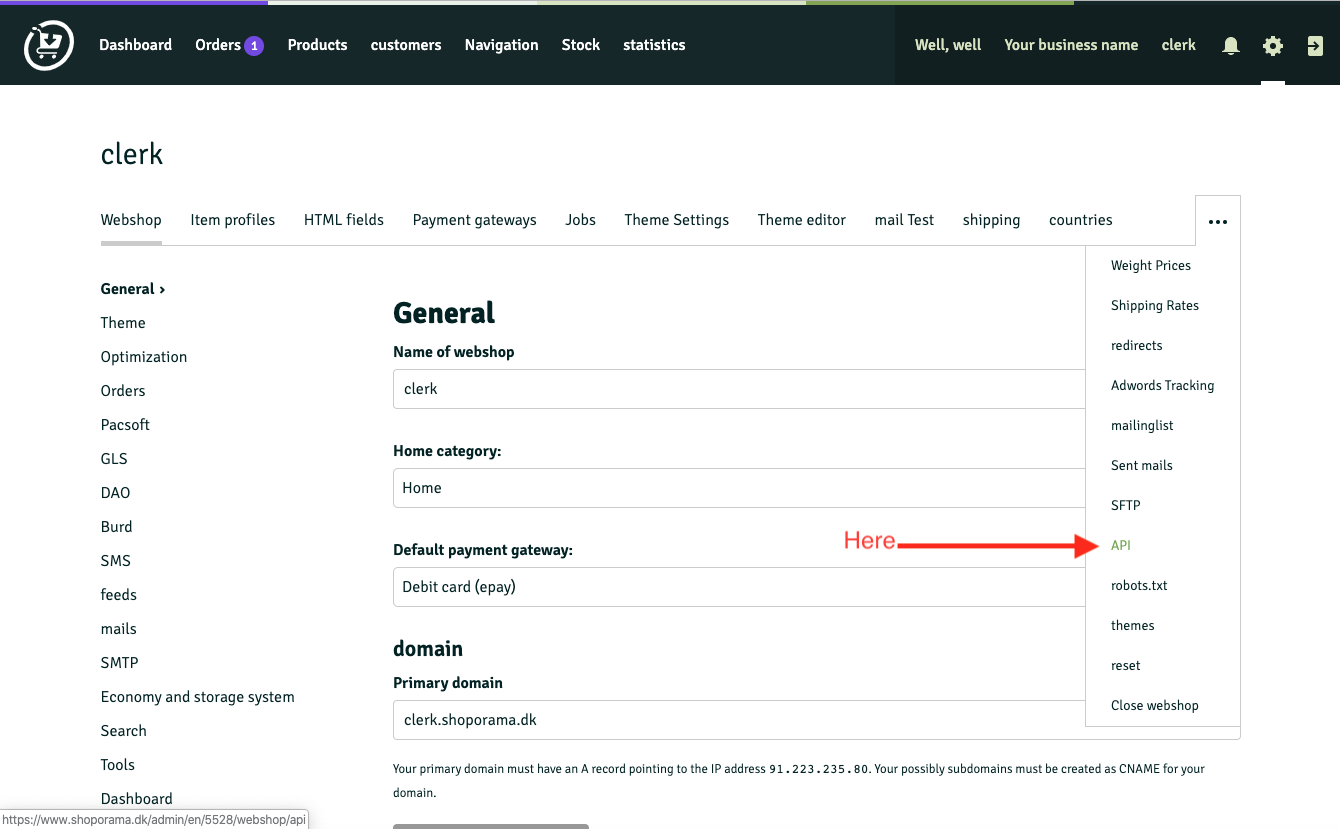
To successfully configure your Shoporama store you will need two pieces of data: the API Access and the Store URL.
1. To find the Access Token go to the Shoporama backend and to Settings -> API.
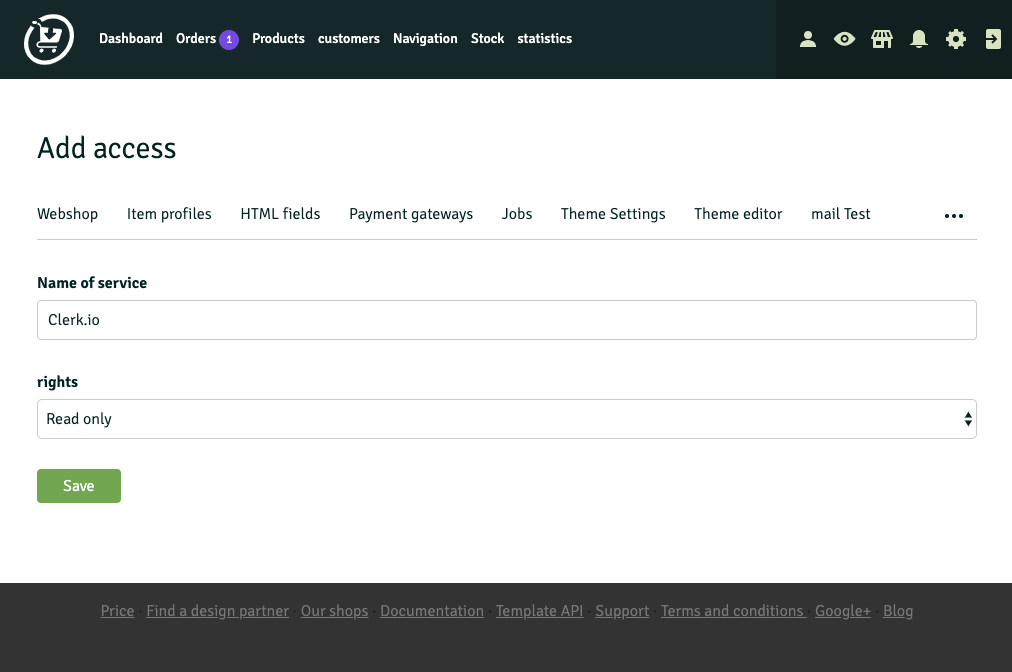
2. Create a new API access by clicking on Add access.
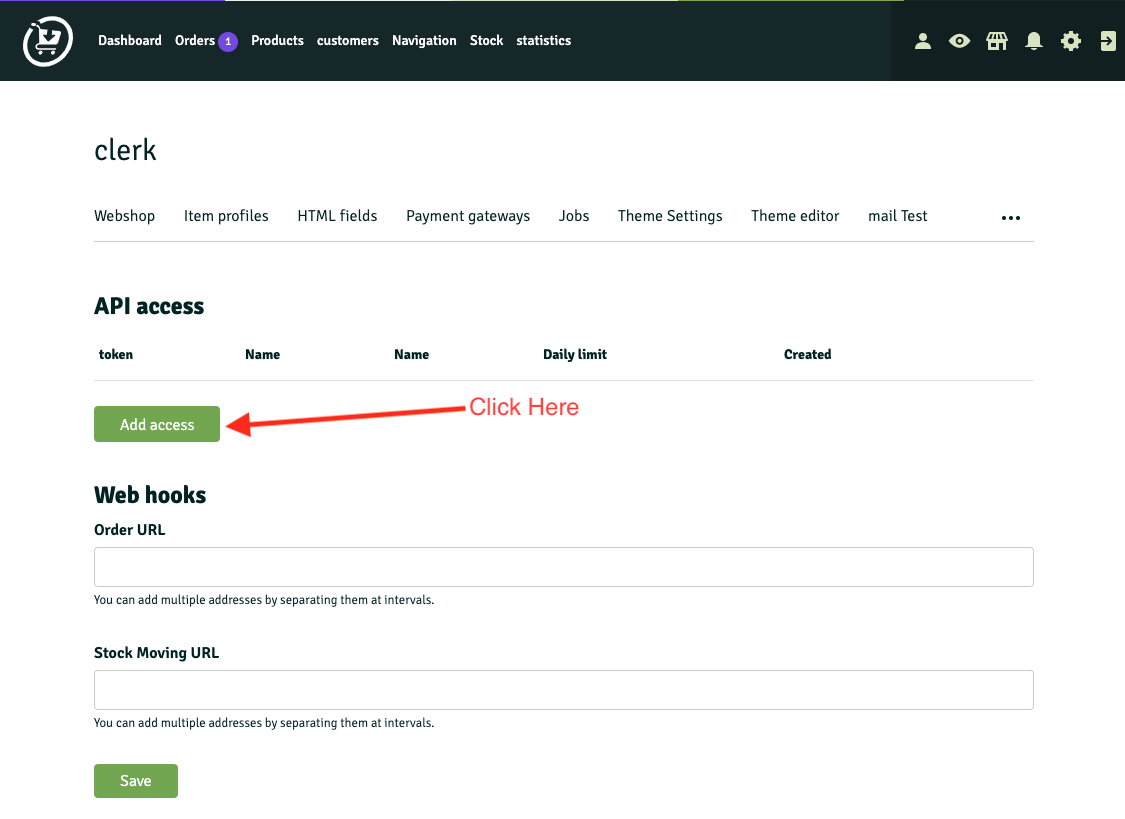
3. Name the new API account Clerk.io, set the rights to Read Only click Save.
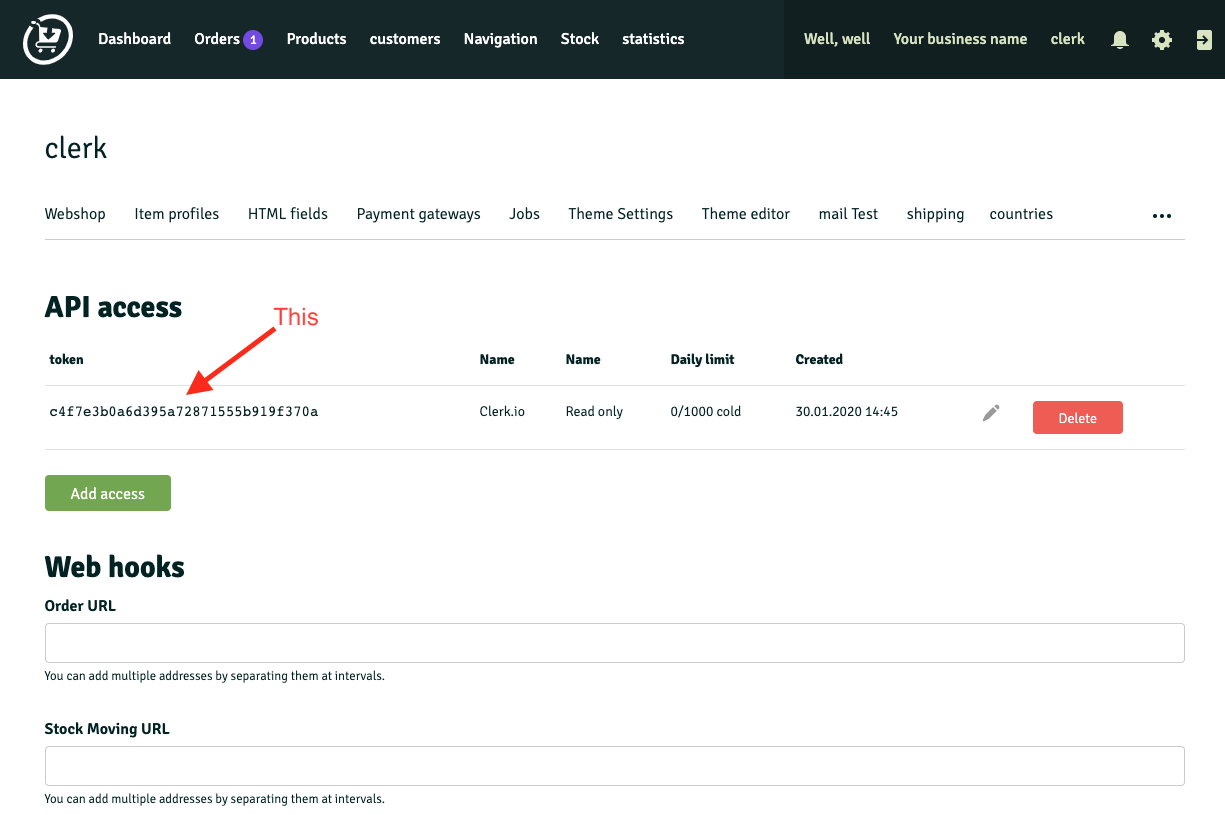
4. Once you have saved the new access, Shoporama will send you back to the API page where you will find the API Access Token.
5. Go back to my.clerk.io.
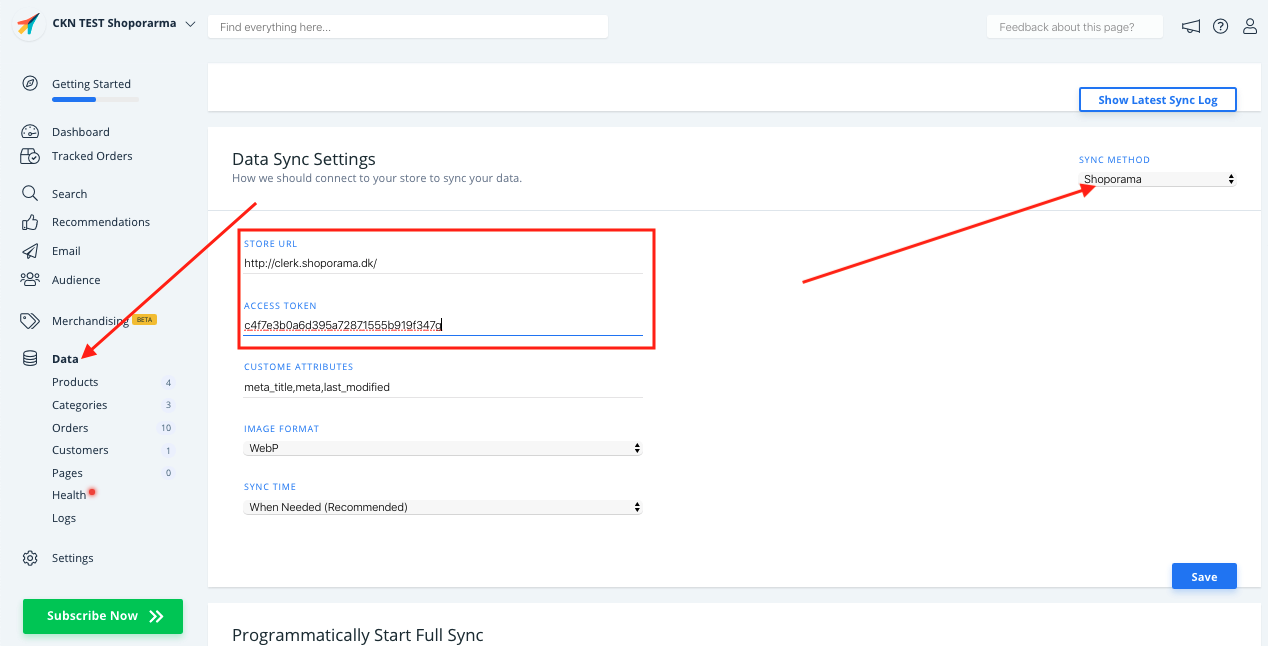
6. From the main menu of my.clerk.io go to Data.
7. Under Sync Method, select Shoporama from the dropdown list and paste the API Access and Store URL in the appropriate fields.
Scroll up and click Start New Data Sync
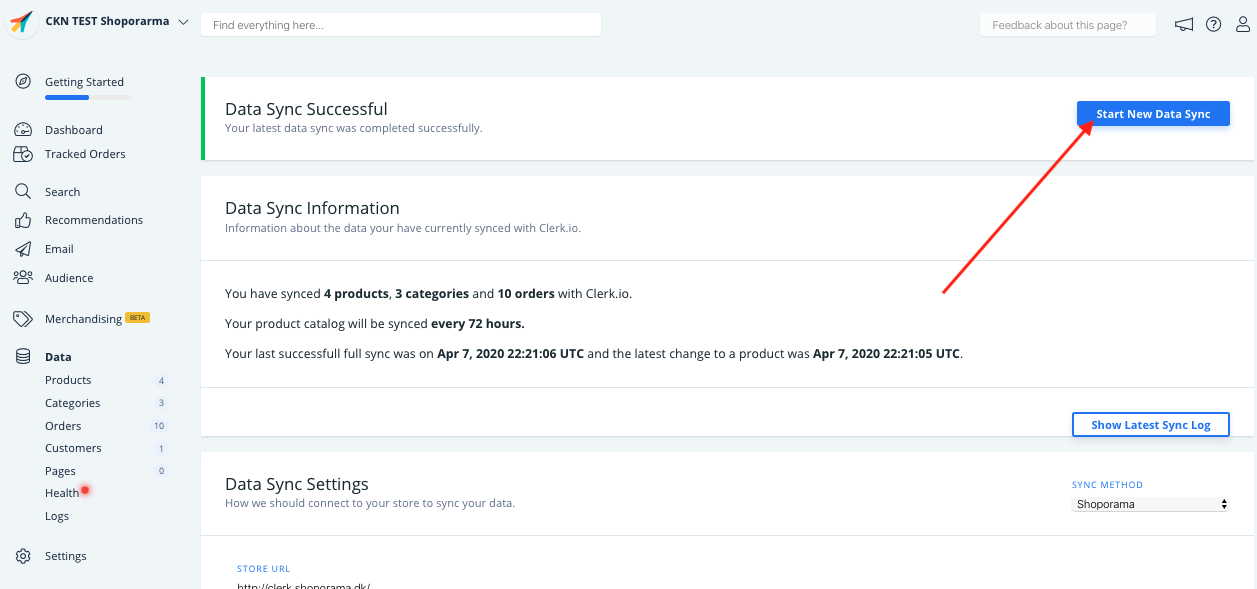
Now your store is connected to Clerk :)