Connecting your Shopware 6 Store
Platforms:
The first step of installing Clerk.io, is connecting your store with your Clerk.io account.
The video belows shows you what to do, step-by-step. Use the rest of the guide as a reference :)
After following these simple steps you will be able to see your Live Demo Store, which gives you a personal overview of how Clerk.io will work on your webshop. Reach out to your Clerk.io contact person to see the Live Demo.
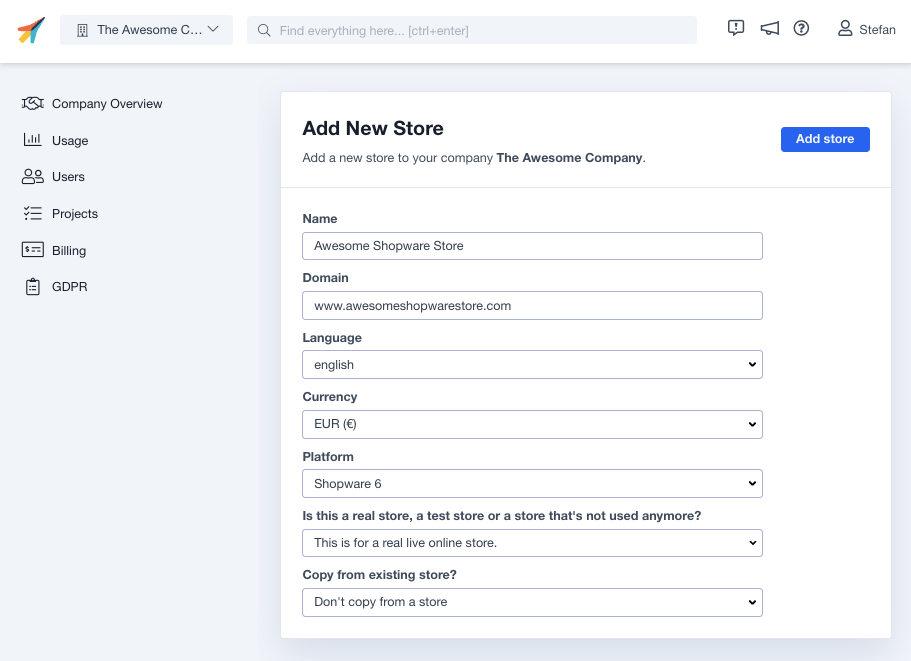
1. Add Store
Login to my.clerk.io. The first time you do this, you will see the Add New Store page.
Write the Name and Domain of your webshop
Choose Shopware 6 as the Platform and choose your Currency.
Click Add Store.
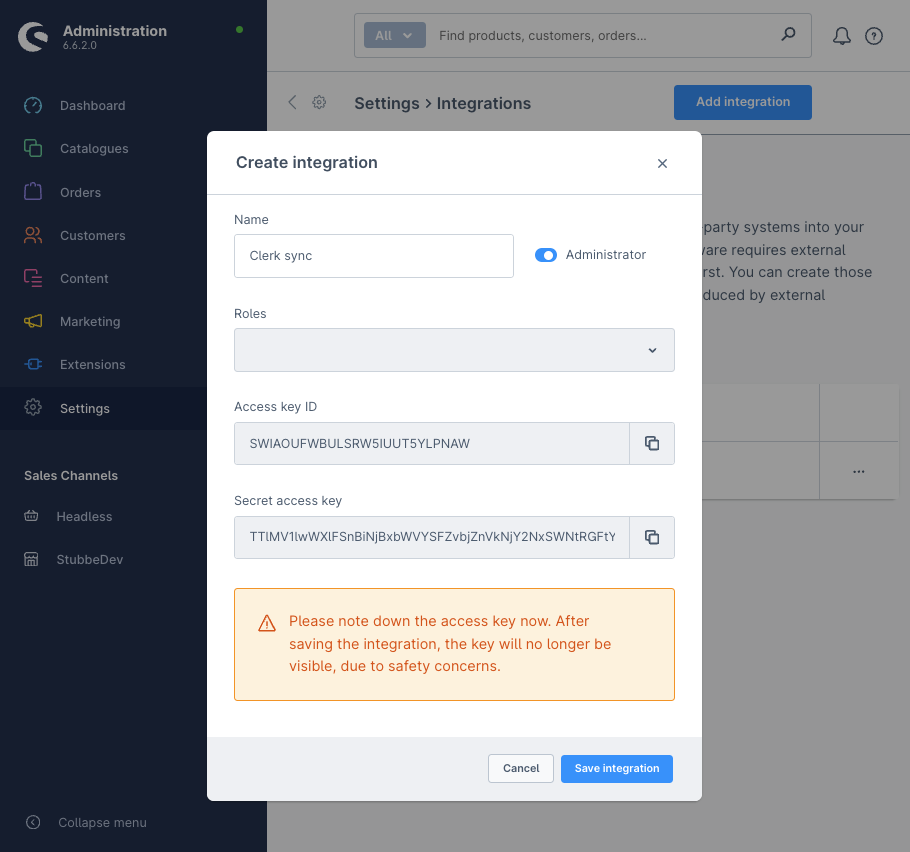
2. Configure the Shopware 6 Connection
From the main menu of the Setup Guide, click Sync your data
The my.clerk.io setup guide shows what you need to do in your Shopware 6 backend. Here is an outline of the steps:
In the Shopware backend, go to Settings > System > Integrations
Click Add integration
In the popup, write Clerk.io as the name and enable Administrator
Copy the Access key ID and the Secret Access Key to the respective fields in my.clerk.io
Click Save integration
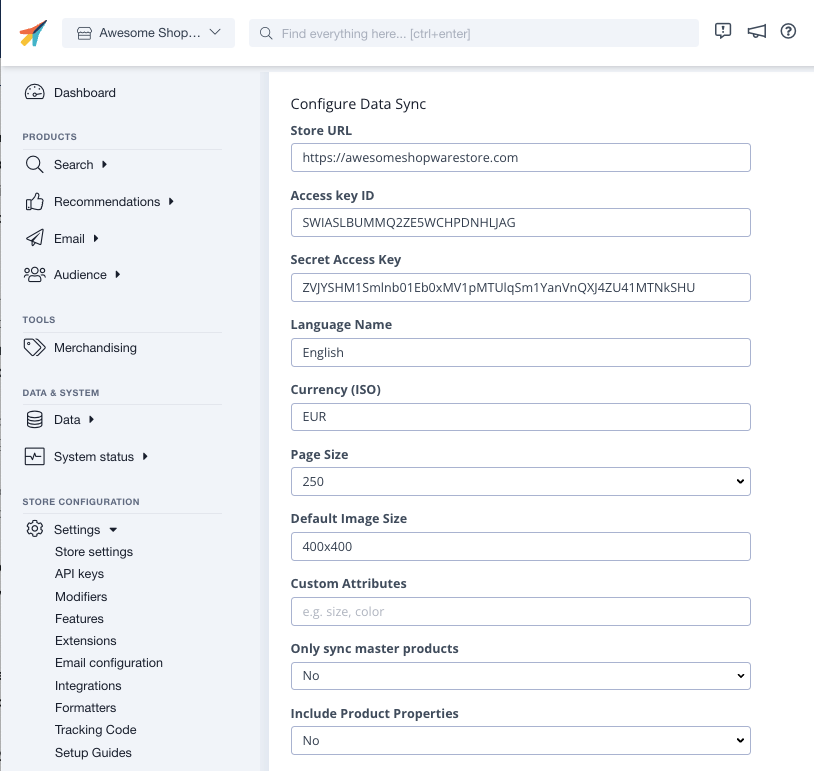
3. Sync your store
In my.clerk.io, add your Store URL to the field in the importer. This is is usually your domain e.g. https//yourdomain.com
Add your Language Name to the field. If you are unsure what it is, you can find it in the Shopware backend under Settings > Shop > Languages. Use the text in the Name column.
Add your currency ISO code. If you are unsure what it is, you can find it in the Shopware backend under Settings > Shop > Currencies. Use the text in the Short name column.
In my.clerk.io, scroll down and click Start sync. Maybe have a cup of coffee if you have a big product catalog ;)
That’s it!