Customising Product Data on WooCommerce
Platforms:
In WooCommerce you can add custom product attributes through the WooCommerce backend, or through the Clerk.io plugin in code, if needed.
Adding Simple Attributes
If the attributes you want to send are already available as simple attributes in your WooCommerce admin, they can easily be added on the Plugin page.
1. In your WooCommerce backend, start by going to Products -> Attributes
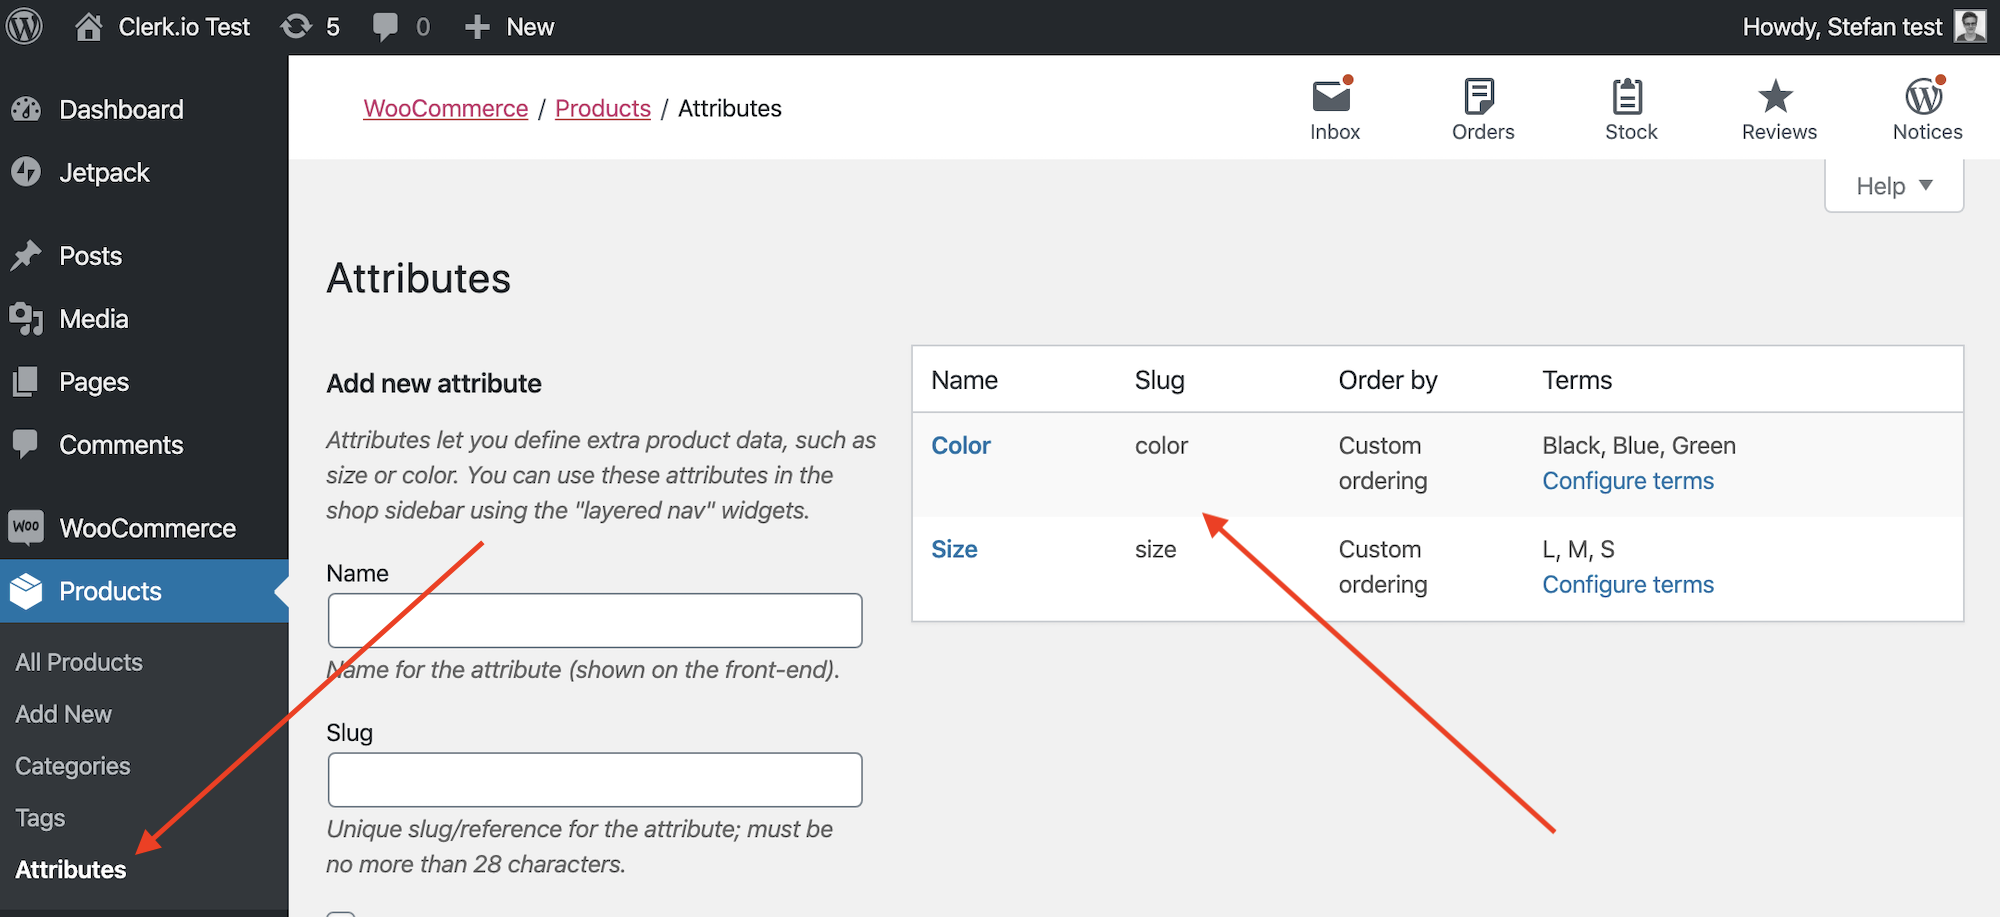
2. In here, find the slug of the attribute you want to add.
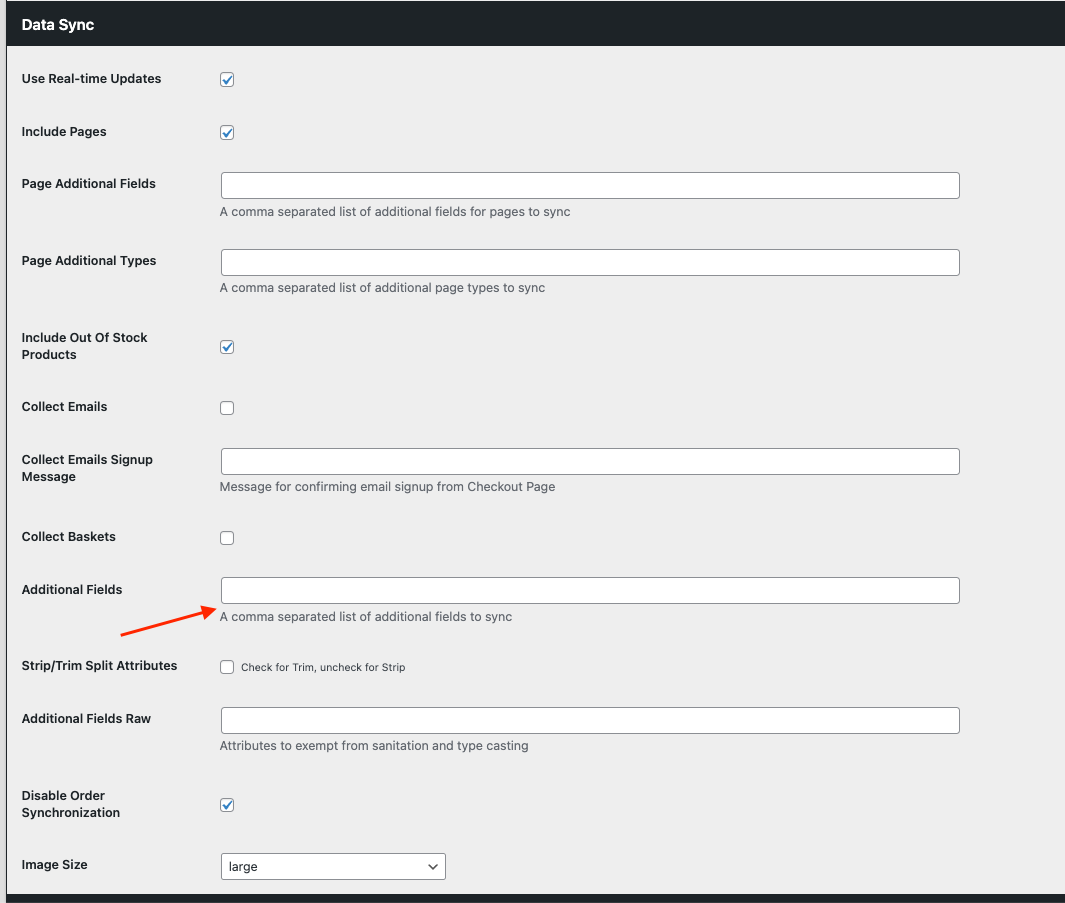
3. Now go to Clerk -> Settings .
4. Under Additional Fields, add the attribute slug. You can also add several different ones, separated by comma:
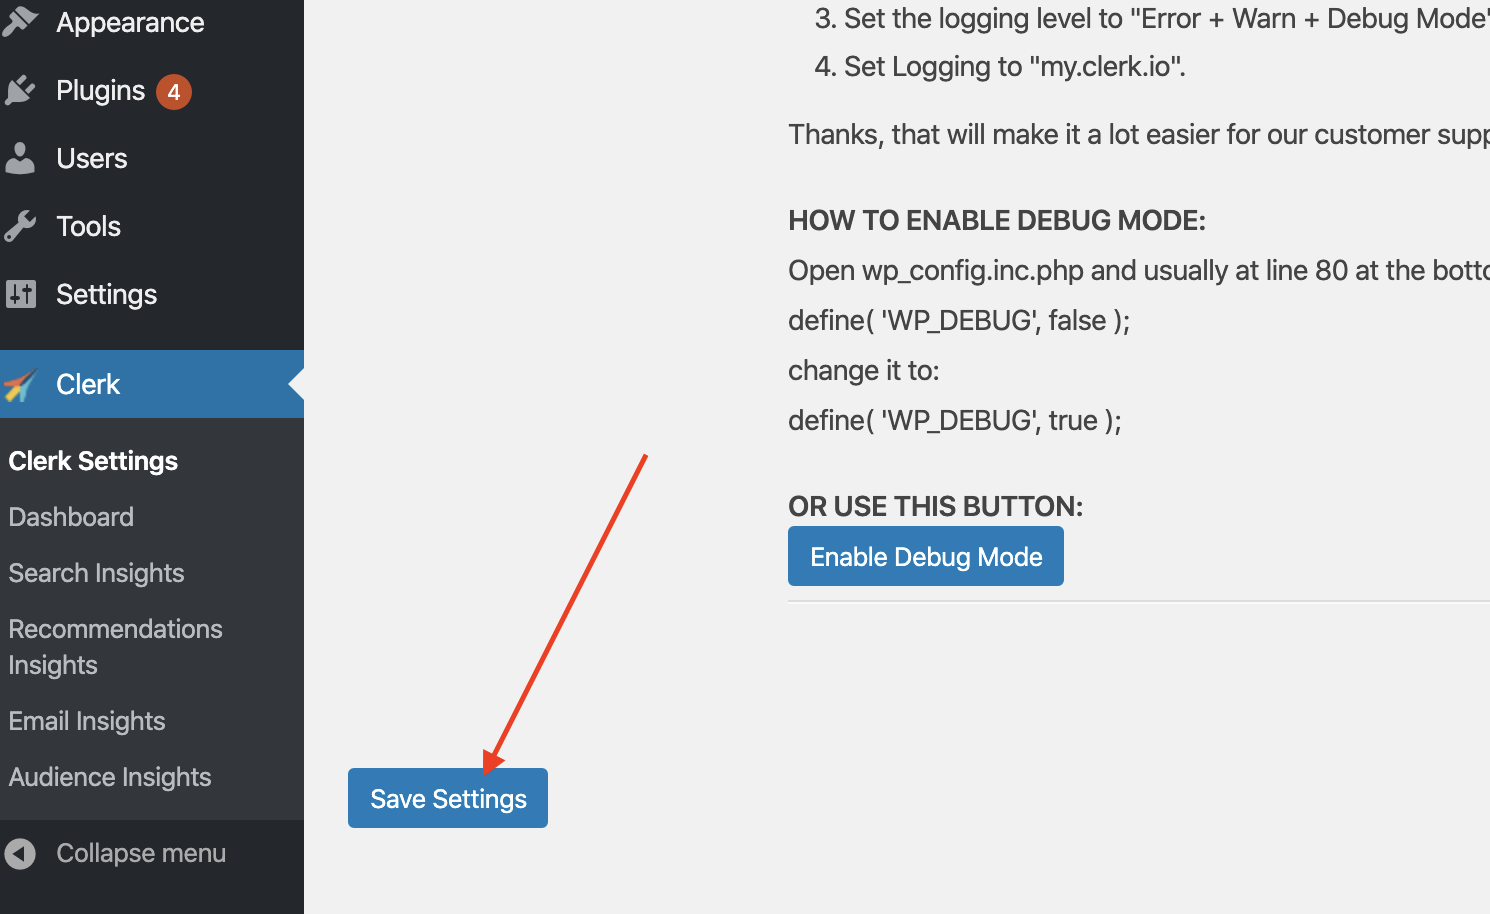
5. Scroll to the bottom of the page and click Save Settings:
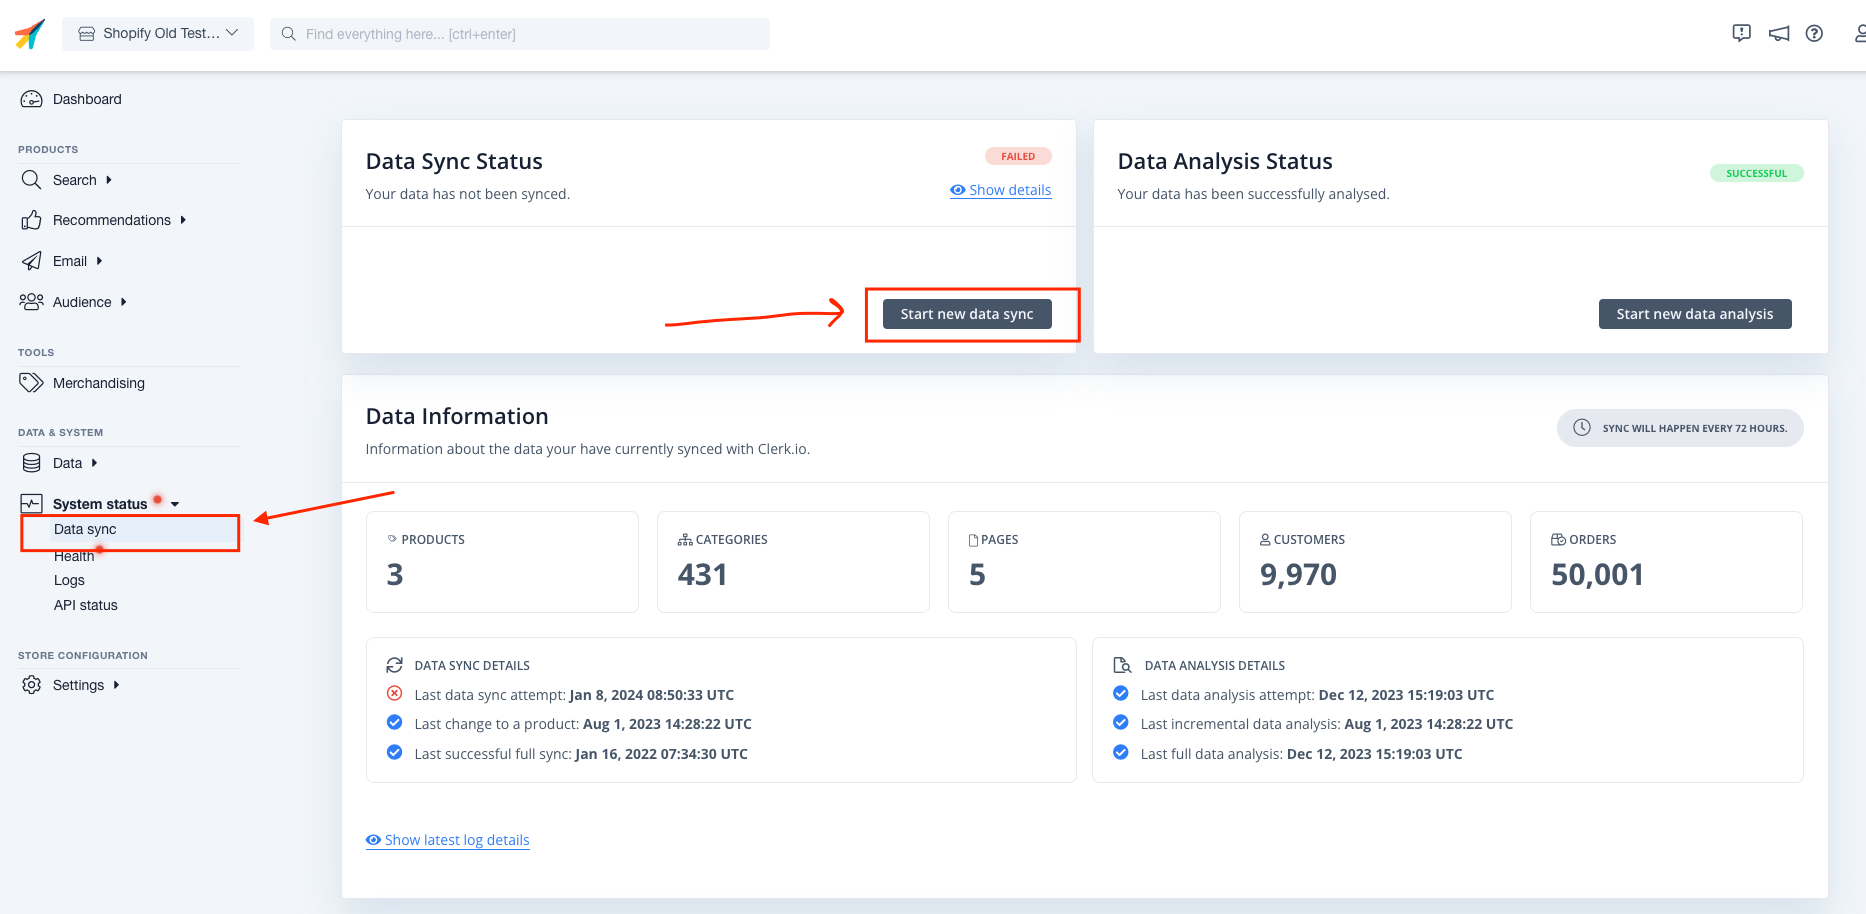
6. After implementing your attributes, go to my.clerk.io->System Status -> Data Sync and click Start New Data Sync in the upper right corner.
If the attributes you want to send are already available as part of your configurable/grouped products data in your WooCommerce admin, they can easily be synced on the latest version of your plug-in. They will appear as child_attribute, for example, child_color, child_skus etc.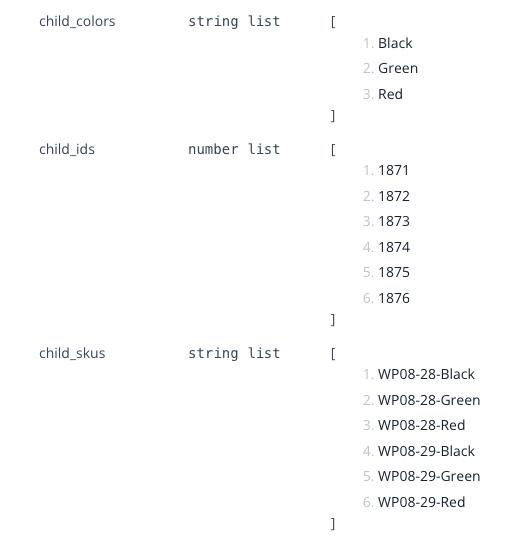
Adding attributes through code
Attributes in WooCommerce can also be added in code, through two files, as they are used to sync products manually and automatically when changes are made in the webshop.
These are the files:
wp-content->plugins->clerkio->includes->class-clerk-product-sync.php
in the function add_product
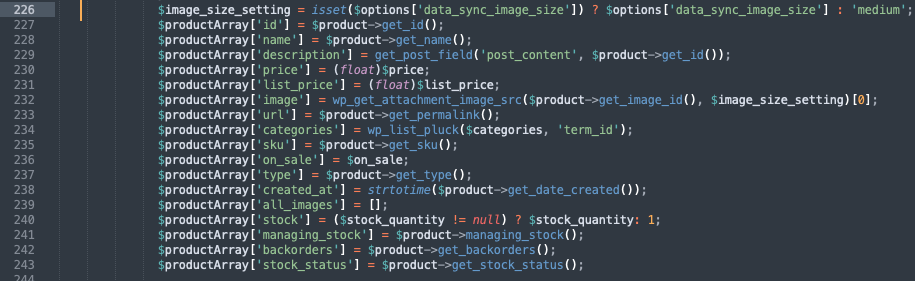
wp-content->plugins->clerkio->includes->class-clerk-rest-api-php
in the function product_endpoint_callback in $productArray
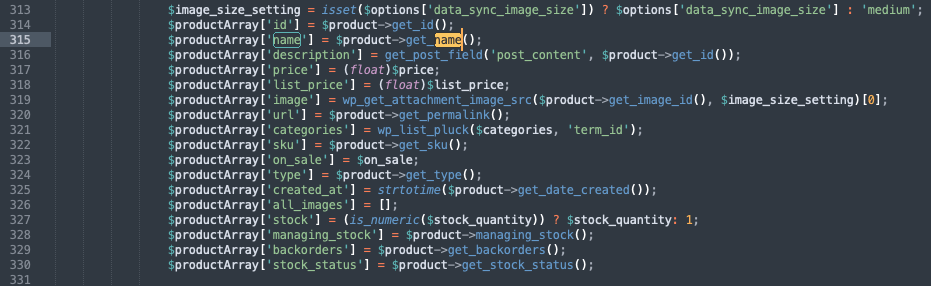 Each attribute is structured like this:
'sku' => $product->get_sku(),
where ‘sku’ defines the name you want it to have in Clerk.io, and => $product->get_sku(), is a WooCommerce logic for pulling the attribute.
Adding Product Data Using functions.php
New attributes can also be added to Clerk.io by changing the file functions.php, and will not be overwritten when the plugin is updated.
Add the following code to the WooCommerce backend to Appearance > Theme Editor > functions.php :
// Alters clerk parameters
add_filter( 'clerk_product_sync_array', 'clerk_change_params', 10, 2 );
add_filter( 'clerk_product_array', 'clerk_change_params', 10, 2 );

function clerk_change_params( $params, $product ) {

// Used to hide hidden products from search
   $params['catalog_visibility'] = $product->get_catalog_visibility();

// We only use short_description
   $params['description'] = $product->get_short_description();

    return $params;
}
Finally, go to my.clerk.io -> System Status -> Data sync and click Start New Data Sync to import your new attributes.