FAQ
Running into issues with your Magento 1 integration? This FAQ covers the most common problems and their solutions, from currency conversion to sync errors.
Currency conversion #
From v3.0.3 of the Magento 1 extension, Currency Conversion is included by default, if you are using Magento 1’s standard conversion function.
It’s added in my.clerk.io -> Designs, with the formatter price_in_currency.
The helper can be added to your Design in the following way:
{%raw%}
<div class="clerk-product-price">
{{ product.price_final_excl_tax | price_in_currency }}
</div>{%endraw%}
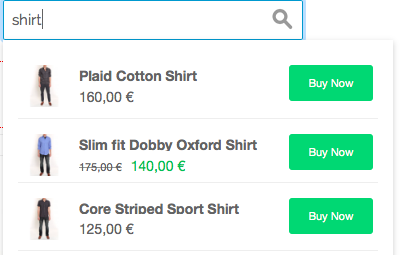
The helper will automatically convert the price to the currency of the current session, and add the currency symbol.
Example output:
Using formatters #
Clerk.js allows you to write custom JavaScript functions that add new functionality to your Designs.
Formatters can be added in two ways:
Through my.clerk.io > Developers > Formatters, where each Formatter can be created as separate entries.
As a configuration for Clerk.js, in the tracking-script that is inserted on all pages, where multiple formatters can be added at once.
For Magento 1, this file contains the tracking-script:
app->design->frontend->base->default->template->clerk->tracking.phtml
Example formatter #
An example can be seen below. Please be aware this is for Clerk V2 (latest version):
Clerk('config', {
  key: 'O7UITkJIXqXibeQF9ONobiGGKYYKtbvh',
  formatters: {
    form_key: function () {
      return '<?php echo $this->getFormKey(); ?>';
    },
    price_in_currency: function(price) {
      price = Math.round(price * 100) / 100;
      var price_converted = Math.round((price * <?php echo (float)$rates[$currentCurrencyCode]; ?>) * 100) / 100;
      var retVal = <?php echo json_encode($currentCurrencySymbol); ?> + ' ' + price_converted.toFixed(2).toString();
      return retVal;
    },
    log_price: function(price) {
      console.log(price);
    }
  }
});
Multiple formatters #
You can write any number of Formatters, separated by comma:
formatters: {
  log_price: function(price) {
    console.log(price);
  },
  calculate_discount: function(price, special_price) {
    return price - special_price;
  },
  substring: function(text) {
    var short_string = text.substring(0, 20);
    return short_string;
  }
}
Use in designs #
After creating your Formatters, you can use them in your Designs using this syntax:
{%raw%}{{ x formatter | attribute }} {{ x | formatter | attribute1 | attribute2 }}{%endraw%}
This allows you to create any functionality in your Designs that you require.
HTTP authentication #
HTTP authentication is often used on staging sites to avoid unwanted visitors.
This will block the Clerk Importer and display a 401 Unauthorized error in the sync log.
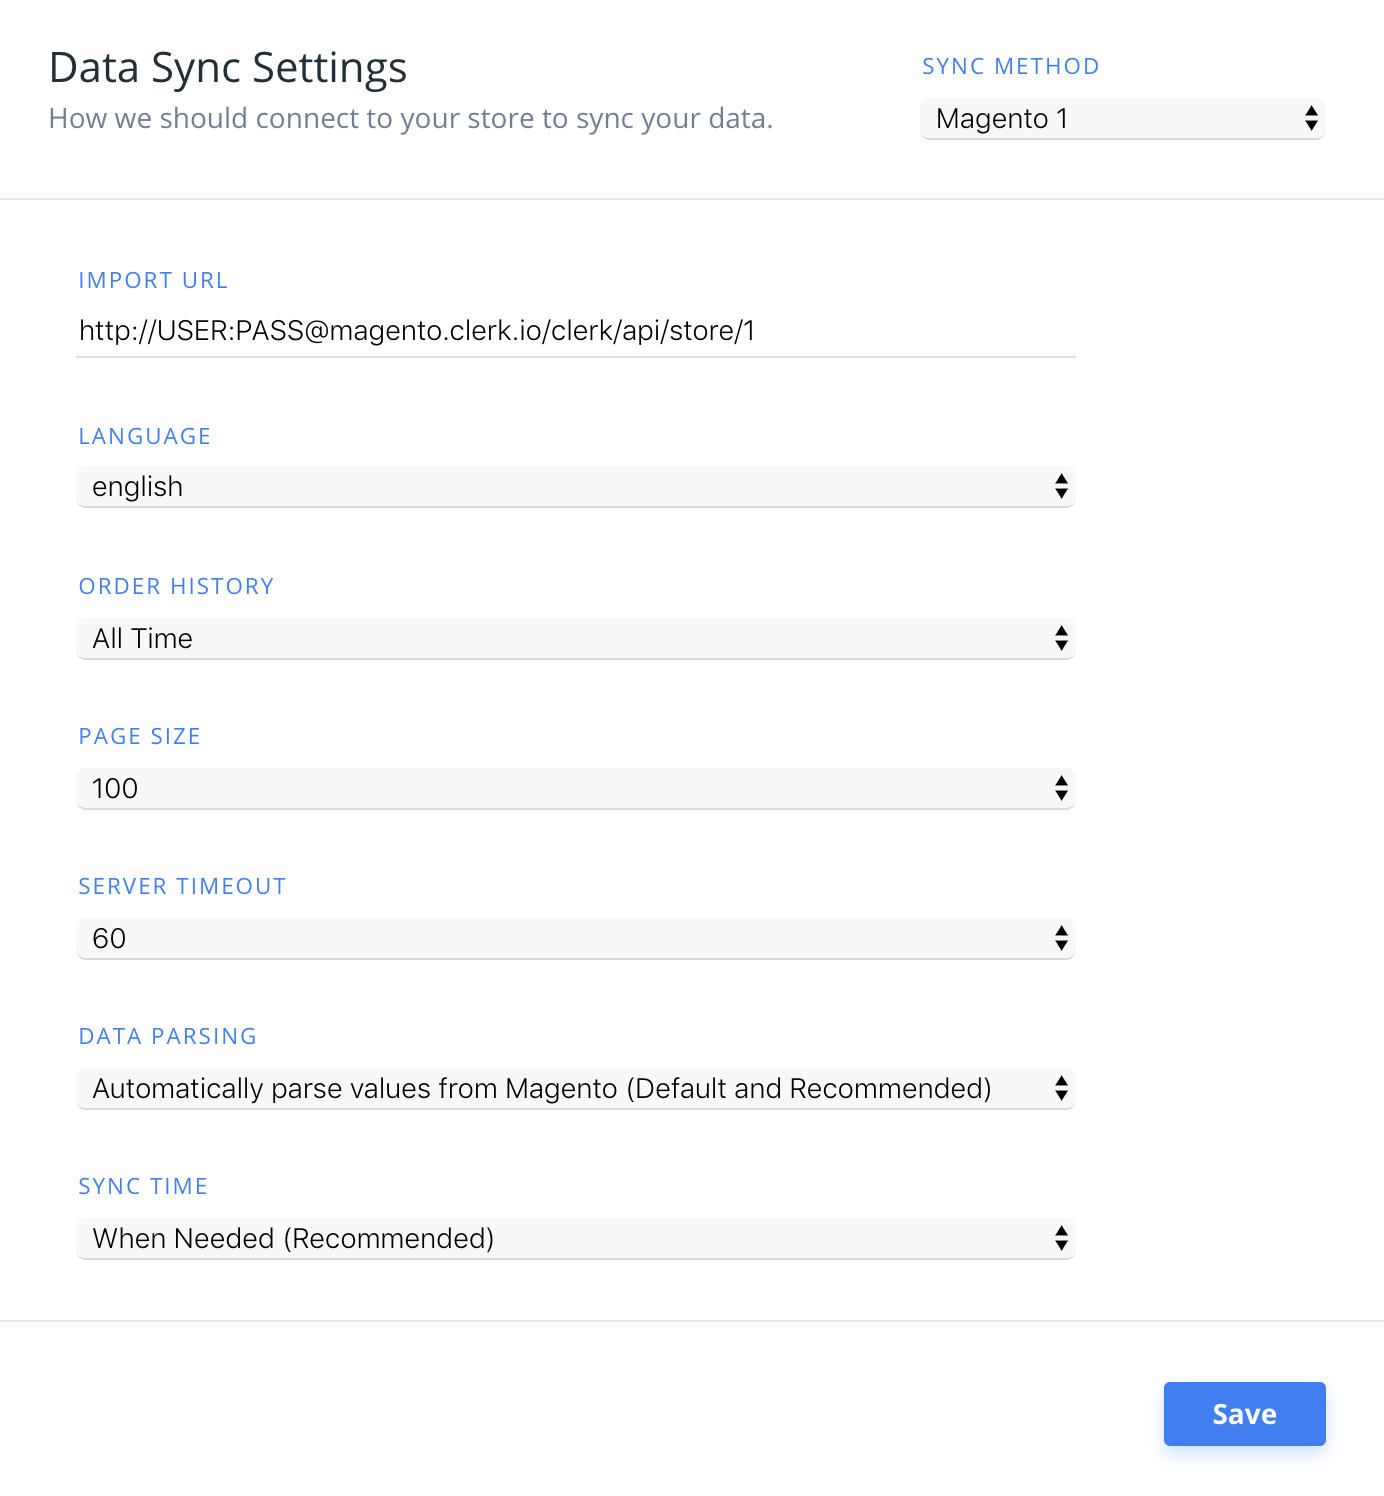
You can fix this by inserting the authentication info in the Import URL.
In my.clerk.io > Data > Configuration, update your import URL like this:
http://USER:PASS@magento.clerk.io/clerk/api/store/1
Common sync errors #
Note: We recommend always updating the extension to the latest version to get all up-to-date features from Clerk.
When importing data with the Magento 1 extension, your webshop’s server is responsible for sending product, category, and sales data to Clerk.
However, in some cases, the server’s configuration might stop the Importer from getting access, causing an error in Data Sync.
Below is a list of the most common errors and how to fix them.
401 Unauthorized #
This error happens if your webshop or dev environment requires HTTP authentication to access it.
This is solved by inserting the Username and Password as part of the Import URL:
http://username:password@magento.clerk.io/clerk/api/store/1
403 Forbidden #
This error happens if your server blocks the importer from accessing it.
In most cases, you simply need to whitelist the importer’s IP address to give it access.
The latest IP address can be found here.
Also check your public key, private key, and import URL are correct for the store you are operating within my.clerk.io.
What if I have already whitelisted but the same error still occurs?
There are a few instances when you have whitelisted the importer’s IP address, and the error still persists.
In these cases, we recommend you look into these parts:
The authentication part of the body may be removed from the request from the shop’s server.
Rate limit for the server in regards to Cloudflare.
404 Not Found #
This error happens if the importer could not access the link that sends data from the webshop.
In most cases, it happens because the extension is either:
Not installed at all
A cache causes the link to not be initialized
First, make sure that you have installed the extension correctly.
Second, be sure to clear your webshop’s cache before trying a new import.
429 Too Many Requests #
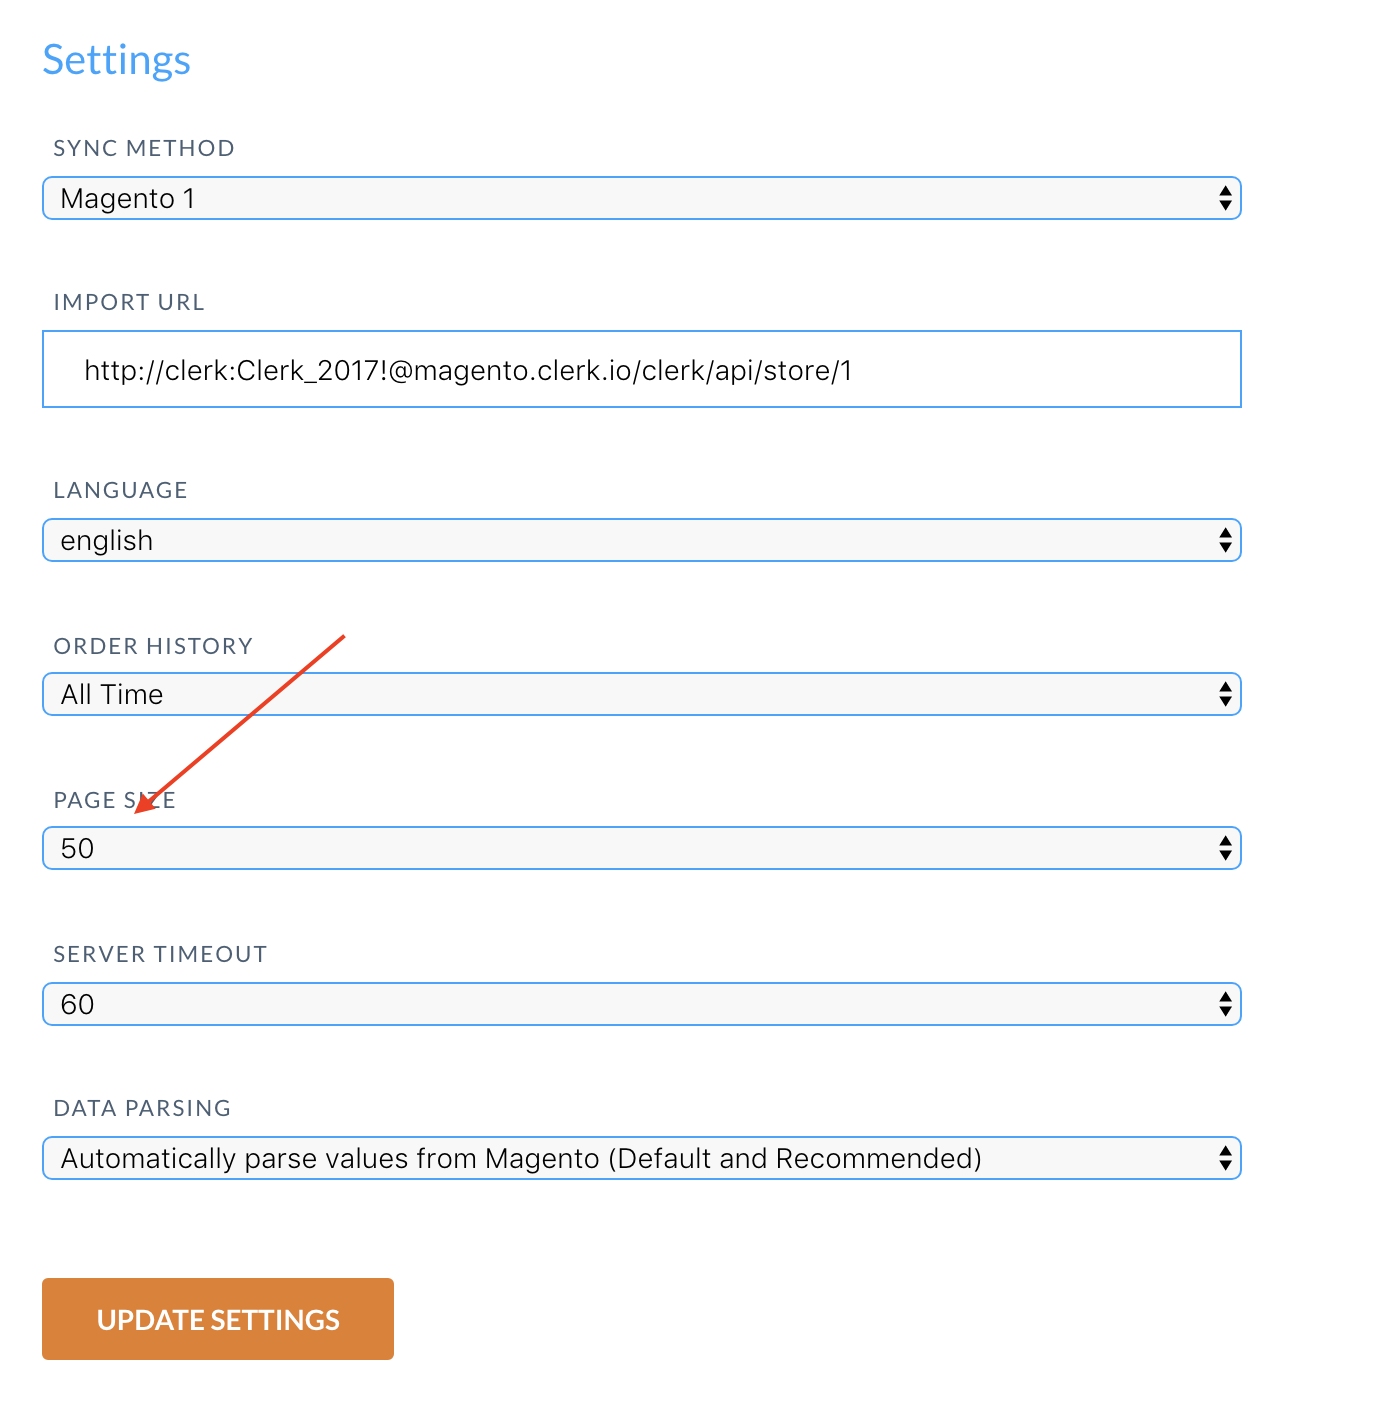
This error happens if your server denies the importer access because of too many incoming requests.
You can fix this by setting the request limit higher for your server or by setting Page Size to a higher value in my.clerk.io > Data > Configuration, causing the importer to make fewer, bigger requests:
If you are using the host provider Byte.nl, the importer usually returns this error because of their rate limiter. In this case, contact Byte.nl and ask them to whitelist the importer’s User-Agent “clerk”.
500 Internal Server Error #
This error means that your server encountered an internal error and was unable to specify which error happened.
In these cases, check your Server Log to identify which process crashed and why.
In most cases, it’s simply because of a product with an invalid attribute, or a function that is called incorrectly in the webshop.
503 Service Unavailable #
This error is usually temporary and is caused by the server being too busy to handle the request.
Try again a bit later.
If the issue continues to happen, it could mean that the server is overloaded with processes and is close to maximum capacity.
Check the server load to identify if this is the case.
Magento API error #
This error also means that your server encountered an internal error and was unable to specify which error or error code happened.
In these cases, check your Server Log to identify which process crashed and why.
In most cases, it’s simply because of a product with an invalid attribute, or your memory limit was exceeded.
Powerstep not showing #
If the Add-To-Basket step is not activated, it’s typically due to two reasons:
You have another add-to-basket popup or function enabled which blocks Clerk’s function.
The wrong Element IDs are inserted in the extension.
Another popup enabled #
Start by checking your existing Magento installation to see if you already have a popup or dropdown that is shown when adding a product to the basket.
These can normally stop Clerk’s add-to-basket step from showing.
If this is the case, deactivate it and try again.
Wrong element IDs #
If you have no other add-to-basket popup, and your powerstep is activated but not showing, it’s likely because the wrong template IDs have been inserted in the Clerk extension settings.
This will cause the Powerstep to fail.
To fix this, start by logging into your Magento admin and go to System > Configuration > Clerk > Settings.
Then choose the correct Configuration Scope that matches your store.
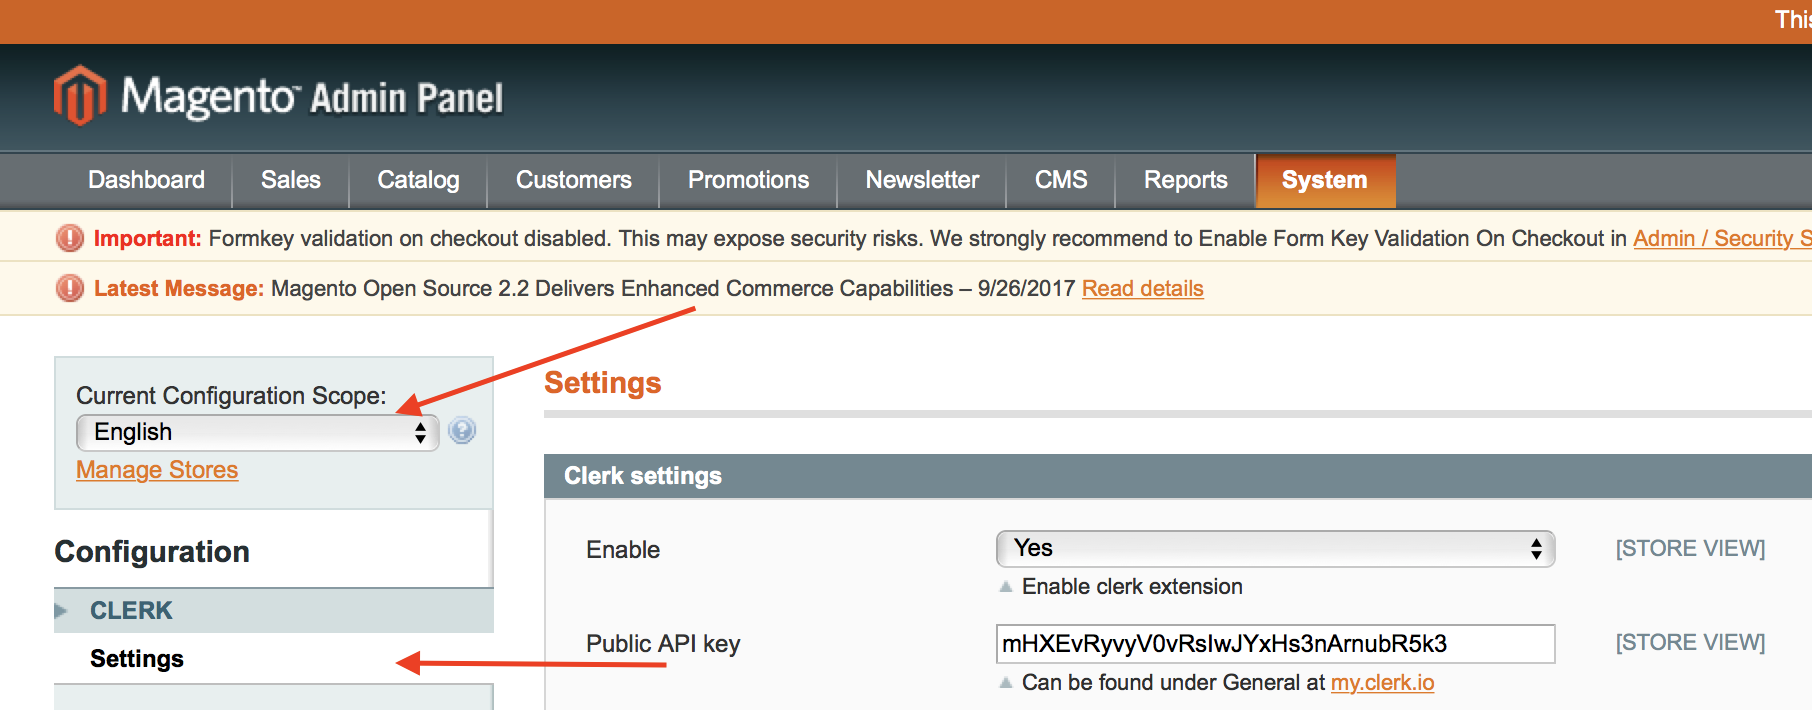
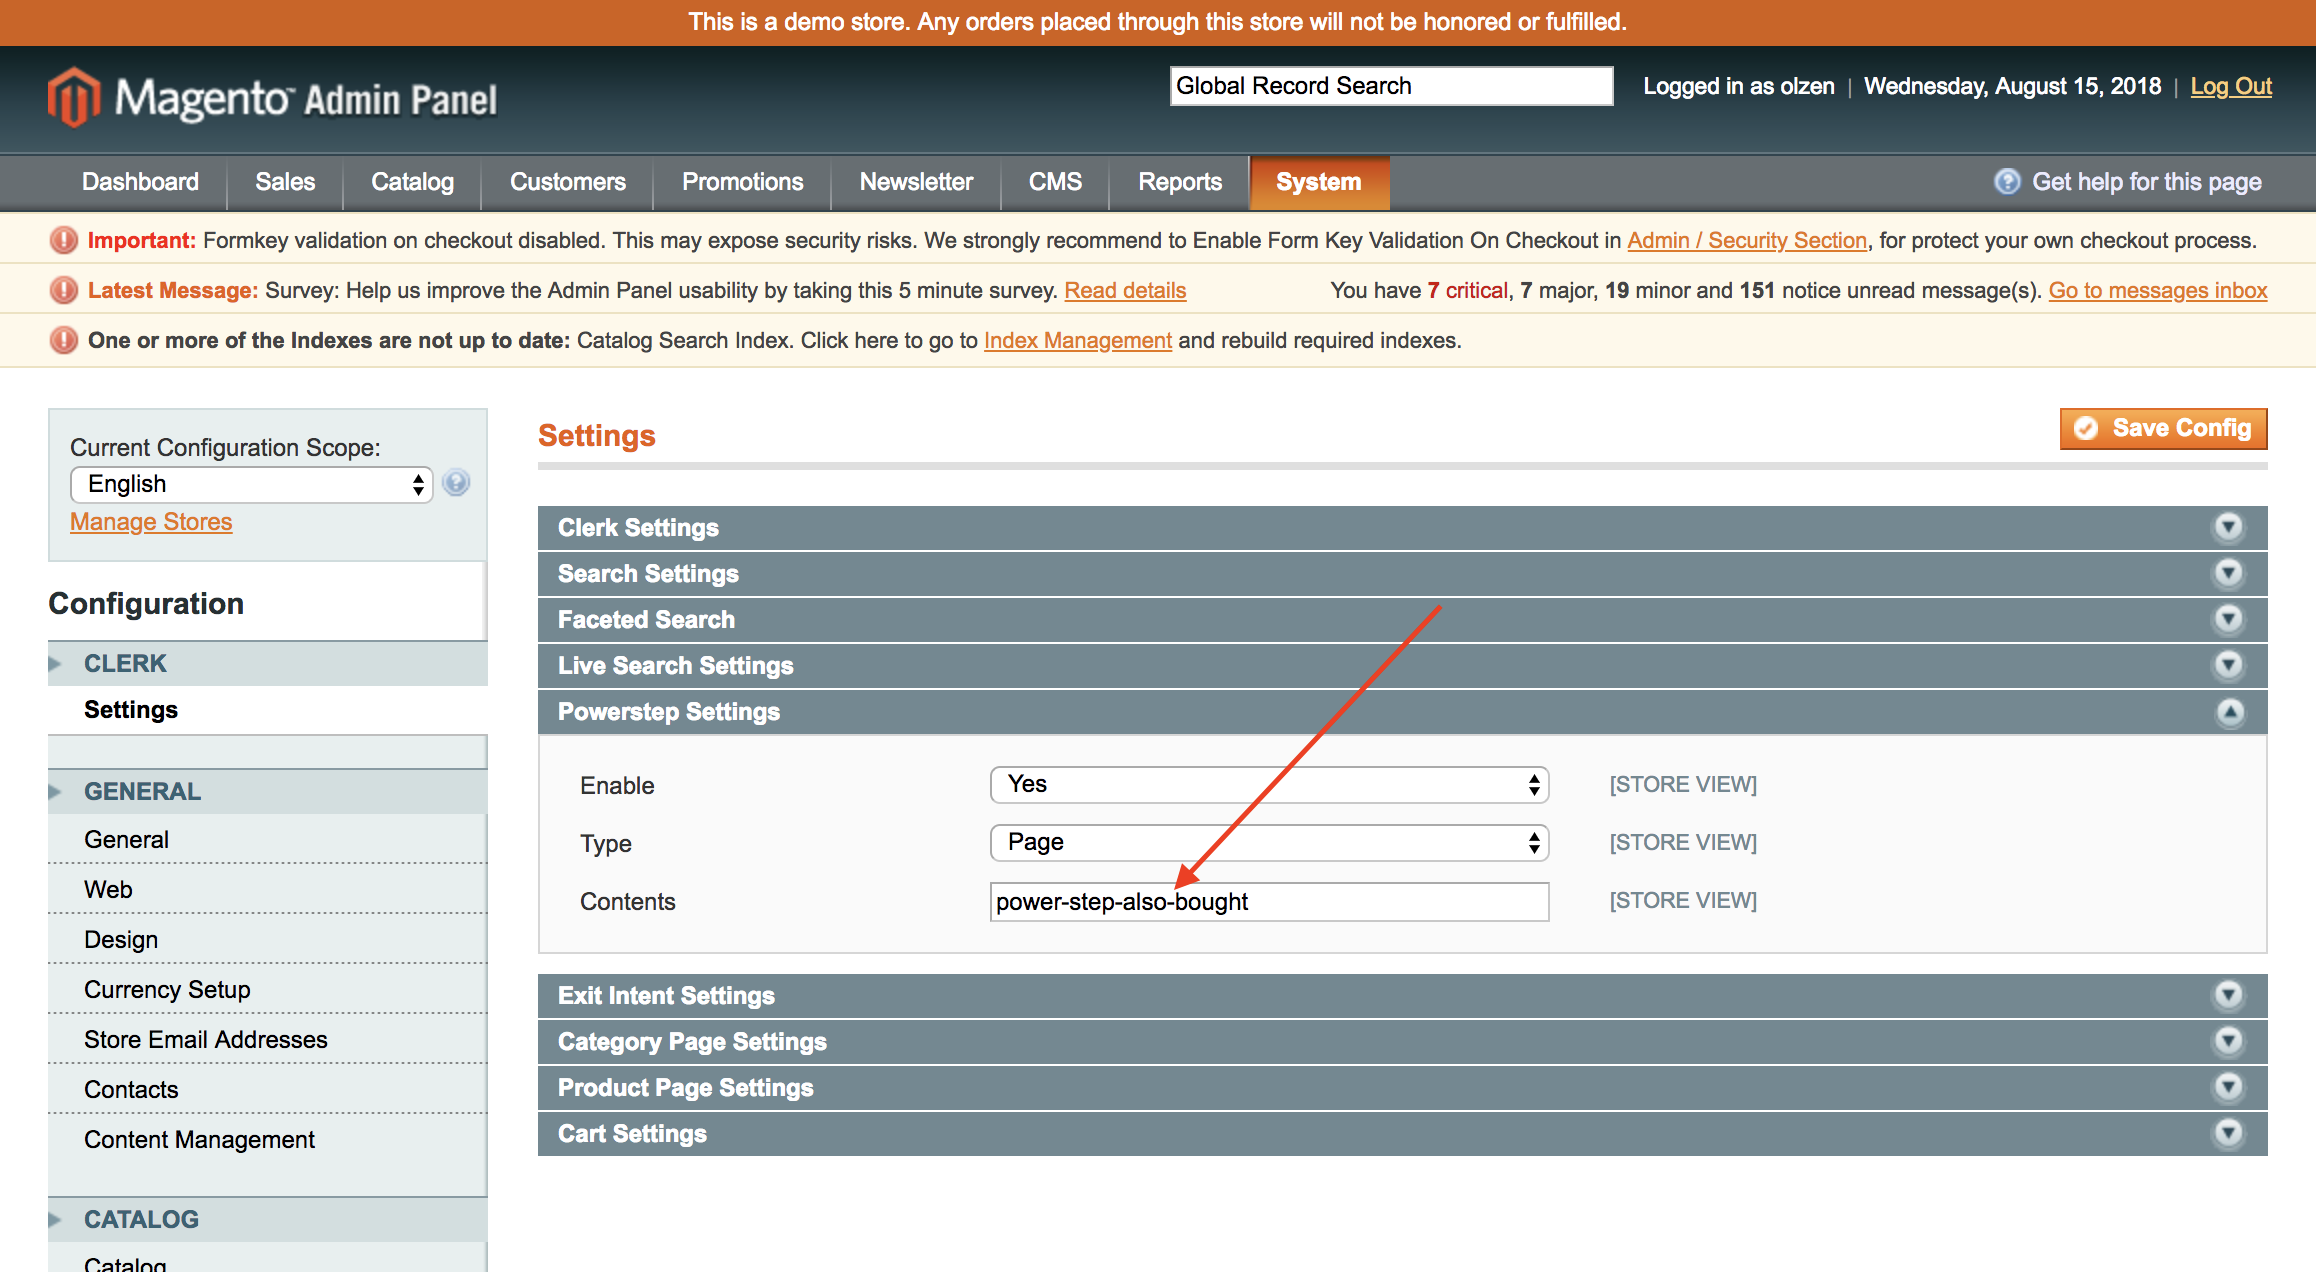
Under Power step settings, check the Templates field.
This field should contain the correct IDs separated by commas, if you use more than one.
To make sure your IDs are correct, log in to my.clerk.io.
Choose the correct Store and go to Recommendations/Search > Elements.
Click Edit Element for a slider that you want to show in the powerstep.
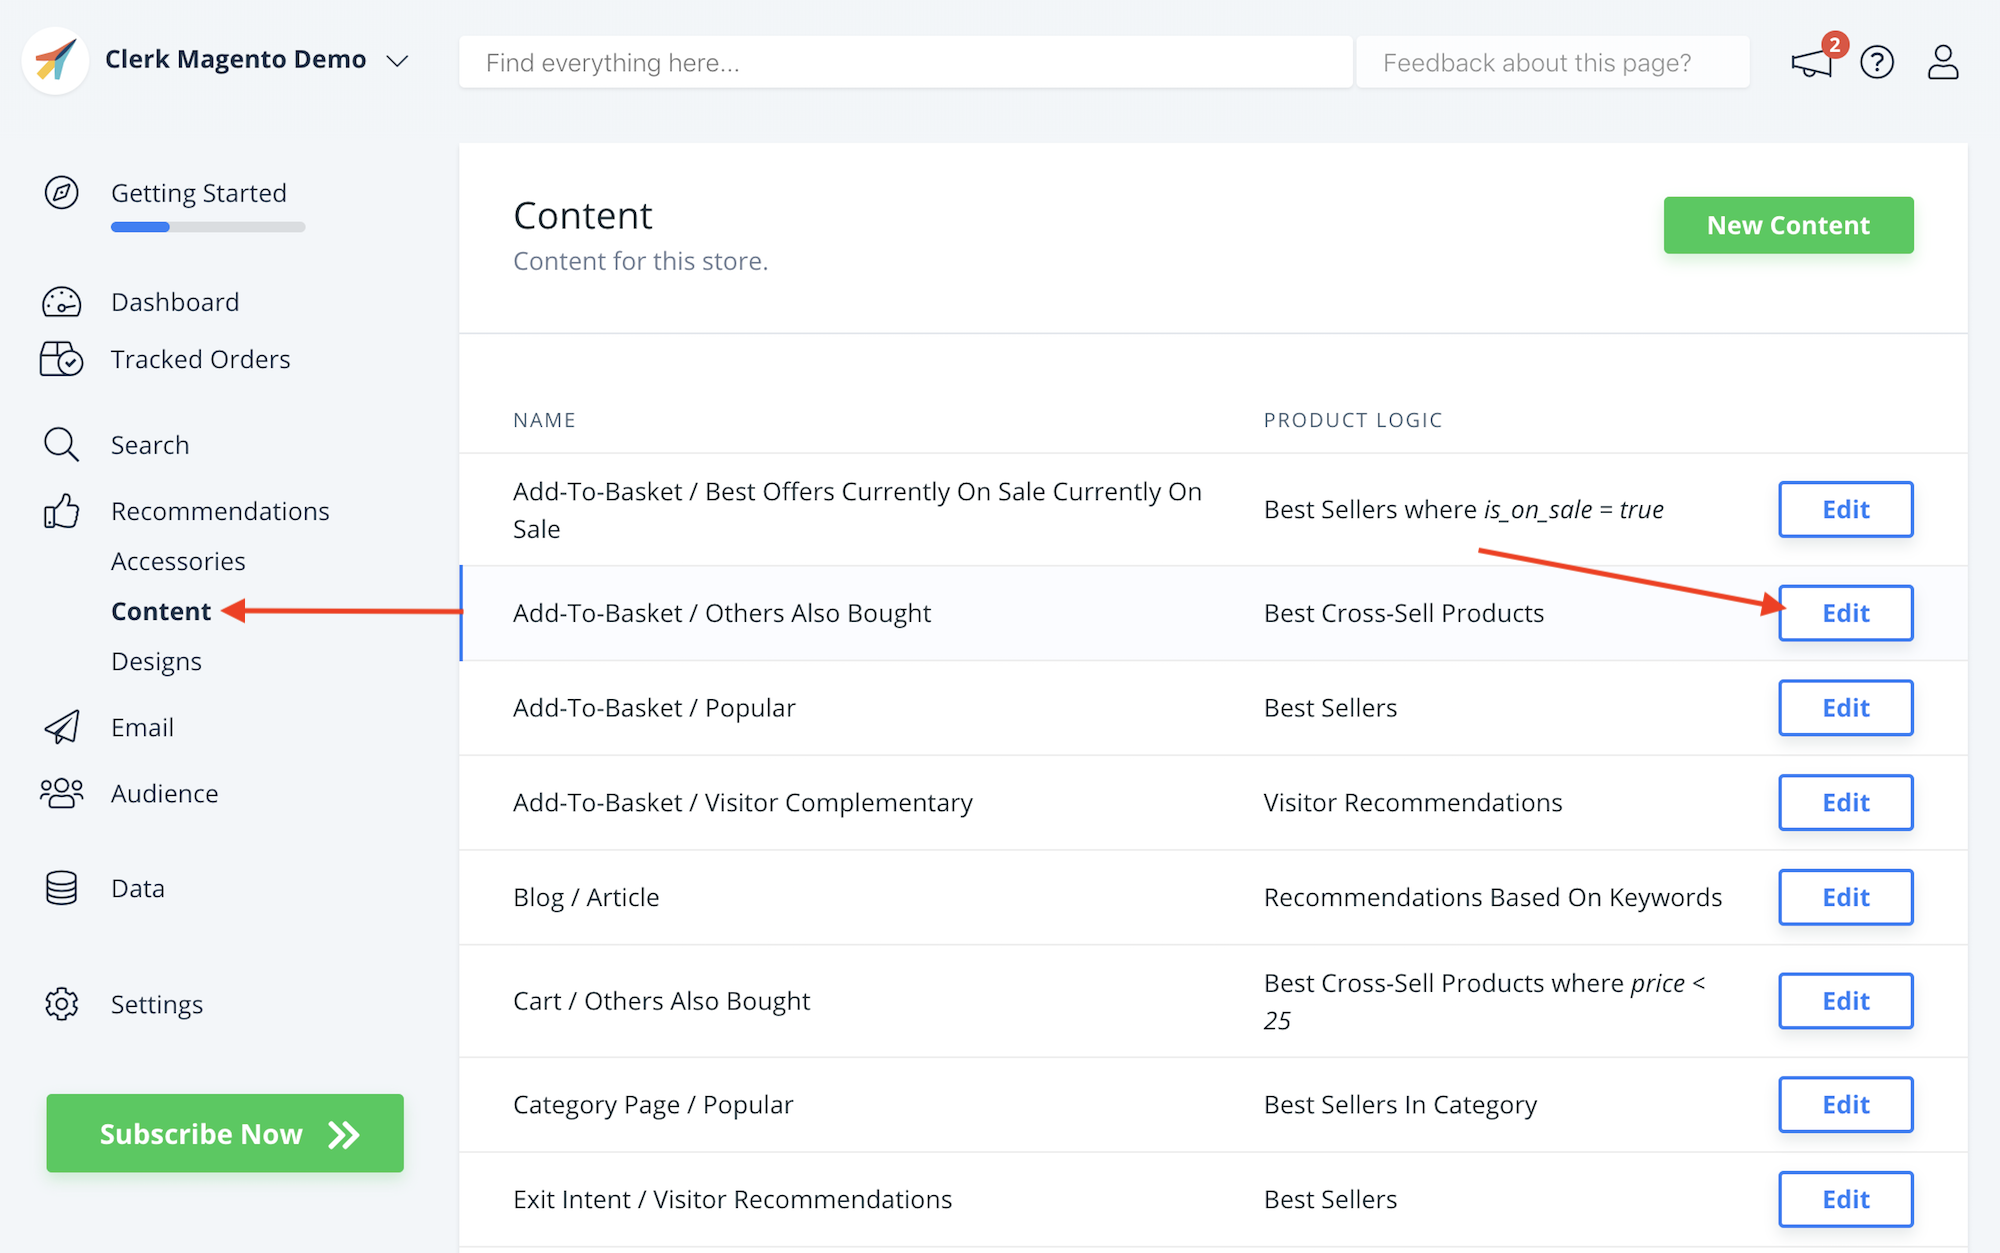
Check the last tab “Insert into website” and locate the embed code.
The ID found in data-template is the ID you need to copy to the Magento extension:
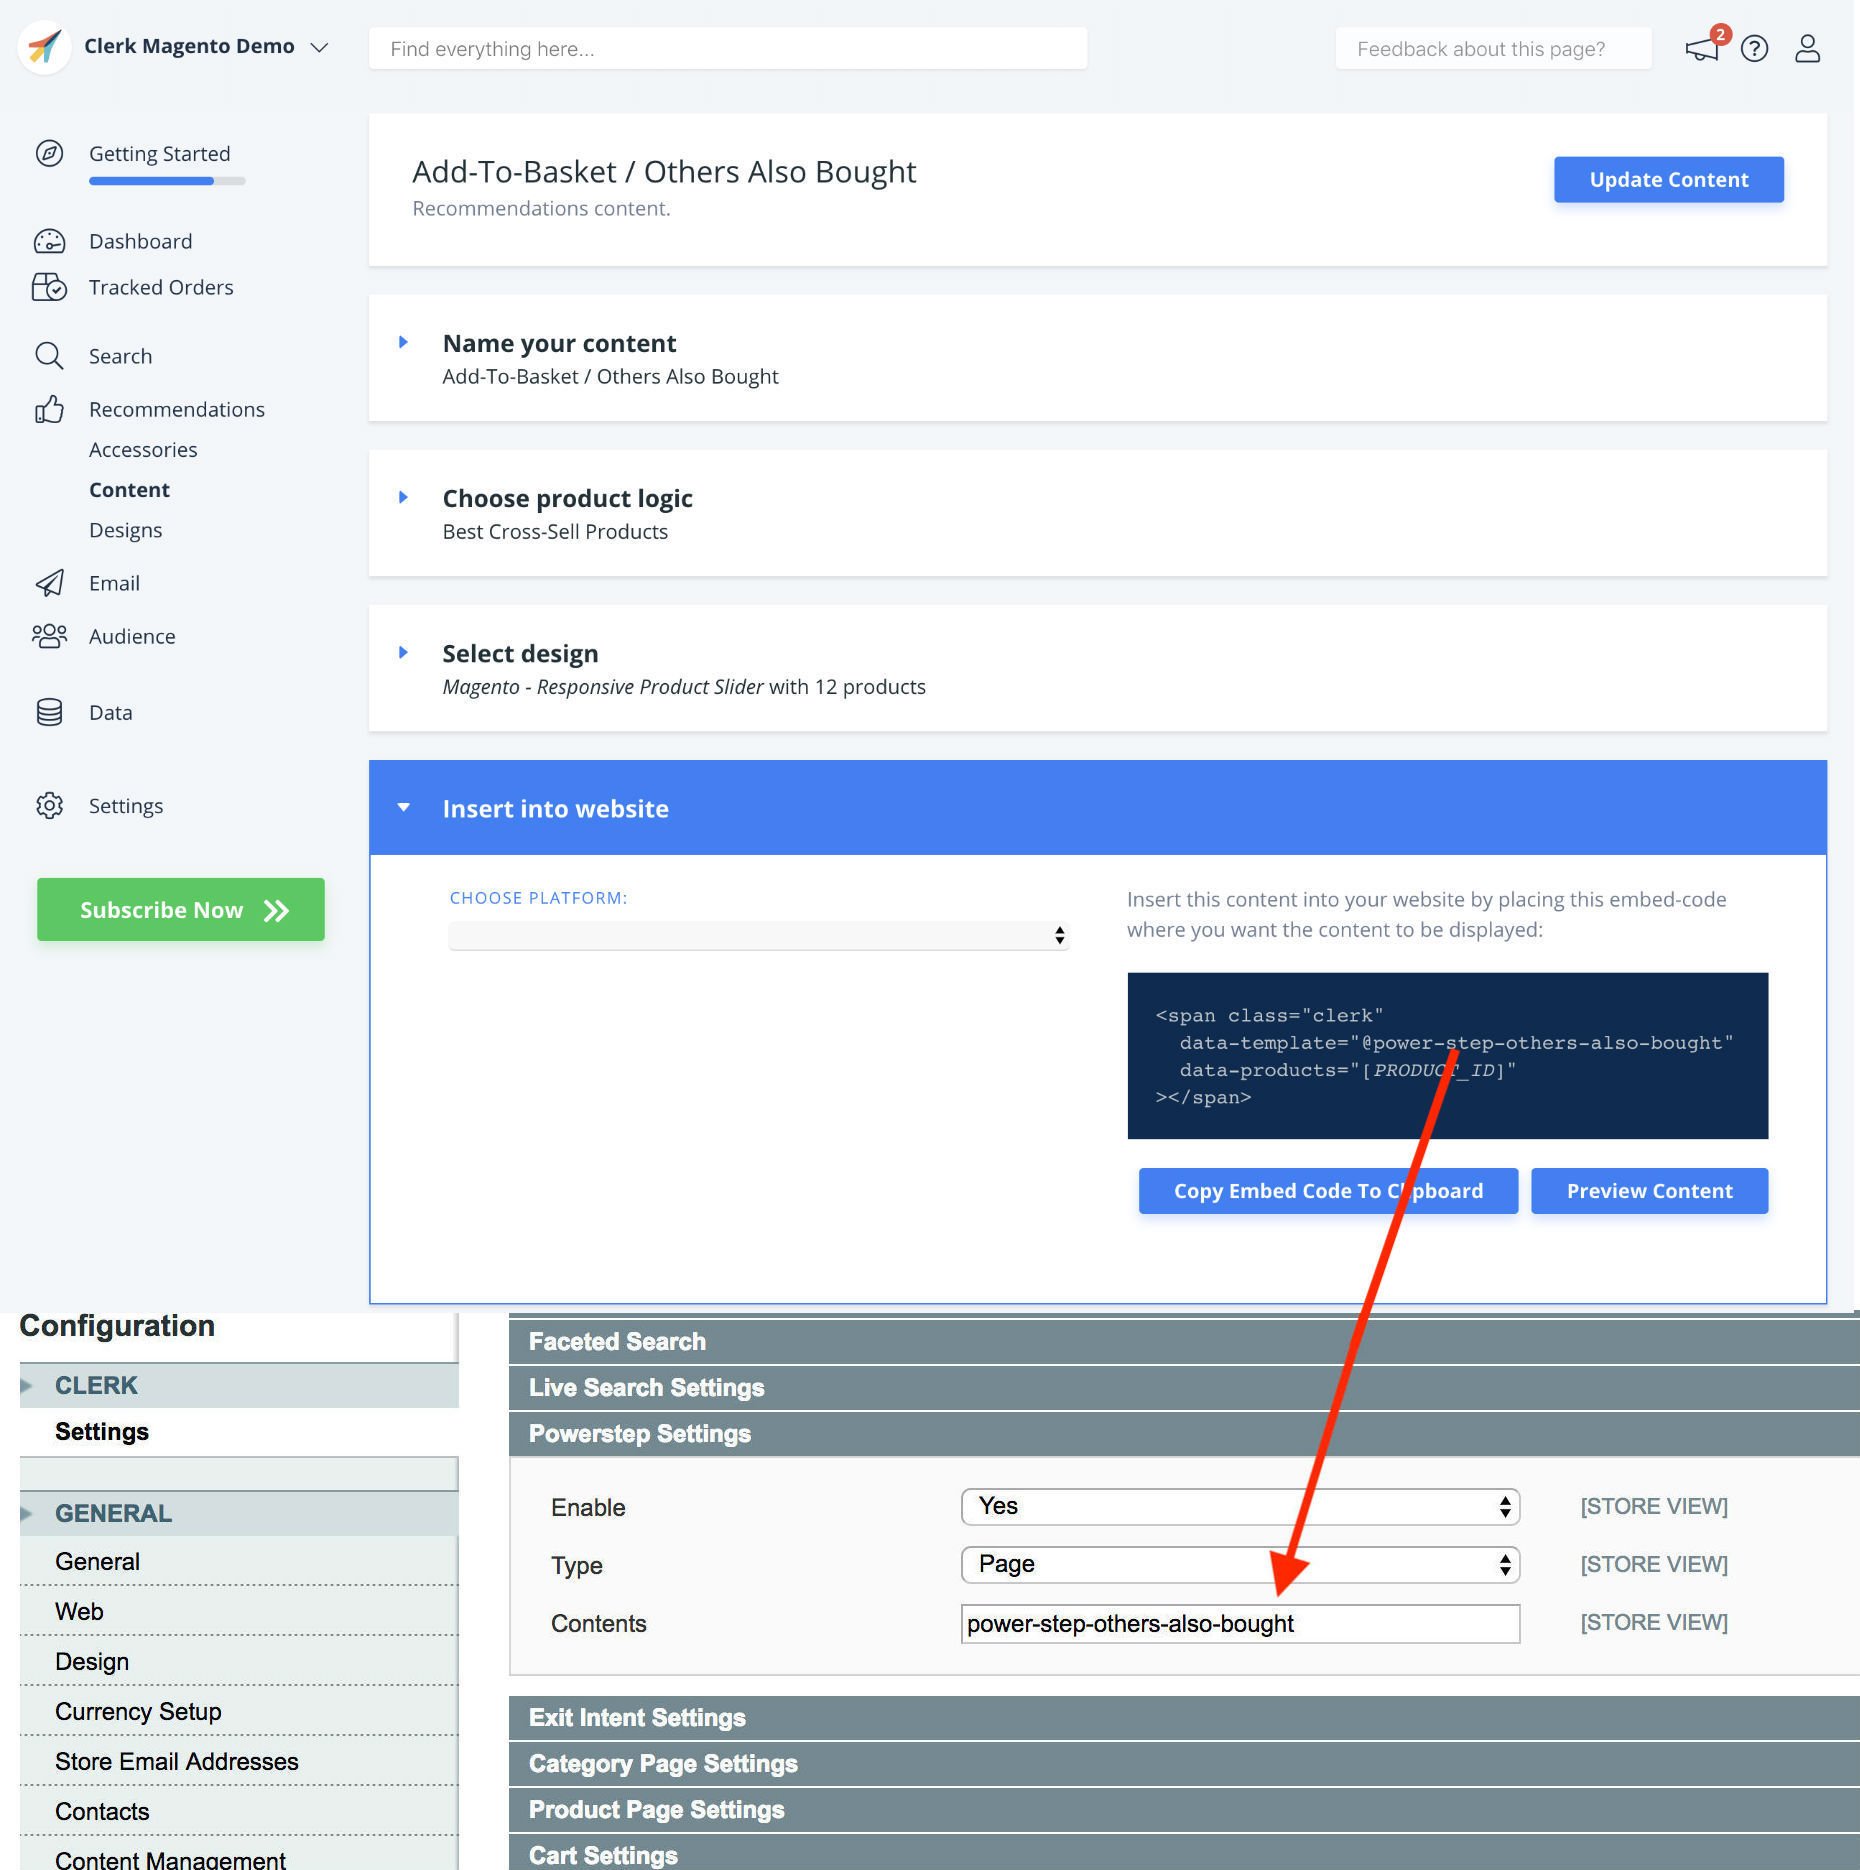
Click Save Config in the Magento extension, and the Powerstep should work afterwards.
Cache issues #
If you have activated the powerstep popup and it still does not show when adding a product to the basket, the issue is often because of Cache.
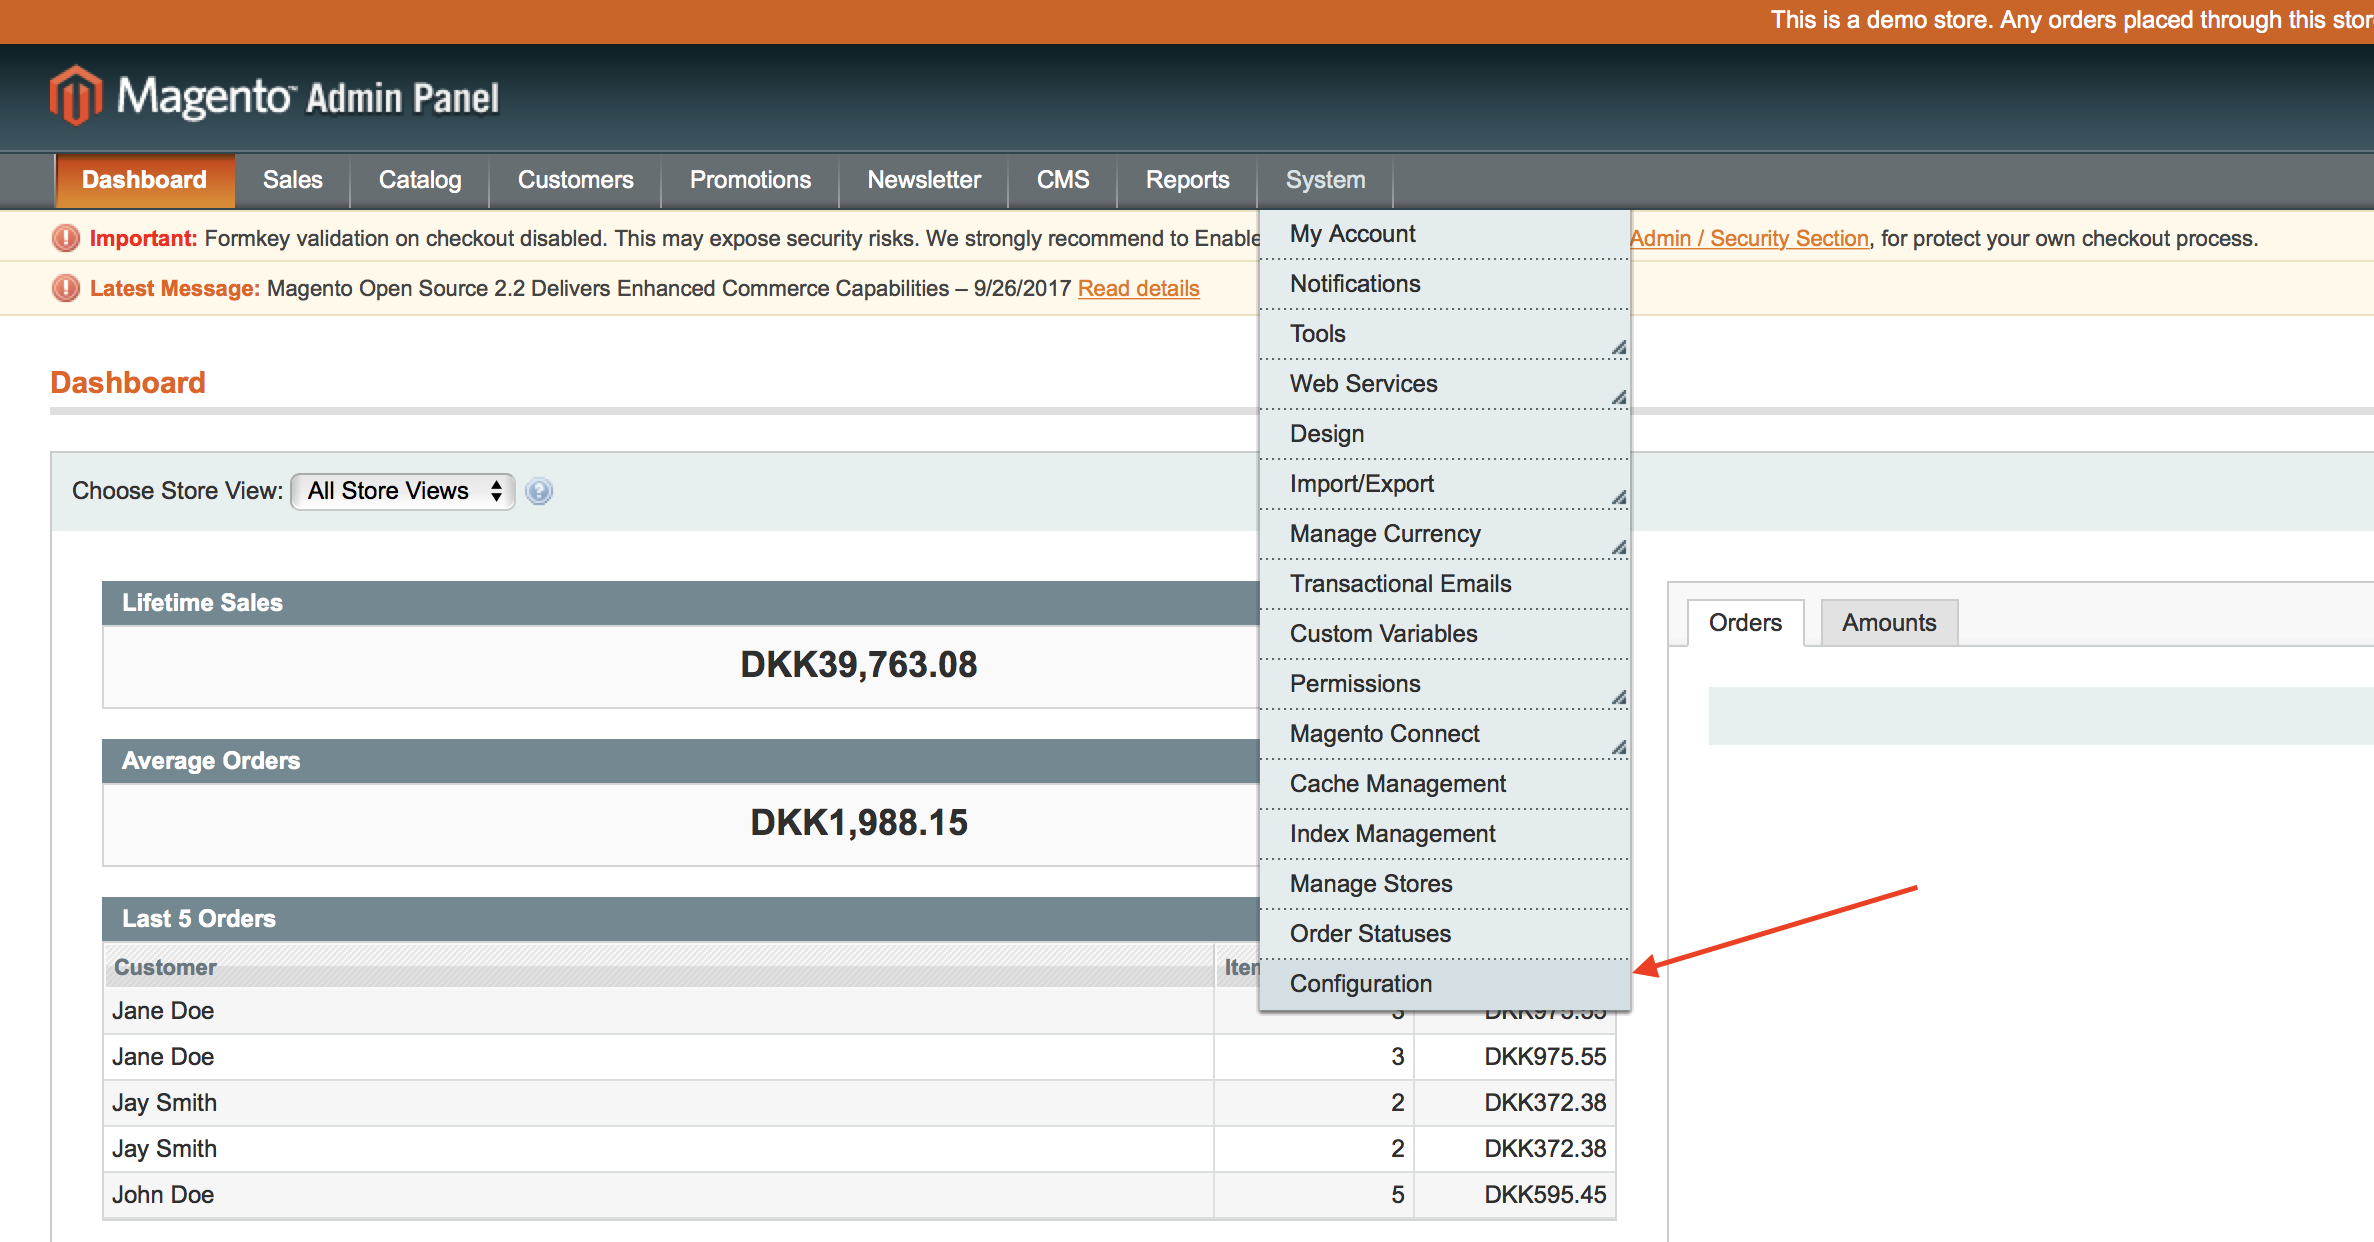
Go to System > Cache and clear all Internal and Third Party Caches.
If it does not solve it, you are likely using Full Page cache, which only impacts the pages a visitor has already viewed in their session. Deactivating it will have a minimal impact on page speed.
The screenshot below shows exactly which one to deactivate:
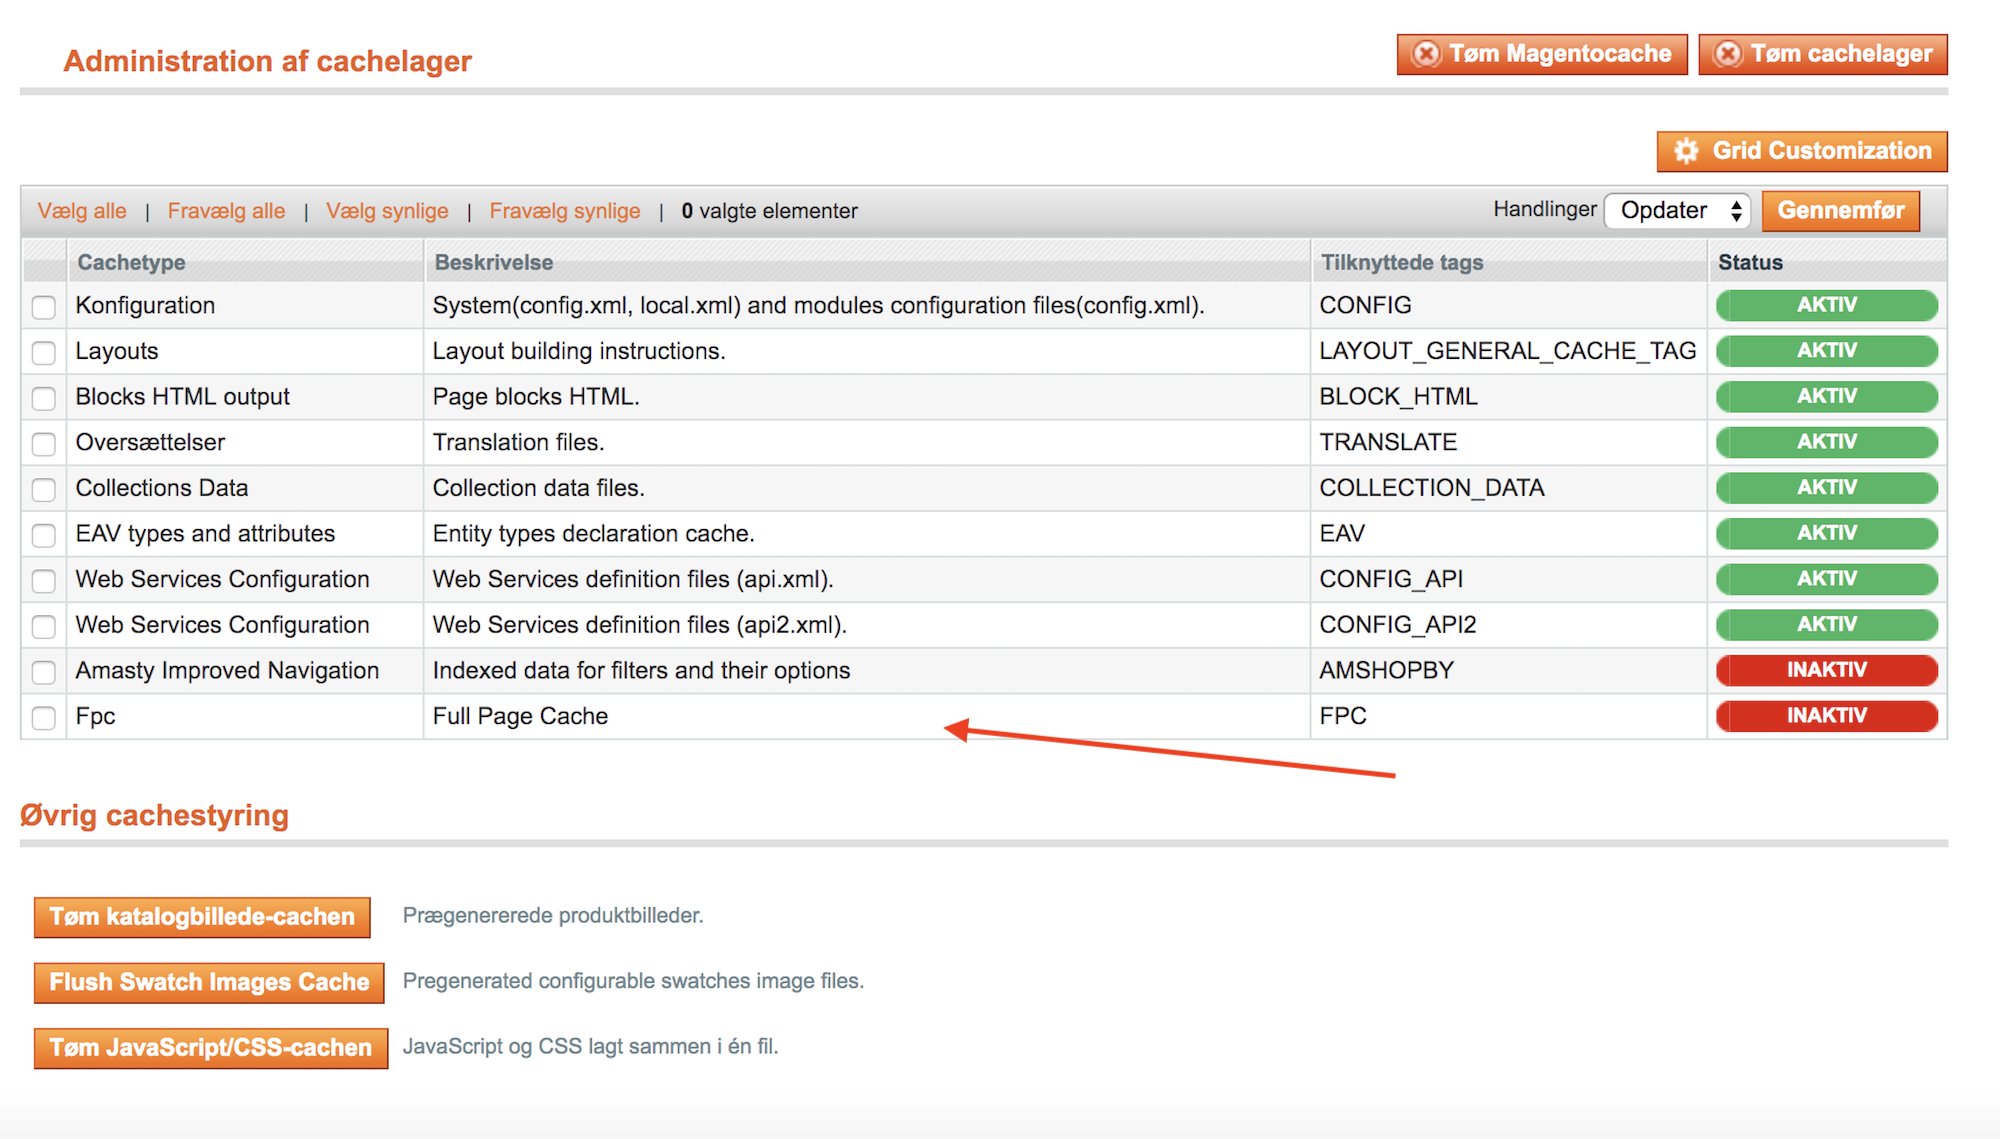
Once you have deactivated the Full Page Cache, the Clerk popup should appear.
If it does not, please contact Clerk Support from the live-chat icon in the lower right corner, and we can help find a solution for your specific setup.
Frontpage sliders cached #
Normally this only happens if embed codes are inserted through Magento’s CMS Pages in the backend, as the frontpage is cached:
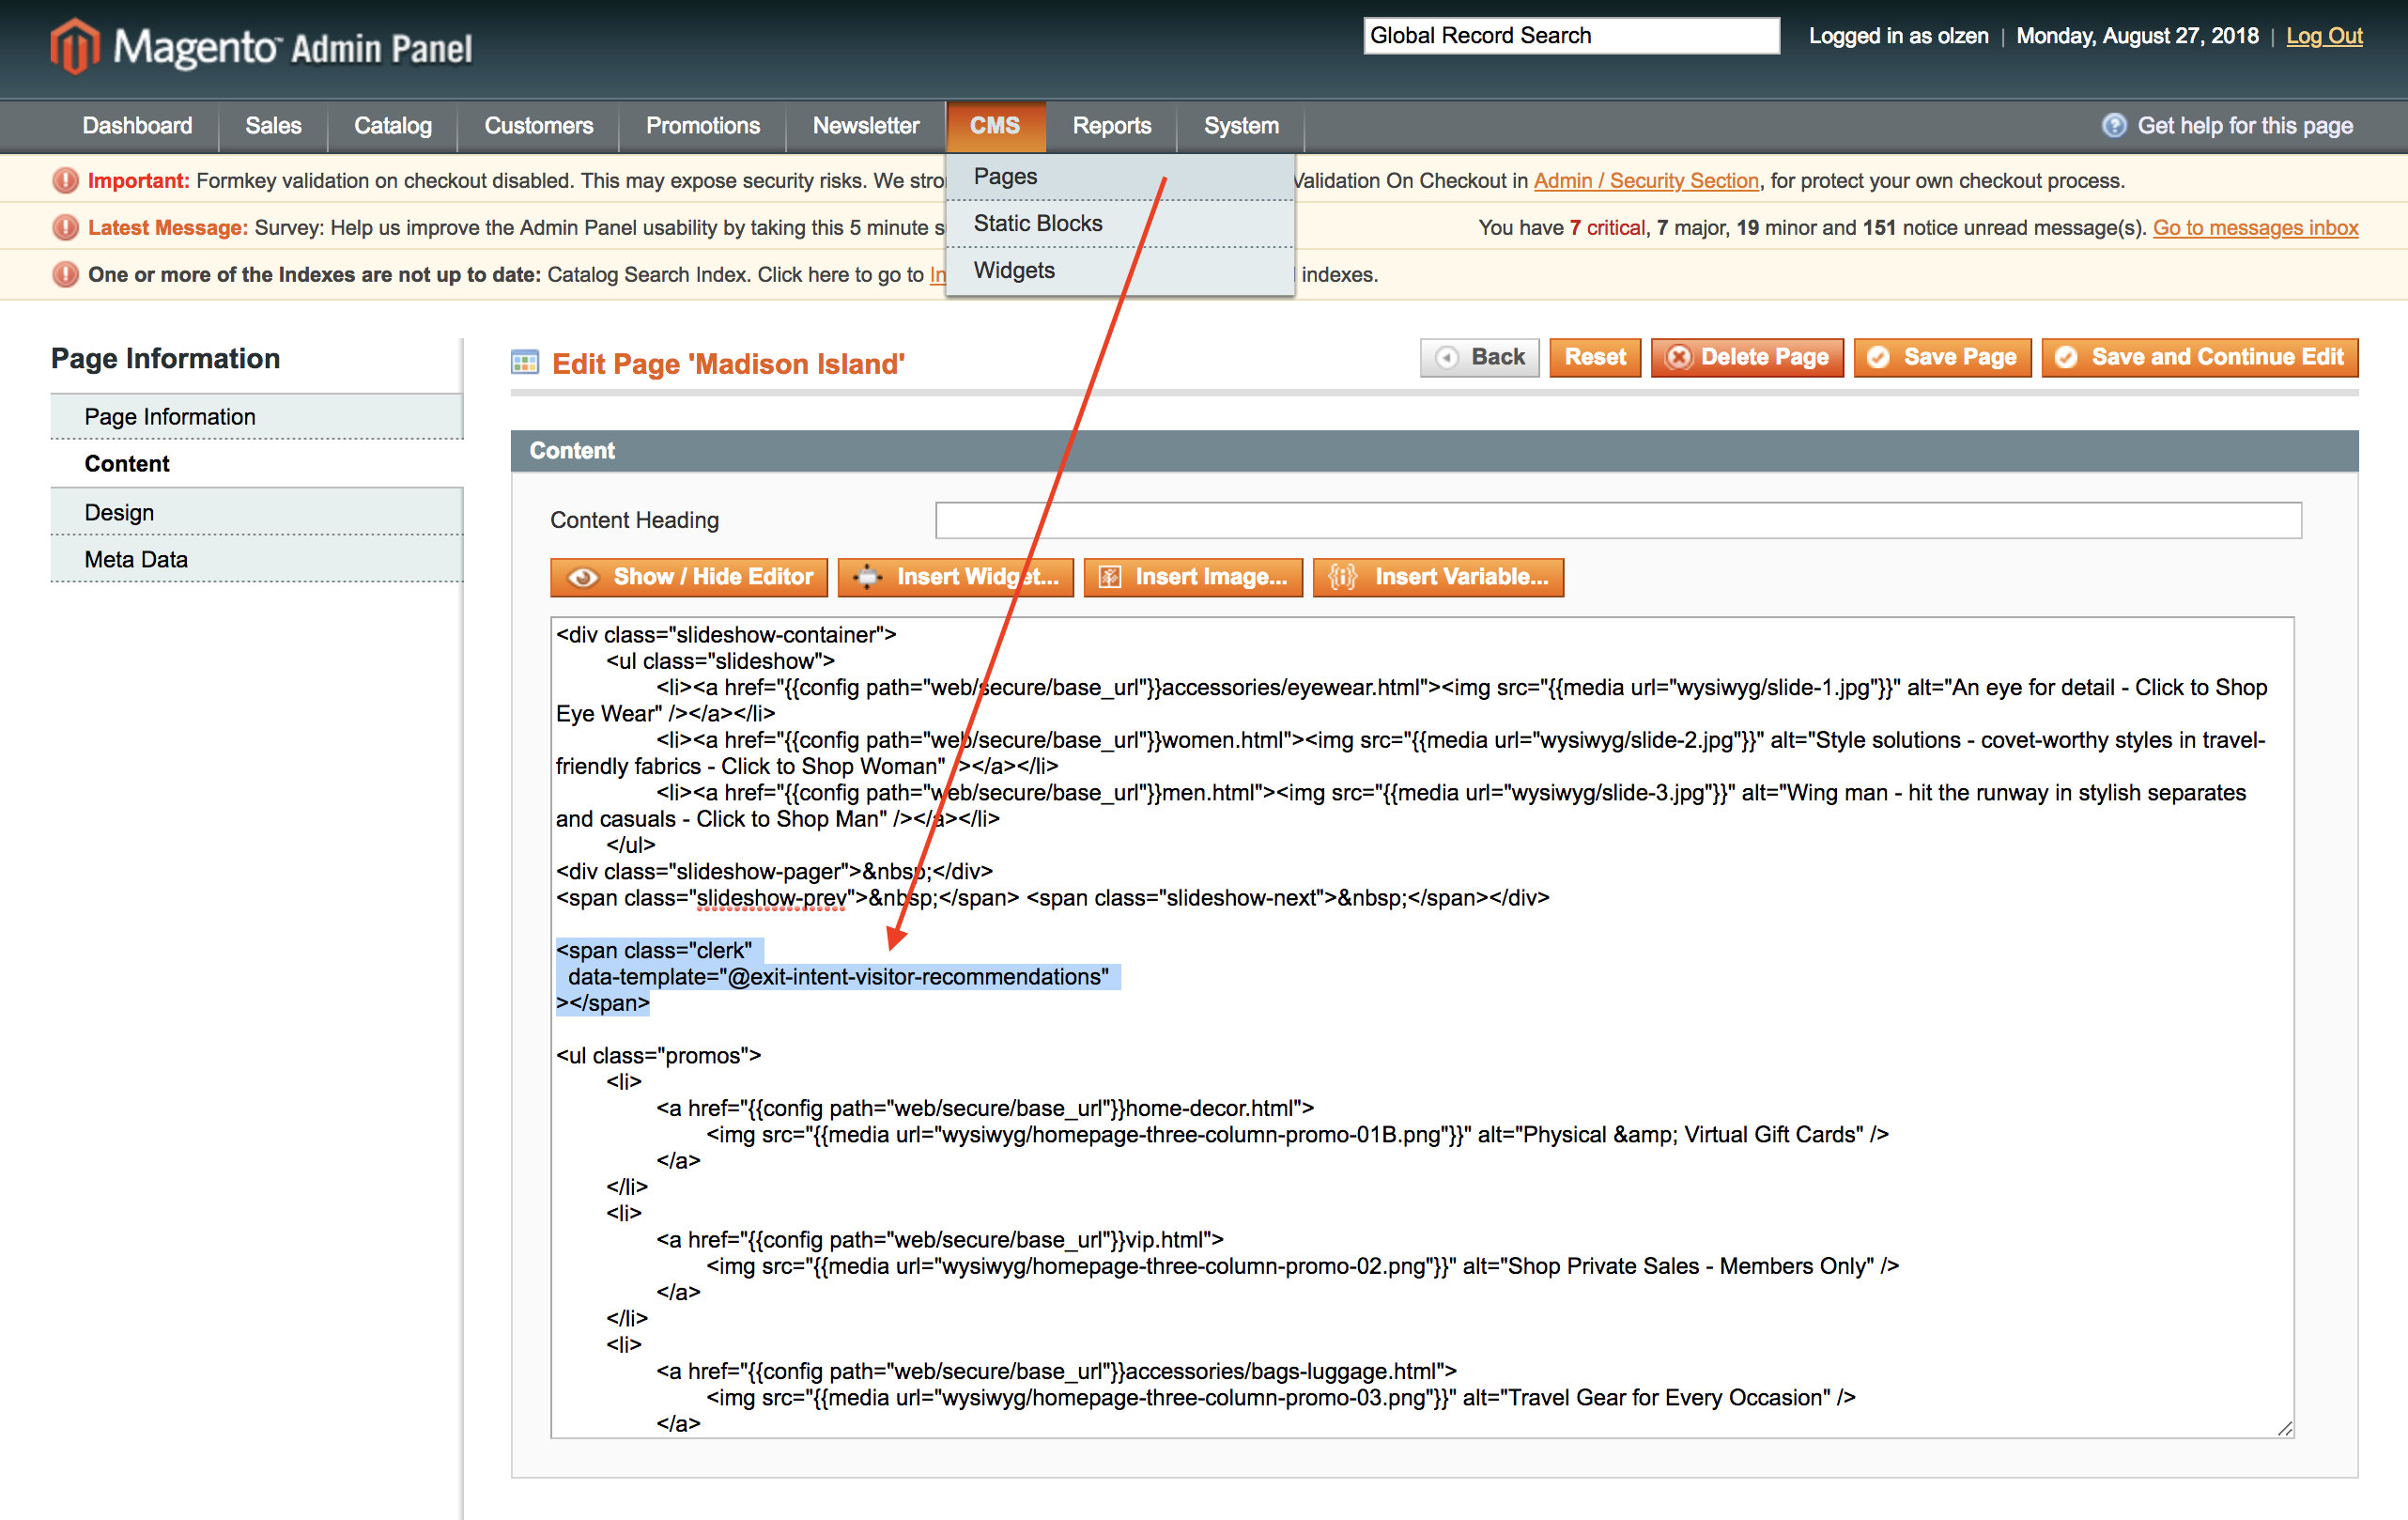
Instead, your embed codes should be inserted directly to the Frontpage files, through FTP:
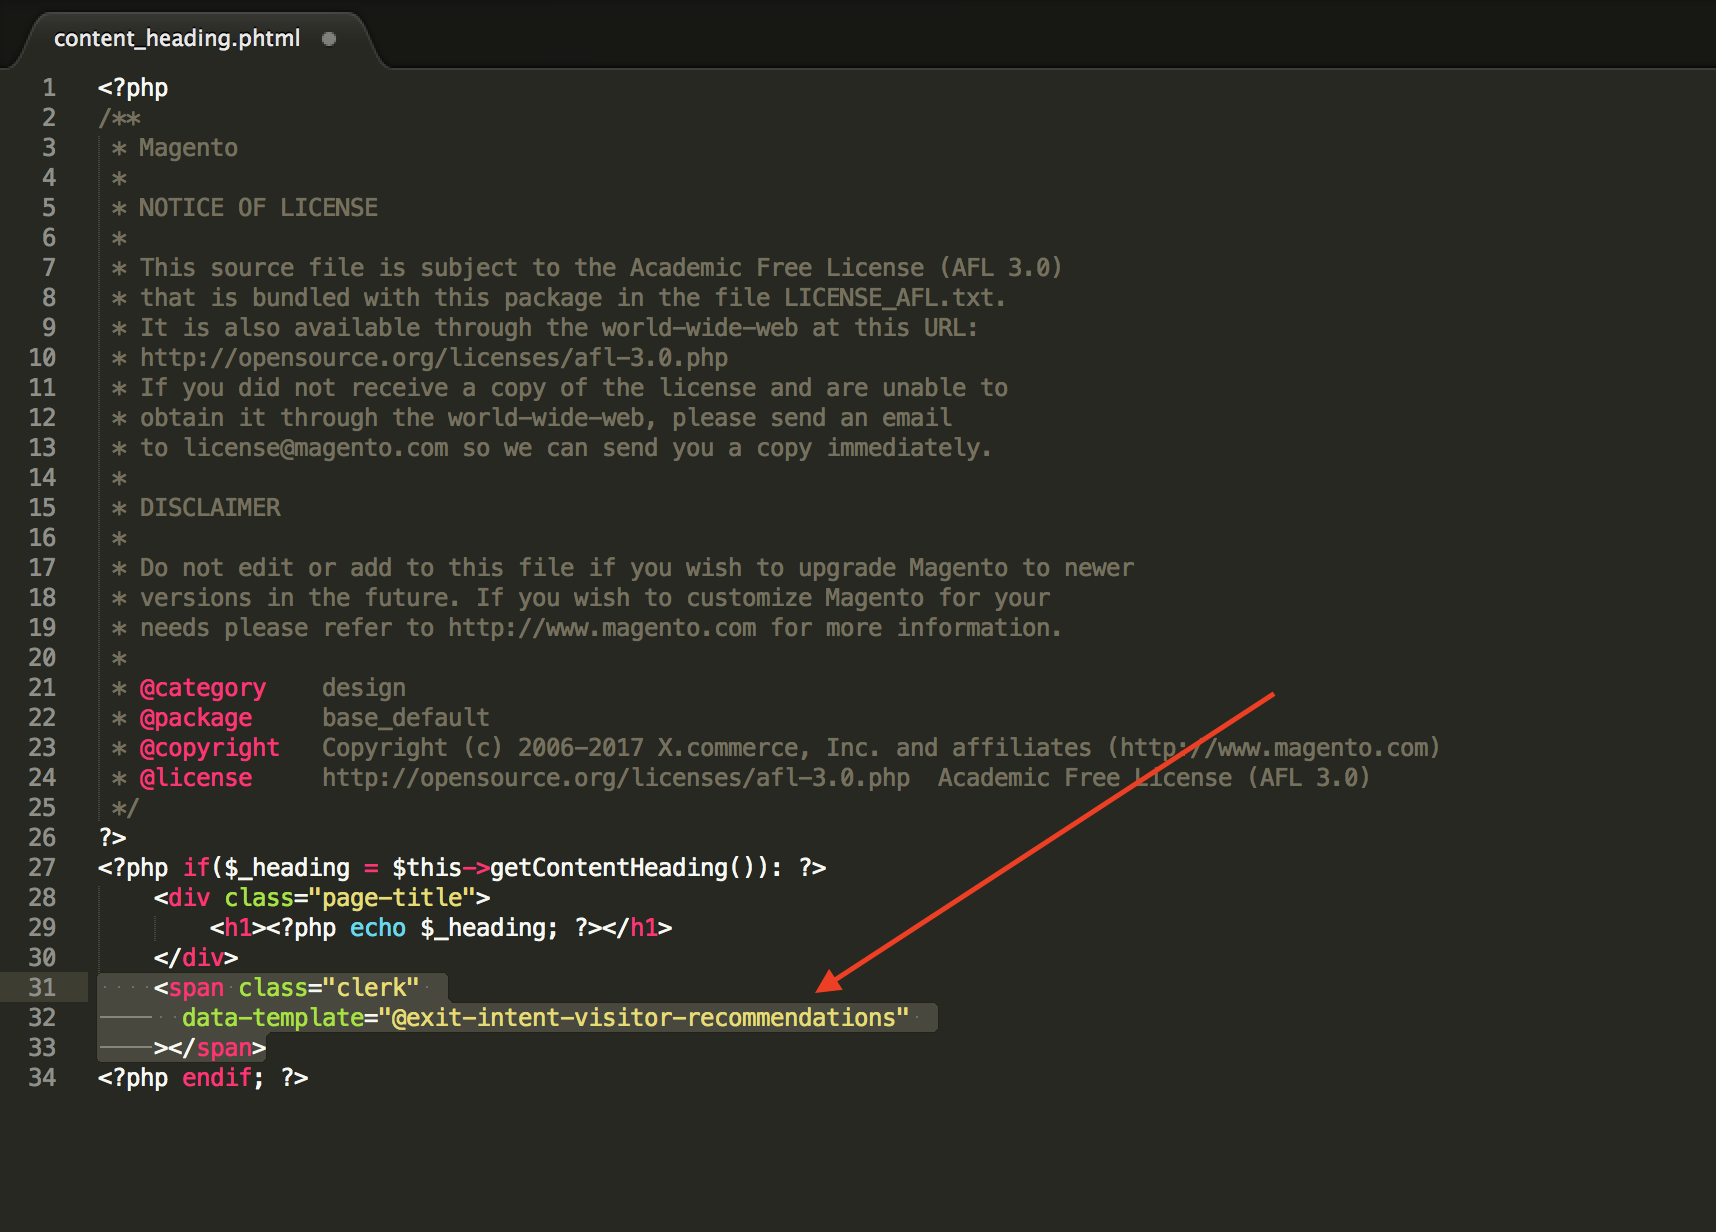
Magento will not cache results when inserted like this.
Images not showing #
When Magento’s image cache is cleared, either manually or automatically, all image paths change.
This means that the image paths sent to Clerk no longer work.
This can easily be fixed by doing this:
Login to my.clerk.io.
Click the Store where images are missing.
Go to Data.
Click Start New Data Sync in the upper right corner.
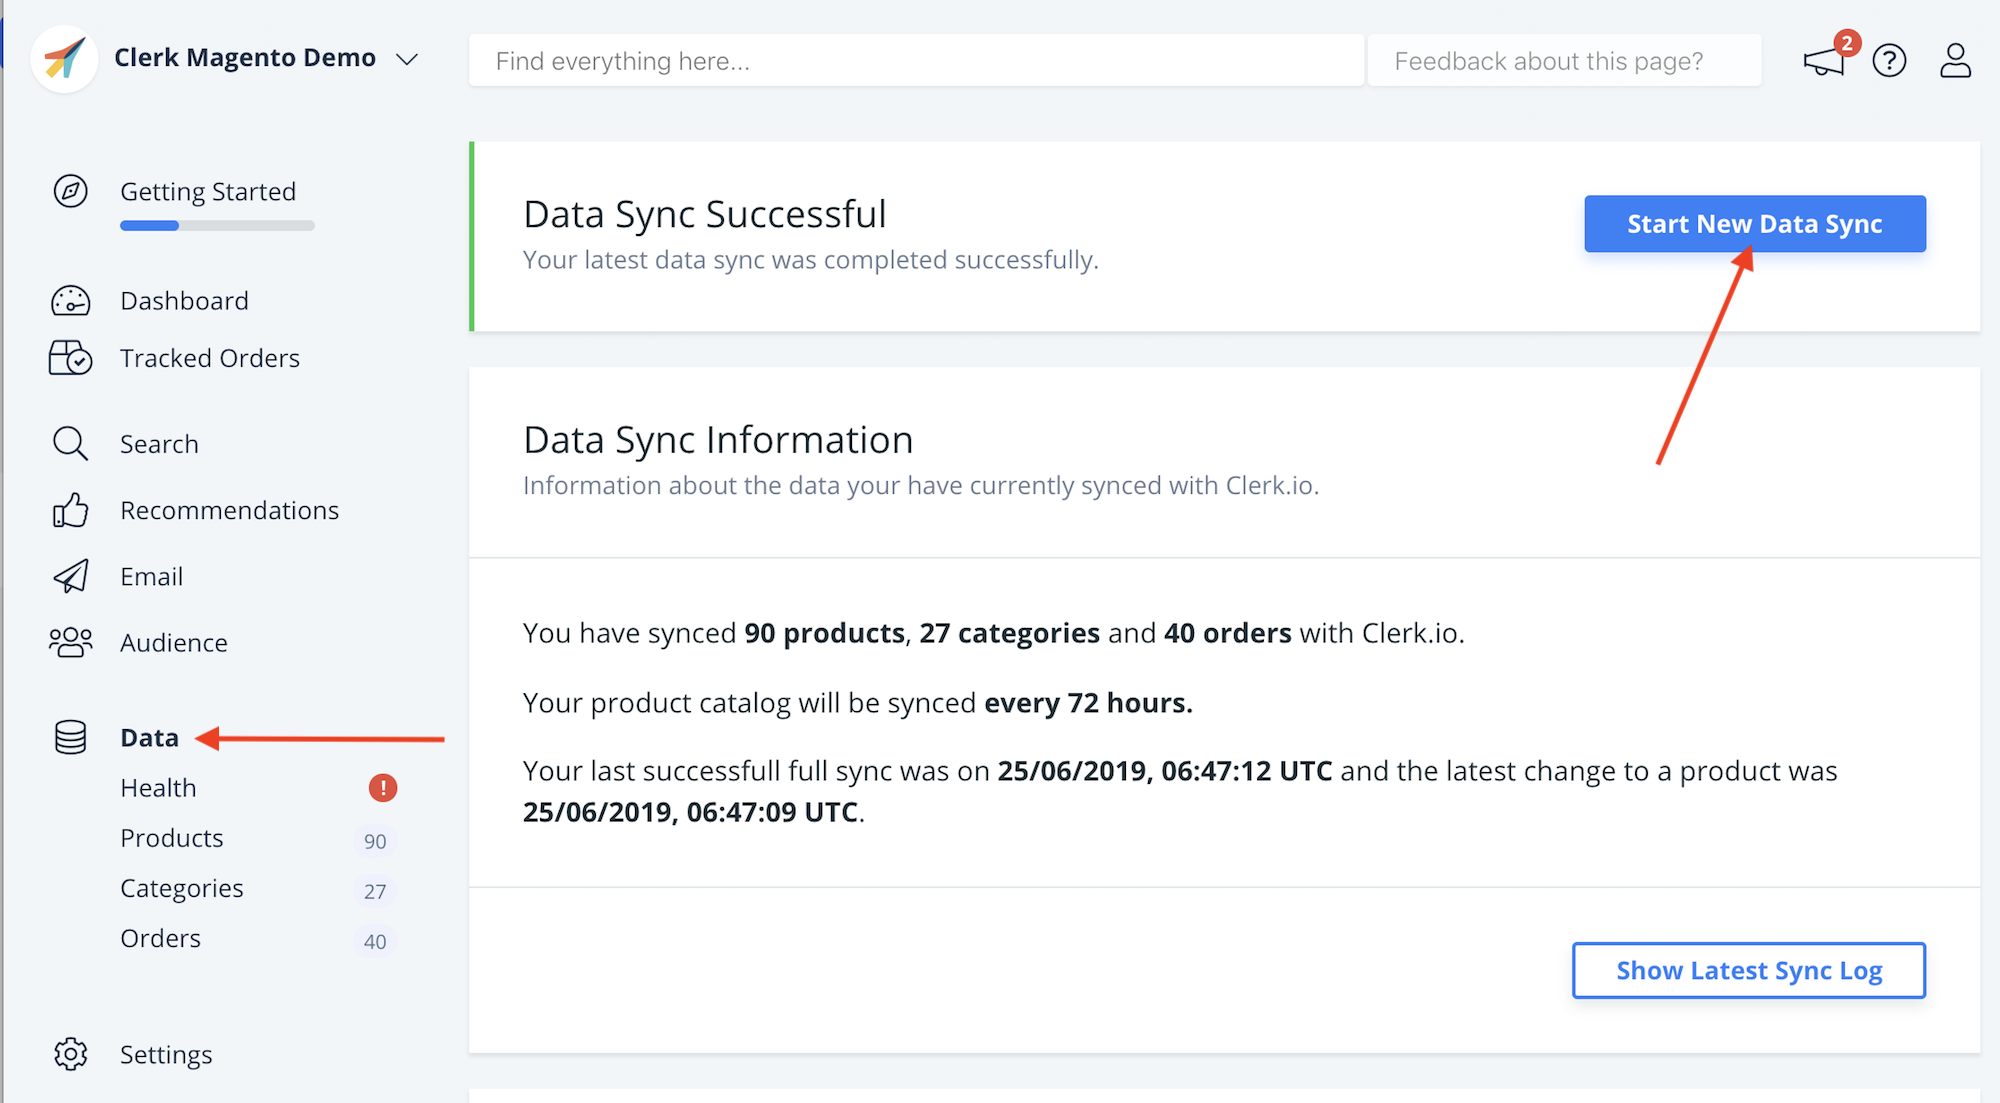
This will start a new full sync of your products, which causes Clerk to get the correct image paths.
In Clerk’s Magento extension v2.1.0, this issue is fixed by automatically starting a Sync when the image cache is cleared.
If you are using an older version of the extension, we strongly recommend upgrading to the latest version.
Upgrade to Clerk.js 2 #
Clerk.js 2 is a faster and more flexible version of our JavaScript library.
It makes installing Clerk on any webshop easier.
However, since the two versions work slightly differently, you need to follow these steps to successfully upgrade.
The two main differences in Clerk.js 2 are that the Designs in my.clerk.io use the Liquid templating language, but they can also easily be created using the Design Editor.
Create designs #
Since Clerk.js 2 has a different approach to Designs, you need to create new ones.
You can create your Clerk.js 2 Designs in one of two ways:
Use the intuitive Design Editor to create new Designs, as described in the following points.
Convert your old Designs. Follow this guide to see how to do it.
Design Editor option #
- Go to my.clerk.io > Recommendations/Search > Designs > New Design.
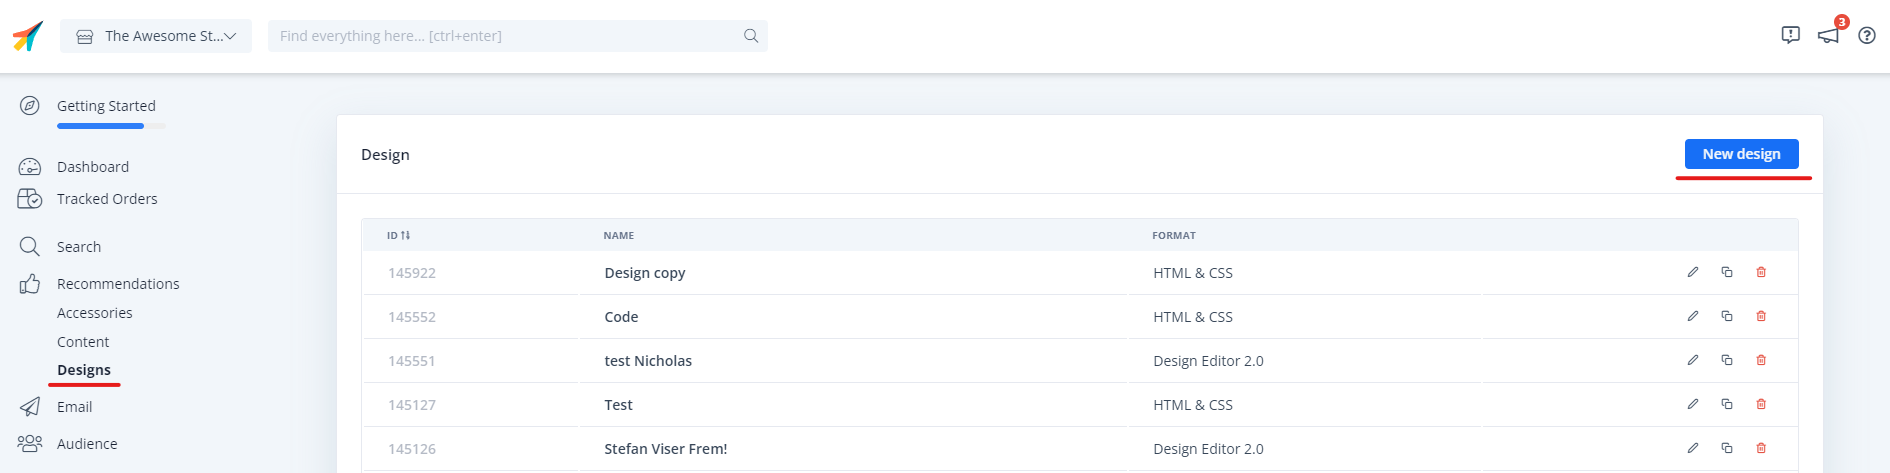
- Choose Your Design Type.
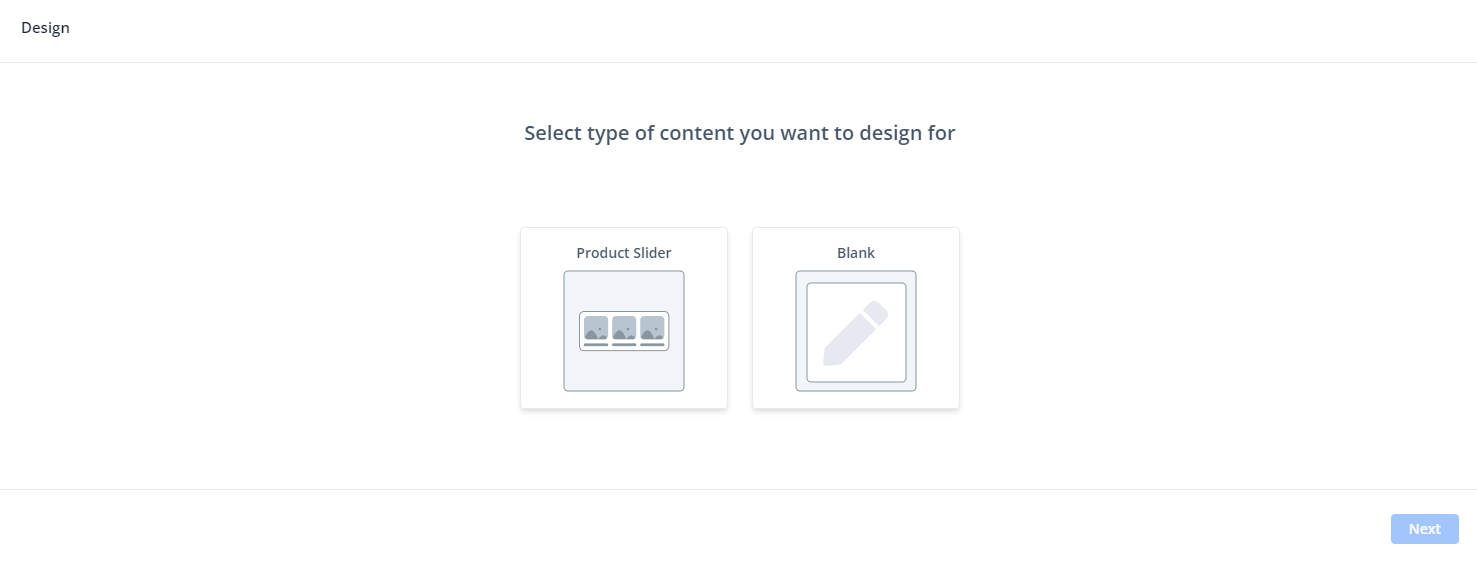
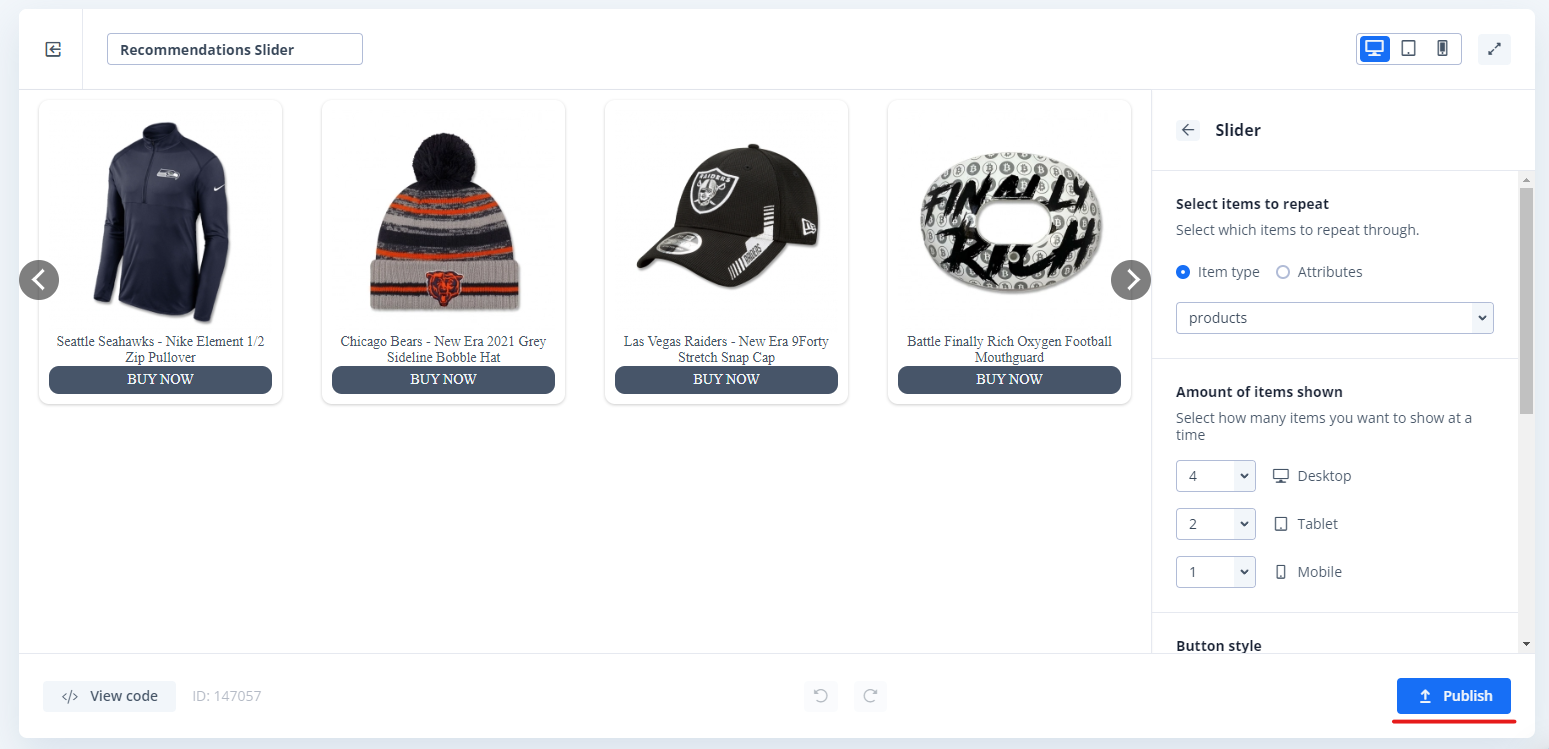
In the Design Editor, click any of the existing elements like the name, image, button, etc. to edit it, or select new elements to add to the Design to add more information about products.
Click Publish when you are done, and go to Step 2 in the guide.
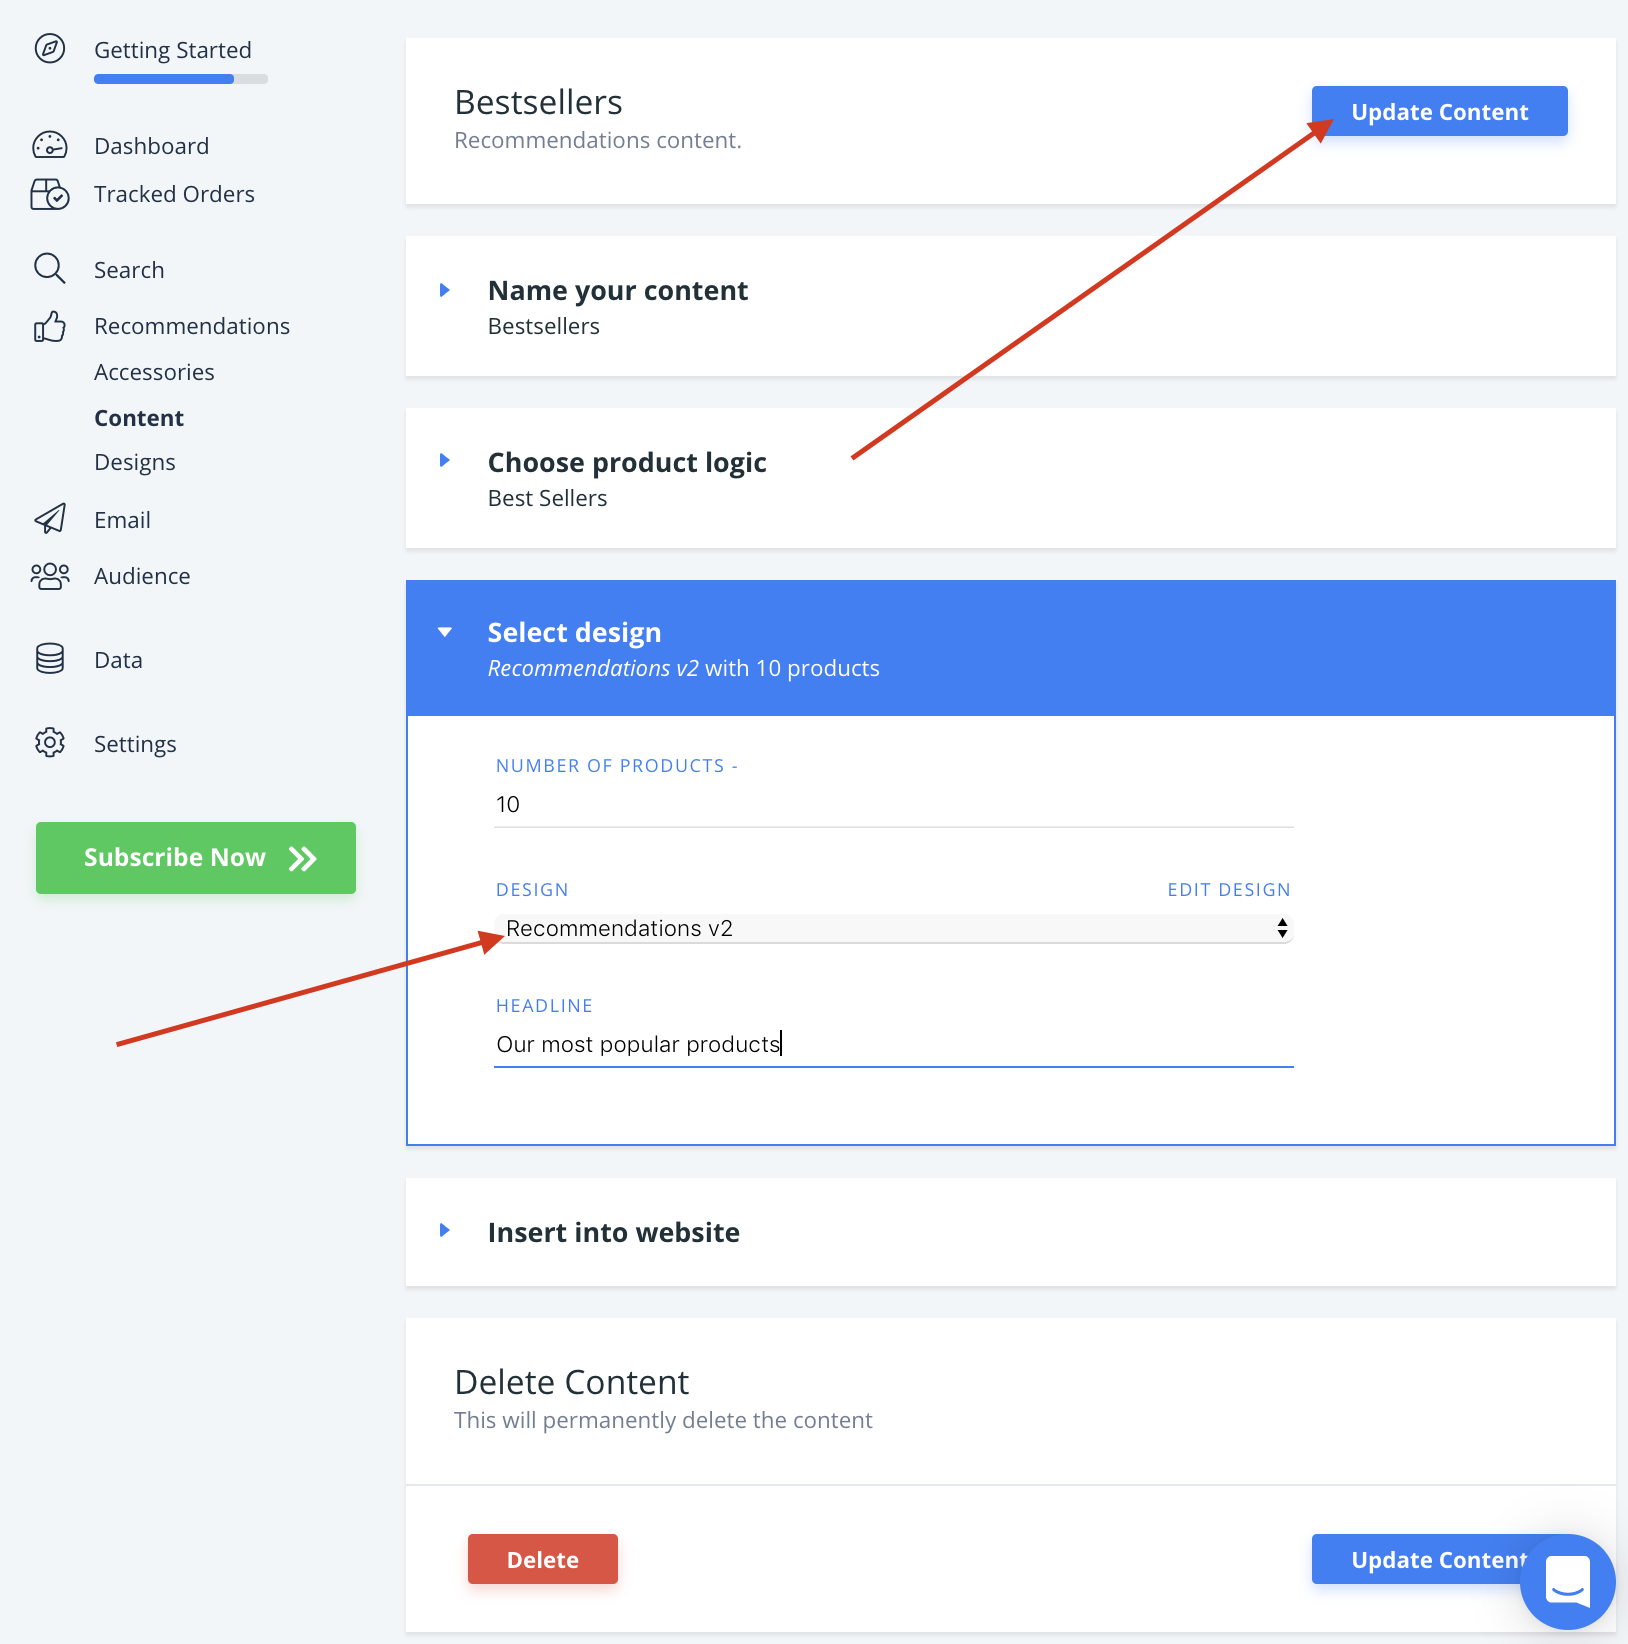
Go to Recommendations/Search > Elements and change your Clerk Element to use your new Design.
Click Update Element. This will temporarily cause them to not show up on your webshop until you are done with Step 2. Choose the new Design for all Elements that should be updated.
You are now ready to switch over to Clerk.js 2.
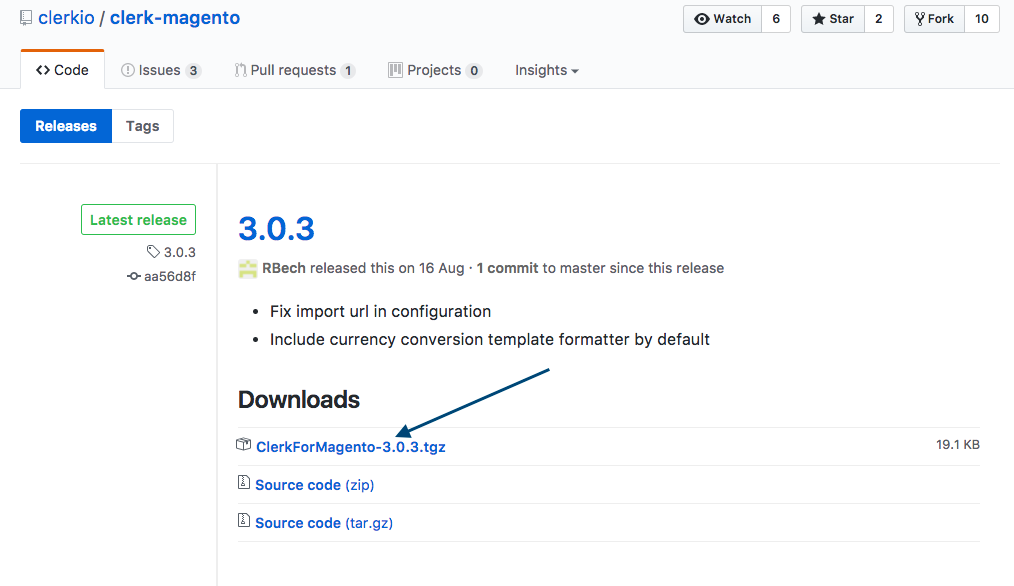
Upgrade extension #
If you already have the latest version of the Clerk Magento extension, you can skip this step.
You can download the latest extension from this link:
https://github.com/clerkio/clerk-magento/releases/latest
Save changes #
Before you attempt to upgrade, make sure you have either:
- Saved the changed files locally on your FTP, or
- Made a backup of any changed files, that you can carry over to the new extension.
Usually, the files that most developers change are Product.php and Productbase.php, which control product attributes.
These files are found here:
app->code->community->Clerk->Clerk->Model->Catalog->Product.php
app->code->community->Clerk->Clerk->Model->Catalog->Productbase.php
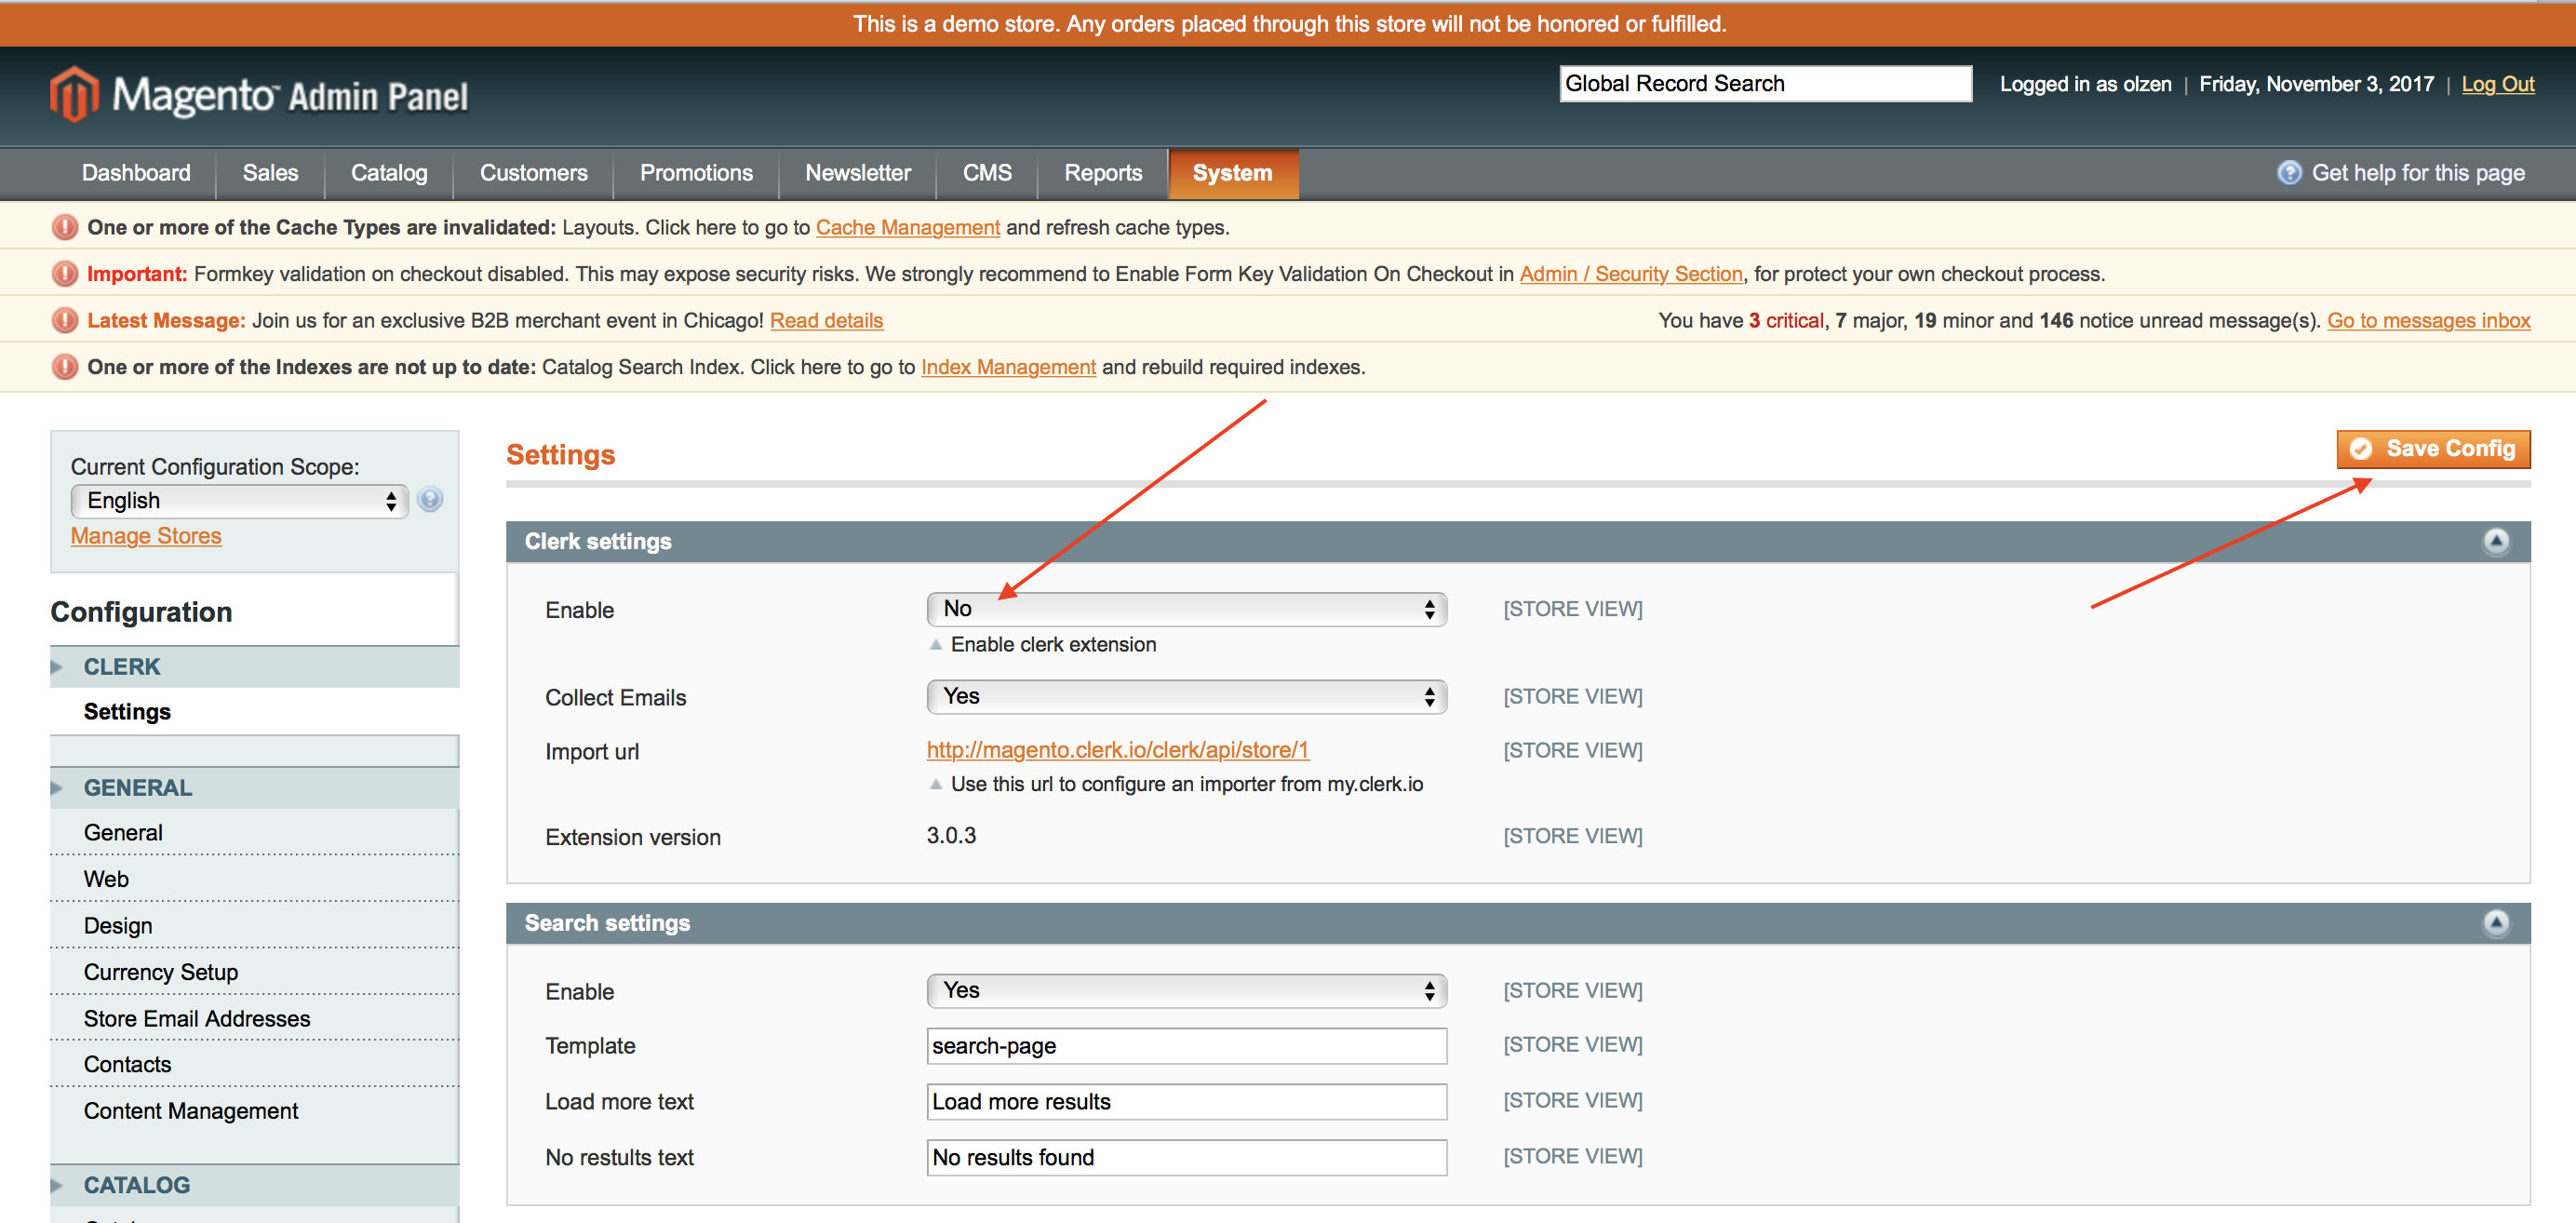
Deactivate extension #
Before attempting to upgrade, it is very important that you do this:
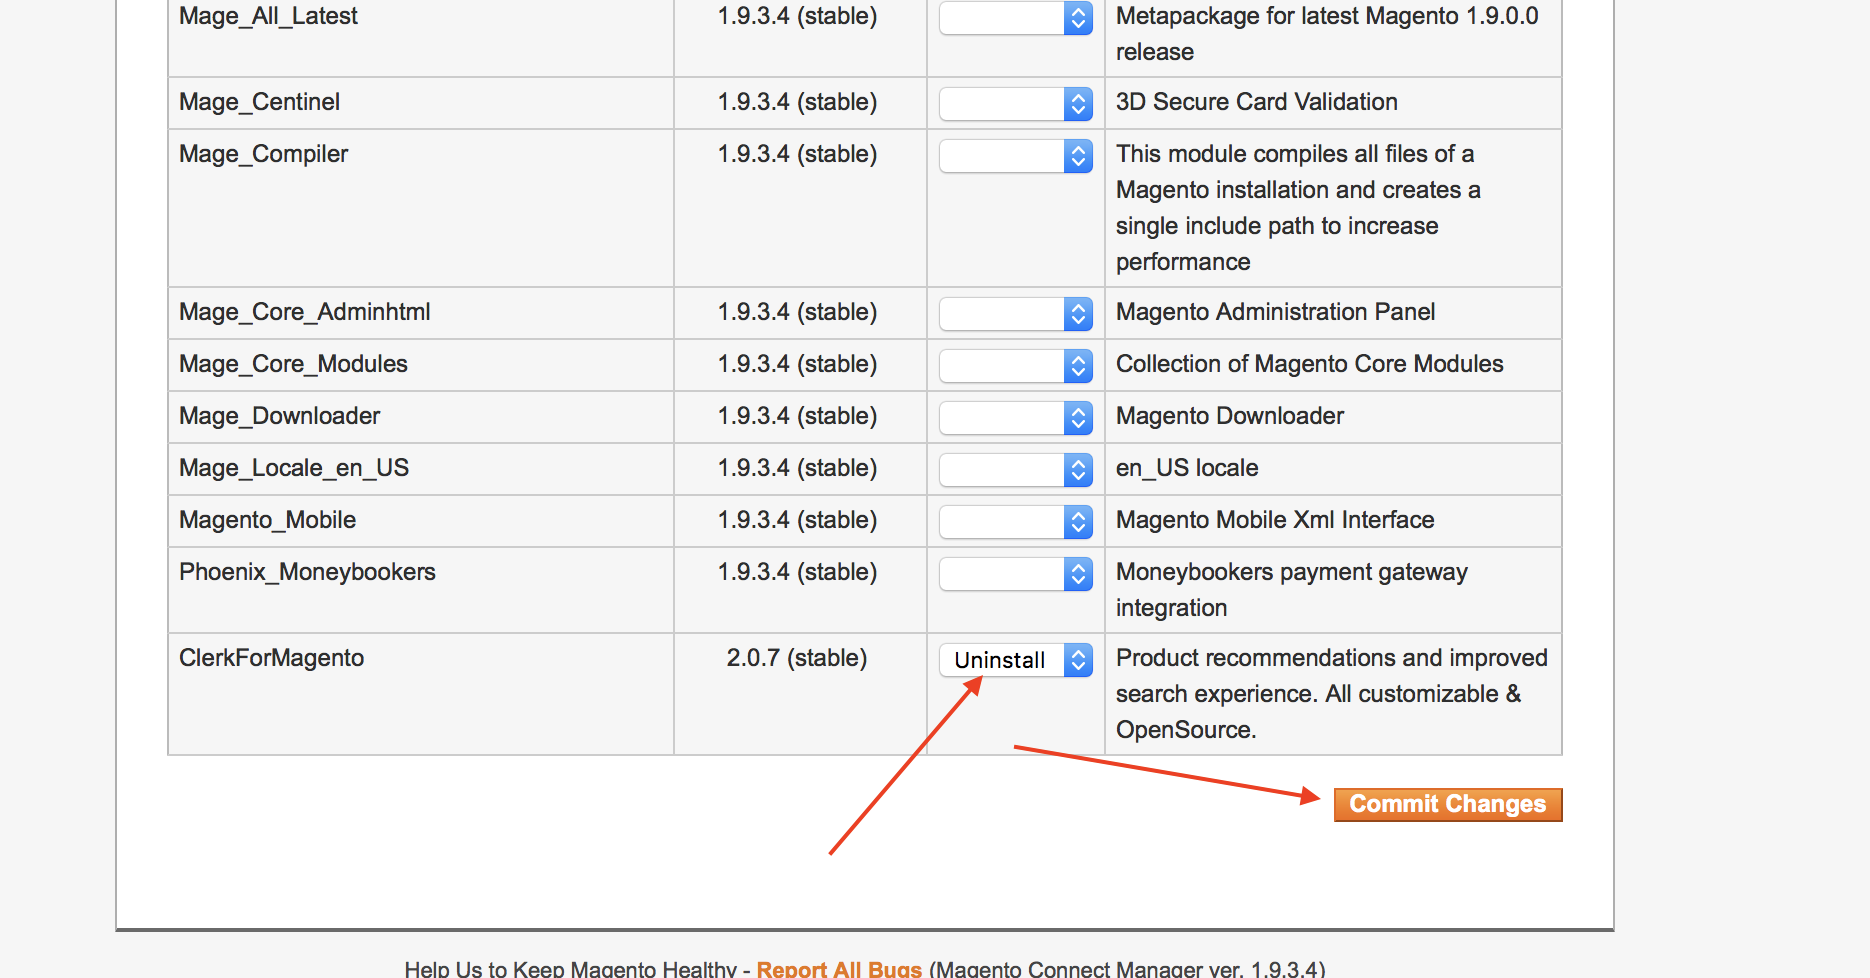
- Deactivate the old extension in Magento’s System > Configuration > Clerk > Settings page. Simply set Enable to No and click Save Config.
- Afterwards, uninstall it either through Magento Connect or by deleting the files from FTP if you installed it directly here.
Otherwise, your Configuration page might stop functioning and neither extension will work afterward.
Install extension #
Lastly, install the latest extension again, and move any files you have backed up to your FTP server.
Your configuration should be saved, even when installing the new version.
Check System > Configuration > Clerk to make sure that everything is still there.
Now you have the latest version of Clerk for Magento installed, and Clerk.js 2 is running on your webshop!
The full documentation for Clerk.js 2 can be found here:
https://docs.clerk.io/docs/clerkjs-quick-start
Handling require.js #
This only applies when using v.3.7.2 or lower of the Magento 1 Clerk extension.
In some setups, Require.js stops Clerk.js from loading, which means that no sliders or search results will be shown.
When this happens, the following error will be shown in your console:
Uncaught ReferenceError: Clerk is not defined
There are two ways to handle Require.js. Both approaches require you to make changes to the tracking-script in this file:
app->design->frontend->base->default->template->clerk->tracking.phtml
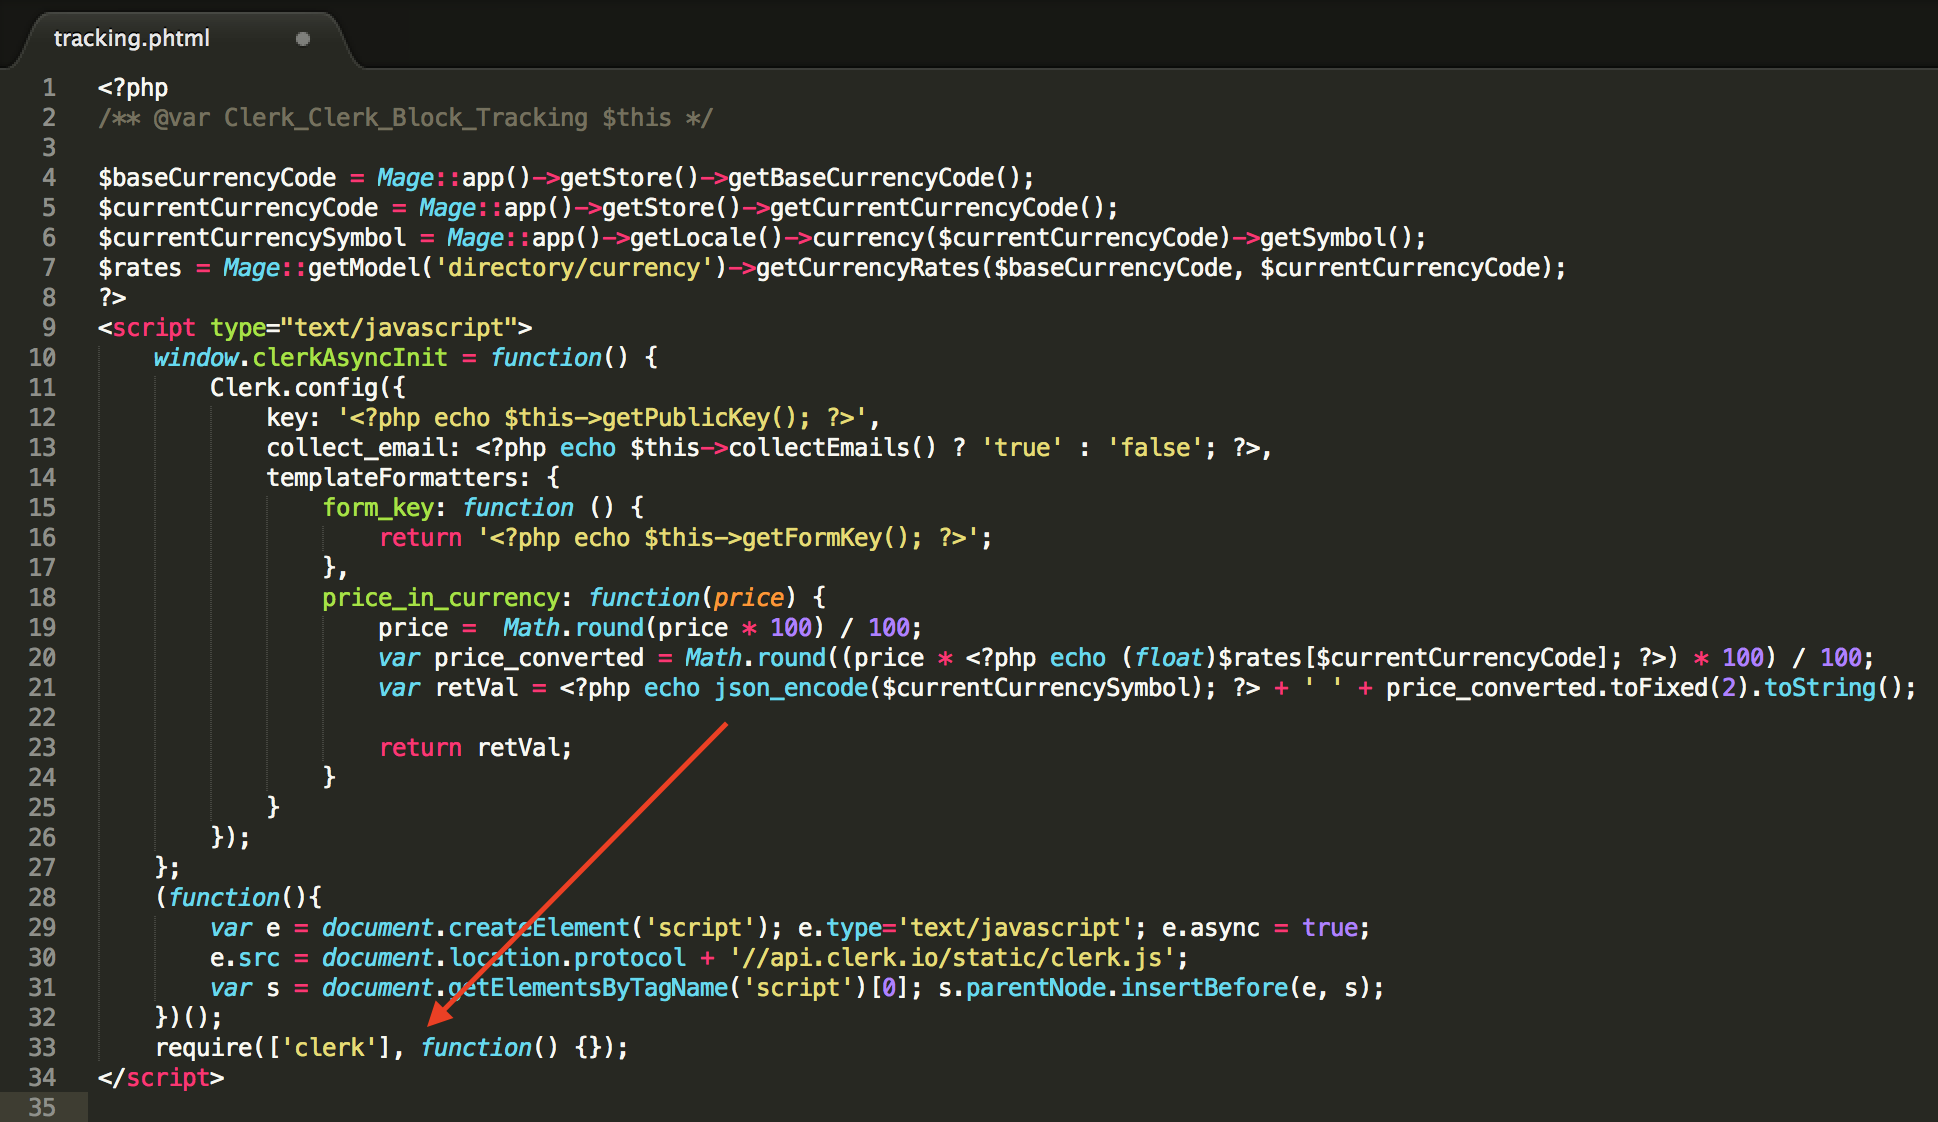
Include in Require.js #
The best approach is trying to get Require.js to recognize Clerk.
You can do this by inserting require(['clerk'], function() {}); in the bottom of the tracking script:
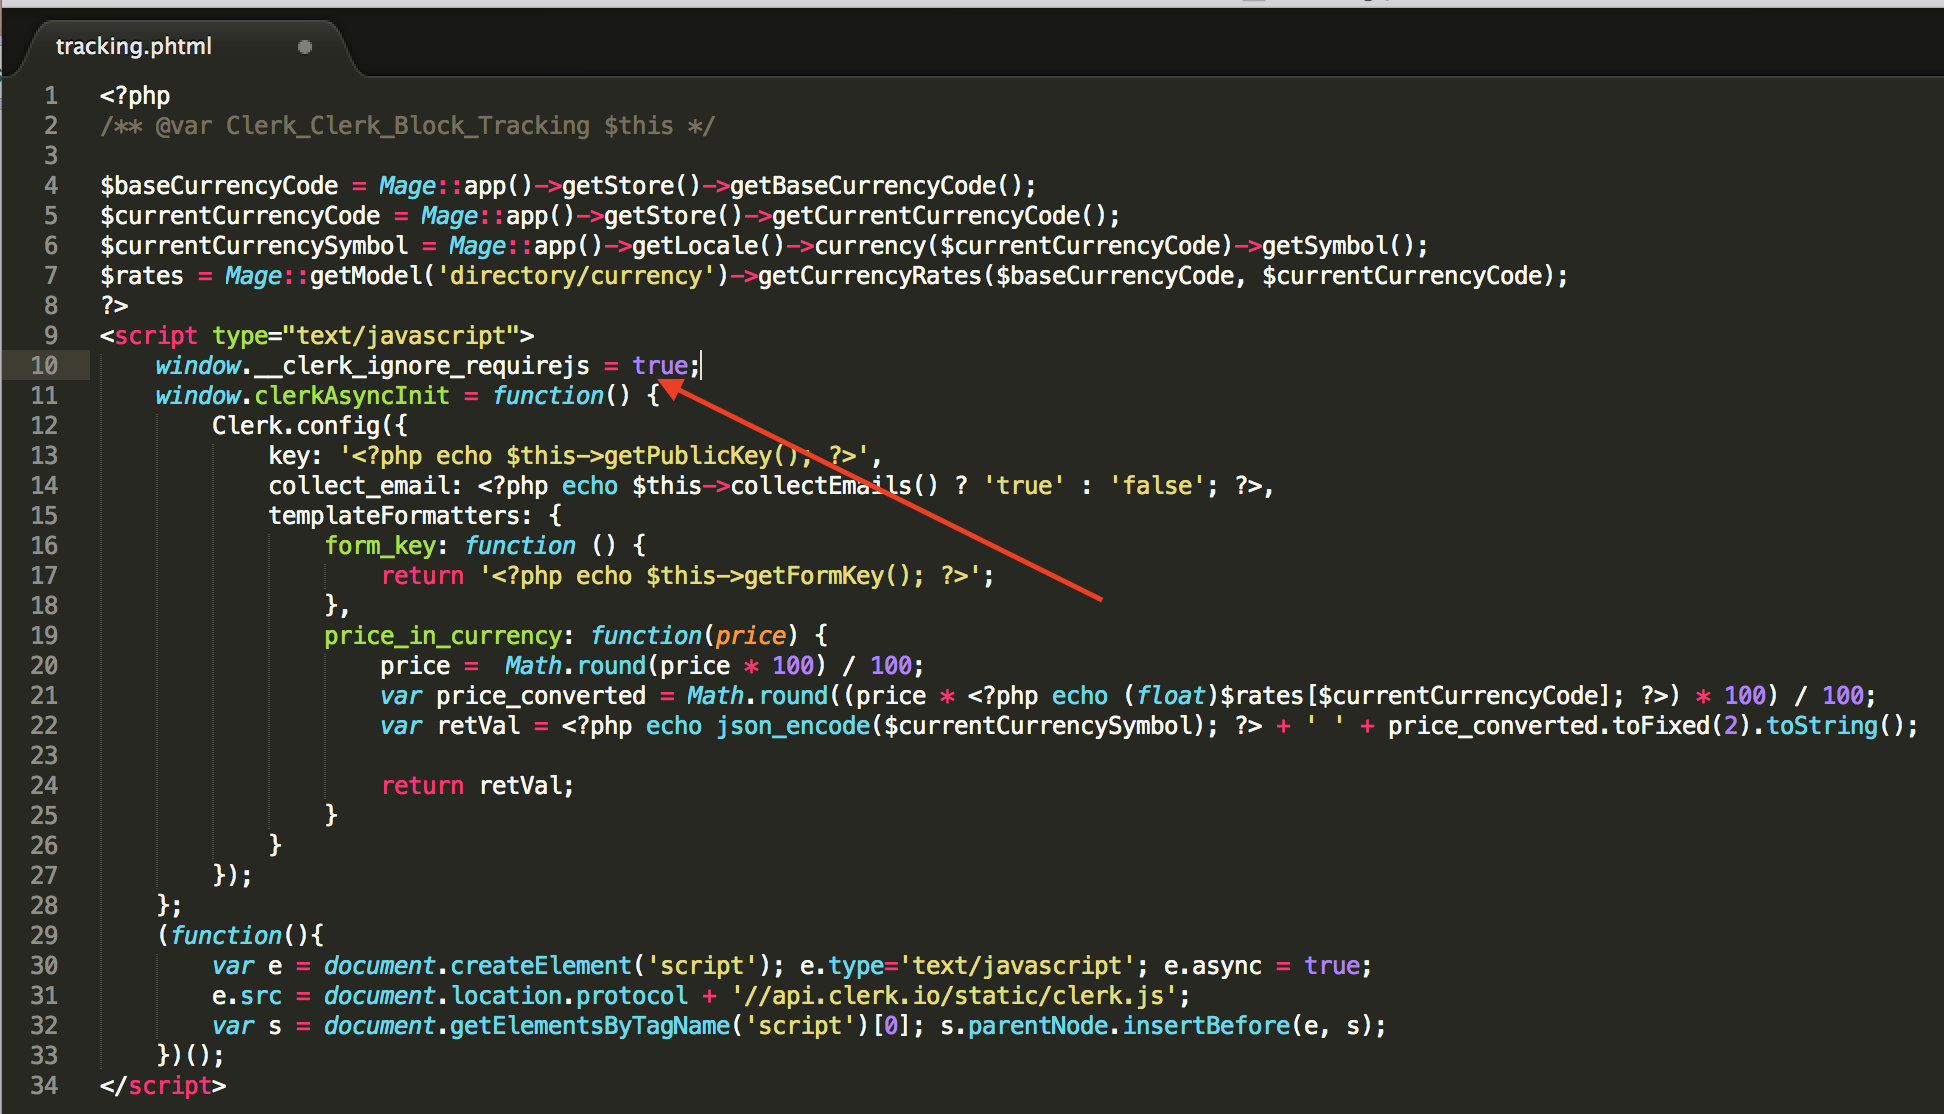
Ignore Require.js #
If the above solution doesn’t work, it’s possible to ignore Require.js.
You can do this by inserting window.__clerk_ignore_requirejs = true; in the top of the tracking script:
After using one of these approaches, Require.js will now be compatible with Clerk.