FAQ
Running into issues with your Smartweb integration? This FAQ covers the most common problems and their solutions, from formatters to upgrading to Clerk.js 2.
Using formatters #
Clerk.js allows you to write custom JavaScript functions that add new functionality to your Designs.
Formatters can be added in two ways:
Through my.clerk.io > Developers > Formatters, where each Formatter can be created as separate entries.
As a configuration for Clerk.js, in the tracking-script that is inserted on all pages, where multiple formatters can be added at once.
Example formatter #
An example can be seen below. Please be aware this is for Clerk V2 (latest version):
Clerk('config', {
  key: 'O7UITkJIXqXibeQF9ONobiGGKYYKtbvh',
  formatters: {
    log_price: function(price) {
      console.log(price);
    }
  }
});
Multiple formatters #
You can write any number of Formatters, separated by comma:
formatters: {
  log_price: function(price) {
    console.log(price);
  },
  calculate_discount: function(price, special_price) {
    return price - special_price;
  },
  substring: function(text) {
    var short_string = text.substring(0, 20);
    return short_string;
  }
}
Use in designs #
After creating your Formatters, you can use them in your Designs using this syntax:
{%raw%}{{ price | log_price }} {{ price | calculate_discount | special_price }}{%endraw%}
This allows you to create any functionality in your Designs that you require.
HTTP authentication #
HTTP authentication is often used on staging sites to avoid unwanted visitors.
This will block the Clerk importer and display a 401 Unauthorized error in the sync log.
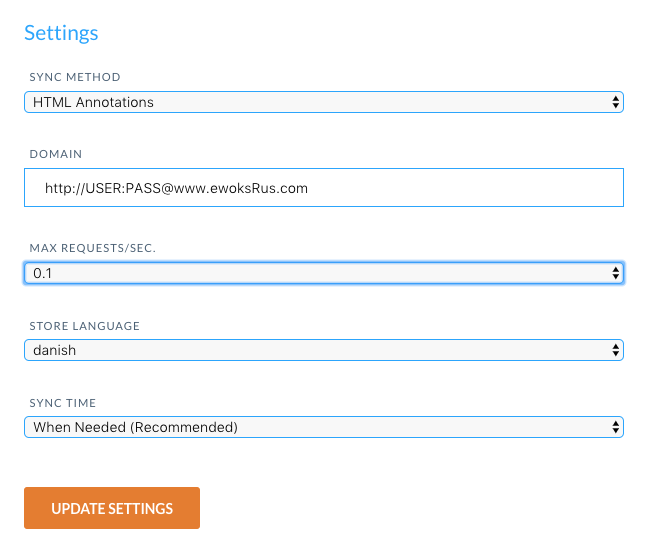
You can fix this by inserting the authentication info in the import URL.
In my.clerk.io > Data > Configuration, update your import URL like this:
http://USER:PASS@www.ewoksRus.com
Upgrade to Clerk.js 2 #
Clerk.js 2 is a faster and more flexible version of our JavaScript library.
It makes installing Clerk on any webshop easier.
However, since the two versions work slightly differently, you need to follow these steps to successfully upgrade.
The two main differences in Clerk.js 2 are:
The Designs in my.clerk.io use the Liquid templating language, but can also easily be created using the Design Editor.
The script must be inserted just before the
</head>tag in your webshop’s template.
Create designs #
Since Clerk.js 2 has a different approach to Designs, you need to create new ones.
You can create your Clerk.js 2 Designs in one of two ways:
Use the intuitive Design Editor to create new Designs, as described in the following points.
Convert your old Designs. Follow this guide to see how to do it.
Design Editor option #
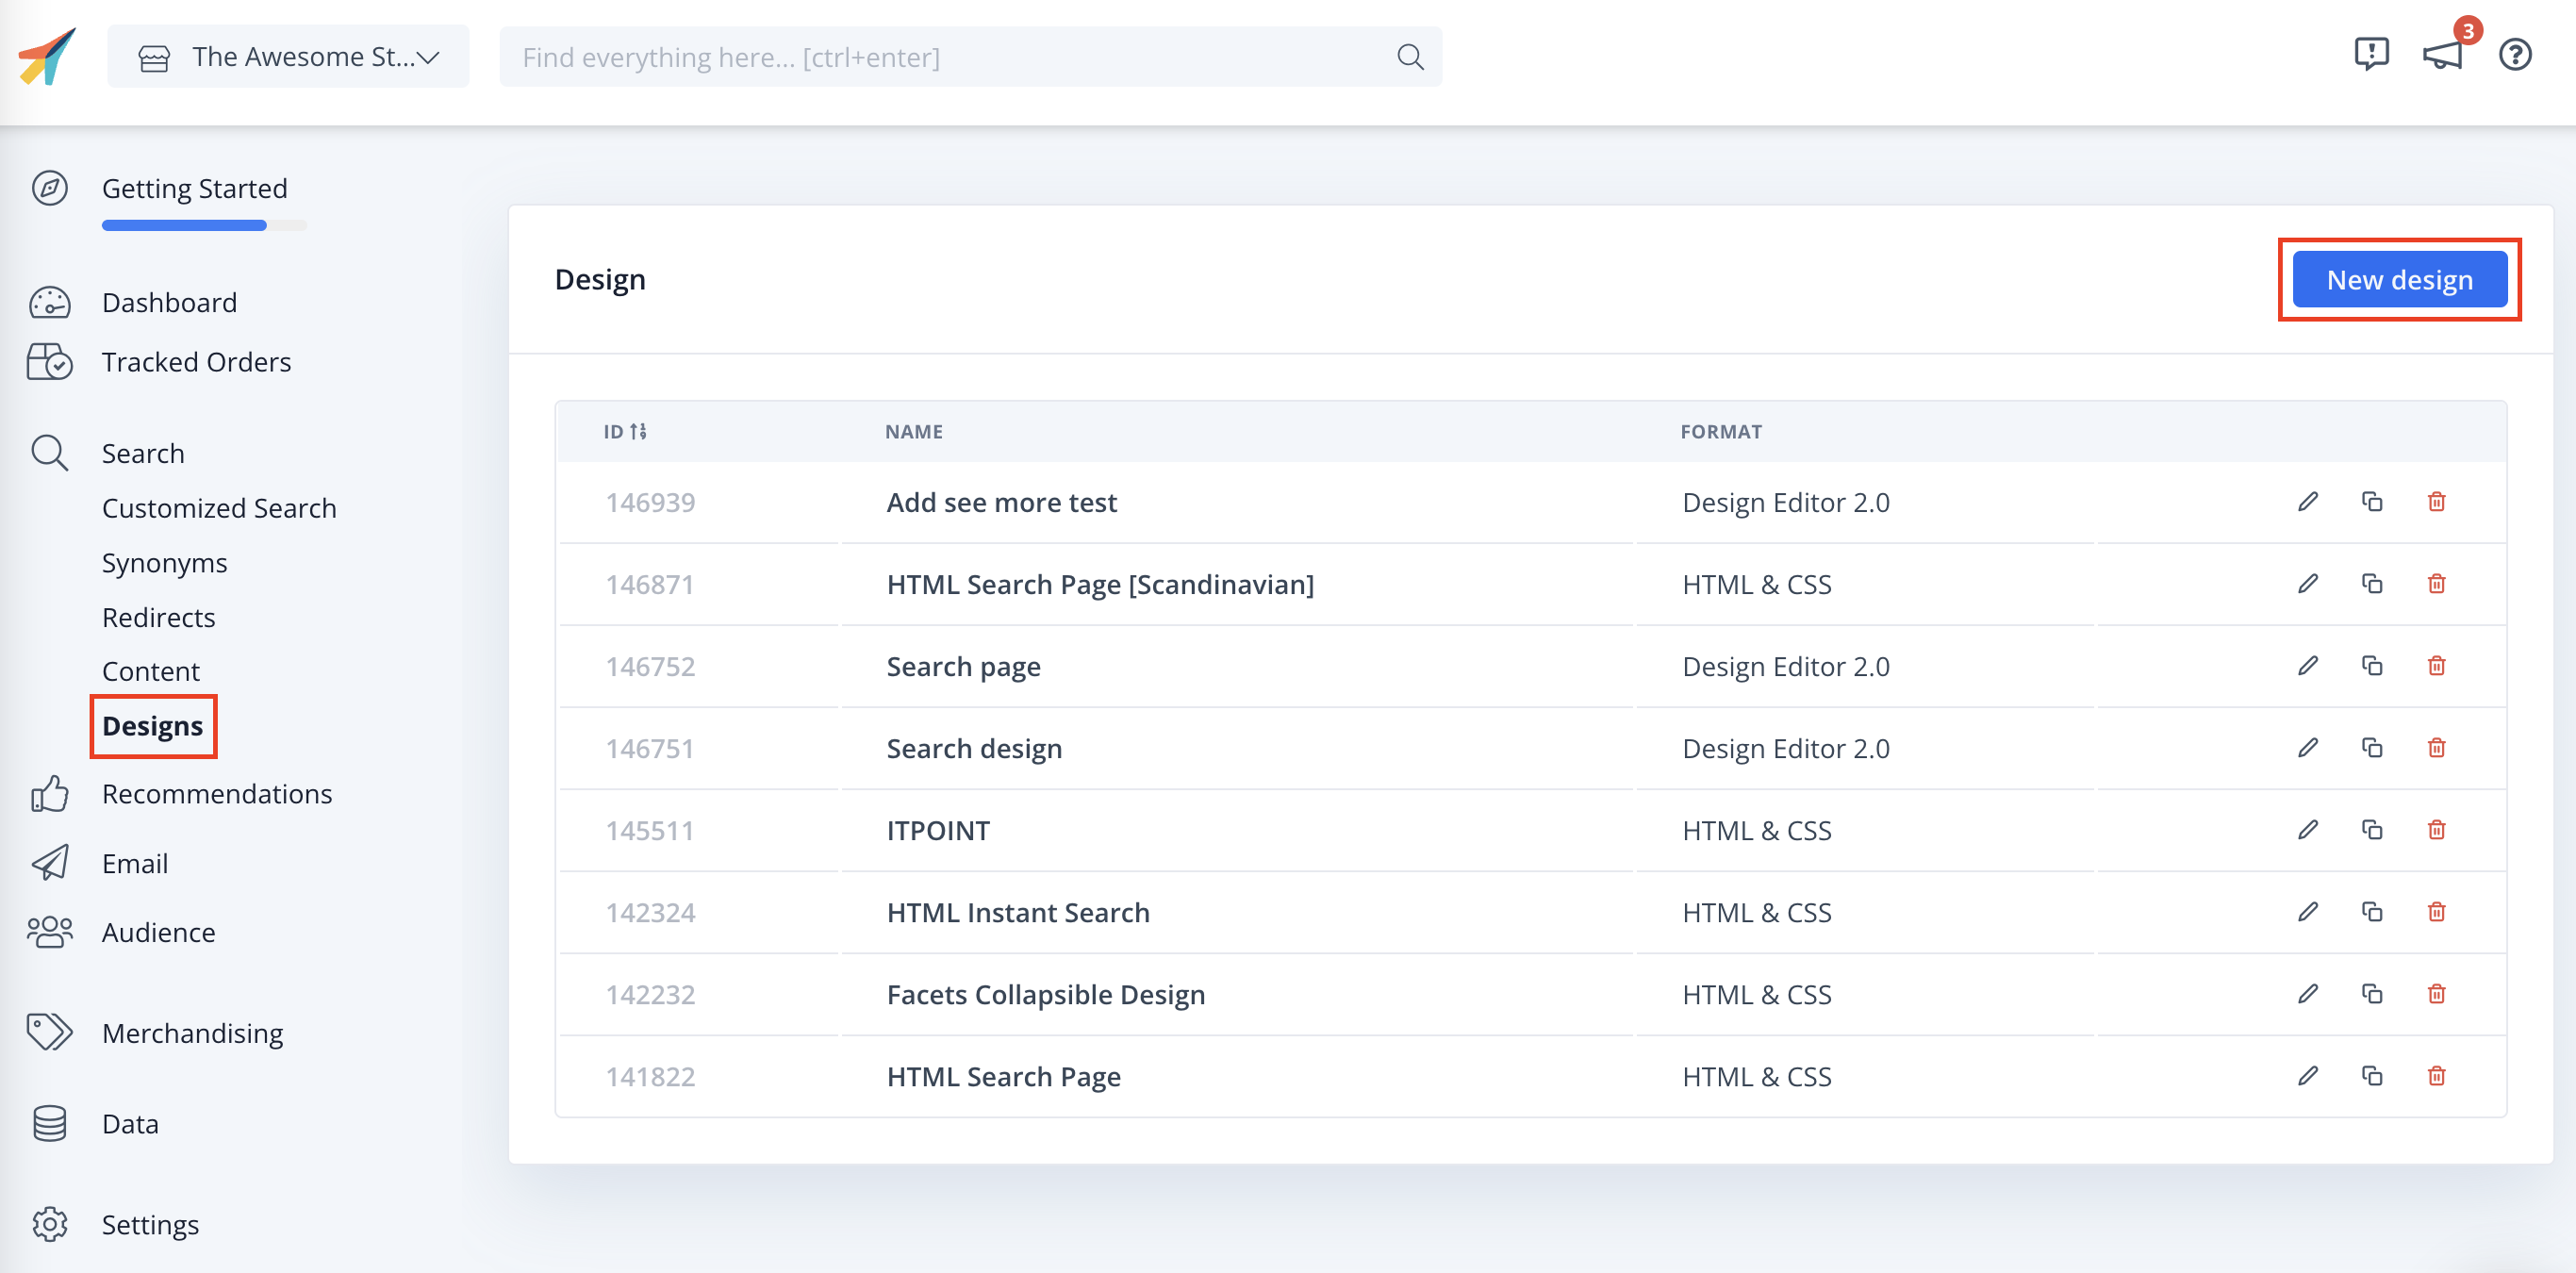
- Go to my.clerk.io > Recommendations/Search > Designs > New Design.
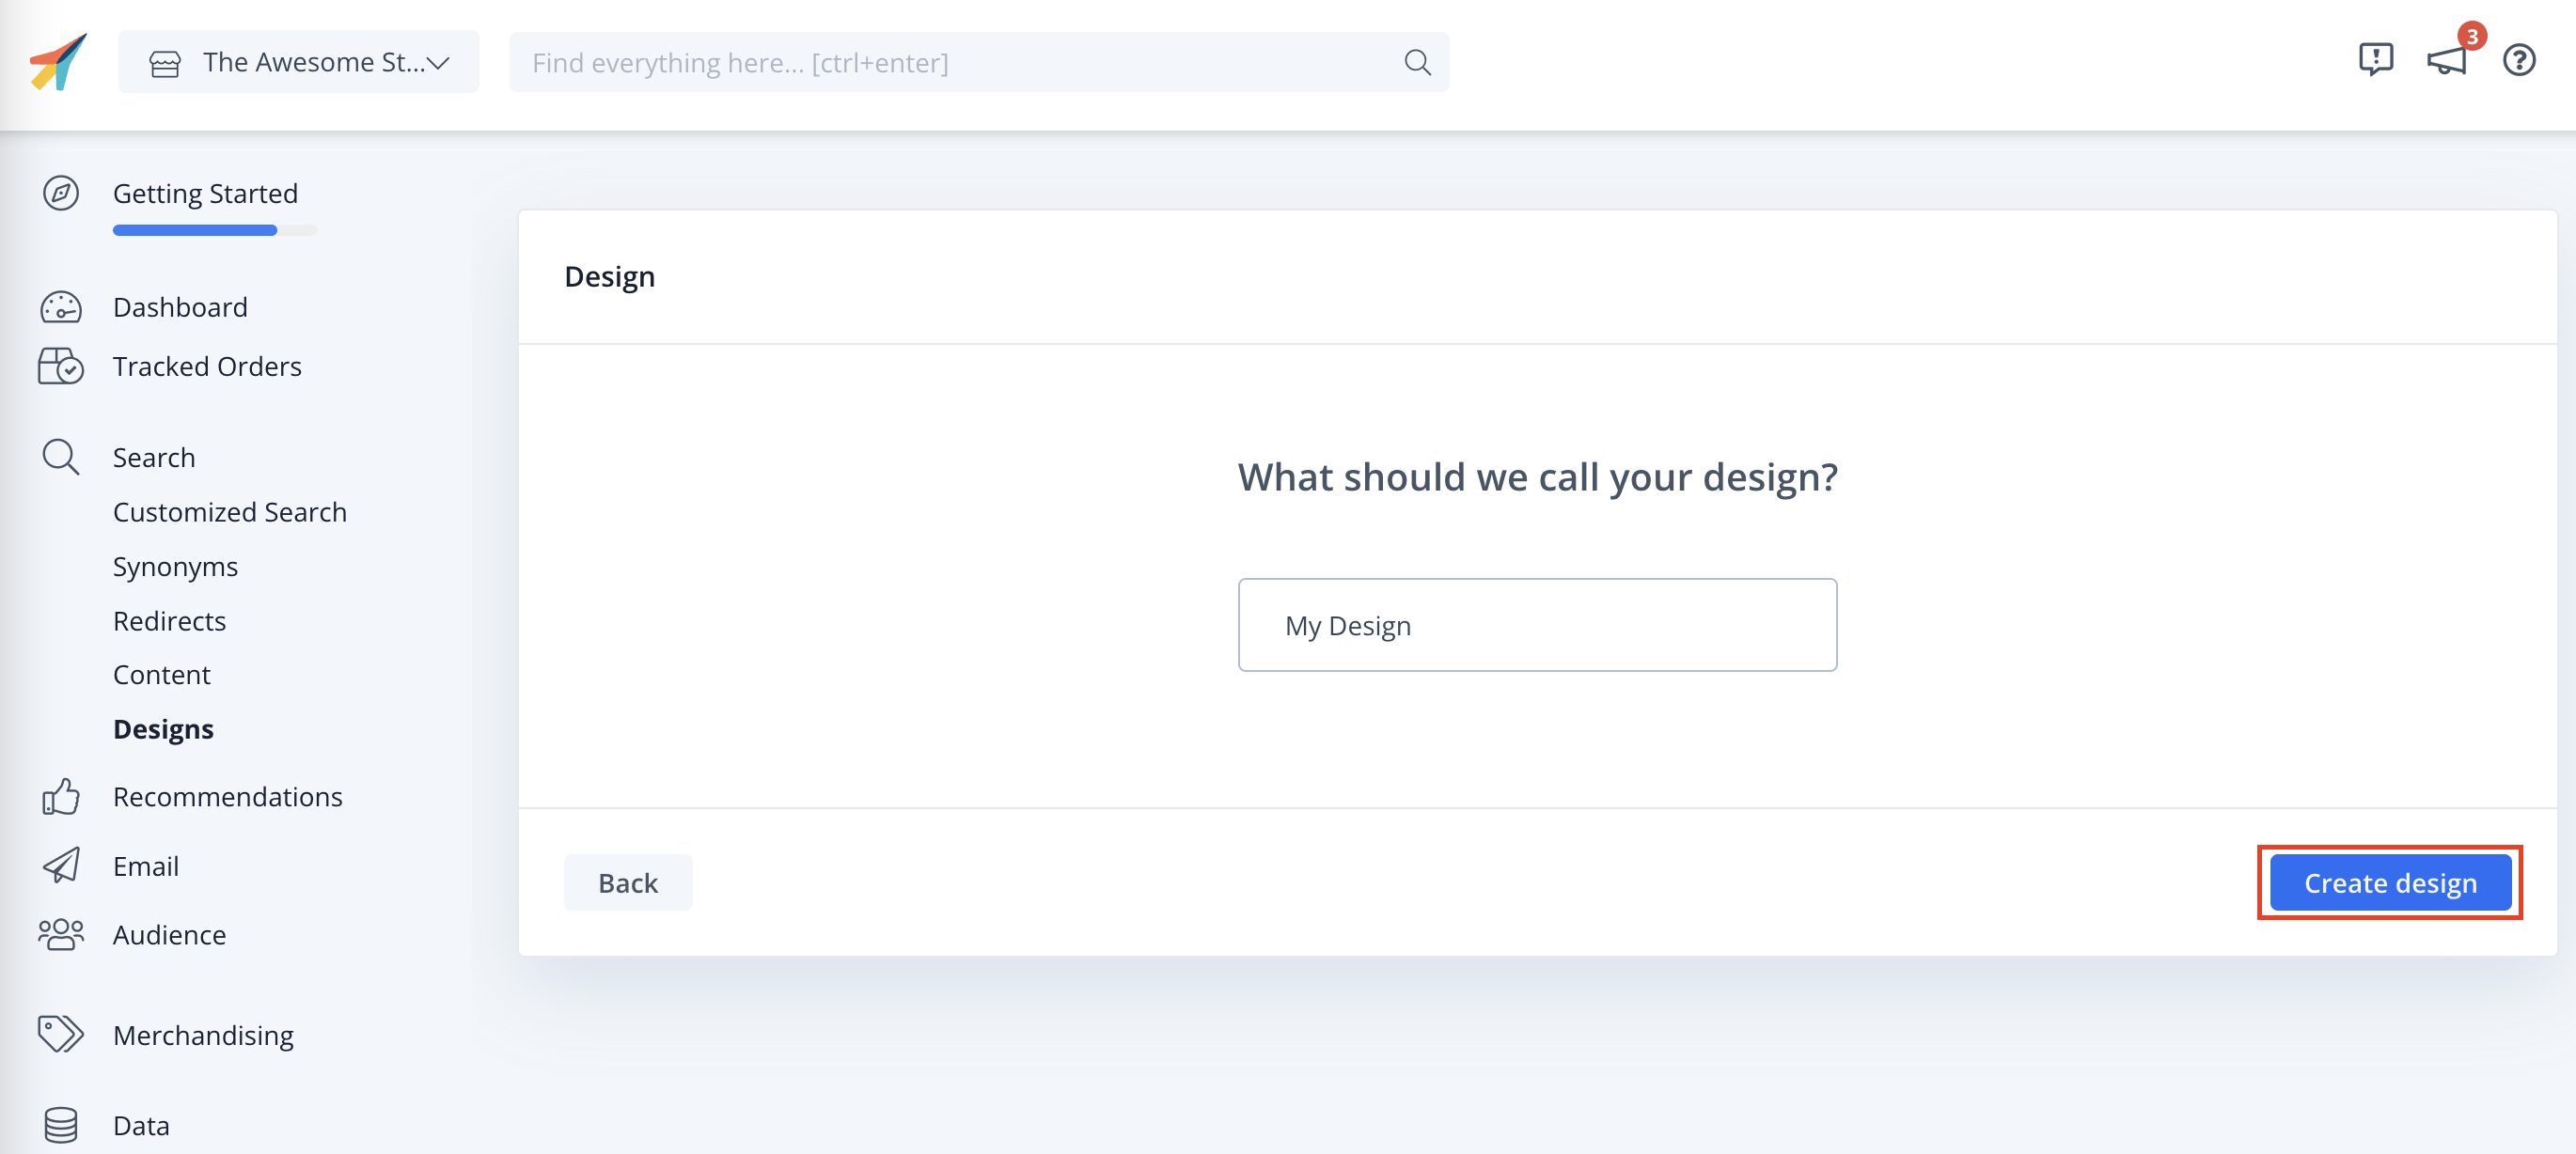
On the following screen, give your Design a Name (we recommend adding “V2” so it’s obvious that you are using Clerk.js 2).
Choose Design Type and follow the design setup Wizard.
When you are done, click Create Design.
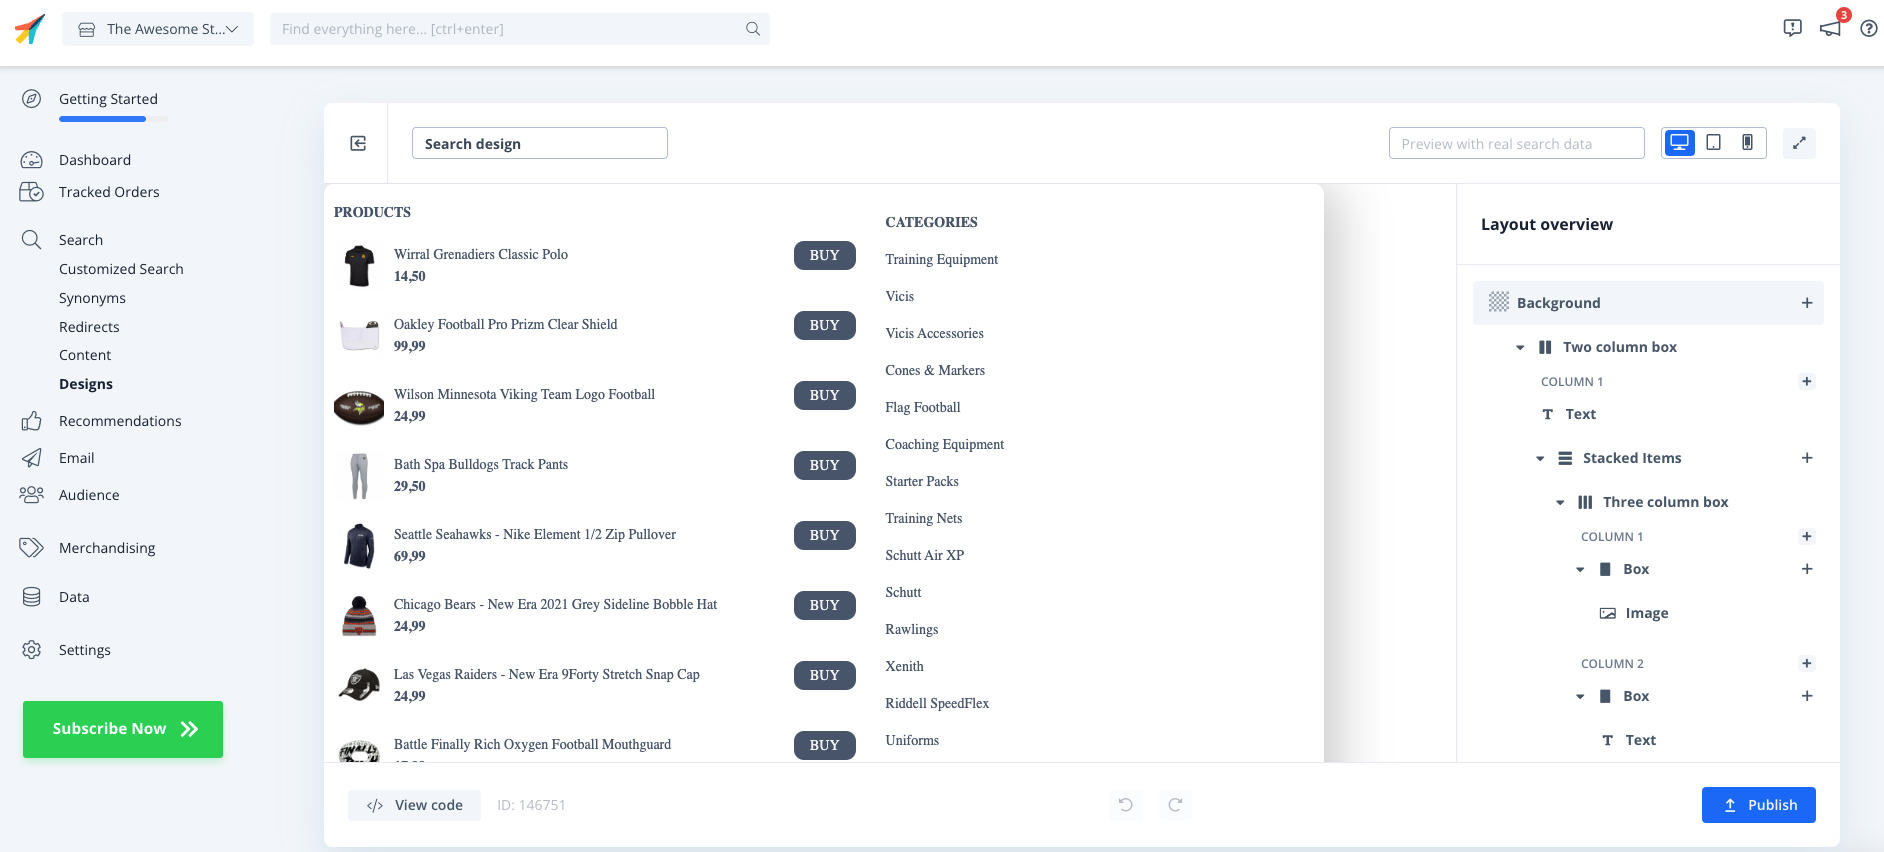
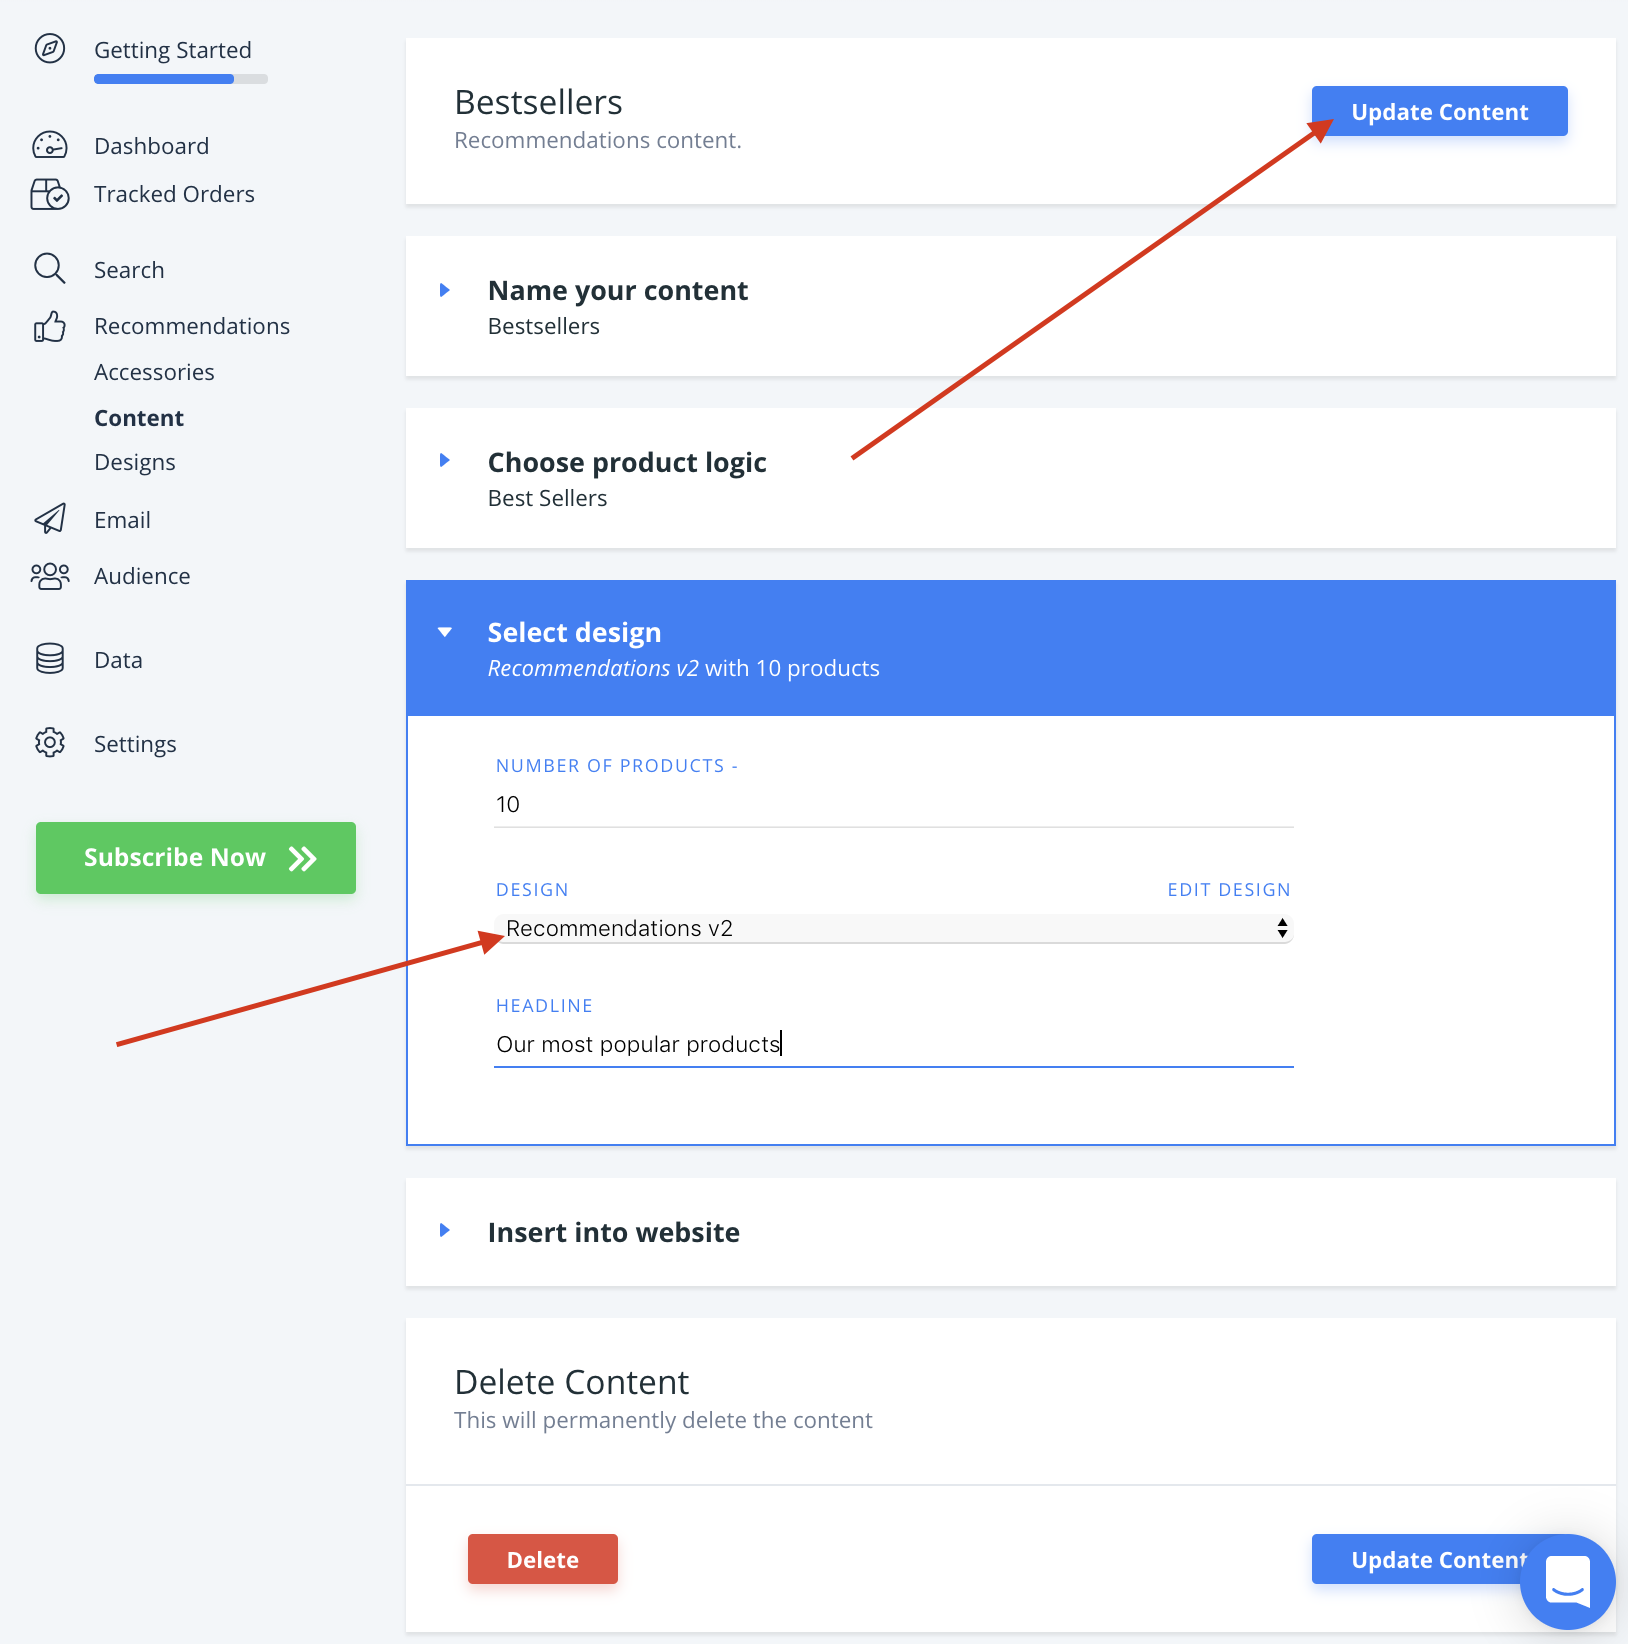
In the Design Editor, click any of the existing elements like the name, image, button etc. to edit it, or add new elements to the Design to include more information about products.
Click Publish when you are done, and go to Step 2 in the guide.
Go to Recommendations/Search > Elements and change your Clerk Element to use your new Design.
Click Update Element. This will temporarily cause them to not show up on your webshop, until you are done with Step 2. Choose the new Design for all Elements that should be updated.
You are now ready to switch over to Clerk.js 2.
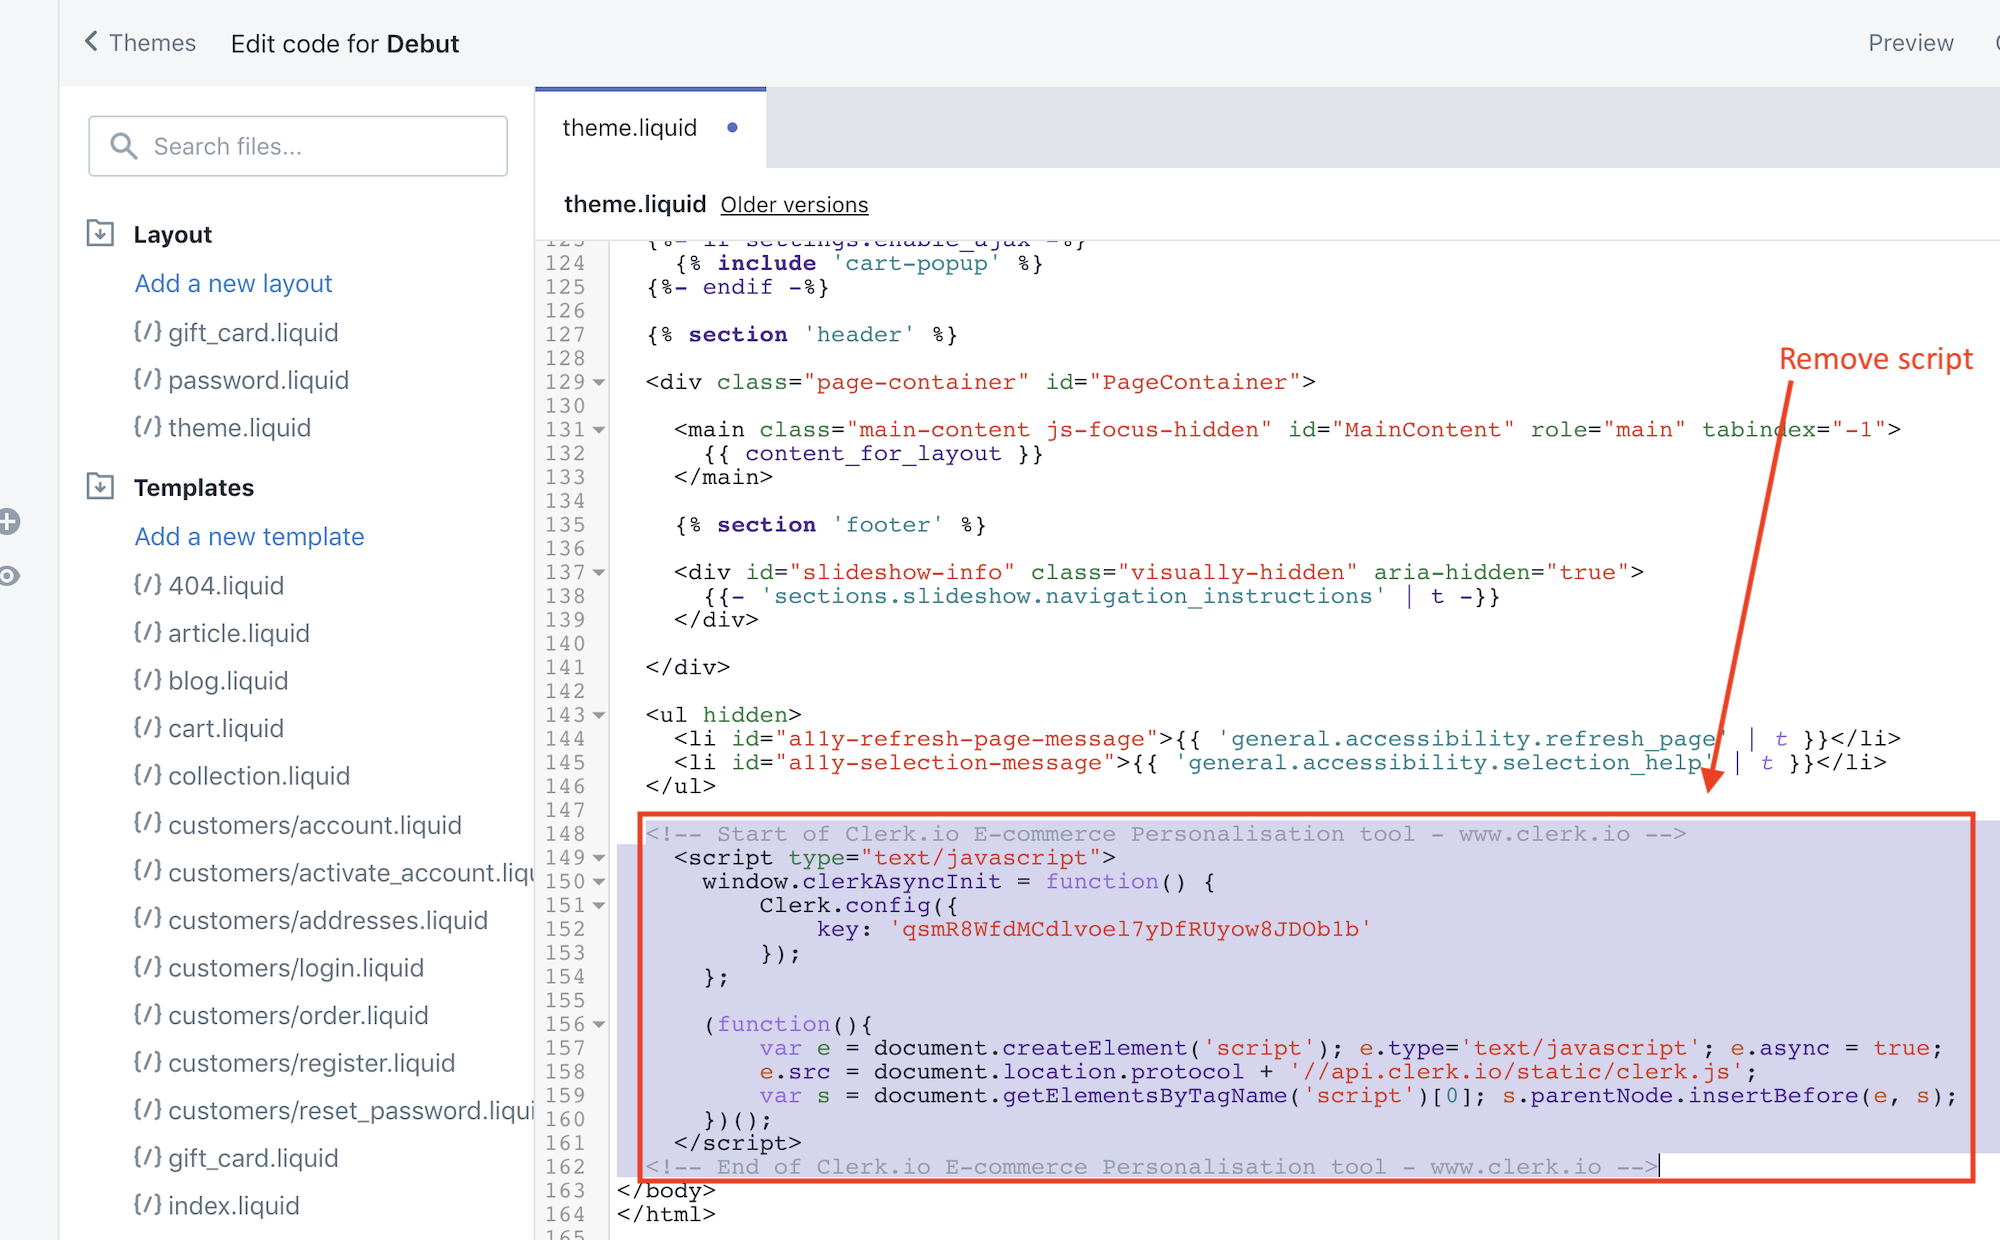
Replace script #
Locate the template file that is used to show all pages of the webshop, and where the original Clerk.js script is found near the bottom.
Remove the old script from the file:
Go to my.clerk.io > Developers > Tracking Code. This page now contains your Clerk.js 2 tracking code.
Copy this code and insert it just before the
</head>tag in the template:
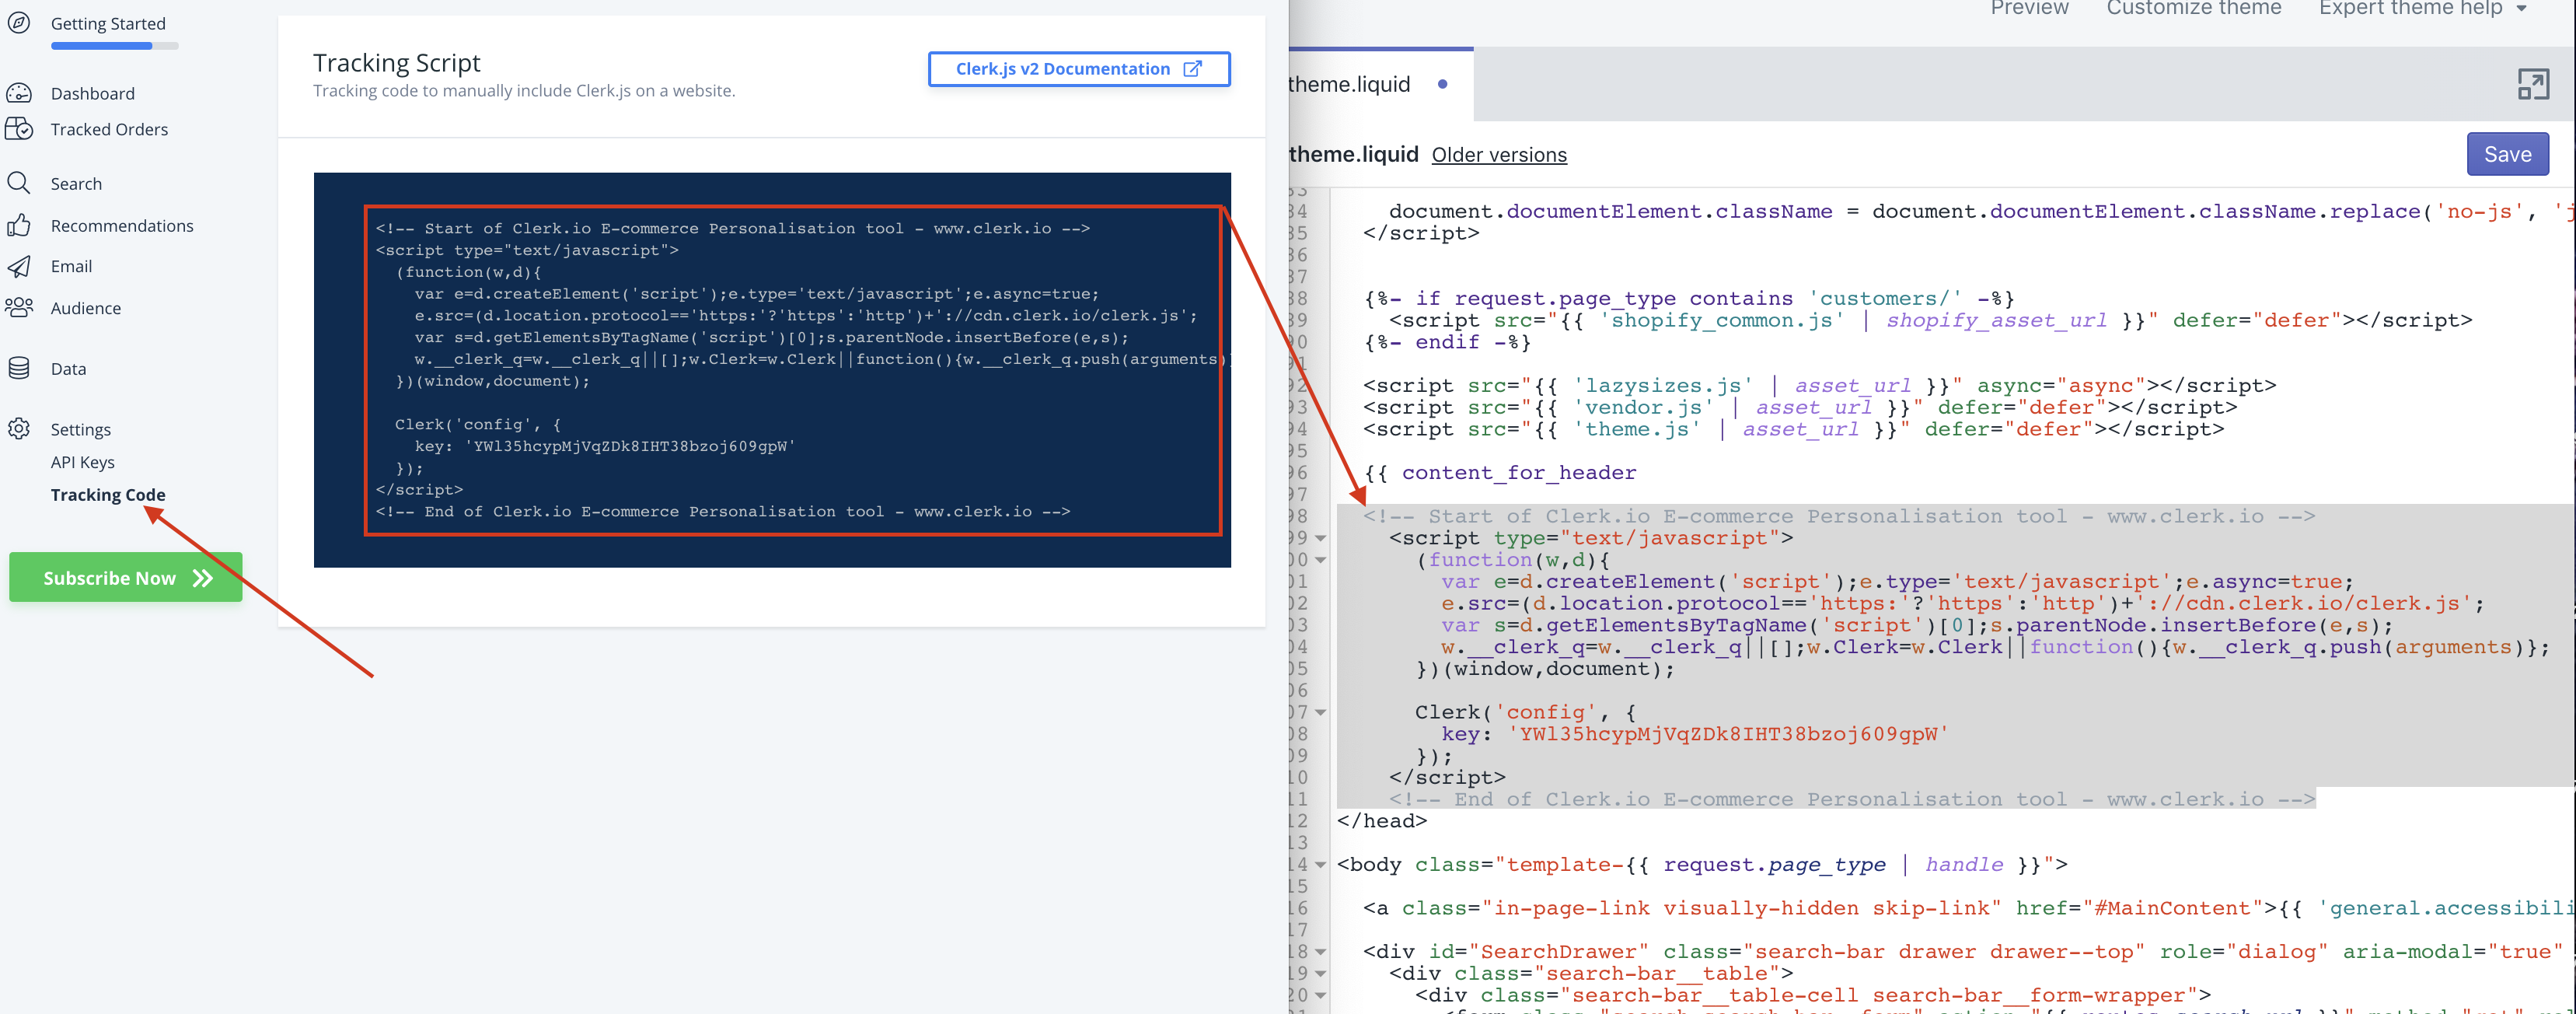
- Save your template.
Congratulations! You are now running on the much-improved Clerk.js 2 setup!
You can see the full documentation for Clerk.js 2 here: https://docs.clerk.io/docs/clerkjs-quick-start