Campaigns
Basics #
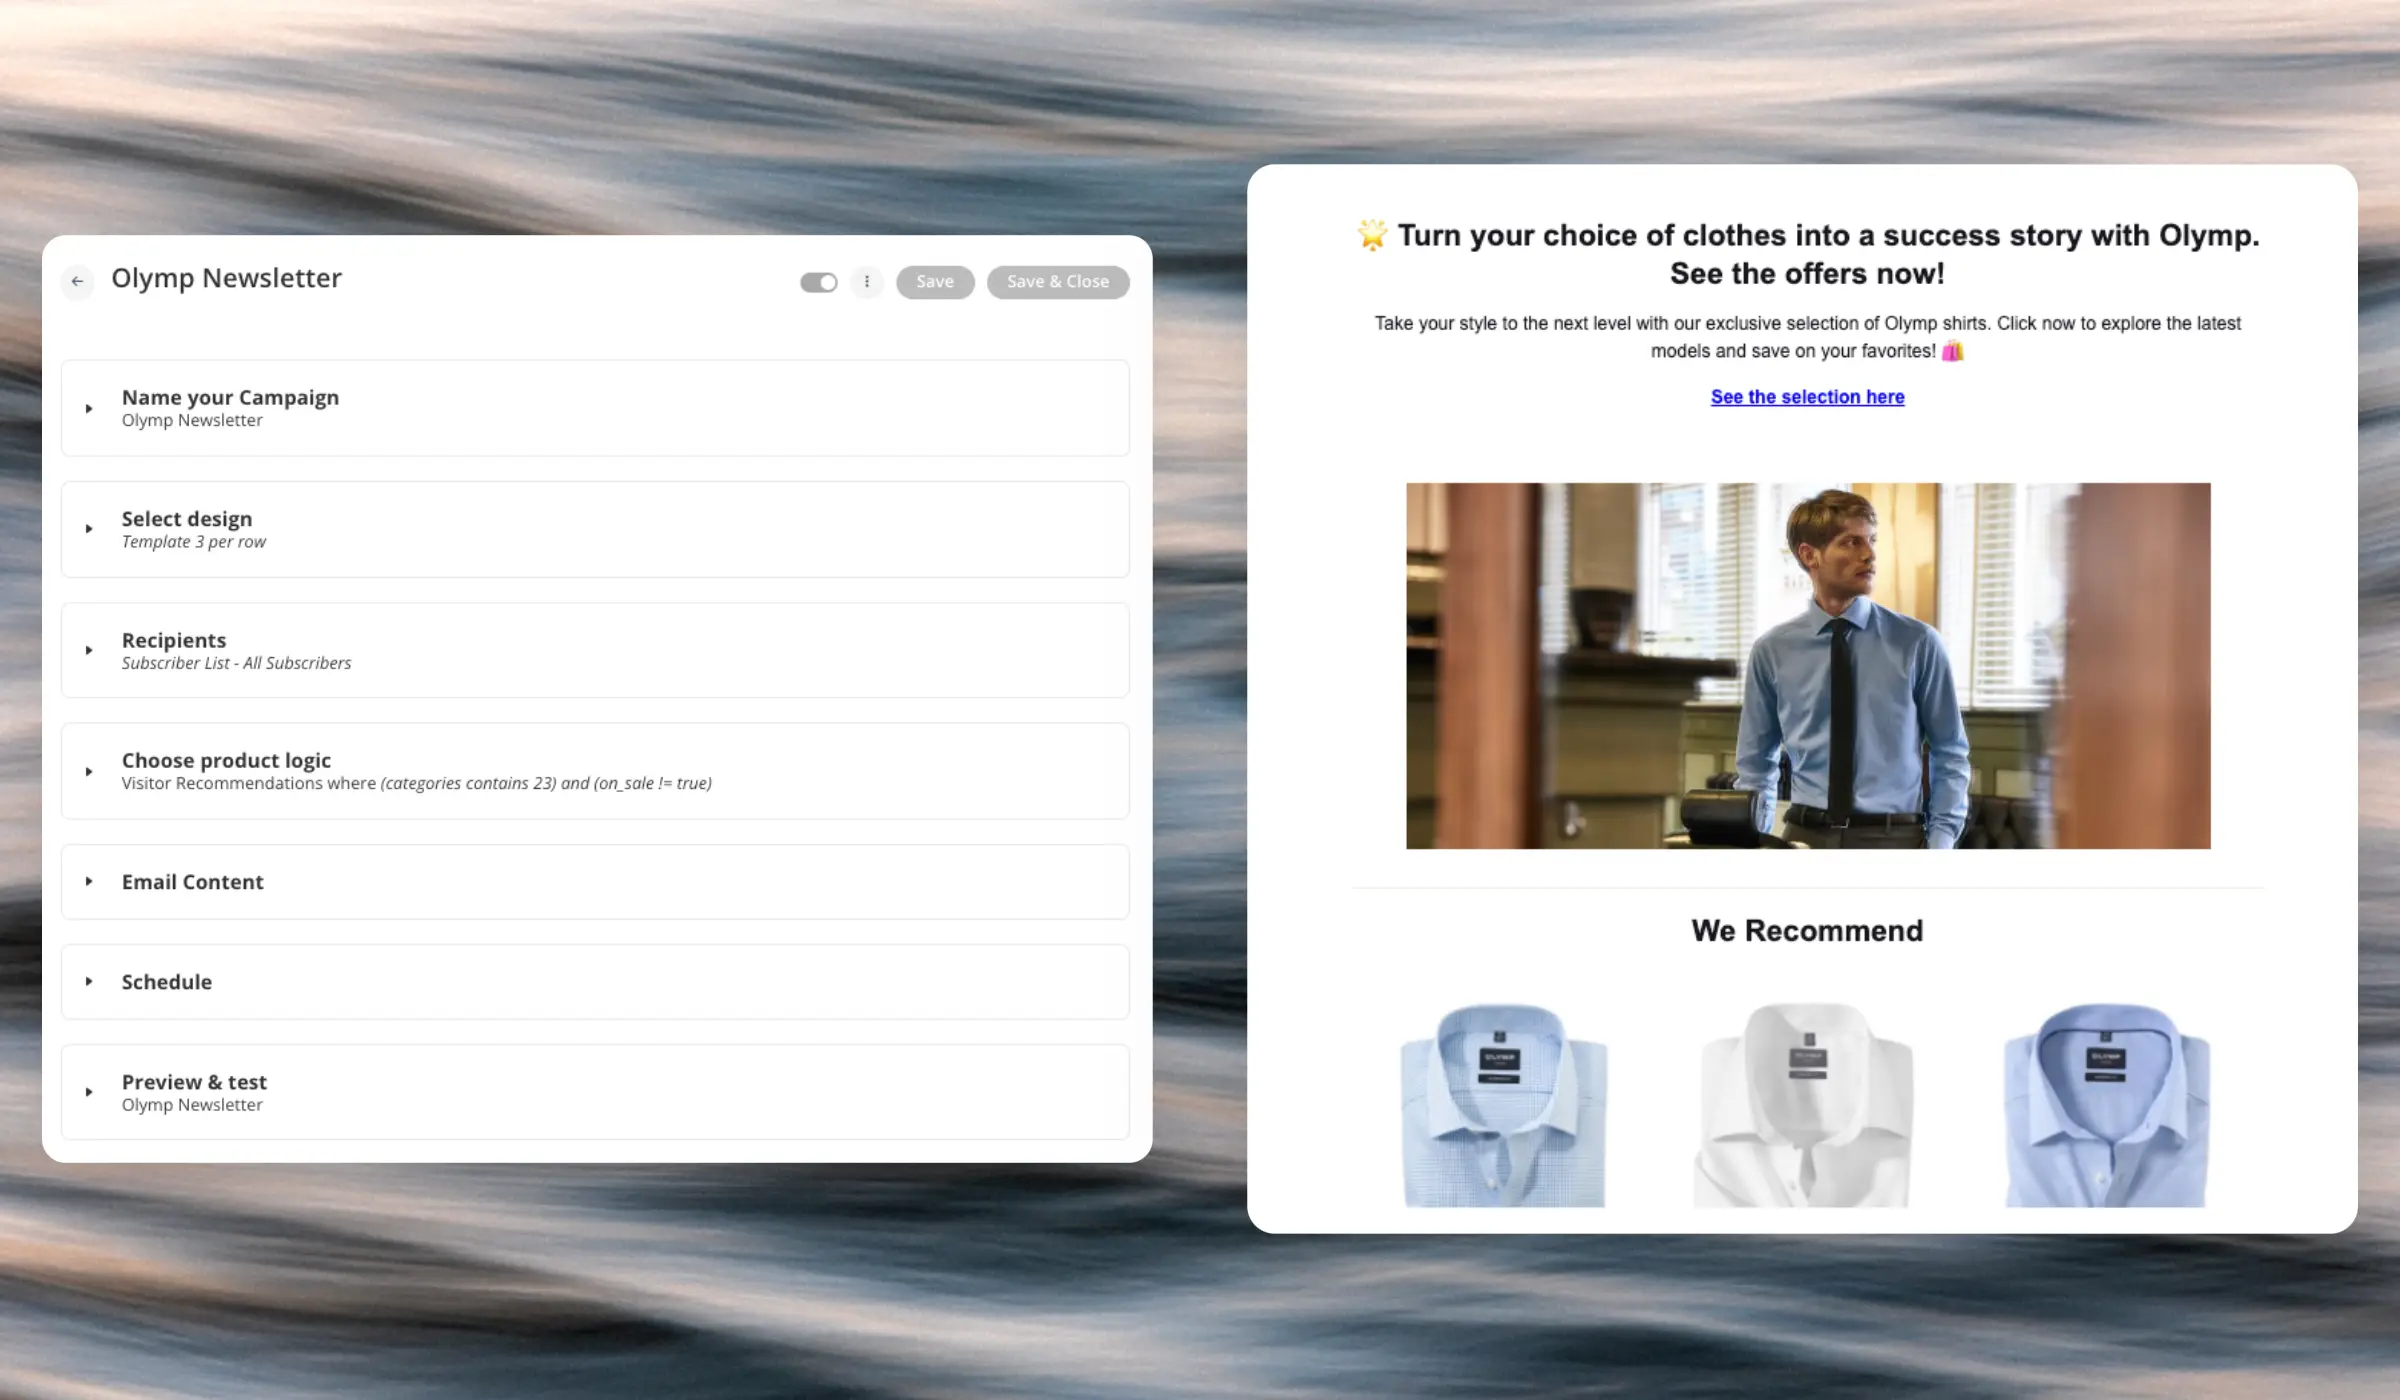
Newsletters are emails that are sent by Clerk through various degrees of automation. Each email consists of the following settings:
- A name and tracking label used to identify the email in Analytics.
- A design for the visual appearance of the email.
- A product logic for what products are shown in the email.
- Email content where you control the number of products to show, and add any relevant elements like subject line, headlines, descriptions, and other texts that are part of your design.
Apart from these settings, each type of email has their own unique settings, outlined in this article.
Email Configuration #
Before you can start sending emails, you must first configure Clerk to match your needs. This is done in Email > configuration.
- Sender Name / Email are the details that will be shown as the sender of the emails.
- Minimum time between emails controls the amount of days that should pass as a minimum before 1 recipient receives another email after having already received emails. This can be controlled for AI Newsletters and Triggers individually.
- Max amount of emails controls the number of emails any 1 recipient is allowed to receive each day. This can be controlled for AI Newsletters and triggers individually.
- Days where newsletters can be sent controls the days of the week where Clerk can send emails. Use this to combine email sendouts with other email providers like Klaviyo, so the two tools do not send emails on the same days.
- Sync subscribers controls where the subscriber status should be synced from. Often this will be your existing email provider, through one of Clerk’s integrations. Read more about Subscribers here.
- Choose Email Service Provider controls which email service Clerk uses to send the emails. Currently, you can choose either MailGun or SparkPost. If in doubt of which one to use, choose MailGun.
- Sender Domain gives you the DNS settings to add in your host server, allowing Clerk to send emails on your behalf.
- After adding your Sender Name and Email, click Register Domain and follow the description for each DNS setting.
- Click Check DNS Records after adding them to confirm that it works.
Triggers #
These are completely automated and will be sent out by Clerk’s AI based on a given event by visitors.
Triggers are an essential part of a successful email marketing strategy and they can generate up to 75% of the total email revenue.
This is likely because they are immediate reactions to something visitors have just done on your site, making them highly relevant.
Apart from the basic configuration, you also set up the Trigger for these. The currently available triggers are:
- Abandoned Session: Sent when a visitor leaves your site without completing a purchase.
- Abandoned Search: Sent when a visitor searches for a product but doesn’t complete the purchase. It will contain the products from their latest search.
- Abandoned Cart: Sent when a visitor adds products to their cart but doesn’t complete the purchase.
- Made an Order: Sent immediately after a customer makes a purchase.
- Welcome Email: Sent when a visitor becomes a subscriber.
Logs #
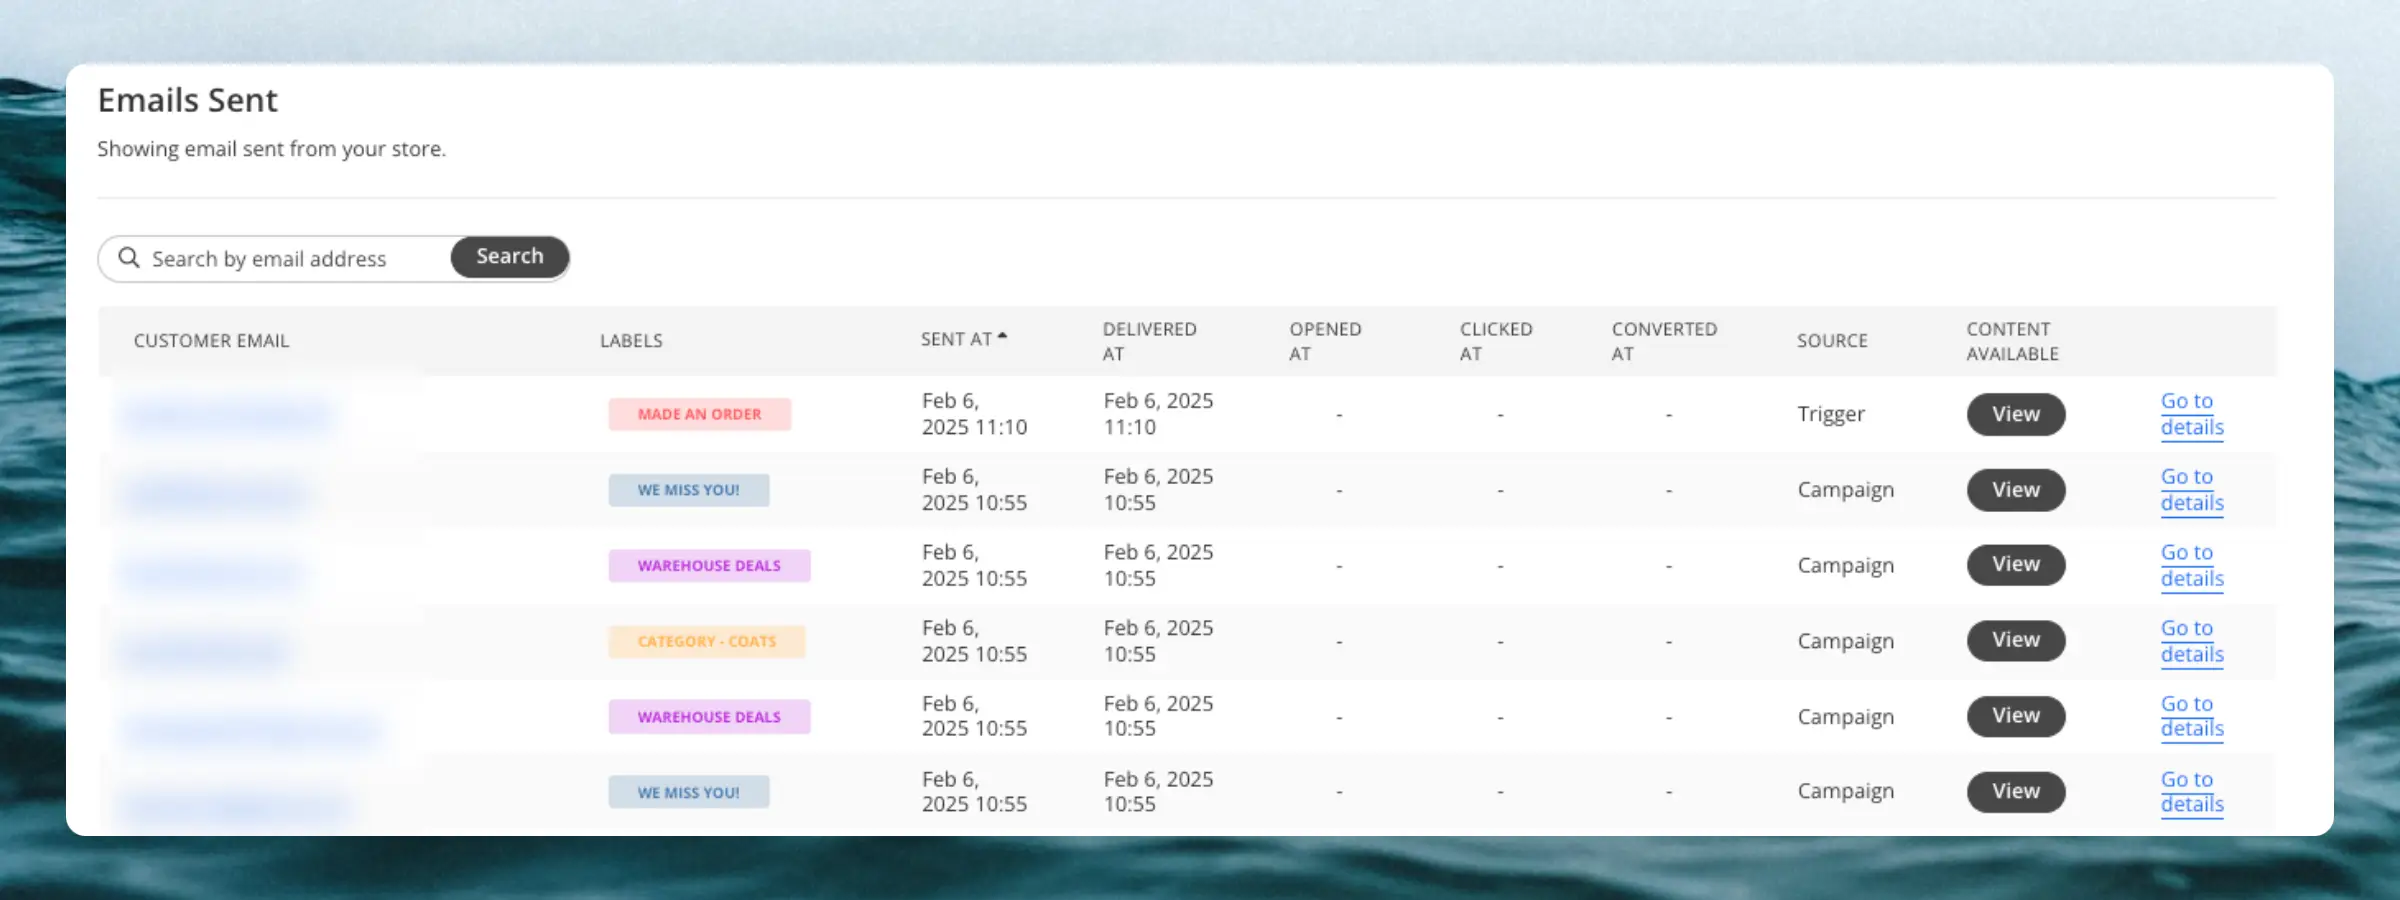
Inspect the emails that have been sent to your recipients. This list gives you complete insight into the exact emails that are being generated by and sent by Clerk.
By clicking on View you can see the email as the recipient would see it in their inbox.
Clicking on Go to details will show you all of the interactions that the recipient has had with the email, the info on the recipient, and stats about the email itself like when it was sent and opened.