Sync

Starting a sync #
You can always start a full sync from my.clerk.io by going to Data > Configuration and clicking Start New Data Sync.
This will import all of the latest data from your webshop, using the sync method you have selected.
Information #
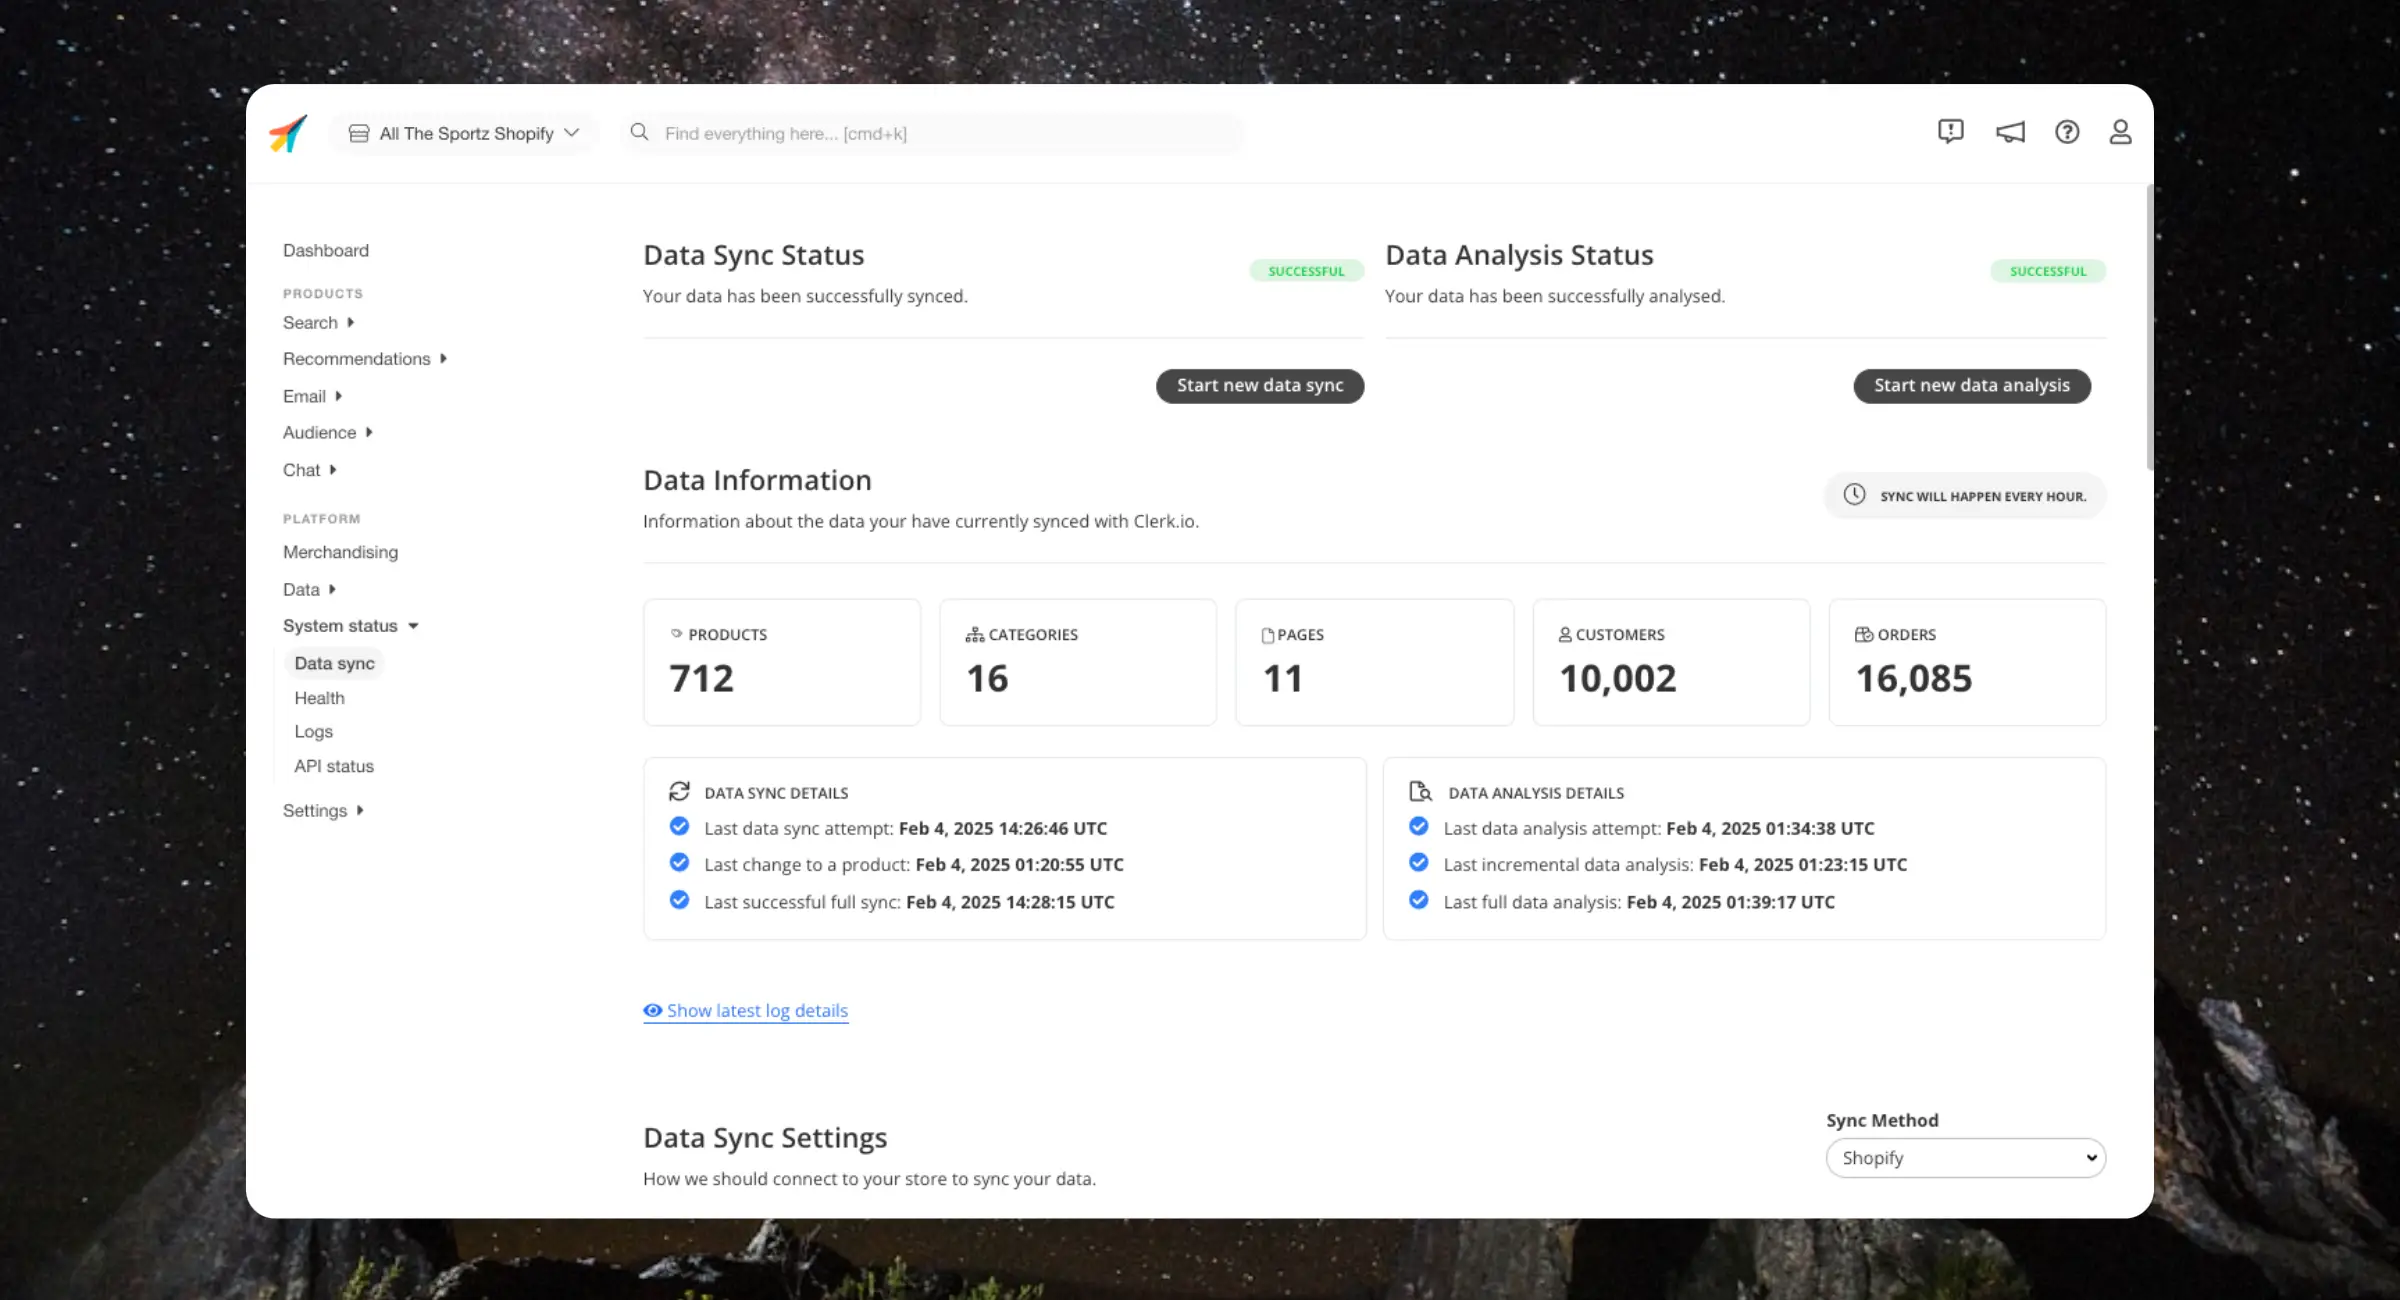
This section provides quick insights into the state of your sync:
- The number of products, categories, pages, orders, and customers that have been imported
- Timestamps for when a sync or analysis was last attempted and completed
- Timestamps for when a sync or analysis last registered a change to a product
The Sync Details relate to when Clerk last fetched data from the webshop, while the Analysis Details relate to when Clerk last processed and saved the data.
Settings #
These settings let you configure the data sync to get access to the webshop and make adjustments to how the data is fetched.
Sync method #
Clerk comes with a number of integrations and sync methods, making it possible to sync from any eCommerce platform. The integrations we build use their own sync method for the platforms like Shopify, Magento, WooCommerce, and so on.
It’s also possible to choose Demo Data as the sync method. With this, Clerk will sync a predefined dataset that you can use for testing. This is useful if you just want to play around with my.clerk.io and our API before starting a real setup.
Sync Time #
This setting lets you choose 1-hour increments when the sync should run. By choosing a time, the sync will only run within that timeframe in UTC time. This is useful if you want to save server capacity during high-load hours, and only sync when the server is less busy.
By default, it’s set to When Needed (Recommended) which will run the sync regularly depending on how long it takes to load your data. If it takes less than 10 minutes, the sync might run every hour, while syncs taking 60+ minutes might only run once a day.
Import #
You can decide exactly which data points to import by selecting either Yes or No to each one of:
- Products
- Categories
- Orders
- Customers
- Pages
Clerk requires products and categories to work correctly, and it’s strongly recommended to also import orders, as these are the main driving force behind Clerks results.
Pages imported through the data sync will overwrite any changes made in my.clerk.io to those synced pages the next time pages are synced.
Pages that you upload manually in Data > Pages are treated as protected and are not overwritten by the data sync.
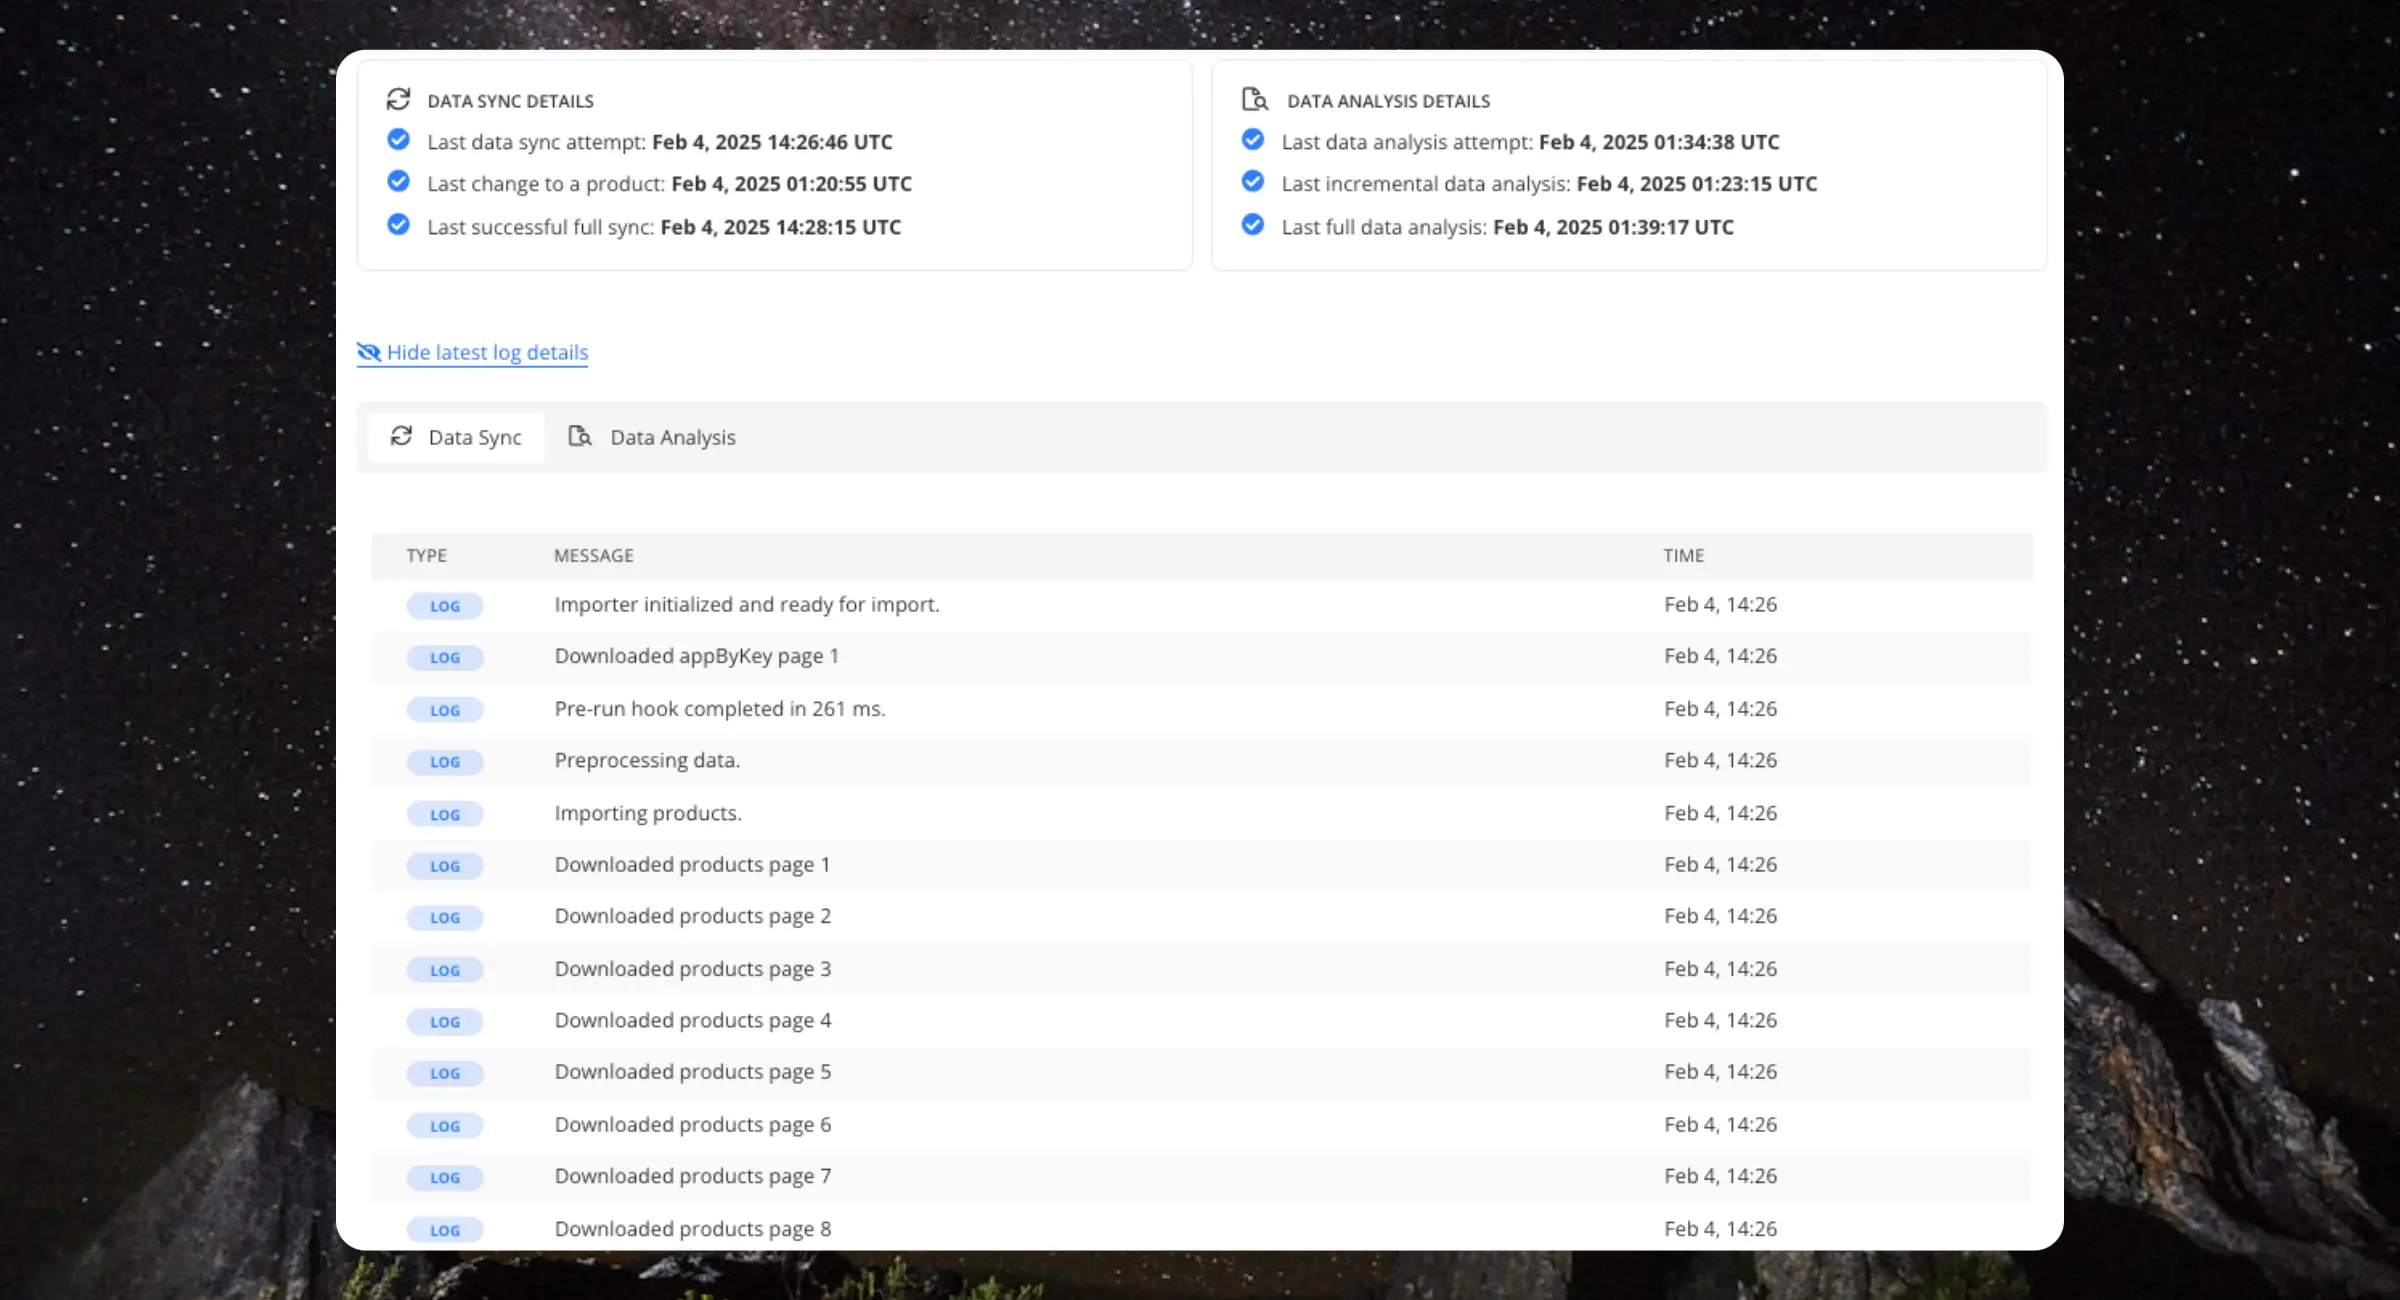
Sync log #
This section shows you the status of the sync while it’s running and when its completed. It’s useful to confirm that everything runs smoothly, and helps you debug if issues arise.
They can be accessed by clicking on Show latest sync log details.

Whitelisting IP Address #
If your server has an IP lock, you need to whitelist the IP address of Clerks Data Sync system to allow access to your data.
The IP address is 52.57.0.11
This IP is subject to change. If Data Sync responds with a 403 or similar error, simply come back to this page to find the current IP address.
Realtime updates #
This is the best way to keep Clerk up-to-date with your webshop without delay. While the full data sync is great for loading large amounts of data at regular intervals, realtime updates are used to send smaller changes as they happen.
Most of our extensions and integrations have them built-in, with no extra setup needed. For any other platforms, they can be set up through our CRUD API.
With realtime updates enabled, Clerk is able to fetch changes like a simple price update, but also add or remove products entirely.
This means Clerk will not have to wait for a full sync every time you make smaller changes, which keeps your setup fully up-to-date immediately.
When adding a product through the real-time sync, it will appear on your webshop instantly after it shows in the Clerk.io backend.
When a product is added through the real-time sync, it’s immediately visible in Search, Recommendations and Email, but the product ranking is not included. This means that it might not show as a popular product until the full data sync runs.
CSV Files #
This is a special sync method that can be used for demoing Clerk.io’s features through a Live Demo by uploading a one-time export of your catalogue. You can use it by choosing One-Time CSV Upload from the Sync method dropdown.
Generate CSV files for at least your products, categories, and orders and, if you want to see the full capabilities of Clerk, also your customers and pages.
Download a zip file containing CSV template files for all data types.